Latest Posts

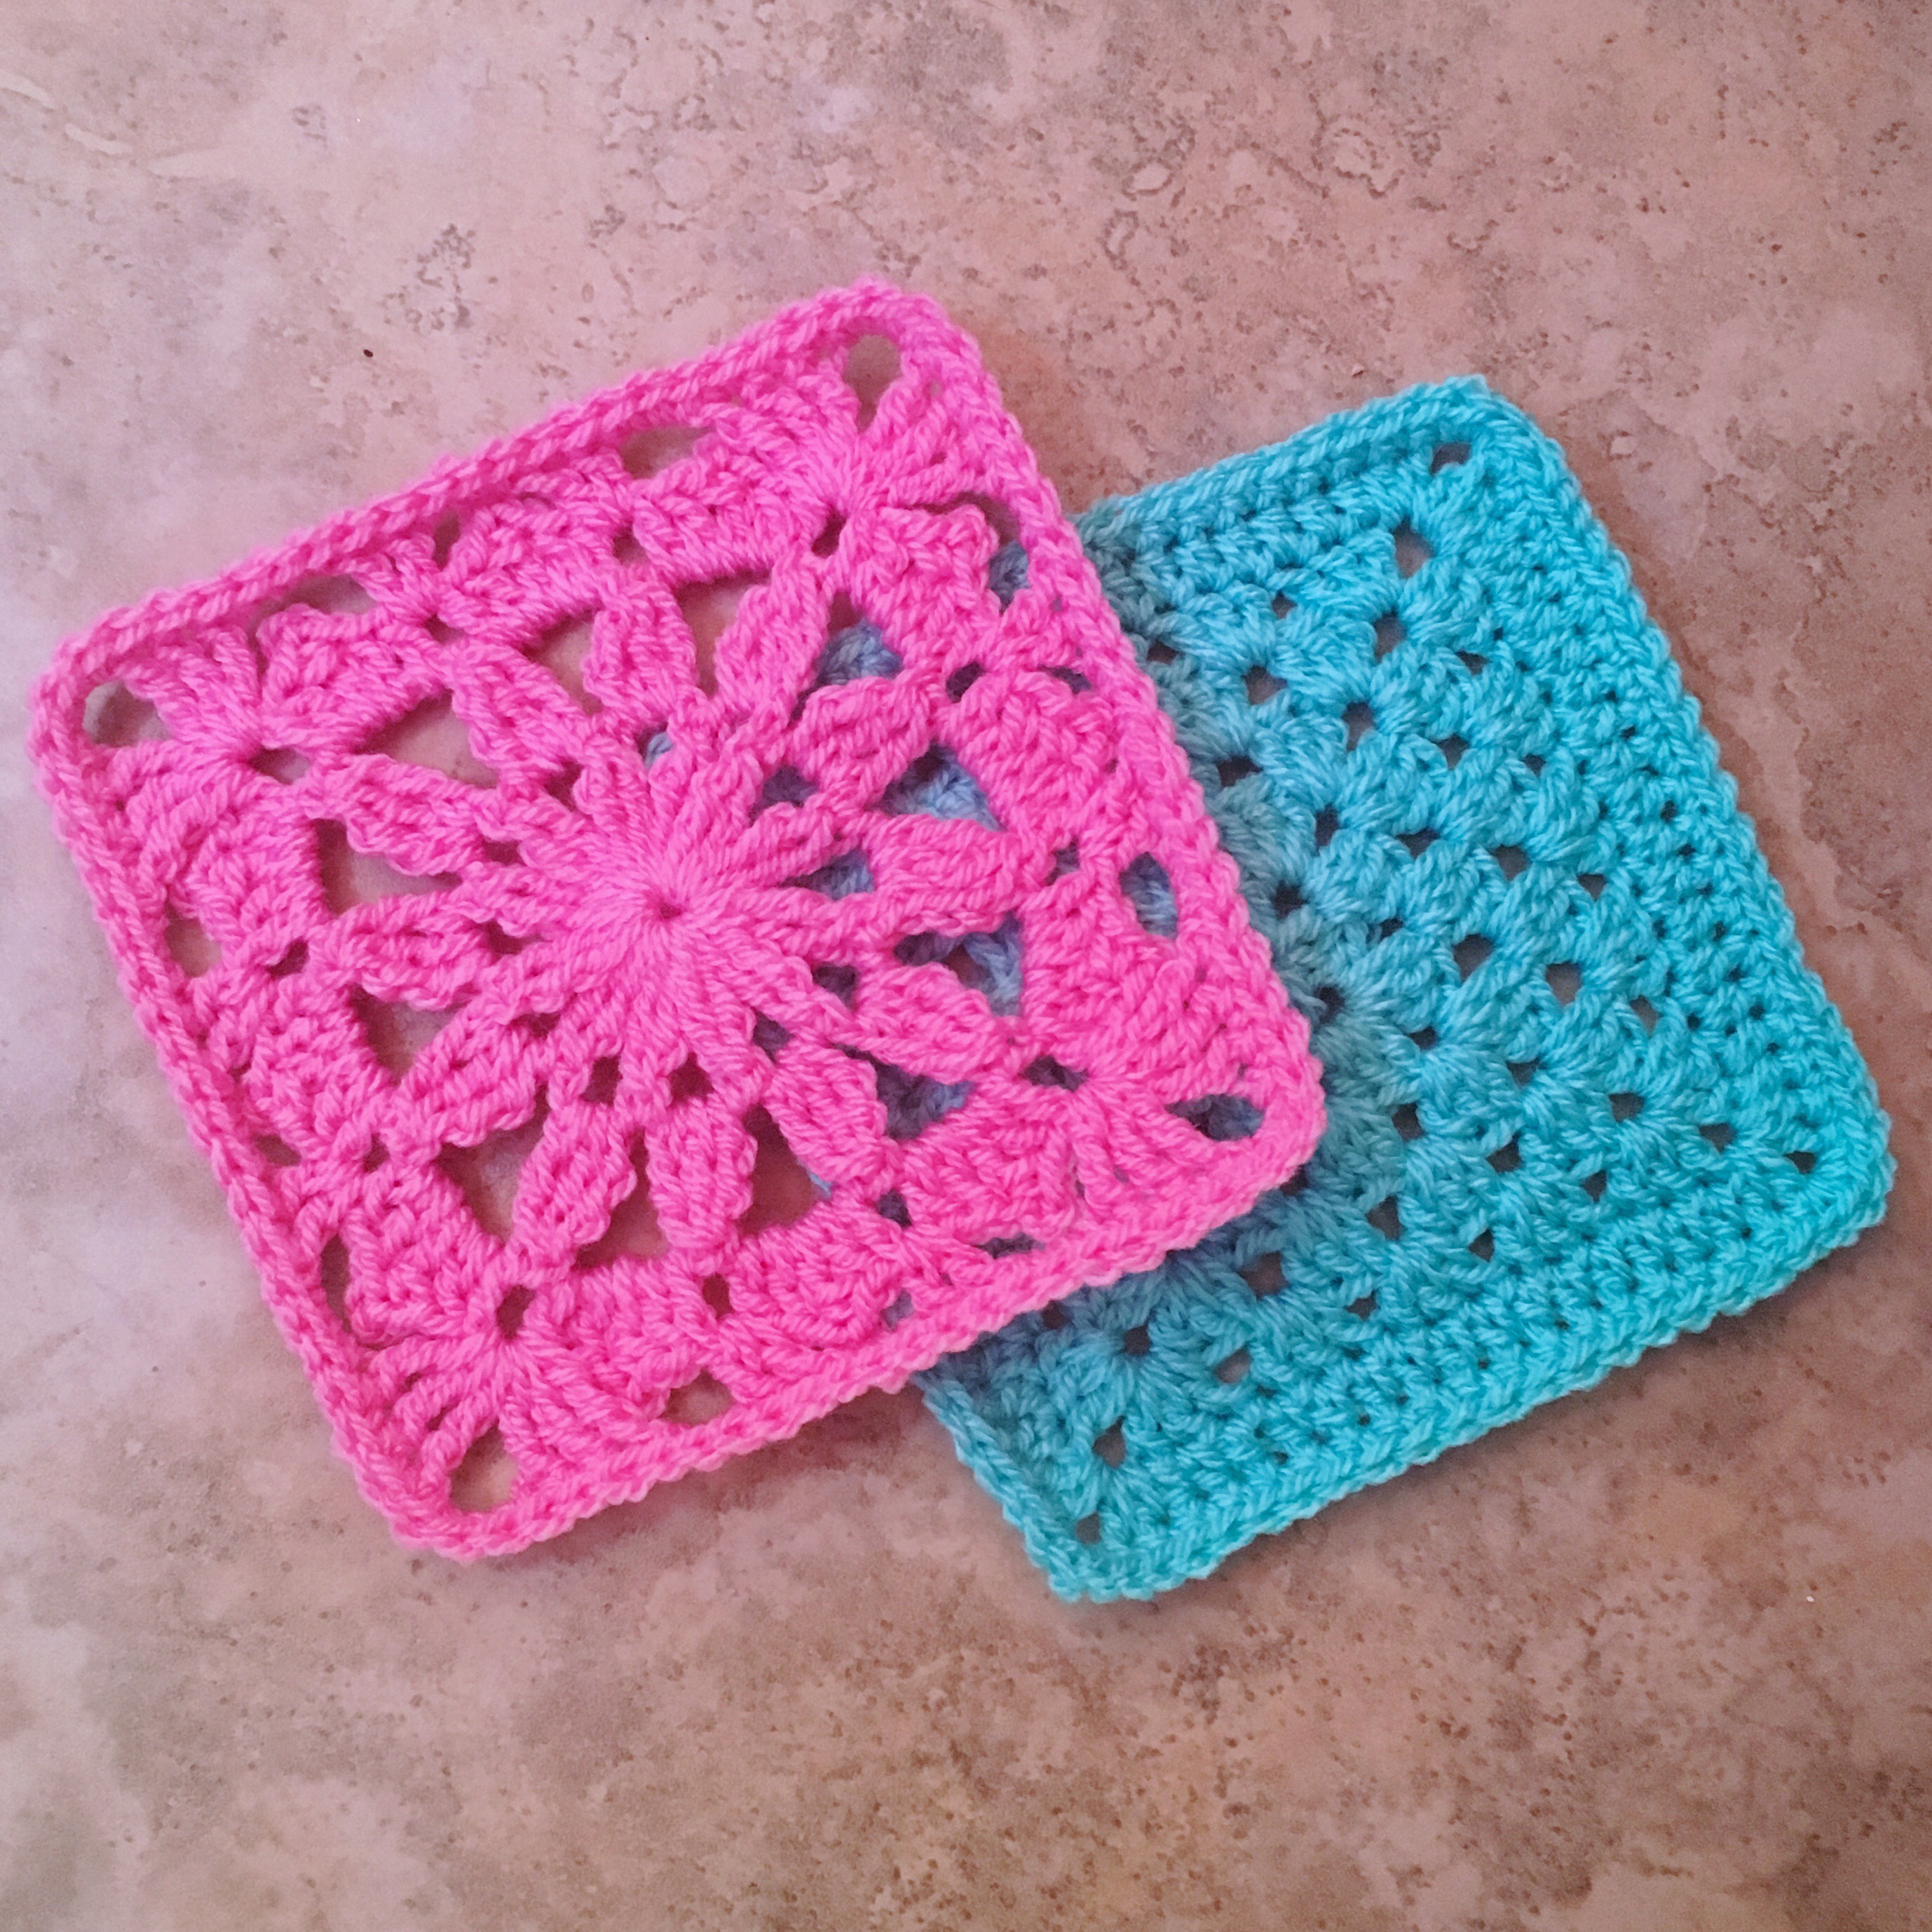
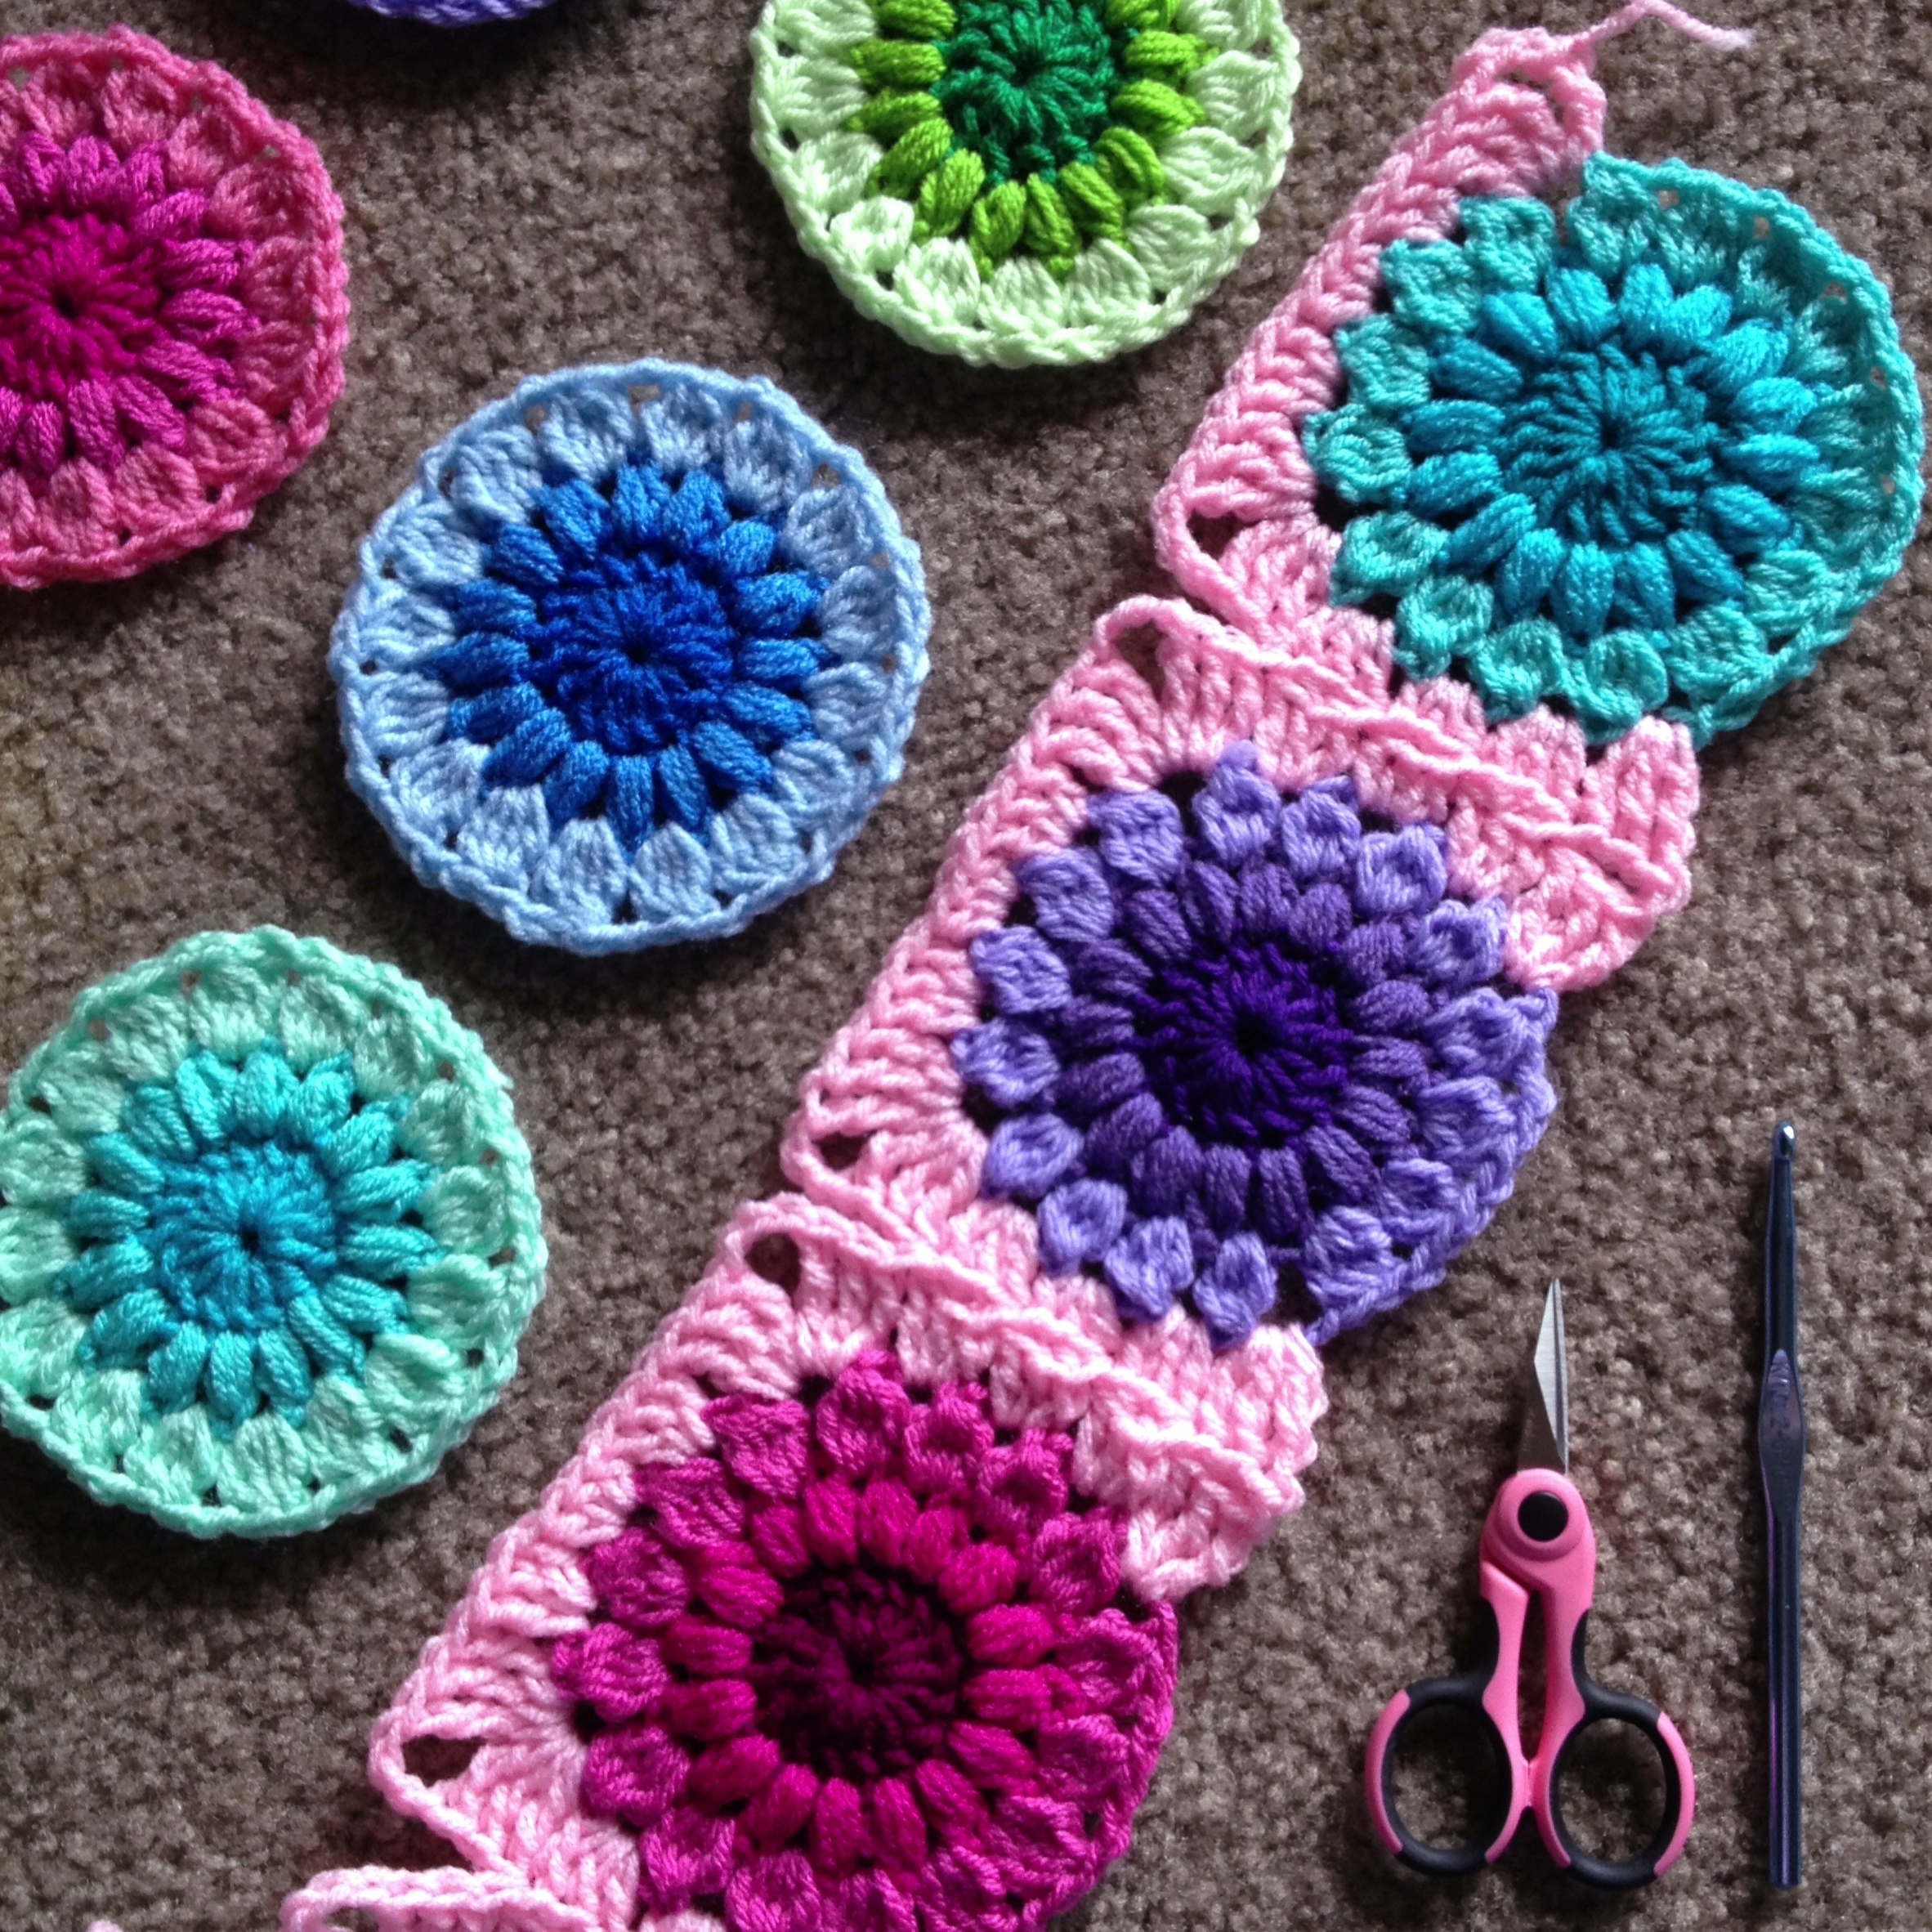
Crochet Motif – Michele Square

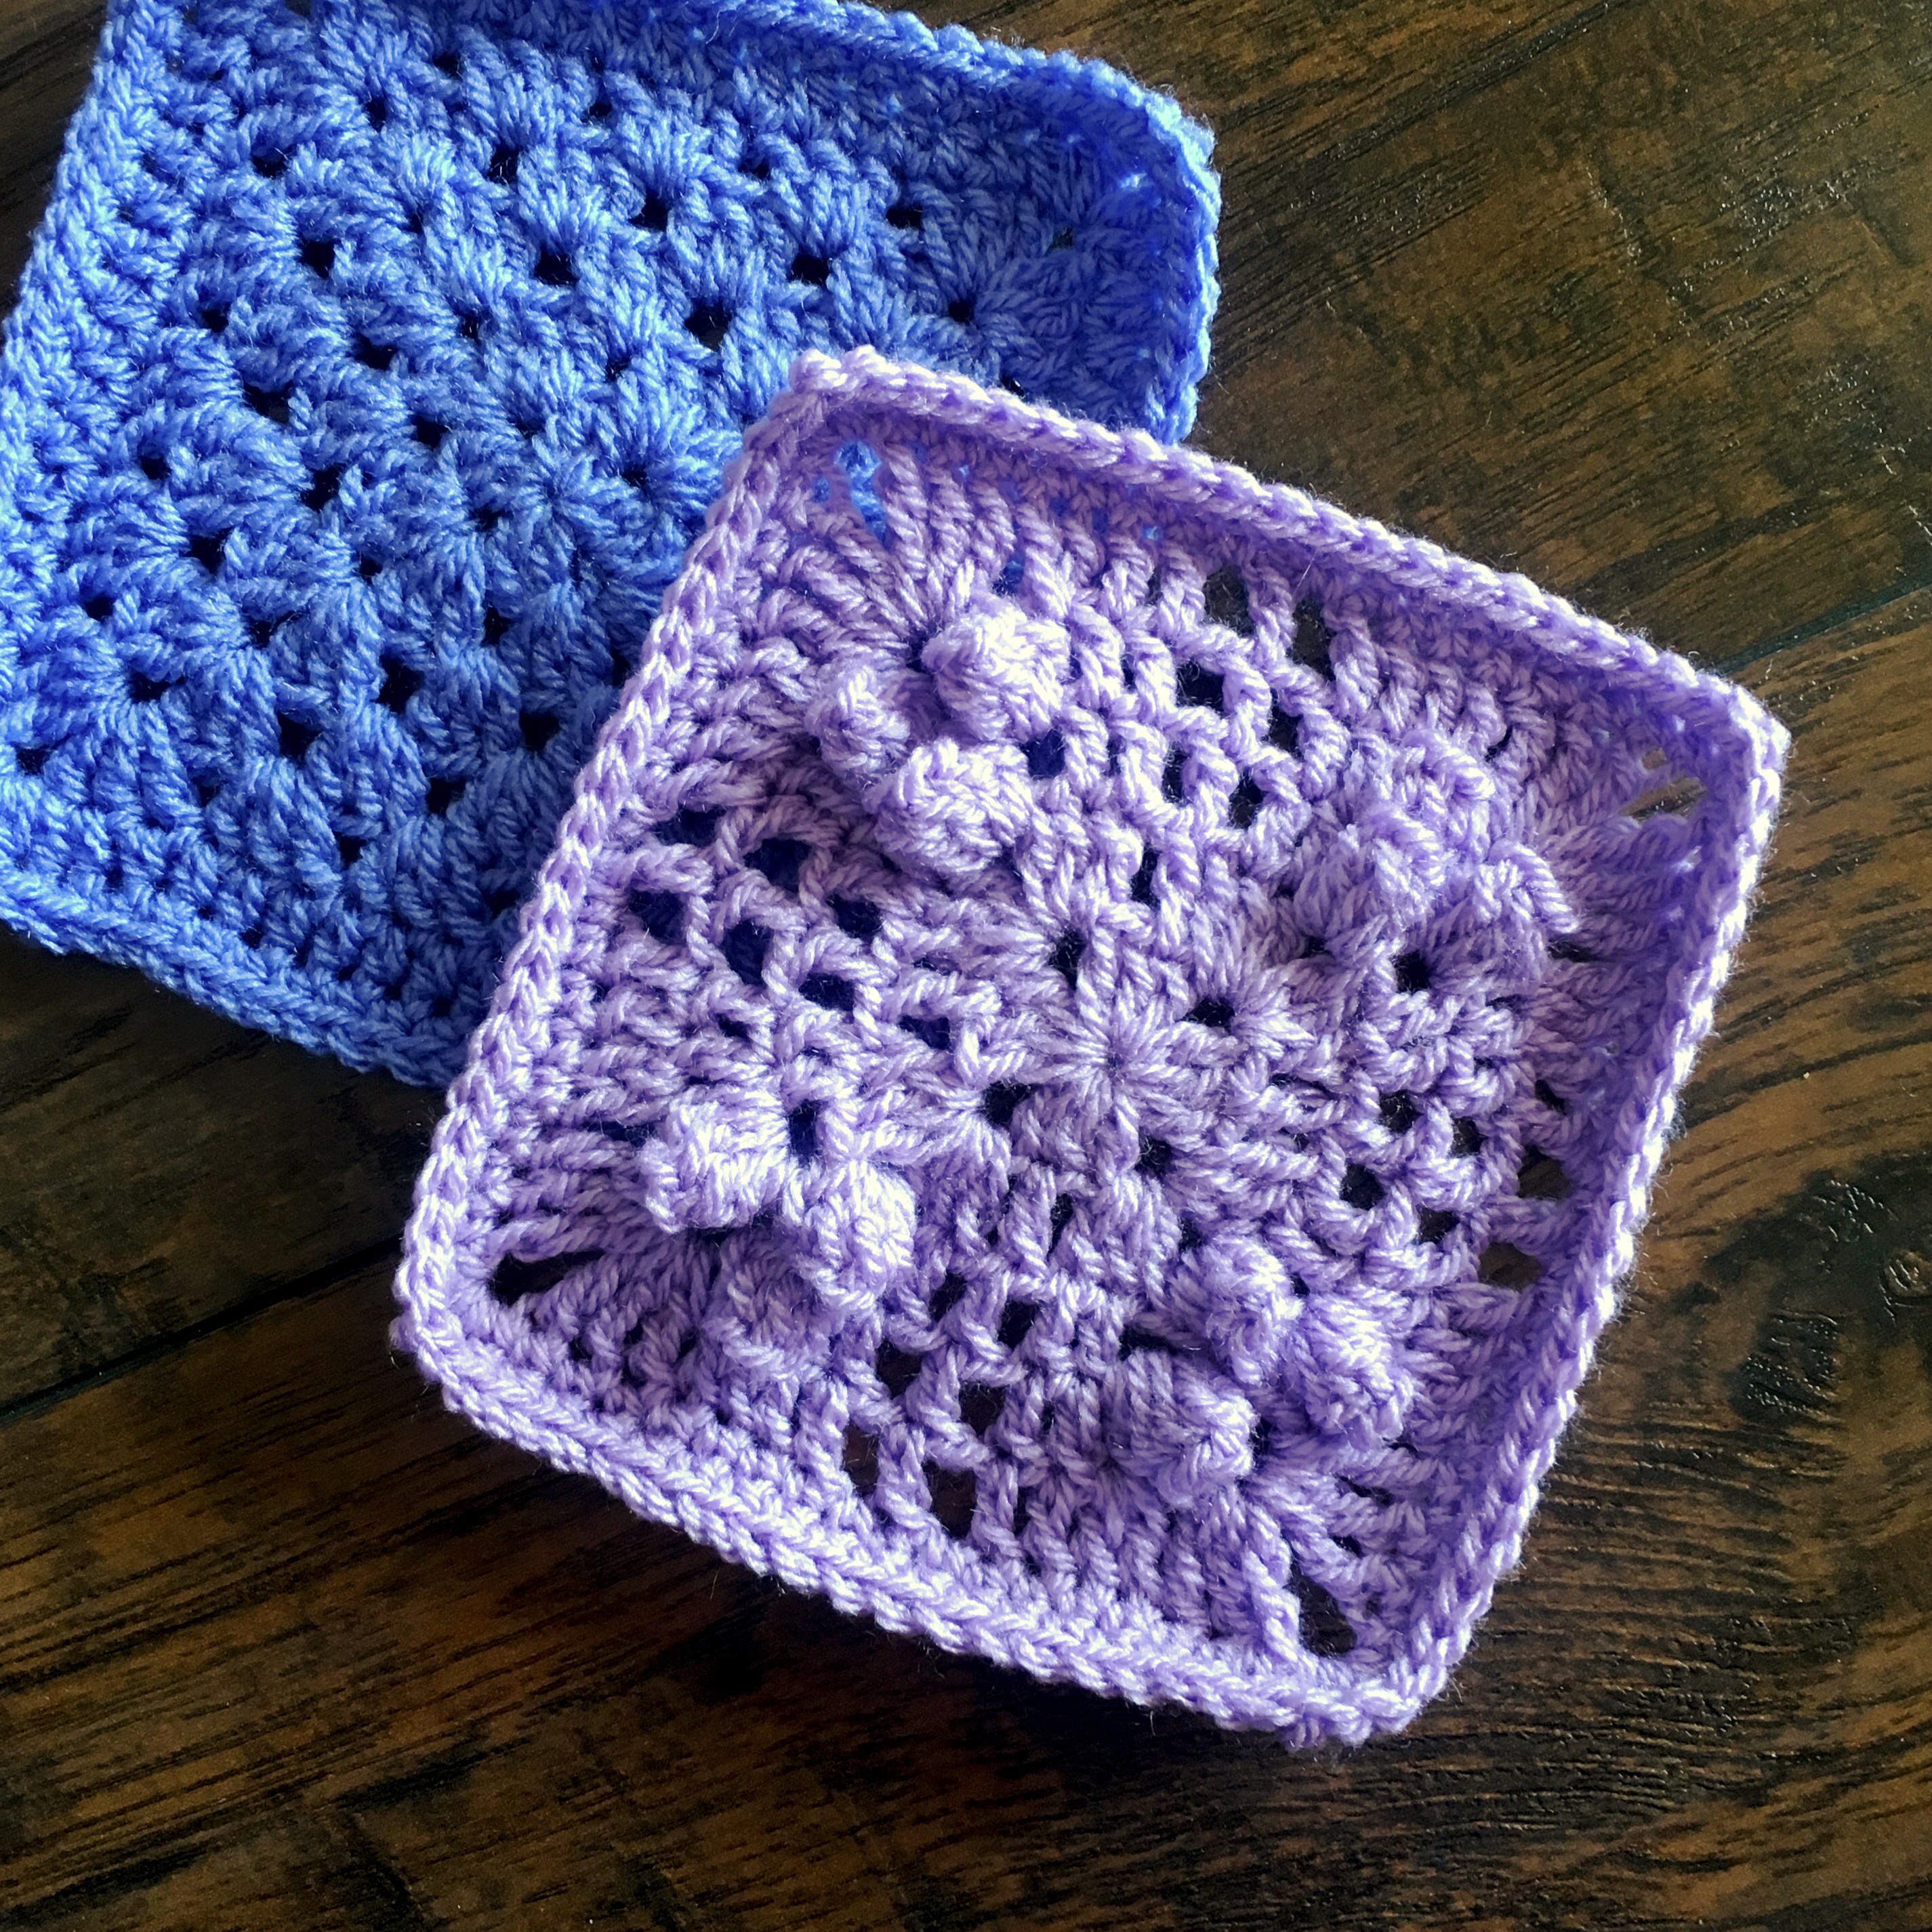
Michele Square

VVCAL Pages

Pin Me!


Related Links

  • Vibrant Vintage main info page (2016)
  • VVCAL Ravelry ebook – Neat photos of all 33 squares, each with a link to its blog post. Favorite the patterns, add them to your queue, see others’ projects, and more!
  • Quick-download Vibrant Vintage Blanket PDF (Etsy) – The entire VVCAL 33-squares collection, condensed and updated for clarity, in a tidy PDF, along with my preferred joining method and the updated wide lace VVCAL border. Yes, all of these patterns are available separately for free linked below, but the updated and condensed printable PDF has everything for the Vibrant Vintage Blanket in one place for a small fee of $4. (Includes charts and written instruction.)
  • VVCAL Facebook Group – Vibrant Vintage CAL (official)
  • My main FB group – CypressTextiles Tree Huggers
  • This CAL has been rebooted! (2018) Here is a link to the VVCAL Reboot Main info page. Have fun! Those squares coordinate with these. Go wild!

Charted instruction:

IMG_1130

Written instruction US Terms:

For UK Terms and Video Instruction, scroll down.

Special stitches

  • Beg DC = (SC, Ch-1)
  • Beg TR = (SC, Ch-2)
  • Beg Popcorn = 5DC in same spot, take loop off hook, insert hook in top of Beg DC, place loop back on hook and pull through Beg DC to front of work
  • Popcorn = 6DC in same spot, take loop off hook, insert hook in top of first DC, place loop back on hook and pull through first DC to front of work

Foundation: Ch-3 and join in first Ch to make ring.

Round 1: All in ring, Beg DC, (Chain 2, 3DC) 3 times, Chain 2, 2DC, join with a slip stitch in top of Beg DC _12 DC, 4 Chain-2 spaces total_

Round 2: In first chain space: (Slip St, Beg DC, Chain 1, 3DC), (Chain 1, Skip 1 st, DC in next st, Chain 1, Skip 1 st, 3DC, Chain 1, 3DC) 3 times, Chain 1, Skip 1 st, DC in next st, Chain 1, Skip 1 st, 2DC in first corner to complete it, join with a slip stitch in top of Beg DC _28 DC, 12 Chain-1 spaces total_

Round 3: In first Chain space: (Beg DC, Make Beg Popcorn), **Chain 1, skip 1 st, DC in next st twice, Chain 1, DC in next DC, Chain 1, DC in next st twice, Chain 1, Make Popcorn in corner chain space, repeat from ** 3 times more, omitting final Popcorn on third repeat, Chain 1, join with a slip stitch in top of Beg Popcorn _20 DC, 16 Chain-1 spaces, 4 Popcorns total_

Round 4: Slip St in chain space after popcorn. (Beg DC, Make Beg Popcorn) in chain space, ** Chain 1, DC in next st twice, Chain 1, DC in next DC, Chain 1, DC in next st twice, Chain 1, Make Popcorn in next chain space, Chain 2, Make Popcorn in next chain space, repeat from ** 3 times more, omitting final Popcorn on third repeat, join with a slip stitch in top of Beg Popcorn _20 DC, 8 Popcorns, 16 Chain-1 spaces, 4 Chain-2 spaces total_

Round 5: In same spot (around final SC from Round 4), (Beg TR, Chain 2, 3TR), **skip Popcorn, 2DC in next chain space, DC in next stitch twice, Chain 1, DC in next DC, Chain 1, DC in next stitch twice, 2DC in next chain space, skip Popcorn, (3TR, Chain 2, 3TR) in corner chain space –corner made-, repeat from ** 3 times more, omitting “corner” on third repeat, 2TR in first corner to complete it, join with a slip stitch in top of Beg TR _24 TR, 36 DC, 8 Chain-1 spaces, 4 Chain-2 spaces total_

Round 6: 3SC in first chain space, SC in all stitches and chain spaces around, placing 3SC in 3 more corners, join with a slip stitch in first SC _80 SC total_

Round 7: 3SC in first SC, SC in all stitches around, placing 3SC in 3 more corner SC sts, join with a slip stitch in first SC, cut yarn and weave ends. _88 SC total_

Written instruction UK Terms:

Special stitches

  • Beg tr = (1dc, Ch-1)
  • Beg dtr = (1dc, Ch-2)
  • Beg Popcorn = 5tr in same spot, take loop off hook, insert hook in top of Beg tr, place loop back on hook and pull through Beg tr to front of work
  • Popcorn = 6tr in same spot, take loop off hook, insert hook in top of first tr, place loop back on hook and pull through first tr to front of work

Foundation: Ch-3 and join in first Ch to make ring.

Round 1: All in ring, Beg tr, (Ch2, 3tr) 3 times, Ch2, 2tr, join with a slip stitch in top of Beg tr_12 tr, 4 Chain-2 spaces total_

Round 2: In first chain space: (Slip St, Beg tr, Ch1, 3tr), (Ch1, Skip 1 st, 1tr in next st, Ch1, Skip 1 st, 3tr, Ch1, 3tr) 3 times, Ch1, Skip 1 st, 1tr in next st, Ch1, Skip 1 st, 2tr in first corner to complete it, join with a slip stitch in top of Beg tr _28 tr, 12 Chain-1 spaces total_

Round 3: In first Chain space: (Beg tr, Make Beg Popcorn), **Ch1, skip 1 st, 1tr in next st twice, Ch1, 1tr in next tr, Ch1, 1dc in next 2 sts, Ch1, Make Popcorn in corner ch-sp, repeat from ** 3 times more, omitting final Popcorn on third repeat, Ch1, join with ss in Beg Popcorn _20 tr, 16 Chain-1 spaces, 4 Popcorns total_

Round 4: Slip St in chain space after popcorn. (Beg tr, Beg Popcorn) in chain space, ** Ch1, 1tr in next 2 sts, Ch1, 1tr in next tr, Ch1, 1tr in next 2 sts, Ch1, Popcorn in next ch-sp, Ch2, Popcorn in next ch-sp, repeat from ** 3 times more, omitting final Popcorn on third repeat, join with ss in Beg Popcorn _20 tr, 8 Popcorns, 16 Chain-1 spaces, 4 Chain-2 spaces total_

Round 5: In same spot (around final dc from Round 4), (Beg dtr, Ch2, 3dtr), **skip Popcorn, 2tr in next chain space, 1tr in next 2 sts, Ch1, 1tr in next tr, Ch1, 1tr in next 1 sts, 2tr in next ch-sp, skip Popcorn, (3dtr, Ch2, 3dtr) in corner chain space –corner made-, repeat from ** 3 times more, omitting “corner” on third repeat, 2dtr in first corner to complete it, join with ss in Beg TR _24 dtr, 36 tr, 8 Chain-1 spaces, 4 Chain-2 spaces total_

Round 6: 3dc in first ch-sp, 1dc in all stitches and ch-sps around, placing 3dc in 3 more corners, join with ss in first dc _80 dc total_

Round 7: 3dc in first dc, 1dc in all stitches around, placing 3dc in 3 more corners, join with ss in first dc, cut yarn and weave ends. _88 dc total_

Video Instruction

Rachele C.

The Art of Crochet Blankets

You may also enjoy:

Support My Work

You’re supporting by just being here! You can read my blog (Start Here!), like and comment on socials, and message me for a chat. All of this supports my work free of charge!

  • Affiliate links – Shopping through my links supports me at no additional cost to you as I get a small commission through my affiliates. Jimmy Beans Wool // WoolWarehouse // Amazon.com
  • Buy my pattern book – I wrote a super neat crochet blanket pattern book, published under Penguin Random House. You can buy it here!
  • Browse my self-published patterns – I have over a hundred patterns on Etsy and Ravelry
  • Creative Art Blanket Course – Check it out on Teachable

Where to Find Me

Most Popular Free Crochet Patterns

Crochet Motif – Melissa Square

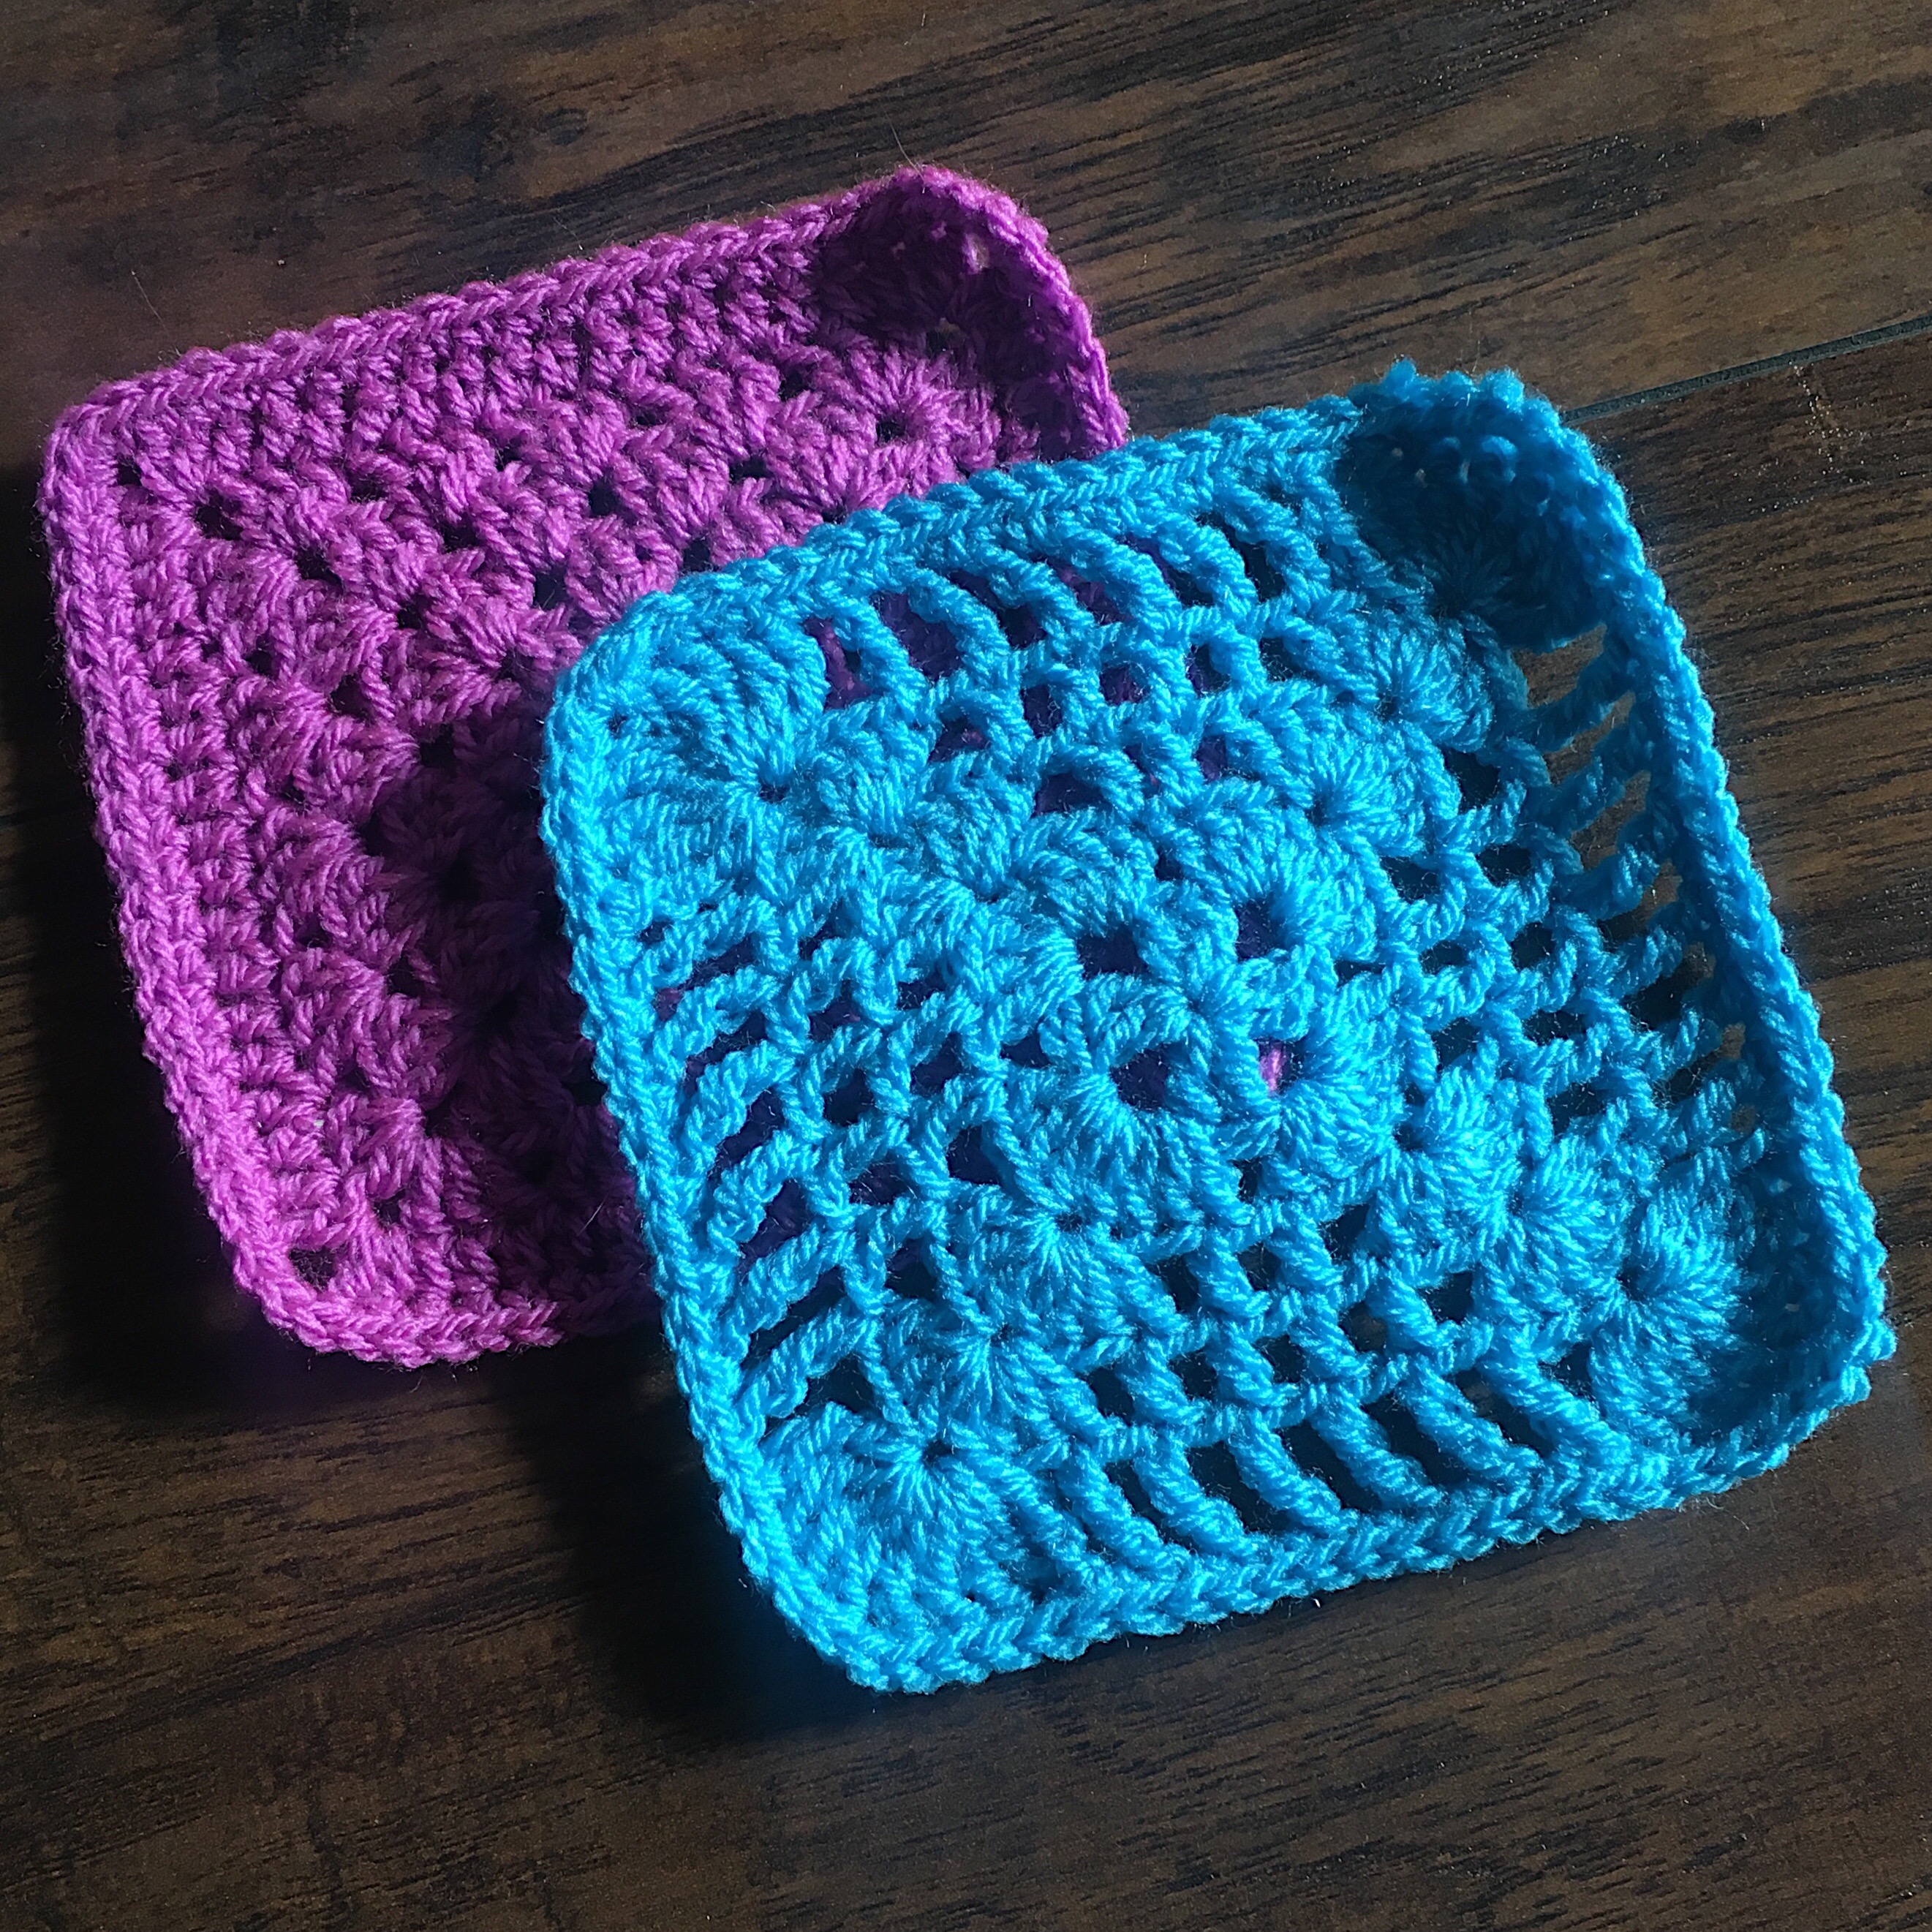
Melissa Square

VVCAL Pages

Pin Me!


Related Links

  • Vibrant Vintage main info page (2016)
  • VVCAL Ravelry ebook – Neat photos of all 33 squares, each with a link to its blog post. Favorite the patterns, add them to your queue, see others’ projects, and more!
  • Quick-download Vibrant Vintage Blanket PDF (Etsy) – The entire VVCAL 33-squares collection, condensed and updated for clarity, in a tidy PDF, along with my preferred joining method and the updated wide lace VVCAL border. Yes, all of these patterns are available separately for free linked below, but the updated and condensed printable PDF has everything for the Vibrant Vintage Blanket in one place for a small fee of $4. (Includes charts and written instruction.)
  • VVCAL Facebook Group – Vibrant Vintage CAL (official)
  • My main FB group – CypressTextiles Tree Huggers
  • This CAL has been rebooted! (2018) Here is a link to the VVCAL Reboot Main info page. Have fun! Those squares coordinate with these. Go wild!

Charted instruction:

IMG_1356

Written instruction US Terms:

For UK Terms and Video Instruction, scroll down.

Special stitches

  • Beg DC = (SC, Ch-1)
  • Beg TR = (SC, Ch-2)

Foundation: Ch-3 and join in first Ch to make ring.

Round 1: All in ring, Beg DC, (Chain 3, 2DC) 3 times, Chain 3, DC, join with a slip stitch in top of Beg DC _8 DC, 4 Chain-2 spaces total_    

Round 2: In first chain space: (Beg DC, 3DC), (Chain 1, 7DC in next corner space) 3 times, Chain 1, 3DC in first corner to complete it, join with a slip stitch in top of Beg DC _28 DC, 4 Chain-1 spaces total_

Round 3: In same stitch as join: (Beg DC, 3DC), **Chain 1, skip 2 DC, (DC in next DC, Chain 1) 2 times, 7DC in corner DC -corner made- , repeat from ** 3 times more, omitting “corner” on third repeat, 3DC in first corner to complete it, join with a slip stitch in top of Beg DC _36 DC, 12 Chain-1 spaces total_

Round 4: In same stitch as join, (Beg DC, 3DC), **Chain 1, skip 2 DC, (DC in next DC, Chain 1) 4 times, 7DC in corner DC -corner made- , repeat from ** 3 times more, omitting “corner” on third repeat, 3DC in first corner to complete it, join with a slip stitch in top of Beg DC _44 DC, 20 Chain-1 spaces total_

Round 5: In same stitch as join, (Beg TR, 4TR), **skip 2 DC, (TR in next DC, Chain 1) 5 times, TR in next DC, 9TR in corner DC -corner made- , repeat from ** 3 times more, omitting “corner” on third repeat, 4TR in first corner to complete it, join with a slip stitch in top of Beg TR _44 tr, 20 Chain-1 spaces total_

Note: If you can tell that after adding your final sc round (Round 6) your square will be too big, then frog Round 5 and switch it to double crochet.

Round 6: 3SC in top of Beg TR, SC in all stitches and chain spaces around, placing 3SC in 3 more corner TR stitches, join with a slip stitch in first SC, cut yarn and weave ends. _88 SC total_

Written instruction UK Terms:

Special stitches

  • Beg tr = (1dc, Ch-1)
  • Beg dtr = (1dc, Ch-2)

Foundation: Ch-3 and join in first Ch to make ring.

Round 1: All in ring, beg tr, (Ch3, 2tr) 3 times, Ch3, 1tr, join with a slip stitch in top of Beg tr_8 tr, 4 Chain-2 spaces total_    

Round 2: In first chain space: (beg tr, 3tr), (Ch1, 7tr in next corner space) 3 times, Ch1, 3tr in first corner to complete it, join with a slip stitch in top of Beg tr_28 tr, 4 Chain-1 spaces total_

Round 3: In same stitch as join: (Beg tr, 3tr), **Ch1, skip 2 tr, (1tr in next tr, Ch1) 2 times, 7tr in corner tr -corner made- , repeat from ** 3 times more, omitting “corner” on third repeat, 3tr in first corner to complete it, join with a slip stitch in top of Beg tr_36 tr, 12 Chain-1 spaces total_

Round 4: In same stitch as join, (Beg tr, 3tr), **Ch1, skip 2 tr, (1tr in next tr, Ch1) 4 times, 7tr in corner tr -corner made- , repeat from ** 3 times more, omitting “corner” on third repeat, 3tr in first corner to complete it, join with a slip stitch in top of Beg tr_44 tr, 20 Chain-1 spaces total_

Round 5: In same stitch as join, (Beg dtr, 4dtr), **skip 2 tr, (1tr in next tr, Ch1) 5 times, 1dtr in next tr, 9dtr in corner tr -corner made- , repeat from ** 3 times more, omitting “corner” on third repeat, 4dtr in first corner to complete it, join with a slip stitch in top of Beg dtr_44 dtr, 20 Chain-1 spaces total_

Note: If you can tell that after adding your final dc round (Round 6) your square will be too big, then frog Round 5 and switch it to treble crochet.

Round 6: 3dc in top of Beg dtr, 1dc in all stitches and chain spaces around, placing 3dc in 3 more corner stitches, join with a slip stitch in first dc, cut yarn and weave ends. _88 dc total_

Video Instruction

Rachele C.

The Art of Crochet Blankets

You may also enjoy:

Support My Work

You’re supporting by just being here! You can read my blog (Start Here!), like and comment on socials, and message me for a chat. All of this supports my work free of charge!

  • Affiliate links – Shopping through my links supports me at no additional cost to you as I get a small commission through my affiliates. Jimmy Beans Wool // WoolWarehouse // Amazon.com
  • Buy my pattern book – I wrote a super neat crochet blanket pattern book, published under Penguin Random House. You can buy it here!
  • Browse my self-published patterns – I have over a hundred patterns on Etsy and Ravelry
  • Creative Art Blanket Course – Check it out on Teachable

Where to Find Me

Most Popular Free Crochet Patterns

Crochet Motif – Darlene Square

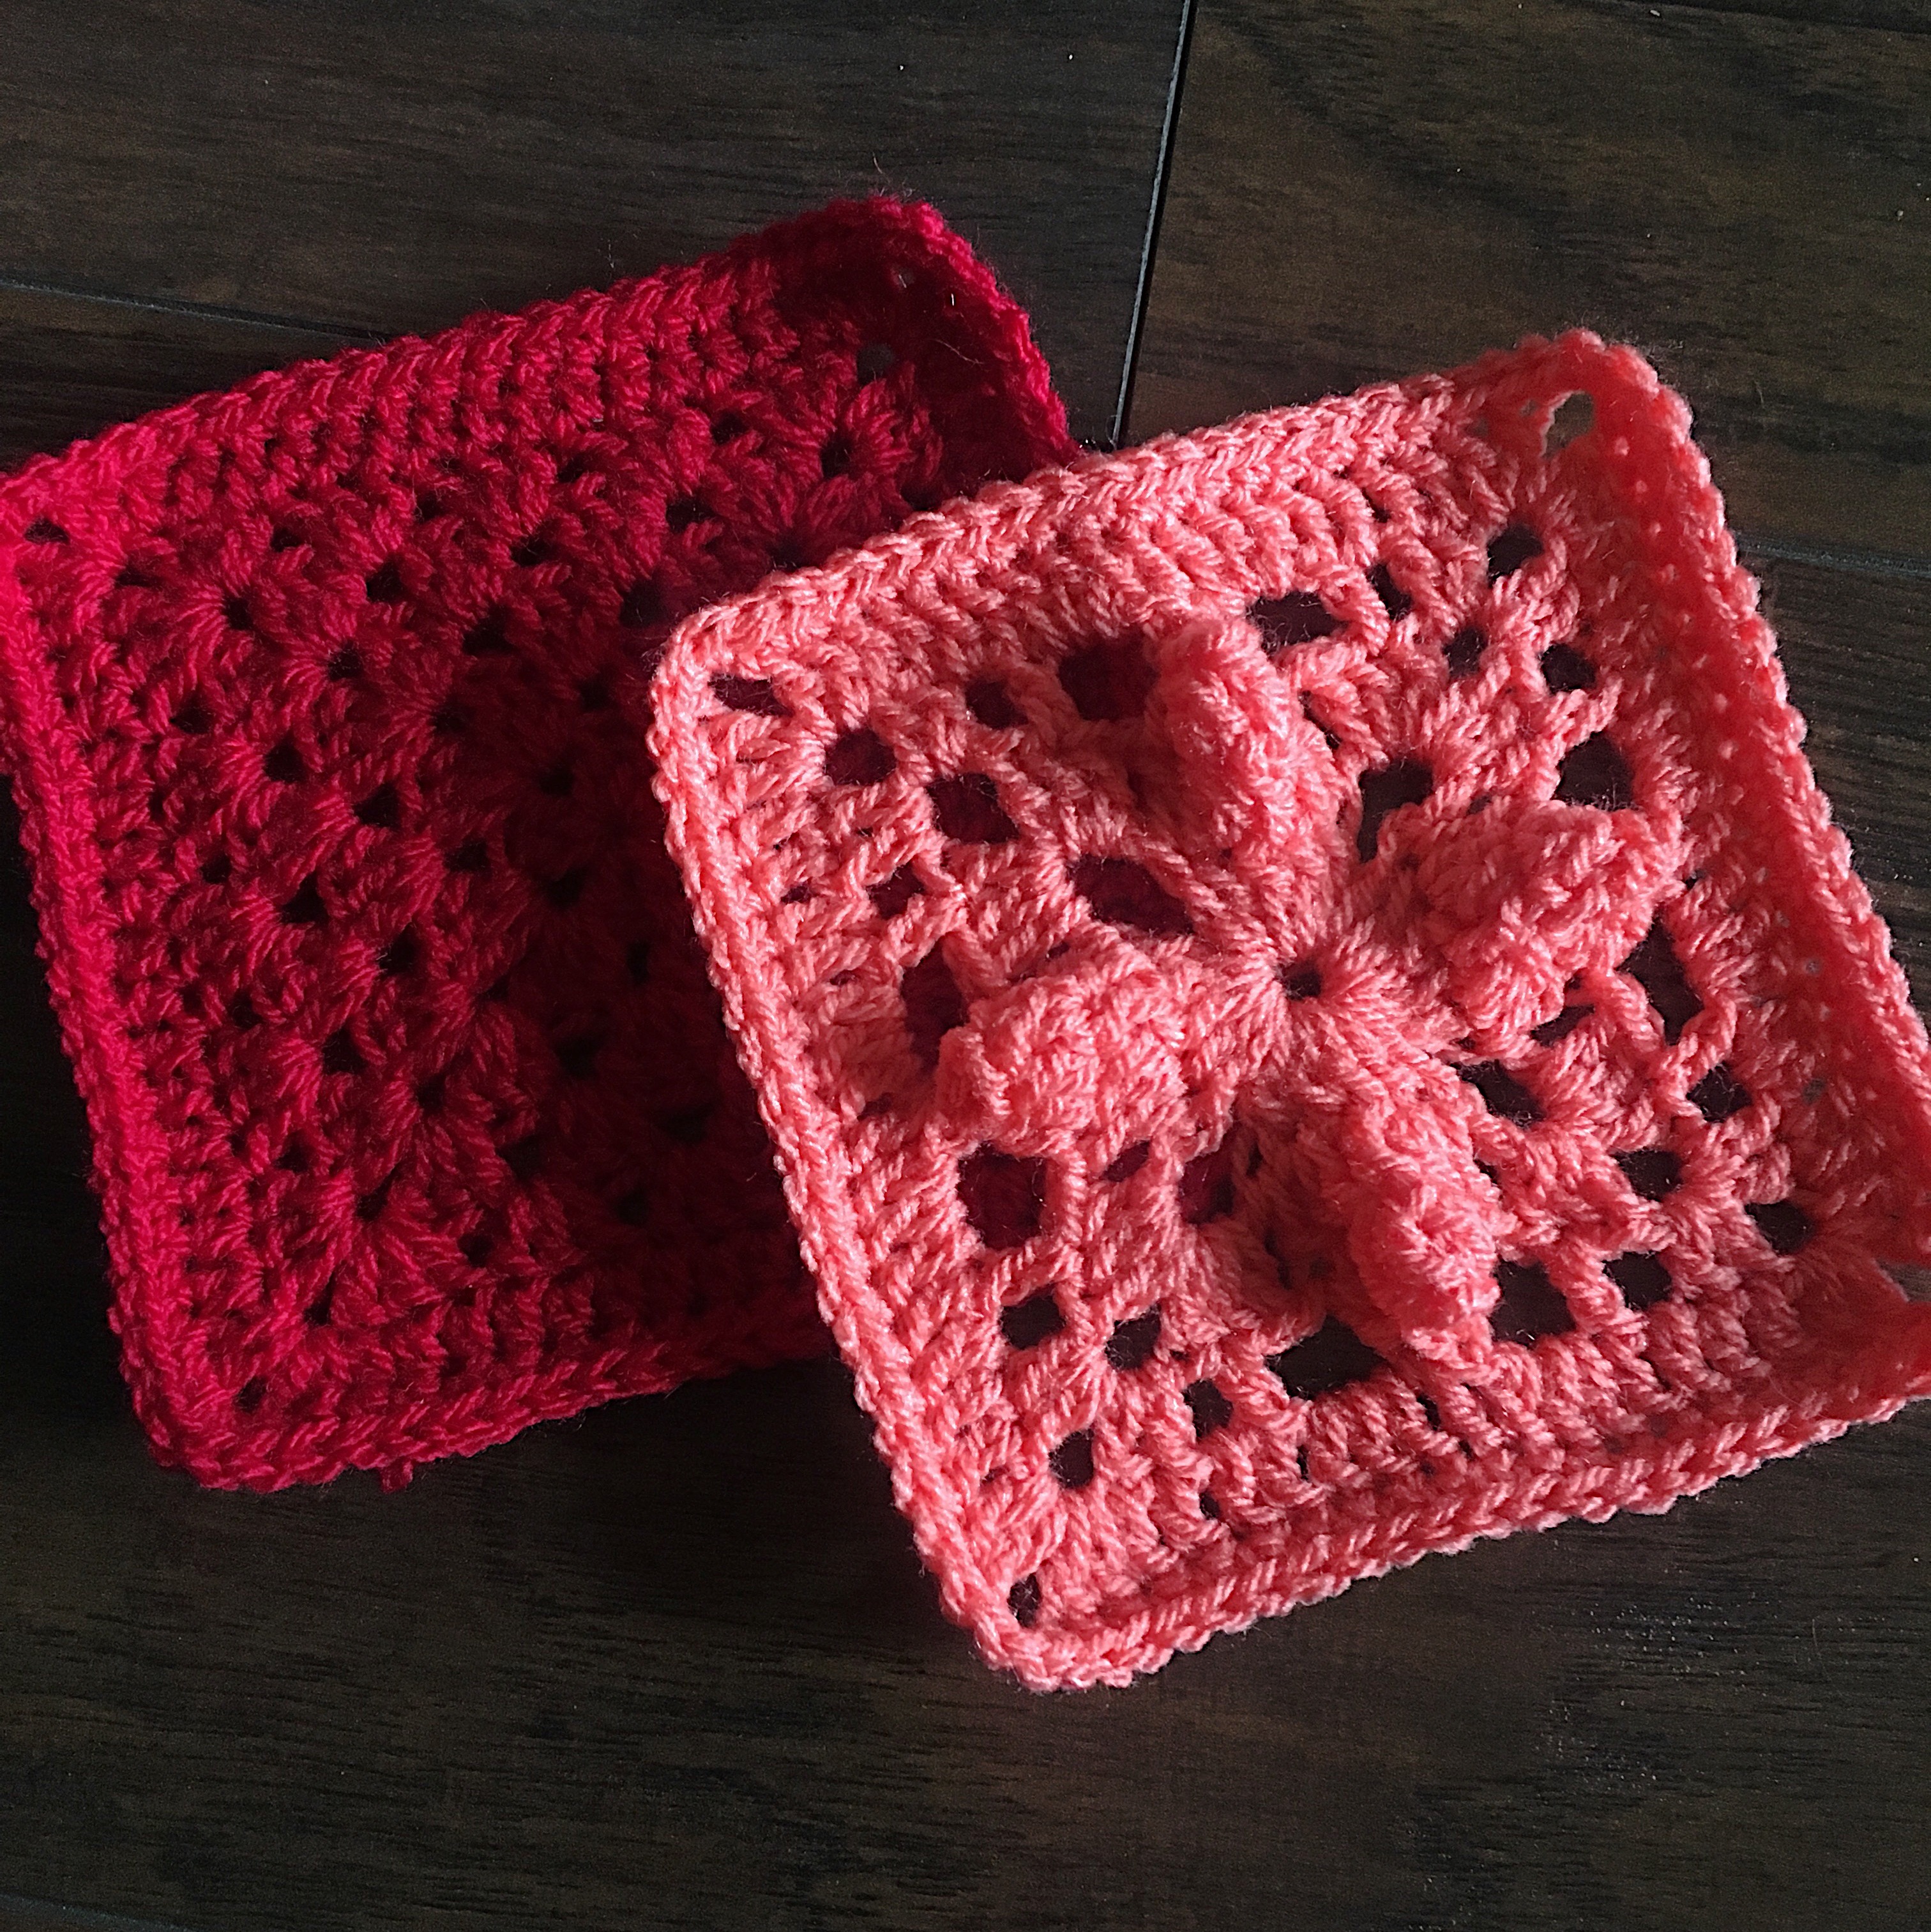
Darlene Square

VVCAL Pages

Pin Me!


Related Links

  • Vibrant Vintage main info page (2016)
  • VVCAL Ravelry ebook – Neat photos of all 33 squares, each with a link to its blog post. Favorite the patterns, add them to your queue, see others’ projects, and more!
  • Quick-download Vibrant Vintage Blanket PDF (Etsy) – The entire VVCAL 33-squares collection, condensed and updated for clarity, in a tidy PDF, along with my preferred joining method and the updated wide lace VVCAL border. Yes, all of these patterns are available separately for free linked below, but the updated and condensed printable PDF has everything for the Vibrant Vintage Blanket in one place for a small fee of $4. (Includes charts and written instruction.)
  • VVCAL Facebook Group – Vibrant Vintage CAL (official)
  • My main FB group – CypressTextiles Tree Huggers
  • This CAL has been rebooted! (2018) Here is a link to the VVCAL Reboot Main info page. Have fun! Those squares coordinate with these. Go wild!

Charted instruction:

IMG_1355

Written instruction US Terms:

For UK Terms and Video Instruction, scroll down.

Special stitches

  • Beg DC = (SC, Ch-1)
  • Popcorn Petal = DC in all 7 DCs, make Popcorn Petal: insert hook into top of first of 7 DCs, put working loop back on hook, pull working loop through to close Popcorn Petal

Foundation: Ch-4 and join in first Ch to make ring.

Work 5 Rounds as follows…

Round 1: All in ring, working over center tail so as to pull center circle closed tight when square is complete: Make Beg DC, (Chain 5, 5DC) 3 times, Chain 5, 4DC, join with a slip stitch in top of Beg DC _20 DC, 4 Chain-5 spaces total_    

Round 2: Slip Stitch in 2 chains, All in same chain space: (Beg DC, Chain 3, 3DC), ** Ch1, 1dc, 2dc in next st, 1dc, 2dc in next st, 1dc, Chain 1, (3DC, Chain 3, 3DC) in corner chain space -corner made- , repeat from ** 3 times more, omitting “corner” on third repeat, 2DC in first corner chain space to complete it, join with a slip stitch in top of Beg DC _52 DC, 4 Chain-3 spaces, 8 Chain-1 spaces total_


Round 3: In first chain space: (Beg DC, Chain 3, 2DC), ** Chain 1, skip next stitch, DC in next stitch, Chain 3, skip next DC, Make Popcorn Petal, Chain 3, skip next DC, DC in next DC, Chain 1, (2DC, Chain 3, 2DC) in corner chain space -corner made- , repeat from ** 3 times more, omitting “corner” on third repeat, DC in first corner to complete it, join with a slip stitch in top of Beg DC _4 Popcorn Petals, 12 Chain-3 spaces, 8 Chain-1 spaces, 24DC total_


Round 4: All in first Chain space: (Beg DC, Chain 2, 2DC), DC in next 2 DC, DC in chain space and in next DC, 3DC in chain-3 space, DC in top of Popcorn Petal, 3DC in chain-3 space, DC in next 4 stitches as before, (2DC, Chain 2, 2DC) in next corner space -corner made- , repeat from ** 3 times more, omitting final corner on third repeat, DC in first corner to complete it, join with a slip stitch in top of Beg DC _76 DC, 4 Chain-2 spaces total_

Round 5: 3SC in first corner space, SC in all stitches around, putting 3SC in all corners, join with a slip stitch in first SC, cut yarn and weave ends. _88 SC total_

Written instruction UK Terms:

Special stitches

  • Beg tr = (1dc, Ch-1)
  • Popcorn Petal = 1tr in all 7 tr sts, make Popcorn Petal: insert hook into top of first of 7tr, put working loop back on hook, pull working loop through to close Popcorn Petal

Foundation: Ch-4 and join in first Ch to make ring.

Round 1: All in ring, Beg tr, (Ch5, 5tr) 3 times, Ch5, 4tr, join with ss in Beg tr_20 tr, 4 Ch-5 spaces total_    

Round 2: Slip Stitch in 2 chains, All in same ch-sp: (Beg tr, Ch3, 3tr), ** Ch1, 1tr, 2tr in next st, 1tr, 2tr in next st, 1tr, Ch1, (3tr, Ch3, 3tr) in corner chain space -corner made- , repeat from ** 3 times more, omitting “corner” on third repeat, 2tr in first corner ch-sp to complete it, join with ss in Beg tr_52 tr, 4 Chain-3 spaces, 8 Chain-1 spaces total_


Round 3: In first ch-sp: (Beg tr, Ch 3, 2tr), ** ch1, sk1, 1tr, ch 3, skip next tr, make Popcorn Petal, Ch3, skip next tr, 1tr in next tr, Ch1, (2tr, Ch3, 2tr) in corner chain space -corner made- , repeat from ** 3 times more, omitting “corner” on third repeat, 1tr in first corner to complete it, join with ss in top of Beg tr_4 Popcorn Petals, 12 Chain-3 spaces, 8 Chain-1 spaces, 24tr total_


Round 4: All in first ch-sp: (Beg tr, Ch2, 2tr), 1tr in next 2 tr, 1tr in ch-sp and in next tr, 3tr in ch-3 sp, 1tr in Popcorn Petal, 3tr in ch-3 sp, 1tr in next 4 st/sps as before, (2tr, Ch2, 2tr) in next corner space -corner made- , repeat from ** 3 times more, omitting final corner on third repeat, 1tr in first corner to complete it, join with ss in Beg tr_76 tr, 4 Chain-2 spaces total_

Round 5: 3DC in first corner space, 1DC in all stitches around, putting 3DC in all corners, join with a slip stitch in first DC, cut yarn and weave ends. _88 DC total_

Video Instruction

Rachele C.

The Art of Crochet Blankets

You may also enjoy:

Support My Work

You’re supporting by just being here! You can read my blog (Start Here!), like and comment on socials, and message me for a chat. All of this supports my work free of charge!

  • Affiliate links – Shopping through my links supports me at no additional cost to you as I get a small commission through my affiliates. Jimmy Beans Wool // WoolWarehouse // Amazon.com
  • Buy my pattern book – I wrote a super neat crochet blanket pattern book, published under Penguin Random House. You can buy it here!
  • Browse my self-published patterns – I have over a hundred patterns on Etsy and Ravelry
  • Creative Art Blanket Course – Check it out on Teachable

Where to Find Me

Most Popular Free Crochet Patterns

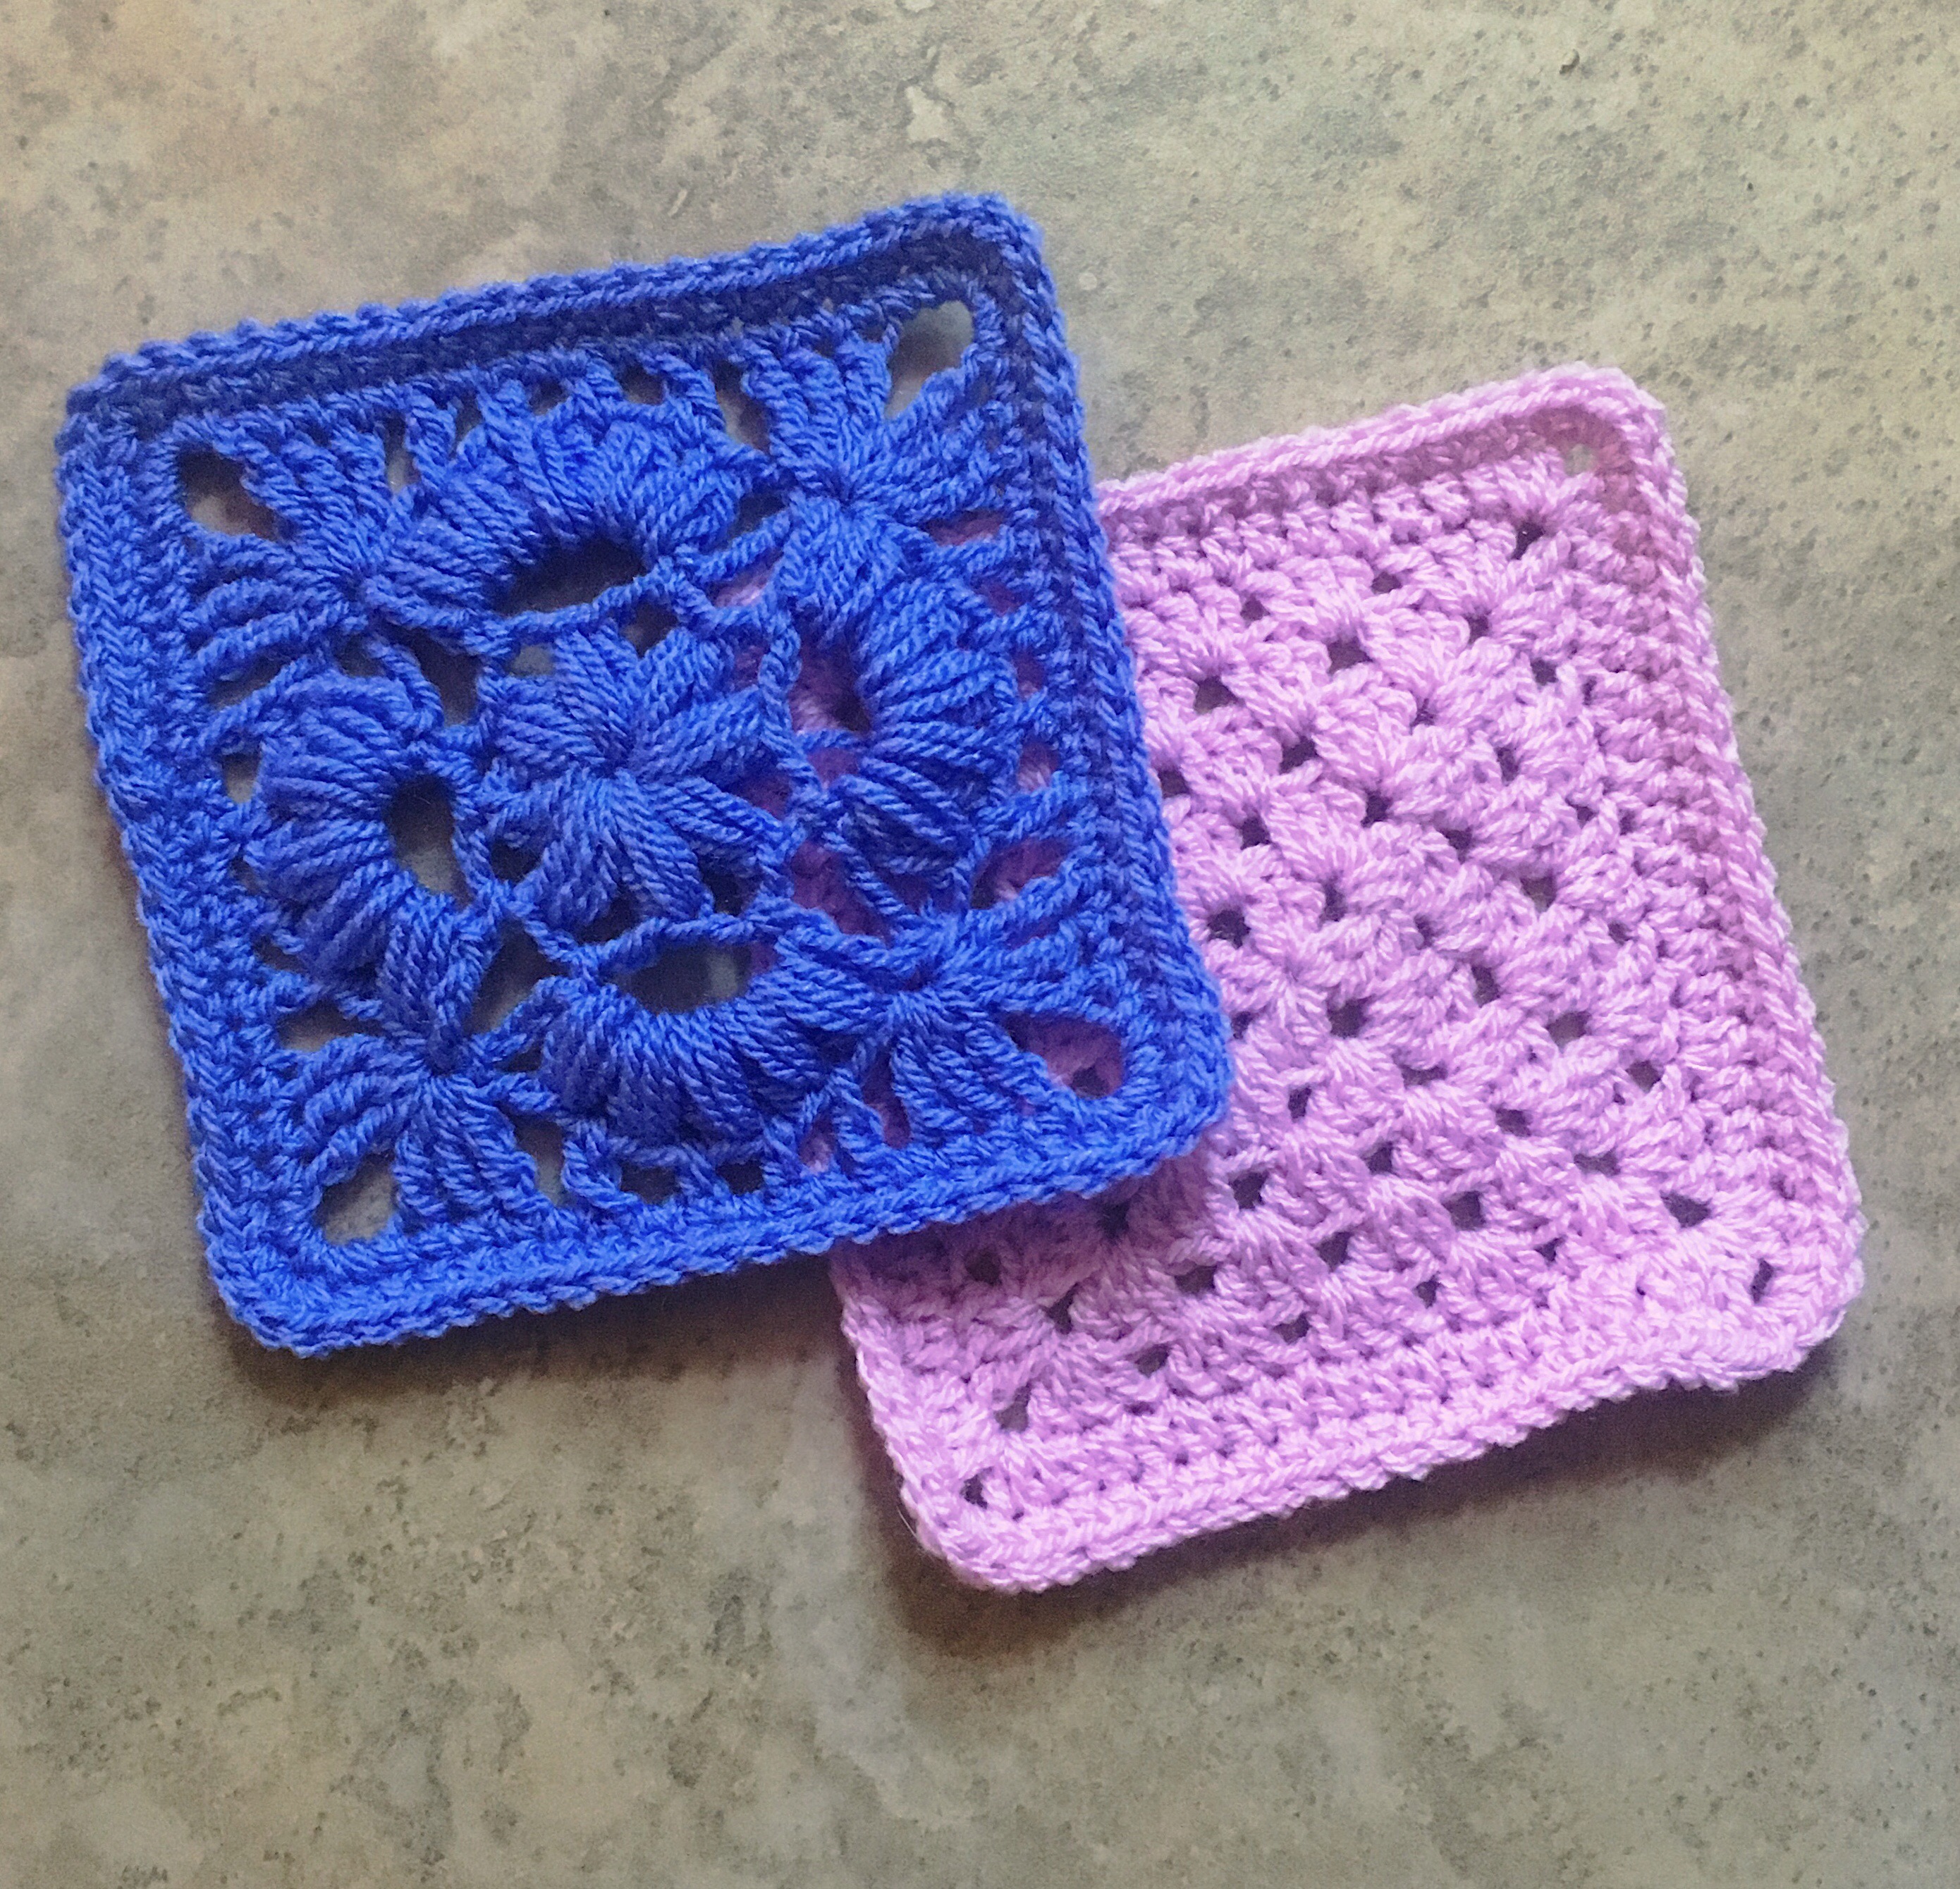
Crochet Motif – Nicolas Square

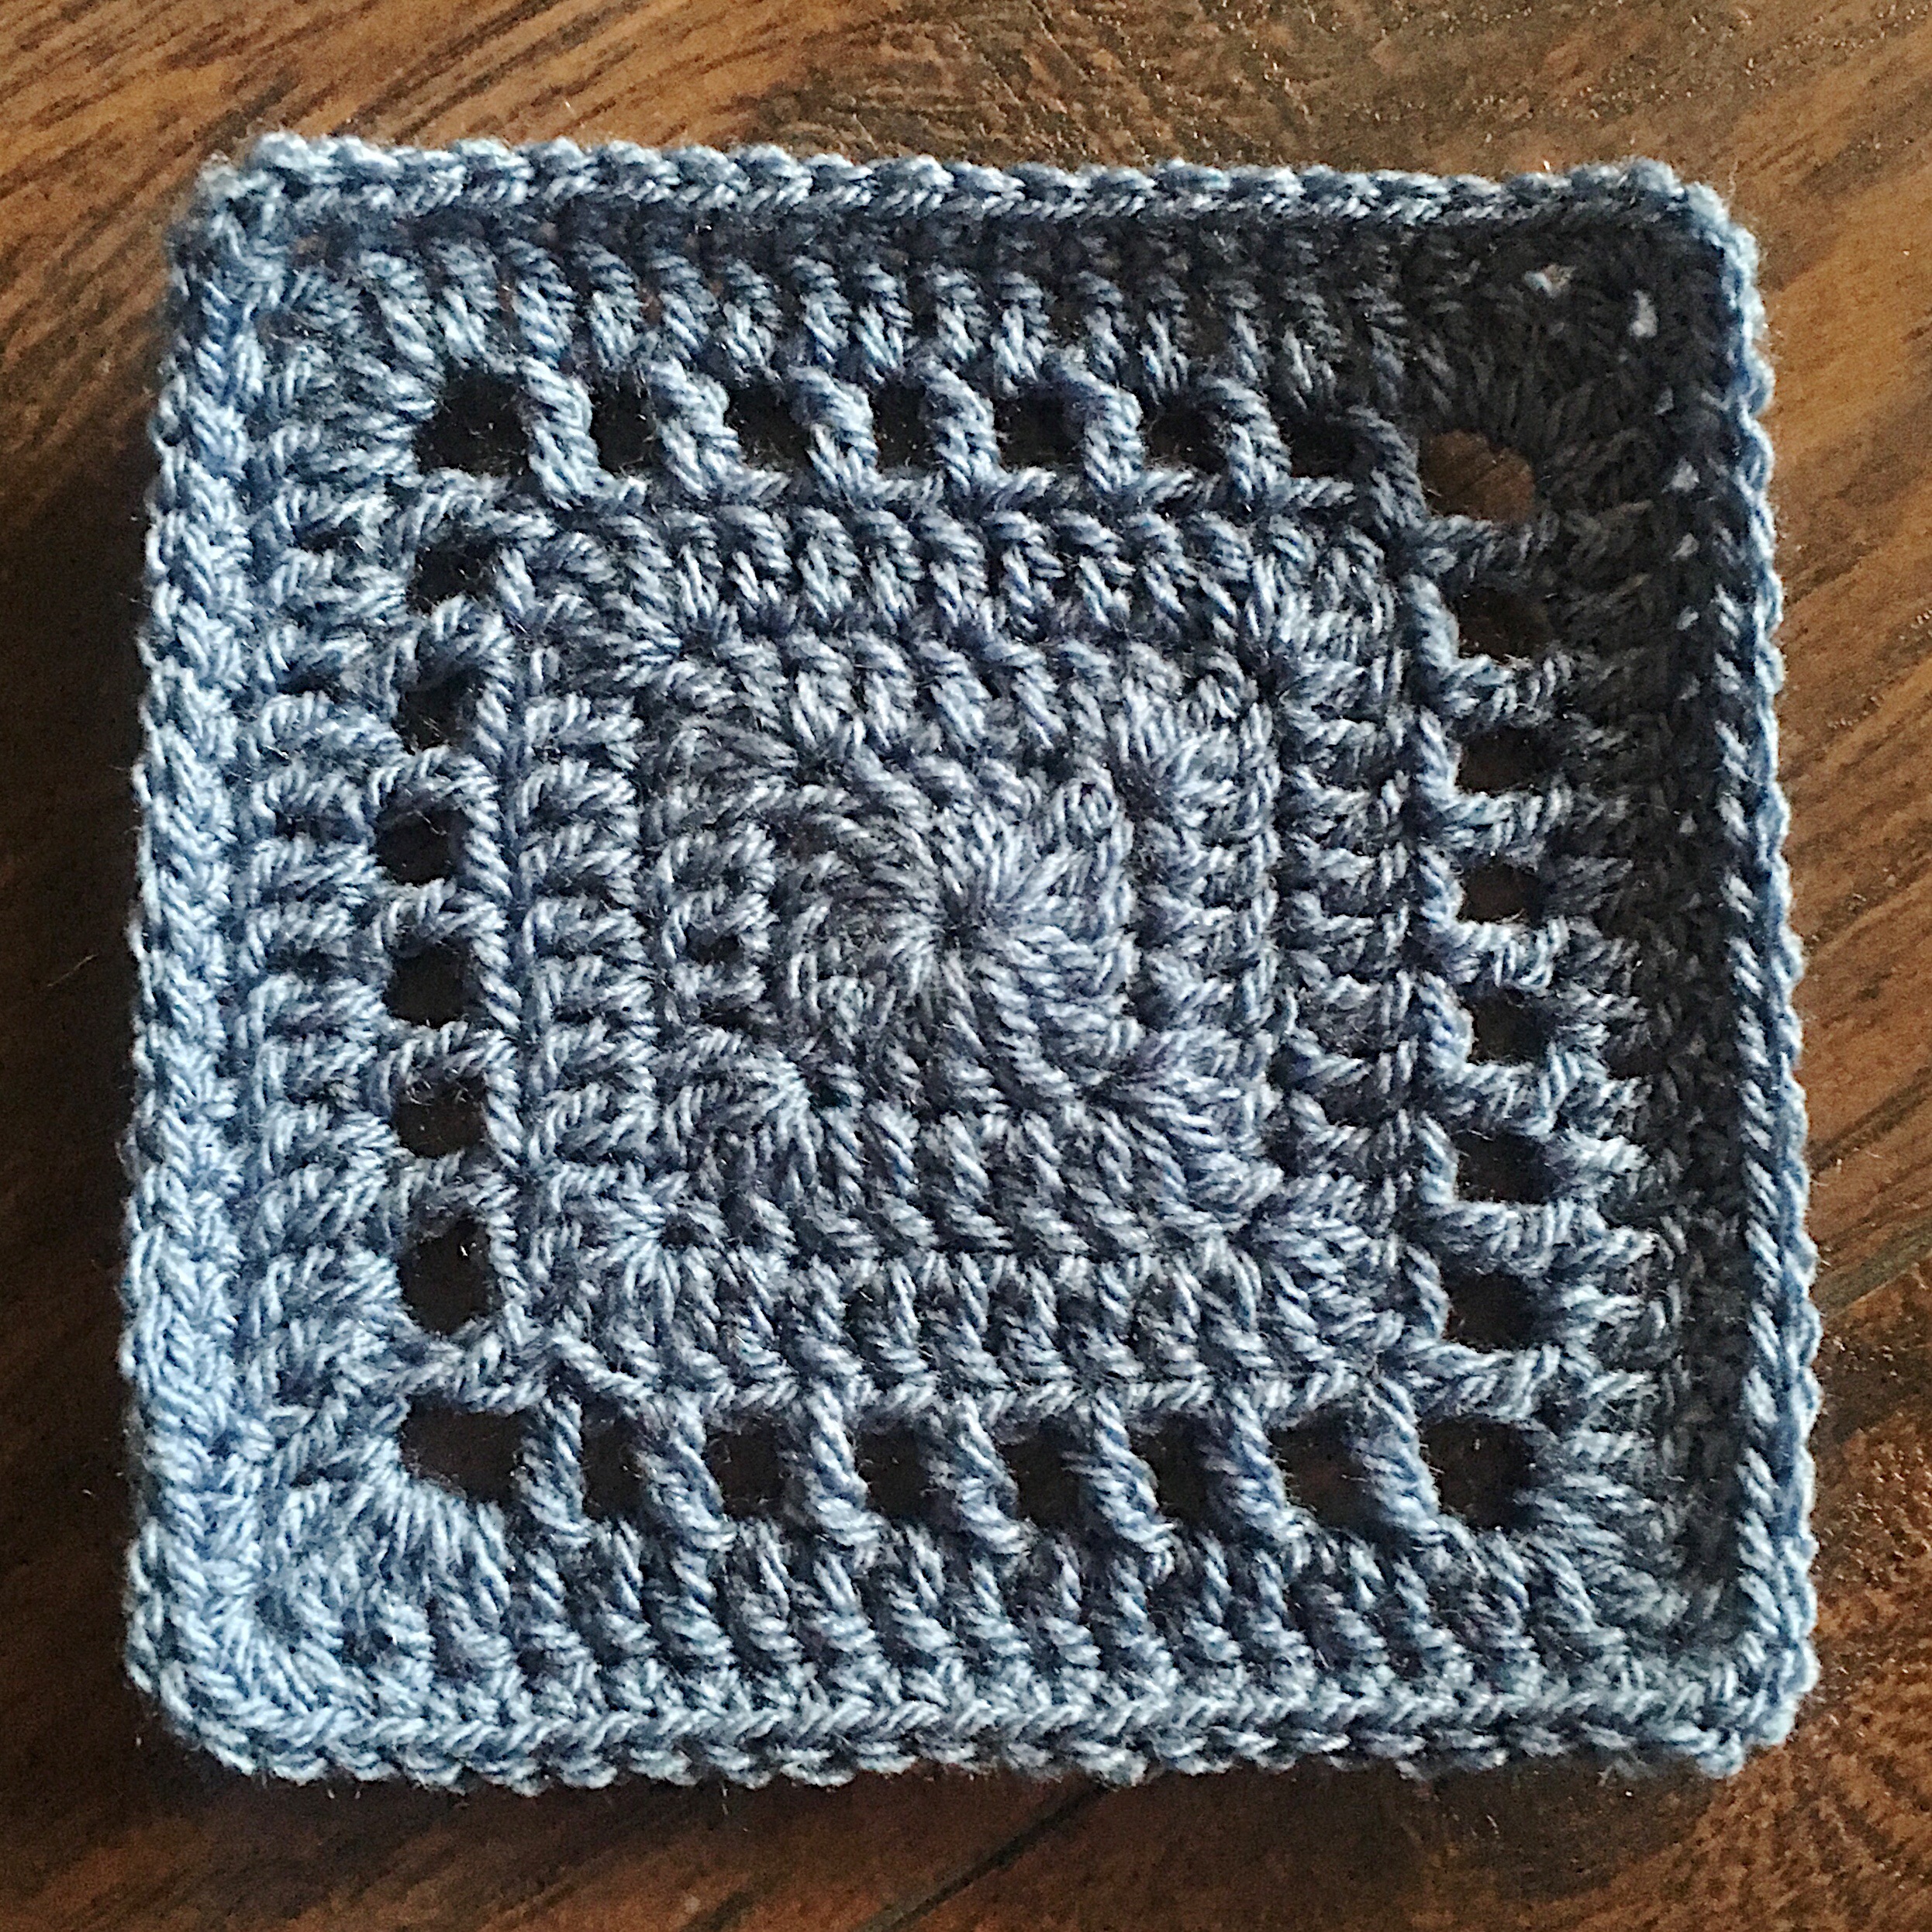
Nicolas Square

VVCAL Pages

Pin Me!


Related Links

Charted instruction:

Written instruction (US Terms):

For UK Terms and Video Instruction, scroll down.

Special stitches

  • Beg DC = (SC, Ch-1)
  • Beg TR = (SC, Ch-2)

Foundation: Ch-3 and join in first Ch to make ring. You may also make a magic circle if you prefer that method. Also feel free to chain more stitches if you are used to chaining 4 or 5. I like to chain 3 for my ring, because I like the center hole to disappear when I weave ends.

Work 6 Rounds as follows…

Round 1: All in ring, working over center tail so as to pull center circle closed tight when square is complete: Make Beg TR, (3DC, TR) 3 times, 3DC, join with a slip stitch in top of Beg TR _12 DC, 4 TR total_    

Round 2: (Beg TR, 2DC) in same stitch as join, **DC in next 3 stitches, (2DC, TR, 2DC) in next TR -corner made- repeat from ** 2 times more, DC in next 3 stitches, 2DC in same stitch as Beg TR, join with a slip stitch to top of Beg TR.  _28 DC, 4 TR total_

Round 3: (Beg TR, 2DC) in same stitch as join, **DC in next 7 stitches, (2DC, TR, 2DC) in next TR -corner made- repeat from ** 2 times more, DC in next 7 stitches, 2DC in same stitch as Beg TR, join with a slip stitch to top of Beg TR.  _44 DC, 4 TR total_

Round 4: (Beg DC, chain 3, DC) in same stitch as join, **Chain 1, (DC, Chain 1, skip 1 stitch) 5 times, (DC, Chain 3, DC) in corner TR -corner made- , repeat from ** 3 times, omitting final corner join with a slip stitch to top of Beg DC.  _28 DC, 4 corner chain-3 spaces, 24 chain-1 spaces total_

Round 5: (Beg DC, DC, TR, 2DC) in first chain corner space, **DC in all DC and chain spaces across to corner chain space, (2DC, TR, 2DC) in corner, repeat from ** twice more, DC in all DC and chain spaces across, join with a slip stitch to top of Beg DC  _68 DC, 4 TR total_

Round 6: SC in all stitches around, putting 5SC in all 4 TR corners, join with a slip stitch to first SC, cut yarn and weave ends _88 SC total_

Written instruction (UK Terms):

Special stitches

  • Beg tr = (1dc, Ch-1)
  • Beg DTR = (1dc, Ch-2)

Foundation: Ch-3 and join in first Ch to make ring. You may also make a magic circle if you prefer that method. Also feel free to chain more stitches if you are used to chaining 4 or 5. I like to chain 3 for my ring, because I like the center hole to disappear when I weave ends.

Round 1: All in ring, Make Beg dtr , (3tr, 1dtr) 3 times, 3tr, join with a slip stitch in top of Beg dtr_12 tr, 4 dtr total_    

Round 2: (Beg DTR, 2tr) in same stitch as join, **1tr in next 3 stitches, (2tr, 1DTR, 2tr) in next dtr -corner made- repeat from ** 2 times more, 1tr in next 3 stitches, 2tr in same stitch as Beg dtr, join with a slip stitch to top of Beg dtr.  _28 tr, 4 dtr total_

Round 3: (Beg DTR, 2tr) in same stitch as join, **1tr in next 7 stitches, (2tr, 1dtr, 2tr) in next dtr -corner made- repeat from ** 2 times more, 1tr in next 7 stitches, 2tr in same stitch as Beg dtr, join with a slip stitch to top of Beg dtr.  _44 tr, 4 dtr total_

Round 4: (Beg tr, chain 3, 1tr) in same stitch as join, **Chain 1, (1tr, Chain 1, skip 1 stitch) 5 times, (1tr, Chain 3, 1tr) in corner DTR -corner made- , repeat from ** 3 times, omitting final corner join with a slip stitch to top of Beg tr.  _28 tr, 4 corner chain-3 spaces, 24 chain-1 spaces total_

Round 5: (Beg tr, 1tr, 1dtr, 2tr) in first chain corner space, **1tr in all tr and chain spaces across to corner chain space, (2tr, 1dtr, 2tr) in corner, repeat from ** twice more, 1tr in all tr and chain spaces across, join with a slip stitch to top of Beg tr _68 tr, 4 dtr total_

Round 6: 1dc in all stitches around, putting 5dc in all 4 dtr corners, join with a slip stitch to first dc, cut yarn and weave ends _88 dc total_

Video Instruction

Happy crafting,

Rachele C.

The Art of Crochet Blankets

You may also enjoy:

Support My Work

You’re supporting by just being here! You can read my blog (Start Here!), like and comment on socials, and message me for a chat. All of this supports my work free of charge!

  • Affiliate links – Shopping through my links supports me at no additional cost to you as I get a small commission through my affiliates. Jimmy Beans Wool // WoolWarehouse // Amazon.com
  • Buy my pattern book – I wrote a super neat crochet blanket pattern book, published under Penguin Random House. You can buy it here!
  • Browse my self-published patterns – I have over a hundred patterns on Etsy and Ravelry
  • Creative Art Blanket Course – Check it out on Teachable

Where to Find Me

Most Popular Free Crochet Patterns

SC JAYG – with PLT Join

Let’s celebrate the PLT Join by putting it to good use in our Vibrant Vintage CAL!

Today I’m going to show you how to do a regular join-as-you-go method, in case you don’t feel ready to take the Continuous JAYG plunge 🙂

If you are feeling adventurous or are already familiar with the CJAYG, then wait for that post! I do recommend the continuous join. Only a few ends to weave in (versus 2 per square), and adds great integrity to the piece since it forms kind of a “net” of stability. I will be using the CJAYG version for my piece, and I’ll show it on the Joining post when we get there.

If you’re making squares ahead of time (you’ve edged all your squares in DC), and you want to start joining, then go ahead! Enjoy! 🙂

SC Join-As-You-Go – featuring PLT Join

Work first motif complete:

Start by joining yarn with a slip stitch in any corner DC. All in same stitch: (SC, Chain 2, SC) – corner made

SC in all stitches around, placing (SC,  chain 2, SC) in all corners


Join with a slip stitch to first SC.

Cut yarn and weave ends. First motif will be referred to as “completed motif”

Pick up second motif (this one will be joined below the first motif).

Work one side of second motif up through the first chain of the corner

Through corresponding corner on completed motif, slip stitch to complete corner

Here is the slip stitch after completing. This is just a plain old slip stitch – no PLT here in the corner.

Work SC in same st on motif in progress to complete the corner.

Now that the slip stitch corner join is complete, let’s work a “side.”

As pictured below, work one SC

PLT join with corresponding stitch on completed motif. Pictured below is hook ready to Pull Loop Through.

And here is the loop pulled through

SC on motif in progress,

Hook ready to pull loop through pictured below.

(If you need to check out the PLT Join post, please do.. Scroll down to where it says “official PLT Join maneuver” to learn how to release loop from hook, insert hook in corresponding stitch on completed motif, place loop back on hook, Pull Loop Through, and continue)

Continue PLT Join in every SC across the side – remember on the sides, there is no slip stitch performed.

Below I have stopped just before the corner.

SC in corner, Slip Stitch (not PLT) in corner chain space on completed motif, Chain 1,

And SC to complete corner.

Finish the motif around all sides. Cut yarn and weave ends.

Pick up the next motif and join 1 side in the same manner.

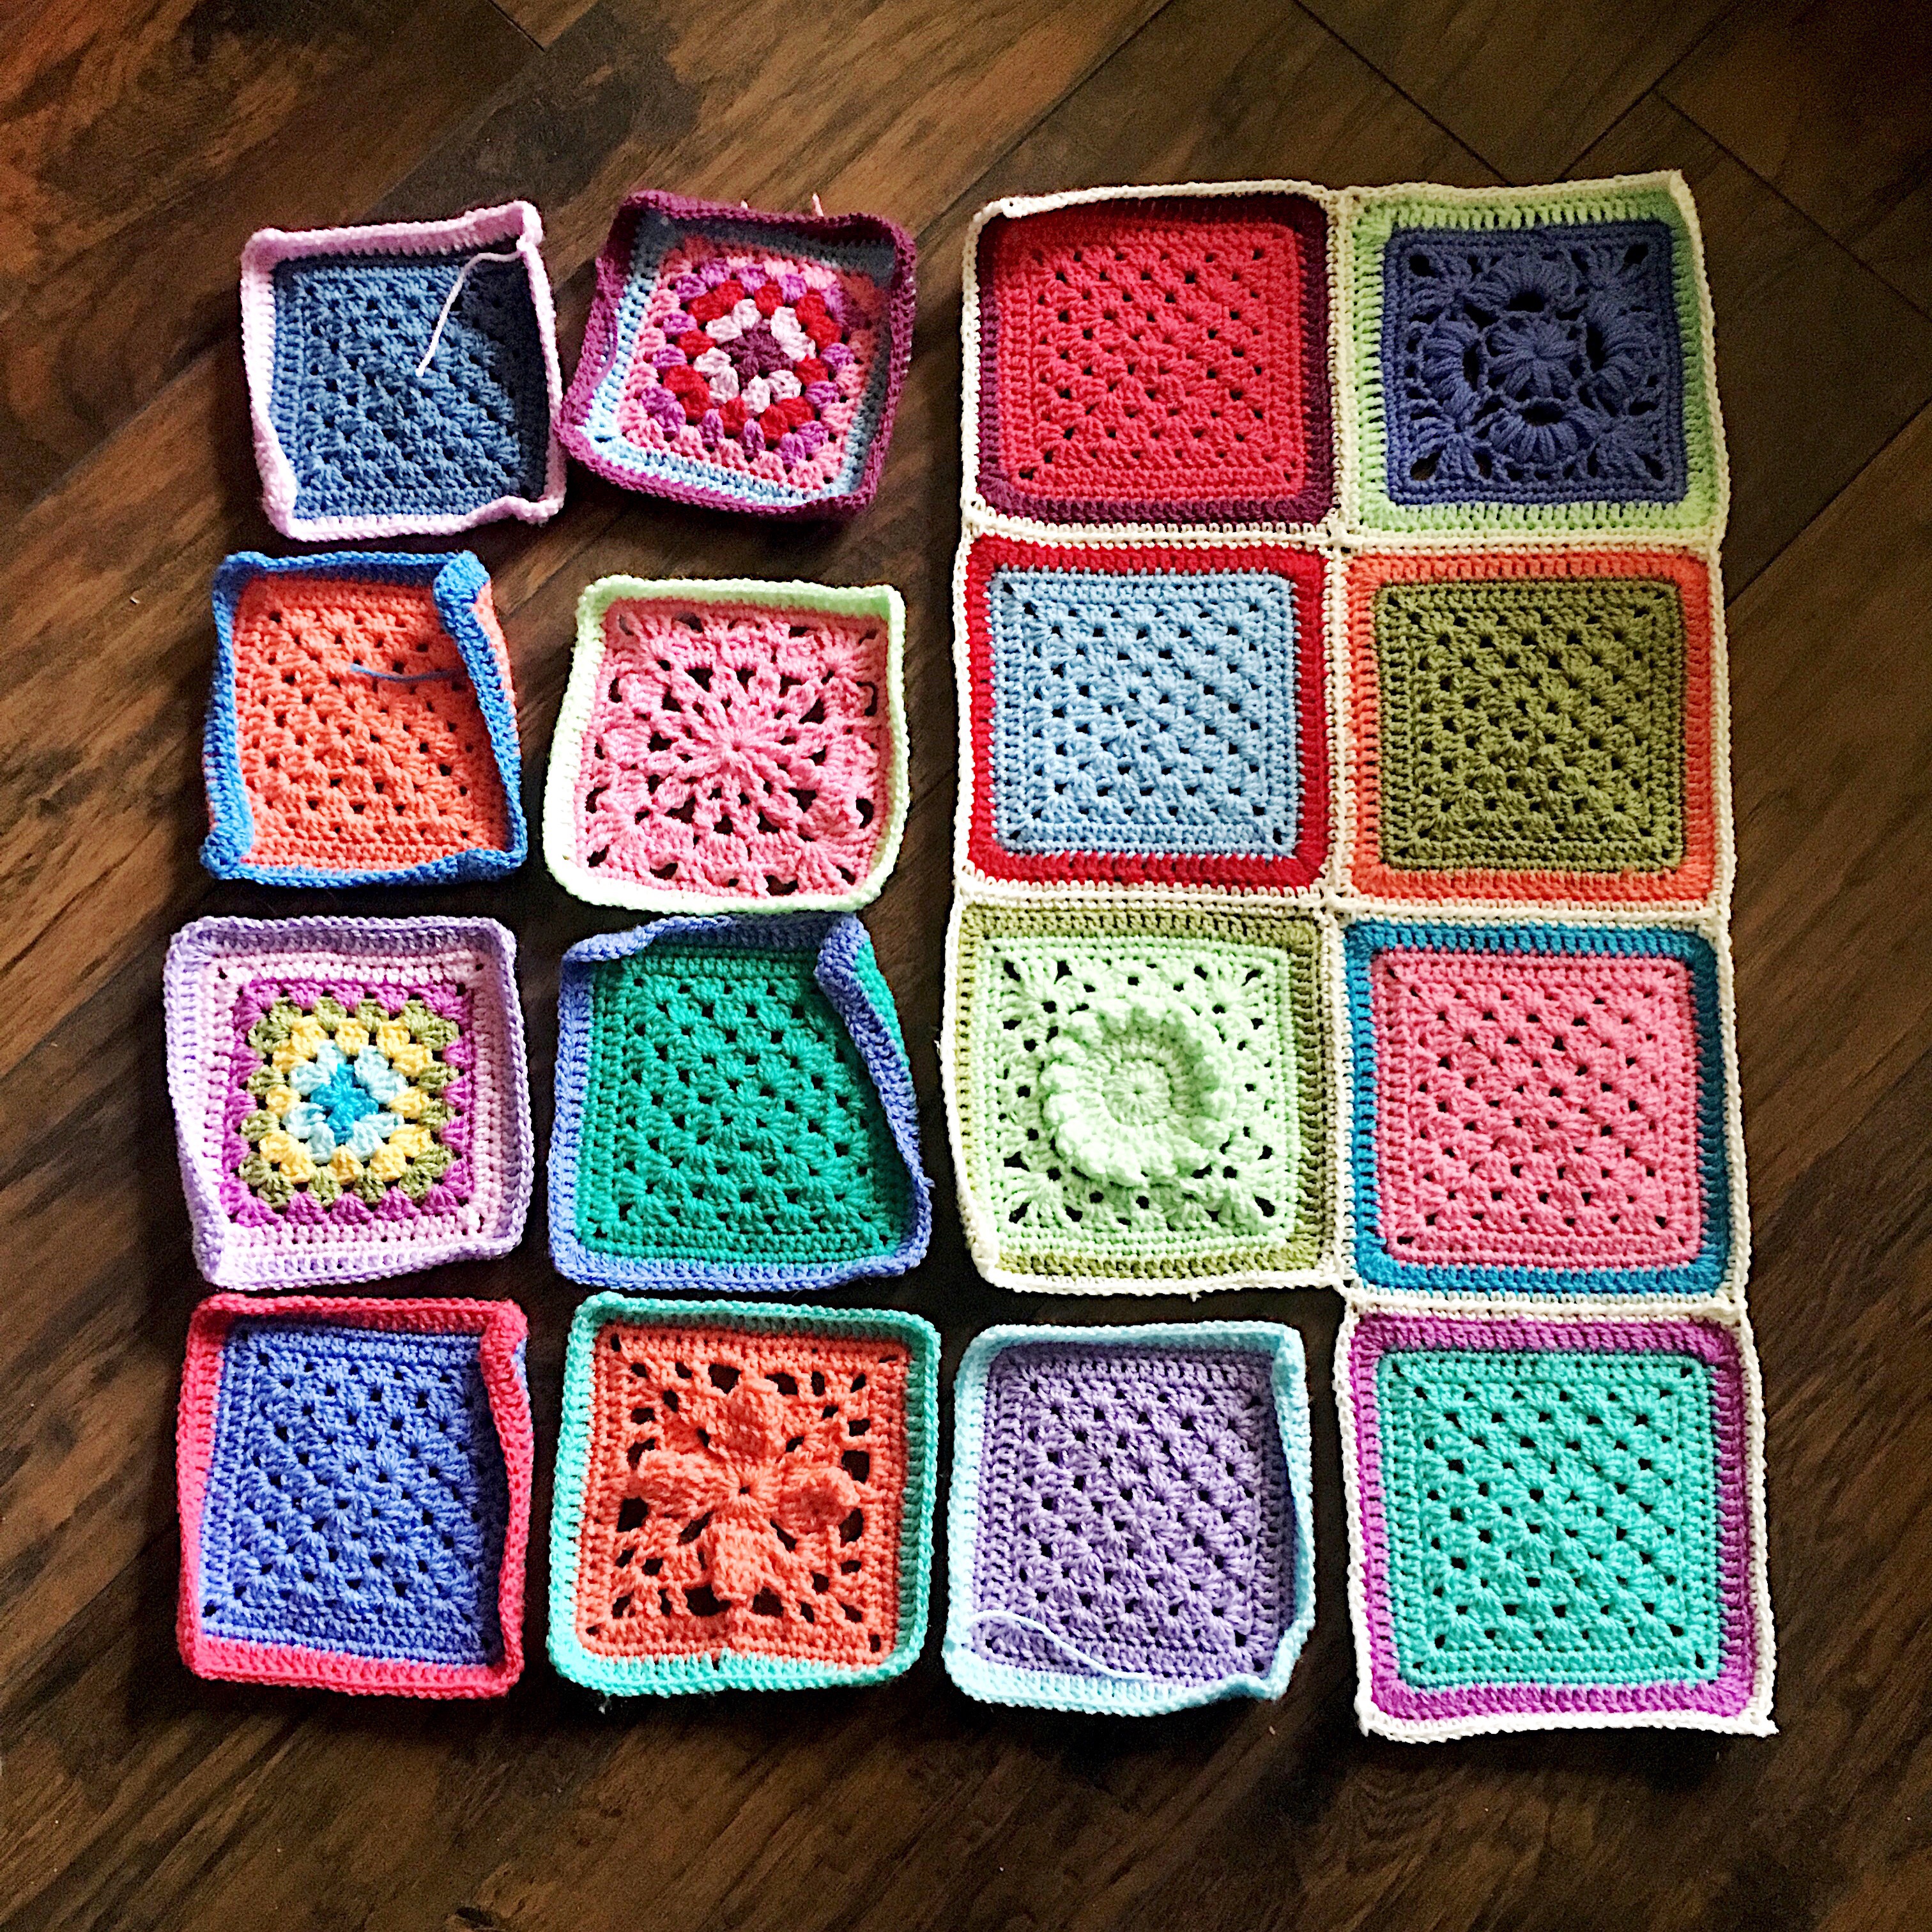
When you’ve joined all motifs in that first column, you’re ready to go back up to the top and join the first motif on its right hand side. In the photo above, we’ll be joining the red square with plum edging.

Work 1 side plain as before, through to 1 chain of the corner.

Slip stitch in adjacent corner of square to the right – which is the corner of the first square we made (here it is blue with green border) SC to complete corner, and start on the “side”

Work first SC of the side

And join up the side as before. Work your top right corner and continue around the square.

Here is a close-up of that corner.. You can see that both diagonal squares are joined with a slip stitch to the corner of the top right (blue and green) square.

Pick up the next motif in the column. Work 1 side plain, chain 1, join with slip stitch to corner, PLT join one side. In the photo below, I’ve worked the first SC of my corner.

Remove the hook from your working loop and insert it through both diagonal corner chain spaces just like in the photo below. Note that the hook is placed through pointing to the bottom right.

Place the working loop back on the hook, and pull it up through both corners.

Complete a small chain to tack the corners together, and SC to complete your corner.

Work across the second joining side, and connect the top left corner.

Here is a close-up of the 4 corners meeting.

Join remaining squares in the same manner.

That’s it! Now you can go around the entire piece with an SC border if you like, to get it ready for edging of choice.

Now, I’ve got to get back to work on photographing the steps of the Continuous SC Join-As-You-Go 🙂

My workspace is looking very colorful as of late! Enjoy the join, lovelies! Comment with questions and I’ll help as best as I can.

PLT Join

Update!! Instagram user (and crochet friend!) @StitchGwen has made an excellent mini demo video of this join on her feed – go check it out! Her motions are exactly how I do it, so two thumbs up!

IG StitchGwen PLT demo link

See all of the projects where I’ve used PLT join HERE – over 100 blankets!

What can I say about this join? When I started to teach myself crochet as a way to pass the time in college, I came across the work of Priscilla Hewitt. Often, I refer to her as my Crochet Idol, because her methods really intrigued me. I loved that her patterns were so innovative and complex, and I wanted to use them as a springboard into my own spin on the craft.

Through working some of Priscilla’s patterns, I developed the PLT (or Pull Loop Through Join. Back then I didn’t have a name for it, and the closest I could come to describing it to everyone who asked was that it’s “like a flat braid join, but without the chains.” 🙂

I used this join in 2012 as part of my first published pattern, Gumball, and would continue to use it in all of my motif patterns, most notably, Geometric Lace. Finally, I gave it a name after folks started using it but not really knowing what to call it, and I realized it needed a label. So the PLT Join was born!

I love this join because it’s flat, straight, pretty, and involves no sewing and very little weaving ends. You can use it with any squares as long as the stitch counts are identical.

Below you’ll find a JAYG version, and the Continuous JAYG method will be in a separate post. Enjoy!

PLT Join (JAYG)


For this demo, I’m using KnitPicks Palette yarn and size E hook.

The PLT is just a simple maneuver to connect the motifs, so you can use it in many different ways, as you’ll see. I’m showing you the join with a certain granny square motif, but it’s just an example.

Since this is a JAYG, you’ll be joining on the final round. Work the first motif complete.

Then work one side on your unfinished motif. This granny square has 3 chains for the corner, so I worked one side, and the first chain of the corner.

Remove that chain from the hook. Insert the hook in the chain corner on the completed motif.

Place the working loop back on the hook.

Pull the Loop Through to the front of the completed motif and finish the stitch – in this case it’s the center chain of the corner space.

Work the final chain of the corner chain space, and work however much of the side you want to, up to where you want to start joining again. Here, I’ve worked the 2 DCs that go in the corner.

And here is the official “PLT Join” maneuver:

Remove the loop from the hook. Insert the hook through the exact corresponding stitch on the completed motif. So, since the stitch I’ve just worked on the motif in progress is the second DC of the corner, that’s the same stitch I put the hook through – reference the photo below.

Replace the working loop on the hook.


Pull Loop Through to the front of the completed motif.

Work the next stitch on the motif in progress – here it’s the next DC – notice you don’t work any chains or slip stitches. Just work the next stitch as normal.

Now, repeat the PLT maneuver – here in the next photo, I’m all ready to Pull Loop Through.

Keep repeating until you’re done with the stitches you want to join on this side. I didn’t connect the corner spaces on the left hand side, because I wanted to share a fun little X corner method. You can see the corner spaces on the right are conmected, and the left ones aren’t.


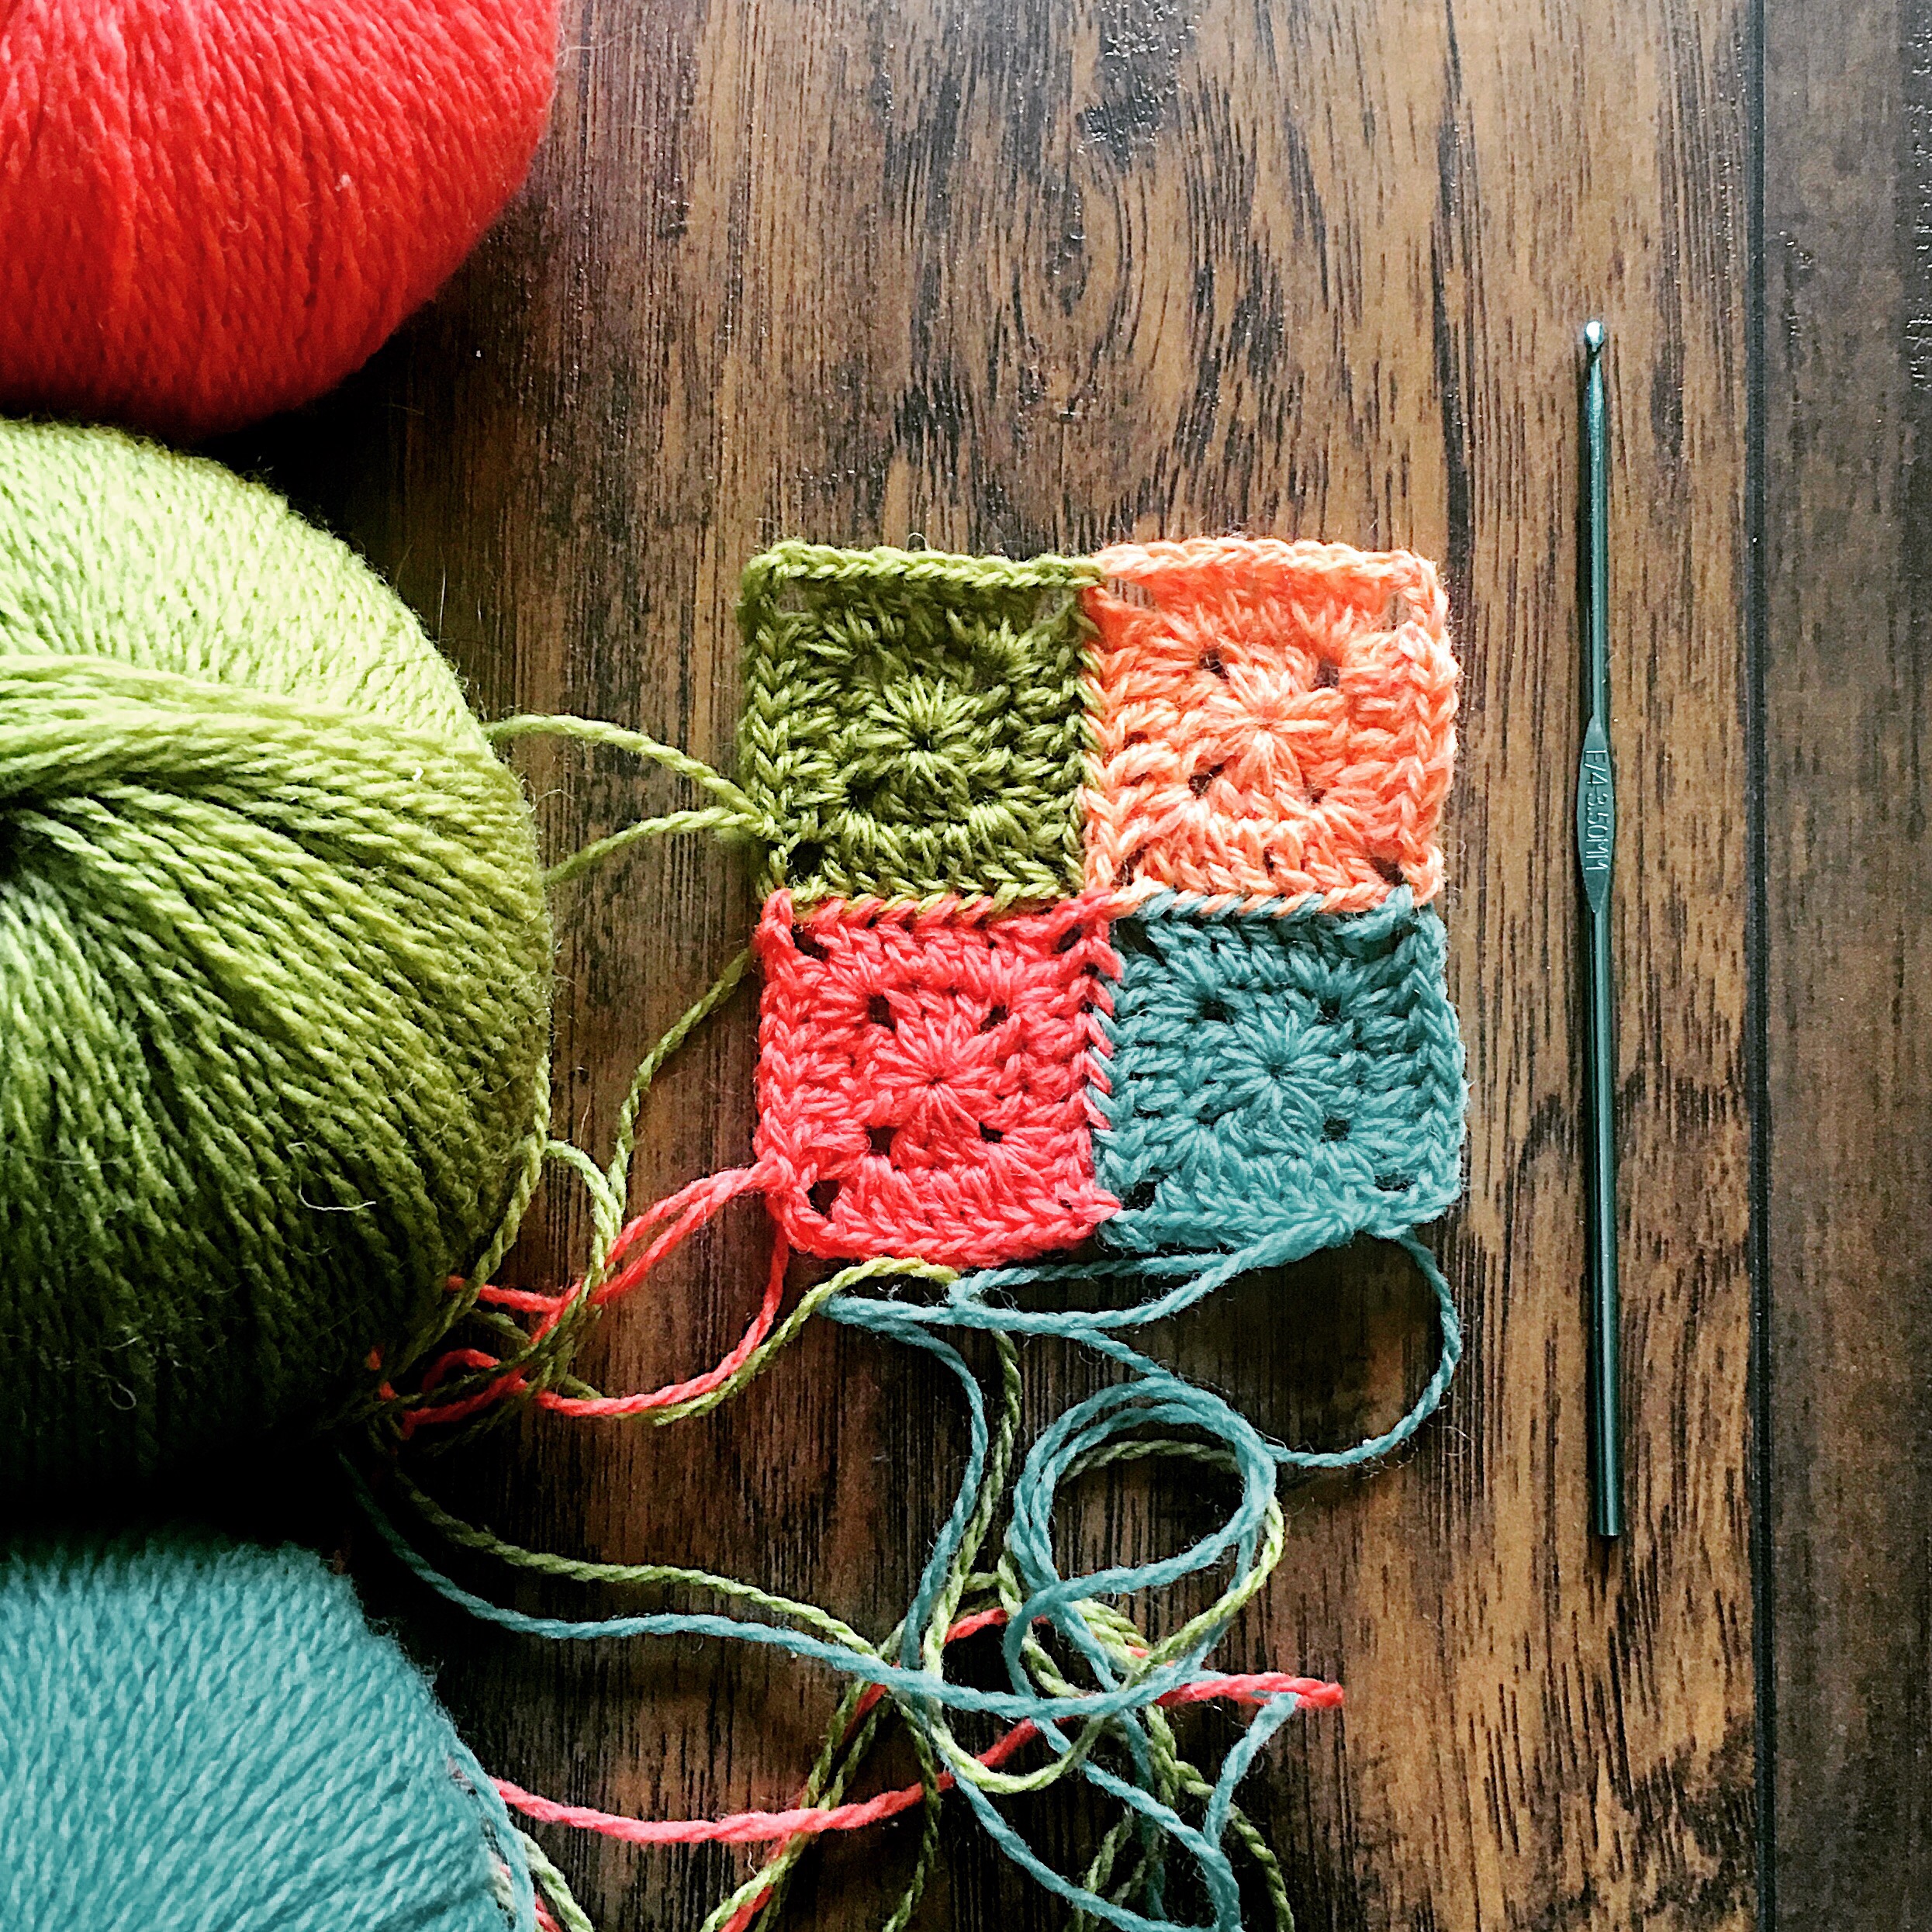
Here, I’m just working 2 columns of squares, so the green square below is the next column. Work 1 side up to the first chain of the corner – as before with the aqua square.

On the center chain of the corner space, PLT on the *diagonal* motif – here it’s the aqua. Complete the side adjacent to the first motif, and connect the top corner, since this is on the “perimeter” of our tiny four-patch. You can see how the bottom right corner is linked diagonally, and top corner linked with adjacent motif. The bottom left corner of the first (coral) motif is still hanging out waiting to be picked up.

Work 1 side of the fourth motif as before, PLT on the center chain of perimeter corner, work the second side, joining to adjacent square. When you get to it, PLT the center corner chain diagonally up – to the first (Orange) motif. The 4 corners make a cute X. Work the adjacent PLT join side to the motif above, and connect the left side perimeter corner. Now all corners are picked up and the tiny blanket is complete.

I hope the simple PLT maneuver was clear! Whatever you do with the corners is up to you. The adjacent sides are worked PLT.

Below I’ve shown several examples of the join.

Here is PLT Join with SC instead of DC.


Another DC one with pretty chain corners joined.


And you can play with the spacing of the joined stitches – you don’t have to join in every stitch. Try joining in every other stitch, or every third. Spacing out joined stitches creates a nice braided or spiraled/twisted look.

Have fun with PLT Join! Make it your own! 😊😊❤️❤️


VVCAL – Edging Squares

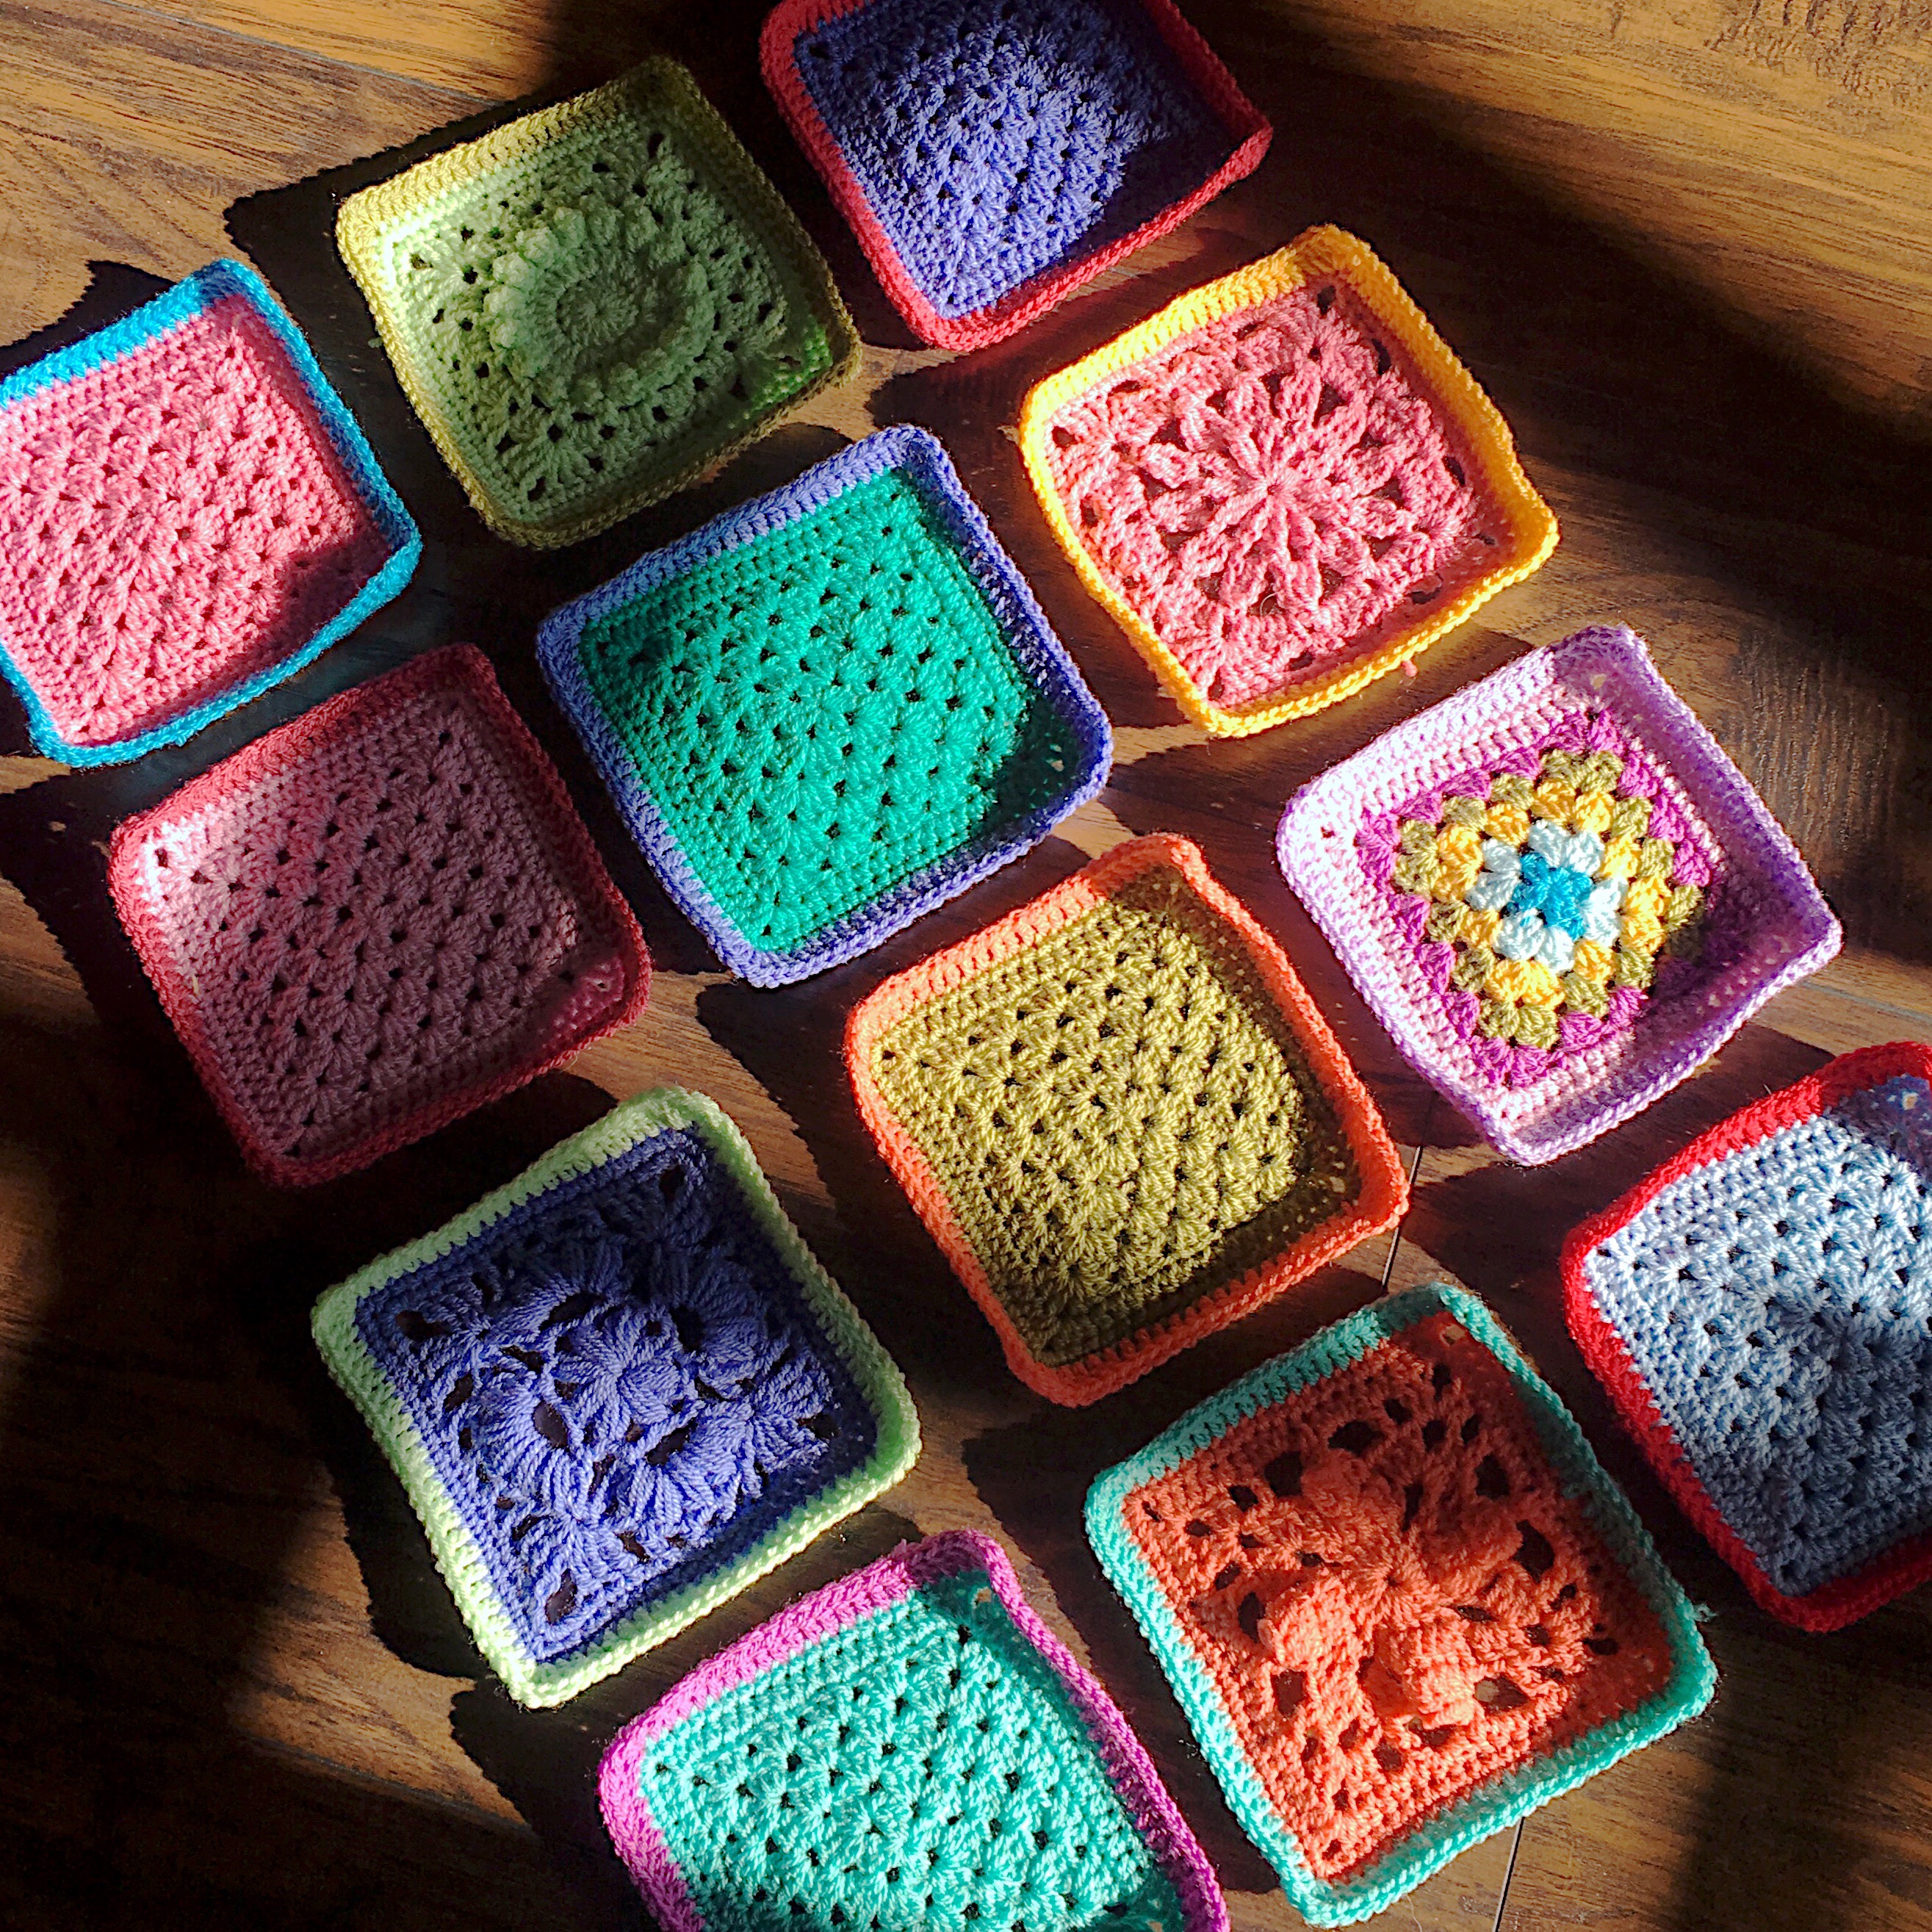
Every 8 weeks during the VVCAL (as indicated in the weekly schedule on the Main Post) we will edge the granny squares that we’ve made so far with a DC round. You can also do this after you make them every week! I prefer to edge mine in batches.

***********************************************************

The pattern to edge your squares is as follows:

Beg DC = (SC, Chain-1)

DC Round: Join new yarn with a slip stitch in any corner SC. In same St as join, (Beg DC, 2DC), **DC in all sts across to corner st, 5DC in corner st, repeat from ** 3 times more, DC across all sts to first corner, 2DC in first corner to complete it. Join with a slip stitch to top of Beg DC and cut yarn/finish off. (104 DC sts total)

***********************************************************

What color should I use?

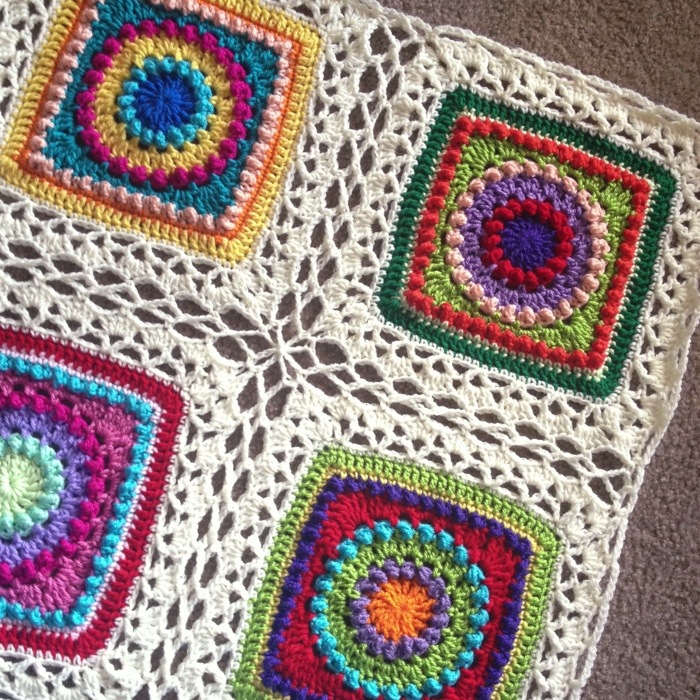
One edging color option is to mix and match from the colors you’re using for your squares like I’ve done below – if you’re using even just 12 balls of Stylecraft Special DK for the squares, you’ll still have enough for all the square edging.

Note: The blanket in progress pictured below is just a quickie I am putting together so I can advance the joining and border instruction for people who are itching for it. My real VVCAL blanket will have a different square-edging yarn because I’m using some funky yarns from my stash! 🙂

 img_1202-1
Or just use the same color as the square! Don’t break yarn, just continue on to the DC round. Save the time of weaving more ends and preserve a little of the integrity of your piece! Great idea!


Another edging color option is to edge the squares in only one color, as seen in this beautiful screenshot image from a fellow CAL participant on Instagram:

Here is my joining color – a couple shades (one white, one cream) of acrylic yarn with a variegated ply running through it. It’s slightly thicker than my square yarn, so I went down a hook size. It’s coming out great! Loving the denim yarn look. 


You can edge your squares with any color! Or you actually don’t need to edge them at all. The join and border will work with any size squares, as long as the stitch counts on the squares are identical to each other.

Have fun!

Crochet Motif – Cecilia Square

Cecilia Square

VVCAL Pages

Pin Me!


Related Links

Charted instruction:

IMG_1126

Written instruction (US Terms):

For UK Terms and Video Instruction, scroll down.

Special stitches

  • Beg DC = (SC, Ch-1)
  • Beg TR = (SC, Ch-2)
  • Beg Popcorn = Beg dc, 3DC in same spot, remove loop from hook, insert hook in top of Beg DC, place loop back on hook and pull loop through Beg DC to front of work, closing the Beg Popcorn
  • Popcorn = 4DC in same spot, remove loop from hook, insert hook in top of first DC, place loop back on hook and pull loop through first DC to front of work, closing the Popcorn

Foundation: Ch-3 and join in first Ch to make ring. You may also make a magic circle if you prefer that method. Also feel free to chain more stitches if you are used to chaining 4 or 5. I like to chain 3 for my ring, because I like the center hole to disappear when I weave ends.

Work 7 Rounds as follows…

Round 1: All in ring, working over center tail so as to pull center circle closed tight when square is complete: Beg DC, 15DC, join with slip stitch in top of Beg DC  _16 DC total_ 

Round 2: (Beg DC, DC) in same stitch as join, 2DC in all stitches around, join with a slip stitch in top of Beg DC  _32 DC total_

Round 3: Skipping joining stitch and instead, working in next DC: (Beg DC, Beg Popcorn), (Chain 2, Skip 1 stitch, Popcorn) 15 times, Chain 1, join with a slip stitch to top of Beg Popcorn.  _16 Popcorn, 16 Chain space total_

Round 4: SC in first chain loop, (Chain 3, SC in next chain space) 15 times, Chain 3, join with a slip stitch to top of first SC.  _16 SC, 16 chain loop total_

Round 5: In first chain loop: (Beg DC, 2DC), 3DC in all chain spaces around, join with a slip stitch to top of Beg DC.  _48 DC total_

Round 6: Slip Stitch in next 2 DC, in between the 3DC groups: (Beg TR, 2TR, Chain 3, 3TR), **working in between 3DC groups, *3DC, 3HDC, 3DC*, (3TR, chain 3, 3TR) -corner made-, repeat from ** 2 times more, repeat from * to * once, join with a slip stitch to top of Beg TR.  _4 corners, 24 DC, 12 HDC total_

img_1152

Round 7: SC in same stitch as join, and in all stitches around, putting 1 SC between all 3Stitch groups, and 3SC in the corners, join with a slip stitch to top of Beg DC, cut yarn and finish off ends  _88 SC total_

Written instruction (UK Terms):

Special stitches

  • Beg tr= (1dc, Ch-1)
  • Beg DTR = (1dc, Ch-2)
  • Beg Popcorn = Beg tr, 3tr in same spot, remove loop from hook, insert hook in top of Beg tr, place loop back on hook and pull loop through Beg tr to front of work, closing the Beg Popcorn
  • Popcorn = 4tr in same spot, remove loop from hook, insert hook in top of first tr, place loop back on hook and pull loop through first tr to front of work, closing the Popcorn

Foundation: Ch-3 and join in first Ch to make ring. You may also make a magic circle if you prefer that method. Also feel free to chain more stitches if you are used to chaining 4 or 5. I like to chain 3 for my ring, because I like the center hole to disappear when I weave ends.

Round 1: All in ring, Beg tr, 15tr, join with slip stitch in top of Beg tr_16 tr total_ 

Round 2: (Beg tr, 1tr) in same stitch as join, 2tr in all stitches around, join with a slip stitch in top of Beg tr _32 tr total_

Round 3: Skipping joining stitch and instead, working in next tr: (Beg Popcorn), (Chain 2, Skip 1 stitch, Popcorn) 15 times, Chain 1, join with a slip stitch to top of Beg Popcorn.  _16 Popcorn, 16 Chain space total_

Round 4: 1dc in first chain loop, (Chain 3, 1dc in next chain space) 15 times, Chain 3, join with a slip stitch to top of first dc.  _16 dc, 16 chain loop total_

Round 5: In first chain loop: (Beg tr, 2tr), 3tr in all chain spaces around, join with a slip stitch to top of Beg tr.  _48 tr total_

Round 6: Slip Stitch in next 2 tr, in between the 3tr groups: (Beg DTR, 2DTR, Chain 3, 3DTR), **working in between 3tr groups, *3tr, 3htr, 3tr*, (3DTR, chain 3, 3DTR) -corner made-, repeat from ** 2 times more, repeat from * to * once, join with a slip stitch to top of Beg DTR.  _4 corners, 24 tr, 12 htr total_

img_1152

Round 7: 1dc in same stitch as join, and in all stitches around, putting 1 dc between all 3Stitch groups, and 3dc in the corners, join with a slip stitch to top of Beg tr, cut yarn and finish off ends  _88 dc total_

Video Instruction:

Happy crafting,

Rachele C.

The Art of Crochet Blankets

You may also enjoy:

Support My Work

You’re supporting by just being here! You can read my blog (Start Here!), like and comment on socials, and message me for a chat. All of this supports my work free of charge!

  • Affiliate links – Shopping through my links supports me at no additional cost to you as I get a small commission through my affiliates. Jimmy Beans Wool // WoolWarehouse // Amazon.com
  • Buy my pattern book – I wrote a super neat crochet blanket pattern book, published under Penguin Random House. You can buy it here!
  • Browse my self-published patterns – I have over a hundred patterns on Etsy and Ravelry
  • Creative Art Blanket Course – Check it out on Teachable

Where to Find Me

Most Popular Free Crochet Patterns

Crochet Motif – Ana Maria Square

Ana Maria Square

VVCAL Pages

Pin Me!


Related Links (2016)

Charted instruction:

IMG_1127

Written instruction US Terms:

For UK Terms and Video Instruction, scroll down.

Special stitches

  • Beg DC = (SC, Ch-1)
  • Beg TR  = (SC, Ch-2)
  • 2TR Cluster = *YO 2 times, insert hook in st, YO, draw yarn through, (YO, draw yarn through 2 loops) twice, repeat from * once, YO, draw yarn through all 3 loops
  • 2DC Cluster = *YO, insert hook in st, YO, draw yarn through, YO, draw yarn through 2 loops, repeat from * once, YO, draw yarn through all 3 loops
  • 3DC Cluster = *YO, insert hook in st, YO, draw yarn through, YO, draw yarn through 2 loops, repeat from * twice, YO, draw yarn through all 4 loops

Foundation: Ch-3 and join in first Ch to make ring. You may also make a magic circle if you prefer that method. Also feel free to chain more stitches if you are used to chaining 4 or 5. I like to chain 3 for my ring, because I like the center hole to disappear when I weave ends.

Work 5 Rounds as follows…

Round 1: All in ring, working over center tail so as to pull center circle closed tight when square is complete: Make Beg TR, TR (Ch-3, 2TR Cluster) 11 times, Ch-3, join with a slip stitch in top of Beg TR.  _12 2TR Cluster, 12 3-chain loop total_ 

Round 2: In first chain loop: (Beg DC, 2DC Cluster), **((Chain 4, 3DC Cluster in next chain loop)) twice, Chain 3, 3DC Cluster, Repeat from ** 2 times more, Repeat from (( to )) twice, Chain 3, join with a slip stitch to top of Beg DC.  _12 3DC Cluster, 12 chain loop total_

Round 3: In first chain loop: (Beg DC, 2DC, chain-2 and SC in top of DC -Picot made- , 2DC), **in next chain loop: (3DC, Picot, 2DC), repeat from ** 10 times more, join with a slip stitch to Beg DC.  _60 DC, 12 Picot total_

Round 4: Working to the RIGHT – in between the final DC of Round 3 and the joining stitch of round 3 (see close-up photo below): (Beg DC, Chain 2), **between the next 2 groups of 5DC,  (3TR, Chain 3, 3TR) -corner made- *(Chain 2, 2DC between the next 2 groups of 5DC) twice*, Chain 2, repeat from ** 2 times more, make corner, repeat from * to * once, Chain 2, DC in same spot as Beg DC to complete round, join with a slip stitch to Beg DC.  _16 DC, 4 corners, 12 2-chain spaces total_


Round 5: SC in Beg DC and in all stitches around, putting 3SC in all chain spaces (including corner chain spaces). Join with a slip stitch in first SC, cut yarn and finish off ends. _88 SC total_

Written instruction UK Terms:

Special stitches

  • Beg tr = (1dc, Ch-1)
  • Beg dtr = (1sc, Ch-2)
  • 2dtr Cluster = *YO 2 times, insert hook in st, YO, draw yarn through, (YO, draw yarn through 2 loops) twice, repeat from * once, YO, draw yarn through all 3 loops
  • 2tr Cluster = *YO, insert hook in st, YO, draw yarn through, YO, draw yarn through 2 loops, repeat from * once, YO, draw yarn through all 3 loops
  • 3tr Cluster = *YO, insert hook in st, YO, draw yarn through, YO, draw yarn through 2 loops, repeat from * twice, YO, draw yarn through all 4 loops

Foundation: Ch-3 and join in first Ch to make ring. You may also make a magic circle if you prefer that method. Also feel free to chain more stitches if you are used to chaining 4 or 5. I like to chain 3 for my ring, because I like the center hole to disappear when I weave ends.

Round 1: All in ring, Make Beg dtr, 1dtr (Ch-3, 2dtr Cluster) 11 times, Ch-3, join with a slip stitch in top of Beg dtr.  _12 2DTR Cluster, 12 3-chain loop total_ 

Round 2: In first chain loop: (Beg tr, 2tr Cluster), **((Ch4, 3tr Cluster in next chain loop)) twice, Ch3, 3tr Cluster, Repeat from ** 2 times more, Repeat from (( to )) twice, Ch3, join with a slip stitch to top of Beg tr.  _12 3tr Cluster, 12 chain loop total_

Round 3: In first chain loop: (Beg tr, 2tr, chain-2 and 1dc in top of tr -Picot made- , 2tr), **in next chain loop: (3tr, Picot, 2tr), repeat from ** 10 times more, join with a slip stitch to Beg tr.  _60 tr, 12 Picot total_

Round 4: Working to the RIGHT – in between the final tr of Round 3 and the joining stitch of round 3 (see close-up photo below): (Beg tr, Chain 2), **between the next 2 groups of 5tr,  (3DTR, Chain 3, 3DTR) -corner made- *(Chain 2, 2tr between the next 2 groups of 5tr) twice*, Chain 2, repeat from ** 2 times more, make corner, repeat from * to * once, Chain 2, 1tr in same spot as Beg tr to complete round, join with a slip stitch to Beg tr.  _16 tr, 4 corners, 12 2-chain spaces total_


Round 5: 1dc in Beg tr and in all stitches around, putting 3dc in all chain spaces (including corner chain spaces). Join with a slip stitch in first dc, cut yarn and finish off ends. _88 dc total_

Video:

Happy crafting,

Rachele C.

The Art of Crochet Blankets

You may also enjoy:

Support My Work

You’re supporting by just being here! You can read my blog (Start Here!), like and comment on socials, and message me for a chat. All of this supports my work free of charge!

  • Affiliate links – Shopping through my links supports me at no additional cost to you as I get a small commission through my affiliates. Jimmy Beans Wool // WoolWarehouse // Amazon.com
  • Buy my pattern book – I wrote a super neat crochet blanket pattern book, published under Penguin Random House. You can buy it here!
  • Browse my self-published patterns – I have over a hundred patterns on Etsy and Ravelry
  • Creative Art Blanket Course – Check it out on Teachable

Where to Find Me

Most Popular Free Crochet Patterns

Crochet Motif – Rebecca Square

Rebecca Square

VVCAL Pages

Pin Me!


Related Links

  • Vibrant Vintage main info page (2016)
  • VVCAL Ravelry ebookNeat photos of all 33 squares, each with a link to its blog post. Favorite the patterns, add them to your queue, see others’ projects, and more!
  • Quick-download Vibrant Vintage Blanket PDF (Etsy) – The entire VVCAL 33-squares collection, condensed and updated for clarity, in a tidy PDF, along with my preferred joining method and the updated wide lace VVCAL border. Yes, all of these patterns are available separately for free linked below, but the updated and condensed printable PDF has everything for the Vibrant Vintage Blanket in one place for a small fee of $4. (Includes charts and written instruction.)
  • VVCAL Facebook Group – Vibrant Vintage CAL (official)
  • My main FB group – CypressTextiles Tree Huggers
  • This CAL has been rebooted! (2018) Here is a link to the VVCAL Reboot Main info page. Have fun! Those squares coordinate with these. Go wild!

Charted instruction:

Week 1 Rebecca Square with Key

Written instruction US Terms:

For UK Terms and Video Instruction, scroll down.

Special stitches

  • Beg DC = (SC, Ch-1)
  • Beg Tall Puff = Pull up long loop (about 1in), **YO, insert hook in space indicated, YO, draw up a loop as long as initial loop, repeat from ** once more, YO, draw yarn through all 5 loops, chain 1 to finish Beg Tall Puff
  • Tall Puff = **YO, insert hook in space indicated, YO, draw up a long loop (about 1in), repeat from ** twice more, keeping all loops the same height as initial loop, YO, draw yarn through all 7 loops, chain 1 to finish Tall Puff

Foundation: Ch-3 and join in first Ch to make ring. You may also make a magic circle if you prefer that method. Also feel free to chain more stitches if you are used to chaining 4 or 5. I like to chain 3 for my ring, because I like the center hole to disappear when I weave ends.

Work 6 Rounds as follows…

Round 1: All in ring, working over center tail so as to pull center circle closed tight when square is complete: Make Beg Tall Puff, **Ch-2, make Tall Puff, repeat from ** 6 times more, Ch-1, HDC in top of Beg Tall Puff to complete round _8 Tall Puff, 8 chain loop total_    

Round 2: SC in same spot – over HDC, Ch-6, **SC in next chain space, Ch-6, repeat from ** 6 times more, join with a slip stitch to first SC.  _8 6-Chain Loops, 8 SC total_

Round 3: Slip stitch in first chain of first 6-chain loop, make Beg Tall Puff, make 4 Tall Puffs, SC in next 6-chain loop, **Ch-1, make 5 Tall Puffs in next 6-chain loop, SC in next 6-chain loop, repeat from ** 2 times more, Ch-1, join with slip stitch in top of Beg Tall Puff.  _20 Tall Puff, 4 SC, 4 Ch-1 total_

Round 4: Beg DC in chain space, Ch-1, **(HDCin next chain space, Ch-1) 2 times, DC in next chain space, Ch-1, (3TR, Ch-3, 3TR) all in next SC, Ch-1, DC between next 2 Tall Puffs, repeat from ** 3 times more, omitting final DC of third time repeating. Join with a slip stitch to top of the Beg DC _24 TR, 8 DC, 8 HDC, 5 Ch-1 spaces, 4 Ch-3 spaces total_

Round 5: SC in chain space, **SC in all stitches and chain spaces across to corner chain space, 5SC in corner chain space, repeat from ** 3 times more, SC in all stitches and chain spaces to first SC, join with a slip stitch to first SC. _80 SC total_

Round 6: SC in first SC and in all stitches around, putting 3SC in all 4 corners, join with a slip stitch in first SC, cut yarn and finish off ends. _88 SC total_

Double check that your squares are the same size 🙂

Written instruction UK Terms:

Special stitches

  • Beg tr= (1dc, Ch-1)
  • Beg Tall Puff = Pull up long loop (about 1in), **YO, insert hook in space indicated, YO, draw up a loop as long as initial loop, repeat from ** once more, YO, draw yarn through all 5 loops, chain 1 to finish Beg Tall Puff
  • Tall Puff = **YO, insert hook in space indicated, YO, draw up a long loop (about 1in), repeat from ** twice more, keeping all loops the same height as initial loop, YO, draw yarn through all 7 loops, chain 1 to finish Tall Puff

Foundation: Ch-3 and join in first Ch to make ring. You may also make a magic circle if you prefer that method. Also feel free to chain more stitches if you are used to chaining 4 or 5. I like to chain 3 for my ring, because I like the center hole to disappear when I weave ends.

Round 1: All in ring, Make Beg Tall Puff, **Ch-2, make Tall Puff, repeat from ** 6 times more, Ch-1, htr in top of Beg Tall Puff to complete round _8 Tall Puff, 8 chain loop total_    

Round 2: 1dc in same spot – over htr, Ch-6, **1dc in next chain space, Ch-6, repeat from ** 6 times more, join with a slip stitch to first dc.  _8 6-Chain Loops, 8 dc total_

Round 3: Slip stitch in first chain of first 6-chain loop, make Beg Tall Puff, make 4 Tall Puffs, 1dc in next 6-chain loop, **Ch-1, make 5 Tall Puffs in next 6-chain loop, 1dc in next 6-chain loop, repeat from ** 2 times more, Ch-1, join with slip stitch in top of Beg Tall Puff.  _20 Tall Puff, 4 dc, 4 Ch-1 total_

Round 4: Beg tr in chain space, Ch-1, **(1htr in next chain space, Ch-1) 2 times, 1tr in next chain space, Ch-1, (3dtr, Ch-3, 3dtr) all in next dc, Ch-1, 1tr between next 2 Tall Puffs, repeat from ** 3 times more, omitting final tr of third time repeating. Join with a slip stitch to top of the Beg tr_24 dtr, 8 tr, 8 htr, 5 Ch-1 spaces, 4 Ch-3 spaces total_

Round 5: 1dc in chain space, **1dc in all stitches and chain spaces across to corner chain space, 5dc in corner chain space, repeat from ** 3 times more, 1dc in all stitches and chain spaces to first dc, join with a slip stitch to first dc. _80 dc total_

Round 6: 1dc in first dc and in all stitches around, putting 3dc in all 4 corners, join with a slip stitch in first dc, cut yarn and finish off ends. _88 dc total_

Double check that your squares are the same size 🙂

Video Instruction

Happy crafting,

Rachele C.

The Art of Crochet Blankets

You may also enjoy:

Support My Work

You’re supporting by just being here! You can read my blog (Start Here!), like and comment on socials, and message me for a chat. All of this supports my work free of charge!

  • Affiliate links – Shopping through my links supports me at no additional cost to you as I get a small commission through my affiliates. Jimmy Beans Wool // WoolWarehouse // Amazon.com
  • Buy my pattern book – I wrote a super neat crochet blanket pattern book, published under Penguin Random House. You can buy it here!
  • Browse my self-published patterns – I have over a hundred patterns on Etsy and Ravelry
  • Creative Art Blanket Course – Check it out on Teachable

Where to Find Me

Most Popular Free Crochet Patterns

Celtic Lace Join

Yarn Recommendation

Try this fun join in a built tough, but super soft DK weight yarn like:

Notes

**I wrote this pattern in 2013, but I’ve relocated it here from my portfolio site to further organize my free pattern library – Thank you!*

Note: This pattern was added by a crafter to my Ravelry pattern library – check out that addition via this link and add your own project!

You can also find this pattern on AllFreeCrochetAfghanPatterns.com.

Celtic Lace Join (Created in 2013)

I originally made this join for my 13th Textured Circles piece, but I ended up re-working that to attain my final measurement. I am working on updating the pattern with photos and videos.

Social Media: Use hashtag #CelticLaceJoin and #CypressTextiles to show off your pics! I always add community photos to my story highlights, so head to Instagram @cypresstextiles and click “Joining” in the story highlights on my profile to see all of the folks using Celtic Lace Join.

In addition to Celtic Lace Join, I also added two more versions to the fun! Head to the Celtic Lace Junior and Celtic Lace Mini joins – I wrote these for you to have some variety and see which will best suit your squares.

PDF File

For a convenient condensed, ad-free PDF file with all three joining methods included – Celtic Lace Join and Celtic Lace Junior and Mini, click here for my Etsy listing.

This join can be used for any type square! Enjoy!

First motif

Round 1: Join border color with a slip stitch in any corner stitch. 3SC in same corner stitch. SC around, working 3 SC in all corners. Join with a slip stitch to the beginning SC. (See photo above.)

Round 2: (SC, chain 3, 2DC) all in corner stitch. ***Skip 1 stitch, (DC, chain 3, DC) all in next stitch *V Stitch made* (chain 1, skip 3 stitches, V Stitch) 6 times, (2DC, chain 2, 2DC) all in corner***, Repeat from *** to *** 2 more times and work the final side in the same manner until you reach the first corner. DC in the first corner and join with a slip stitch to the first chain.

Round 3: (SC, chain 2, 3DC) all in corner space. ***5DC in chain space 7 times across, (3DC, chain 2, 3DC) in corner space***, Repeat from *** to *** 2 more times and work final side in the same manner until you reach the first corner. 2DC in the first corner space and join with a slip stitch in the first chain.

Round 4: ***(SC, chain 5, SC) all in corner space. Chain 5, (SC in center DC of next 5-DC group, chain 5) 7 times.***, Repeat from *** to *** 3 more times. Join with a slip stitch in the beginning SC.

First motif complete! Now you will be joining the subsequent motifs on the final round of the lace.

Subsequent Motifs

Work the second motif all the way until you have worked 1 side of round 4, stopping after 2 chains of the second corner space.

(Release loop from hook, insert hook in any corner space of the completed motif, put loop back on hook, chain 1) *Join made* chain 2, SC in same corner space. Chain 2, Join to next chain space of completed motif, chain 2, SC in center DC of next 5DC group. Continue across until you reach the next corner. (SC, chain 5, SC) in corner space. Do not join this corner.

You are leaving these two corners un-joined because this is an area where 4 motif corners meet. On your next row of squares, these un-joined corners will be picked up by their diagonal corner buddies. In other words, they will be “reaching” across diagonally to each other, forming an X.

The reason why you immediately join the first corner (see below) it because it lies around the perimeter of the blanket.

Below, you can see 1 of the un-joined corners being picked up by its diagonal buddy. There is still 1 corner to be picked up because its diagonal buddy has not been attached yet.

When you pick up both corners on that next row of squares, magic happens (see said magic in photo below :P) The corner looks lacy and pretty and your hard work deciphering my confusing instructions has paid off 🙂

Copyright Information

No pattern or other material may be reproduced — mechanically, electronically, or by any other means, including photocopying — without written permission of Rachele Carmona. This applies to all content on CypressTextiles.net, BabyLoveBrand.net, and all other URLs and social media used by Rachele Carmona. Paid patterns are for personal use only.

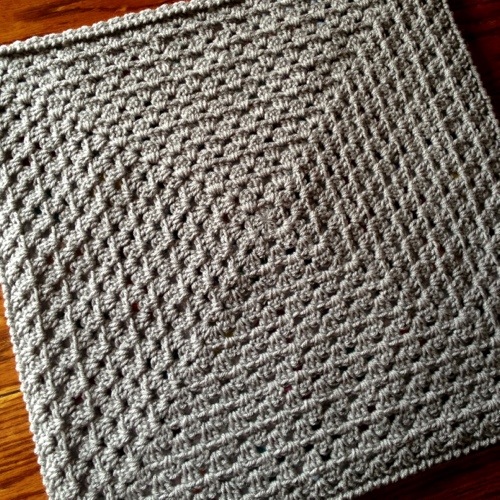
Perfect Granny Square

*I wrote this pattern in 2013, but I’ve relocated it here in order to further organize my free pattern library – Thank you!*

20130827-125351.jpg

Here is a quick tutorial for the Perfect Granny Square! 🙂

**Note: Find this and other patterns by looking under the “Free Patterns” tab in the menu in my website header. (Or under the tag “Free Patterns“)**

(US Terminology, Worsted weight yarn, size K/6.5mm hook)

I have featured this tutorial on Facebook, but I have decided to give it a permanent home, here on my website. I have found that I’m not the only one who does this method, but maybe you’ll learn something new!

The yarn I am using is a soft and sturdy economical powerhouse, KnitPicks Brava Sport. Read more about this yarn on my Crafter site!

Okay, I like to start with an adjustable ring (“Magic Ring”) – see it at Crochet Cabana (.com) tutorial.

You can also chain 4 and join to make a ring.

Round 1: All in ring, SC, chain 2, (3DC, chain 1) 3 times, 2DC, join with a slip stitch in the chain directly above the beginning SC.

Round 2: Slip stitch in same chain space, FLIP WORK OVER to the opposite side, (SC, chain 2, 3DC) all in same space, (3DC, chain 1, 3DC) in all 3 other spaces around, 2DC in first space, join with a slip stitch to the chain directly above the beginning SC.

Round 3 (pattern round): Slip stitch in same space, FLIP WORK OVER to opposite side, (SC, chain 2, 3DC) all in same space, 3DC in all spaces across, (3DC, chain 1, 3DC) in corners around the blanket until you reach the first space. 2DC in that space and join with a slip stitch in the chain directly above the beginning SC. Cut yarn and finish off when your work is large enough.

I like to end on an odd round so that the first and last rounds are both facing up.

If you are using many colors, you would cut yarn and finish off after every join, and then flip the work over, attach yarn in any corner, and work as normal.

I use this method (flipping work to alternate sides, omitting chains between 3DC groups, working only 1 chain in the corners) as a means to make a perfectly straight-edged granny square. If I do not do these things, I end up with a warped, twisted-centered, loosey-goosey, un-structured thing… 🙂

Around the square in the photo below, I did a reverse SC round. Nice and neat!

20130827-125701.jpg

This post features affiliate links.

African Flower Half-Hexagon

*I wrote this pattern in 2013, but I’ve reproduced it here to further organize my free pattern library – Thank you!*

African Flower Half-Hexagon Pattern

Hi, Y’all! Let’s talk hexie blankets. I love a good hex blanket, but I have so much trouble with the edges because in my mind a blanket must have a straight edge. Of course your mileage may vary and you may love the fun-shaped border, but I just HAVE to fill in the gaps to square off.

Someone asked me for advice on a hexie blanket border (Instagram user @theoriginaldumblonde) and I thought I’d do a quick tutorial for a half-hex. I’ve never done an African Flower (although I’ve seen it a zillion times and it’s gorgeous!) so I Googled it and saw the Ravelry pattern from Heidi’s Bears. I used this pattern to make my half-hex design. Then I went ahead and searched for “Half African Flower Motif” and I did find some hits. BUT My method is different.

Here we go!

Slip knot, chain 4, join with a slip stitch to make a ring. (OR do what I do and Magic Loop it!)

Row 1 (all in ring): SC, chain 2, (2DC, chain 1) 3 times, DC. Cut yarn and finish off.

20130812-065635.jpg

FLIP WORK

Row 2: Attach new color with a slip stitch in the first chain 1 space. (SC, chain 2, 2DC) all in same space, (2DC, chain 1, 2DC) in next 2 chain 1 spaces, (2DC, chain 1, DC) in final chain 1 space. Do not cut yarn.

20130812-065640.jpg

FLIP WORK

Row 3: SC in top of first DC, 3DC in first chain 1 space. 7DC in next 2 chain 1 spaces. 3DC in final chain 1 space and DC in top of final stitch (this will be the chain right above your beginning SC). Cut yarn and finish off.

(NOTE: In the photo below, when I flipped my work and made my initial SC, I did NOT make it in the top of the first DC as I describe in the pattern. I went directly into the chain 1 space. This was a mistake on my part… you should definitely go into the DC for this first stitch.)

20130812-065645.jpg

Do not flip work; rather, slide back to the beginning of this row.

Row 4: Attach new color with a slip stitch into the chain directly above the initial SC. SC in same chain and in 3 DC, Make the long DC reaching down into row 2 just like in the original pattern. (Work SC in 7 DC, and the long DC) 2 times, and work SC in the last 4 DC. Cut yarn and finish off.

20130812-065649.jpg

Slide piece over to the beginning again.

Row 5: Attach new color with a slip stitch in the first SC. (SC, chain 2, DC) all in that same stitch. (DC in 7 DC, *DC, chain 1, DC* in next stitch) 3 times. Cut yarn and finish off.

(NOTE: In the photo below, I was apparently half-asleep for this half-hex because I made a mistake by working 2DC into the 7th DC of the first side worked. What a shame! I recommend having your morning coffee *before* making this motif 🙂 )

20130812-065654.jpg

So what now?

Some folks make another round on their motif. If you do this, just attach yarn in the first chain space and work (DC, chain 1, DC) in all chain spaces around – from there it should be self explanatory.

Join these in your gaps at the edge of your blanket. You will still have 2 sides that have a zig-zag shape to them. What I do to fill this in is use different height stitches (SC, HDC, DC, TR, DTR, etc…) to fill in this gap when I go around the blanket for the border.

Happy hooking, y’all! 🙂

Postage Stamp Block

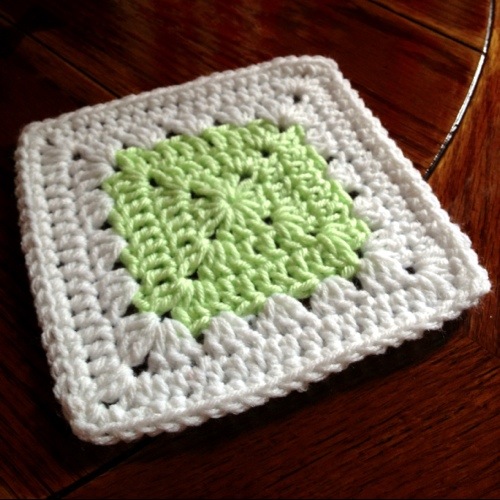
Postage Stamp Block Pattern

This is the block I am using for my version of Bear’s Rainbow Blanket, which is the blanket in the Scrappy Crochet-Along. Mary from Crafty Goodness Crochet and I are the hosts.

Written in American crochet terms

Work a “solid granny square”

Chain 4 and join to make a ring (or Magic Circle)

Round 1: SC in ring and Ch 2. (3 DC in ring, Ch 1) three times in ring. 2 DC in ring and join to first chain, leaving the second chain as the corner chain.

Round 2: SC in corner chain and Ch 2. 2 DC in corner. (DC in the next 3 sts, *2 DC, Ch 1, 2DC* in corner) three times around the square. DC in next 3 sts and DC in corner. Join in first chain, leaving the second chain as the corner.

Round 3: SC in corner chain and Ch 2. 2 DC in corner. (DC all sts across, *2 DC, Ch1, 2 DC* in corner) three times around square. DC in all sts across final side and DC in corner, joining in first chain. Cut yarn and finish off.

Work wide border

Join border color with a slip stitch in any corner.

Round 1: SC in corner chain and Ch 2. 3 DC in corner. ***(Skip 2 sts, 3 DC in next st) three times, *3 DC, Ch 1, 3 DC* in corner)*** three times around the  square. (Skip 2 sts, 3DC in next st) three times. 2 DC in corner and join in first chain.

Round 2: SC in corner chain and Ch 2. 2 DC in corner. (DC in all sts across, *2DC, Ch 1, 2 DC* in corner) three times around square. DC in all sts across, DC in corner and join in first chain.

Round 3: 3 SC in corner chain. (SC in all sts aross, 3 SC in corner) three times. SC in all sts across and join to first SC.

Cut yarn and finish off.

Yay! :)

Continuous Join As You Go: Master Post

I love this join so much that it I decided to dedicate a complete post to it.

Where can I learn it?

Find the YouTube tutorial here (by Crochet Cabana). It would be easiest to get some granny squares that you need to join and actually follow along with the video. When I learned it I had to pause and rewind a bunch!

See a flat braid version here (by my YouTube crochet idol – Bethintx1).

*****

I made 2 tutorials so far whilst using the join on 2 projects.

See the original tutorial here (pink Sunburst Granny).

See my second *most popular!* tutorial here (green cushion cover).

See my Partial CJAYG for Squares HERE

See the Hexagon version of the Partial CJAYG HERE

*****

Why should I love it?

CJAYG is a no-sew join with a ton of integrity. Without all the fastening off and re-joining of the yarn, you have a neat, durable, and professional join.

I have increased my speed with this join because it’s more of an over-all completion process versus a one-at-a-time process. Plus, I’m not wasting time searching for my scissors after every joined motif…

When can I use it?

If my final joining color is on only the last round and all of my squares are the same size, I can use this join. For example, my Gelato Blanket would not work, nor would my Geometric Lace blanket.

Also, my Gumball Blanket would not work, because the joining color is used on the final two rounds. In fact, I am reworking my Gumball Blanket so that I can use the continuous join on custom orders from now on to increase durability.

I think I could re-work just about any join into a continuous join, and I would be thrilled to do it!

Now, go learn it! You’ll be happy you did!

PS – I now have a complete CJAYG Hexagon version HERE 🙂

IMG_4816