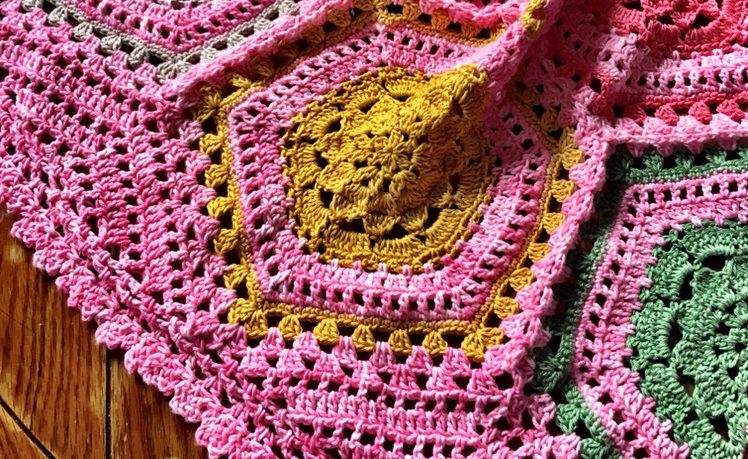
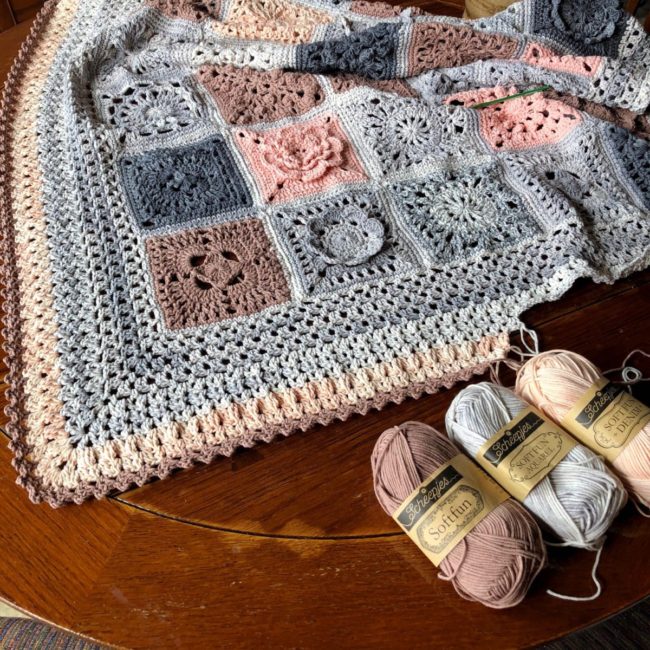
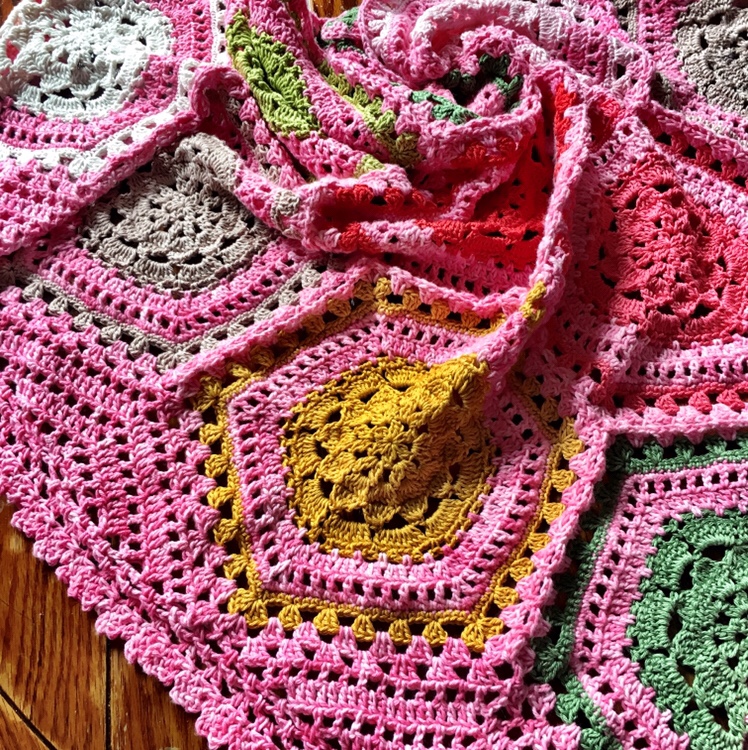
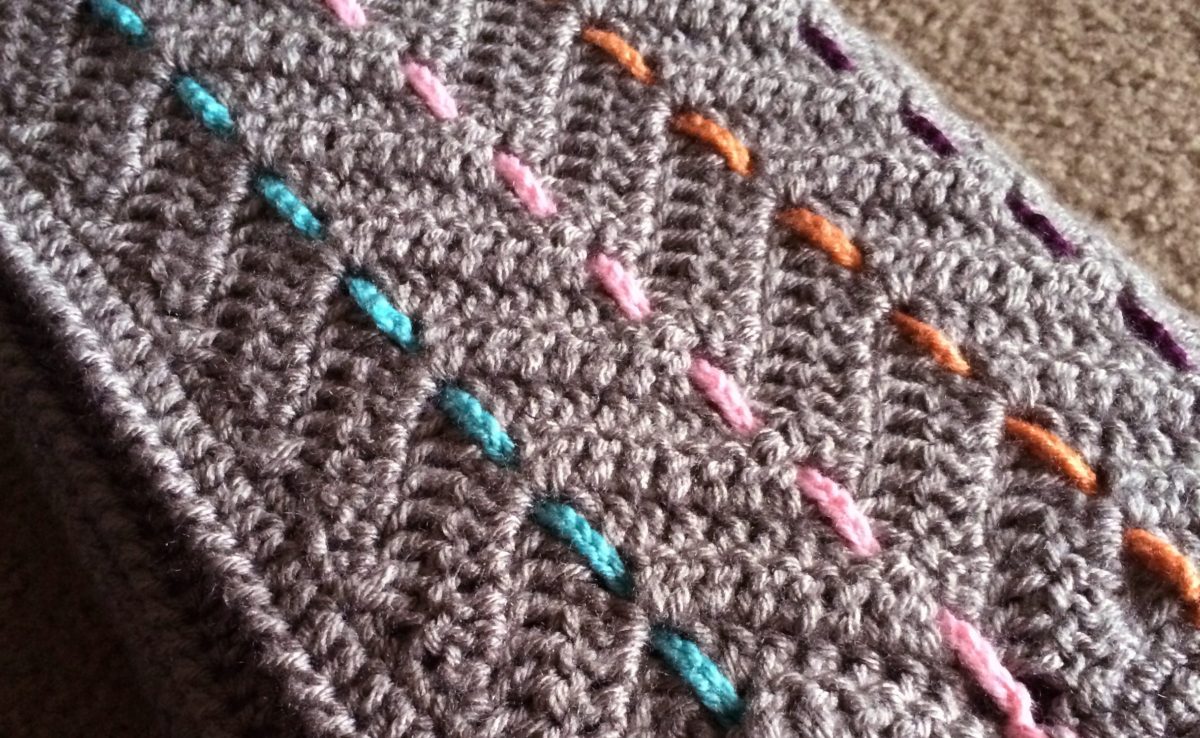
_____________________________________ If you’ve followed me for any period of time, you know about my obsession with a certain six-sided shape… In fact I’m having a deja vu moment feeling like I’ve started a blog post with that exact phrase in the past. Probably. I am madly in love with hexagons, and that’s why September is Hexagon Month!
One of the patterns I’m releasing is called Autumn Blues! When I made my YouTube tutorial “Continuous Flat Braid JAYG for Hexagons” I had a ton of feedback asking for the actual hexagon pattern (which was so heart-warming btw). Well this is it! And that join linked is the one I used for this blanket! So you have a bonus video tutorial for the join 🙂
This project has a perfect mix of Peachy to Tangerine-y hues of orange, paired with some soft and lovely shades of denim. And all that juicy autumnal richness is joined with a flat braid in a bold navy.
WHITE TEETH – Read it. It’ll change you for the better.
In the pattern, you’ll find:
a full hexagon
a half hexagon
the joining method (condensed version)
the border – with optional but highly recommended beads
woohoo!
I’m proud of this piece, because its simplicity is charming. The colors are allowed to sing over the repeating motifs. You can wrap this piece over your shoulders and be as comfortable as you are in your worn-out, too-loose blue jeans.
Tonal color play is so freeing and extremely effective. Good news: It’s also easy, peasy! Once you have motifs in all of your color shades, you can lay them out like if it were the rippling water of a swimming pool. You’re going to fade into lights and darks, with some highlights randomly throughout. Luckily with Scheepjes | Cotton 8* there are a ton of colors to choose from. There’s no need to evenly distribute the colors, and I have a bone to pick with perfectly even color distribution anyway. But that’s for another blog post – lol.
To get back to the point haha, Autumn Blues is available now! Pick one up wherever you’re most comfortable shopping.
Is anyone else having a rough go at the moment? Who else is feeling recently like they’re MacGyvered together with chewing gum and scotch tape? We know what we have to do, right? Get more sleep, drink less caffeine, go for a walk, eat a vegetable. Gotta get around to doing all that. In the meantime, I’m comfortable wallowing in my feelings for a bit longer while Autumn rolls in. …Until I’m all “Ahh so this is what feelings are like. Erm ok no thanks.” Then back to normal lol
Anyway, on those days where it gets gloomy, I give myself a yarny infusion! Today I’m having a pastel pick-me-up! Playing with colors from my Scheepjes | Cotton 8* yarn pegs. Yes they’re tied off with a surgeon’s knot, but I like to leave the messy ends hanging.
Conjured a My Little Pony “Friendship is Magic” vibe for this one as my kids are watching the new episodes on Netflix. Cotton 8 has a fantastic range of oranges, which is something many yarn lines cannot say, but I’ve saved those for a different hexie project [Link coming soon] 🙂
These are, starting with the dark pink at the bottom and moving clockwise:
And of course, the Theme of the Month (TOTM) at CypressTextiles is….. Drumroll….. Hexagons! So I had to make a fun and sunny hexagon to lift me up until all my hecks-are-gone. …No? Just me? Ok. 😆
I present: the Sunshine Blanket – a freebie pattern coming soon. You’ll love the beginner-friendly granny stitch Join as-you-go YouTube video. Check the September Calendar for dates! ❤️❤️
* Shopping through affiliate links is a great way to support my blog and all the included content – and it costs nothing extra! Yay!!
Welcome to the Continuous Flat Braid JAYG for Hexagons tutorial. I’ve made a video for this Join, but written instructions are added below. I recommend looking at both the video and the written instructions for the best clarity. (Add this pattern to your favorites on Ravelry!)
A pile of hexagons, with the same stitch count around. It doesn’t matter what the pattern is. For these Hexagons I have 18 sts between my 3-sc corners. I used ScheepjesCotton 8 yarn and these hexies are from my Autumn Blues Blanket releasing this weekend.
If you’ll be filling in the half-hexagons on the sides, set those to the side for now. They’ll be added in once all of the full hexies are joined together.
Joining yarn – you’ll want to have full balls of this, as one of the joys of joining continuously is that you eliminate having to weave all those ends. If you have a bunch of shorter lengths of your joining yarn, you’ll cancel that fun part out. Boo!
Abbreviations (US Terms)
ch-n chain n number of times
PLT Pull loop through
RS right side of motif/blanket
sc single crochet
sp space
ss slip stitch
Setup
Before you begin, choose your motif layout. For my hexagon blankets I like to square the edges off by adding in half-hexagon motifs, and then filling in the “zig-zag” sides to make a perfect rectangle. You can choose either hexie orientation from the diagram below, but be sure your opposite sides start and end with a half-hexagon as shown. This will help when you’re filling in the zig-zag sides. If you don’t want to fill these sides in, you can easily start and end these rows with a full hexagon instead, and adjust the join path to accommodate.
For this blanket the orientation is with the half-hexies along the sides; however, when joining, the blanket will be rotated like the photo below. The green spot indicates where the Join will start and stop.
Here is the diagram you will follow for this tutorial. The start/end point is labeled, and the special path is drawn in using colors to represent the steps. Along the way there will be “Close-ups” (areas circled in blue) where detailed explanation is needed.
Sunshine Blanket: A super cute circle surrounded by fun rays of granny stitch that transitions to a hexagon shape. These motifs made in Cotton 8 are joined as-you-go on the final round. It’s a classic method that will have you feeling some crafty nostalgia or some excitement to try something new!!
Full and Half Motif: Cozy Flowers blanket Pattern made in Scheepjes yarn Sweet Treat* and Catona* (held together) using the continuous granny st join demonstrated in this week’s YouTube tutorial
Welcome to Perfect Palette! This is an open-ended series in which I scribble down a color combination that I’m currently madly in love with – a new combo every week.
Fresh Earth is a palette that combines full-of-life brights with two down to earth shades for an unexpected effect. Go ahead and cover up those two left-hand yarn balls. You could imagine just about any brights – some pinks would look lovely. I’m envisioning a magenta and a purple! But instead, you have a shift downward into the sophisticated and serious with the clay and sand, shoving this palette into the Fall category for me. Indeed I have a blanket planned for this Fall in a very similar palette! Stay tuned ❤️
*This post uses affiliate links – at no additional cost to you, shopping through them helps me keep providing content! Thank you!
Welcome to Perfect Palette! This is an open-ended series in which I scribble down a color combination that I’m currently madly in love with – a new combo every week.
Okay you guys, believe it or not, I did not just gather a bunch of mind-blowingly beautiful yarn colors to stare at them, mouth agape. I mean I am doing that. But the reason I’ve curated this lovely group of yarns is for a Hexagon Month pattern!
More on that later.. for now, here is this week’s Perfect Palette:
Fire meets ice – well, sugar really. Fire meets sugar in this this electrifyingly sweet palette. It’s like if you have one foot in summer and one foot in fall – perfect for today, the first day of Autumn!
[Related: Full review of Sweet Treat, including pics of alllllll the rainbowlicious colors!]
I’ve already made some headway on this pattern and the little motifs are coming out so cute. I should clarify.. some are cute. Others are fire-hot! Try this palette if you’re looking for a project that will energize you as you work.
I’ll be combining these two amazing cotton yarns held together in similar but varying shades to create a heathered look. The pattern will be (shocker!) hexagons! Tiny flowers with a fun continuous granny stitch join for your learning pleasure. And it’s going to be a freebie! A little gift for all the love y’all have shown me on my new YouTube channel – if you visit, be sure to subscribe. There are more videos for y’all every week ❤️
*Support free content on CypressTextiles.net by shopping via affiliate links marked with an asterisk. It costs nothing extra! Or consider becoming a Patron for awesome rewards – starting October 1, 2017. My mission for an ad-free website continues!
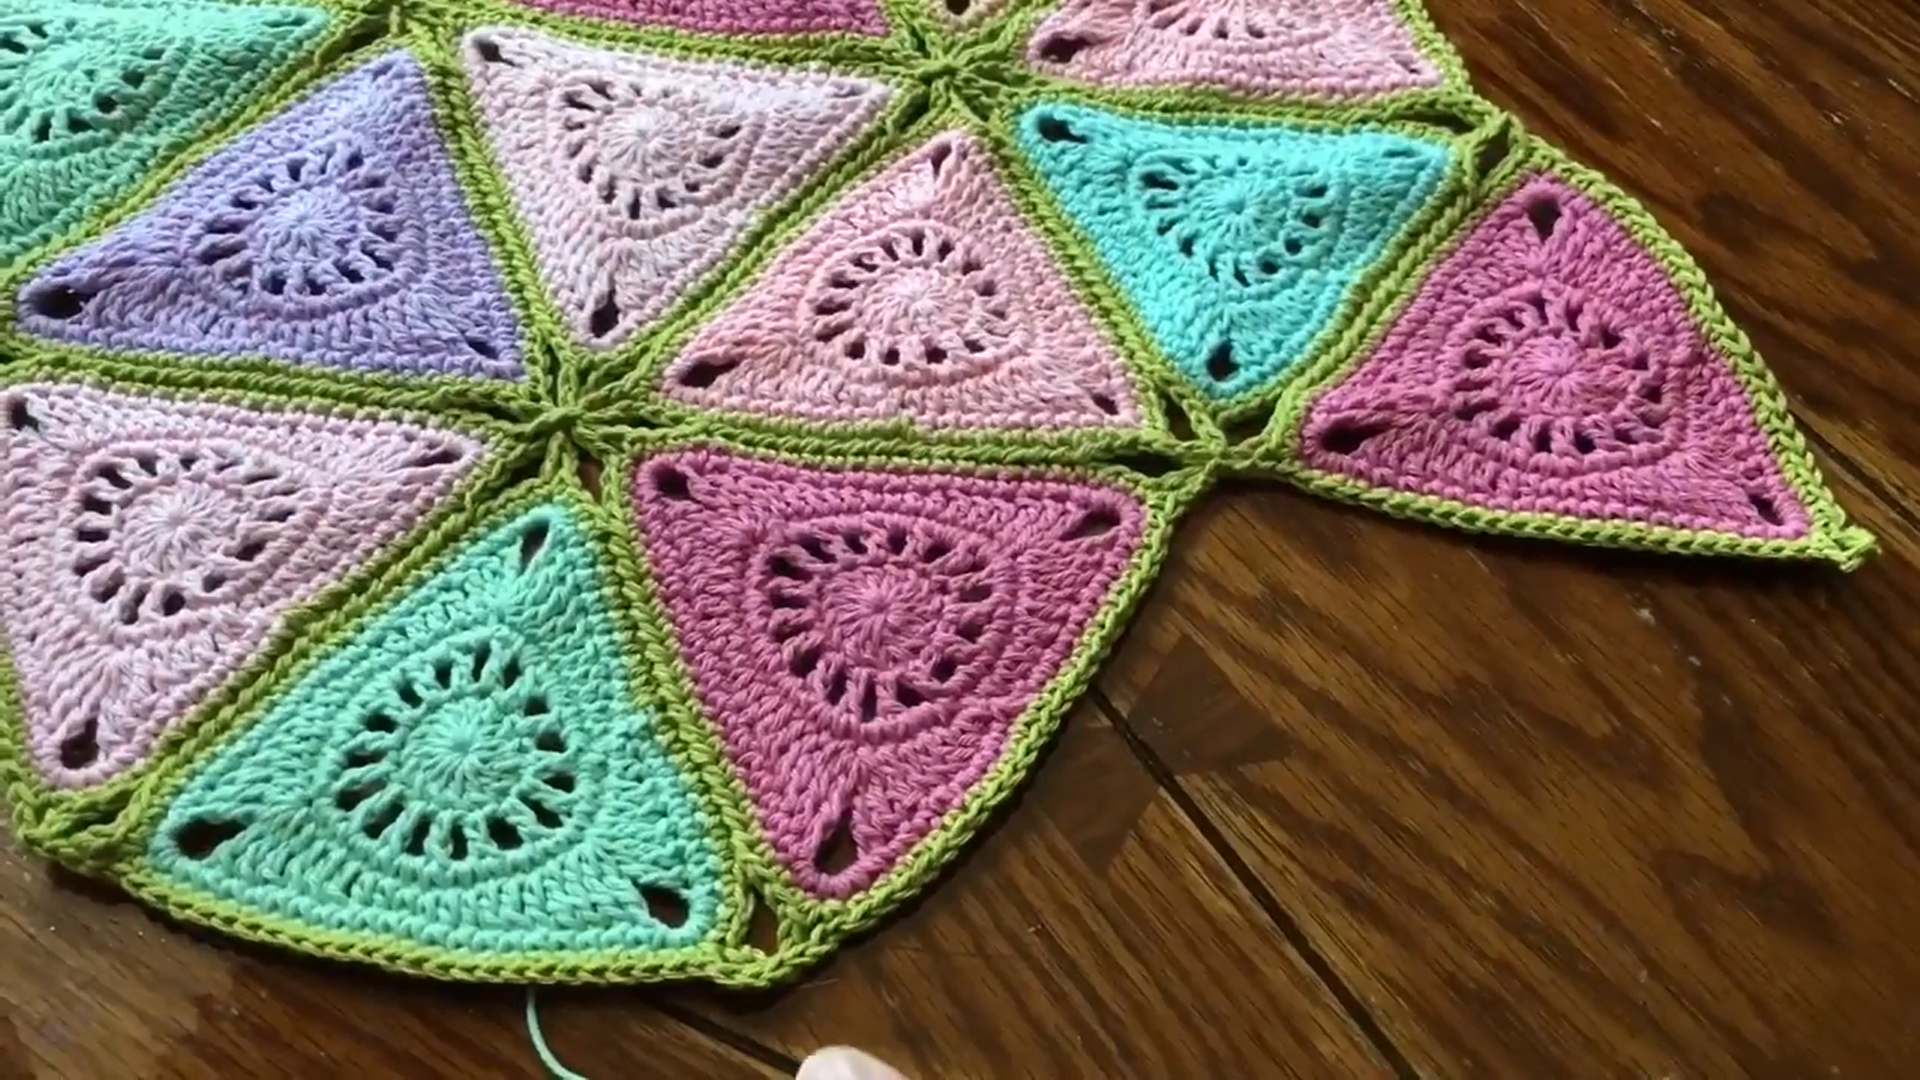
Welcome to my newest Joinjng Method Tutorial “CJAYG for Triangles (SC with PLT)”. There are so few good patterns for triangles out there, I am determined to get out of my hexagon obsession for a while to show some love to the 3 sided shape.
Often, the sides of triangle motifs bow out, making them difficult to join together without causing puckering and warping. This join can be adjusted for triangles whose points are very pointy (hardly any bow on the sides) or very rounded (heavily bowed sides). You would simply adjust the length of the chain loop in the corners. For extreme cases, more modification may be required, but this is a great springboard.
Part 1
Part 2
Part 3
The video is in 3 parts, portion 1 demonstrates parts 1-3 shown in the graphic below, portion 2 demonstrates parts 4 and the repeat of parts 2 and 3 as shown below in the diagram. The third video shows the third row of triangles added on and at that point more rows of triangles could be added by repeating the instructions, but the video shows you how to end the blanket and complete the join.
The CJAYG method for triangles is best learned through video, so you can really see what’s going on in real time, but I’m happy to clarify anything in the comments section or via email (scroll down to footer).
I used Scheepjes | Cotton 8 for this pattern. Find Cotton 8 at WoolWarehouse (aff), and more Scheepjes Retailers – ❤️ The triangle motif shown in the tutorial is coming soon, in a special collection of patterns I am releasing in the Fall called ShadeTree. Exciting!
Hope you enjoy the first parts! Looking forward to a couple more quiet hours in a row to shoot and edit footage for part 3 ❤️
This week, my city experienced the worst tropical storm to hit the US since the 1950s with catastrophic flooding and destruction. The days felt so long, at one point I thought the flash flooding and tornado weather would never end.
My family is somehow fortunate enough that we had zero damage to our home, but tens of thousands of others have lost everything, and some their lives as the death toll rises.
The relieving stories of last-minute rescue and the heartbreaking ones of lives lost are making for emotional news reading. My aunt, Emily Wax is a journalist who writes for the Washington Post and she and my uncle had been in town visiting when Harvey came in. Reporting from Katy, TX, a Houston suburb, she drafted up some articles on the storm and how it has brought everyone together in the rescue efforts, even from across state lines in Louisiana. The warming tales of The Cajun Navy and so many other rescue teams looking to pay it forward since Hurricane Katrina flooded Louisiana more than a decade agoI’m so proud of these articles! You can find her on the Washington Post site here. Check out her Facebook page for her recommended Hurricane Harvey reads.
We are exhausted and truly basking in the sun and fresh air today after being trapped indoors for the past 4 days. I wanted to accomplish a monumentous amount of hooky while I was confined to my art-space, but with four kiddoes asking about the tornado warnings and my husband offshore on an oil rig for the entire storm, I could not stay focused. So, welcome to the tour of some bits and bobs that were born out of the Hurricane Harvey tragedy.
I worked on my green blanket – VVCAL blanket pattern – and began joining granny squares using my new technique Row by Row JAYG, or the “boomerang join” – which I documented as my first YouTube video tutorial. Read the latest update here to see all the deets and pics!
As I had a lot of time on my hands and was looking for something I could control, I decided to tackle the task of finishing off my Cotton 8 yarn pegs. Now they’re all neatly tied off and ready to be used. I did leave the ends about 1.5in long because I like them better slightly messy!
Organize by color for your viewing pleasure.
In organizing my yarn pegs I started putting a palette together for an upcoming blanket.
And I also made some headway on a few designs for my upcoming hexie projects. September is Hexagon Month here at CypressTextiles! Here’s one of the hexies I have in store – “Callie”
Below, you’ll find the Catona palette I pulled for my IG Live Session last week.
And the motif I’m working up for a blanket named “Shep”
I’m seriously giving thought to making these two blankets part of a paired pattern. A 2 for 1! I’ll be using some Scheepjes Stone Washed, Catona, and Cotton 8 for my hexie surprises. I can’t wait to share it all!ll
Scheepjes is having its annual Bloggers’ Days in the Netherlands, and I am deeply saddened that I will not make it due to airport closures and high waters. I really looked forward to meeting the other bloggers that I interact with on a daily basis in my yarny Internet hijinks. There’s always next year, and I’ve asked my Scheepjes friends to fondle lots of yarn for me at HQ. Including these new 10g Catona “Cutie Pies” 🙂
Photo by Simy of @SimysStudio – clicken for instagrammen 😁❤️
While we have had a somber end to August, I’m committed to making it a bright and productive September, with the help of the comfort of my yarn and a zillion granny squares lol.
Hi, y’all! I’ve developed a new joining method called “Row by Row Join as you go” – or the “boomerang join” as I’ve nicknamed it. This was also my very first YouTube video tutorial on my new channel! If you enjoy it, like and subscribe as I will be uploading a new tutorial video on Thursday of each week.
PDF on Ravelry
If you’d like a printable PDF of the join, head to the Ravelry page. (4 pages, with photos)
Description
Row by Row JAYG is a method for joining granny squares for a blanket. It is a simplified alternative to the continuous join-as-you-go, worked in horizontal rows, then in vertical rows, until the entire blanket is joined, much like if you were to Slip St join or SC your squares together.
Because the joins are worked to and fro, I have nicknamed this the “Boomerang Join.” I hope you guys enjoy it as much as I enjoyed putting it together! Grab a stack of squares and a cuppa, and dive right in. I used KnitPicks Palette Yarn (affiliate) from my stash for this demonstration, and I only joined 4 squares, but you can use any number of squares for your desired size blanket. Instead of stopping after just 2 squares in the row, you will just continue down the row to the end.
I enjoyed making this tutorial, and I already have a stack of squares waiting to be joined! When I finish the rest of these Vibrant Vintage CAL squares, I’ll be sure to take progress pics and show y’all how it turned out. Doesn’t this join look just like a normal JAYG? And its so fun to just cruise back and forth rather than having to break yarn after every square.
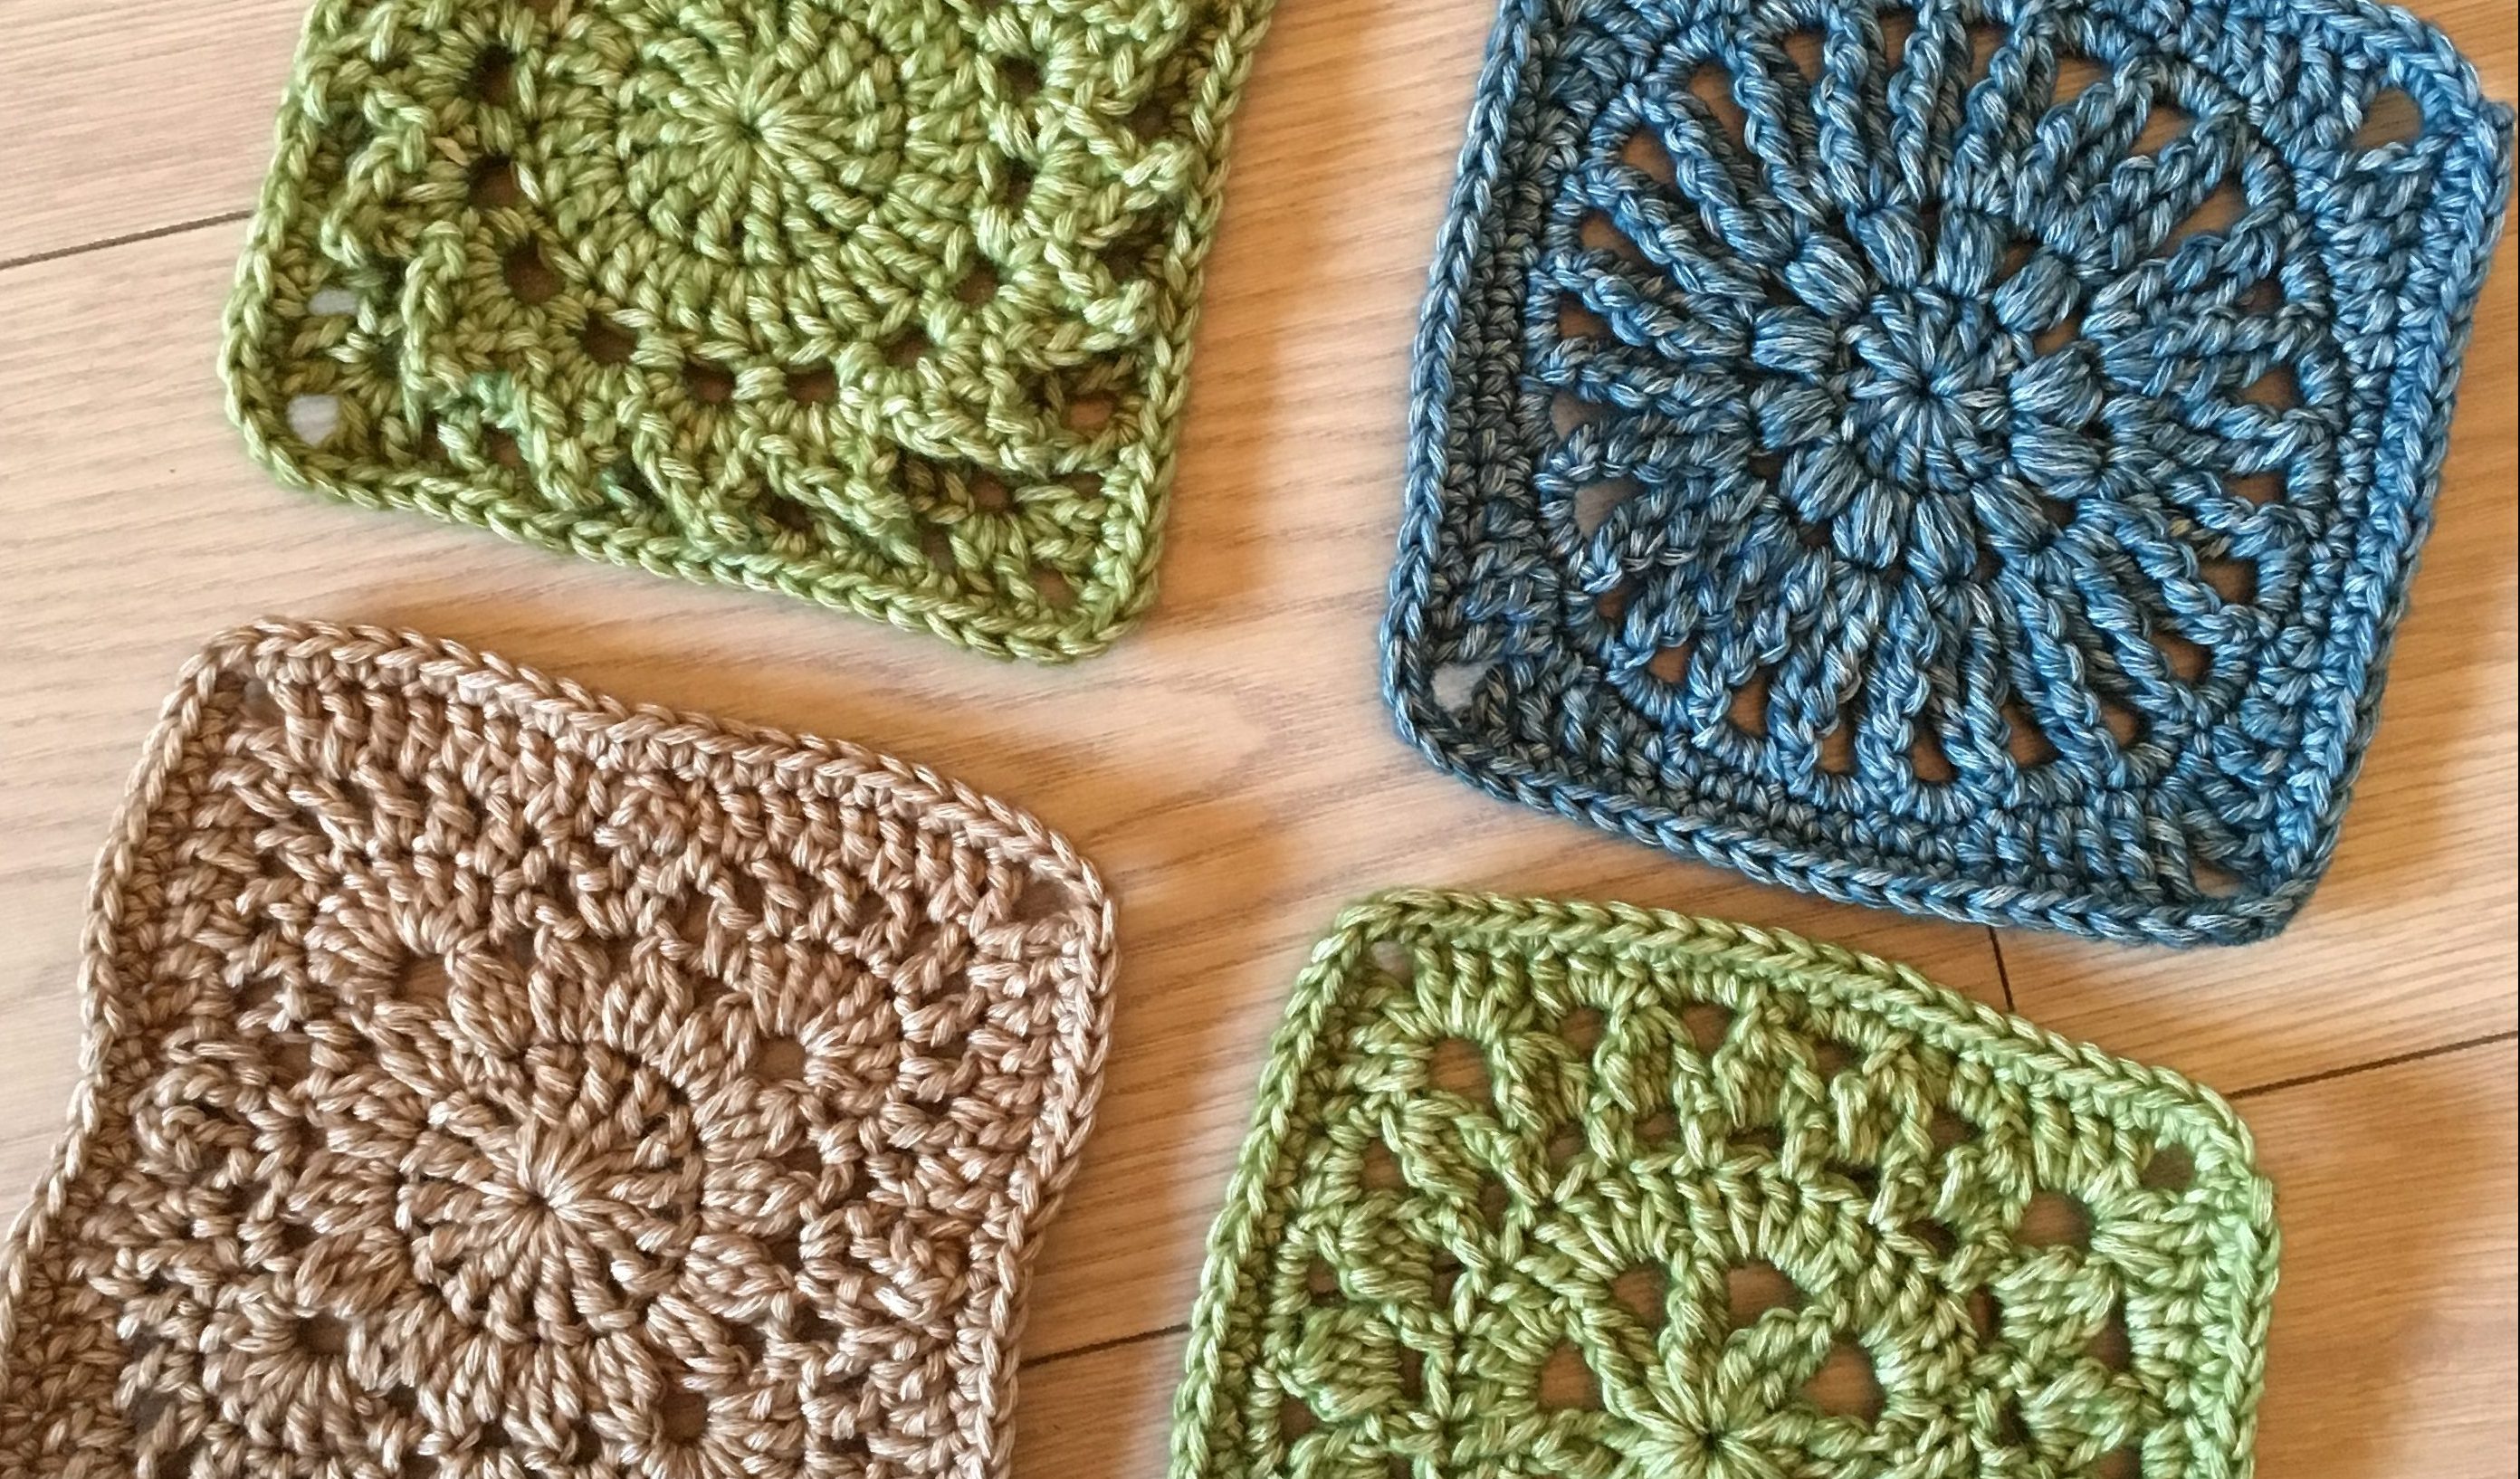
These squares are my favorite thing… I took advantage of being able to make any type of square for this project and I designed some new granny squares! The bottom two in the photo above are totally new – that bottom left hand one has my heart <3
Stay tuned for new square patterns that will go very nicely with your VVCAL squares. Zing!
It all started with the idea to update all of my older written patterns, slowly, one at a time, in 2017… Wildflower has been a “wildly” popular pattern and I had a fantastic idea to update it using Scheepjes Stone Washed. And include a drumroll here…..
I converted it to a FREE pattern for your enjoyment!
Find Stonewashed at LoveKnitting* (US), WoolWarehouse* (UK), and KnottyHouse* (CA), and other Scheepjes retailers. Trust me, you can put 10 random colors in your shopping cart and it’ll make a smashing palette. Remember the time I had the biggest pile of yarn on my breakfast nook table? Let me show you just in case…
Well I started pulling random sets out of this pile, and I fell in love with this fresh, vibrant palette. I like it because it goes through a sort of tropical rainbow range of colors. I tried to keep it fresh while still adding in some more muted colors like the olive greens to keep it grounded.
But I couldn’t decide… 12 colors? 14? 16? The beautiful thing about this yarn is the wide color range available. Check out my review of this yarn for lots more info!
I finally decided on 12 colors and here is the final palette. More than a little in love with this one! Nice and bold, without too many pastels. I like how these colors have a similar “strength” of instensity, with exception maybe for the light orange at the bottom left, but I couldn’t live without it 🙂
Grey is my new favorite neutral, so yay! I had enough to make it the background for this piece.
More info on these colors as the project progresses!
And lookie at what the lovely Tester Tribe member, Teresa Davis, is testing! A reboot of the Wildflower Blanket ❤️❤️❤️
Stay tuned, y’all!
*This post has affiliate links – shopping through them is no extra cost to you and will help me keep posting great content on CypressTextiles ❤️
Look out world, Wildflower is finished and she is a stunner! Teresa Davis (Facebook) sent me the results of a beautifully styled photo shoot of her finished piece. She has graciously provided all of the photos for this upcoming pattern and all of the related social media and blog posts. Wow!
I gave my Wildflower blanket pattern a serious facelift in a whole new yarn: Scheepjes Stone Washed. Read more about the yarn and where to find it (as well as some yummy progress pics!) in the previous post. Or see my full review of this luscious yarn!
The new Wildflower pattern update will be coming next week as I wrap it up for y’all, but for now you can enjoy Teresa’s photos as they are a feast for the eyes.
A wild flower in its natural habitat ❤️❤️
I am so excited to share this pattern update with you all! My popular Wildflower Blanket is getting a makeover! I promised myself that in 2017 I would begin updating all of my patterns, starting first with the most popular ones from my Ravelry Store. So now I present Wildflower!
It’s a work in progress as the lovely Tester Tribe member, Teresa Davis is busy testing the pattern and has provided all of the beautiful photographs for this post, and for this I am ever so grateful ❤️ She is also the lucky one playing with all the that Scheepjes Stone Washed color!
I can’t wait to show you more photos, but for now you’ll have to wait for the blanket to block until I can show off the FO Reveal 🙂 If you haven’t seen this piece before, I suggest you head over to the Wildflower Ravelry Pattern and check it out. These circles are about to be transformed into a unique shape. I always get comments that it looks like an optical illusion.. like the blanket has been folded to look that way! Go see for yourself ❤️
An updated pattern will be released soon, so get your hooks ready – it’s a fun one!
*Affilate links help CypressTextiles continue providing content and costs you nothing extra! Woohoo!
Description
Island Wildflower is a simple design using elements of crochet that you have probably used in the past, such as sunburst squares and granny stitch, and combining them in a new way. The result is a unique and opulent piece that will garner endless compliments. Use any favorite color combination as this beauty will make your stash yarn look great! Included are joining and border instruction, and feel free to use the motifs in a blanket or bag. Browse hashtag #IslandWildflowerBlanket on social media for color palette ideas!
Pattern is written by Rachele Carmona and was tested by the lovely Teresa Davis, who has also provided the gorgeous photographs for this pattern and all related blog posts at CypressTextiles.net.
Find an ad-free, easy print PDF version for a small $2 fee on Etsy//Ravelry//LoveCrochet.com or see below for the free pattern.
Materials
Yarn Scheepjes Stone Washed (78% Cotton, 22% Acrylic; 130m/50g)
Yarn A: 814 x 10 balls
1 ball each of the following:
Yarn B: 805
Yarn C: 826
Yarn D: 825
Yarn E: 816
Yarn F: 824
Yarn G: 808
Yarn H: 827
Yarn I: 823
Yarn J: 835
Yarn K: 834
Yarn L: 811
Yarn M: 806 x 2 balls
Notions
US Size 5mm hook, US Size 4.25mm hook (for final rnd of border only), Tapestry needle for weaving ends
Gauge: Motif 1, worked through Rnd 4, measures 4.75in; Finished blanket measures about 40x60in
Abbreviations – US Terminology
as folls as follows
beg beginning
bet between
ch(s) chain(s)
ch-sp(s) chain space(s)
ch-1 sp(s) chain 1 space(s): number denotes number of chains in chain space
corner-sp corner space
dc double crochet
dc2tog double crochet 2 together: (yoh, insert hook in next st/sp, yoh, pull up loop, yoh, draw through 2 loops) twice, yoh, draw through all loops
dc3tog double crochet 3 together: (yoh, insert hook in next st/sp, yoh, pull up loop, yoh, draw through 2 loops) 3 times, yoh, draw through all loops
dec decrease
dtr double treble crochet
hdc half double crochet
incl including
lp(s) loop(s)
rep(s) repeat(s)
RS right side
sc single crochet
sc2tog single crochet 2 together: (insert hook in next st/sp, yoh, pull up loop) twice, yoh, draw through all loops
ss slip stitch(es)
st(s) stitch(es)
tog together
tr treble crochet
WS wrong side
yoh yarn over hook
Special Abbreviations
beg cl beginning cluster: beg dc, (yoh, insert hook in st/sp indicated, yoh, pull up loop, yoh, draw yarn through 2 loops on hook) 3 times, yoh, draw yarn through all 4 loops on hook (beg dc does not count as a st in this case)
beg dc beginning double crochet: sc, ch 1 (counts as 1 dc)
beg dc3tog beg dc, dc2tog – beg dc does not count as a st in this case
beg dtr beginning double treble crochet: sc, ch 3 (counts as 1 dtr)
beg puff st Elongate the working loop slightly until it is the height of a normal puff st, then work puff st as normal
beg tr beginning treble crochet: sc, ch 2 (counts as 1 tr)
cl cluster: (yoh, insert hook in st/sp indicated, yoh, pull up loop, yoh, draw yarn through 2 loops on hook) 4 times, yoh, draw yarn through all 5 loops on hook
picot ch 2, sc in top side bars of previous stitch
puff st yoh, (insert hook in st/sp indicated, yoh, pull up loop) 3 times, yoh, draw yarn through all loops on hook
Instructions
Notes: All motifs are made using larger hook and joined as-you-go to create center panel, then zig-zag sides are straightened by working back and forth until tringle gap is filled. A simple border completes the piece.
Motif 1 (Make 50)
Color Distribution
There are 12 colors and 50 motifs. Using Yarns B-K, make 4 centers each, and using Yarns L and M, make 5 centers each. Then, using Yarns B and C, add rnd 2 onto 5 centers each, and using Yarns D-M, add rnd 2 onto 4 centers each. Use Yarns D and E to add rnd 3 onto 5 motifs each, and use Yarns B and C, and F-M to add rnd 3 to 4 motifs each. Use Yarns F and G to add rnd 4 to 5 motifs each, and Yarns B-E and H-M to add rnd 4 to 4 motifs each. Be sure not to repeat colors on a single motif.
Rnd 1 Using first color of motif, make a sl knot, ch 4 and ss in fourth ch from hook to make ring. All in ring: Beg dc, 19 dc, cut yarn and finish off. [20 dc]
Rnd 2 Join next color with ss in any st, and beg tr in same st. (Ch 1, tr) in all rem sts, ch 1, ss in beg tr, cut yarn and finish off. [20 tr, 20 ch-sp]
Rnd 3 Join next color with ss in any tr. Beg puff st in same st, (ch 2, puff st in next tr) 19 times, ch 2, ss in beg puff st, cut yarn and finish off. [20 puff st, 20 ch-sp]
Rnd 4 Join next color with ss in any ch-sp. Beg cl in same space. (ch 2, cl in next ch-sp) 19 times, ch 2, ss in beg cl, cut yarn and finish off. [20 cl, 20 ch-sp]
Note: Rnd 5 (Joining/squaring round) will be worked in the joining section. You can work all of Motifs 1 and 2 through Rnd/Row 4 for the perfect on-the-go project.
Motif 2 (Make 20)
Row 1 (RS) Using first color of motif, make a sl knot, ch 3, and ss in third ch from hook to make ring. All in ring: Beg dc, 10 dc, cut yarn and finish off, turn. [11 dc]
Row 2 Join next color in first st, and beg tr in same st. (Ch 1, tr in next st) 10 times, cut yarn and finish off, turn. [11 tr, 10 ch-sp]
Row 3 Join next color with ss in first st. In same st: (Beg dc, ch 1, puff st). (Ch 2, puff st in next tr) 10 times, ch 1, dc in same st as final puff st, cut yarn and finish off. Do not turn. [11 puff st, 10 ch-2 sp, 2 ch-1 sp]
Row 4 With RS still facing, join next color in first st. Beg dc in same st, dc bet first dc and puff st, (ch 2, cl in next ch-sp) 10 times, ch 2, dc bet puff st and final st, dc in final st, cut yarn and finish off. [4 dc, 10 cl, 11 ch-sp]
Join motifs to make center panel
Note: Motifs will be joined with RS facing, using a “join as you go” method worked in 10 rows from top to bottom of blanket. Each row of motifs is made of 5 of Motif 1 and 2 of Motif 2, as seen in Schematic. Color placement is random.
Lay out all 70 motifs in a zig-zag formation using Schematic as a guide.
Top row of motifs
First motif (Located in upper left corner) Join Yarn A with ss in first st. Beg tr in same st, ch 2, 3 tr in ch-sp, * 3 dc in next ch-sp, 3 sc in next 2 ch-sps, 3 dc in next ch-sp, ** (3 tr, ch 3, 3 tr) – corner made in next ch-sp, work from * to ** 1 time, 3 tr in ch-sp, ch 2, tr in first st, cut yarn and finish off.
Second motif (The second motif in the top row of the blanket) Join Yarn A with ss in any ch-sp, (beg tr, ch 3, 3 tr) in same ch-sp – note: this corner will be the bottom right corner of the motif, work from * to **, make corner, work from * to **, (3 tr, ch 1, ss in adjacent ch-sp on completed motif, ch 1, 3 tr) in next ch-sp, ss bet 3-tr group and 3-dc group on completed motif, 3 dc in next ch-sp on motif in progress, ss bet 3-dc group and 3-sc group on completed motif, (3 sc in next ch-sp on motif in progress, ss after 3-sc group) twice, 3 dc in next ch-sp, ss after 3-dc group, (3 tr, ch 1, ss in adjacent ch-sp, ch 1, 3 tr) in next ch-sp, work from * to **, 2 tr in first corner to complete it, ss in beg tr, cut yarn and finish off.
Continue to join in this manner across the row, joining one side to the adjacent completed motif, ending with a Motif 2.
Next row of motifs
First motif Work as for first motif of previous row, but join 1 side to adjacent motif above.
Second motif Work as for previous row of squares, but work the third corner as follows: (3 tr, ss in top adjacent corner ch-sp, and ss in left hand side adjacent corner ch-sp, 3 tr) in corner ch-sp, join next side as before, work remainder of motif without joining as before.
Join all remaining rows of squares in this manner until bottom of blanket is reached and all motifs are joined on. When fourth motif joins onto 3 others, always work the corner join as indicated above – 2 slip sts, 1 in the top motif’s corner, and one in the left hand side motif’s corner. When all motifs are joined, triangle gaps are ready to be filled in so that blanket is a complete rectangle.
Full Triangle Gap (Work four times)
Note: On first occurrence of a new st, please refer to Special Abbreviations section on p 2.
Row 1 With RS facing, join Yarn A with ss in first ch of ch-3 corner-sp before triangle gap, sc in same ch, sc 53 evenly across to center, sc 54 evenly up the other side, placing final sc in the ch-3 corner-sp at the end of the row, turn. [108 sc]
Row 2 Beg dc3tog over first 3 sts, * (ch 1, sk 1, dc) 24 times, ch 1, skip 1,* dc2tog over next st and fourth st, skipping over center 2 sts as folls: YO, insert hook in next st, pull up lp, YO, draw yarn through 2 lps on hook, YO, sk 2 sts, insert hook in next st, YO, pull up lp, YO, draw yarn through 2 lps on hook, YO, draw yarn through all 3 lps on hook, rep from * to *, dc3tog over final 3 sts, turn. [2 dc3tog, 1 dc2tog, 48 dc, 50 ch-sp]
Row 3 Beg dc3tog over first 3 sts – Note: “first 3 sts” here means dec st, ch-sp, and dc, * (ch 2, sc in next dc st) 22 times, ch 2 * dc2tog over next 2 dc sts skipping over 2 ch-sps and center dec, rep from * to *, dc3tog over final 3 sts, turn. [2 dc3tog, 1 dc2tog, 44 sc, 46 ch-sp]
Row 4 Sc2tog over first 2 sts – Note: these first 2 sts are the dc3tog and ch-2 sp. * (ch 2, sc in next ch-sp) 21 times, ch 2 * sc2tog over next 2 ch-sps skipping over center dec, rep from * to *, sc2tog over final 2 sts, turn. [3 sc2tog, 42 sc, 44 ch-sp]
Row 5 Beg dc3tog over first 3 sts, * (ch 2, sc in next ch-sp) 20 times, ch 2 * dc2tog over next 2 ch-sps, rep from * to *, dc3tog over final 3 sts, turn. [2 dc3tog, 1 dc2tog, 40 sc, 42 ch-sp]
Row 6 Sc2tog over first 2 sts, * (ch 2, sc in next ch-sp) 19 times, ch 2 * sc2tog over next 2 ch-sps, rep from * to *, sc2tog over final 2 sts, turn. [3 sc2tog, 38 sc, 40 ch-sp]
Row 7 Beg dc3tog over first 3 sts, * (ch 1, sk 1, dc) 18 times, ch 1, sk 1,* dc2tog over next 2 ch-sps, rep from * to *, dc3tog over final 3 sts, turn. [2 dc3tog, 1 dc2tog, 36 dc, 38 ch-sp]
Row 8 Sc2tog, * sc in 34 sts across side *, sc2tog over next 2 dc sts, rep from * to * across next side, sc2tog in final 2 sts, turn, cut yarn and finish off. [3 sc2tog, 68 sc]
Row 9 (RS) Join leftover of Yarn B-M with ss in first st, beg dc3tog over first 3 sts, * dc in 30 sts *, dc5tog over next 5 sts incl center dec, rep from * to *, dc3tog over final 3 sts, turn. [2 dc3tog, 1 dc5tog, 60 dc]
Row 10 Beg tr4tog over first 4 sts, * (ch 1, sk 1, tr) 12 times, ch 1, sk 1 *, tr2tog over next st and fifth st as before skipping over center 3 sts, rep from * to *, tr4tog over final 4 sts, cut yarn and finish off, turn. [2 tr4tog, 1 tr2tog, 24 tr, 26 ch-sp]
Row 11 Join leftover of yarn B-M with ss in first st, beg dc3tog over first 3 sts, * (ch 1, puff st in tr) 10 times, ch 1 *, puff st in next tr. Without making any chs, puff st in next tr, rep from * to *, dc3tog over final 3 sts, cut yarn and finish off, do not turn. [2 dc3tog, 22 puff st, 22 ch-sp]
Row 12 (RS) Join leftover of Yarn B-M with ss in first st, beg dc3tog over first 3 sts, * (ch 1, cl in ch-1 sp 9 times, ch 1 *, cl in next ch-sp, without making any chs, cl in next ch-sp, rep from * to *, dc3tog over final 3 sts, cut yarn and finish off, do not turn. [2 dc3tog, 20 cl, 20 ch-sp]
Row 13 (RS) Join Yarn A with ss in first st, sc2tog over first 2 sts, * sc in 17 chs/cls across, * sc2tog over next 2 ch-sps, rep from * to *, sc2tog over final 2 sts, turn. [3 sc2tog, 34 sc]
Row 14 Beg dc3tog over first 3 sts, * (ch 1, sk 1, dc) 6 times, ch 1, sk 1,* dc2tog over next st and fourth st skipping over center 3 sts, rep from * to *, dc3tog over final 3 sts, turn. [2 dc3tog, 1 dc2tog, 12 dc, 14 ch-sp]
Row 15 Beg dc3tog over first 3 sts, * (ch 2, sc in next dc st) 4 times, ch 2 * dc2tog over next 2 dc sts, rep from * to *, dc3tog over final 3 sts, turn. [2 dc3tog, 1 dc2tog, 8 sc, 10 ch-sp]
Row 16 Sc2tog over first 2 sts, * (ch 2, sc in next ch-sp) 3 times, ch 2 * sc2tog over next 2 ch-sps, rep from * to *, sc2tog over final 2 sts, turn. [3 sc2tog, 6 sc, 8 ch-sp]
Row 17 Beg dc3tog over first 3 sts, * (ch 2, sc in next dc st) 2 times, ch 2 * dc2tog over next 2 ch-sps, rep from * to *, dc3tog over final 3 sts, turn. [2 dc3tog, 1 dc2tog, 4 sc, 6 ch-sp]
Row 18 Sc2tog over first 2 sts, * ch 2, sc in next ch-sp, ch 2 * sc2tog over next 2 ch-sps, rep from * to *, sc2tog over final 2 sts, turn. [3 sc2tog, 2 sc, 4 ch-sp]
Row 19 Work a Beg dc6tog as folls: Beg dc, make dc5tog by working a dc up to the final step (leaving 1 lp on the hook) in all 4 chain-2 spaces, and in final st, making 6 “legs” total for the decrease, cut yarn and finish off. [1 dc6tog]
Half Triangle Gap (Work twice)
Row 1 With RS facing, join Yarn A with ss in first ch of ch-3 corner-sp before triangle gap, sc in same ch, sc 53 evenly across row, turn. [54 sc]
Row 2 Beg dc3tog over first 3 sts, (ch 1, sk 1, dc) 24 times, ch 1, skip 1, dc3tog over final 3 sts, turn. [2 dc3tog, 24 dc, 25 ch-sp]
Row 3 Beg dc3tog over first 3 sts, (ch 2, sc in next dc st) 22 times, ch 2, dc3tog over final 3 sts, turn. [2 dc3tog, 22 sc, 23 ch-sp]
Row 4 Sc2tog over first 2 sts, (ch 2, sc in next ch-sp) 21 times, ch 2, sc2to over final 2 sts, turn. [2 sc2tog, 21 sc, 23 ch-sp]
Row 5 Beg dc3tog over first 3 sts, (ch 2, sc in next ch-sp) 20 times, ch 2, dc3tog over final 3 sts, turn. [2 dc3tog, 20 sc, 21 ch-sp]
Row 6 Sc2tog over first 2 sts, (ch 2, sc in next ch-sp) 19 times, ch 2, sc2tog over final 2 sts, turn. [2 sc2tog, 19 sc, 20 ch-sp]
Row 7 Beg dc3tog over first 3 sts, (ch 1, sk 1, dc) 18 times, ch 1, sk 1, dc3tog over final 3 sts, turn. [2 dc3tog, 18 dc, 19 ch-sp]
Row 8 Sc2tog, sc in 34 sts across side, sc2tog in final 2 sts, turn, cut yarn and finish off. [2 sc2tog, 34 sc]
Row 9 (RS) Join leftover of yarn B-M with ss in first st, beg dc3tog over first 3 sts, dc in 30 sts, dc3tog over final 3 sts, turn. [2 dc3tog, 30 dc]
Row 10 Beg tr4tog over first 4 sts, (ch 1, sk 1, tr) 12 times, ch 1, sk 1, tr4tog over final 4 sts, cut yarn and finish off, turn. [2 tr4tog, 12 tr, 13 ch-sp]
Row 11 Join leftover of yarn B-M with ss in first st, beg dc3tog over first 3 sts, (ch 1, puff st in tr) 10 times, ch 1, dc3tog over final 3 sts, cut yarn and finish off, do not turn. [2 dc3tog, 10 puff st, 11 ch-sp]
Row 12 (RS) Join leftover of yarn B-M with ss in first st, beg dc3tog over first 3 sts, (ch 1, cl in ch-1 sp) 9 times, ch 1, dc3tog over final 3 sts, cut yarn and finish off, do not turn. [2 dc3tog, 9 cl, 10 ch-sp]
Row 13 (RS) Join Yarn A with ss in first st, sc2tog over first 2 sts, sc in 17 chs/cls across, sc2tog over final 2 sts, turn. [2 sc2tog, 17 sc]
Row 14 Beg dc3tog over first 3 sts, (ch 1, sk 1, dc) 6 times, ch 1, sk 1, dc3tog over final 3 sts, turn. [2 dc3tog, 6 dc, 7 ch-sp]
Row 15 Beg dc3tog over first 3 sts, (ch 2, sc in next dc st) 4 times, ch 2, dc3tog over final 3 sts, turn. [2 dc3tog, 4 sc, 5 ch-sp]
Row 16 Sc2tog over first 2 sts, (ch 2, sc in next ch-sp) 3 times, ch 2, sc2to over final 2 sts, turn. [2 sc2tog, 3 sc, 4 ch-sp]
Row 17 Beg dc3tog over first 3 sts, (ch 2, sc in next dc st) 2 times, ch 2, dc3tog over final 3 sts, turn. [2 dc3tog, 2 sc, 3 ch-sp]
Row 18 Sc2tog over first 2 sts, ch 2, sc in next ch-sp, ch 2, sc2tog over final 2 sts, turn. [2 sc2tog, 1 sc, 2 ch-sp]
Row 19 Beg dc4tog as folls: Beg dc, make dc3tog, cut yarn and finish off. [1 dc4tog]
Border
Rnd 1(sc rnd) Join Yarn A with ss in upper right corner of blanket, * 3 sc in corner st, work 114 sc evenly across short side, 3 sc in corner, 157 SC evenly across long side, rep from * 1 time, ss in first st.
Rnd 2(eyelet rnd) (Beg dc, ch 3, dc) in corner-sp * (ch 1, sk 1, dc) across, ch 1, sk 1, (dc, ch 3, dc) in corner-sp, rep from * 3 times omitting final corner on third rep, ch 1, sk 1, ss in beg dc.
Rnd 3(sc rnd) * 3 dc in corner st, sc in all sts/chs across side, rep from * 3 times omitting corner on third rep, ss in first st.
Rnd 4 (dc/picot rnd) Change to smaller hook for this rnd. All in corner st: (Beg dc, 3 dc, ch 2, sc in previous dc – picot made, 4 dc), * sk 1, (2 dc, picot, 2 dc) in next st, ** sk 2, (2 dc, picot, 2 dc) in next st, rep from ** across, to corner, sk 1, (4 dc, picot, 4 dc) in corner st, rep from * 3 times omitting corner on final repeat, ss in beg dc, cut yarn and finish off.
Charts Written instruction Some Photos (I have been working on shortening the length of my patterns, and trying to get better at explaining with words versus step by step photos.) Included is a “Variations” section with resizing options and alternate layout/palette options
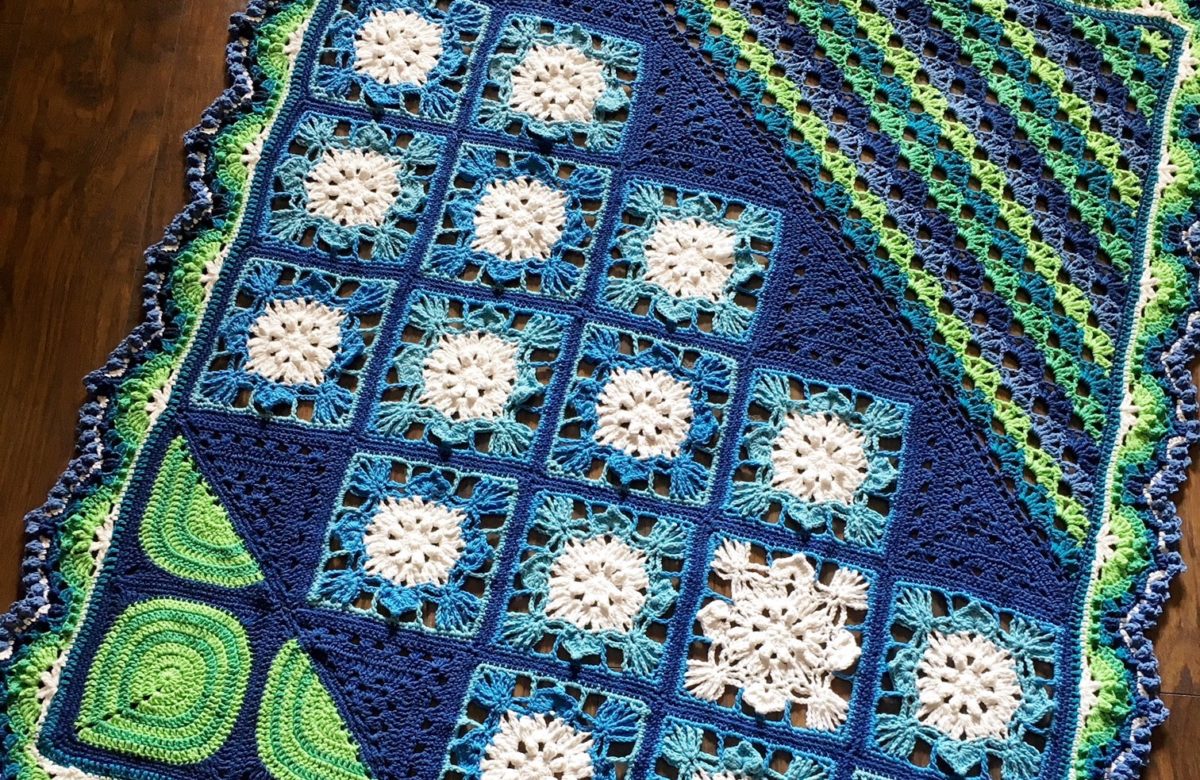
Seaglass is a unique piece that takes two classic elements of crochet, the granny squares in sea glass colors wrapped in corals, and a nautical chevron ripple, and combines them with breezy ocean colors for a beachy summer look. The combo of different stitches will keep your interest, and you may learn some new techniques along the way! Change up the color palette for a whole new look. I can imagine this in pastels with a grey and white chevron – yum!
Pattern is written by Rachele Carmona, and tested by the lovely Kaelyn Guerin. Find her across social media as @iiirdwind and enjoy her fresh style. Kaelyn has graciously provided all of the photos for this pattern and blog post. Aren’t they lovely!!
Buy this yarn – HERE*
_________________________
This is my first time using my KnitPicks* Brava yarn that I bought eons ago during an email sale promo – gotta love some discount stash enhancement!
I chose this palette for kind of a coral + sea glass vibe with navy added in to throw the whole thing off (in a good way).
For curious crafters, here are these colors (front to back in the photo above):
When I got this yarn I was pretty sure it would be like all the other acrylic yarns out there. But it’s so much smoother! If you’re looking for great stitch definition, be sure to use a smaller hook because this yarn is flooooppppy 🙂 It’s very loosey-goosey. But this means the hand is so creamy soft it’s a great trade off.
Since it is sport weight, you can see it’s a touch thinner than the DK, but I would use them all together. That’s just me! I’m a huge fan of mixing brands because it adds to the artsy feel and greatly expands color palette possibilities.
Very soon I’ll be putting a link and photo here of what I make with this gorgeous yarn! In the meantime, check out these patterns from KnitPicks:
Hue Shift Afghan – 11 colors of Brava Sport come together to create this opulent piece – See more HERE*
Sideways Throw – what a sophisticated and clean stripe design! I love the colors too – Check it out HERE*
Disclosure: This post contains affiliate links, which means I receive a small commission if you make a purchase using the links marked with an asterisk*. It doesn’t cost you anything extra, and it helps keep CypressTextiles going!
Check out the beginnings of this blanket in the WIP post! Wanna make one??
Notions
US Size 4.25mm hook, US Size 3.75mm hook, Tapestry needle for weaving ends
Gauge: Motifs measure 10in across using 4.25mm hook, Final measurements: about 41x41in
Maybe my favorite pic by Kaelyn of her sample blanket – we have a lot in common lol – Head to Kaelyn’s Instagram for more beauty.
Welcome to the CypressTextiles continuous JAYG tutorial for hexagons using PLT and SC. This sounds scary, and it can take a moment for it to “click” but I promise it’s easy. Nearly any JAYG can convert to be worked continuously.
So this is a mouthful… Let’s break it down:
Continuous: The join will flow from one motif to the next, without breaking the yarn, tracing around the motifs following a special path. Think of making a drawing without picking up your pencil. We’ll start and stop at the same place. (I have a Continuous JAYG – or CJAYG – masterpost!)
JAYG: This means the motifs will be crocheted together as their final round, instead of being seamed with crochet stitches or with a tapestry needle. Since we are joining continuously, the Hexagons will look like they’re joined on the final round as normal, but this is the illusion of the “special path” I talked about. (I have some JAYG tutorials!)
PLT: The “Pull Loop Through” technique is where you join a stitch to its corresponding stitch on the adjacent motif using a method that I will explain in the joining instructions. (I have a separate PLT tutorial!)
…with SC: For this blanket, we will be using US single crochet. You can substitute HDC in for a wider join, and you don’t have to change anything. If you want to use DC to get an even wider border, you may have to do some fancy footwork at the corners.
Materials
A pile of hexagons, with the same stitch count around. It doesn’t matter what the pattern is. For these Hexagons I used a mix of different 4ply Yarns from my stash.
If you’ll be filling in the half-hexagons on the sides, set those to the side for now. They’ll be added in once all of the full hexies are joined together.
Joining yarn – you’ll want to have full balls of this, as one of the joys of joining continuously is that you eliminate having to weave all those ends. If you have a bunch of shorter lengths of your joining yarn, you’ll cancel that fun part out. Boo!
Abbreviations (US Terms)
ch-n chain n number of times
PLT Pull loop through
RS right side of motif/blanket
sc single crochet
sp space
ss slip stitch
Setup
Before you begin, choose your motif layout. For my hexagon blankets I like to square the edges off by adding in half-hexagon motifs, and then filling in the “zig-zag” sides to make a perfect rectangle. You can choose either hexie orientation from the diagram below, but be sure your opposite sides start and end with a half-hexagon as shown. This will help when you’re filling in the zig-zag sides. If you don’t want to fill these sides in, you can easily start and end these rows with a full hexagon instead, and adjust the join path to accommodate.
For this blanket the orientation is with the half-hexies along the sides; however, when joining, the blanket will be rotated like the photo below. The green spot indicates where the join will start and stop.
Here is the diagram you will follow for this tutorial. The start/end point is labeled, and the special path is drawn in using colors to represent the steps. Along the way there will be “Close-ups” (areas circled in blue) where detailed explanation is needed.
Part 1
Work down the first column of hexies (Red portion of path)
Using joining yarn, ss in center st/sp of the corner located at the start/end point, (3 sc in the corner st/sp, sc in all sts to next corner) 4 times, 2 sc in corner.
Make 2 sc in the top right corner of the second hexagon in the column.
Close-up A
PLT performing these 3 steps:
Remove loop from hook as shown in photo above.
Insert hook in the stitch shown in the photo above. When these motifs are placed adjacent to one another, this stitch is the corresponding st to the one that just been worked on the motif-in-progress.
Grab loop as shown in photo below.
Finally, Pull Loop Through to front of work. This is the actual maneuver which joins the motifs – the PLT.
Work the next sc st, remove loop from hook insert hook front to back through next st on adjacent motif, grab loop, and Pull Loop Through. In the photo below, the loop is ready to be pulled through.
Now do the same PLT in all sc sts across to the next corner, sc in corner, PLT, 2 sc in same corner.
Work around 3 more sides of hexagon as normal, and make 2 sc in the next corner as shown in photo below.
Repeat for the next motif in this column, joining the top side again.
And once more, but this time, stop short so only 3 sides of last motif in column are worked as shown in photo below, and also shown in main diagram. This concludes Part 1.
Part 2
Work up sides of motifs on next column, joining only the far right sides to the piece (Orange portion of path)
Join across side as before, ending with 1 sc in the corner as shown in the photo below.
Close-up B
Ch 1, sc in the corner on the next motif located above this one. (Solid grey in the photo above.) PLT in the stitch marked with an arrow below.
The photo below shows the hook pointing to the skipped corner st on the motif to the right.
Join the side across to the next corner as normal. Place 1 sc in the corner.
Close-up C
Remove loop from hook, insert hook front to back in center sc on upper right motif, then from back to front on lower right motif as shown in photo below. Grab loop and pull through both corner sts to join all 3 corners together. Sc in corner to complete it.
Use these methods to join the remainder of the motifs in this column
When the top is reached, Part 2 is complete. I call this the “flag” stage because the motifs look like little flags to me!
Part 3
Work down the left side of this column of motifs, completing their join to the piece (Yellow portion of path)
First, work around 5 sides of the motif, placing 2 sc in the next corner as shown in the photo below.
Close-up D
Remove loop from hook, insert hook front to back in the center st that was previously skipped on part 2. Make sure to put the hook under the ch-1 sp as well. Grab loop as shown in photo below, and PLT.
2 sc in next motif corner, and PLT as shown below.
Complete join of this side, and work 3 sides around motif, repeat corner join as in Close-up D.
Continue to join down left side of motifs to end, but stop short working only 2 sides of final motif as shown in main diagram. Part 3 is now complete.
Working across the blanket, join the remainder of the motifs in columns, working Part 2 and Part 3 as shown in main diagram. All remaining motifs can be joined with the methods discussed so far, working all the way up to Part 4 (green portion of path).
Below is a photo of the third column of motifs in the “flag phase.”
If there are any questions at this point, please leave a comment!
Part 4 coming shortly!
Cant wait to join your hexies? Use a partial CJAYG!
Joining motifs has got to be the main reason why people are led to my websites. I cannot sew to save my life, so I have learned to get creative with the way that I join my motif pieces.
On social media venues, the most frequent question I get asked is what is my favorite way to join. Well, I like joins that use the fewest cuts as possible. If I can join continuously, I do it and if I can’t, then I do a traditional JAYG. I learned to JAYG originally from traditional designer, Priscilla Hewitt (my crochet idol!) – many of her lacy square motif blanket patterns use a flat braid JAYG, and then I reinforced my skills through the contemporary granny JAYG by Lucy @ Attic24.
Okay, so let’s talk about a partial continuous JAYG that I am using for this hexagon blanket.
When can I use this method??
To work this method, you’ll already need to know how to JAYG and Continuous JAYG. The actual join I am using is from my Geometric Lace Pattern.
If you’re making a hex blanket where your motifs are joined using a single color (white, grey, it doesn’t matter the color) like in the examples in this mini-gallery of beautiful work by talented crochet artists, then you can use the method that I describe in this post. In my case, I am joining with KnitPicks Chroma, which is a yarn that changes color, so technically my join is multi-color, but it’s the same yarn strand, so I can still use this method.
If your hexagon motifs are joined with the final color of each hex, then you won’t be able to do this particular Partial Continuous JAYG method. I still recommend a regular JAYG on the final round because aren’t you tired of whip stitching? 😉
Here are some examples of blankets that couldn’t use my Partial Continuous JAYG method:
Okay, got that? Now that you understand when you can use it, here’s the method…
Partial Continuous JAYG: Hexagon Edition
This join takes up to 3 hexagons at a time and joins them together. For example, the pink yarn circles the next 3 hexes that I’m going to join continuously.
Below is a rudimentary illustration of the path that you will follow as you continuously JAYG, starting where the very end of the pink yarn is, and following around until you get back to the center after joining all 3 hexes in a “clover” type formation. Where the yarn crosses over onto itself is the end of your join… The yarn leads off the page but that area should be ignored. Once you have all 3 joined, cut yarn, pull yarn tail through to the back, and weave tail. Of course, I won’t be explaining the whole C-JAYG process here. See the Related Links above for more info on that.
In the photo below, I have joined the first (darker olive green) hex, I made it back to the center, and I started joining that pale sea foam hex to the right. In the photo, I have finished one side of the pale hex and I am working on joining it to the existing blanket on the second side.
In the next photo, I have finished joining on the second hexagon of the 3, and I am back to the center again.
Now, the third hex is joined in, and I am heading to the center of the 3 hexes to finish up.
Here, I have pulled the tail through to the back and I’m ready to cut it and weave. This is a view from the back of the blanket.
Okay, now that those 3 hexes are joined, I’ll pick my next couple of motifs. These two circled in pink below are what I’ll be working on. There aren’t 3 together there, but I still want to avoid weaving as many ends as possible, and I figure the more I join continuously, the less likely my blanket is to fall apart somehow.
here is the path I’ll follow. Starting near the top where the yarn end touches, follow around the half-hex and then around the full hex until it’s all joined up. The “raw edge” of my half-hex will be bordered by the edging of the blanket, so here it will mot be worked over.
I’ve finished the half-hex including joining the edge where it touches the existing blanket, and now I’m ready to go around the full hex.
My blanket, in its current state. I know it looks curious with the mismatch half-hex bits and the diagonal slant on the right hand side… I’m using the techniques from my Cottage Quilt pattern to make this design. Been working on this in stolen spare moments so it isn’t complete, but I still wanted to share my joining method in case anyone wants to use it. 🙂
You can do a partial join for squares too!
Quick tip for my Gelato pattern or any blanket you are making that has different size granny square motifs.
You’ve heard of the Continuous JAYG – a great way to make a sturdy join that saves you from weaving in hundreds of ends – but it would be difficult to join this random placement of multi-size squares with that completely continuous join. So what I did was to locate the areas where several same-size squares are lined up in my reference blanket (a Gelato I made in the past – see below).
I made 2 identical Gelato blankets for a custom order, so as you can see in the photo above, I joined adjacent same-size squares continuously. Then, I joined the larger squares in, picking up and joining in the sides of the already connected pieces as I went, so as to incorporate all squares of the blanket.
Essentially, this blanket was made with one part Continuous JAYG, and one part regular JAYG. I saved over 100 ends between the two blankets with this method. Comment with questions and I’ll clarify anything I can!
If you’ve followed me for any length of time, then you probably know that I have an obsession with a certain six-sided shape. I love creating them, and then coming up with the half-motif to fill the sides, and deciding how I’ll fill in the zig-zag sides to square it all off. The whole process is so much fun to me. And hexies are just tops!
Over the years, I’ve designed several hexagon blankets, and then made some joining methods to go along with them. Browse my website with a search for the word “Hexagon” and you’ll see it all!
Painted Hexagons (Rav link) remains one of my favorite hexie patterns. I dug it out of the vault and grabbed the leftover cotton basket that I used for the original. I used RICO Creative Cotton, Patons Grace, and some Annie’s size 3 thread. Basically all the stash cotton I had at the time (in 2014)!
Then *dun-dun duuunnnnn* I pulled out the border and the join.. Why?!? Because I want to demo a hex join and I don’t have any spare hexies laying around 🙂 Plus it’s also the perfect time to make this blanket bigger! I’ve had a really fun time over the past week making some comforting granny hexies after wrapping up a huge deadline.
Granny squares are like the mashed potatoes of crochet. They’re like the let’s watch Grease in our PJs of crochet… The hug from ma.. The early AM cuppa when the house is still asleep.. I think you get the idea. And for me, even more comforting than the granny square is the granny hexagon. True love! ❤️
The original hexies change color each round, but to save time I’m doing multiple rounds in one color, and even adding in some solid ones. I only have 2 half-hex motifs because I can’t find the others, so those extras will be solid as well.
Keep your eyes on this blanket because I’m writing up a new join tutorial for it! I’ll post the updates down below with FO pics when it’s all done, plus links to the join and updated Painted Hexagons pattern (coming soon!)
Painted Hexagons is a beautifully constructed piece that will have you feeling like an artist every time you make it. If mobility is a priority, you can crank out all of the motifs on the go, then join them (either with the continuous join-as-you-go in the pattern (it’s best to have already practiced with a continuous JAYG), or with your preferred method)! Then add the simple border and marvel at your updated granny hexagon blanket. Truly a masterpiece!
For my sample blanket, I used light weight stash mercerized cotton yarn in a variety of colors and a G (4.25mm) hook. I crochet tighter than the average bird. You could use any weight yarn with your favorite hook. My finished blanket in this pattern with this yarn and hook is about 32×42”.
July’s featured entrepreneur is Makenzie Pearson of BQueen Collection. Makenzie and I first met when I became completely smitten by her yarn box dye kit. I had my first yarn dye experience with Safflower and wrote all about it in a blog post. Check out that yellow! I’m still not completely over it, and I’ve probably used this photo in ten different places, including a Facebook profile pic. Can you blame me?
As Makenzie grew her business and began to introduce new yarn-dye products, she came up with the idea to create custom dye boxes, working one-on-one to suit the maker. Of course I had to get in on it! And so Makenzie contacted me personally to discuss my color preferences, and she was able to come up with a really gorgeous palette of dye stuffs for me. (Side note: This careful attention to the customer might be my favorite thing about BQueen!)
Read about the natural materials used and the beautiful resulting yarn in my custom dye box blog post. Just try not to drool.
The yarn dyeing is really something, but I think what most people picture when they hear BQueen Collection are those absolutely gorgeous handmade hooks.
Photo from BQueenCollection.com
I was immediately wowed when I saw the behind-the-scenes video of Makenzie’s business partner (and husband!), Brian, making the famous wooden hooks. And then the fact that Makenzie carves and shapes the tapered head is absolutely incredible. Check that before and after in the photo below. When you teach people more about your process, it makes owning the final product so much more special. Love that personal touch!
Photo from @BQueenCollection on Instagram
Recently, my relationship with Makenzie grew from B2B to crochet buds when I asked her if she would be interested in testing patterns for me. What an exciting day it was when she came on board as a member of my Tester Tribe! I’m pleased to announce that she has worked up a sample for the inaugural issue of a very special upcoming project. Stay tuned for that!
Sneak peek! • Photo by Makenzie Pearson
In the meantime, BQueen has been busy introducing crochet patterns into its repertoire – pssst, go look at the Aven Square – and now it’s time for me to test a pattern for Makenzie! Squeee! Small businesses supporting each other is the bees knees!
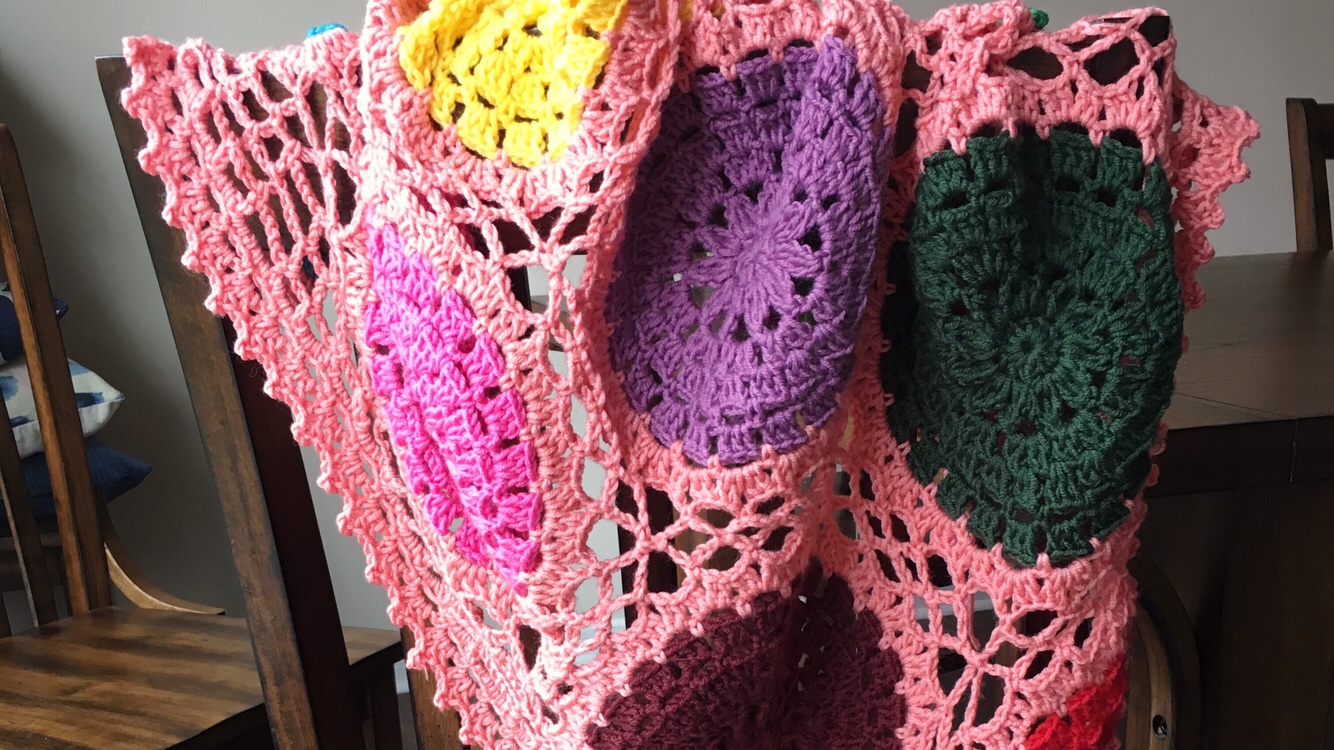
The coaster pattern that I tested has my heart right now. I was going to make just one, but then I found myself hooking up a set of six. And if I’m 100% honest, I absolutely could not resist… I might have accidentally designed a sweet lace join to use the coaster pattern as a blanket motif. I couldn’t help it you guys!!
For now, take a peek at this beauty, made in Scheepjes Catona (affiliate).
The beautifully written pattern and supplies + more will be included in a specially curated collection of goodies that BQueen calls the Black Box. Peachy is the theme of the newest box, and you can buy one starting Wednesday, July 26, 8AM through July 27, 8AM. That’s right! Just 24 hours to be one of the lucky 10 recipients. Run, don’t walk for this exclusive experience!
And now, let’s meet Makenzie! She’s a Colorado-based mother of two whose dream of running a successful business has taken her craft to new heights. Say hi!
I sat with Makenzie over a cup of coffee (okay with about 600 miles between us) and picked her brain. As someone who is working on building a crochet empire, I wanted to know more about BQueen Collection as a small business. Here are the details of our coffee talk sesh.
Q In the Crafting section of your About Page, you mention you’ve been knitting for two decades and crocheting for just six years. What made you pick up the hook, and how did you learn to crochet?
A I think I finally just thought, I am going to learn this, and so bought some very cheap acrylic yarn and a cheap hook and just made myself learn. My very first project ever (and I mean, before I knew how to work in rows or even chain), was the Snowflake Afghan. I had to look up every single abbreviation and then learn that specific step, using YouTube videos. It took me about five attempts to get one snowflake correctly done – but I really enjoyed the challenge and how different it was from knitting.
Q What ignited the spark in you to evolve your hobby into a new business venture? How did the idea for BQueen Collection come about? Also I’m curious which came first: the natural fiber dyeing, or your stunning handmade hooks?
A Like many others, I dabbled in the selling of my handmade items for years – mostly to family and friends. I tried to have a successful shop on Etsy, but I just couldn’t compete with my competitor’s impossibly low prices and I struggled to be unique. I knew I wanted to sell, but I just couldn’t find that one product that made BQueen Collection stand on its own. Then when I was pregnant and my husband bought a lathe, I convinced him to try and turn a crochet hook. He was sure they wouldn’t sell, and so we made a bet that if we sold two within a month we’d switch BQueen to crochet hooks and develop a niche. What is confusing probably to people is that although he makes 75% of each hook, I run the business and do everything else and he’d prefer to just make the hooks. So – it’s always me on IG, answering emails, etc.!
I’ve actually only been dyeing fiber for a little over a year. I came up with the Dye Box subscriptions before I even knew how to dye, and then learned right before the product launch. I love it – I love working with color and bare fiber and just experimenting. I am still such a beginner, but just like any other artwork, you really can’t make a “mistake” – it’s all art. I love my huge 100 qt pot and playing with the natural dyes. I’m not a super “natural” person – I like a good ol’ 409 manic cleaning, but something about natural dyes with yarn is what I’ve stuck with.
Q Your website and blog are very stylish and vogue, which is not so common in the world of crafting and fiber-works. Why do you feel this is important, and what is your inspiration?
A Oh gosh, vogue? I don’t even hardly know what that is – isn’t it a magazine? LOL. I am not “hip” or “trendy” in any way. It’s not like my home matches my Instagram feed – I have gross throw pillows that still need covers and crayon on the walls and I step on a toy at least once a day. BQueen is much more organized and cohesive than my life! I try to balance the “behind the scenes” but still maintain professionalism – but I really enjoy even the work that goes into branding. I think packaging, branding, etc., are sometimes more important than the product. The customer is buying an experience, not just an item.
Q What are your favorite aspects of being an entrepreneur, and also what sacrifices have you had to make to be successful at what you do?
A I love having my own business, making the rules and following any creative aspiration – that’s the best. I struggle following leadership and I need creative outlets. Brian and I sacrifice a lot of free time for our business, but we’d rather be doing this business than any other. It’s hard – sometimes sales are low and you’re stressed or too high and you’re just overworked. But providing income for your family that is from your own artistry is empowering. It’s also hard to sometimes find enough time for all of your ideas – there just isn’t enough time in a day! So, prioritizing is a must.
Q What are three key pieces of advice you would give someone who is just starting down the path of evolving from Casual Crafter to Crafty Business Owner?
A 1) Find your own brand – take your time, plan out your logo, packaging, brand image, and style. Find a way that makes customers know it’s your package in their mailbox before they even open it. Find a signature for your brand, and make sure it matches the essence of your product. 2) Don’t undersell. Yes, someone probably already sells what you make for a lower price – you have to let that go and not drop to that price point. Charge a fair price for you because “just covering the cost of materials” is not a successful business. 3) Give. Your. Product. Away. Find influencers – people you admire, the “untouchables” on social media that are in your niche, and pick their brains, send them your products for reviews, etc. Make good connections – put in the effort for the positive friendships/business relationships on social media and let go of the negative vibes. We owe all of BQueen’s success to the relationships we’ve built on social media – connecting with the right people can greatly impact your business success.
And that’s a wrap! I hope you enjoyed this dive into the entrepreneurial endeavors of BQueen Collection with fabulous owner, Makenzie Pearson. Be sure to follow on Instagram and Facebook, and sign up for the newsletter to see the latest and greatest from BQueen.
Tune in next Month to read about another amazing handmade business!
You guys!!! I have a super fun pattern published in the most recent (July 2017) issue of Simply Crochet Magazine. Scheepjes teamed up with the popular crochet magazine to create a Shawl Special, an insert with five beautiful shawl patterns by some of the talented Scheepjes bloggers. It is a total honor to be included with such talented ladies as Esther of Happy in Red, Carmen of Crafty Queens, Nerissa of Miss Neriss, and Esther of It’s All in a Nutshell.
(Buy this issue here to see the shawl special and more!!)
So here it is! My Coastal Garden shawl all laid out. It’s like a mix of a rectangle and a vortex shape.
A couple of close-ups coming up. This was actually my first shawl ever (I had to convince myself it’s really just a small blanket lol!) and the first time I blocked anything also. Blocking was actually really fun! My husband bought me that foam puzzle piece flooring – 4 large squares that piece together – and a couple packs of pins. I was short on time, so I sprayed it with water and then set our industrial strength fan in front of it… Amazingly, it worked like a charm!
And find the pattern – along with 4 more gorgeous patterns and a free shawl pin (!) in this month’s issue of Simply Crochet Magazine.
Instagram
I also wanted to share a bit about the motif I used for this piece and the inspiration behind the design and color palette.
The aqua and purple are inspired by the Dendrobium Orchid.
Take one look at these breathtaking flowers, and you’ll see why I instantly fell in love with them and had to use the colors in my shawl.
Why the stripes though? My thought process for the flower motifs and stripes stems from the 2012-13ish fashion trends.
onewhimsylane.com
I never could let this trend go, and every time I see these two together I think of a new blanket idea. You think that’s crazy? You should see my wardrobe 😜❤️❤️
Pick up your issue of the magazine, or if you’re a subscriber I hope you enjoy the Coastal Garden pattern! It was fun to write, and a blast to create. Enjoy!
* Affiliate links are awesome! Shop through them to support this website at no extra cost to you ❤️
Who remembers that Sesame Street song??? I just knew it would be on YouTube, and yep! Go ahead… you know you wanna watch it 🙂
Today I’m getting into this spirit by turning some (111!) squares that I made last year into 2 blankets for my little cousins on their birthday. They’re 4 years apart, but born on the same day! Wowzers!
Here are some old photos of the squares I’m using today. They are the extra pattern tester squares, photo model squares, etc.. from the Vibrant Vintage CAL that I hosted in 2016 using Stylecraft Special DK (affiliate) – All 33 square designs are represented here and I love these squares enough to frog all the edging and joining and give them new life as a pair of birthday blankets.
Here is what my living room looks like at the moment:
I’ve frogged most of the edging and joining of the squares that were previously joined up for tutorials and what-not. 48 of the squares have a DC round of edging already on them. They are laid out as a blanket in the photo above. 16 were joined together with a Border, but I frogged the border and I kept the joined part. That’s the center mass of squares that you see… I’ll be adding the remaining squares onto that for an 8×6 motif blanket.
The other 63 squares (in the pile) are not edged, and I think I’ll join them as they are, in a 9×7 configuration. That way the dimensions of the 2 blankets are fairly identical.
So, here we go… wish me luck! I’ll update y’all as I work! 🙂
I’ve worked around the perimeter of the center 16 squares, which were previously joined. I used PLT JAYG and attached one side of 16 more squares. They look like little flags hanging off!
Now I’ll use a continuous JAYG to create a 6×6 square of blocks. I used a freebie app to make a quick (and poorly drawn) little diagram of the joining path I’m about to take in order to join these blocks continuously. This is all in the name of speed and eliminating ends to weave. The red circle is where I will start and stop.
Progress of joining these squares (bonus cat photobomb):
First Blanket joined, and working on edging. This is my freebie edging pattern “Treble Scallop”
You can see the various different DC edging colors that I used for each square. This wide variety is because originally these squares were made into small 16-square blankets and used for joining and Border demos, tutorials, and patterns. (Look in my “patterns” tab on the menu and you’ll find lots of free jons and borders.)
I decided to keep all the funky mismatch square edgings because it adds to the patchy and full-of-love look. To add further to the patchwork feel, I made the edging in purple!
And I’m joining the second Blanket now! These squares are not edged so I’m just joining them in white, as-is. I’ll still add a bright Border so it’s not too different from the other one.
I’ll post FO pics soon!
Thanks for visiting and seeing how I turned something old into something new!