
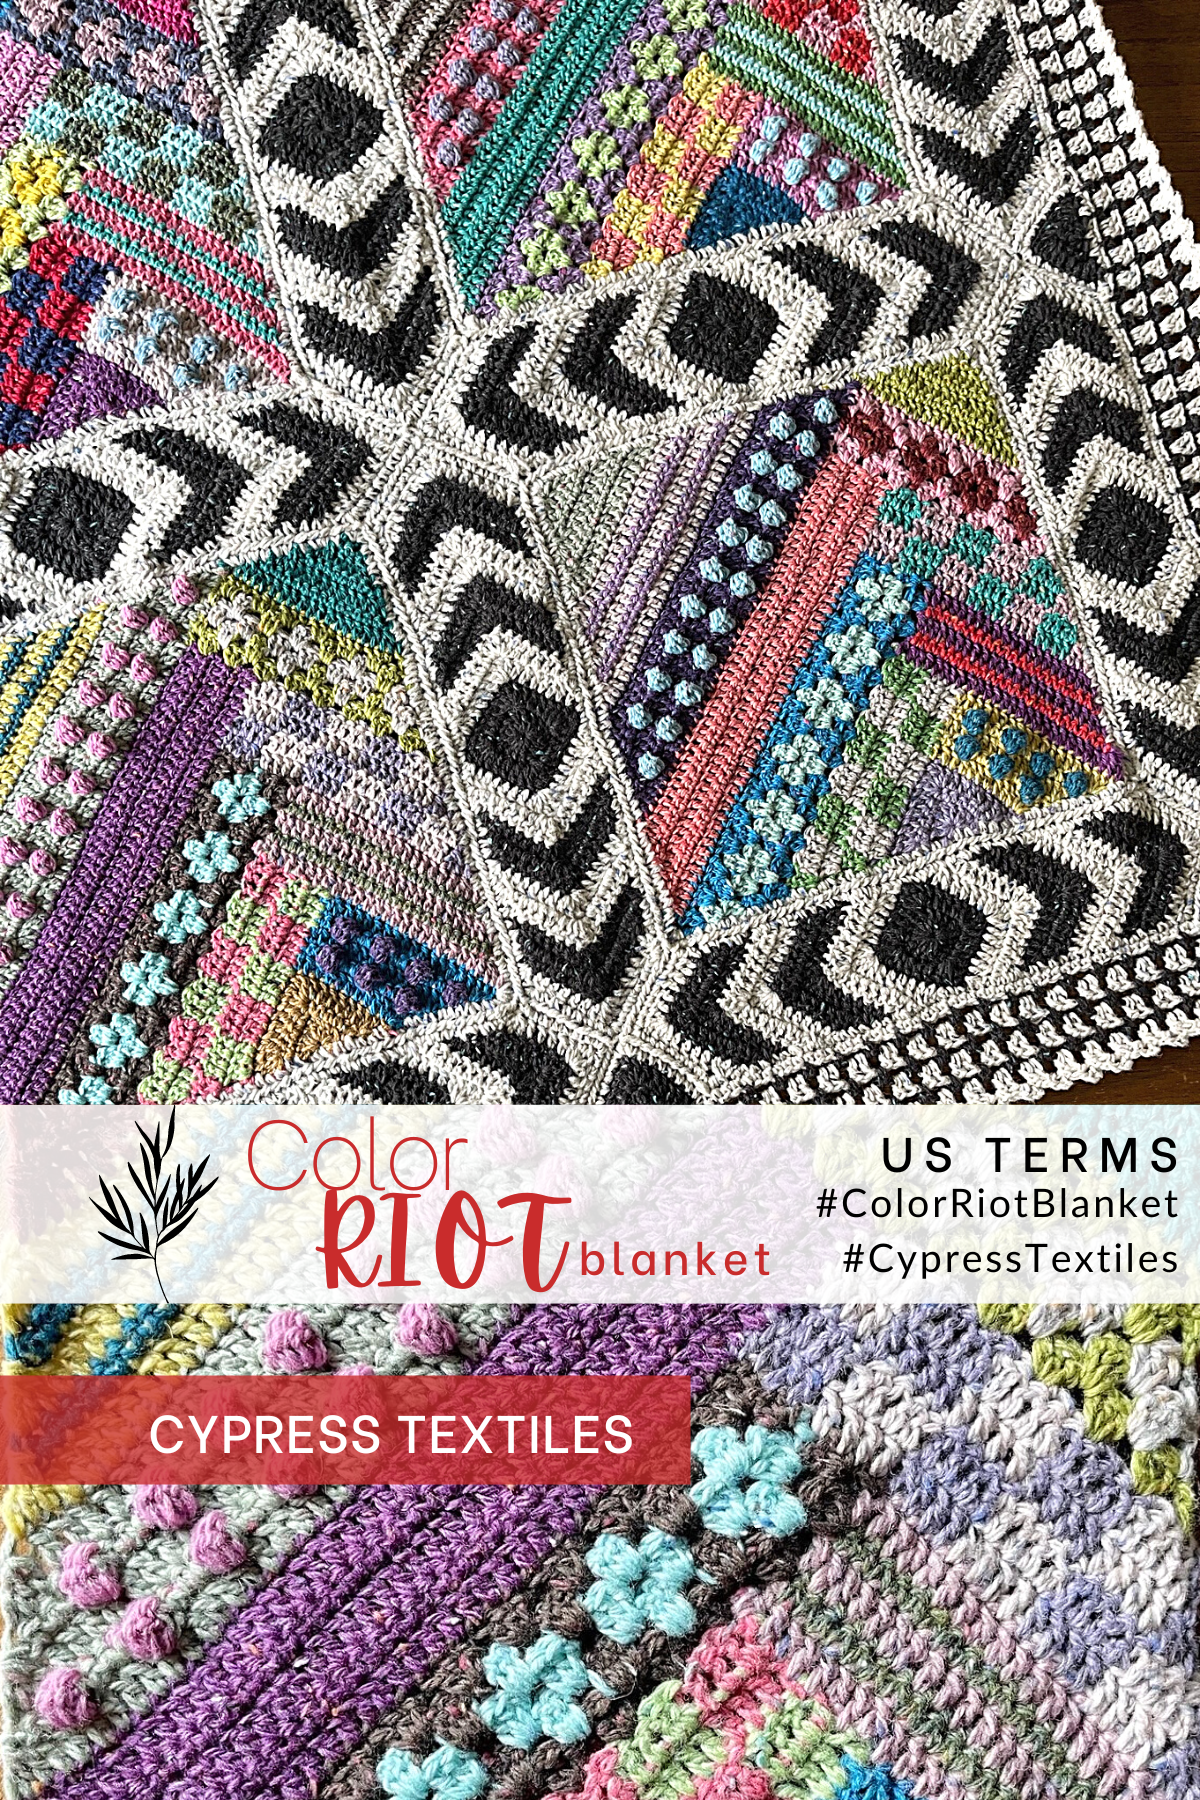
Hello, lovely crafter! Today I have a special release for you – The Color Riot Blanket free crochet pattern! Wildly colorful motifs come together more simply than you think. Helpful instruction to take care of yarn tails makes this a calming piece, perfect for remnants. Express yourself with this color riot!
You can hide all sorts of odd colored remnants in this blanket and it will look wonderful. This piece works great with different lengths of remnants as well. Use them all! Omit the border motifs and just join the Color Riot Motifs together if you like, for a whole different look.
PDF Format
The condensed PDF version of this pattern is available for convenient printing on Etsy and Ravelry, and both US and UK Terms PDFs are included in the purchase.
This pattern is in US Terms – Click here for UK Terms
Project Details
- Skill Level Adventurous Beginner
- Measurements Approximately 48x58in before blocking (Gauge is not necessary for this project)
- Materials Scheepjes Terrazzo Yarn (details below), Size 3.5mm Crochet Hook
- Social Media Instagram, Facebook, Twitter, Pinterest, Etsy, Ravelry: CypressTextiles
- Hashtags #ColorRiotBlanket #CypressTextiles

Yarn + Affiliate Links
Shopping through these links will gain me a small commission to support CypressTextiles, at no additional cost to you!
Note: This pattern is written for stash busting so there are no yarn amounts listed. Simply put together at least 10 colors of yarn from your stash and create as many squares as your heart desires! This pattern will show off any colors wonderfully and is a great way to use up those odd remnants that you feel don’t work in any project. For your convenience, the join and border are written for any size blanket.
Yarn Used in Pattern (Light Worsted):
Scheepjes Terrazzo Yarn
- 1 x Terrazzo 10g Colour Pack
- Head to Jimmy Beans Wool or WoolWarehouse to shop this yarn through my affiliate link.
- 7 x 50g balls each of the following:
- Head to WoolWarehouse to shop this yarn through my affiliate link.
- CC1: Pergamena – 745
- CC2: Ardesia – 743
Alternate Yarn Suggestions:
- Any of the following Colour Packs will work for this pattern, using their appropriate hook sizes:
- Catona Colour Pack – WoolWarehouse
- Metropolis Colour Pack – WoolWarehouse
- Stone Washed/River Washed Colour Pack – WoolWarehouse

Repeat and Bracket Guide
Square brackets [ ] are used for small repeats: 4dc, [2dc, 3tr, 2dc] 2 times
Asterisks *are used for repeats that include small repeats: *5dc, [1ch, 1dc] 3 times in next ch, rep from * 3 times
Round brackets ( ) are used when a string of stitches are worked into the same spot: (3tr, 3ch, 3tr) in next st
Stitch Counts are given at the end of rows where necessary, in the following format: [12 dc, 3 sp]
Tips and Notes
- Weave your ends after each time you cut the yarn to avoid having to do them all at the end.
- Please read the stitch guide for any abbreviations.
- To get a neater result, I do not “chain up” for the first sc of the round/row. Jump straight into the first sc.

Stitch Descriptions (US Terms)
- beg beginning
- beg dc beginning double crochet: (1sc, ch1) – counts as 1 dc
- beg dc3tog beg dc, (yoh insert hook into next st/sp, yoh, pull up lp, yoh, draw yarn through 2 lps) 2 times, yoh, draw yarn through 3 lps on hook
- beg tr beginning treble crochet: (1sc, ch2) – counts as 1 tr
- bobble (yoh, insert hook in st/sp, yoh, pull up lp, yoh, draw yarn through 2 lps) 4 times, yoh, draw yarn through 5 lps
- chN chain N number of times
- dc double crochet
- dc3tog (yoh insert hook into next st/sp, yoh, pull up lp, yoh, draw yarn through 2 lps) 3 times, yoh, draw yarn through 4 lps on hook
- lp loop
- MR make ring: slip knot, ch3, ss in third ch from hook
- rep repeat
- RS Right Side of work
- sc single crochet
- sc2tog insert hook into st indicated, yoh, pull up lp, insert hook into next st, yoh, pull up lp, yoh, draw yarn through all 3 lps on hook
- sk skip
- sp space or chain space
- ss slip stitch
- st stitch
- tr treble crochet
- WS Wrong Side of work
- yoh yarn over hook

Important Pattern Notes
Color Placement
This blanket works fabulously with yarn color packs that have at least 58 x 10g balls that is anywhere from fingering weight to DK weight. Of course, you can use any number of colors that you prefer, especially if you are stash busting, and you can also use just 2 colors, which I think would look absolutely fabulous.
The contrast border motifs are made in black and white using full balls of the yarn you have chosen, and mine took about 10 x 50g balls of each. For the Color Riot Motifs, there are 20 colors each motif as written in the pattern. If you are using a color pack, use up the 10g balls evenly until you notice that some balls are down to a small amount, and you can use those for the smaller sections. This will ensure that you will not run out of larger yarn amounts for the larger sections.
I have not included a color layout because it would be very tedious for you to hunt down every color number for each section, on every motif. Crochet is meant to de-stress you, not re-stress you. As long as you use the balls evenly and pay attention that you will have enough for the larger sections, you will be fine.
How to Change Color
Eight of the twelve Color Riot Motif sections have two-color patterning and the Border Motif has two colors as well. To change between the colors, pull the new color through during the final step of the last stitch you will make in the old color. Work over the color that is not in use. There should be no yarn floating at the back of the work.
For example, “make bobble changing to second color, 1sc” means make the bobble in the first color, but on the final step of the bobble, instead of drawing the first color through all loops on the hook, draw the second color through, then continuing with the second color, make 1sc, and continue as instructed.
Weaving Ends
The pattern instructs how to deal with all of the ends in the pattern. I have written this pattern to create the fewest number of ends possible, and I will let you know how I weave the few ends that do remain.
The condensed PDF version of this pattern is available for convenient printing on Etsy and Ravelry, and both US and UK Terms PDFs are included in the purchase.

Instructions
Color Riot Motifs are made and joined together with border motifs to make this opulent art blanket. Small triangle motifs are filled in and a simple border completes the piece. Use Charted Instruction as needed.

Motif 1 – Color Riot Motif (Make 12)
Note: All sections are started with RS facing. For two-color sections: C1 = first color, C2 = second color
Section 1 – Base Triangle – 1 color
Row 1 (RS) With any color, MR, beg tr, 3dc, 1tr, 3dc, 1tr, turn. [3 tr, 6 dc]
Row 2 2sc in first st, 3sc, 3sc in next st, 3sc, 2sc in final st, turn. [13 sc]
Row 3 (Beg tr, 2dc) in first st, 5dc, (2dc, 1tr, 2dc) in next st, 5dc, (2dc, 1tr) in final st, cut yarn. [3 tr, 18 dc]
Section 2 – Bobbles – 2 colors
Row 1 Join C1 with ss in first st, (beg dc, 2dc) in same st, 10dc placing final dc in tr st, turn. [13 dc]
Row 2 [2sc changing to C2 on second sc, make bobble changing back to C1, 1sc] 3 times, 2sc in final st, turn. [3 bobbles, 11 sc]
Row 3 Working over C2 across entire row, (beg dc, 2dc) in first st, 13dc, turn. [16 dc]
Row 4 [2sc changing to C2 on second sc, make bobble changing back to C1, 1sc] 4 times, 1sc in same st as previous, cut C2, turn. [4 bobbles, 13 sc]
Row 5 Working over C2 yarn tail across entire row, (beg dc, 2dc) in first st, 16dc, turn, cut C1. [19 dc]

Section 3 – Checkerboard – 2 colors
Row 1 Working across short side of Section 2, join C1 with ss in top half of final dc of Section 2, beg dc in same st, 1dc in bottom half of same dc from Section 2, 1dc in side of sc, 1dc in top half of next sc changing to C2, 4dc evenly across remainder of short side of Section 2 changing to C1, starting in tr st, 4dc changing to C2, 4dc changing to C1, 2dc, 3dc in final st changing to C2, turn. [21 dc]
Row 2 (Beg dc, 2dc) in first st changing to C1, [4dc changing to C2, 4dc changing to C1] 2 times, 4dc changing to C2, turn. [23 dc]
Row 3 Beg dc, 3dc changing to C1, [4dc changing to C2, 4dc changing to C1] 2 times, 2dc, 3dc in final st changing to C2, turn. [25 dc]
Row 4 (Beg dc, 2dc) in first st changing to C1, [4dc changing to C2, 4dc changing to C1] 3 times ignoring final color change at end of row, cut C1 and C2 and weave the tails with a tapestry needle. [27 dc]
Section 4 – Stripes – 2 colors
Row 1 Join C1 with ss in first st, beg dc3tog, 16dc across Section 2, 8dc evenly across the short side of Section 3 changing to C2, turn. [1 dc3tog, 24 dc]
Row 2 Working over C1 across entire row, 23sc, sc2tog changing to C1, turn. [1 sc2tog, 23 sc]
Row 3 Working over C2 across entire row, beg dc3tog, 21dc changing to C2, turn. [1 dc3tog, 21 dc]
Row 4 Working over C1 across entire row, 19sc, sc2tog, changing to C1, cut C2, turn. [1 sc2tog, 19 sc]
Row 5 Working over C2 yarn tail across entire row, beg dc3tog, 18dc, cut C1 and weave in yarn tail. [1 dc3tog, 18 dc]
Section 5 – Granny Stitch – 2 colors
Row 1 Join C1 with ss in top half of final dc of Section 4, beg dc in same st, [3dc in side of next sc, sk next dc row of Section 4] 2 times, [3dc in next dc, sk2] 8 times, 3dc in next st, sk1, 3dc in final st, turn. [37 dc]
Row 2 (Beg dc, 2dc) in first st changing to C2, [3dc between next 2 3-dc groups changing to C1, 3dc between next 2 3-dc groups changing to C2] 6 times omitting final dc, cut C1, turn. [38 dc]
Row 3 Continuing with C2, beg dc in first st, 3dc between next 2 3-dc groups 12 times, 3dc in final st, turn. [40 dc]
Row 4 (Beg dc, 2dc) in first st changing to C1, [3dc between next 2 3-dc groups changing to C2, 3dc between next 2 3-dc groups changing to C1] 6 times, 2dc between next 2 3-dc groups, cut C2 and weave yarn tail, turn. [41 dc]
Row 5 Continuing with C1, beg dc in first st, 3dc between next 2 3-dc groups 13 times, 3dc in final st, cut C1. [43 dc]

Section 6 – Checkerboard – 2 colors
Row 1 Working across Section 4, join C1 with ss in first st, beg dc3tog changing to C2, [4dc changing to C1, 4dc changing to C2] 3 times working final 8 dc evenly across short side of Section 5 ignoring final color change at end of row, turn. [1 dc3tog, 24 dc]
Row 2 Working over C2, beg dc, 3dc changing to C2, [4dc changing to C1, 4dc changing to C2] 2 times, 2dc, dc3tog changing to C1, turn. [1 dc3tog, 22 dc]
Row 3 Beg dc3tog changing to C2, [4dc changing to C1, 4dc changing to C2] 2 times, 4dc, turn. [1 dc3tog, 20 dc]
Row 4 Working over C1, beg dc, 3dc changing to C1, [4dc changing to C2, 4dc changing to C1] 2 times omitting final 2 dc and ignoring final color change, dc3tog, cut C1 and C2 and leave tails to be worked over during Motif Border. [1 dc3tog, 18 dc]
Section 7 – Solid – 1 color
Row 1 Join any color with ss in top half of first dc on final row of Section 6, beg dc in same st, 7dc evenly across short side of Section 6, 40dc working over the C1 yarn tail from Section 5, dc3tog, turn. [1 dc3tog, 48 dc]
Row 2 Sc2tog, 1sc in all sts to end, turn. [1 sc2tog, 47 sc]
Row 3 Beg dc, 44dc, dc3tog, turn. [1 dc3tog, 45 dc]
Row 4 44sc, sc2tog, turn. [1 sc2tog, 44 sc]
Row 5 Beg dc, 41dc, dc3tog, cut the yarn, leaving the tail to be worked over during Motif Border. [1 dc3tog, 42 dc]
Section 8 – Granny Stitch – 2 colors
Row 1 Join C1 with ss first st, beg dc in same st, [sk2, 3dc in next st] 6 times, [sk next dc row of Section 7, 3dc in next sc] 2 times, 1dc in top half of first dc from row 5 of Section 7 changing to C2, turn. [26 dc]
Row 2 (Beg dc, 1dc) between first 2 sts changing to C1, [3dc between next 2 3-dc groups changing to C2, 3dc between next 2 3-dc groups changing to C1] 4 times omitting final 3dc, dc in final st changing to C2, cut C1, turn. [24 dc]
Row 3 Continuing with C2, beg dc in first st, 3dc between next 2 3-dc groups 7 times, 1dc in final st, turn. [23 dc]
Row 4 (Beg dc, 1dc) between first 2 sts changing to C1, [3dc between next 2 3-dc groups changing to C2, 3dc between next 2 3-dc groups changing to C1] 3 times omitting final 3dc, 1dc in final st changing to C1, cut C2 leaving yarn tail to be worked over during Motif Border, turn. [21 dc]
Row 5 Continuing with C1, beg dc in first st, 3dc between next 2 3-dc groups 6 times, 1dc in final st, cut C1 leaving yarn tail to be worked over during Motif Border. [20 dc]
Section 9 – Solid – 1 color
Row 1 Join any color with ss in second dc of Section 8, beg dc3tog, 13dc, dc3tog, turn.
Row 2 Sc2tog, 11sc, sc2tog, turn.
Row 3 Beg dc3tog, 7dc, dc3tog, turn.
Row 4 Sc2tog, 5sc, sc2tog, turn.
Row 5 Beg dc3tog, 1dc, dc3tog, turn.
Row 6 Beg dc3tog, cut yarn, leaving tail to be worked over during Motif Border.
Section 10 – Bobbles – 2 colors
Row 1 Join C1 with ss in top half of final dc of Section 8, beg dc3tog, 5dc evenly across short side of Section 8, 40dc across Section 7, dc3tog, turn. [2 dc3tog, 45 dc]
Row 2 Sc2tog changing to C2, [make bobble changing to C1, 3sc changing to C2] 11 times omitting final sc and ignoring final color change, sc2tog, turn. [2 sc2tog, 11 bobbles, 32 sc]
Row 3 Working over C2 across entire row, beg dc3tog, 39dc, dc3tog, turn. [2 dc3tog, 39 dc]
Row 4 Working over C2, sc2tog, [1sc changing to C2, make bobble changing to C1, 2sc] 9 times, 1sc, sc2tog, cut C2, turn. [2 sc2tog, 9 bobbles, 28 sc]
Row 5 Working over C2 yarn tail across entire row, beg dc3tog, 33dc, dc3tog, turn, cut C1 leaving tail to be worked over during Motif Border. [2 dc3tog, 33 dc]
Section 11 – Stripes – 2 colors
Row 1 Join C1 with ss in first st, beg dc3tog, 29dc across Section 10, dc3tog changing to C2, turn. [2 dc3tog, 29 dc]
Row 2 Working over C1 across entire row, sc2tog, 27sc, sc2tog changing to C1, turn. [2 sc2tog, 27 sc]
Row 3 Working over C2 across entire row, beg dc3tog, 23dc, dc3tog changing to C2, turn. [2 dc3tog, 23 dc]
Row 4 Working over C1 across entire row, sc2tog, 21sc, sc2tog, changing to C1, cut C2, turn. [2 sc2tog, 21 sc]
Row 5 Working over C2 yarn tail across entire row, beg dc3tog, 17dc, dc3tog, cut C1 leaving tail to be worked over during Motif Border. [2 dc3tog, 17 dc]
Section 12 – Solid – 1 color
Rows 1-5 With any color, work as for Section 9.
Color Riot Motif Chart

Motif Border Round
Join CC1 with ss in any corner, [working over any stray yarn tails, 3sc in corner, 22sc making 11sc evenly across 2 sections, 1sc at center, 22sc making 11sc evenly across 2 sections] 4 times, ss in first sc, cut yarn and weave yarn tail. [192 sc]

Motif 2 – Border Motif (Make 31)

Center Square
Rnd 1 With CC2, MR, beg tr, [3dc, 1tr] 3 times, 3dc, ss in beg tr. [4 tr, 12 dc]
Rnd 2 (Beg tr, 2dc) in same st as ss, [3dc, (2dc, 1tr, 2dc) in tr st] 3 times, 3dc, 2dc in tr st, ss in beg tr, do not cut yarn. [4 tr, 28 dc]
Side A
Row 1 Join CC1 with ss in next st, beg dc3tog over same and next 2 sts, 4dc, (2dc, 1tr, 2dc) in tr st, 4dc, dc3tog, turn. [2 dc3tog, 1 tr, 12 dc]
Row 2 Beg dc3tog, 4dc, (2dc, 1tr, 2dc) in tr st, 4dc, dc3tog, changing to CC2 in final st, being sure not to pull CC2 too tightly when you bring it up, turn.
Rows 3-8 Work as for Row 2, changing color after every even row.
Row 9 Continuing with CC1, work as for Row 2, cut CC1 and CC2.
Side B
Row 1 Rejoin CC1 with ss in first dc on opposite side of Center Square, beg dc3tog over same and next 2 sts, 4dc, (2dc, 1tr, 2dc) in tr st, 4dc, dc34tog, turn. [2 dc3tog, 1 tr, 12 dc]
Rows 2-9 Work as for Side A, cut CC2, do not cut CC1.
Motif Border Round
Continuing with CC1 and working across all yarn floats and stray yarn tails, [3sc in dc3tog, 1sc, 5sc across next 4 color stripes, 3sc across corner of Center Square, 5sc across next 4 color stripes, 1sc, 3sc in dc3tog, 6sc, 3sc in tr, 6sc] 2 times, ss in first sc, cut CC1 and weave yarn tail.

Motif 3 – Fill Triangle (Make 18)
Row 1 (WS) With CC2, MR, beg tr, 3dc, 1tr, 3dc, 1tr, turn. [3 tr, 6 dc]
Row 2 (Beg tr, 2dc) in first st, 3dc, (2dc, 1tr, 2dc) in tr st, 3dc, (2dc, 1tr) in final st, cut CC2. [3 tr, 14 dc]
Row 3 Join CC1 with ss in first st, working over CC2 yarn tail, 8sc, 3sc in tr st, 8sc, cut CC1 and weave yarn tail. [19 sc]

Whip St Join
Note: If you are familiar with my PLT Join, you can certainly use that join during the Motif Border Rounds. You could also use a joining method that doesn’t add width like Slip Stitch Join or SC motifs together.
- Hold 2 motifs with wrong sides together, and using a length of CC1, ss in first st at right-hand side.
- Using your hook, pull the long tail through the center sc of both motifs, back to front.
- Insert the hook front to back through both loops of the next st to the left, on both motifs.
- Grab the long tail and pull it all the way through to the front of the piece, allowing the whip st to rest flush against the top edge of the motifs.
- Repeat steps 3 and 4 across, inserting the hook through both motifs from front to back in the next st to the left, and pulling the yarn through to the front.
- When the next corner is reached, if there are no more subsequent sides to join, you can weave the excess tail, cutting it down if necessary.
- If there are more sides to join, do so, then cut yarn shorter if needed and weave in.
- Important: Do not pull yarn tail to tighten whip sts, rather, leave them flush against the join so when you open the motifs flat, you can see the sts. This will prevent puckering.

Work Blanket Border
Rnd 1 With CC1, ss in any corner, [3sc in corner, sc evenly across to next corner] 4 times, ss in first sc, cut yarn.
Rnd 2 With CC2, * (1sc, ch3, 1sc) in corner st, [ch3, sk2, 1sc] across to next corner, ch3, rep from * 3 times, ss in first sc, cut yarn.
Rnd 3 With CC1, ss in corner sp, beg dc, * ch2, 2dc in same sp, [ch1, 2dc in next sp] across to next corner, ch1, 2dc in corner sp, rep from * 3 times omitting final dc, ss in beg dc, cut yarn.
Rnd 4 With CC2, * (1sc, ch3, 1sc) in corner sp, [ch3, sc in next sp] across to next corner, ch3, rep from * 3 times, ss in first sc, cut yarn.
Rnds 5-7 Rep Rnds 3 and 4, then 3 again.
Rnd 8 (1sc, ch3, 1sc) in all sps around, ss in first sc, cut yarn.
Finishing
Weave all remaining ends, and block blanket if desired for a neater look.
Yay! All done! Give yourself a fist bump

Copyright Information
No pattern or other material may be reproduced — mechanically, electronically, or by any other means, including photocopying — without written permission of Rachele Carmona. This applies to all content on CypressTextiles.net, BabyLoveBrand.net, and all other sites used by Rachele Carmona including social media. Paid patterns are for personal use only. You may sell your finished crocheted items, but do not use my photos to sell your items.

RACHELE CARMONA
Crochet Designer & Fiber Artist
I hope you enjoyed this free pattern, and I know the diagram and videos will help! They will start going up on this post starting Monday.
The condensed PDF version of this pattern is available for convenient printing on Etsy and Ravelry, and both US and UK Terms PDFs are included in the purchase.
Happy crafting,
Rachele C.

You may also enjoy:
Support My Work
You’re supporting by just being here! You can read my blog (Start Here!), like and comment on socials, and message me for a chat. All of this supports my work free of charge!
- Affiliate links – Shopping through my links supports me at no additional cost to you as I get a small commission through my affiliates. Jimmy Beans Wool // WoolWarehouse // Amazon.com
- Buy my pattern book – I wrote a super neat crochet blanket pattern book, published under Penguin Random House. You can buy it here!
- Browse my self-published patterns – I have over a hundred patterns on Etsy and Ravelry
- Creative Art Blanket Course – Check it out on Teachable
Where to Find Me
- Instagram: @cypresstextiles
- Facebook Page: CypressTextiles
- YouTube Channel: Rachele Carmona
- Pinterest: CypressTextiles
- Tumblr: CypressTextiles
- Etsy: CypressTextiles
- Ravelry: Rachele Carmona
- Teachable: Creative Art Blanket Course