
Hello, lovely! Lately I’ve been thinking of you. Who are you, and where are you on your creative crochet journey? Are you just starting out and still learning the basics? Do you have years of crochet under your belt, but you love sticking to those simple rhythmic designs for a little #craftastherapy? Are you looking for a way to push the boundary of your hook and yarn, and let your creativity flow?

No matter where you are on your journey, you probably feel like creativity is deeply connected to your soul and cultivating happiness. Keeping that creative feeling fresh is so important to get out – and stay out – of those low energy points of life. It happens to all of us. The creative funk.
If you want a creative refresher, I have an idea for you. If you haven’t tried it, you should definitely take a few afternoons to see how you like freeform crochet. The freedom of expressing yourself with fiber art will get those creative juices flowing again.

[Related: Scheepjes Cahlista Colour Pack* – Over 100 colors of Cahlista yarn, in adorable 15g balls, perfect to start creating a colorful freeform crochet masterpiece.]
What is Freeform Crochet?
I think of freeform crochet as moving the crochet hook as you would move a paintbrush, creating shapes and lines – round and square, thick and thin – without necessarily following a crochet pattern. Freeform crochet requires an understanding of how to manipulate the shape of your “fabric” by using different basic techniques of crochet.
It strengthens the connection between your mind and your creation, helping the creative energy flow freely from your mind through your hands and hook, and out into your artwork. I know this may sound hokey, but let me put it this way: freeform crochet is for someone who is ready to set the crochet pattern aside for a moment, and treat the yarn and hook as if they were paint and paintbrush.
You don’t need to be an advanced artist or even a crochet designer to have the command over the art that freeform work requires. You just need to understand a few basics about how crochet “moves” with various crochet techniques. It’s a snap!

Freeform Crochet Basics
In this “Ultimate Beginners Guide to Freeform Crochet Basics”, I discuss a few topics to help you get started, and then offer a basic freeform project to sink your teeth into, as well as plenty of inspiration for you to get even more excited about freeform crochet.
What you’ll find in this guide:
- 4 basic techniques used in freeform crochet
- Tips and tricks to keep in mind
- Abstract Blocks blanket pattern: freeform basics
- Explore freeform crochet: beginner and beyond

4 Basic Techniques Used in Freeform Crochet
These are very basic crochet techniques, so don’t be afraid to mix them to create something beautiful. After I go over them with you, I’ll have a play and combine them together for a quick freeform piece.
- Play with stitch height
- Increase and decrease stitches
- Crochet off of any edge
- Join pieces as you go
Play with Stitch Height
You already know that different basic crochet stitches have different heights: slip stitch, single, half double, double, treble, double treble and beyond. I created videos of tips on how to make these stitches for my Learn to Crochet video playlist. Click each stitch above to see the video. From the double crochet and beyond, each stitch is made taller by increasing the number of yarn-overs.

This shape could make an eye, or a fish, or a mermaid tail – anything you want! The varying height of basic crochet stitches can be used to create shapes and lines in your piece. Use a taller stitch to make a thicker line, or a shorter stitch to make a thinner line, or combine stitch heights to make a wavy line.
Once you get used to using these simple stitches to manipulate the stroke thickness of your “paintbrush”, you can have some fun incorporating bobbles, popcorns, puffs, eyelets, cables, and other textural stitches of varying heights into your piece.
Increase and Decrease Stitches
If you have ever made a chevron or ripple blanket, then you have already manipulated the shape of your piece using increases and decreases. Here is my Soulful Sierra Blanket (a free pattern using Scheepjes Colour Crafter*) which makes use of increases and decreases with extra long stretches of straight stitch in between for a unique look.

With an actual chevron or ripple blanket, you need to keep careful track of your stitch count with all the increases and decreases, because it’s very easy to accidentally gain or lose an extra stitch, throwing everything off. With a freeform piece, you don’t have to worry about that, because you are only adding or subtracting stitches to create that artistic movement.

All you need to remember is, a decrease will create a valley shape, and an increase will create a hill shape. From there, you can play with adding and subtracting different numbers of stitches to create a steeper or shallower hill or valley.
I made a couple videos with different ways to increase and decrease. Be sure to check those out for more tips!
Crochet Off of Any Edge
If you have ever added a border to a blanket, you may have used the technique of crocheting off of a “raw edge”, meaning, you are working into the side of stitches, rather than into the top as you normally would.
Here’s another chevron blanket, Threaded Colors Chevron, also in Colour Crafter – and you can see that the border is worked onto a “raw edge” or into the sides of the stitches.
Here are a few tips for working off of any edge to add onto your freeform piece. Of course, if you have the tops of the stitches ahead, then just work off of them like normal, but more often, you will have to work off of that raw edge.
Tip #1: Work into the side of the stitch, not around the stitch itself
You can see in this pic from Dream A Little Bigger blog that working into the side of the stitch eliminates that big hole that you’d get if you worked around the stitch itself.

Tip #2: Pay attention to how many stitches you work per stitch side on your piece
Work 1 st off of the side of a single, 2 sts off of the side of a double, 3 sts off of a treble, and so on.
The amount of stitches you work per stitch side only matters if you are looking for a completely flat piece. Too many or too few stitches, and your work will pucker or ripple. If you don’t mind this, then just let the freeform spirit flow. I support you!
Tip #3: If you’re after a super clean edge, use this technique
I learned an awesome technique from Susan of Felted Button in this blog post about creating a neat edge for your border. You make slip stitches across your raw edge first. This creates a super clean edge when you work your stitches off of it.

The photo above is from Susan’s blog post showing the clean edge worked down the side of the piece. Head to the blog post to learn how Susan did it! She is a genius.
Join Pieces As You Go
For an uninterrupted artistic flow, if you have to attach a separate piece to your project, use a join-as-you-go technique. I recommend my PLT Join, this way you don’t have to stop what you’re doing and change notions to a tapestry needle. You can just join while you’re in the motion of your project.
These are some pics from my PLT Join. Head to that link for all of the step by step photos so you can attach your freeform pieces together as you go.
In this photo I am ready to attach these two pieces together.

Here, I am in the process of working my PLT Join as you go.

And here, the pieces is joined – all worked as you go.

You can see in the Jose Dammers freeform portraits I have featured in this post, that she attaches the ears with PLT Join as you go, or a similar technique. Super fun!
Now that you have the basic concepts down, let me share some tips and tricks you can use along the way.
Tips and Tricks
I put together some helpful tips and tricks for you to keep in mind while you work.
- Weave ends as you go
- Plan your display method
- Quiet your inner crochet meanie
Weave Ends As You Go
How many times have you finished a crochet project, and thought “blarg, now I have all these ends to sew in.” Well if you are wanting your freeform crochet piece to have the ends sewn in (you can certainly leave them hanging for a neat effect), you should definitely weave them in as you go.


I have created a short bonus video for my most recent crochet blanket pattern, Mateo’s Granny Square Blanket, which shows you one way to weave your ends as you go. Click here to watch the video.
There is also an old blog post from a few years back where I show a few more ways for as-you-go end weaving. I am a huge fan, because having to darn in all of the ends at once is such an arduous task and can stall my project finish in a major way.
Besides, you may know this about me already, but I cannot be bothered to switch to a tapestry needle, and prefer to conduct all hooky business with only my crochet hook. So I always “as-you-go” all of the things.
Plan Your Display Method
Okay, of course you are going to display your artwork like the proud art momma that you are. You have a special freeform crochet baby.. Show off that li’l abstract bundle of joy! But I recommend choosing a display method ahead of time.
If you don’t have a display plan, you may just let your work sit in a WIP basket collecting dust. Or you may have to make last minute adjustments to fit the display method, when you could have had your art piece all figured out. Here are three display ideas for you.
Idea #1: Attach your work to a hoop
This is all the rage! I have just finished the Trinity Mandala MAL by Esther of It’s All in a Nutshell, and those mandalas look awesome stretched on a hoop.


Well those are hula hoops, but if your work is smaller, you can use dream catcher hoops – available on Amazon in different sizes. Anything you make will look phenomenal in a hoop. Find lovely bamboo embroidery hoops on Amazon*.
Idea #2: Make a DIY frame for your art
Every time I read about folks framing their art, whether it be a painting, a cross stitch piece, or another medium, their number one complaint is the framing cost. To keep costs low, buy a small frame, or if your artwork is larger, you can DIY an inexpensive large frame following these 3 steps.
Step 1: Shop Inexpensive Molding
Head to your local hardware store, like Home Depot or Lowe’s, and get some wooden molding. You will find a variety of pretty designs that mimic the look of an expensive art frame. Molding is so cheap and you can get a lot of framing material out of just a couple of pieces, depending on the size of your artwork.

Alternatively, order a (genius) flexible roll of molding from Amazon – check it out* – and you won’t have to leave your comfy chair. Just attach it around the edge and paint as desired.
Step 2: Wood Stain
Pick up some wood stain while you’re at the hardware store, and color your molding piece however you like. Dark, redwood, natural, anything will look great!

Paint is another alternative – white, grey, or any color that matches your decor. Go for a turquoise or another louder color for an antique, retro look. Still don’t want to leave your chair? Find wood stain and paint on Amazon*.
Step 3: Cut and Frame
Measure the molding to the size you would like your frame edges, and cut the molding on the miter so that you can piece the frame together. Use wood nails to attach smaller pieces to the back of the frame to secure it, and also to hold your artwork inside the frame.

We have used this DIY method countless times to frame mirrors, artwork, bulletin boards, and more. It works so well, and is simple and cost-efficient.
Idea #3: Make a pillow with your artwork sewn on
For a wonderfully practical display method, there are a couple of options here to display your freeform crochet art on a throw pillow.

You can either purchase a ready-made cushion or pillow from a home decor store, or you can make your own pillow. Find a pillow form*, use a great DIY pillow tutorial, and then attach your artwork to it when you’re done. Looking for another tutorial? Here’s a lovely one I found from The Girl Inspired with some great DIY pillow tips.
Quiet Your Inner Crochet Meanie
Freeform crochet is all about getting loose and letting your creativity flow. You cannot let your inner crochet meanie criticize your work. Even in your standard issue crochet baby blanket, I believe mistakes should be revered as markings of the human touch. Someone made this blanket with their loving hands, and perfection is not required (or desired in my opinion). But especially in freeform crochet, there is no such thing as a mistake.

Tell your inner crochet meanie to be quiet, and just let go. I wrote a whole series of six free “Relaxghan” blanket patterns that foster “letting go”.” They’re designed with peace in mind to give you that freedom of expression. Freedom of color selection, motif placement, stitch choice – just the thing you need to erase self-doubt and just create.
If you’re experiencing a bout of creative funk or you just have that broody artist thing going on (you know what I’m talking about), I recommend you use freeform crochet, with its loose boundaries, as a springboard to get back into creating. Then display that artwork like you’re Vincent van freaking Gogh.
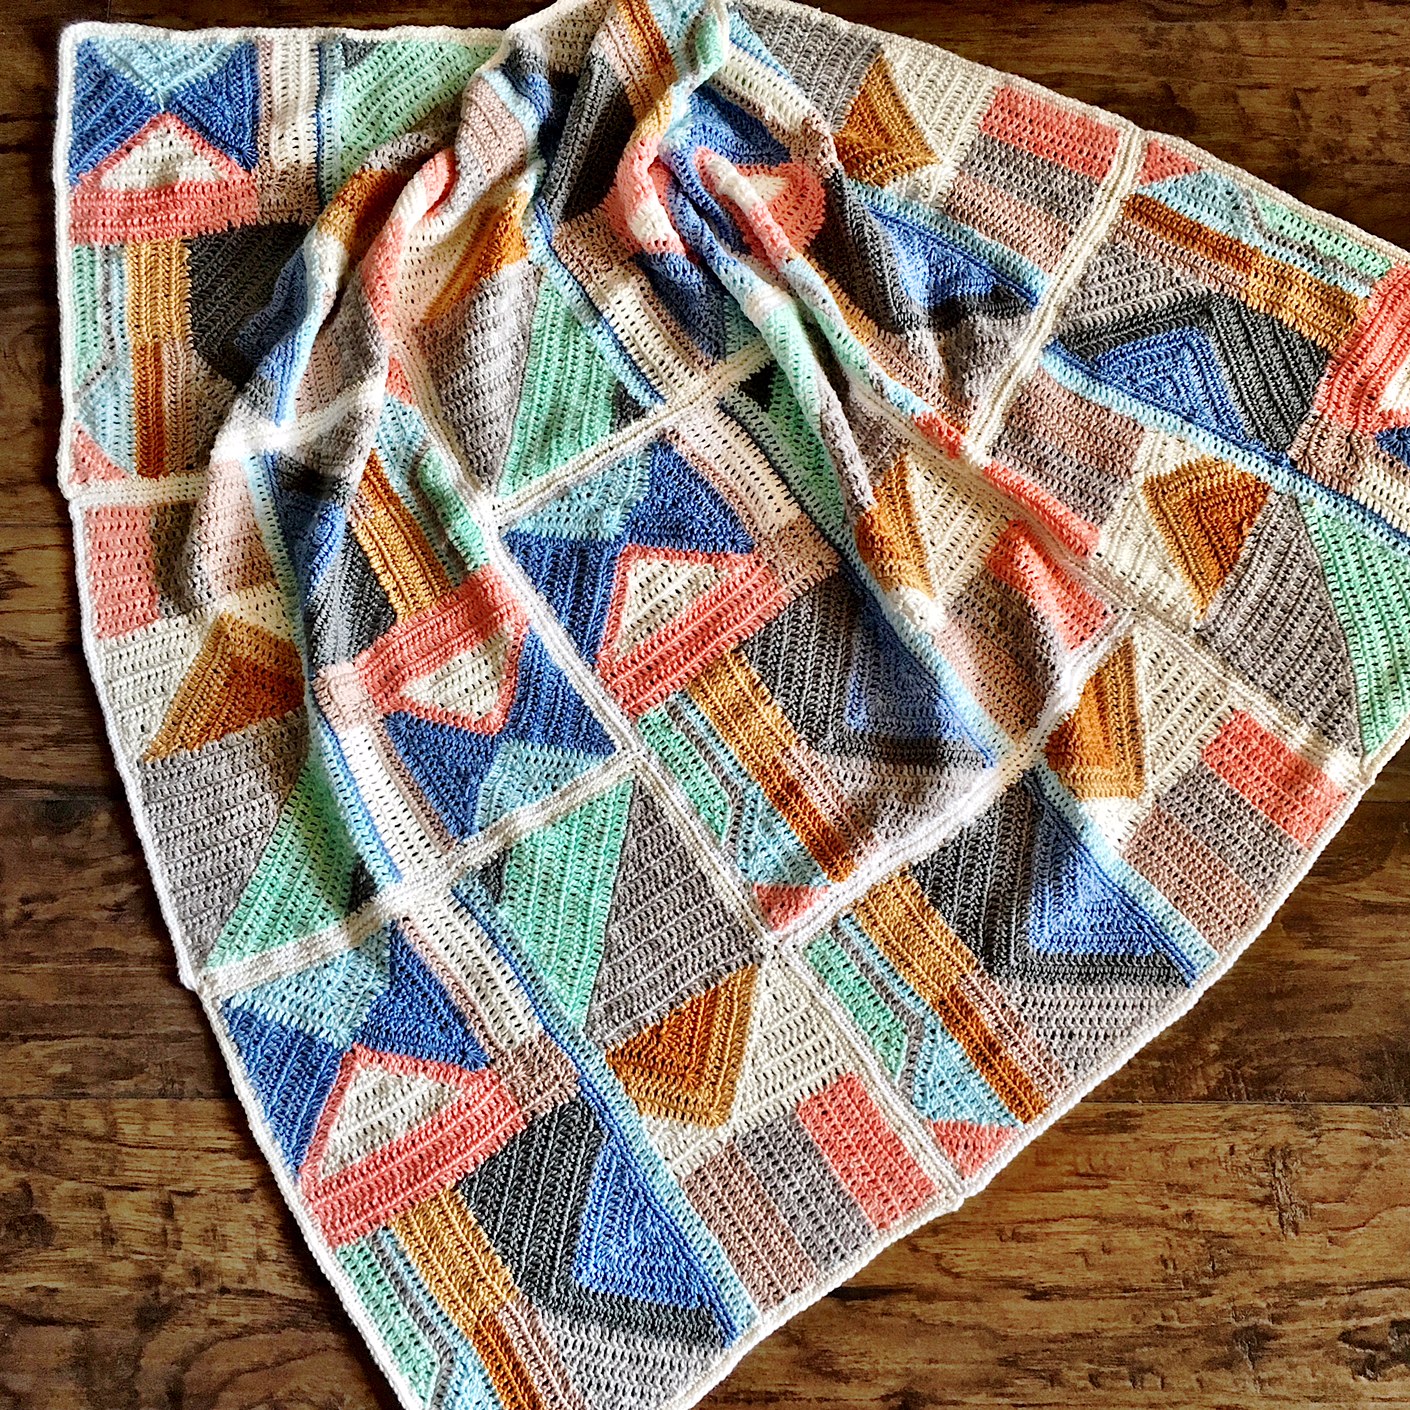
Abstract Blocks Blanket Pattern: Freeform basics
Now it’s time for you to meet my latest WIP! Well, the pic below shows the completed blanket sample I worked up for my book, but I am making another one to use up some of my stash Scheepjes Catona.

Abstract Inspiration
In my book, The Art of Crochet Blankets,* each design is inspired by a non-crochet artist/maker. For Abstract Blocks, my inspiration was this fabric shown in the photo below, from the BOUND collection by April A. Rhodes.

I drew from some of the visual elements in April’s design, and translated them to a freeform crochet motif of sorts.

Yarny Info
To make this blanket, I am using Scheepjes | Catona in random colors from my stash (see below). Shop this yarn – shopping through these affiliate links is a great way to support CypressTextiles, and it doesn’t cost you any extra!

I’m assembly-lining these freeform motifs. Another reason why I think cutting your teeth on a freeform-esque pattern will be a nice transition to move from working up your typical piece following a crochet pattern to creating freeform crochet art.

Another progress pic that really showcases the freeform quality of this blanket.

And moving along! I am quite proud of all these little seedlings, growing to be big beautiful motifs, one stitch at a time. Since I am using stash yarn, some of the colors aren’t quite the same across the motifs. Who cares! It’s freeform, and my inner crochet meanie is quiet.

I’ll update you in a future blog post when this abstract blanket is all done, but scroll back up if you want to remember what it looks like when complete. Of course, this blanket is larger! So stay tuned for that finished object reveal.
Bonus: It’s All in A Nutshell blog post
Recently, Esther of It’s All in A Nutshell reviewed my book (read the review here), and she highlighted another project that I think borderlines on freeform crochet.

Sweet Spring blanket pattern is inspired by a beautiful butterfly quilt designed by Tula Pink.

I used my knowledge of how basic crochet techniques can be used to create movement in different blocks, and created several motifs to loosely mimic the shapes represented on Tula’s quilt.

Freeform crochet inspiration is everywhere! Fuse your inspiration from makers outside of the crochet realm with your crochet techniques, and you can create something totally fresh and new. Evolve the craft through freeform crochet.
Here are a few more fun ideas to get you started.
Explore freeform crochet: Beginner and Beyond
- Freeform shawl or handbag, featuring Ellen Deckers
- Rock decoration, featuring Elin Gudrunardottir
- Yarn bombing, featuring Eleonora Tully
- Freeform portraits, featuring Jose Dammers
Freeform Shawl or Handbag
Form meets function in these gorgeous designs by Ellen Deckers. Talk about a great way to display your freeform crochet: sew it onto a tote bag!

Simply Crochet Magazine, issue 84 features this awesome freeform shawl designed by Ellen Deckers, made with Scheepjes Colour Crafter. Wouldn’t that be neat? Whip up some freeform shapes and sew them onto a basic shawl background – how lovely!

Head to Ellen’s shop to see more freeform designs and patterns. You can also find her on Ravelry.
[Related: Shop Colour Crafter Yarn at your favorite shops, Black Sheep Wools, Deramores, Wool Warehouse* or Find a Scheepjes retailer close to you!]
Rock decoration
A lovely way to create a small and quick freeform project and display it nicely is to decorate a stone or a set of stones.

Elin Gudrunardottir of Fidgety Hands on Instagram has used Scheepjes Maxi, in the Sweet Treat ball size to make these beautiful freeform rock decorations. Relieve stress while livening up your home.
[Related: Shop Maxi Yarn in the Sweet Treat* ball size.]
Yarn Bombing
Eleonora Tully of Coastal Crochet used freeform crochet skills to create this yarn bomb over a railing at the beach. You might not have thought of yarn bombing as freeform crochet, but you see all of the crazy color and mixed up stitches, as well as the spacial skills it takes to make a piece that will fit perfectly over the structure being yarn bombed. Well, all of that definitely sounds freeform to me.

If it’s allowed in your city, take the time one day to create a yarn bomb and lend a colorfully creative and personally folksy touch to the surroundings of your community. That’s also a great way to join in a group and yarn bomb with other creative souls like yourself.
Freeform Portraits
Jose Dammers is a talented and renowned freeform crochet artist. She creates stunning portraits that will awe and inspire you. Do go take a look at her Instagram account.

The lovely Sun and Moon portrait above is made with Scheepjes Cahlista*, which is a fabulous starter yarn for freeform crochet as it’s thicker weight and comes in a wide range of colors. Buy the Colour Pack* to get a sweet 15g sample ball of every single color in the range. All those color options will be perfect to use for a freeform piece.
Go and Do
If you are so inspired, I hope you do take a few moments out of your day to take a few cleansing breaths and create a freeform crochet piece. Use basic crochet techniques and a few tips and tricks to make something inspired, and be sure to display it proudly in your home.
If you enjoyed this “Ultimate Beginners Guide to Freeform Crochet Basics”, then share it, pin it, link it, post it – and all that jazz. It was a super-inspiring experience to collect all of this information over the past couple of weeks, and I can’t wait to get back to my Abstract Blocks blanket!
Happy crafting to you,
Rachele C.
*This article contains affiliate links. Shopping through them helps support my work, and it doesn’t cost you any extra. Awesome!
2 Comments