Latest Posts

Continuous Flat Braid Join Tutorial

Part 1: How to join all of your squares up to the final column. Part 2 will include your final left-hand column of squares plus finishing the border.

Many of you will say this is confusing and crazy! There is definitely a “light-bulb” moment that has to go off, and then its smooth sailing, and before you know it, you’ll be trying to convert every join so it’s continuous. I’m not technologically advanced enough to make videos, but check our YouTube “continuous granny square join” for some great views of the process. The “continuous” method will be very similar, but obviously the join has a different look since this is flat braid.

To begin, you will need finished squares ready to join. My blanket is 4 x 4 12″ squares (16 total). My chosen square is the Circle of Friends square by Priscilla Hewitt (worked with worsted weight yarn held double and a size 9mm hook), plus one DC round (DC in every stitch around, placing 5 DC in all 4 corners). See my adjustments to the Circle of Friends square here. Also, when I do my Flat Brand Join, I like to add another round of SC (SC in all stitches around, placing 3 SC in all 4 corners), in the same color as my joining color.

For ease of readability within the tutorial, I name my 3SC corner Sts (purple SC round) as follows: From RIGHT to LEFT, these 3 corner stitches will be called “SC#1, SC#2, and SC#3”

So here, you can see my final SC round of purple on all motifs. That square at lower right in the photo below will be my first square to join.

IMG_0117

The diagram below shows how you will align and number your squares and the path you will take during this tutorial. I borrowed this image from CrochetCabana.com, and it’s also in my other CJAYG tutorial. (One notable difference is that I do not start where the diagram says “start”; rather, I back over to the top right corner so that I start and finish in the corner of the blanket.)

Okay, let’s get to it! Work 3 sides of Square 1, starting in upper right corner of square as follows:

Work Corner: (SC in SC#1, Ch-5, SC in SC#3), **(Ch-2, Skip 1 St, SC in next St) across, stopping when you have 2 Sts left before the corner SC#2. Ch-2, and Work Corner. Repeat from ** once more, and continue across the third side in this manner until you reach the SC in SC#1 of the lower right corner. Ch-5

IMG_0118

Pick up motif 2 and SC in SC#3 of any corner.

IMG_0119

Ch-1 and remove loop from hook, as seen in the photo below.

IMG_0120

Insert hook in the Ch-2 loop on the completed motif that opposes your current position. Put the loop back on the hook.

IMG_0121

Pull the loop through and Ch-1.

IMG_0122

**Skip 1 St, SC in next St, Ch-1, Repeat this maneuver of “remove loop from hook, insert hook in corresponding Ch-2 loop, replace loop on hook, Pull Loop Through, Ch-1, repeat from ** across. Photo below shows progress. The chain loop at the right-hand side is the Ch-5.

IMG_0123

When you reach the corner, work it without joining anything, as seen below. Continue Ch-2 loops around, over 2 more sides, worked plain. Again, after the first SC of the corner, Ch-5.

IMG_0124

Next, you’ll be joining Motif 3 – and then 4. On your final square of this first row, only work 2 sides, as seen in the photo below.

IMG_0126

Now you’re ready to join on your second row of squares! I’ve laid a couple out to give you an idea.

IMG_0127

To attach motif 5, begin by working as you have before, joining by pulling loop through in the Ch-2 loops. When you reach the upper right corner of motif 5, SC in SC#1, Ch-2

IMG_0128

Remove loop from hook and insert hook into the diagonal Ch-5 corner loop. Replace loop on hook as seen in photo below.

IMG_0129

Pull loop through and Ch-3

IMG_0130

Pick up motif 6 and SC in SC#3

IMG_0131

Join one side of motif 6 as you’ve been joining before, and repeat the same “pull loop through” maneuver when you reach the corner. Below you can see how the diagonal Ch-5 corner loop is “picked up” but the adjacent corner loop is left unworked.

IMG_0132

Join motif 7 and 8 or all of however many squares you have in your column. When you reach the final square at the very top (adjacent to motif 1) you will need to join the corners together by working Ch-2, pull loop through on adjacent corner, Ch-2. These corners are joined because this is the perimeter of your piece.

IMG_0133

Here is what your piece will look like at this point. I know it looks weird!! Trust the process 😉

IMG_0115

Work 3 sides of the top square, until you reach the SC in SC#1 of the final corner, and Ch-2

IMG_0135

Here is a close-up of the corner as it should look to you. Get ready to work magic!

IMG_0134

Remove loop from hook and insert hook down through the adjacent Ch-5 corner loop…

IMG_0136

…and then down through the diagonal (unworked) corner loop. Below you can see the hook going down through both corner loops

IMG_0137

Put the loop back on the hook

IMG_0138

Pull loop through, and Ch-3, SC in SC#3 on Motif 7. Congratulations! Your four-corner join is complete!

IMG_0139

Work 3 sides of this motif, making sure to leave outer Ch-5 loops unjoined as seen below, since these are not yet at the perimeter of your piece.

IMG_0140

Once you reach your last square at the bottom of your piece, work only 2 sides as seen below. Ch-5 and you’re ready to join your next column of squares from the bottom up!

Repeat this joining process for all remaining columns of squares until you have 1 final column of squares remaining, and that will conclude Part 1 of this tutorial.

In Part 2, we can work your final column of squares and go around the border.

IMG_0141


Part 2!

Now it’s time to add your final column of squares to your piece. Join from the bottom up, just as you joined your other columns.


Then work around the upper-left square and join one side of the next square until you get to the perimeter of the blanket. 


Instead of working chain 5 here, work chain 2, join in the adjacent chain 5 loop to close the perimeter, chain 2, and continue. 


Continue joining in this manner until you reach the bottom left corner of the piece. 

Now, when you look at your blanket, you have 2 sides with perimeter joins that look like the one in the photo above, and 2 sides that look like the photo below. 


Let’s zoom out!


Make your chain 5 corner, and continue across until you reach the first little loop on the bottom edge. 

Chain 2, slip stitch in the loop, chain 2


Continue like this across the bottom and up the right-hand side, and join to the beginning SC. 


Now all of your continuous flat braid is complete! You can add any border at this point. 

I like to work (SC, chain 2, SC) in the first chain 5 loop, then (chain 2, SC) across, working an SC decrease in the join between two squares. (Put one “leg” of each part of the SC decrease in each chain 5 loop of the perimeter join.) 


Then you can do a round of SC – 5 SC in the corners and 2 SC in each chain 2 space. 

From here you can do Reverse SC, or some lace, or shells… Anything! 🙂 
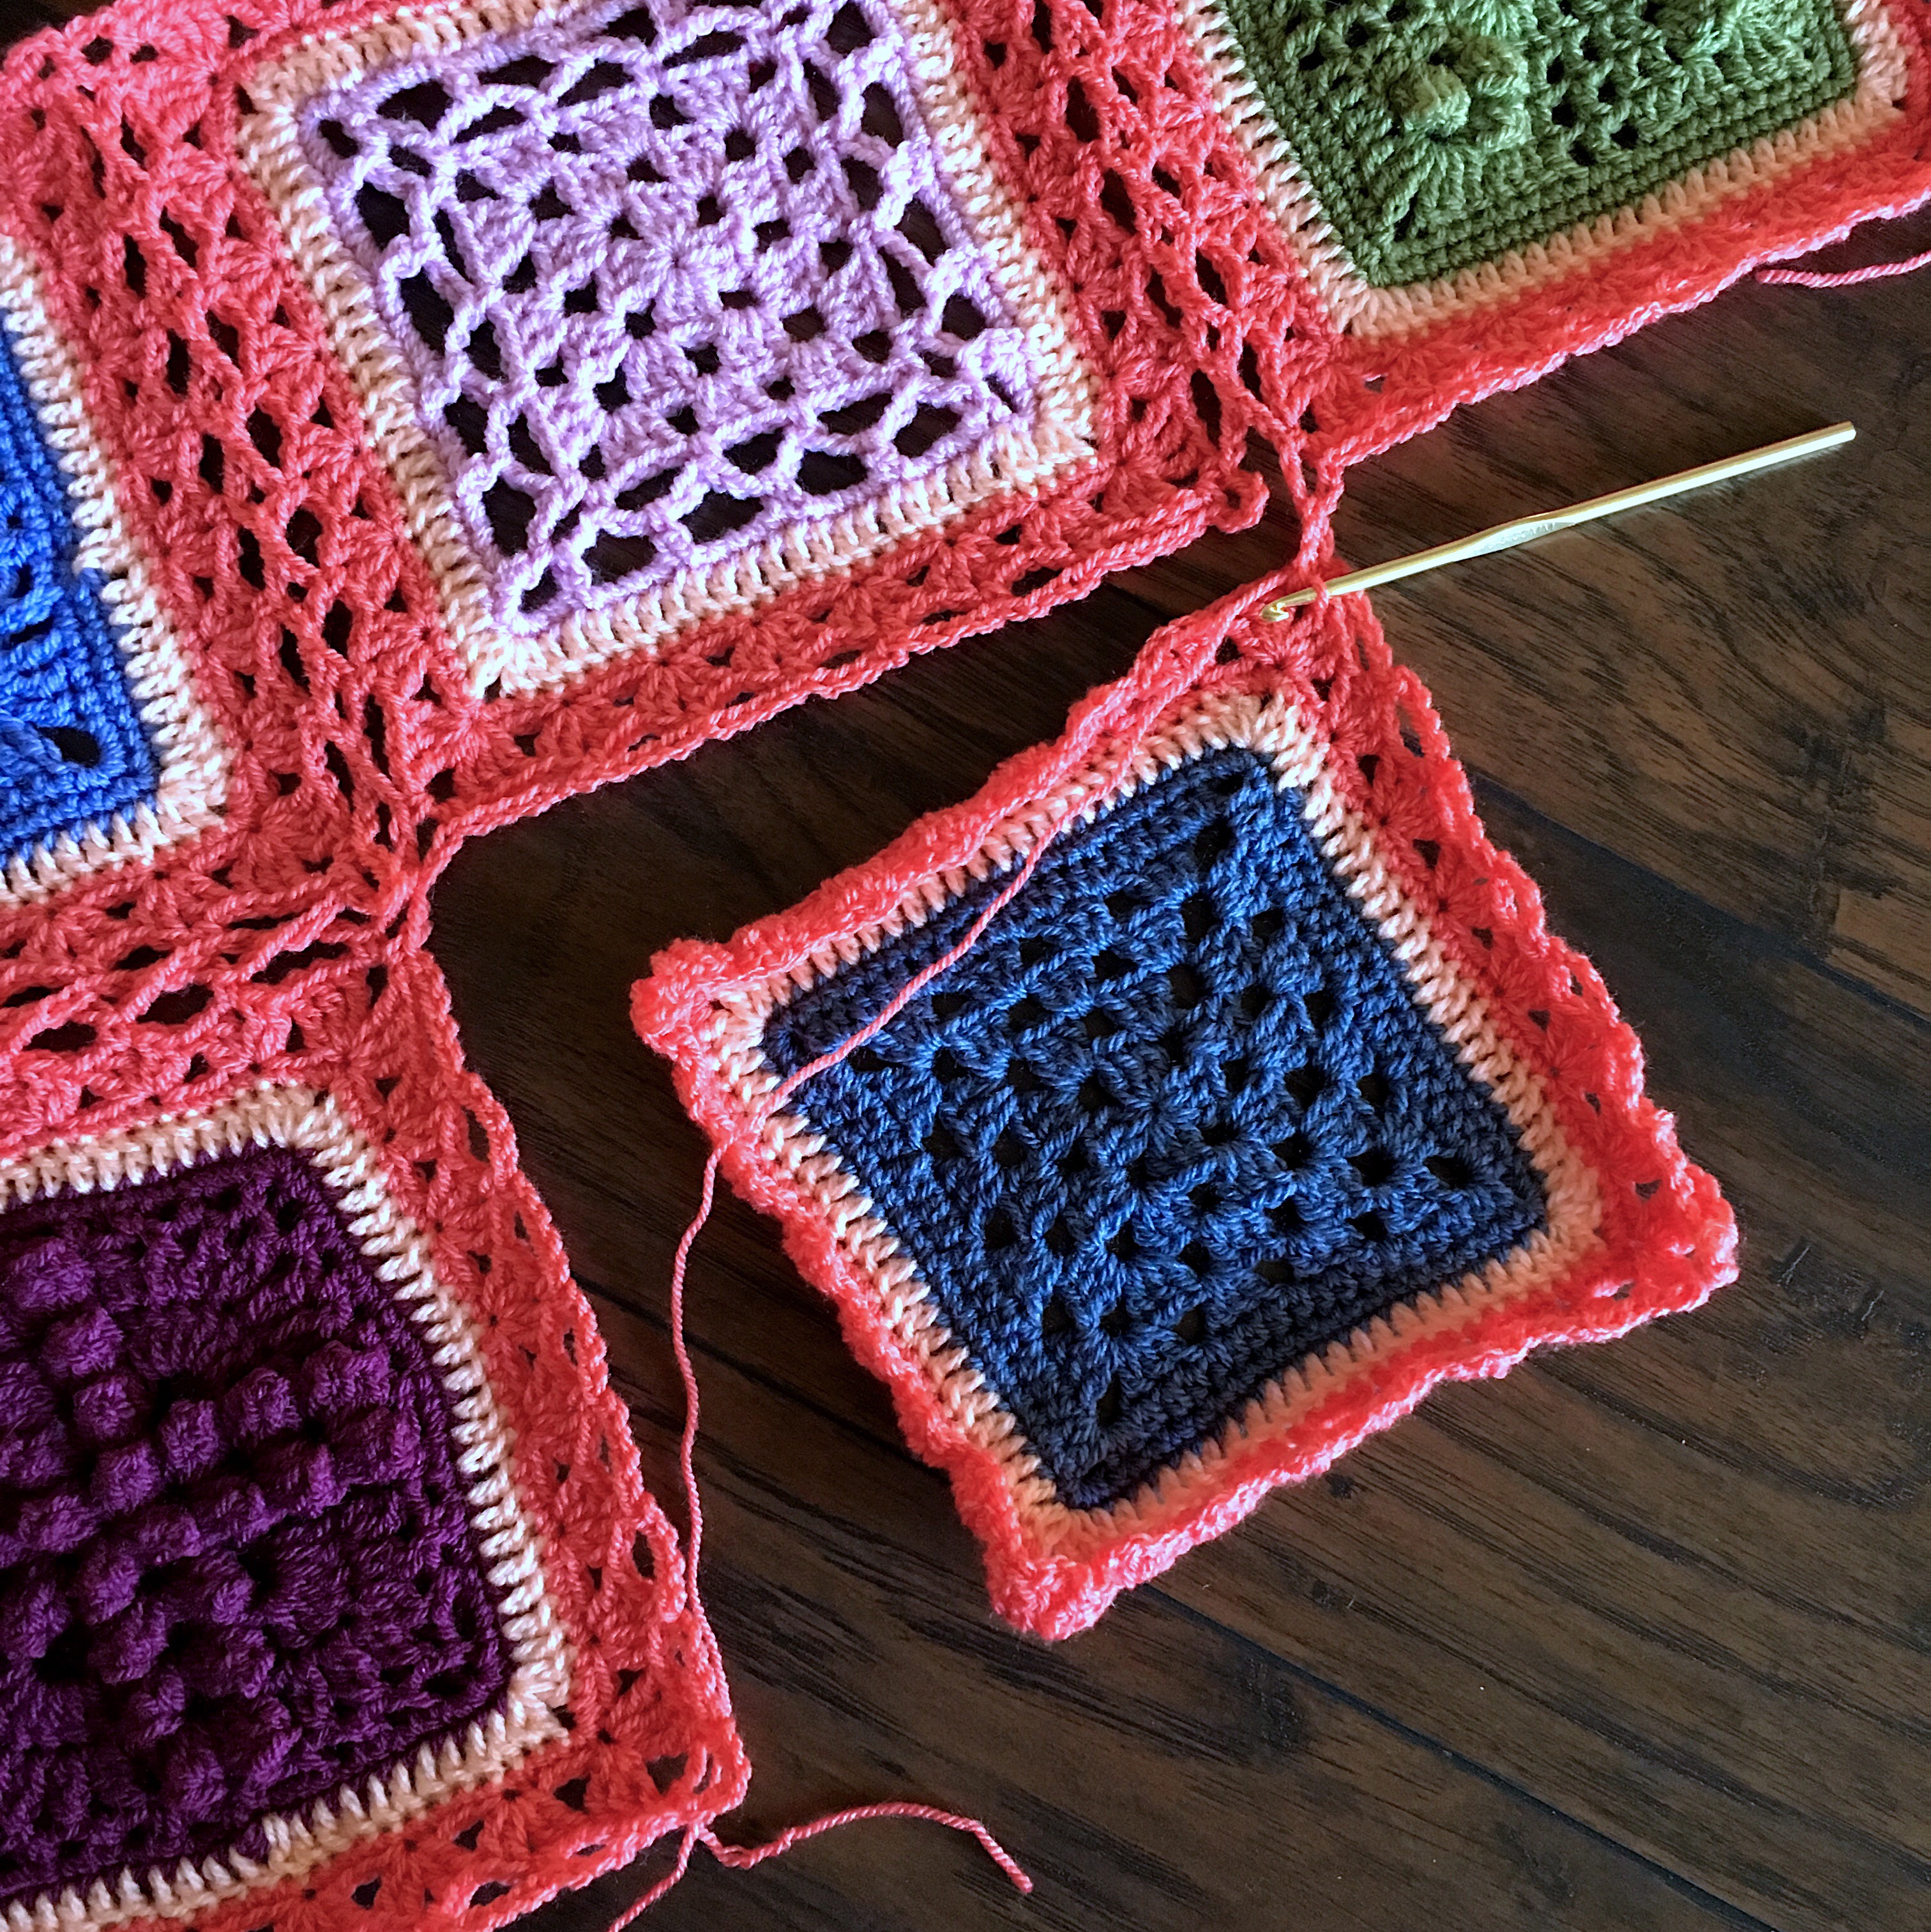
 

Bravo! You did the Continuous Flat Braid Join! 😊😊

Looks beautiful with any project and is very sturdy. Crafterly luck to you all!


Textured Circles: An Expansion on the Circle of Friends Square


Important Links:

  • Circle of Friends – what a wonderful free pattern written by my crochet idol, Priscilla Hewitt.
  • Check out my Textured Circles Blanket master post for all the different ways I’ve played with this square over here. It incudes different joins, block modifications, and borders!

IMG_4971

Today, I’d like to share a pattern to expand this square by 5 rounds to 11″ – using worsted weight yarn and a size K (6.5mm) hook.

5-Round Expansion for Circle of Friends Square

After you have completed your final SC round of the Circle of Friends square, you are ready to begin.

Round 1: Join new yarn with a slip stitch in Back Loop Only (BLO) of corner stitch. Work (SC, Chain 1) – this stands in for the first DC – 2 DC in that same BLO spot, work DC all around the square in BLO of all stitches, putting 3DC in BLO in the corners. Join to the beginning DC. Finish off.

Round 2: Join new yarn with slip stitch in any corner DC. (SC, Chain 2, SC) in same corner stitch. (Chain 2, skip 1 stitch, SC) around the square, putting (SC, Chain 2, SC) in all corners. Join with a Slip stitch to beginning SC. Do not finish off.

Round 3: (SC, Chain 1) in first corner chain loop – counts as first DC – Chain 2, 3DC in same corner loop, 2 DC in all loops around, putting (3DC, chain 2, 3DC) in all corners. When you reach the beginning corner, work 2 DC in it to complete the round. Join and finish off.

Round 4: Join new color in any corner chain space. Work 3 DC in same chain space. Work SC all around, putting 3SC in all corners. Join to beginning SC and finish off.

Round 5: I work this round in my joining color! Join in any corner SC through BLO. Work 3 SC in that same BLO spot. Work SC in BLO all around, putting 3SC in BLO of all corners. Join to beginning SC and finish off.

Done! Now you’re ready to work any join. I like the Flat Braid Join – link on main page as indicated above.

IMG_5034

IMG_5033

IMG_5035

Treble Scallop Edging: Free Pattern

Treble Scallop Edging!

This edge starts with a foundation round of (SC, Chain 2, Skip 1 stitch) repeated, with (SC, Chain 2, SC) in the corners. Check out the before pic below to see this in action.

2015/01/img_4949.jpg

Here is what your piece will look like before each scallop.

Try this pretty edging in a built tough, but super soft DK weight yarn like:

2015/01/img_4950.jpg

Step 1: Skip 1 Chain loop, Treble Crochet in the next Chain loop, Chain 2

2015/01/img_4951.jpg

Step 2: Single Crochet in the top side bars of the Treble Crochet that you’ve already done – (Picot made)

2015/01/img_4952.jpg

Step 3: Continue to make (Treble, Picot) until you have 5 Picots made. Treble Crochet once more to finish the Scallop

2015/01/img_4953.jpg

Step 4: Skip 1 Chain loop, SC in the next Chain loop to anchor the Scallop

That’s it! Easy-peasy 1 round scallop/picot lace edging 🙂

2015/01/img_4954.jpg

Now for the corners..

If you’re a mega planner, then you’ve made your foundation round to have the correct amount of Chain loops made to end up with perfect corners. *I* prefer to relax and just let the artistic muse guide me 😉

BUT that means I end up with extra Chain loops at the end of my row.. So, as shown in the pic below, I just did a little “floating picot” as follows:

SC to anchor Scallop, Chain 4, SC in third chain from hook, Chain 1, skip 1 Chain loop, SC in next Chain loop.

Work corner: Copy your instructions for the regular scallop, but instead of only working 5 picots, you’ll work 7.

2015/01/img_4955.jpg

When I got to the next corner, I had the correct amount of chains for a normal corner. So, I made the next corner as in the photo below. “But that’s not right!! But.. but.. SYMMETRYY?!”

I just make sure I have diagonal symmetry in this case, and it still makes for a beautiful edging. Diagonal corners will be identical, and all is well in the universe.

2015/01/img_4956-0.jpg

Bravo! Enjoy your pretty lace edging 🙂

2015/01/img_4964-0.jpg

2015/01/img_4959-1.jpg

Lacy Peaks Edging: Free Pattern

IMG_4539.JPG

Lacy Peaks Edging Tutorial

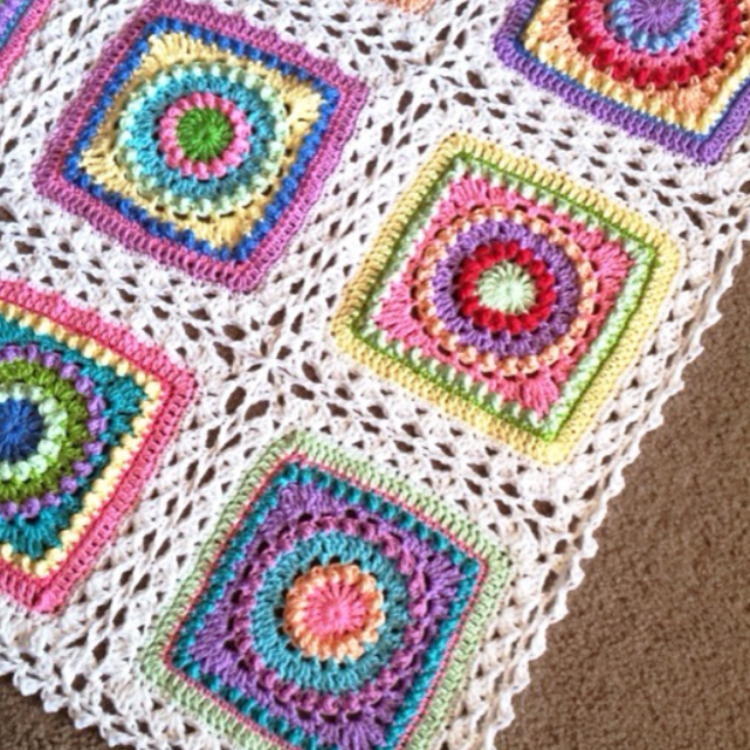
This is a fabulous (and easy!) 5-round border option to work on my “Candy Puffs Blanket” pattern as pictured in the photos.

Make Picot: Chain 2, SC in side bar of the previous HDC  just made.

Foundation Rnd: On Rnd 1 (the next round), you will be working groups of 3DC all around, so your Foundation Rnd needs to set that up. In most cases, you can go ahead and work an SC or DC Foundation round, with 3SC or (3DC, Ch-2, 3DC) in the corners.

On my blanket, I have a raw edge with puffs, chain loops, sideways DC stitches, and the lot (hopefully you can somewhat see this in the photos), so my raw edge here was not suitable for an SC or DC Foundation round.

I chose instead to work (SC, Ch-3) repeat around, with the plan of making my Rnd 1 3DC groups in each Ch-3 loop.
Rnd 1: If you have started with an SC or DC round, then work evenly spaced (3DC in next St, Skip 2 St) repeats around, putting (3DC, Ch-2, 3DC) in all corners.

Make sure you have the same amount of 3DC groups on opposing sides of your piece.

IMG_4538.JPG

Rnd 2 and 3: (SC between 3DC groups, Ch-3) repeat around.

Rnd 4: SC in corner Ch-3 loop. Ch-1, (HDC, Picot, 2HDC, Picot, HDC) all in same corner loop. (2HDC, Picot, HDC) in all Ch-3 loops around, making (2HDC, Picot, 2HDC, Picot, HDC) in remaining 3 corners. Finish off.

IMG_4541.JPGIMG_4540.JPG

Lace Flower Hexagon: Half Motif

IMG_3680.JPG

I’ve been playing with my Knit Picks Chroma Yarn* – Fingering weight – and this lacy flower hexagon chart that I found online.

After showing some photos of this heavenly blanket on Instagram and Facebook, I received some questions regarding the half-hexagon. I made it up, but here is the written pattern!

Lacy Flower Hexagon: Half Motif

Row 1: Chain 3 and join to make a ring. All in Ring, (SC, Chain 1) counts as first DC here and throughout,

IMG_3756.JPG

(Chain 1, DC) 7 times. 8 DC total. Turn work
IMG_3755.JPG

Row 2: (SC, Chain 1) in first stitch, Skip chain space here and throughout. 2 DC in next stitch, (Chain 2, 2 DC in next 2 stitches) 2 times, Chain 2, 2 DC in next stitch, DC in final stitch (which will be the top of your beginning DC). 14 DC and 3 Chain-2 spaces total. Turn work

IMG_3754.JPG

Row 3: (SC, Chain 1) in first stitch, DC, 2 DC, (Chain 2, 2 DC, DC in next 2 stitches, 2 DC) 2 times, Chain 2, 2 DC, DC in next 2 stitches. 20 DC, 3 Chain-2 spaces. Turn work

IMG_3753.JPG

Row 4: (SC, Chain 1) in first stitch, DC in next 2 stitches, 2 DC, (Chain 2, 2 DC, DC in next 4 stitches, 2 DC) 2 times, Chain 2, 2 DC, DC in next 3 stitches. 26 DC and 3 Chain-2 spaces. Turn work

IMG_3752.JPG

Row 5: (SC, Chain 1) in first stitch, DC in next 4 stitches, (Chain 3, SC in Chain-2 space, Chain 3, DC in next 8 stitches) 2 times, Chain 3, SC in Chain-2 space, Chain 3, SC in next 5 Stitches. 26 DC and 6 Chain-3 spaces. Turn work

IMG_3751.JPG

Row 6: (SC, Chain 1) in first stitch, DC in next 3 stitches, [(Chain 3, SC in next chain space) 2 times, Chain 3, Skip next DC, DC in next 6 stitches] 2 times, (Chain 3, sc in next chain space) 2 times, Chain 3, skip next DC, DC in next 4 stitches. 20 stitches and 9 Chain-3 spaces. Turn work

IMG_3750.JPG

Row 7: (SC, Chain 1) in first stitch, DC in next 2 stitches, [(Chain 3, SC in next chain space) 3 times, Chain 3, skip 1 DC, DC in next 4 stitches] 2 times, (Chain 3, SC in next chain space) 3 times, Chain 3, skip 1 DC, DC in next 3 stitches. 14 DC and 12 Chain-3 spaces. Turn work

IMG_3749.JPG

If you aren’t joining on the final row, then work your last row as follows:

Row 8: (SC, chain 1) in first stitch, Chain 1, DC between this and next stitch, [(Chain 3, SC in next chain space) 4 times, Chain 3, (DC, chain 1, DC) between two center stitches) 2 times, (Chain 3, SC in next chain space) 4 times, Chain 3, skip 2 stitches, DC between this and final DC, Chain 1, DC in final stitch. Finish off.

IMG_3748.JPG

If you will be joining on the final row, work row 8 as follows:

Row 8 (Join as you go): (SC, Chain 1) in first stitch, release loop from hook, insert hook in chain-1 space between DC stitches on corresponding motif. put loop back on hook. See photo below. In the photo, I have released the loop, inserted the hook, and placed the loop back on the hook.

IMG_3761.JPG

Pull the loop through that space and complete your chain stitch. From now on, I will refer to this procedure as “Join.” When you Join, it counts as a chain – See below.

IMG_3760.JPG

DC between this and next stitch, **(Chain 1, join to corresponding chain space, Chain 1, SC in next chain space) 4 times, Chain 1, Join, Chain 1, DC in between 2 center stitches, release loop from hook, insert hook in chain space of left-most corner, and in chain space of right-most corner, and put the loop back on the hook. Pull loop through both corners, joining them together, complete chain, DC between center 2 stitches again. Repeat once more from **, Join final side, and DC in between final 2 stitches, Join final chain-1 space, and DC in final stitch. Reference next 3 photos to see joining process. This is a “Flat Braid Join” if you’d like to do some YouTube/Internet research on the method.

IMG_3759.JPG
IMG_3758.JPG
IMG_3757.JPG

Disclosure: This post contains affiliate links, which means I receive a small commission if you make a purchase using the links marked with an asterisk*. It doesn’t cost you anything extra, and it helps keep CypressTextiles going!

Playful Lace Scallop Edging

20140206-211043.jpg
Your blankie is sure to be a hit with this super cute edging!

Foundation:

Your first round will be a chain loop round. So if your final blanket round is an SC round, then (SC, skip 1 stitch, chain 2) repeat around – in all 4 corners, work (SC, chain 2, SC).

If your final round is chain loops, just make sure you can work (SC, chain 2) loops around, putting (SC, chain 2, SC) in the 4 corners.

It will help if between corner chain loops, you have a number of chain that is a multiple of 6 + 5. Example: 35 chain loops between corners.

20140206-211058.jpg

Playful Scallop Edging

Count 2 chain loops before any corner and join yarn. SC in same chain loop, treble crochet (TR) in corner chain loop, (chain 3, SC in top of TR) – Picot made – (TR, Picot) 6 more times, TR, skip 1 chain loop, SC in next chain loop. 7-Picot Scallop Corner made.

In next chain loop: 3 DC, Picot, 3 DC, SC in next chain loop. Meringue made.

Skip 1 chain loop, {(TR, Picot) 5 times, TR} skip 1 chain loop, SC in next chain loop. 5-Picot Scallop made.

Alternate between Meringue and Scallop across to next corner. In the corners, make your 7-Picot Scallop like before.

IMG_3554.JPG

Heart Mandala: Octagon to Square


IMG_3224

This Heart Mandala is absolutely addictive and completely, divinely beautiful! I’m in love with it 🙂 Check out the related links at the end of this post.

Try this fun pattern in a built tough, but super soft DK weight yarn like:

 Square Off Heart Mandala

Special Stitches (American terms)

DC Cluster:  In the same stitch, work 2 DC stitches up to the final step, leaving behind a loop each time. YO and draw yarn through all 3 loops on hook.

TR Cluster: In the same stitch, work 3 TR stitches up to the final step, leaving behind a loop each time. YO and draw yarn through all 4 loops on hook.

DTR stitch: Wrap yarn around hook 3 times. YO and pull through 2 loops on hook until all loops are used (4 times total).

2DCdec: Make a DC cluster, but instead of working both “legs” in the same stitch, work them in the two stitches indicated.

2SCdec: Decrease the 2 indicated stitches together by working (insert hook in first stitch, YO, draw up a loop, insert hook in second stitch, YO draw up a loop, YO, draw yarn through all 3 loops on hook.)

IMG_3229

Pattern

Round 1: With right side facing up, attach background color in any SC that falls in the center of a heart (not an SC made in a chain space). All in same stitch, (SC, Ch-6,  3 DTR), ***skip 2 stitches, TR in next stitch, DC in next 3 stitches, 2DCdec over last stitch of this shell and first stitch of next shell. DC in next stitch, SC in next 4 stitches, 2SCdec over last stitch of this shell and first stitch of next shell, SC in next 4 stitches, DC, 2DCdec as before, DC in next 3 stitches, TR, (3 DTR, Ch-3, 3 DTR) in next SC, repeat from *** around to beginning corner. 2 DTR in same SC as beginning corner. Join with a slip stitch to 3rd chain in Ch-6 loop.

IMG_3227
Round 2: 5 SC in first chain space, SC in all stitches around, putting 5 SC in every corner chain space. When you arrive at the beginning, join with a slip stitch in beginning SC. Finish off and smile! 🙂

IMG_3225

Check out the original motif by the talented Crochet_Millan!

See the Half-Square Motif!

And the Quarter-Square Motif, too!

Using these partial motifs, you can make a square or rectangle blanket with the squares turned on the diagonal, for a neat effect. Use an opulent join such as my Celtic Lace Join for a beautiful lacy lattice to show off these gorgeous Heart Mandalas.

IMG_3211

Zipper Stripe Blanket

The Zipper Stripe Blanket came about when I wanted to make a unisex design – it’s kind of like a Granny Stripe, but I didn’t want to use the word “Granny” 🙂

To make the blanket, I like to use the yarn held double, but it isn’t necessary.

Pattern (US Terms):

Foundation Chain: Start off by chaining an even number of stitches plus 3 (for turning)

I make my chain a tad smaller than what I want my final measurement to be because this blanket has a tendency to expand on row 2.

Row 1: DC in the 3rd chain from hook and in all chains across.

You should have an odd number of stitches.

Chain 2 and turn work.

I also recommend an alternate method: Turn work without chaining up, work SC in first DC and chain 1. This is what I do.

Row 2 (Pattern row): Work DC *between* the first and second DC of the row below. Skip 2 DC, and 2DC between the DC of the row below. Repeat across blanket until you reach the final 2 DC. Skip 1 DC and DC in last DC. Chain 2 and turn work.

In this blanket, except for at either end, you will be working between DC stitches, not in a chain space or into a stitch like normal. 

Repeat Row 2 for length of blanket.

Working with yarn held double gives more depth and texture to the piece. I like DK yarn doubled with a size 9mm hook. Or use any yarn with any hook! 🙂

I change color every other row to create the zipper effect. On my blankets, every other “zipper” stripe is white. To minimize yarn ends from color changes, work 2 rows white, don’t cut the yarn, attach new color and work 2 rows, carrying white yarn up the edge. This way, you only cut yarn on every other color.

There are a lot of color options with this blanket! I like this pattern because it makes a nice and sturdy piece and you get the granny stripe effect.

Have fun and let me know if I can clarify something! 🙂

20130809-055931.jpg

20130809-055955.jpg

Offset Circles Crochet Blanket Pattern

20140729-145013-53413391.jpg

Offset Circles just might be my favorite design yet! I made it with a size H hook in my beloved Stylecraft DK Lucy Pack – perfect!! I can’t wait to make it in neutral, sandy tones with pale blues… Luuushh!

Available on three convenient crafty websites!
Etsy || Ravelry || Craftsy

Pattern includes:
Offset Circle – Square Motif
Offset Circle – Hexagon Motif
Half-hexagon gap filler (Offset Circle chopped down the center!)
Join as you go instructions!
Three great border options!

Go get it and fall in love with this funky piece!

20140729-145013-53413879.jpg

Polka Dot Blanket Crochet Pattern

20140726-170803-61683347.jpg

Polka Dot Blanket Pattern now available on three convenient sites Etsy, Ravelry, and Craftsy!

The Polka Dot is a great way to add a fresh breeze to any room décor. I have included three different sizes of hexagon, and the smaller the hex, the more polka dots will fit in your blanket size.

I just adore this pattern and will be making it in a variety of colors! Anything will work! Check pattern for ideas to brainstorm.

Color placement on sample blanket inspired by the Crazy Circus Wall Decals of WallsNeedLove.etsy.com 🙂

20140726-170802-61682307.jpg

20140726-170802-61682884.jpg

Free Crochet Square Pattern: Crafter Mystery!

Mystery Square! If you know who made this mystery free crochet square pattern, please let me know and I will link! For now, this square pictured below has been floating around without any credit to artist, designer, or pattern, but I just HAD to make it – such a beautiful sight. And I have these yarns that I have been dying to use in a blanket, but never knew what pattern I wanted to use. Well, now it’s staring me in the face!

Read More

Hexagon Continuous JAYG – Granny stitch

20140620-170044-61244796.jpg

Hexagon CJAYG

PART ONE: Which hexagon pattern can I use for this join?

I am using the Tillie Tulip Blog Daisy in this tutorial, but you can choose any pattern you’d like! There are many circle-to-hexagon patterns, as well as plain hexies. You’ll want to keep in mind that with this method, you have to imagine that the “final round” of each hexagon will be the same color. I recommend that you learn the basics of the CJAYG for squares.

To clarify, here are some patterns that can be worked with this method.

And here are some equally beautiful patterns for which this method cannot be used.

The Tillie Tulip Daisy pattern is originally a granny square, and I have used it a couple of times before. What a beautiful square it is! But this time, I have fashioned it into a small hexagon. If you’d like to follow along, go ahead and make up some daisies! I’ll wait 🙂

Hint for making flowers with a center like this one:

If you’d like all of your flowers to have the same color center (i.e., yellow), try using slight variations of the same color instead. When looking at a blanket with identical center circles, the mind can tend to respond to the salient grid of dots, which may distract from the pretty flowers. Slightly varied shades will break this grid and soften your look so that the individual flowers can shine!

20140620-170043-61243701.jpg

Okay now we’re ready for…

PART TWO: The first row of hexagons.

Take a motif and locate a corner. Join your border/joining yarn with a slip stitch, SC, Chain 2, 2 DC all in same space.  If you’d like to reference my hand-drawn diagram below, you can note the “beginning” indicated. This is where you will start.

20140620-170042-61242891.jpg

Working around the motif, *3 DC in the next space, (2 DC, Chain 1, 2 DC) in the next space for the corner, repeat around from * until 4 sides are worked. Instead of the final complete corner of the fourth side, work only (2 DC, Chain 1) as seen below.

20140620-170043-61243316.jpg

Pick up your next motif, and in any space, work 2 DC as below.

20140620-170044-61244067.jpg

Slip stitch in between the corresponding stitches on the first motif. 3 DC in the next space, Slip stitch in the corresponding space to join, 2 DC, Slip stitch in the corner space. 2 DC in same space to complete the corner and continue around in the same manner to complete 4 sides.

20140620-170044-61244413.jpg

I have seen this joining method a couple times on the web but could never find a pattern, so I drew a diagram based on CrochetCabana’s CJAYG for squares diagram – link in original CJAYG post.

20140620-170045-61245146.jpg

Stop on your final hexagon of the row, after only 2 rows are completed, instead of the usual 4 sides (in the picture below, I have 4 more hexies to add)…

Unfortunately, the sun is setting! I’ll move on to the next part tomorrow 🙂

20140620-170045-61245764.jpg

Trampoline Block

Good morning! I am in the perfect crochet situation right now – riding in the passenger seat on a road trip to SeaWorld San Antonio.

In my travel, I decided to bring only prototype work and no custom queue pieces. Scary for me! But I wanted to take a true creative vacation and flesh out some fresh ideas. Please note: Since this pattern is a mobile endeavor, it will be bare bones for right now! I’ll come back and edit with more pics, links, and a view of multiple squares to see the joining method.

Here is the Trampoline Block pattern born from my desire to have a solid granny without corner holes, and a “detached” feeling border to frame that pretty variegated yarn.

Pattern Notes

Variegated yarn: Ice Yarn “Dancing Baby” available online at YarnParadise.com

Solid yarn: Bernat Yarn – the big one pounder whose name is escaping me at the moment… I’ll link when I’m back home 😉

These are both DK weight, so I’m using an I (5.5mm) hook.

General directions: Make a solid granny square, work an eyelet round, an hdc round, and an sc round. Join new motifs as you go on the sc round, using a method that I will discuss.

Okay, here we go!

Rnd1: Magic Loop and work Sc, Ch2, 3Dc, (Tr, 3Dc) 3 times join in top chain of Ch2.

Rnd2: (Sc, Ch2, 2Dc) all in joining St, Dc across all Sts to corner Tr. *(2Dc, Tr, 2Dc) in corner Tr, Dc across all Sts to corner St* 3 times. 2Dc in corner Tr to complete first corner, and join in top chain.

Rnd3 & 4: Repeat Rnd2.

Finish off yarn (cut and weave)… Admire your solid granny with no corner holes 😛

Attach border color in any corner with a Slst.

Rnd5: (Sc, Ch4, Dc) all in joining St. (Ch1, Sk St, Dc) 7 times across side. Ch1, Sk St, *Dc, Ch3, Dc* in corner St to make corner. Repeat around the square and at last corner, Ch1 and join to the chain *right above* the beginning Sc.

Rnd6: (Sc, Ch1, 2Hdc) all in joining St. Hdc in all Sts across to Ch3 corner, working your Hdc *IN* the chains

(Instead of working in the chain space, you will work through the chain stitch, creating a cleaner look.)

(2Hdc, Dc, 2Hdc) in corner. Continue in this manner around the square until you reach the last corner. 2Hdc in the first corner St to complete the first corner. Join in the Ch1 St *right above* the beginning Sc.

Rnd 7: 3Sc in first and all 3 other corner stitches, working Sc in all Sts around the square. Finish off.

Joining the subsequent squares:
For these purposes, since I am mobile and can’t take more pictures, check out the Tight Join by Mary Bucek of “Crafty Goodness Crochet” Hop over to the ScrappyCAL – ScrappyBlanket.com to see Admin Mary’s post on the Tight Join. It’s a beautiful join! 🙂