
Yay! It’s all done! The first of 6 free crochet blankets in my Relaxghan series. Look forward to a new free crochet blanket pattern on the last day of the month, every month through July 2018.
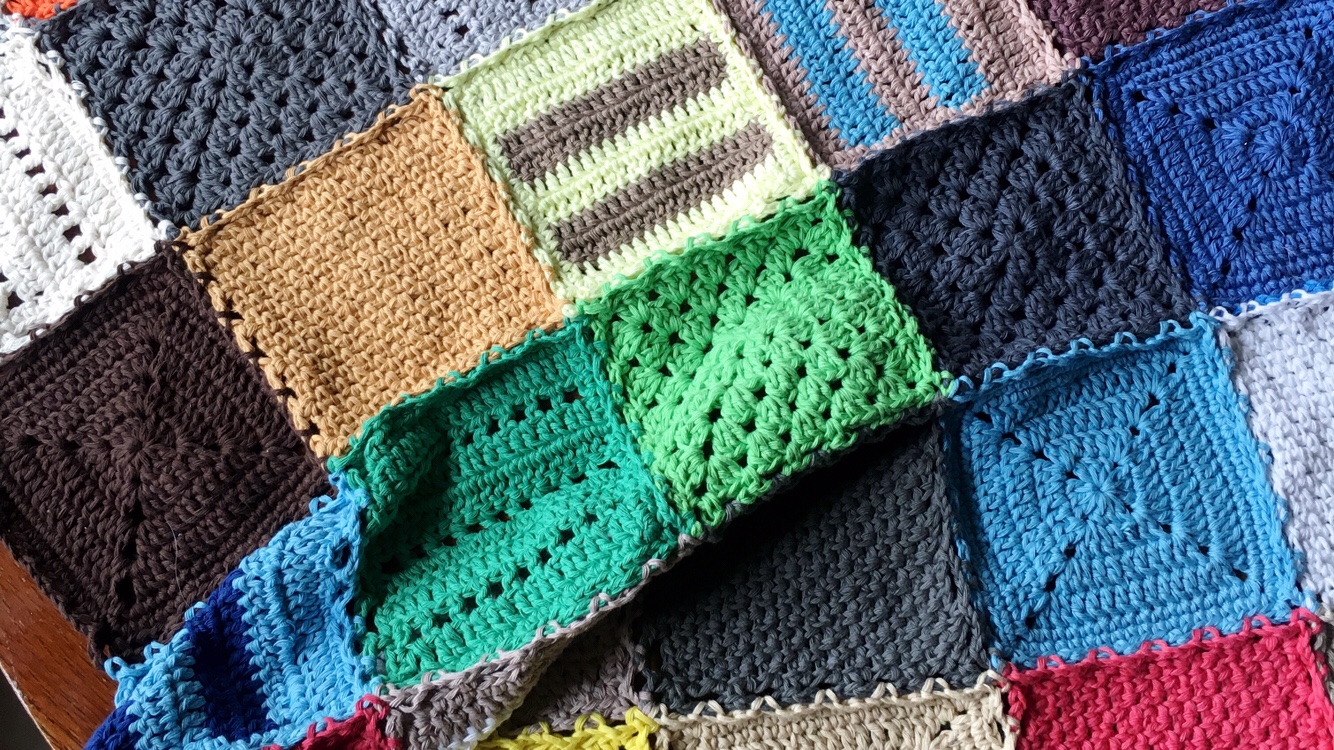
Yay! It’s all done! The first of 6 free crochet blankets in my Relaxghan series. Look forward to a new free crochet blanket pattern on the last day of the month, every month through July 2018.
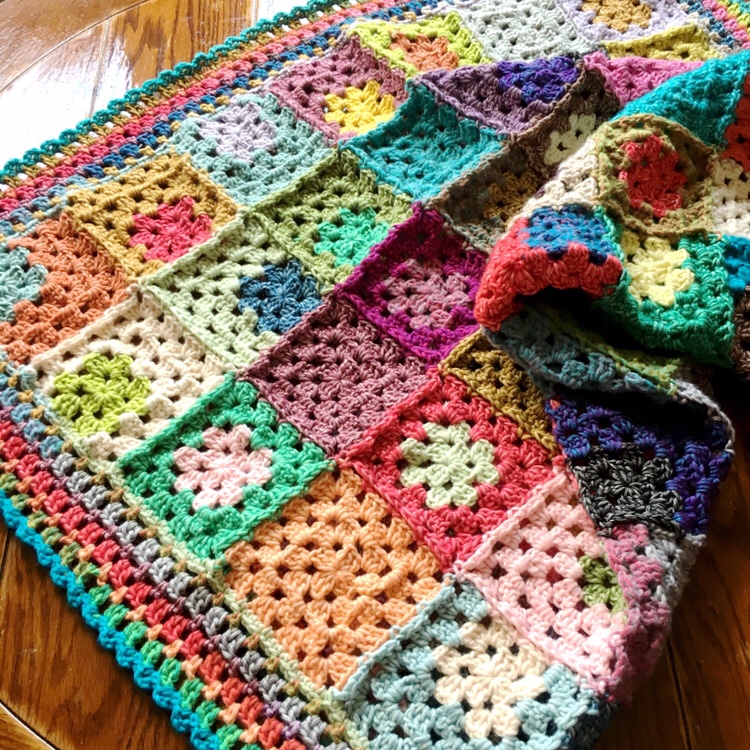
In January, I decided to create a series of blanket patterns that were designed with an air of peacefulness and tranquility. Patterns that you can work on whenever you like, without stressing over any element. I’ve been saying lately: Crochet is meant to de-stress you, not re-stress you. The high strung and tightly wound among you will undoubtedly want to meticulously plan layouts, bypass stash to buy fresh new yarn, or frustratedly obsess over every pattern quirk.
This includes me. I am not a laid back person, and I’m as tightly wound as they come, but I’m trying to get better at relaxing. While constant tension does play a factor in CypressTextiles upward motion and in my own personal continuous improvement (pressure makes diamonds, or what-have-you), I’ve recently begun to appreciate letting the light in a bit more.
Maybe you also need to let some light in? Join me as I release a new free blanket pattern on the last day of every month from February to July. (Yes! The first pattern releases tomorrow, Feb 28!) Stash busters, remnant eaters, squares, hexagons, whip stitch, join as you go… it’s all in there.
Find all six condensed easy-print, ad free versions in PDF format, you can find them as a full ebook on Ravelry.
All patterns are made with Scheepjes Yarns
Affiliate links:
And here is a small taste of the six projects! Yippee!

Made of five simply casual square motifs which are worked in random blocks of color, Unbothered is a join-as-you-go piece that’s edged with a plain Jane no-waste border. Heart eyes.
Yarn: Scheepjes Cahlista

A pretty circle motif with an adorable flower center, which is magically turned into a hexagon?? And with a lacy join built in? I’m there! Also: PINK background.
Yarn: Scheepjes Merino Soft

Sweet as candy, this design will keep you smiling as you work the large hexie motifs. They are easy as pie, and still manage to look intricate. Choose and mix bright colors without a care, channeling and indulging your inner bohemian spirit along the way.
Yarn: Scheepjes Catona and Catona Denim

Linen stitch is my all time favorite, and it’s perfect for dazing out and letting muscle memory take over. But this design doesn’t just stop at the unassuming linen st triangle shown below… there is much more in store to give good vibes! ❤️
Yarn: Scheepjes Colour Crafter and Colour Crafter Velvet

A fresh new spin on the traditional granny square pattern, Let it Go is the perfect project for your Scheepjes Stone Washed and River Washed XL Cutie Pie Colour Pack. It uses every ball from the pack, and with the no-waste border, you can feel good about your pattern choice.
Yarn: Browse these packs!

Yes! It’s the Stone Washed and River Washed cutie pie Colour Pack! I cannot wait to reveal more about these designs (the motifs are cuuute!) but I’m going to do my best to wait. On the blog it’ll be easy! Social media… yeaaaahhhh I’ll be sharing a bit 🙂

Thanks for taking the Relaxghans tour with me! I’m looking forward to sharing these patterns with you! For now, Happy Crafting, y’all 😁
Note: The links in this post are affiliate links. Shopping through them will help support CypressTextiles and allow me to continue to bring you loads of content. Plus, it doesn’t cost you any extra! ❤️
Hey, y’all! Exciting news: I was interviewed for the mini “Blog We Love” feature in Inside Crochet, issue 97. And when I say I rode the confidence-boost wave of this magazine interview for at least a month, I’m not the least bit kidding. The proof is where I’ve been doing the majority of my *squeeeeeee*-ing as of late: my IG stories lol

[Related: Check out Inside Crochet!]
I’ll let you all read the issue for yourself to see the full interview, but it was so much fun, and got me thinking about big picture ideas like why I do what I do. Sometimes it’s refreshing to get back on track with that “forest” stuff, especially when starting a new endeavor like opening a yarn shop gets you stuck in the trees 🙂
Another fabulous thing about this interview, and the main thing I want to share today, was having to sift through all of my makes to select three photos. Oh my goodness…
*Backstory moment* …If you didn’t know, I used to be “BabyLove Brand” and I just used my website to document and catalog my FOs. Well, when I rebranded in 2013 or thereabouts, I decided to create CypressTextiles for crafter things like tutorials, patterns, etc., and just maintain BabyLoveBrand.net as my FO Gallery. So all that is to say: there are a TON of projects over there to look through. How to pick just three???
You guys have most definitely met this make, “Amazon Blanket” which I designed for Scheepjes YARN Bookazine, issue 3. I share it every chance I can, because it’s just one of my most favorite designs.

Color-wise, this Geometric Lace blanket is my absolute favorite. There are over 300 motifs in this 86x86in blanket. I used several brands of DK acrylic yarn to get all the color blending, and it was an absolute blast feeling out the layout as I went. Super-fave.
[Related: Check out all 47 Geometric Lace Blankets I have made! Have you made one too? Hashtag #geometriclaceblanket on social media so I can see ❤️]
 <
<
Lastly, I selected Hexagon Burst, because it is by FAR my most downloaded free pattern. This piece can get up over 250 downloads on Craftsy in one day, and it’s been over a year since I uploaded it. Just crazy! But truly these motifs are so addictive. Try to make just one! You’ll have a finished blanket before you know it.
 <
<
Hope y’all scoop up a copy of Inside Crochet, Issue 97 – loads of great patterns and pretty inspiration photos inside, and a tiny interview with li’l ol’ me ❤️
Happy crafting, y’all!
Rachele C.

Welcome to ShadeTree, a collaboration of artists from around the world to bring you unique and adventurous crochet patterns. The inaugural issue is focused on pieces inspired by the art and nature photography of Jessica Wilkinson, AKA, “@VanillaLemonCake” on Instagram.
ShadeTree is an ebook (possibly print in the future!) of 5 full blanket patterns and 4 free motif patterns which all share a common trait. In this issue, that common trait is the inspiration artist, Jessica Wilkinson of VanillaLemonCake.
I call ShadeTree an artistic collaboration because there is an inspiration artist or maybe a certain stitch or a visual element, and that is one piece of the collab. Then, I am part of the collab as the pattern designer. I choose the project yarn from my favorite Scheepjes selection, so I feel like the yarns are kind of collaborating, too. And a crucial collab member is the crafter who tests the blanket pattern. a talented member of the Tester Tribe makes the sample blanket and graciously photographs the piece.
The collaboration means a lot to me as I see the artist community as a never-ending source of inspiration, and when we collaborate and bring our talents together, we grow even more in our craft. ShadeTree is the fruit of these cultivated relationships. Meet us under the ShadeTree.
Ravelry! You have 2 options:
As a discounted ebook (Just $12.00) or,
as individual patterns (5 Full blankets: $4 each + 4 free motifs). Yes, you can download the patterns individually via Ravelry, but the ebook is a great value.
Enjoy the free content produced for this ebook as well! A few joining methods were captured as tutorials on YouTube, to help folks who would like to use them outside the pattern.
 4 Floral Motifs


*This post contains affiliate links marked with an asterisk. It costs you nothing extra to shop through these links, and by doing so, I will receive a small commission which I use to help keep CypressTextiles running. I recommend every affiliate product!
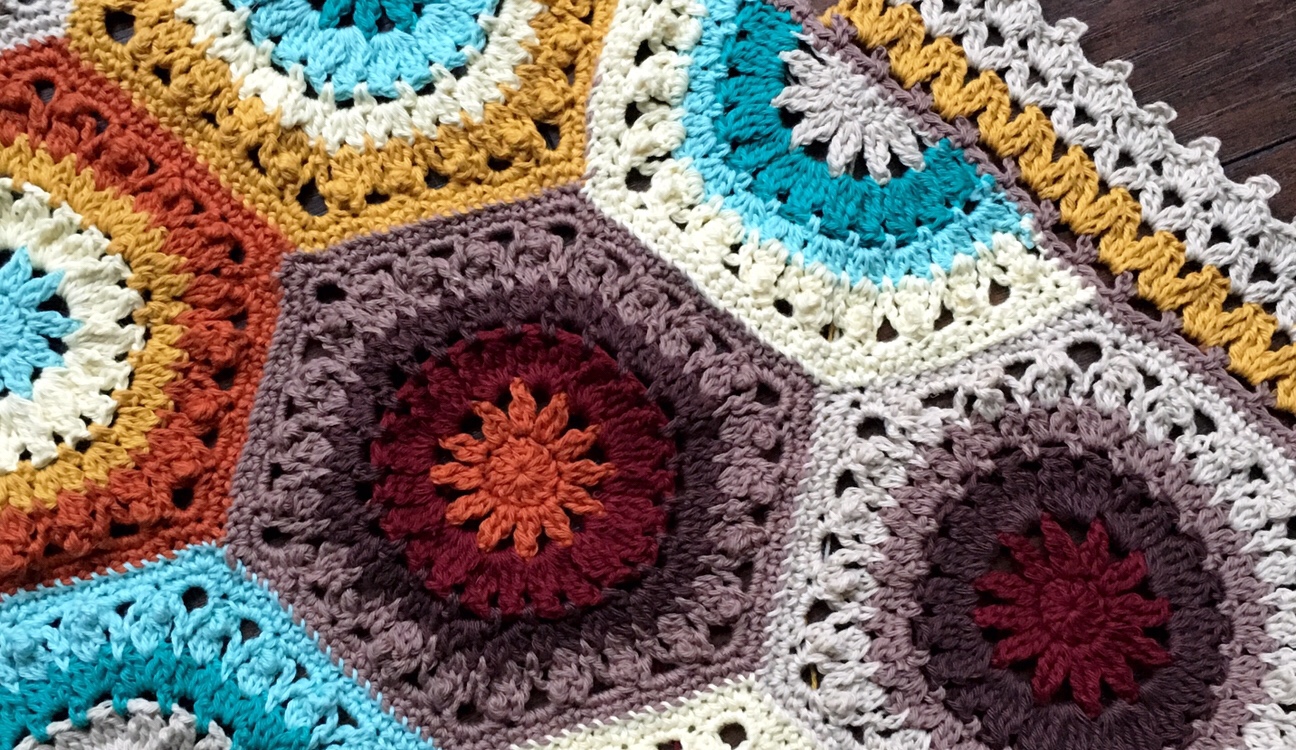
Callie Pattern:
Ravelry | Craftsy | Etsy | LoveKnitting

Info:
Alternate way to whip st join, instead of using the tails: YouTube Tutorial – Click here!
Notions:
US Size 3.25mm hook, Tapestry needle for weaving ends
Gauge: Motif measures about 6.5in at widest point
Measurements: Finished piece measures about 70x58in, and is easily resized by using larger gauge yarn and hook, or by making more motifs.
Yarn
Scheepjes “Cotton 8” (aff)
(100% Cotton; 50g/170m)
Color x No. of balls
Yarn A: 665 Light Blue Green x 3
Yarn B: 723 Sea Green x 3
Yarn C: 508 Soft Yellow x 3
Yarn D: 722 Ochre x 4
Yarn E: 671 Rust x 3
Yarn F: 717 Bordeaux x 3
Yarn G: 657 Dark Brown x 3
Yarn H: 659 Light Brown x 4
Yarn I: 656 Beige x 4

Calliope or simply “Callie” was born from an idea I had in August 2017 to make a floral hexagon with thin petals and an ornate texture. At that time I was working with my Fresh Earth palette and it was really well received, so I decided to start with that color scheme for the piece. Some color-swapping and adding tones, and the finished color combo was decided.
The way I used the colors in the piece is a bit different from most of my projects! I laid out the 9 colors in a circle in the order that most pleased me. Then when I made each motif, I used the colors in the order they appear in the circle. So each motif has very planned color order. This proved to be a success in that instead of a completely randomized color placement, there is some order to it.
Of course I can’t totally let go of random… so I did do random motif placement! Satisfying 🙂

And y’all loved it! I got tons of great feedback and it gave me the warm fuzzies.
But now it’s December. Almost the end of the year and Callie was nearly swept into 2018. Say it ain’t so!! It was time to put the pedal to the metal and get it checked off.

So the Callie pattern is ready for you all, and I really hope you have a wonderful time creating her. Any color combination will look stunning, and if you do decide to make Callie, be sure to hashtag #CallieBlanket and #CypressTextiles – this way I can see your works 🙂
Cotton 8 Yarn:
Scheepjes Cotton 8 (aff)
Callie Pattern:
Ravelry | Craftsy | Etsy | LoveKnitting
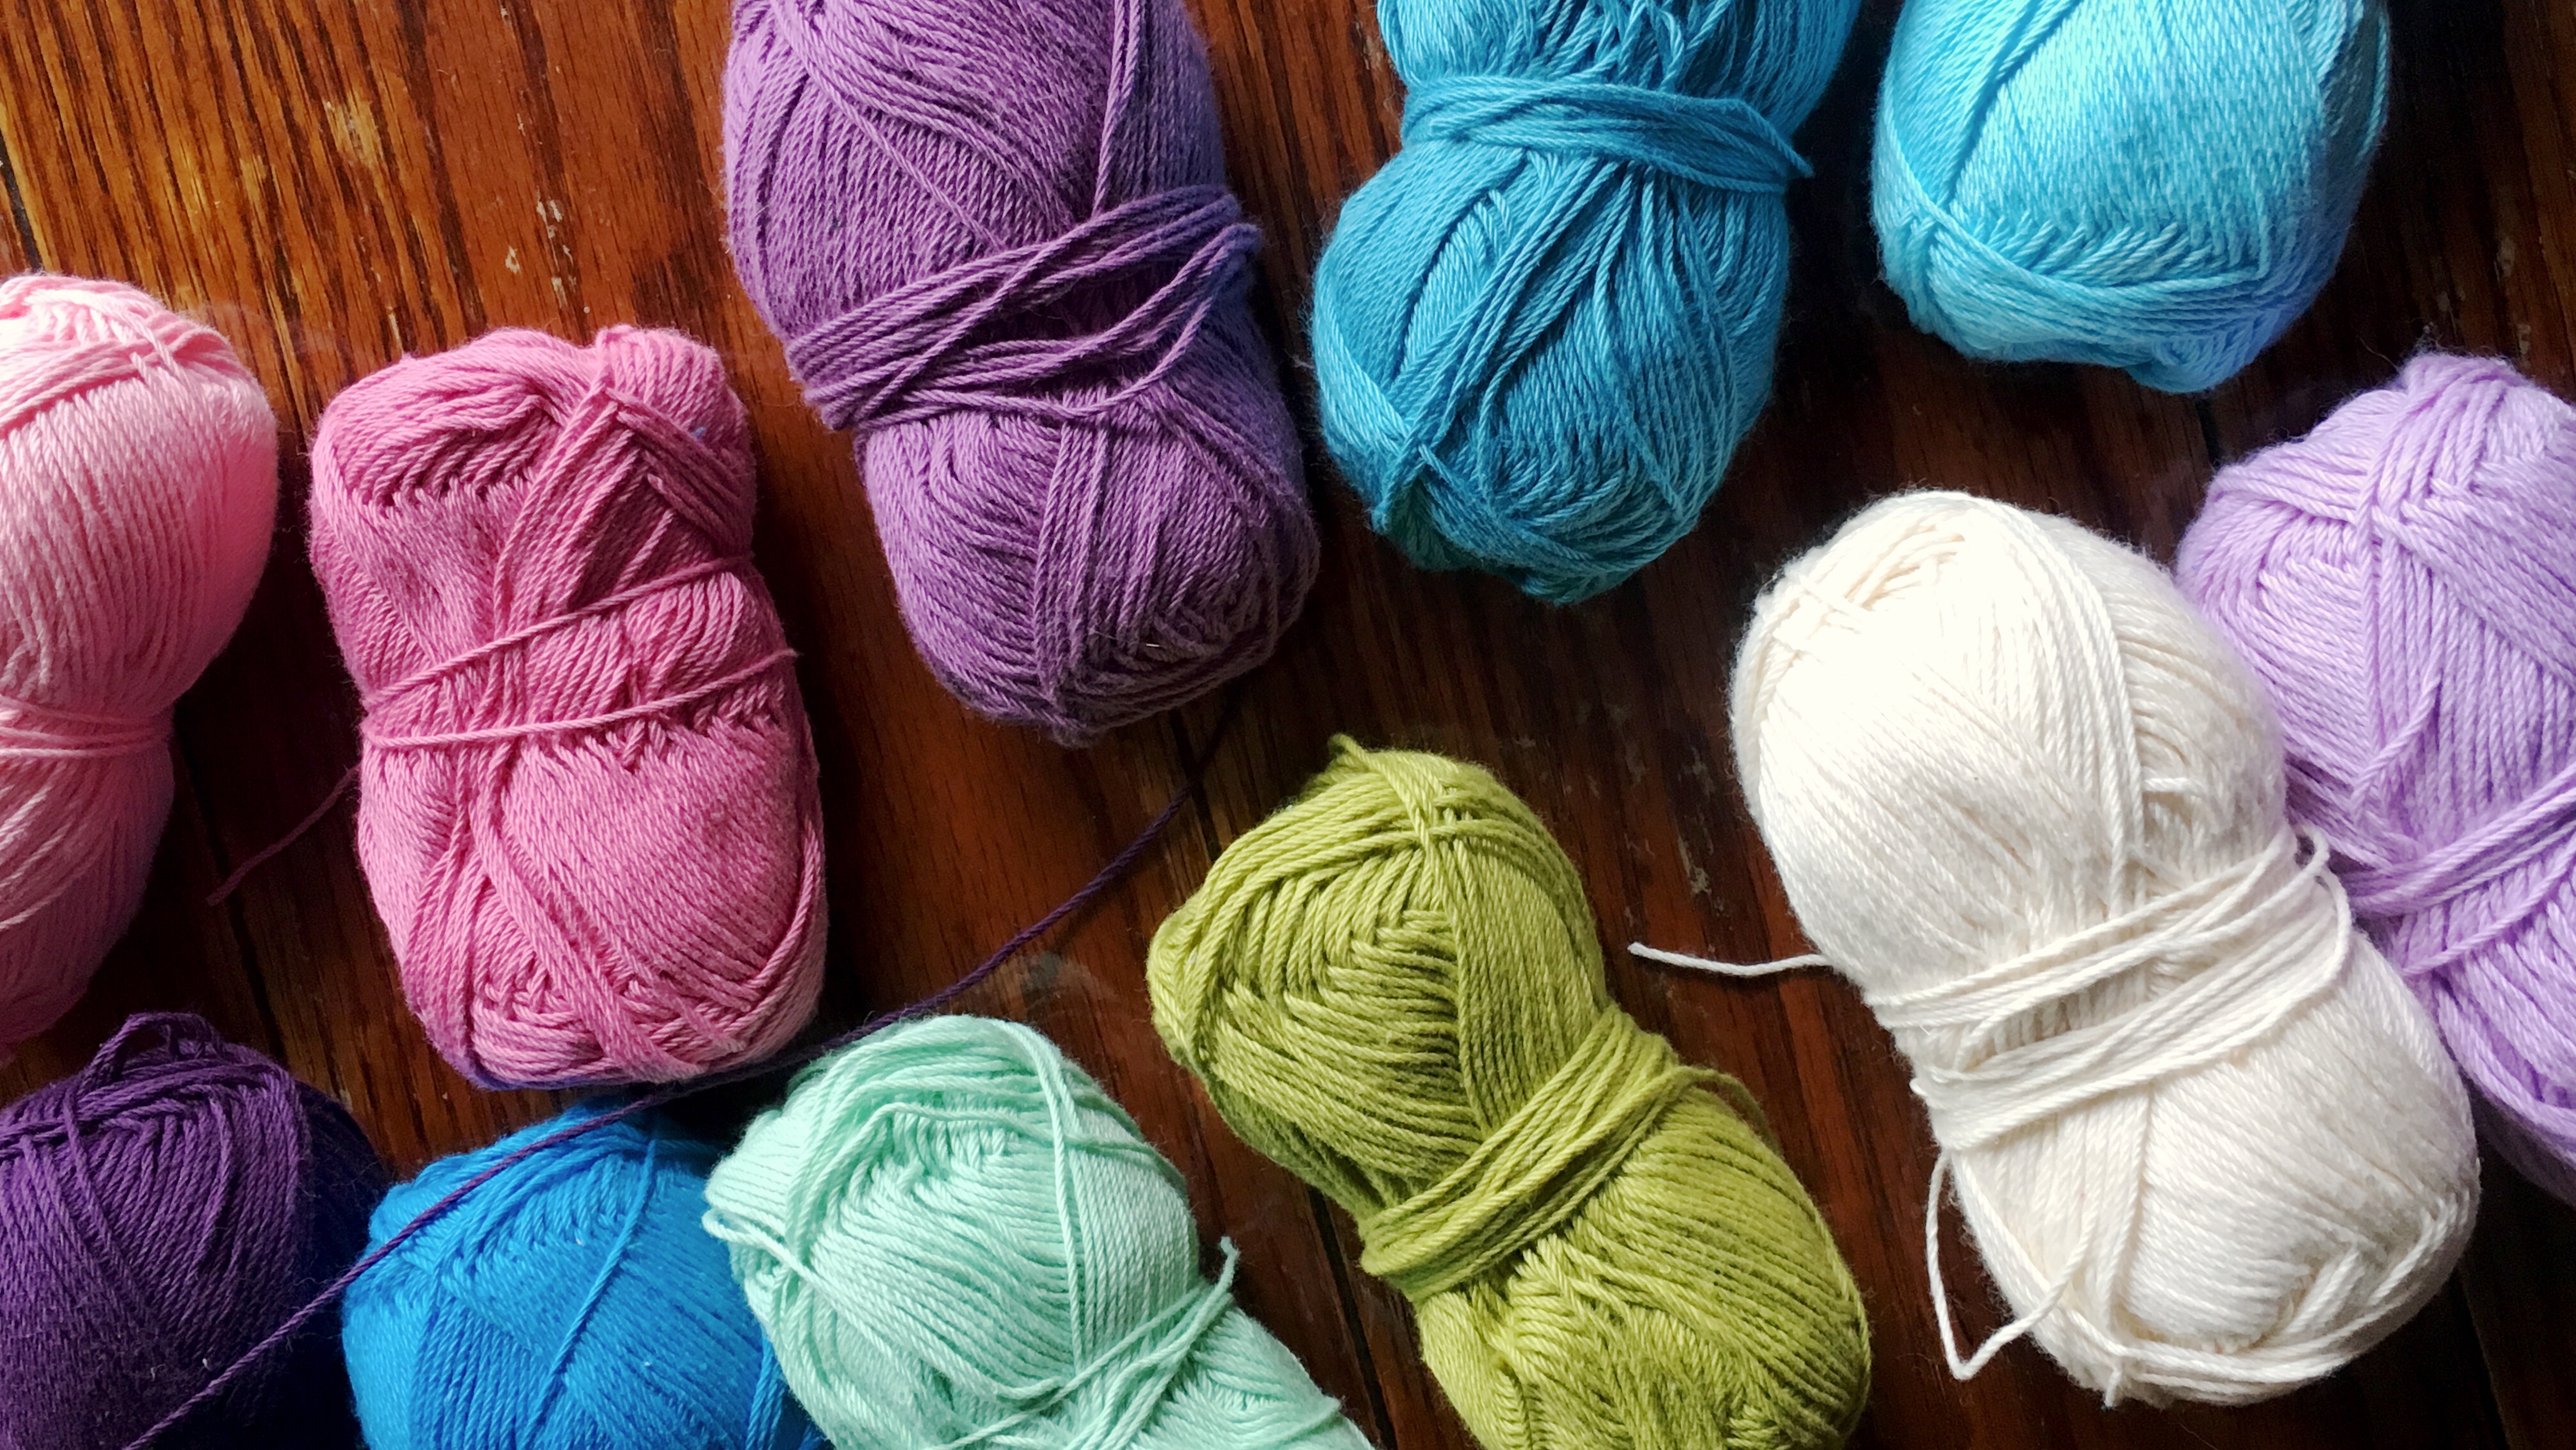

Pattern is in a lovely ad-free, easy to print PDF for you on the websites below for a small fee. Scroll down this post for the free pattern.
Ravelry || Craftsy ||Etsy || LoveCrochet.com
Links:

Yarn – Scheepjes “Cotton 8” (100% Cotton; 50g/170m)
Colors (1 ball each):
The Sunshine Blanket is designed with your happiness in mind. The color palette exudes Spring, and flowers, and cotton candy, and all the playful, fun things. Plus, there is no border but there are pompoms. A ray of sunshine, indeed.
#SunshineBlanket
US Size 3.25mm hook, Tapestry needle for weaving ends (NOT! lol – see note in pattern)
Gauge Motif measures about 4in at widest point
Measurements Finished piece measures about 26x34in, and is easily resized by using larger gauge yarn and hook, or by making more motifs.
Schematic


Note: Full Hexagons are worked in random colors through rnd 5, and joined as-you-go on the sixth round to make the blanket body. Then half hexagon motifs are joined on. Short sides are left as a zig-zag, and fun pompoms are added to the “peaks” to finish the piece.
Full Hexagon Motif (Make 72)
Rnd 1 (RS) Using any color, slip knot, ch 3, ss in third ch from hook to make ring. All in ring: Beg dc, 11 dc, ss in beg dc. [12 dc]
Rnd 2 (Beg dc, dc) in next st, 2 dc in 11 sts, ss in beg dc. [24 dc]
Rnd 3 2 sc in 24 sts around, ss in first sc, cut yarn. [48 sc]
Rnd 4 Using next color, ss in any st, (beg dc, 2 dc) in next st, (ch 1, sk 3, 3 dc) 11 times, ch 1, ss in beg dc, cut yarn. [36 dc, 12 ch-sp]
Rnd 5 Using next color, ss in any ch-sp, (beg dc, ch 1, 3 dc) in same chsp, * ch 1, 3 dc in next ch-sp, ch 1, (3 dc, ch 1, 3 dc) in next ch-sp, rep from * 4 times, ch 1, 3 dc in next ch-sp, ch 1, 2 dc in first corner to complete it, ss in beg dc, cut yarn. [54 dc, 18 ch-sp]
Rnd 6, Motif 1 (reference schematic on first page) Using any color, ss in any corner ch-sp, (beg dc, ch 1, 2 dc) in same ch-sp, * (ch 1, 3 dc in next ch-sp) 2 times, ch 1, (2 dc, ch 1, 2 dc) in corner ch-sp, rep from * 4 times, (ch 1, 3 dc in next ch-sp) 2 times, ch 1, dc in first corner ch-sp, ss in beg dc, cut yarn. [60 dc, 24 ch-sp]
Rnd 6, Motifs 2-7 Work as for Rnd 6, Motif 1, but on the side that will be joined, make an sc in each ch sp of the completed motif – this sc takes the place of the ch-sp on the motif in progress. So on the joined side, work an sc on the completed motif 5 times, where the ch-sps would be. Finish round as normal, ss in first st, and cut yarn. Reference photo above if needed.
Rnd 6, Rem Motifs Work as for Rnd 6, Motif 2, but when a corner is reached, where 2 motifs meet, sc in the corner ch-sp of the first motif, then in the corner ch-sp of the second motif. Continue around, joining as many sides as necessary, then complete the round as normal, ss in first st, and cut yarn. Reference above photo if needed.
Row 1 (RS) Using any color, slip knot, ch 3, ss in third ch from hook to make ring. All in ring: Beg dc, 6 dc, turn. [7 dc]
Row 2 Beg dc, 2 dc in 6 sts, turn. [13 dc]
Row 3 Sc in first st, 2 sc in 12 sts, cut yarn. [25 sc]
Row 4 With RS still facing, and using any color, ss in first st, beg dc in same st, ch 1, sk 1, (3 dc, ch 1, sk 3) 6 times – skipping only 1 st at the end, dc in final st, cut yarn. [20 dc, 7 ch]
Row 5 With RS still facing, and using any color, ss in first st, beg dc in same st, ch 1, 3 dc in ch-sp,* ch 1, 3 dc in next ch-sp, ch 1, (3 dc, ch 1, 3 dc) in next ch-sp, rep from * 1 time, ch 1, 3 dc in next ch-sp) 2 times, ch 1, dc in final st, cut yarn. [29 dc, 10 ch-sp]
Row 6 With RS still facing, and using any color, ss in first st, beg dc in same st, sc in corner ch-sp of adjacent motif, 2 dc in ch-sp on current motif, (sc in next ch-sp on adjacent motif, 3 dc in next ch-sp on current motif) 2 times, sc on completed motif, 2 dc in corner ch-sp on current motif, sc in corner ch-sp on first and second adjacent motifs, 2 dc in same corner sp as previous to complete corner, continue around in this manner, joining all 3 sides. DC in final st and cut yarn. Rep for rem half hexagons.
Using any color, make pompoms that measure about 1.75in in diameter. I wrapped the yarn around 3 fingers 130 times (not too tight) in one color, then switched to add 3 more colors, 20 wraps each. I tied a yarn piece tightly across the middle and cut the loops at both ends to create the pompom. I then trimmed to 1.75in. Alternatively, a pompom maker may be used. Attach pompoms to top and bottom edge of blanket, at the “peak” of each hexagon (7 at each end).

Yay! All done! Weave ends and give yourself a fist bump!
Note: Despite what I just said, I did not weave ends for this project. I tied off all the ends using Surgeon’s Knots and then cut them off to about 2mm. It is so liberating and I have not had any ends come loose yet, even after washing. Run to YouTube and learn about the surgeon’s knot – used also by fishermen who need strong knots too. Bless.
Copyright Information
No pattern or other material may be reproduced — mechanically, electronically, or by any other means, including photocopying — without written permission of Rachele Carmona. This applies to all content on CypressTextiles.net, BabyLoveBrand.net, all free/paid patterns, and tutorials. Paid patterns are for personal use only. You may sell your finished crocheted items.
Hi, y’all! So this has been a WIP for about 2 months now and I’m finally able to show you a decent amount of work… I’ve been addicted to Spring colors lately so don’t mind this off-season palette..
[Related – Shop this yarn! LoveCrochet: US*, WoolWarehouse: UK*]
 I’m using Scheepjes | Cotton 8 yarn for this project. Read more about how I chose this color palette on the yarny blog post.

Cotton 8 is a fingering weight yarn, which I thought I would not enjoy, but it turns out I’ve really grown fond of these tiny motifs, so I think I’ll be making more small gauge patterns. For this yarn I used a size 3.25mm (D) hook. Coming from a long history of worsted weight with a size 6.5mm (K) hook, that’s saying a lot!

(Side note: Don’t you feel like when you switch back and forth between large and small hooks, the large hook feels a bit like crocheting with a log?? Maybe just me lol)
Alert – we have pompoms in the house… I repeat: Pompoms. In. The house.

Of course the wonderful thing about blankets is that you don’t have to pay much attention to gauge – I think that’s one reason I love them so much! – so you can use any thickness yarn with your favorite accompanying hook and still get a gorgeous piece. Check out results of my other Cotton 8 play-times.

If you didn’t notice, I threw an olive green into the mix for these motifs. Another quirk in my long history of crochet is that I often pair olive with mint. I just think those two colors together are so beautiful. You can see in the photo above, I couldn’t resist sitting them next to one another. So pretty!

It’s like an unexpected cool and warm pairing – for some reason it just works.
Okay, but back to this sun-shiny blanket – I got requests to make the pattern release before the holidays, and I think I can do it, y’all! But it may be a by-a-nose win – I’ll get chugging along on it though. In the meantime I have a quickie pattern for a sparkly holiday garland in the works – stay tuned 🙂
Happy crafting!!
Rachele C.
Ta-daaaaa! This post has to be short and sweet as I am off to do a science project with my middle daughter, but i just had to show you all my latest FO.
It. Has. Pompoms.
On this overcast winter day, I present to you the happiest, most Springy-est, pastel-icious Blanket you could imagine. And it’s pint-sized! 26x34in to be exact.
During the progress pic posts on social media, I got a lot of positive feedback on this color combination and on the design of the blanket itself, which is so great and unexpected! I think the draw was the perfect little center circle, or at least that’s what I love about the motif. So playful!
Related links:

Warning: Gratuitous yarn photo ahead!!


* This post contains affiliate links, and Shopping through them costs nothing additional and supports my content.
Affiliate links are better than guacamole! They don’t cost extra!
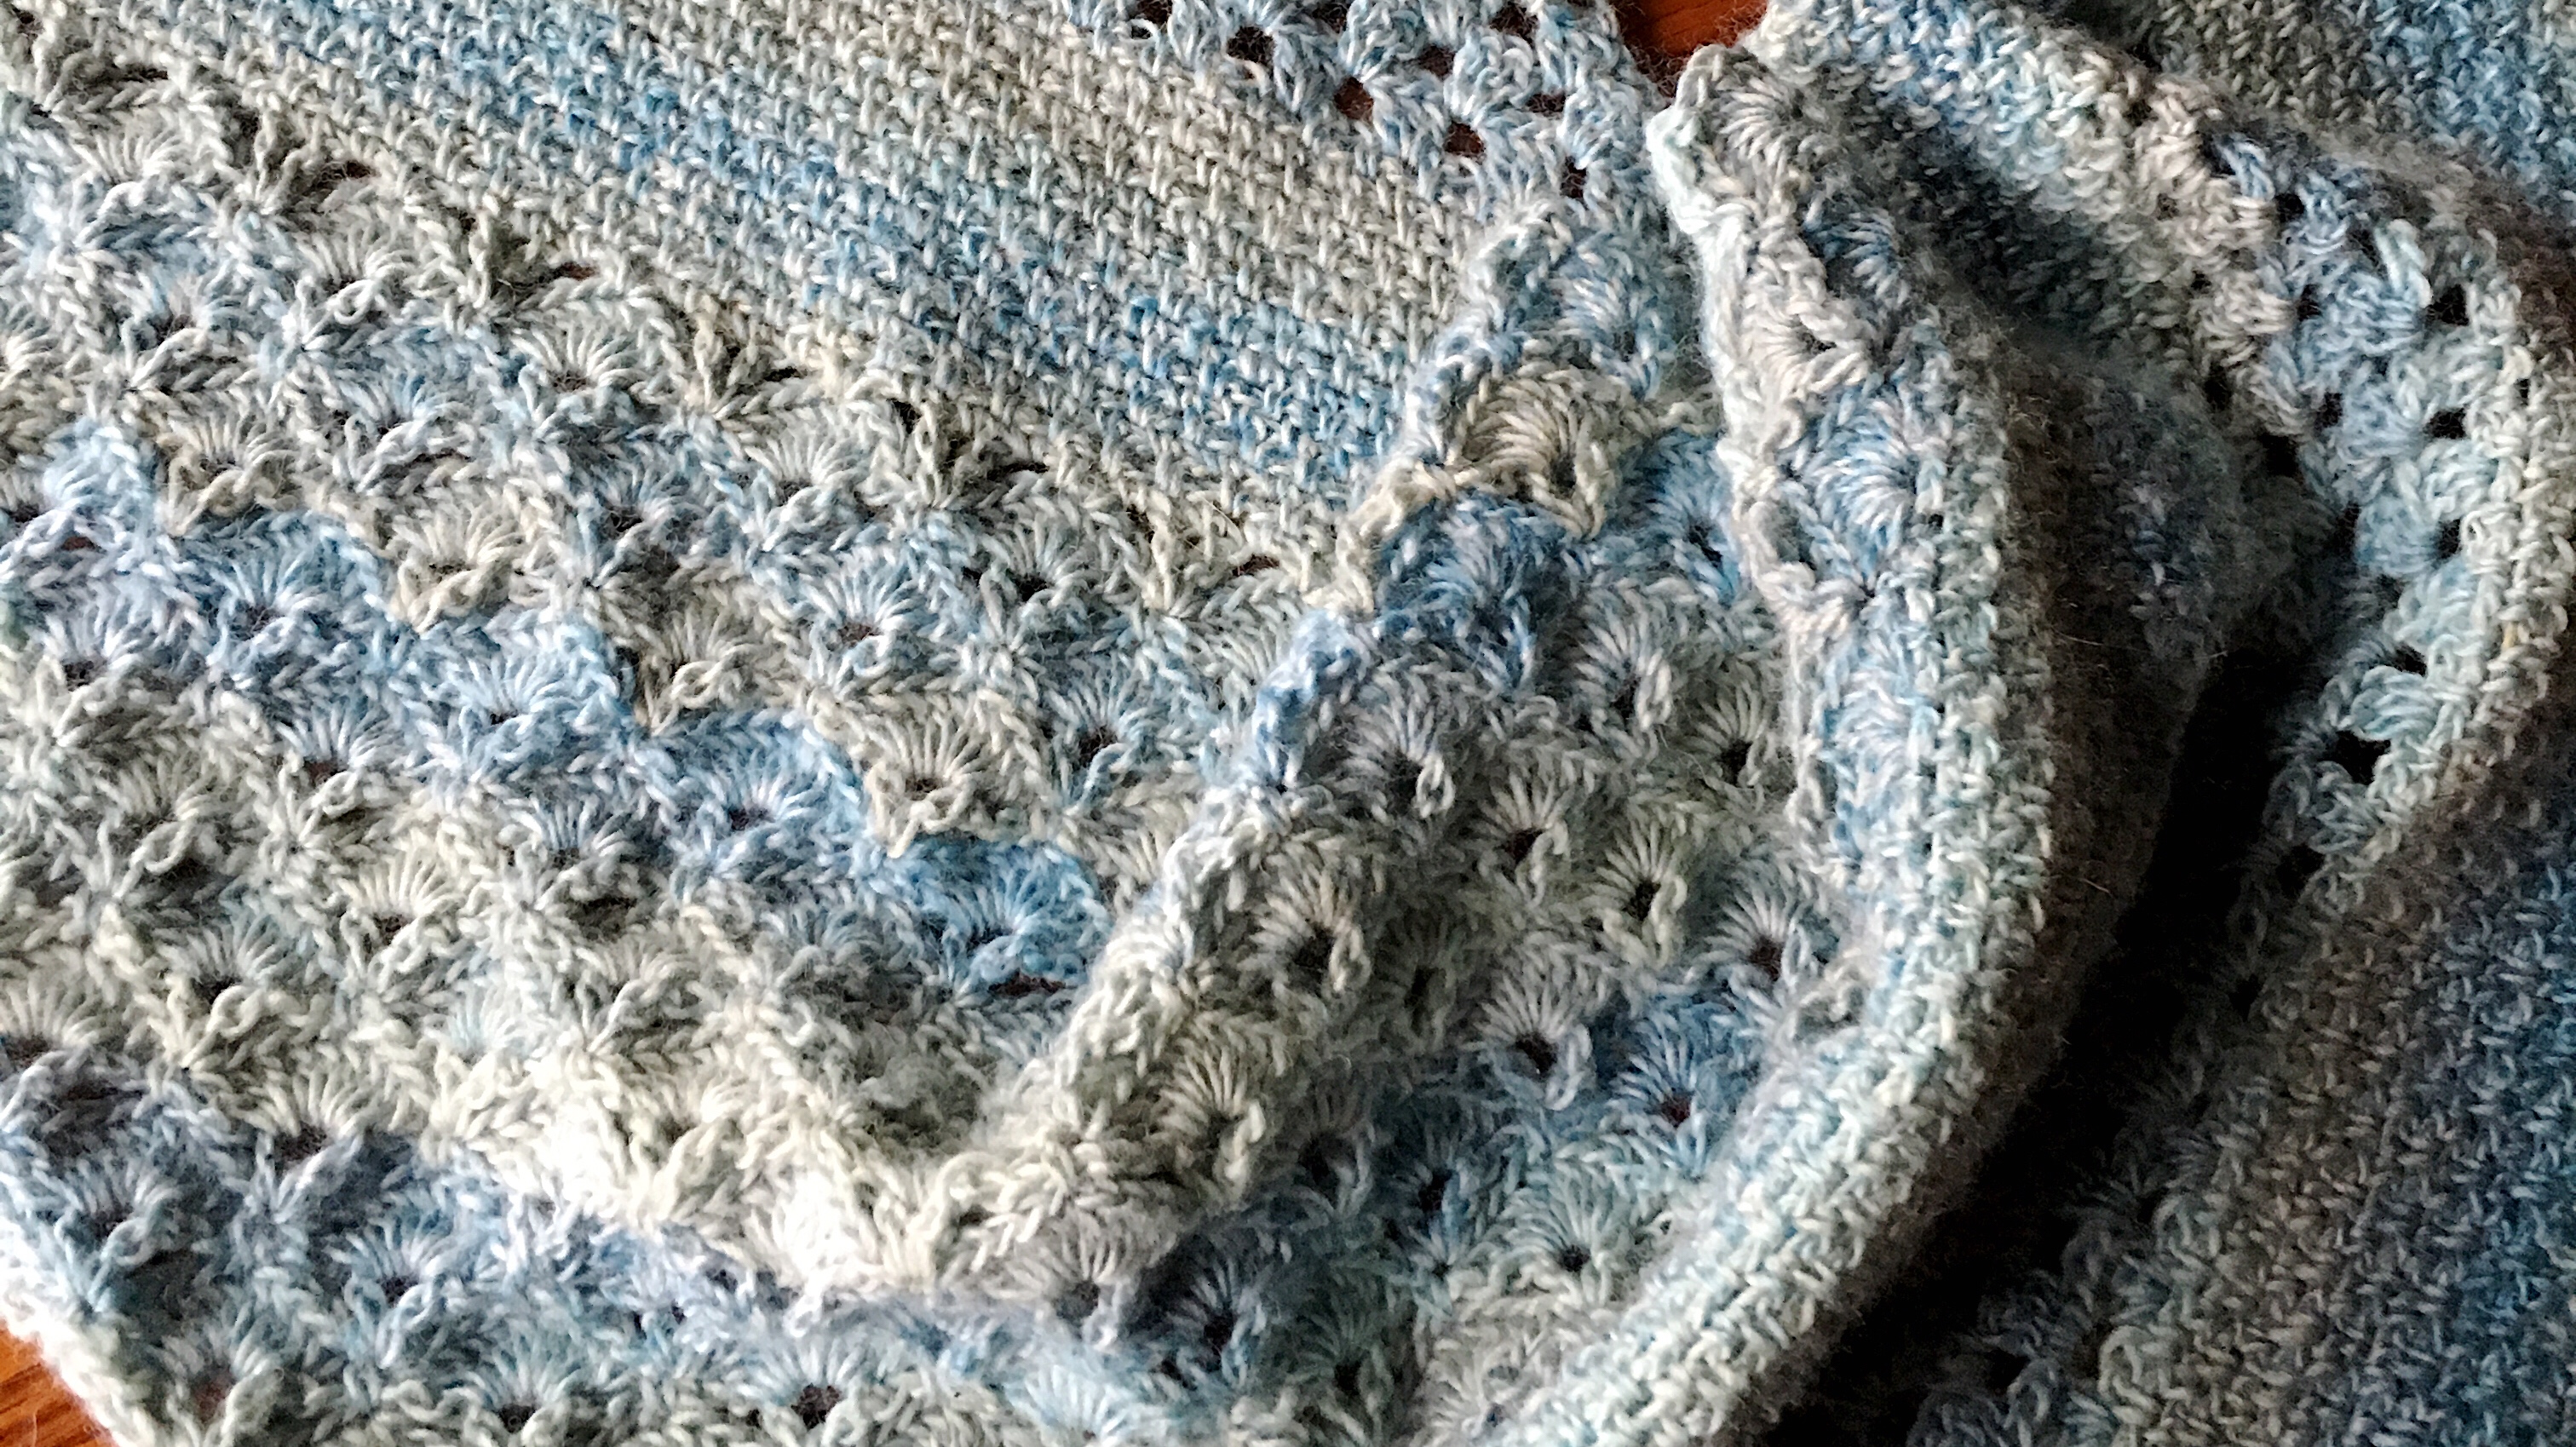
Well, guys, what can I say? I’m a part of the neatest thing since sliced bread – grabbing the baton from Miss Neriss on this Scheepjes Blogger blog hop – (Thank you, Nerissa!!), and it’s now my turn to introduce Our Tribe yarn.
[Related Link: Browse this yarn*!]

Look at that pile of loveliness and tell me you don’t want to just reach out and squeeze a skein.
A few months ago, Scheepjes reached out to me and asked me for six colors that I thought faded well with one another. I was quite puzzled but I replied with a set of colors which have always been in my heart and often make an appearance in my projects (Trellis and Chevron, Desert Bloom, Moon Landing, and many more). These salient shades included a nice turquoise, a mint green, and an olive green, among others. The navy blue, coral, and deeper teal colors I chose are all hinted at in my yarn skein, but the real superstar is the mint and olive combo.
I was actually just recently commenting on how using mint and olive side by side has such a pleasing effect to me and it’s definitely a color pairing that I can’t seem to get out of my system. It shows up over and over in my works. There’s something about the cool mint and the warm olive that play off of each other to create a lovely combination. Add in the breezy turquoise and hints of blue? I’m smitten! Little did I know, when I was asked to pick 6 colors, that I would be choosing the shades of my very own yarn color-way.

Yes! Scheepjes let the Bloggers group members each pick colors to design our own shade of yarn… and it’s named “Our Tribe.” You can see in the photo above that while each of us has a different color personality, all of the shades go together quite well. What does that say about the Scheepjes Bloggers? It’s definitely an eclectic group of makers, but we come together to complement one another and bring our own shade of talents to the group. I’m proud to be a part of it!

In the overcast weather outside, our yarns kept changing color, but above you can see the ocean blues and greens of mine, plus the delicious colors of the rest of our Blogger Tribe members. I honestly cannot wait one minute to make a blanket using all of those yarns. Y’all know I’m not scared to combine a sugary pastel with a striking peacock and a fiery red, right? Bring it on..
Our Tribe yarn is a Superwash Merino blend – so lush! The six shades in each color-way are lightly twisted to blend and fade gloriously, creating loads of visual texture. And boy is this yarn soft. Truly I want to sink my hook into every single skein!
For now, I just dove into my own color-way to make a scarf – after all, a scarf is just a skinny blanket right? Lol. I really tried to get a feel for the yarn and with its soft hand and long color changes, it seemed like a wearable project would be the perfect choice. One with varying stitches just like all my blankets have! I couldn’t resist that one 🙂

I chained 100, and voila, the Hundred Chain Scarf was born. (Go score the pattern! It makes for the perfect gift – a quick, entertaining make with loads of visual impact.)
Ravelry | Craftsy | Etsy | LoveKnitting
You all know that along with using a yarn made of my favorite colors, I had to incorporate my favorite stitches into the inaugural project. So the Hundred Chain Scarf features linen st – a long time fave of mine, granny st – the chicken noodle soup of crochet, and a visually appealing fan and V st, which I added in as the spice to take it up a notch.

As this pattern is on the bias – I could not resist giving myself a slight challenge – I had to work out how to make the diagonal shape in all three stitch types, and when I tell you it worked out perfectly, y’all…. it’s like this was all meant to be! The Tribe power is strong! ❤️
 <<<<<
you want a scarf in every color-way? It only takes 2 balls of Our Tribe to make the Hundred Chain Scarf. For now, Our Tribe is only available in brick and mortar Scheepjes Retailers, but I’ll have a link for y’all soon when it hits the online shops.
<<<<<
you want a scarf in every color-way? It only takes 2 balls of Our Tribe to make the Hundred Chain Scarf. For now, Our Tribe is only available in brick and mortar Scheepjes Retailers, but I’ll have a link for y’all soon when it hits the online shops.  <<<<<
ked my daughter to model it like she has in the past, and she humored me! This girl is growing so fast, and she’s the one who first taught me what it’s like having a Tribe – Our first born ❤️ and growing like a weed!
<<<<<
ked my daughter to model it like she has in the past, and she humored me! This girl is growing so fast, and she’s the one who first taught me what it’s like having a Tribe – Our first born ❤️ and growing like a weed!
 Well there you have it, y’all! A walk through my special shade of Scheepjes Our Tribe yarn from beginning to scarf 🙂
Next up in the blog hop is someone who I have long admired since waaaay before I joined the Scheepjes Bloggers: Susan of The Felted Button (and PS, her color is just as scrumptious as you would think it’d be!) Look out for her blog post tomorrow!
Thanks for coming with me on this journey, y’all!!
Happy crafting,
Rachele C.
*This post has an affiliate link. Shopping through this link will help support CypressTextiles and let me keep producing content, at no additional cost to you.
Affiliate links are better than avocado. They don’t cost any extra!
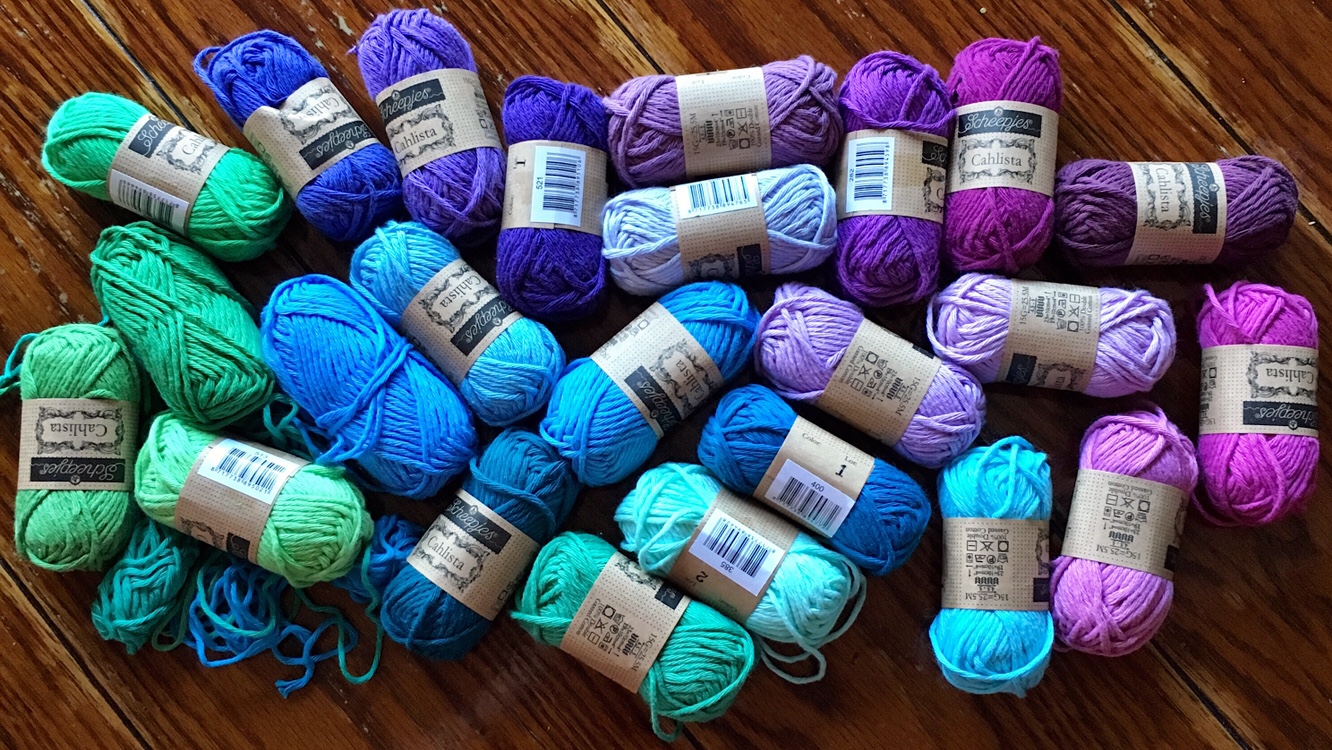
Okay y’all, if you’re ready to see the results of my newest color palette playtime, then feast your eyes on “Mermaid” and keep reading to see my eensy WIP progress. ❤️

These scrumptious little eye-candies of joy are Scheepjes | Cahlista 15g balls.
I’ve created this Mermaid palette after several iterations and shade groupings. If you’re looking for the Color Pack, it will be in Scheepjes retailers by Dec 1, and you can find the 50g Cahlista* at WoolWarehouse.
This is an aran weight cotton yarn that is passed over a flame 2 times to make sure it’s not “fuzzy.” I’ve made a sample Trellis for an upcoming surprise project, and oh my goodness this yarn is lush. I’m not usually the biggest cotton person, but this is a beautiful matte yarn with a lovely hand. It’s not stiff either – my wrists will sometimes get sore working with cotton and I haven’t had that problem with the Cahlista. (Note: I used a size 5mm (H) hook and it works great for me!)

I have to apologize because I took about a zillion photos of these 15g beauties.. but here’s the photo from Scheepjes.com – delish!

To take a closer look at the Color Pack (all 109 colors plus 10 more coming in January!!), go see the drool-worthy stop motion video – it’s every yummy color – on Scheepjes Instagram page!
 Here these cuties are with my secret WIP! Okay not a secret, but I’m going to keep it a surprise until more is done… But I will say, it’s a freebie because it’s something I’ve never made before. Yes! *gasp!* it’s not a blanket!

And of course, the rest of the 15g Cahlista Color Pack, looking like a box of bite-size snaxx. Pick -n- mix of a lifetime!
 You know how you stick your hook and scissors through your yarn ball to keep track of them? No? Just me? Well I couldn’t exactly do that with this tiny ball of yarn – but I tried.. And now I just feel bad for impaling the adorable li’l guy lol

Look out for more info on this WIP – including a few more clues on what it could be. 🙂
And as promised, here’s the Holiday Gift Idea!!
This gorgeous linen bag holds 22 Cahlista 15g Balls exactly, and that’s the exact perfect size for my project. Cohana artist accessories are nothing short of exquisite.
The label and tassel kill me, and there are pockets all around the bag to hold supplies.

And the lush and indulgent packaging! Gorgeous packaging will win me over every time. The pins – heart eyessss! And what’s in that cute little box?

Of course! It’s a Button paper weight/desk decor piece. Plus I invented the best use for it… see below.

Finally, a place to keep track of my hook and scissors for this WIP! Lol! It’s too good. And nicely made too – good weight to it. Mr. Button is officially the new mascot of my tiny desk.

Check out Cohana notions, accessories, and storage solutions at the website linked above. It’s the perfect holiday gift for the crafter who has everything. I’ve been browsing all afternoon. ❤️
One more thing: I just couldn’t resist another shot of the Mermaid palette. Looking forward to sharing more of this mysterious WIP with you all!

*Shopping through affiliate links marked with an asterisk is no additional cost to you, and you’ll be helping support CypressTextiles and all my new content.
Affiliate links are like Pringles – you can’t click just one!
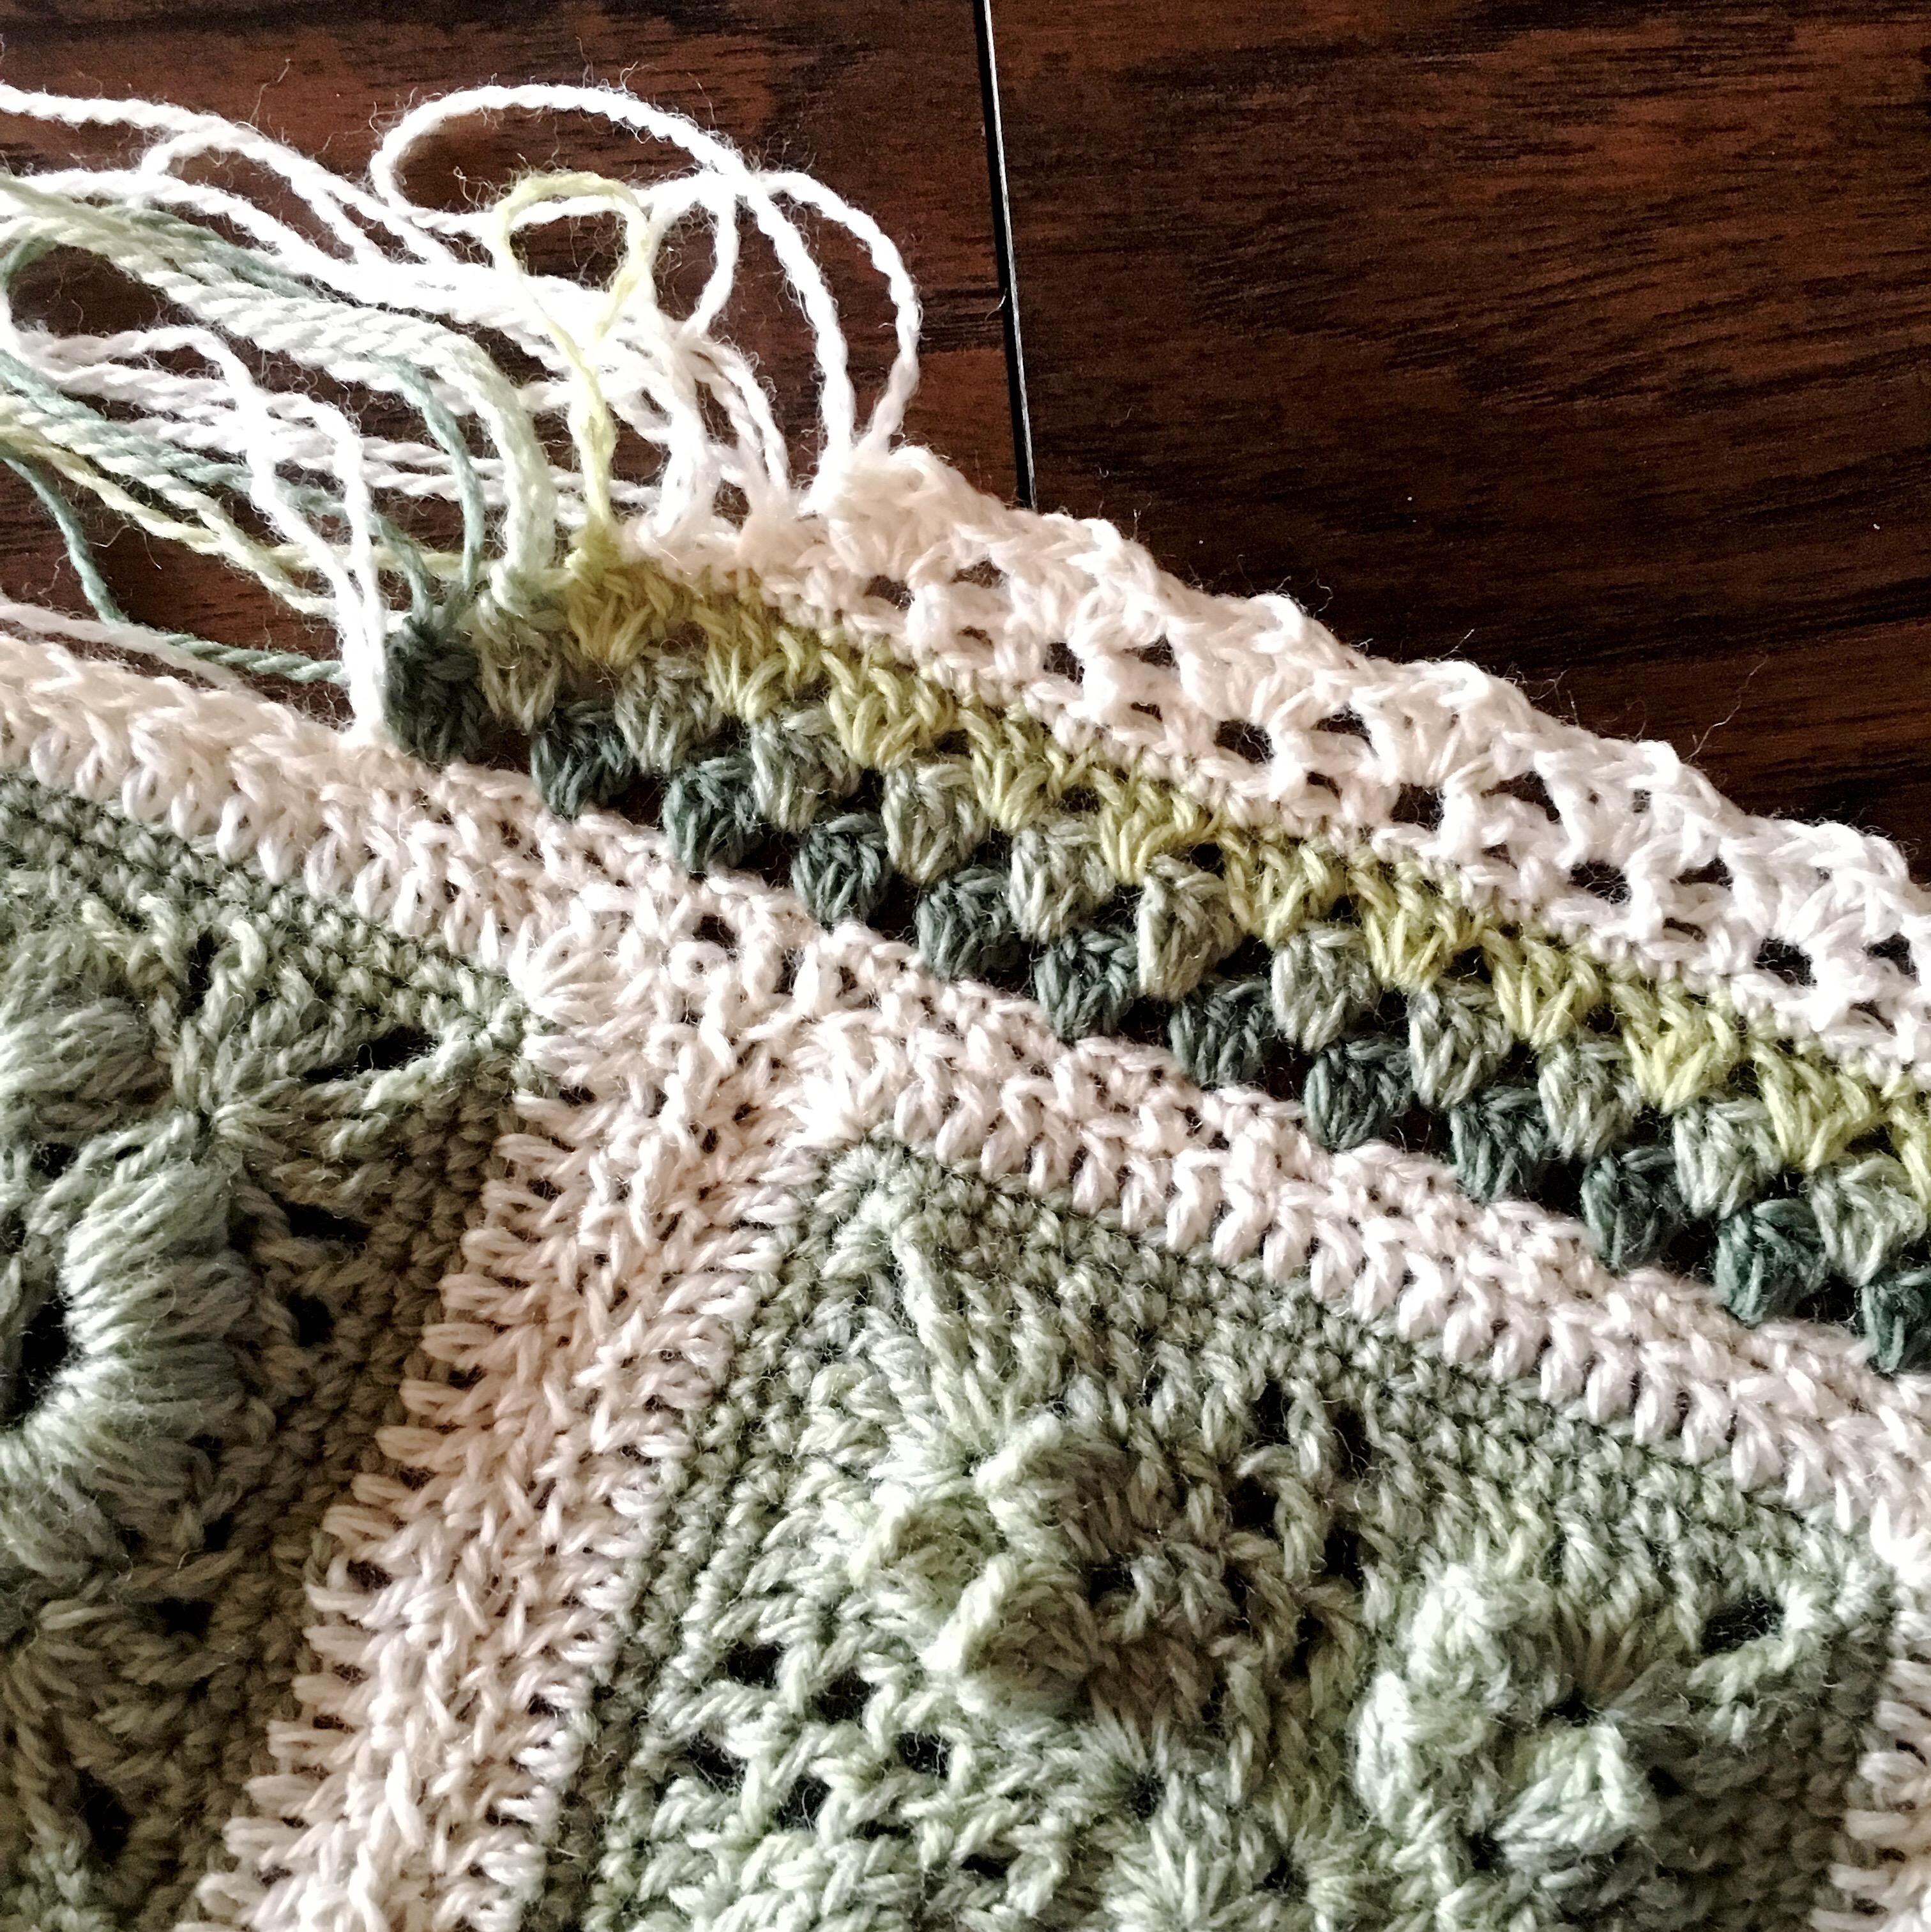
Hi, y’all! As you may already know, I made a Vibrant Vintage Blanket recently in shades of green with a cream color background and Border. It took me several tries to figure out what join to use, but I settled on a little experiment I did with a riff on flat braid join.
YouTube Video Tutorial:
(Shaky hand at the beginning – I apologize!!)

So the normal flat Braid join has 3- or 5-ch spaces or something like that, but the one I used has only 1 chain for the spaces. So on sides that are joined, the only chain is the joining chain.

You can see this dainty little textured join is just a little something extra to set off the squares without taking anything away. There’s the tiny cable effect which is just perfect. It also absorbs any slight variance in the square size, where a rigid, plain join might pucker or pull.
Anyway, I’m happy with this little join, and fellow FaceBook Crafter, Liz Cooper has shared her lovely work using the 1-ch FBJ in my new FB group the “Tree Huggers” – where you can go and show off your CypressTextiles makes. ❤️❤️
Check out Liz’s WIP! Two thumbs up! 🔥🔥

Hope y’all enjoy this join! 🙂
Happy crafting!
Rachele C.
Hi, y’all! It’s time for the release of my Cozy Flowers Blanket free pattern – yay!
Typically I would make a PDF for the free pattern, and make it available in my Ravelry shop and my other shops, but since the majority of the instruction for this pattern is in the YouTube tutorial for the joining method, I thought it would be silly to make a PDF. So here is the full free pattern below.
See the related posts for more details of the blanket process:
Difficulty: Perfect for a beginner who wants to learn some new techniques.
Yarn: Scheepjes | Catona (10 50g balls – all different colors) and Sweet Treat (10 25g balls – all different colors)
Colors
Note: these are the colors I actually ended up using in the final piece. The blanket is worked from right to left, and the colors are used held together until the Catona runs out. There will be a little amount of Sweet Treat left over.
(Catona, Sweet Treat)
Flowers
Join
 Note: These two yarns will be held together throughout the piece. In the photo above, the adjacent Catona and Sweet Treat are the ones to be paired up (note: in the final blanket I did swap the orange for more of a bright yellow). I chose my 10 Catona shades first, then I chose 10 Sweet Treat shades that were very similar to the Catona shades, but not identical. It doesn’t matter what color palette you want to work with, but to get the neat and cozy textured effect of this blanket, you want the shades to be similar, but not the same.
You can see the paired yarn effect clearly in this photo:

[Related link: Shop this yarn: Catona* // Sweet Treat*]
Hook: US hook size 5.5mm (I) for blanket body, and size 5mm (H) for the final border round – I use mine from the set I ordered on Amazon – my favorite crochet hooks ever
Tapestry needle for weaving ends
Final Dimensions: 38x52in
Gauge: Full motif measures 3in across
Make full and half motifs, join full motifs using continuous granny st join as you go for hexagons youtube video, add in half motifs, straighten zig-zag edges, add sc border with smaller hook. Et voila! Done! 🙂
Full Motif (Make 94) – I used 5 of my Catona and Sweet Treat pairs to make the full motifs – the upper set of 5 pairs in the yarn photo at the beginning of this post are the ones I used.
Rnd 1 Slip knot, ch 3, ss in third ch from hook to make ring. All in ring: Beg dc, 11 dc.
Rnd 2 Beg cl in first st, (ch 2, cl in next st) 11 times, ch 2, ss in beg cl, cut yarn.

Half Motif (Make 10) – Using same set of 5 yarn pairings
Row 1 (WS) Slip knot, ch 3, ss in third ch from hook to make ring. All in ring: Beg dc, 7 dc, turn.
Row 2 Beg tr in first st, ch 1, (cl, ch 2) 5 times, cl, ch 1, tr in final st, cut yarn.

Using the other 5 yarn pairings, (I used the more pale shades for this part). The join is: Continuous Granny St Join-as-you-go for Hexagons – Follow the instructions in this YouTube video tutorial for joining – video is in 2 parts.
Note: This blanket is meant to be cozy, so when the yarn ran out, I just began a new yarn pair, no matter where that color change happened to take place in the blanket.
You can see in the photo below that the yarn join changes color randomly.

You will be joining 5 half motifs at each short end of the blanket. Holding half motif with RS facing, join background yarn with ss in first st. Depending on where your motif is located on the edge, you will have a (plain side, joining side, joining side), 3 joining sides, or a (joining side, joining side, plain side).
First plain side: Beg tr, ch 1, 2 dc in first ch-sp, 3 dc in next ch-sp, 2 dc, in next ch-sp to make first half of corner,
Joining side: work as for joining blanket body.
Final plain side, 2 dc in ch-sp to complete corner, 3 dc in next ch-sp, 2 dc in final ch-sp, ch 1, tr in final st.
 Straighten Zig-Zag Sides
Holding blanket body with RS facing, join background yarn with ss in first st. (Sk 1 ch, sc in 2 sts, hdc in 2 sts, dc, tr in 2 sts, tr in next 2 sts on following motif, dc, hdc in 2 sts, sc in 2 sts) rep across side to end, ss in final st, cut yarn. Rep for opposite side.

This photo shows the edge repeat.

I have made this border a plain sc round just to keep it simple and cozy, and also as a great base to add any border.
Switch to smaller hook. Ss in first ss of either zig-zag side. (3 sc in same ss, sc in all sts across to next corner, 3 sc in corner ss, sc evenly across short side, placing 3 sc in the side of each tr st, 2 sc in the side of each dc, and 1 sc in the center ring of each half motif) rep 1 time, ss in first st, cut yarn. Fin!

Finished blanket – hurrah!

Edging shown more clearly:
Working on my Cozy Flowers blanket today for an energizing moment. You can’t help but feel the electricity in this palette, and moving from hot to sweet colors is making me feel like a painter! Oh and also it’s making me feel like I’m channeling my inner Susan Felted Button and Kirsten Haak Maar Raak! ❤️❤️
 For this piece, I am using Scheepjes | Sweet Treat and Catona held together – see all the colors I’m using in my previous post (spoiler alert: I did add another color to the flowers and take one away from the background).

Yarn deets:


To make things easier on me, I wound one big ball using the two yarns, this way I wouldn’t have two yarn balls rolling all around. The Catona runs out first! Here’s how much of the Sweet Treat is left over, once all the Catona is gone. Not much! Dreaming of an embroidery project now, by the way ❤️

Then I started cranking out flowers. This is pretty much the easiest project ever, especially because the continuous granny stitch join (YouTube Tutorial) is so cute and boy is it fast!

Pics just for fun ❤️❤️


*Support my free content by shopping through affiliate links, buying patterns or becoming a patron! I promise no ads ever! ❤️
Hello, y’all! I’m pleased to show off a finished object today despite the fact that I’ve had an extremely busy week. Sometimes you just know if you don’t finish a certain project, you’ll pull your hair out, am I right? So I stayed extra focused and plowed through!
And now I present Cozy Flowers: Free Pattern Here!
Color palette – Sweet-Fire – so named for the sugary pastels that give way to those burning oranges.

Scheepjes | Catona and Sweet Treat held together throughout – I’ll list numbers on the free pattern when i release it!
Shop Catona*, and Sweet Treat* Yarns – it looks awesome when you hold these Yarns together. If you zoom in on the pics you can see the neat texture it creates. Plus I used a size 5.5mm hook – so it works up fast.
Here’s a shot of Cozy Flowers in progress – with the Continuous JAYG Granny St for Hexagons (YouTube Tutorial) and color palette just shining away (I know you can tell I️ introduced a bright yellow to the palette!)
 Some unapologetic FO shots for you!
 Can’t wait to wrap up this pattern and release it! Churn out the tiny 2-round flowers and then join them all continuously before creating the super simple border…. It comes together so quickly!
 For now, just imagine the infinite color palette possibilities for this pattern… Swoon!!
I definitely felt like I channeled Susan of Felted Button and Kirsten of Haak Maar Raak! for this piece… these saturated colors are very energizing to work with and I can see why Susan and Kirsten always have these hues on their hooks ❤️


 <Shopping through affiliate links (marked with an asterisk) doesn’t cost you anything extra, and will help support CypressTextiles. ❤️❤️
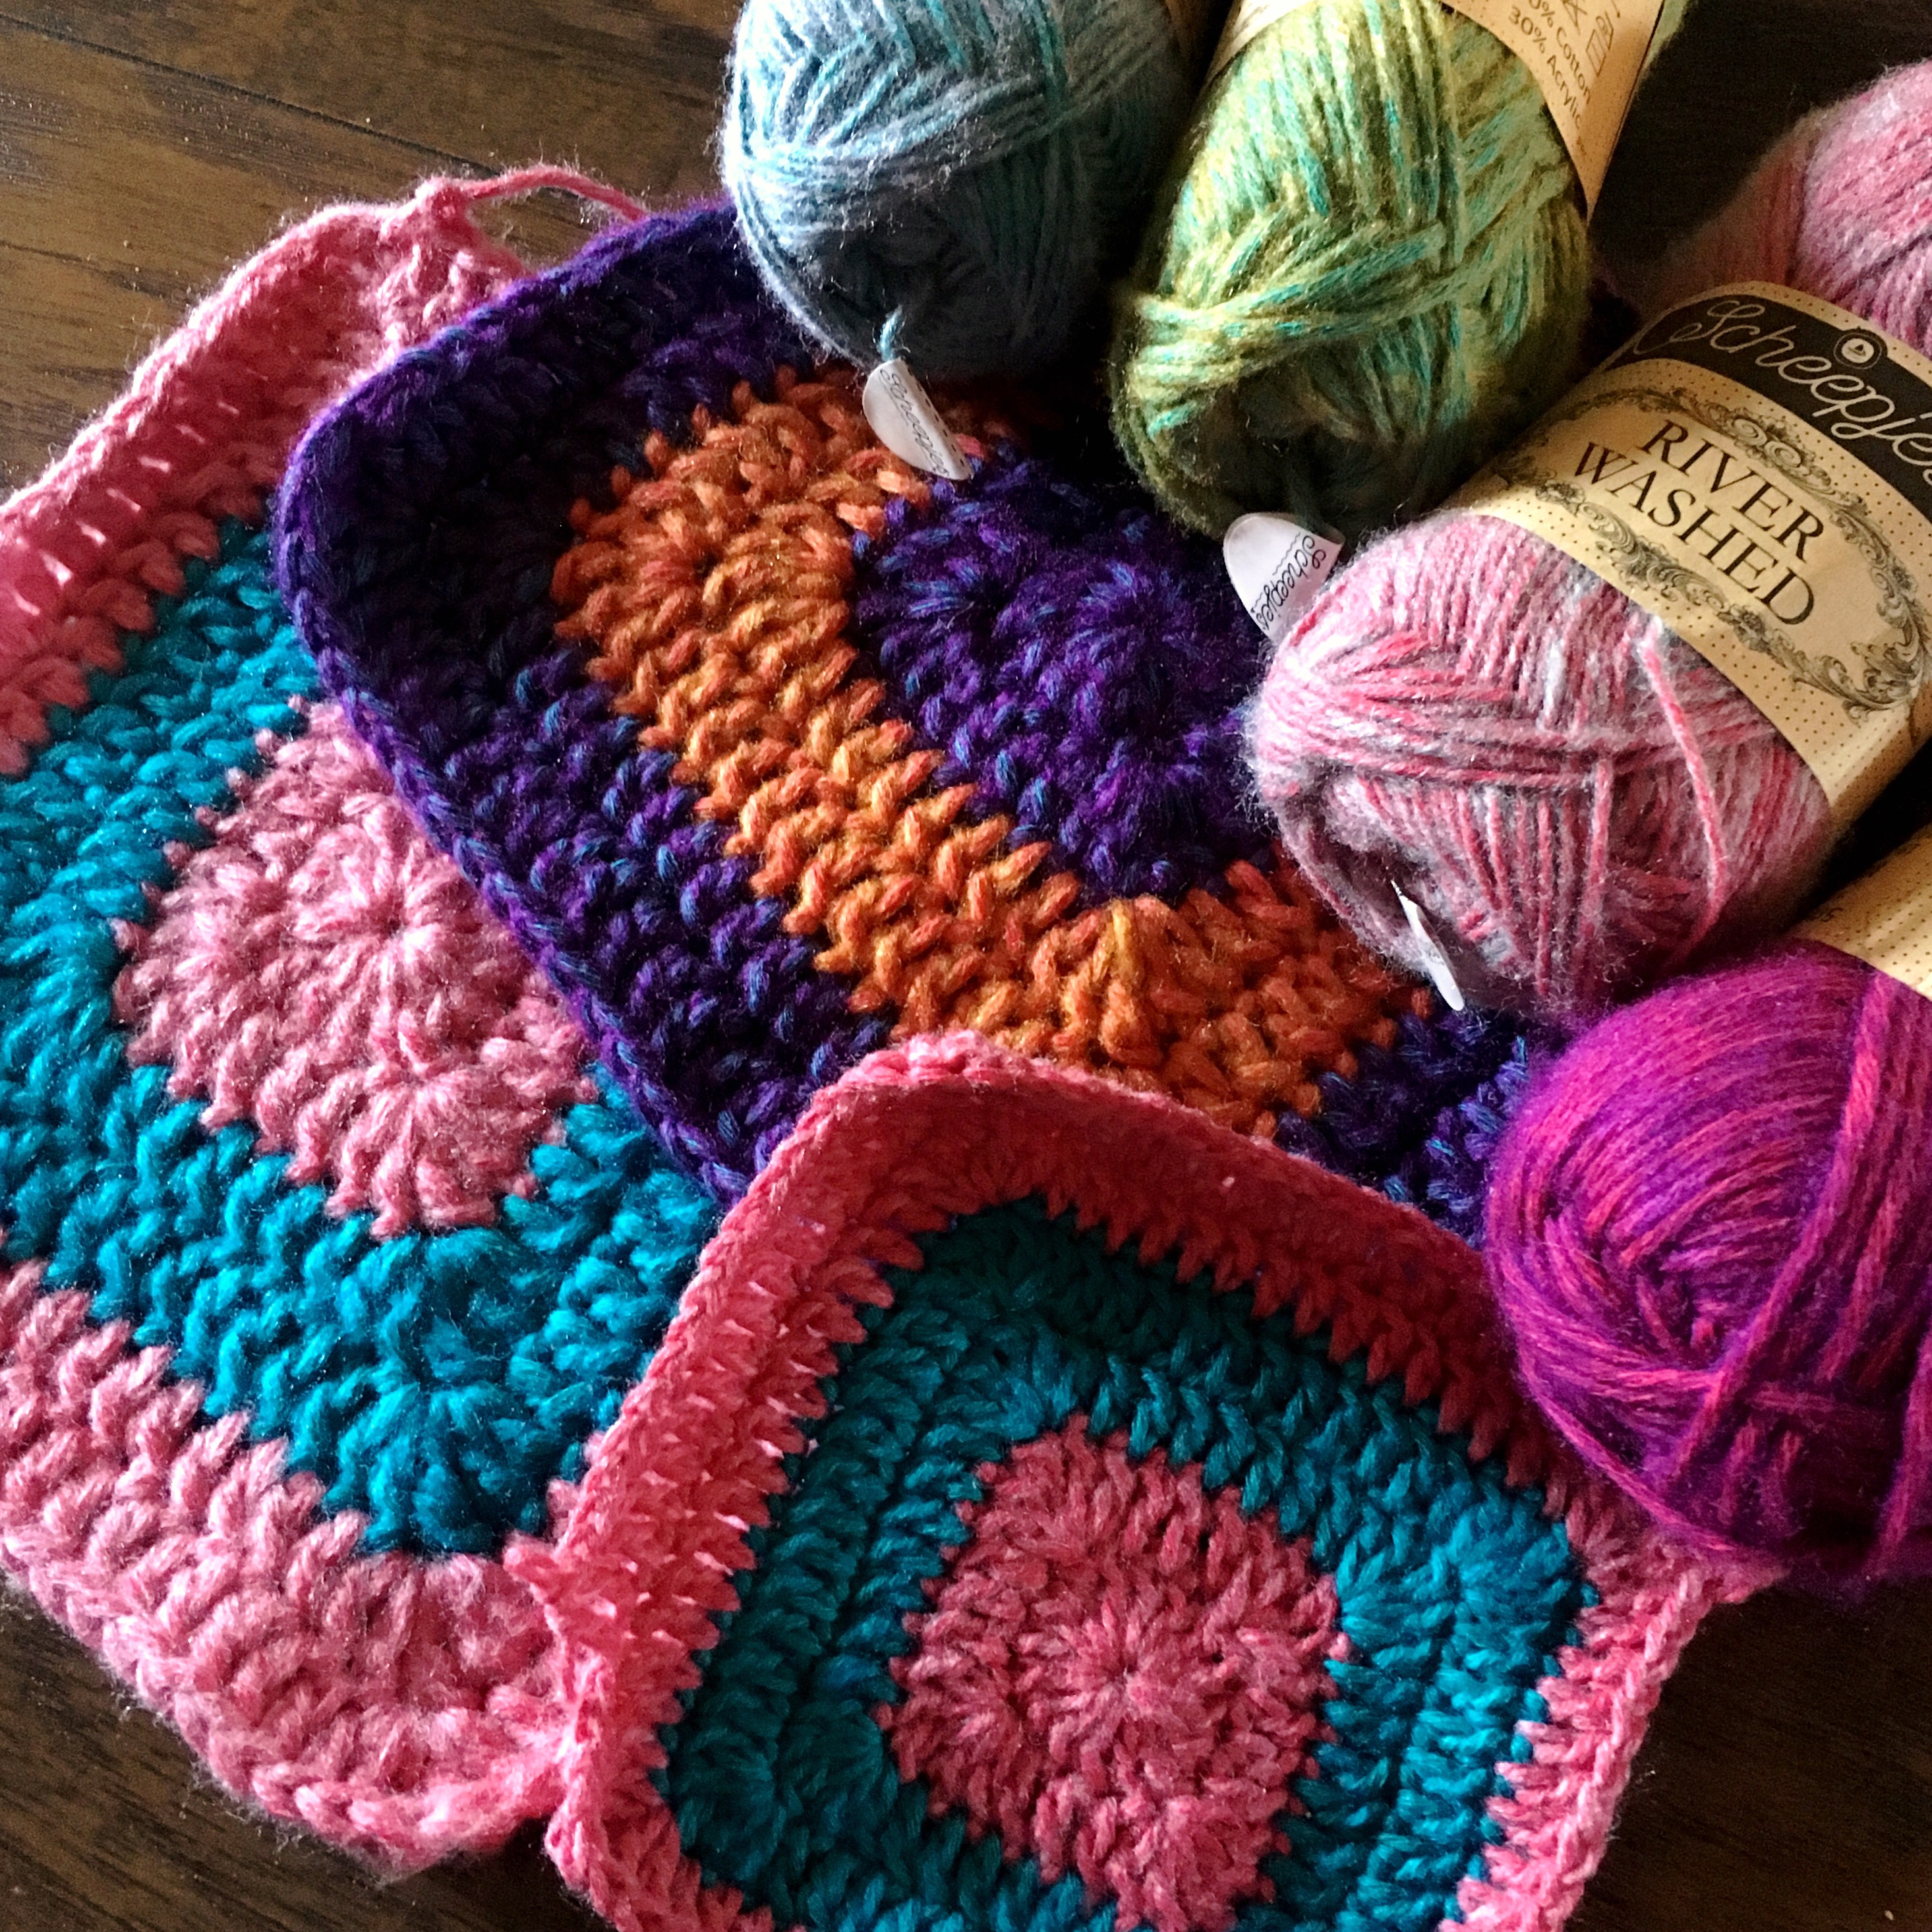
Before I jump into this fun story, go take a look at my new Yarn Shop page! That’s right, I’m working to open up my own yarn shop stocking Scheepjes Yarns for US customers. For now, you can get your hands on exclusive yarn&pattern kits – go check it out – I’ll wait here.
———————————
You back? Okay let’s settle in, where was I?
Ah yes… once upon a time, I was a knitter. Surprised?? I actually started out my fiber arts journey as a knitter when I was in college. It wasn’t a whole lot different from now, as I was knitting every day with no end in sight, even sometimes cutting class to knit (sorry mom!). Knit and crochet were in the beginnings of making their comeback and us gals would meet at a cafe on campus and stitch the afternoon away.
I made a ton of camis, sweaters, and cardigans, and I even made a blanket! Well, the beginnings of a blanket lol…
These mitered squares were found at the bottom of my WIP bin many years later..


But I never made anything with them as a knitter! When I re-discovered them as a crocheter, I made them into three blankets that look like this:

Read more about that transformation in the blog post!
So after five years of knitting non-stop, I graduated college, moved into an apartment, and suddenly picked up a crochet hook. As they say, the rest is history. I became a blanket-obsessed fool and over 300 crochet blankets later, I️ never picked up knitting needles again.
Until today! Lol.. somehow all this gorgeous knit work pops up in my social media feeds, and gives me this great urge to re-learn knitting. In 2013 or so, I️ actually sold all of my knitting needles, knowing I wouldn’t pick them up again, so of course a trip to the hobby store was in order. Nothing grabbed me though so Amazon saved me! Anyway, I like being able to read all the reviews..
I picked some ChiaoGoo needles which seemed like the best reviewed for the best price, and then had to sit and wait for shipping haha… ain’t that the worst??
But here they are – so pretty! With some gorgeous Scheepjes | Colour Crafter* Back in 2001, there was no YouTube, so I had to learn how to knit from books, and eventually had to re-learn everything I was doing wrong from my stitching pals. It was rough! But today we have it easy.. everyone knows learning by watching someone do something is so much easier!
Before going straight to YouTube though, I decided it may be funny to video myself trying to remember how to knit without any help at all. Just picking up the needles and giving it a go. So I did! Haha, you can watch that torturous 6 minutes if you like:
It was shocking how quickly everything came back to me after 12 years of absolutely zero knitting. But I’m very slow at it and definitely need to practice a lot before trying to come up with knitting patterns.
Here’s what came of my efforts…. some Stockinette, Garter, Moss, and Rib. Now ask me how I remembered all of that, with this cobweb-brain of mine??

And in fact, I️ should mention, the reason for this knitting madness is an urge to push the boundaries on mixing and matching stitch patterns in my works. I have a fondness for mixing textures, which you can see in many of my projects, such as Cottage Quilt and Desert Bloom.

 So in the interest of mixing stitch patterns, I felt like I was ignoring an entire art form’s worth! Now my patterns can feature both knit and crochet elements, and that makes me so happy. Of course not all will include knitting, and I’ll probably give notes in the pattern for those who only want to crochet the whole piece, but still – it’s an adventure!
And why wait??
I received some incredible River Washed* yarn – actually to be more precise, I received one of each of every color of both River Washed, and River Washed XL – feeling incredibly lucky!
 Look out world – my next pattern will include a mingling of 2 yarn weights (DK and Aran) and 2 fiber arts (knit and crochet) for an exciting creative journey of color and texture.
I have a sketch, and plans, and loads of chicken-scratch scrawlings in my design notebook, but for now all I think I’ll share is a little peek at the beginnings of “Merging Rivers”

The rest shall remain hidden under my wing. Maybe I’ll make a CAL of it! If you’re interested in sneak peeks, behind the scenes, and exclusive content, you should head to my Patreon page where you get fun rewards for being a CypressTextiles supporter.
*Shopping through affiliate links marked with an asterisk will support CypressTextiles at no additional cost to you! Affiliate links are better than click-bait – all click, no bait! 😁❤️
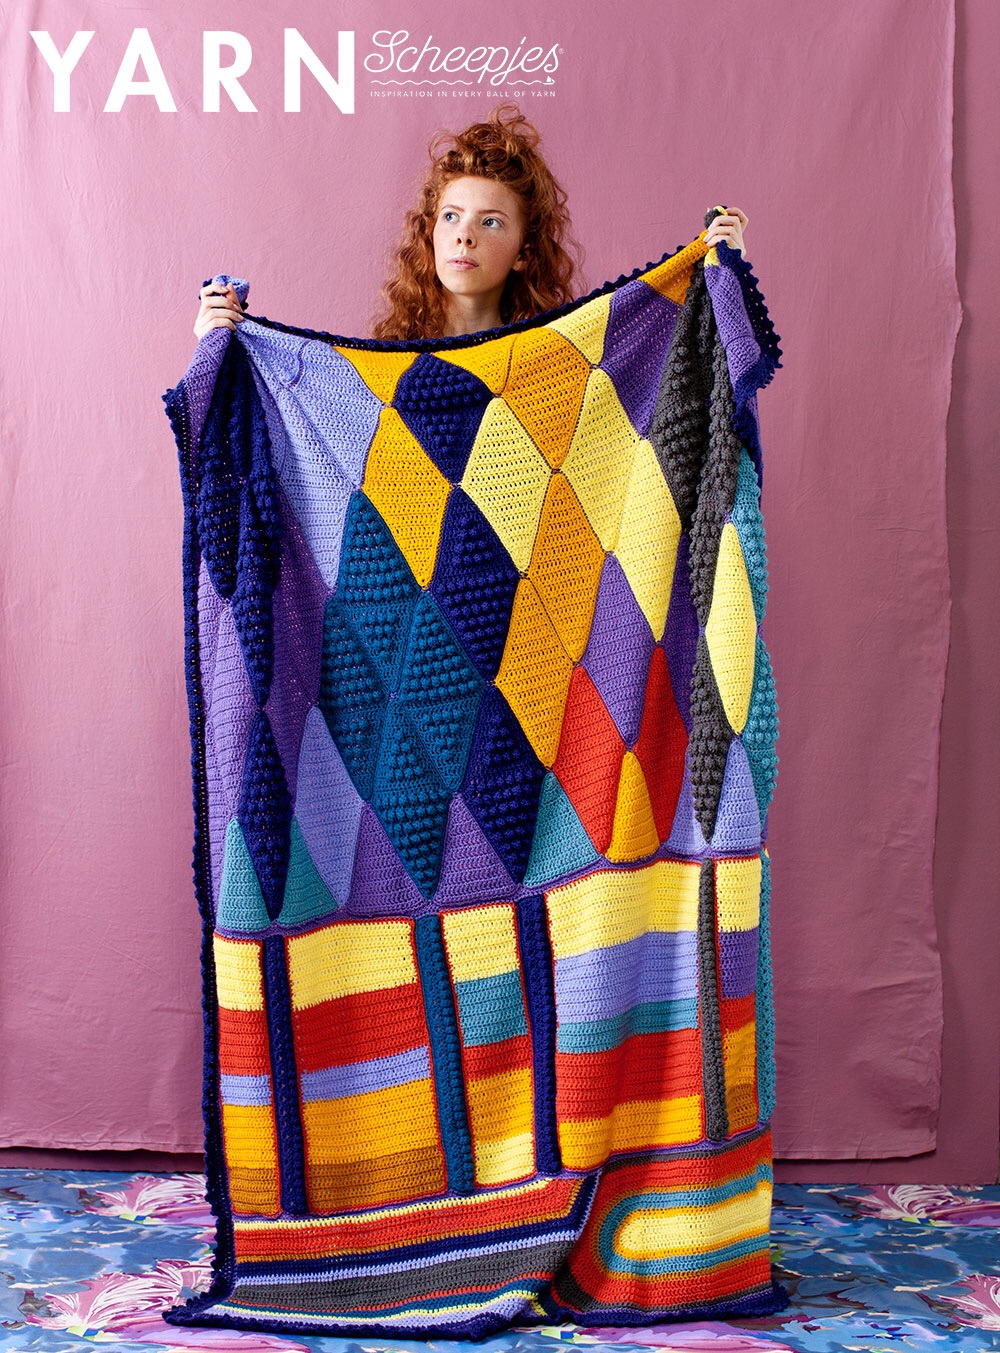
Looking for something new to crochet? Scheepjes Yarns has released their latest issue of YARN bookazine, and it is so lush.
Find this issue here at > WoolWarehouse < for speedy delivery.
Dutch Masters is this issue’s theme, so the strong, deep colors - beautiful reds, purple, blue - are cozy, warm, and inviting. In fact, my coze factor has just dramatically increased.. I think I need a cup of coffee and a blanket; give me a sec..

Okay I’m back.
So my contribution to YARN 04 is on the cover in the upper right corner. It’s a blanket named “New Horizons.”
I did loads of research on the works of Piet Mondrian for my piece, and did you know he did so much more than the mod red blue and yellow squares that he’s known for?

Yep, when I think of Piet Mondrian, I picture the primary color squares and rectangles shown in the image above, and I’ll bet you do too.
But did you know Mondrian’s earlier works include broody landscapes with muddy, emotional color? As I took in all of his works, I had to put the pieces together chronologically, because it is simply fascinating to see how his art morphed over time. I like to think of Mondrian as the Madonna of the Dutch Masters…
I absolutely fell in love with the scene depicted in the piece below, entitled “Woods Near Oele” and the instant I saw it, a blanket design began taking shape. This is my inspiration piece.

Woods Near Oele, 1908 – Piet Mondrian
But look how his work changes so much in just a couple of years.

The Red Tree, 1910 – Piet Mondrian
And then becoming more like the geometric works for which he is famous.

Grey Tree, 1912 – Piet Mondrian
Working with squares now.

Composition with Color Planes 5, 1917 – Piet Mondrian
Boom! The primary geometrics are in full swing!

Composition A, 1921 – Piet Mondrian
What an interesting journey and metamorphosis of the creative mind. Please visit Piet-Mondrian.org to see these and more masterpieces.
My mind filled in a diamond sky and treeline, a beautiful horizon, and that stunning pool of water below.

One of my favorite things about YARN is the way Scheepjes styles the photos, and they did a wonderful job polishing up my blanket to look lovely.

As a big surprise to you all, the lovely and talented Gwen Kok of instagram @StitchGwen has tested the pattern and made up a sample in an alternate colorway. I based this colorway on a re-coloring of the Woods Near Oele piece.

Here is Gwen’s gorgeous blanket:

And my youngest daughter wanted to re-enact the Scheepjes modeled photo – she is standing on the couch 🙂

Both Gwen’s and my blanket will be for sale in my Etsy Shop on Saturday, Nov 4. Take a look and get cozy under a handmade work of art inspired by a true Dutch Master.
Also included in this issue are works by some talented Scheepjes Bloggers.
I’m loving this awesome Artist’s bicycle dress by Esther of It’s all in a Nutshell.

And isn’t this poncho just breath-taking? It’s the Winter Light Poncho by Tatsiana of Lilla Björn Crochet.

This creative piece is the Almond Blossom Scarf by Nerissa of MissNeriss. I love the embroidery and it looks like a fun project.

You may know I had a project in the third issue of YARN as well! Remember the Amazon Blanket from YARN 03 – the tropical issue? I’ve enjoyed designing for this bookazine and I may even have something in the works for the next issue – we’ll have to wait and see!
Hope y’all enjoyed browsing these pieces. Now go take a look at the rest of the Scheepjes publications. ❤️
And happy crafting!
– Rachele C.
PS – Have y’all heard of KreaDoe? It looks like the biggest creative fair in the Netherlands – and it’s going on right now. Scheepjes is there with an incredible stand and they’ve got some awesome pics on their social media right now! Facebook – Instagram
Here’s my favorite pic! Peep those larger-than-life posters!! And a certain giant blanket ❤️❤️❤️

That’s all I have for today! Now off to crochet with a cuppa ❤️
*This post includes affiliate links. Shopping through them will help support CypressTextiles at no extra cost. Affiliate links are better than avocado – they don’t cost any extra!
When I was asked to make another Amazon Blanket in a new color palette, I agreed on the spot.
When I found out the colors would come to be an airy pastel array, anchored to the ground with a seriously cobalt blue, I started to get giddy.
And when I cut into the first granny square of fifty-five, my heart melted and I fell in love instantly.
[Related: Amazon Blanket blog post]

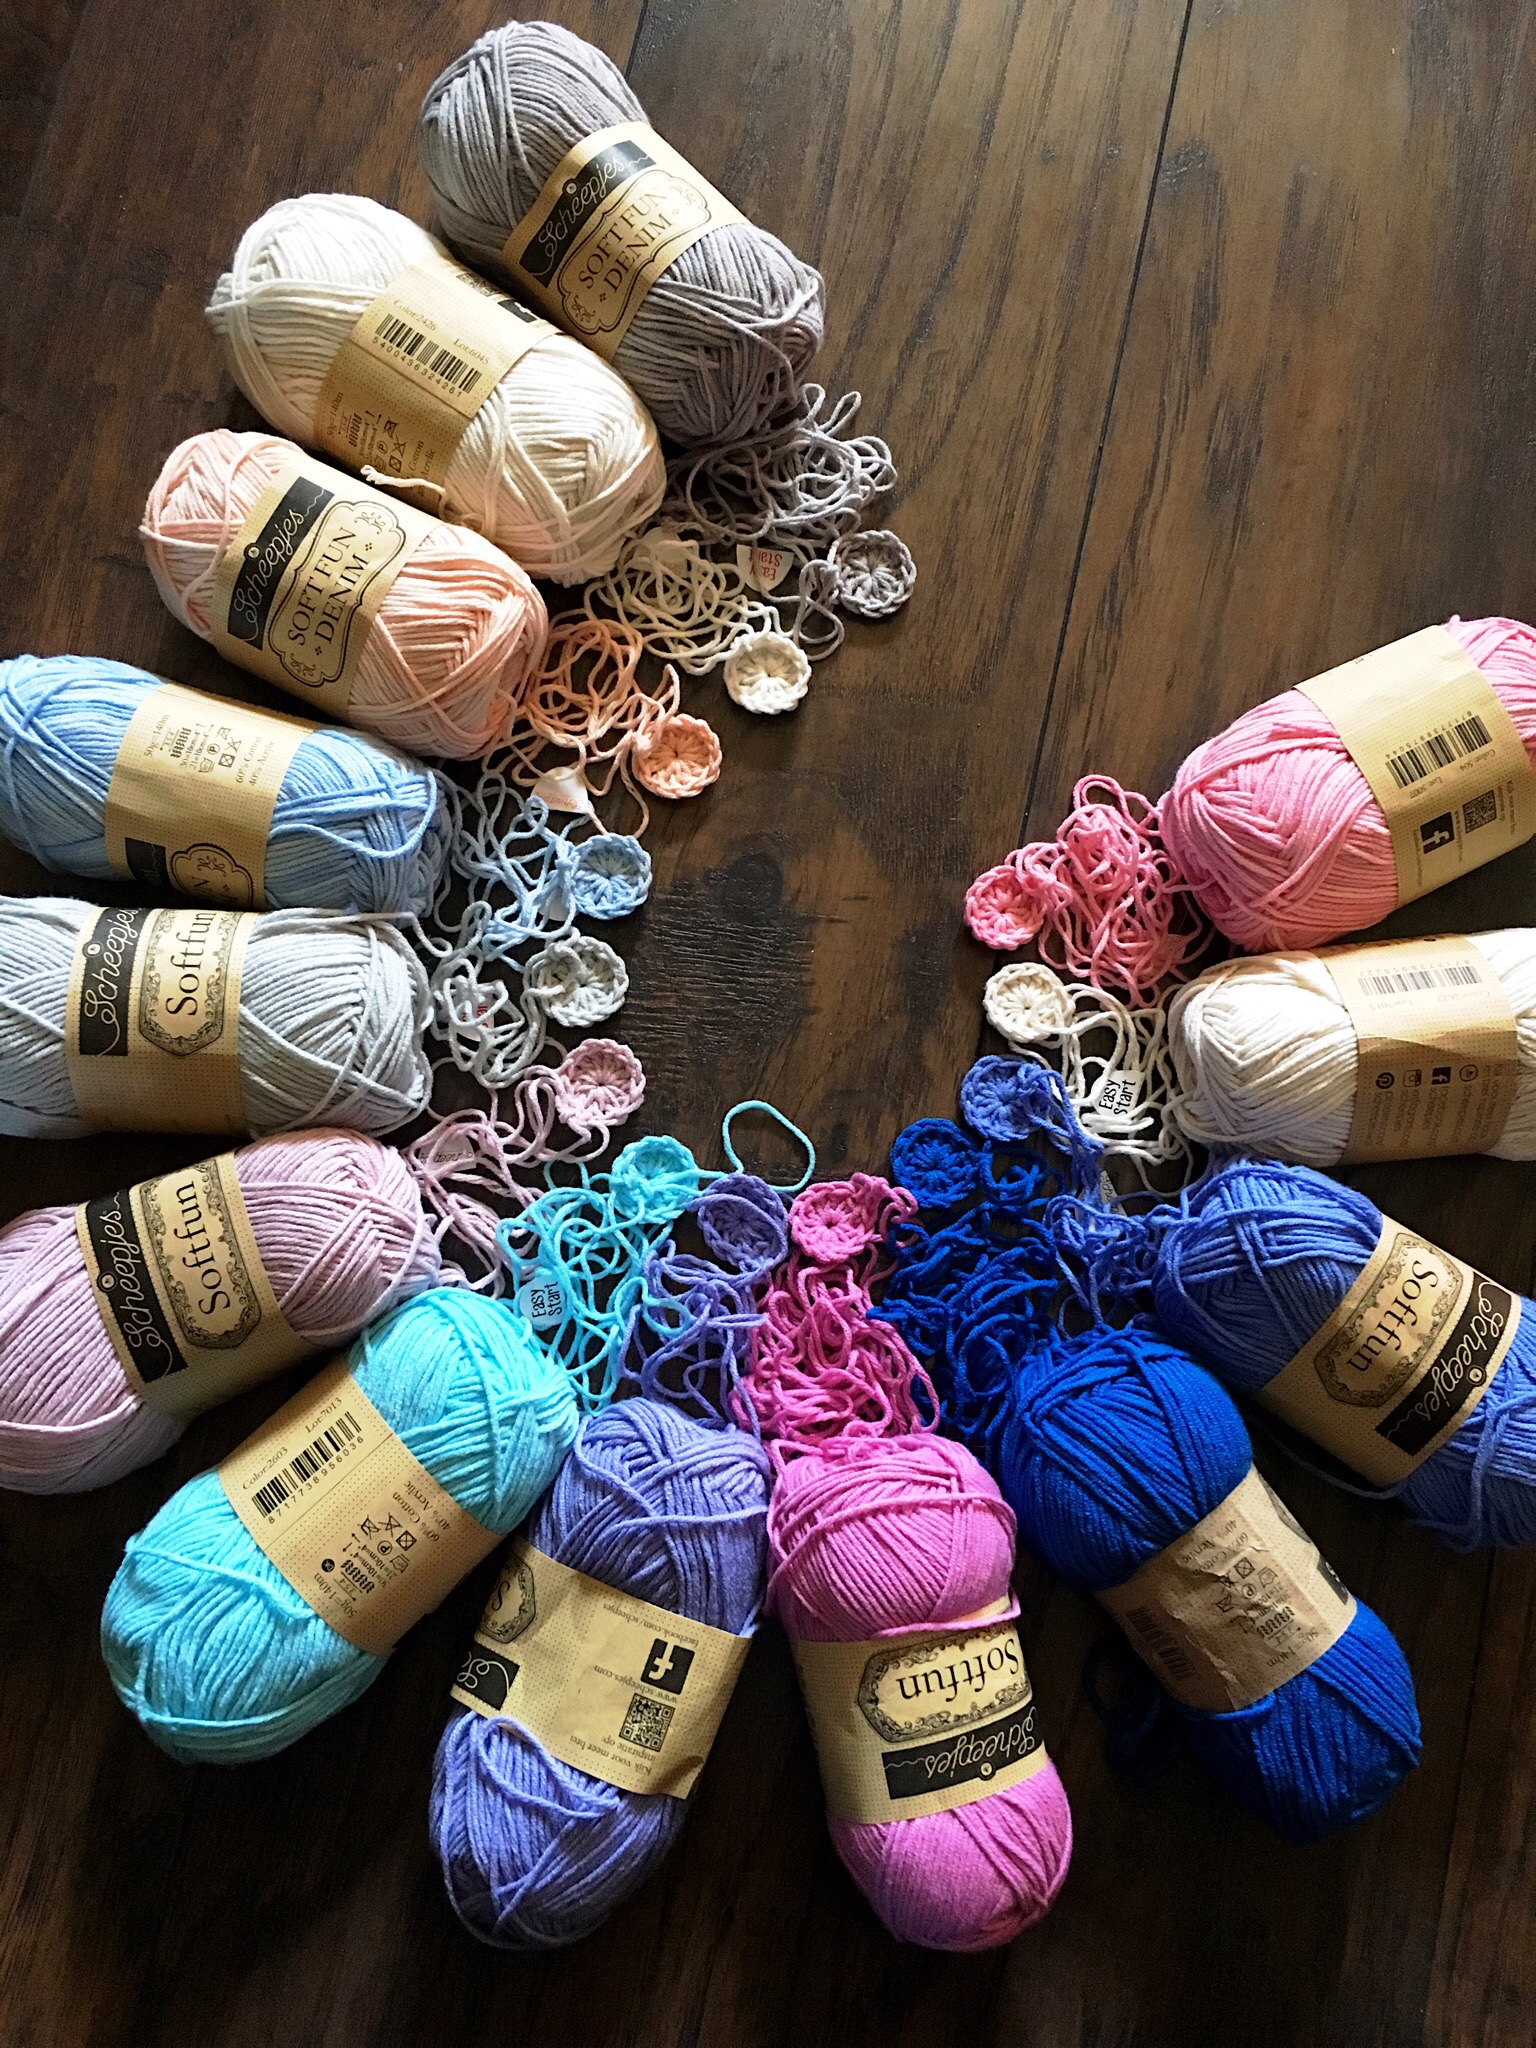
Just look at this Scheepjes | Softfun* and Softfun Denim* chic pastel palette…

How did this color spread come about? Well the recipient wanted a blanket for her daughter that would provoke happiness instantly just by looking at it. (Yes, this is a custom order! No I don’t do custom orders anymore! Slowly backing away now..) So after three palette proposals, and a few color swaps, we came up with the above spread.
Actually when I look at it, it reminds me of a top secret project that I worked on with my good friend Carol Janik – The Hoosier Crocheter – Tester Tribe member. This is the photo she snapped of the yarn I sent her for our test project. Doesn’t it look similar? (Hi, Carol! 😁❤️)
[Pictured yarn: Merino Soft Brush and Colour Crafter]

To get the granny square assembly line started, I made the first round, one in every color. (Then I complete them all, one by one, starting another round one with the ball so it’s ready to go. Am I the only one who does this? Lol) Then the little polka dots were so preciously cute, I couldn’t help but take some more photos.
The mini bouquet:

The pastel paisley:

And the shabby chic windmill:

Can’t wait to show y’all more of this one! For a refresher of what the Amazon Blanket looks like, check out the original, published in Scheepjes YARN 03, the tropical issue. (Ravelry)

Also, recently I stumbled upon an Amazon Blanket made by Ravelry user Shassa. It is incredible! Photo by Shassa:

So totally looking forward to this piece with more muted tones. It’s going to be amazing; I can feel it! Be back soon to show more.
In the meantime, happy crafting!
* This post has affiliate links. By purchasing through them you support CypressTextiles at no additional cost to you. Affiliate links are better than avocado – they don’t cost extra!
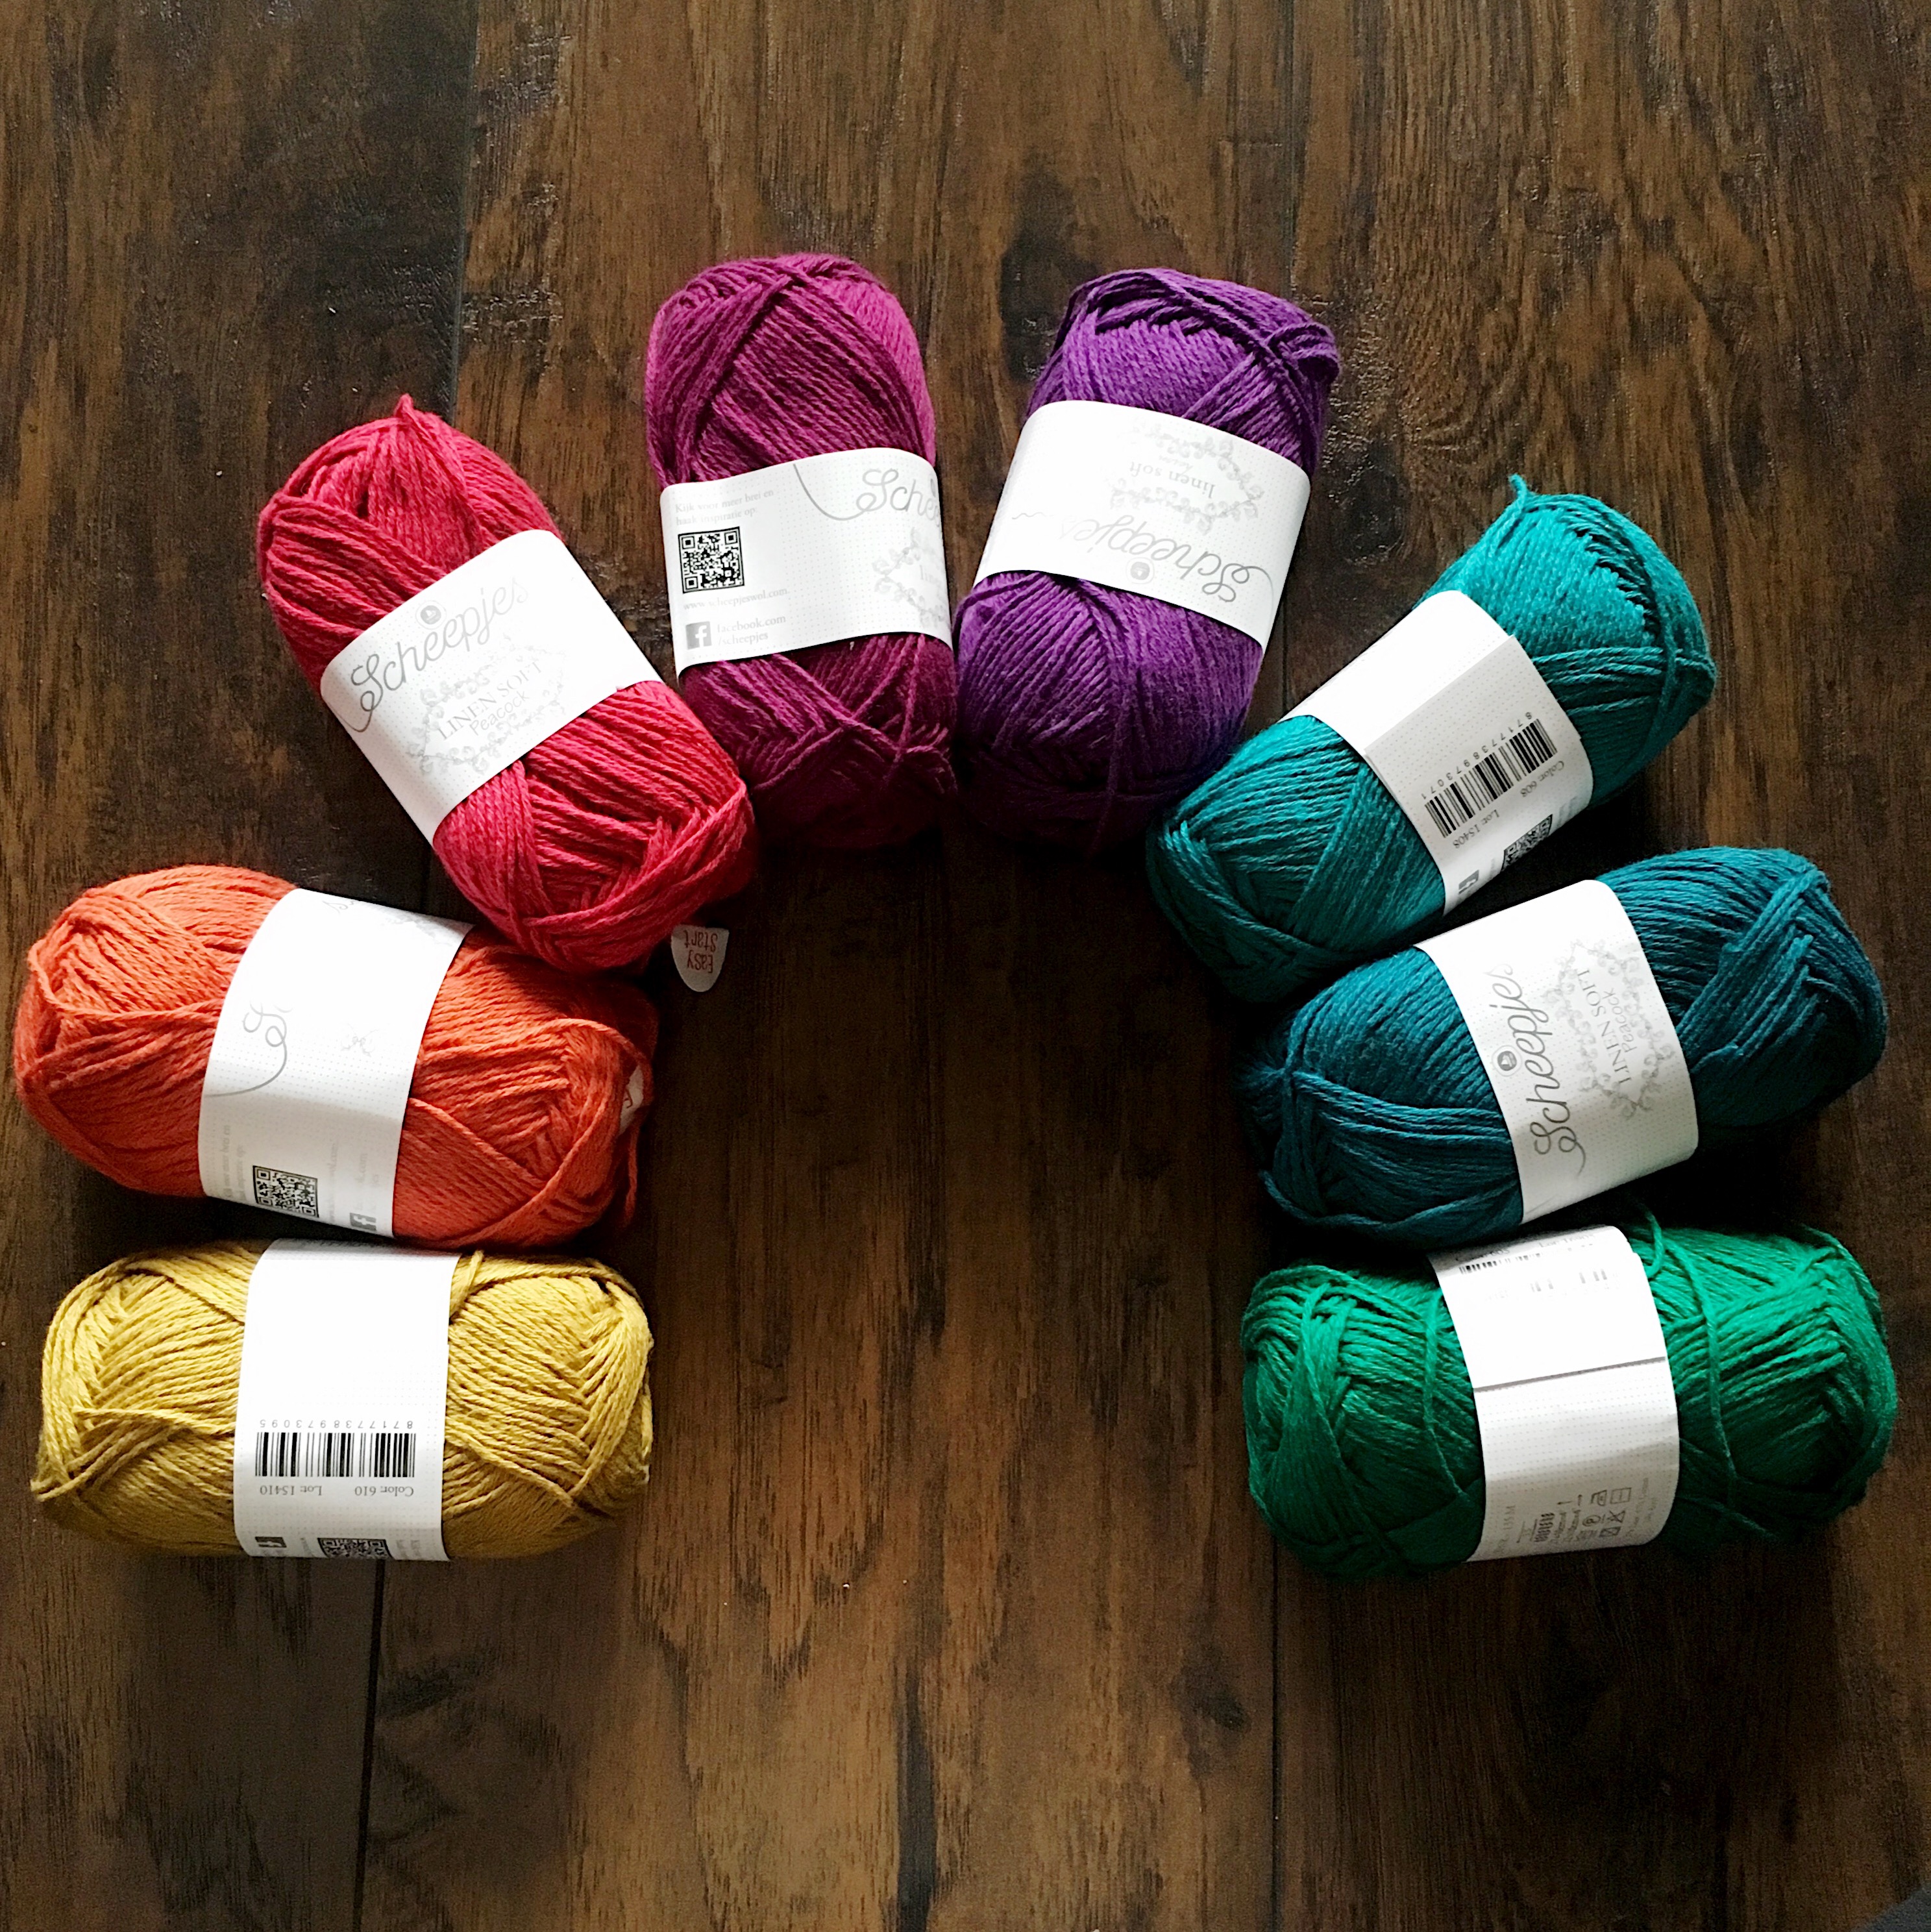

Tired of the same-old, same-old? Yeah, me too! No more smooth acrylic yarn! We want to feel the hearty texture of the yarn between our fingers as we crochet! Long live linen!
Okay, well, maybe not. Certainly there’s a place for the powerhouse soft acrylics out there. For the Colour Crafters in life that we need for everyday pieces. Yeah we need those.
But! Variety is the spice of life, and the spicy yarn I want to show off today is Scheepjes | Linen Soft*. It really does have an amazing texture to it. Perfect for a throw pillow or a couch blanket.
Check out this expertly crafted fiber content. It’s like the Negroni of yarn – an indulgent 3-ingredient cocktail (equal parts gin, Campari, sweet vermouth – errr.. linen, cotton, acrylic).

My personal favorite color of Linen Soft! Hummingbird ❤️ – although that mustard pictured in the first photo is wonderful. I love how all of the colors in this range would work well together.

And here is a snapshot of the full palette with just enough colors to get you going on a beautiful project. Note: these yarn info images are from Scheepjes.com Linen Soft Page.

My welcome package as a fresh, new Scheepjes Blogger included these seven balls of Linen Soft yarn among many others that I promptly began to drool over. I used them to work up this sample, took photos, and put everything away. Read more about my beginnings as a Scheepjes Blogger here.

Fast forward about a year after the above photo was taken, and this sample became the Amazon Blanket pattern published in Scheepjes YARN 03, the tropical issue. I am still in love with this rich color palette and trust me when I say it’s not out of my system yet. These bright, tropical colors have my heart ❤️
Amazon Blanket – full layout:
To see more Scheepjes Yarn Reviews, click here. Enjoy!
* This post has affiliate links. By purchasing through them you support CypressTextiles at no additional cost to you. Affiliate links are better than avocado – they don’t cost extra!
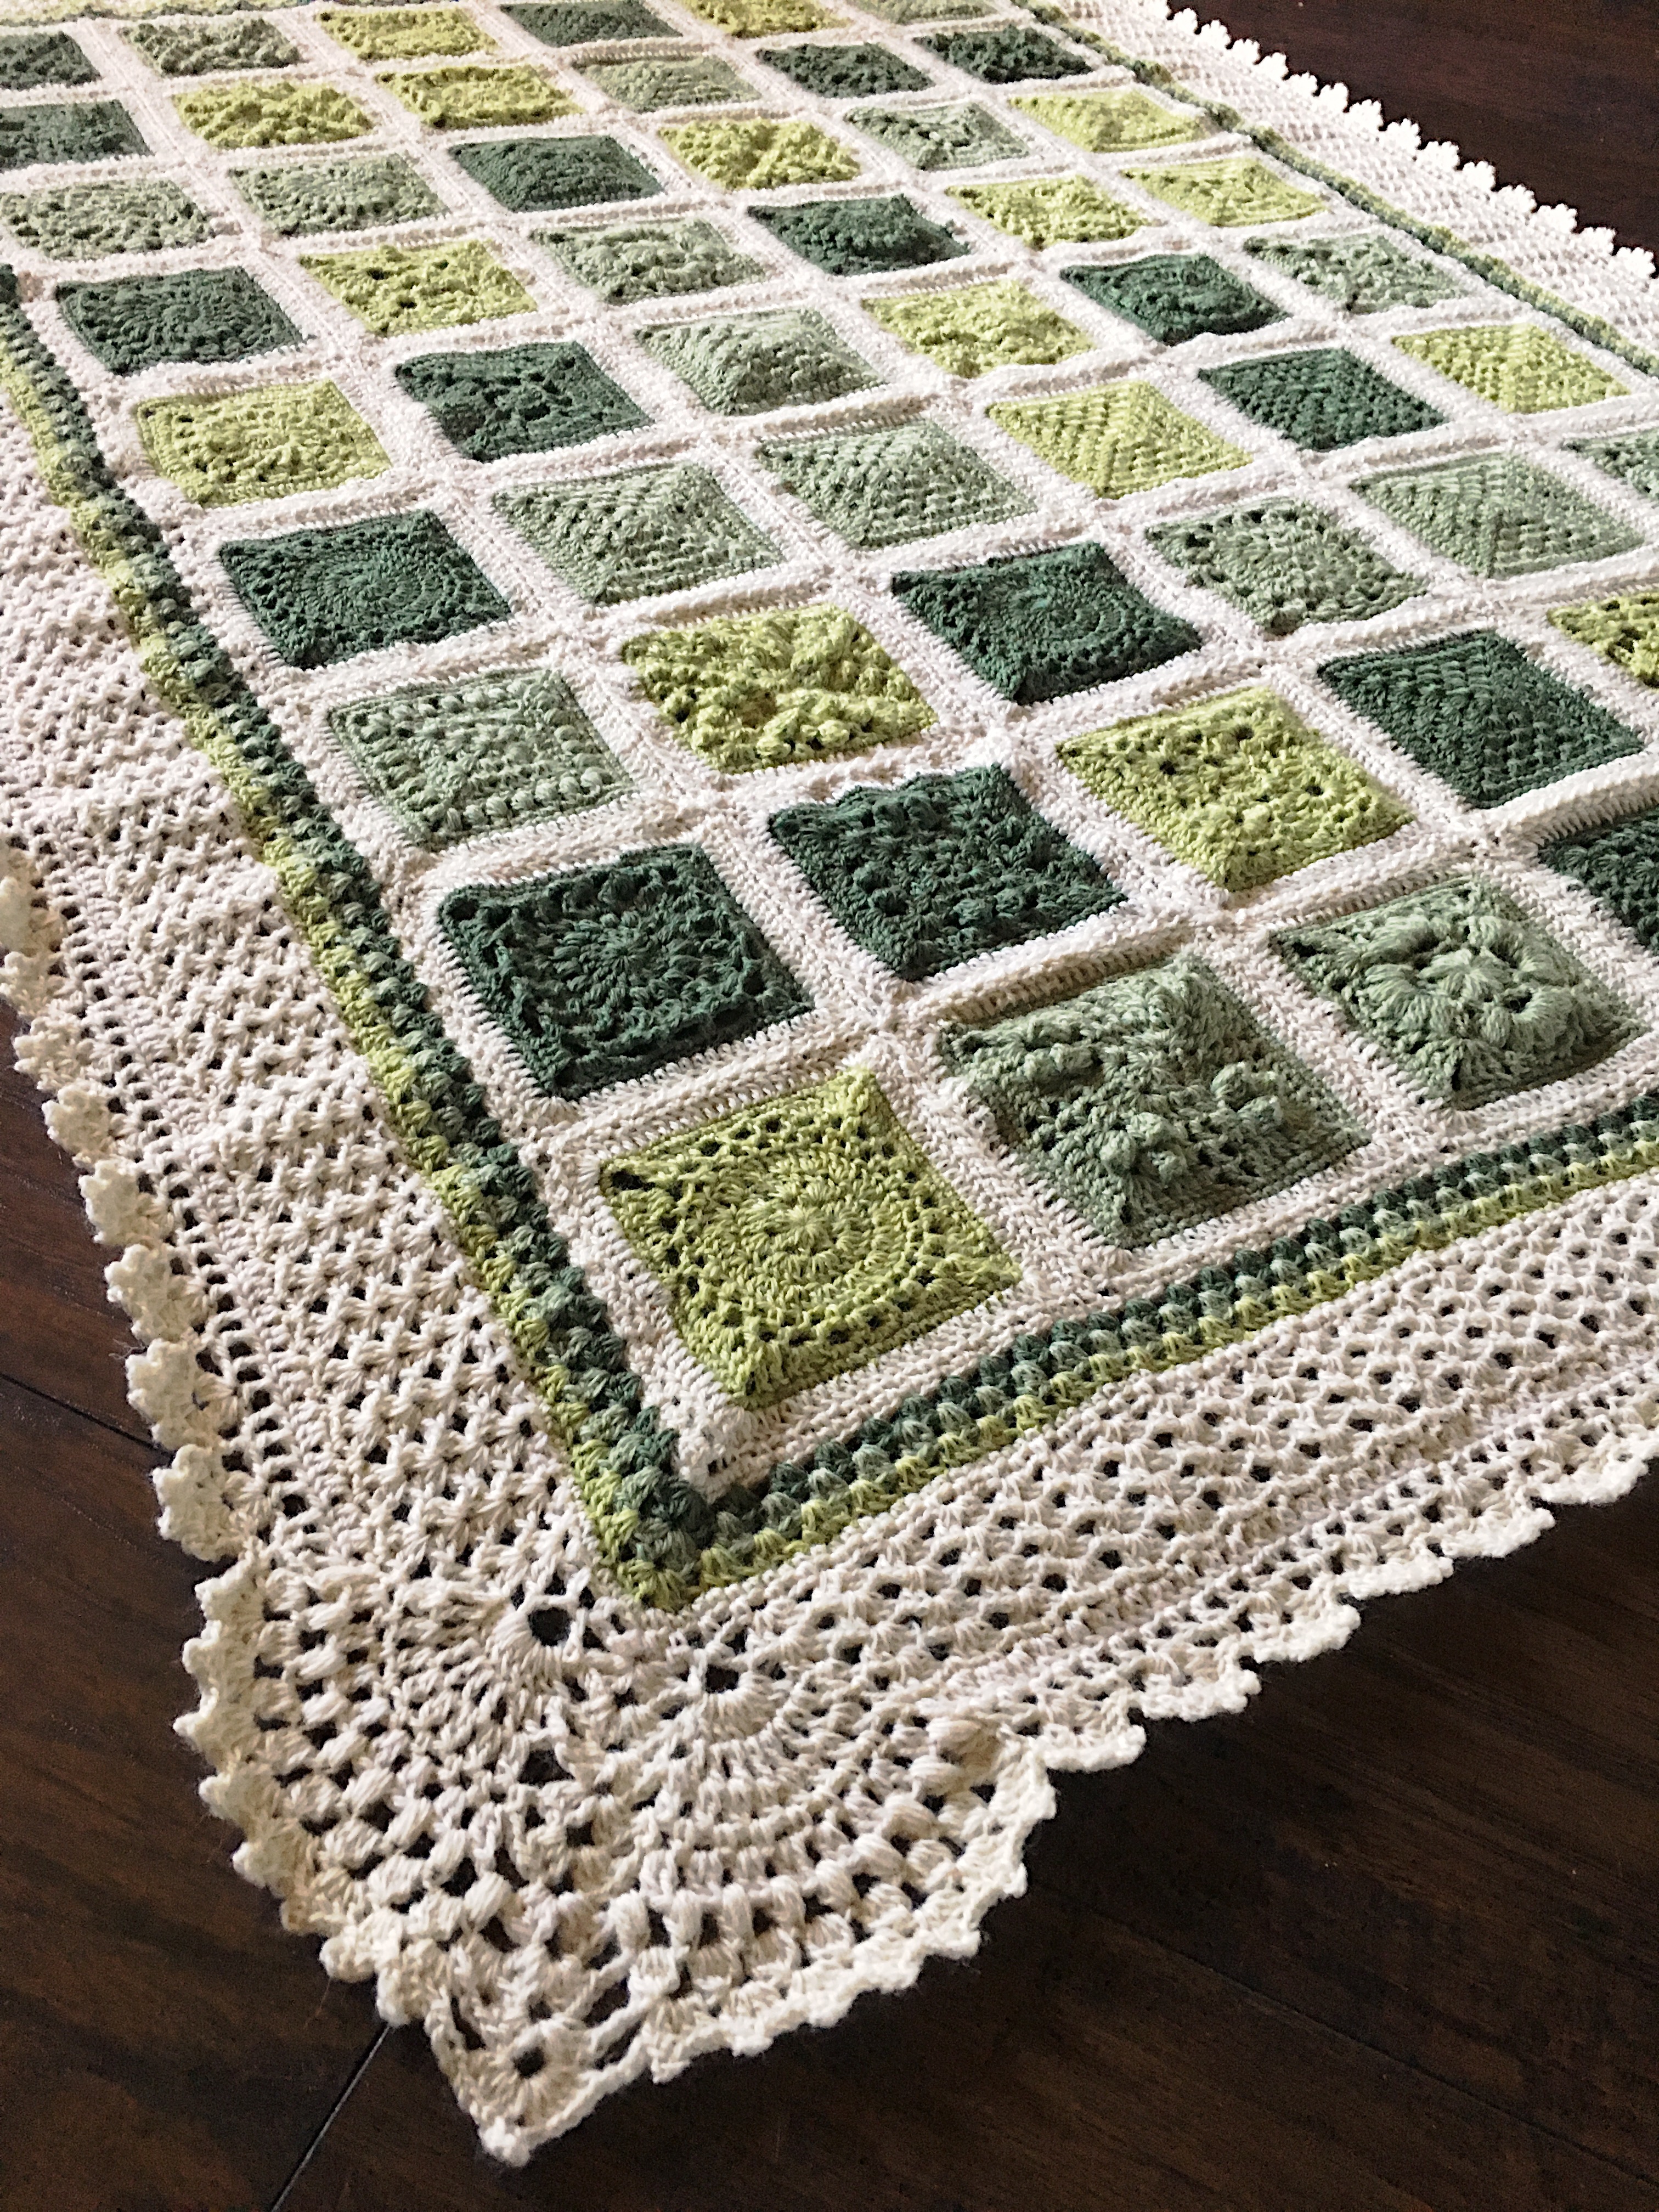
With my trusty KnitPicks Palette yarn, I’ve started a new Vibrant Vintage CAL blanket. You may remember this CAL from January – August 2016 – the Facebook Group has nearly 4000 members! You can find the 33 free granny square patterns in PDF format at Ravelry or at the post linked above.
In the meantime, check out this spiffy green version!

Palette yarn is awesome and as the name suggests, there are a ton of colors – and some are even heathered.

I made one tester square to see what hook I was going to use – Size E! Then I had a serious planning sesh for my chosen squares – the recipient wants mostly three dimensional squares instead of flat ones.

And some joining in progress! You can see a bunch of join options on the VVCAL main page linked above, or look through all the joining methods I show on my site. Or to see what some IG crafters have already done by browse the #VVCAL hashtag on Instagram.

Looking forward to showing y’all more of this blanket as I make it! To see what else I’ve been up to, you can scroll through my WIDN post category. Thanks for stopping in and happy crafting!

I use affiliate links! If you shop through them, you help support my site 🙂 Thank you!
One last status report on this teeny gauge VVCAL blanket before I start joining it and digging into that wide, lush border.
New planning supplies thanks to the tax free weekend and discounts on back-to-school funsies. Graph paper notebooks are the bees knees! And I’m not sure I need another binder, but honestly, floral and stripes?! I’ve been trying so hard to bring back that 2013 fashion trend and this whole time it’s been alive and well on stationery??

This is KnitPicks Palette yarn.

The VVCAL squares already work well together but I’m throwing in a few surprise squares as I took the oppotunity to design some new squares. Yay!

I dragged out my hand-drawn charts from the Vibrant Vintage CAL for this blanket project. Gorgeous hook roll by Instagram’s @SewRayMe.

Joining attempt #1:
And #2 – amongst about 3 more…

I tried several joins for these squares and I didn’t like any of them. So of course I came up with a different Join altogether!

The Row by Row JAYG, or the “Boomerang Join” is a simpler alternative to the continuous Join-as-you-go, but still lets you weave far fewer ends and makes for a quicker joining experience. Read about this Join here. There’s even a video!


Looking forward to sharing this FO with you all, as soon as I can finish it. 🙂
– RC
Sometimes I look at my WIP and think, “Why are you like this?” Lol – but this method is faster, or at least in my mind.

Besides, this pic from January 2015 has over a hundred thousand pins or something, so it can’t be that crazy..

But what IS crazy is how many joins I tried for these squares… eventually I just invented a Join for them – the Row by Row JAYG, and I didn’t even end up using it!! Honestly…

What I did end up using was a version of the Flat Braid Join with only one chain instead of three or five. I made a YouTube video for it!

Along the way I also tried my go-to PLT Join, but I didn’t think it had enough oomph to echo the Lacy squares.

I also tried out making the PLT move on only certain stitches so it would have a pretty Celtic effect. I didn’t end up liking that one either… but it was kinda pretty!

Gratuitous granny square pic… these are the VVCAL (Vibrant Vintage CAL) squares from the cal I hosted in 2016. Check it out! 33 free square patterns, multiple joining options, and a wide Lace border.

And here is the final blanket. All that frogging was worth it. Then I almost ran out of the white yarn. (This is KnitPicks Palette yarn, by the way – aff.) I added in the green border rounds to get the piece a tad larger, and I do like the little frame it makes.

Also, I had to change the border a bit just to keep from running out of yarn. But I was pleased with the result anyhow.

A couple more pics!

And BONUS Green content ❤️❤️❤️
Our trip to the San Antonio Botanical Gardens. If you’re taking a trip to SA, this place is a total hidden gem. It’s serene, beautiful, and the kids enjoyed every moment, plus it’s not over-crowded, so you can spread out.


Just lovely. Highly recommend getting a season pass. ❤️
Hope y’all enjoyed this green post!!
Support my free content by heading to my Patreon fan page. Win prizes and see behind the scenes pics + video. Thank you!
Rachele C.