

Hi, y’all! If you are following along with the crochet VVCAL Reboot, then you’re expecting Week 18 (Edging our Squares) for today, but SURPRISE! I also have the info for Week 19 as the Scheepjes Bloggers are going to Yarndale (Squeeeee! – More on that in a separate post!), so I won’t be home to support the CAL that Friday. So with a hugely enthusiastic hello, I welcome you to Weeks 18 and 19, edging our squares and joining options.
If you aren’t here for the VVCAL Reboot, you can still use the edging info below, or scroll down a bit to get to the joining methods.
Edge Squares Before Joining
For the crochet joining methods I present here, edging your squares is optional. Here is a link to my blog post on edging the squares for the VVCAL Reboot. Here is a side by side comparison of the squares edged and not edged in a final piece. It’s totally up to you! Squares can by joined and the blanket bordered no matter what size the squares are, or how many there are in your blanket. These joins will work for any size project.
[Related: Suggested yarn for a piece like the one below – Scheepjes Colour Crafter (affiliate) – or see other Scheepjes retailers!]

If you’d like to edge your squares, go ahead and edge them all. You can use the same color for all squares, or if you are using the Warm Neutrals palette in Scheepjes Softfun, you can choose any complementary color to join each square. I used this palette for the demo blanket, and here is how it looks with the squares edged with a contrast color.
[Related: Suggested yarn for a piece like the one below – Scheepjes Softfun (affiliate)]

8 Crochet Methods for Joining Square Motifs
I tried to compile a list of various joins – some continuous, some not, some lacy, some plain – so that you can pick one that really speaks to you. Some have written/photo instruction, and some have video tutorials. Some are unique, and some are familiar. All of these tutorials were made by me, as my very favorite part of making a crochet motif blanket is choosing and working a joining method. Enjoy!
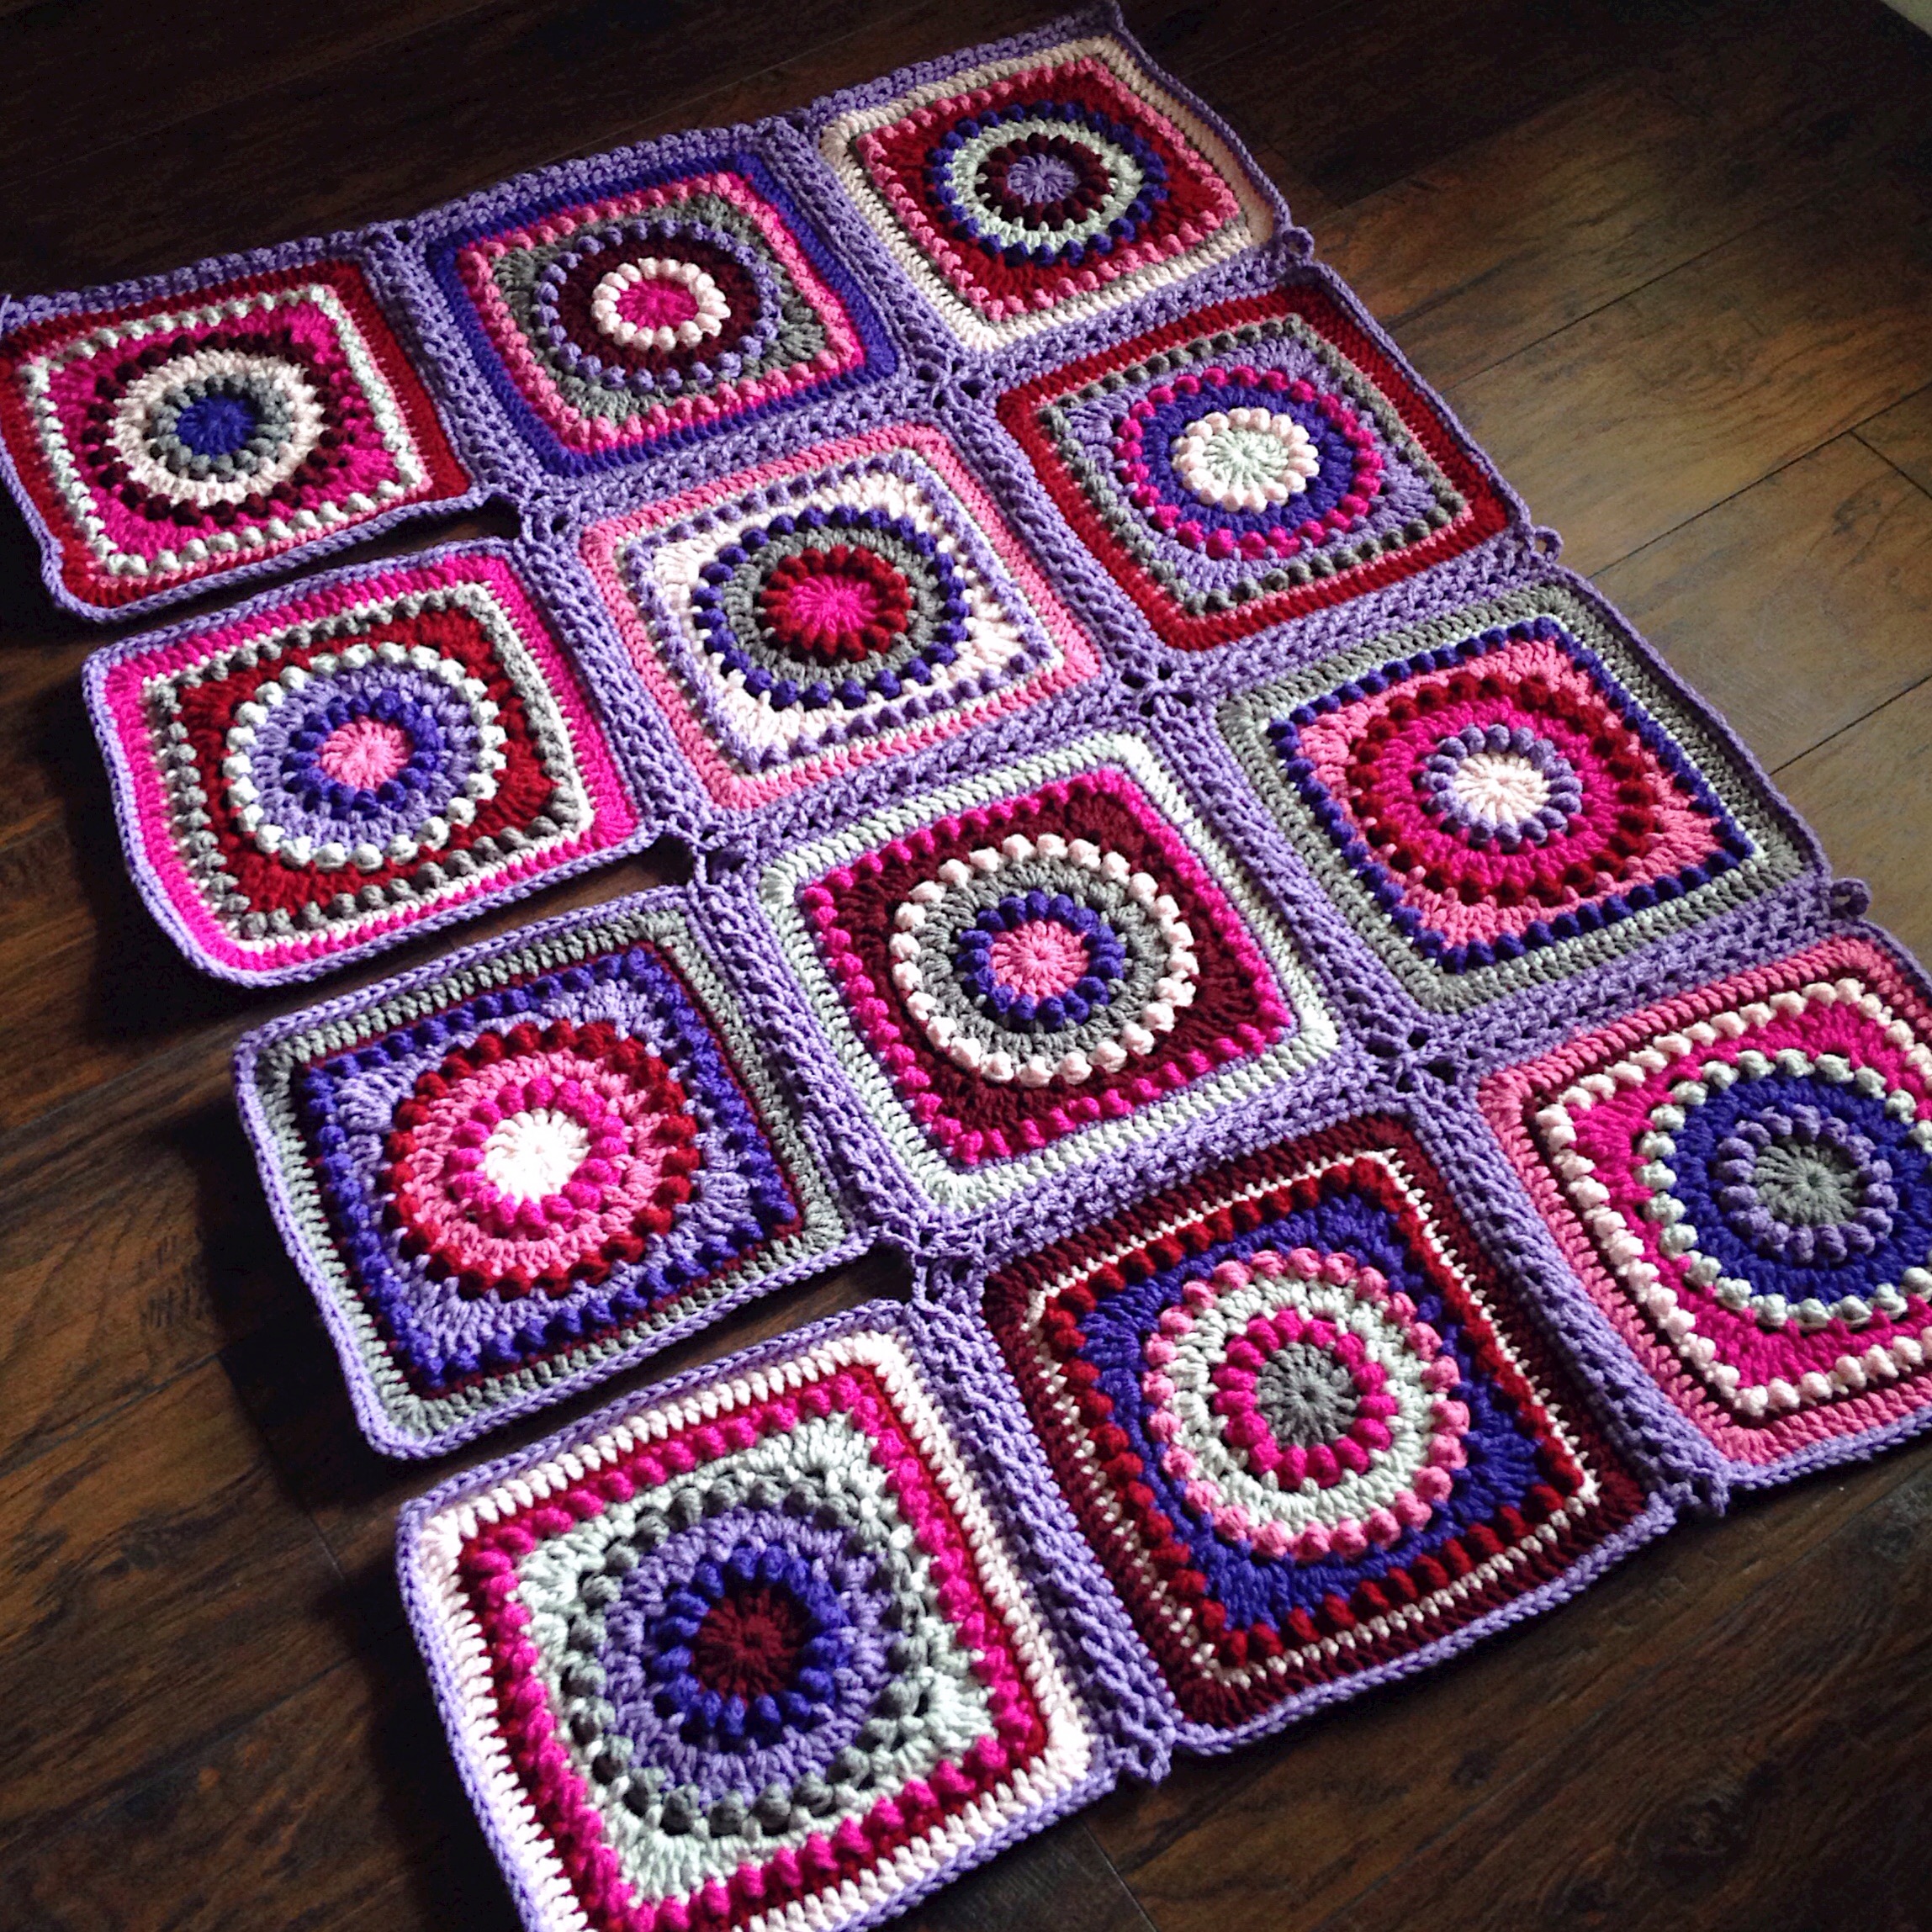
1. Whip Stitch
Used for the demo blanket in the VVCAL.
If you have only a small of yarn to use for the joining, then whip stitch may be the option for you. This is a sewing method, but I actually use my crochet hook for it. I do not use a tapestry needle, however traditional instruction will advise that one be used.
The following is the whip stitch instruction from my crochet pattern book, The Art of Crochet Blankets: 18 Projects Inspired by Modern Makers (available for pre-order now).
“Thread your joining yarn onto a tapestry needle. Hold the motifs with wrong sides together and secure the end of the joining yarn with a stitch through both motifs and pull the yarn through. Repeat across, always inserting the needle from front to back, and allowing the stitches to lie flush along the top of the joining edge. Resist the urge to tighten the stitches by pulling the joining yarn as this will create puckering.”
If you are using your crochet hook, attach the joining yarn with a slip stitch and then pull the yarn all the way through, inserting the hook from front to back each time through both motifs and pulling the yarn all the way through to the front of the work, until the opposite edge is reached. I work in rows and then rotate the blanket to work in the opposite direction until the whole blanket is sewn.
Note: I work through both loops of both motifs, as I prefer to see the neat little stitches on the front of the work, creating a hand-made special look. But many prefer to work from the back side through back loops only, so that the front loops are visible on the front of the piece, creating a nice neat edge. You can definitely do what you choose! I believe a pattern is like a recipe. You change it to your liking 🙂
If you are using the Warm Neutrals palette, then this is the join I used for the demo blanket shown below. Make sure to use the main cream color for joining.

2. Row by Row JAYG (The boomerang join)
This join takes more yarn as it is double crochet. It is quite fun though! I have made a video for the join and embedded it below.

Read more: Row by Row JAYG blog post link
Video Tutorial
3. Celtic Lace Mini or Celtic Lace Junior
Here is another join that will require you have enough yarn to complete it, but it is precious. The coral background piece below is Celtic Lace Mini, and the aqua background piece is Celtic Lace Junior. You can find both of these cute joining methods with their instructions in one convenient blog post, linked below.
Read more: Celtic Lace Mini and Junior blog post link
[Related: Suggested yarn for a piece like the one below – Scheepjes Colour Crafter (affiliate)]


4. Continuous JAYG using SC and the PLT Join
Because this join uses single crochet, it doesn’t take that much yarn. It is a continuous join, so you will save yourself loads of ends weaving, and it’s a really neat tool to learn if you haven’t tried continuous join as you go yet. This is similar to the regular join as you go, except you are travelling around the piece like if you are drawing on a paper without picking up your pen. In a continuous path, you join the squares so that you start and end in the upper right corner of the blanket.
Here is the blog post with complete instructions for this join, with photos, linked below.
Read more: Continuous JAYG using SC and the PLT Join blog post link

5. JAYG using SC and the PLT Join (not continuous)
If the thought of continuous JAYG is just too much, I have instruction for the regular join as you go, using SC and the PLT join. This method joins one square at a time, cutting the yarn after joining each square. Here are those instructions linked below.
Read more: JAYG using SC and the PLT Join (not continuous) blog post link

6. Flat Braid Join with only a ch-1 (Tiny cable join)
This join adds just a little something to the piece, but doesn’t take away from the texture of the squares. See below for the blog post and the video instruction.

Read more: FBJ with only ch-1 Blog Post Link
Video Tutorial
7. Continuous Flat Braid Join as you go
If you are a fan of the flat braid join (FBJ) then you may like to see a continuous option if you haven’t already. Here is the blog post where I have documented the instruction for this pretty yet simple join.
Read more: Continuous Flat Braid Join as you go blog post link

8. Flat Braid Join as you go (not continuous)
Again I have a non-continuous version of the join mentioned above. This is a regular flat braid join method that has a very easy and unique maneuver in the corners for a pretty lace look. Check it out at the link below.
Read more: Flat Braid Join as you go (not continuous) blog post link

I’d love to know which join you selected! No matter what join it is, we will all be able to use the border for this piece, as the border will be designed to fit any size blanket.
Thank you for browsing through my crochet joining methods for square motifs, and I hope you find one you fall in love with! To see even more crochet joining method tutorials I have written, head here to the Joining tag!
Happy crafting, y’all!
Rachele C.
6 Comments