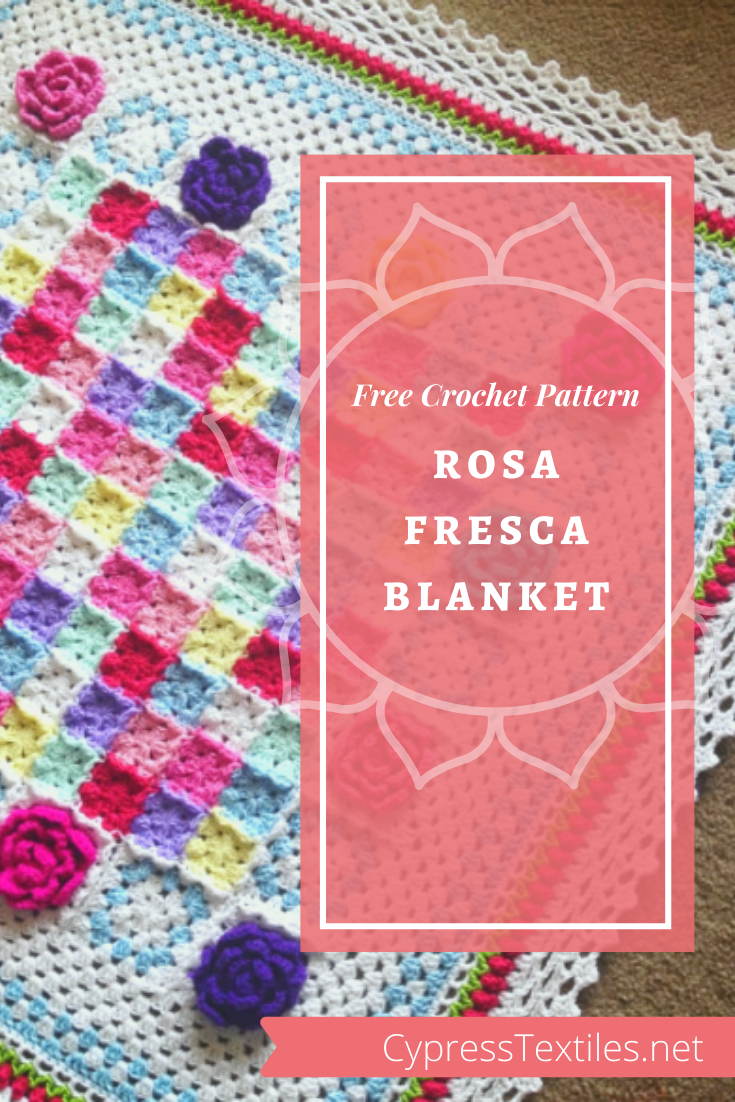
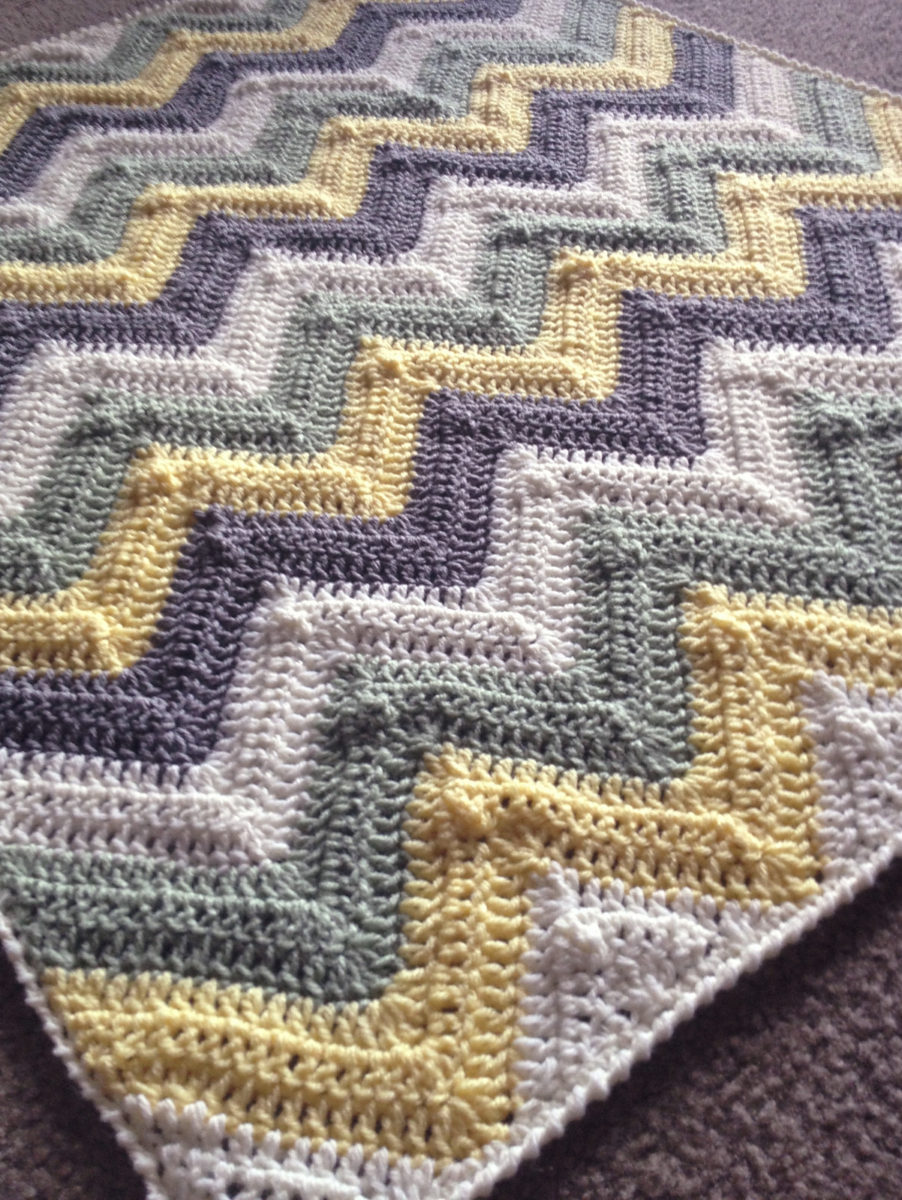
Hello, lovely! Today I have a gift for you. I have converted my Rosa Fresca Blanket paid pattern into a freebie! This is one of my favorite pieces of all time. Perfect for your Spring-time shabby chic home.
Rosa Fresca starts with an adorable and fun-to-create center panel of join as-you-go mini squares, moves on to some gorgeous roses, and then finishes off with a lovely wide border, which includes the sweetest little rosebuds and romantic lace. You will love every moment working on this beauty.
Find this pattern in a convenient, ad-free PDF on Etsy and Ravelry.
Share Your Rosa Fresca Blanket
Join the other crafters who have made Rosa Fresca.
You will need the following colors in the the quantities listed for your Rosa Fresca Blanket.
Yarn A: 1001 Weert x 4
Yarn B: 1083 Tilburg x 1
Yarn C: 2006 Luik x 1
Yarn D: 1080 Venlo x 1
Yarn E: 1019 Texel x 1
Yarn F: 1277 Amstelveen x 1
Yarn G: 1081 Gouda x 1
Yarn H: 1316 Almelo x 1
Shop Colour Crafter
To shop this yarn, click below – I will receive a small commission on any purchase made, at no additional cost to you. Every little bit helps to support my work.
Finished piece measures 52x52in and is easily resized
Stitch Guide (US Terms)
ch chain
beg beginning
beg dc (sc, ch 1) – counts as 1 dc
dc double crochet
hdc half double crochet
lp(s) loop(s)
MR Make Ring: Ch3, ss in third ch from hook
rep repeat
RS/WS right side/wrong side of work
sc single crochet
sk skip
sp space
ss slip stitch
st(s) stitch(es)
tr treble crochet
yoh yarn over hook
Rosa Fresca Blanket Instructions
We will be making a center piece of 196 small granny squares in a 14×14 configuration, with a join-as-you-go joining method. Adorning this center piece will be alternating large granny squares and rose granny squares. After that, we go around the whole thing with granny rounds, an awesome little mini-rose round, a couple more granny rounds, and a lattice lace round with a dainty picot to finish it all off
Schematic
Center Panel
Note: First small square is worked complete. Then, all subsequent small squares are joined on as-you-go on the final round following instructions below. First Small Square is the red one at top right of Center Panel. Use the schematic above to see which color to use for each square.
First Small Square
Round 1 Using Yarn B, MR, beg dc, ch1, (3dc, ch1) 3 times, 2dc, ss
in beg dc. [12 dc, 4 sp]
Round 2 Beg dc in sp, (ch1, 3dc in same sp, 3dc in next sp) 4 times
omitting final dc, ss in beg dc, cut yarn and finish off. [24 dc, 4 sp]
Second and Subsequent Small Squares
Round 1 Using Yarn
indicated in schematic above, work as for First Small Square.
Round 2 Work as for First Small Square, but joining to the adjacent completed square on one or more sides following instructions below.
Joining Schematic
Note: Shows 10×10 squares, but our panel is 14×14 squares
Joining Schematic Key
Grey Arrow: Beginning side – (SC, Ch-2, 3DC) all in corner space, 3dc in next corner space
White Arrow:
Joining sides – Keeping loop on hook and with wrong sides together, Slst
in corner of adjacent square, 3DC in same corner space, Slst between 3DC groups
of adjacent square, 3DC in next corner space, Slst in final corner of adjacent
square
Black Arrow:
Plain sides – Work plain without joining
Yellow Star:
Special join – Insert hook in corner space of adjacent square to the
right, YO, draw yarn through, insert hook through corner space of adjacent
square above, YO, draw yarn through all loops on hook
Red Star: Join to complete square – Join with Slst in chain directly above beginning SC, cut yarn and finish off
Add Squares Around Center Panel
Note: These two motifs are joined onto the blanket as-you-go during their final round in the order indicated on the Joining/Placement Guide on page 5.
Large Granny Square
Rounds 1 and 2 Using Yarn A, work as for First Square
of Small Square section, cut yarn and finish off.
Round 3 Using Yarn E, ss in any corner
sp, beg dc in same sp, (ch1, 3dc in same sp, 3dc in between 3dc-groups from Round
2, 3dc in next sp) 4 times omitting final dc, ss in beg dc, cut yarn and finish
off.
Round 4 Using Yarn A, ss in any corner
sp, work one side plain as follows: beg dc in same sp, (ch1, 3dc in same sp, 3dc
in between 3dc-groups from Round 2, 3dc in next sp), join next side in same
manner as when joining Small Squares together, making ss in corner sps, and
between 3-dc groups of completed adjacent motif and/or center panel. Either 1
or 2 sides will be joined, and the final motif will have 3 sides joined. When
round is complete, ss in beg dc, cut yarn and finish off. For more details, refer
to the section on page 6.
Rose Granny Square
Round 1 Using
Yarn indicated in schematic on page 2, MR, 6sc, ss in first sc.
Round 2 Sc in
same st as join, (ch2, sk1, sc) 2 times, ch2, ss in first sc.
Round 3: (Sc, 3dc,
sc) in all 3 sps. Do not join. (3 Petals made)
Insert hook from back to front through the first sc of Round 3. Grab
the lp and pull it through to the WS of the work.
Round 4 (Ss in the 2 back bars of the first dc of the
Petal, ch3, ss in the 2 back bars of the third dc of the Petal, ch3) 3 times,
ss in first ss. (6 sps made)
Round 5 (Sc, 3dc, sc) in 6 sps. Do not join.
(6 Petals made).
Insert hook as before through the motif from back to front in the first
sc of Round 5. Grab the lp and pull it to the WS of the work.
Round 6 Ch2 (ss in the 2 back bars of
the center dc of the Petal, ch5) 6 times, ss in first ss. (6 sps made)
Round 7 (Sc, 5dc, sc) in 6 sps, ss in first sc, cut yarn and finish off. (Flower made)
Round 8 Using Yarn A, ss in 2 back bars
of first dc of any Petal, (ch3, ss in 2 back bars of fifth dc of same Petal, ch3,
ss in 2 back bars of first dc of next Petal) 6 times omitting final ss, ss in
first ss. (12 sps made)
Note: As you work Round 9, you will join the motif in its position on the perimeter of the Center Panel, by making ss in corner sps and between 3dc-groups just as with the Center Panel and Large Squares. Refer to page 6 for placement diagram.
Round 9 Beg dc in first sp, (ch1, 3dc in same sp, 3dc in next 3 sps) 4 times omitting final dc and joining to any adjacent motifs or edge of center panel as described, ss in beg dc, cut yarn and finish off.
Joining Rose Granny and Large Granny Border – More details
Working
as shown in the placement diagram, start with a Large Square (numbered 1). Join
on one side of Round 4 of the Large Square. When first Rose Square is made,
join it on 2 sides using the same instructions as for the center panel.
Along the perimeter of the Center Panel, where two Small Squares meet in the middle of a Rose Square or Large Square in progress, insert hook in the first small square corner sp, yoh, draw yarn through, insert hook in the second small square corner sp, yoh, and draw yarn through both loops on hook.
Continue joining Large Squares and Rose squares around the perimeter of the Center Panel until all 32 squares are joined.
Wide Border
Round 1 Using Yarn A, ss in top right
corner sp, beg dc in same sp, (ch1, 3dc in same sp, 3dc in between 3dc-groups
of the squares across side, — note: When you come to the place where two
squares meet, dc in first corner sp, yoh, insert hook in first corner sp, yoh,
draw up lp, yoh, draw yarn through 2 lps on hook, yoh, insert hook in second
corner sp, draw up lp, yoh, draw yarn through 2 lps on hook, yoh, draw yarn through
all lps on hook, dc in second corner sp (see first photo below) – 3dc in next
corner sp) 4 times omitting final dc, ss in beg dc.
Rounds 2-5 Beg dc
in corner sp,(ch1, 3dc in same sp, 3dc in
between 3dc-groups across side to next corner sp, 3dc in corner sp) 4 times
omitting final dc, ss in beg dc, cut yarn and finish off after Round 5.
Rounds 6-8
Work as for Round 2, using Yarn E, Yarn A, and then Yarn
E again, cutting yarn after each round.
Round 9 Using Yarn A, ss in corner sp, (3sc in sp, sc in all sts across to next corner sp) 4 times, ss in first sc.
Round 10 Beg dc in next st, * ch1, 3dc in same st, (ch1, sk1, dc) across side until within 3 sts of corner st, Ch-1, 3dc in corner st, rep from * 3 times omitting final dc, ss in beg dc, cut yarn and finish off.
Round 11 Using Yarn H, ss in corner sp, beg dc in same
sp, * ch1, 3dc in same sp, sk 2 dc, dc in next dc, (ch1, yoh, insert hook in
same st as previous, yoh, draw up lp, yoh, draw yarn through 2 lps on hook, yoh,
insert hook in next dc, yoh, draw up lp, yoh, draw yarn through 2 lps on hook, yoh,
draw yarn through all 3 lps on hook) across side to within 2 sts of next
corner, ch1, dc in same st as previous, 3dc in corner sp, rep from * 3 times
omitting final dc, ss in first dc, cut yarn and finish off.
Round 12 Using Yarn B, ss in corner sp, beg dc in same sp, * ch1, 3dc in same sp, (ch2, 3dc in next ch1-sp, drop lp from hook, insert yarn front to back in first of three dc sts, put lp back on hook, pull lp through to close popcorn) rep across side to next corner sp, 3dc in corner sp, rep from * 3 times omitting final dc, ss in beg dc, cut yarn and finish off.
Round 13 Using Yarn A, ss in corner sp, beg dc in same sp, (ch1, 3dc in same sp, 3dc in first ch2-sp, 2dc in all ch2-sps across to within 1 ch2-sp of corner, 3dc in next ch2-sp, 3dc in corner sp) 4 times omitting final dc, ss in beg dc.
Round 14 Switch to smaller hook, beg dc
in corner sp, * ch1, 3dc in same sp, ch3, sc between 2 3dc-groups, ch5, sk5, sc
between 2 2dc-groups, (ch5, sk4, sc between 2 2dc-groups) rep across until within
8 dc of corner sp, ch5, sk5, sc between 2 3dc-groups, ch3, 3dc in corner sp,
rep from * 3 times omitting final dc, ss in beg dc.
Rounds 15 and 16 Beg dc in corner sp, * ch1, 3dc
in same sp, ch3, sc in ch3-sp, (ch5, sc in ch5-sp) across side until ch3-sp is
reached, ch5, sc in ch3-sp, ch3, 3dc in corner sp, rep from * 3 times omitting
final dc, ss in beg dc.
Round 17 Beg dc in corner sp, * ch1, 3dc
in same sp, ch3, sc in ch3-sp, (dc in next sc, ch3, dc in same sc, sc in next ch5-sp)
across side until ch3-sp is reached, sc in ch3-sp, ch3, 3dc in corner sp, rep
from * 3 times omitting final dc, ss in beg dc.
Round 18 Beg dc in corner sp, * ch4, sc in 3rd ch from hook, ch2, 3dc in same sp, (2dc, ch3, sc in 3rd ch from hook, 2dc, ch1) in every ch3-sp across side to next corner, 3dc in corner sp, rep from * 3 times omitting final dc, ss in bed dc, cut yarn and finish off.
Jump up in the air and hug your new blanket!
To make a larger blanket:
Work a larger Center Piece – Increase square rows and columns by multiples of 4 so that you can still get the same Large Square and Rose Square pattern around the perimeter of the Center Panel. Work the additional Rose and Large squares. Finish with the border of the blanket in the same manner as the original blanket.
Or…
Work
larger motifs – Make the Small squares 3 rounds instead of 2. Make the Rose and
Large squares 6 rounds instead of 4.
Or…
Work
more white rounds in the border, between Rounds 5 and 6, making more granny
stitch rounds in the same manner.
Use this blank schematic to color:
Copyright Information
No pattern or other material may be reproduced — mechanically, electronically, or by any other means, including photocopying — without written permission of Rachele Carmona. This applies to all content on CypressTextiles.net, BabyLoveBrand.net, and all other sites used by Rachele Carmona. Paid patterns are for personal use only. You may sell your finished crocheted items, but do not use my photos to sell your items.
Thank you!! Your support means the world, and I am living the dream of practicing my art while putting food on the table, all because you guys and gals enjoy my designs. Wild, huh? Well, I’m forever grateful. 🙂
Hello, gorgeous crafter! Today I am sharing the UK Terms version of the Botanica Blanket CAL in its entirety. The CAL has ended, but I will still have this free pattern laid out in the weekly CAL chunks below. So if you want to follow that schedule, you’re more than welcome to! Or just work it in any order. I have copied all of the weekly UK Terms CAL posts into this post and formatted them to make a full free pattern. Enjoy!
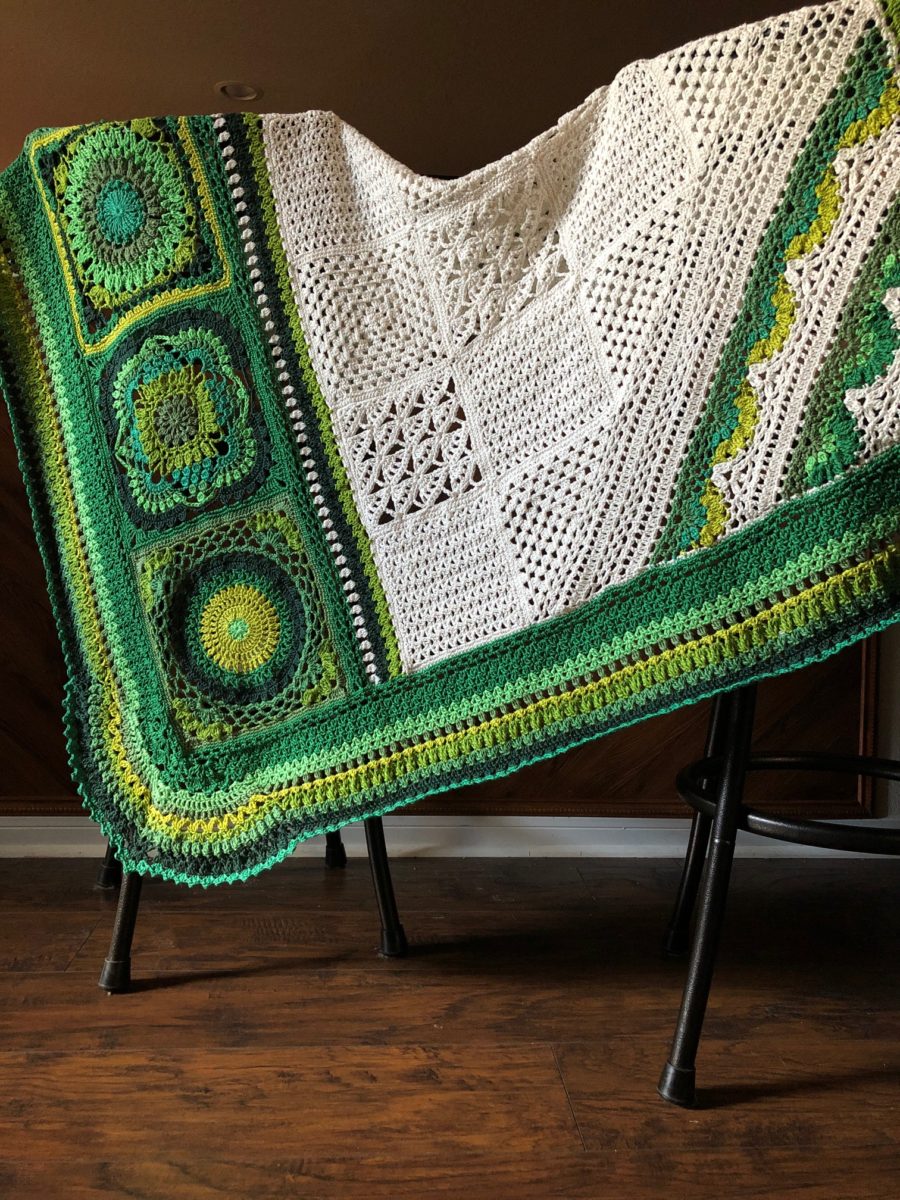
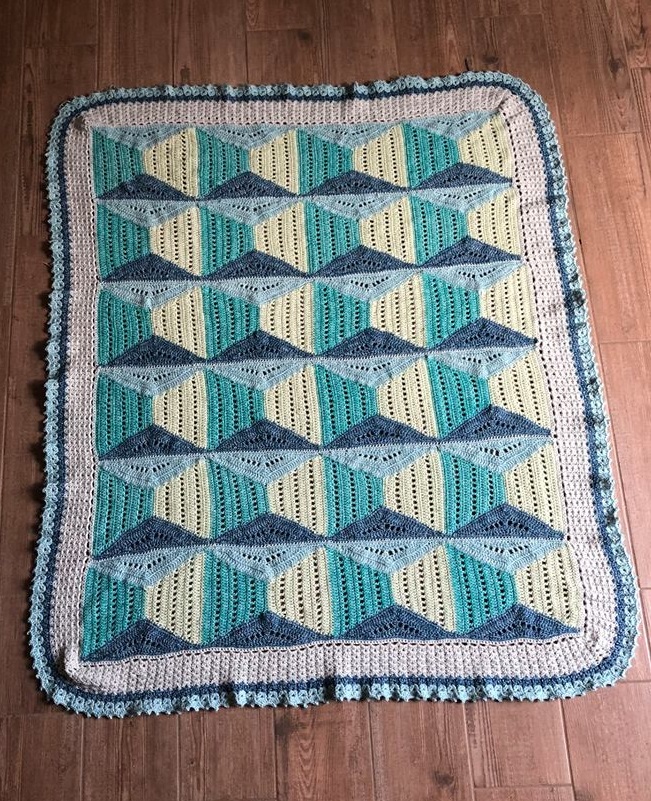
Inspired by the Copenhagen Botanical Garden, the Botanica Blanket features many different crochet techniques by using a few simple stitches, but combining them in an engaging and unique way. Lattice and lace motifs combine with leafy green ones to create the contrast of the famous spiral staircase in the Palm Room of the garden.
You can see when the blanket is laid flat that it has so many interesting design elements, it will feel just as refreshing and energizing to make the blanket as it will to wrap it around you.
And don’t worry, even if you haven’t really worked with many stitches, you can still make this blanket, as the pattern will include step by step photos, videos, and written instruction to ensure gorgeous blanket success. The last thing I want is for your blanket to end up in time-out at the bottom of the WIP pile!
My Instagram account – Post progress pics under hashtags #botanicablanket and/or #cypresstextiles
YouTube Channel (Subscribe!) – Here I will be posting CAL pattern videos weekly for the duration of the CAL – and I have loads of other tutorial videos too.
I was introduced to the Copenhagen Botanical Garden through the Instagram feed of @dori_the_plant_whisperer (YouTube)- here is the photo she posted, taken straight from her IG feed. Can you see why I was inspired?
Check out those filigree and lattice bits, and all of the different shades of green in the leaves. I was instantly smitten and knew I had to create a blanket. By now you probably know that I see a crochet blanket everywhere I look.
Photo from the Instagram feed of Dori the Plant Whisperer
I can’t help but post another shot of this staircase. Breathtaking!
Learn More
From the Natural History Museum of Denmark website, and why visiting the garden is now on my bucket list:
Visit the Palm House – a spectacular botanical collection
In the Palm House, you can view exotic and rare plants, which grow in different tropical and subtropical environments. Among other things, you can experience the greenhouses Aquatic and Mangrove Plants, Warm Subtropics, Dry Tropics, and Mediterranean House.
Giant Bamboo, large palms, spectacular flowers and carnivorous plants are just a small selection of the botanical collection you can experience in The Palm House.
You can also visit the Succulent and Cactus House with plants of all sorts and shapes, as well as The Butterfly House, where you can experience living butterflies during the summer months.
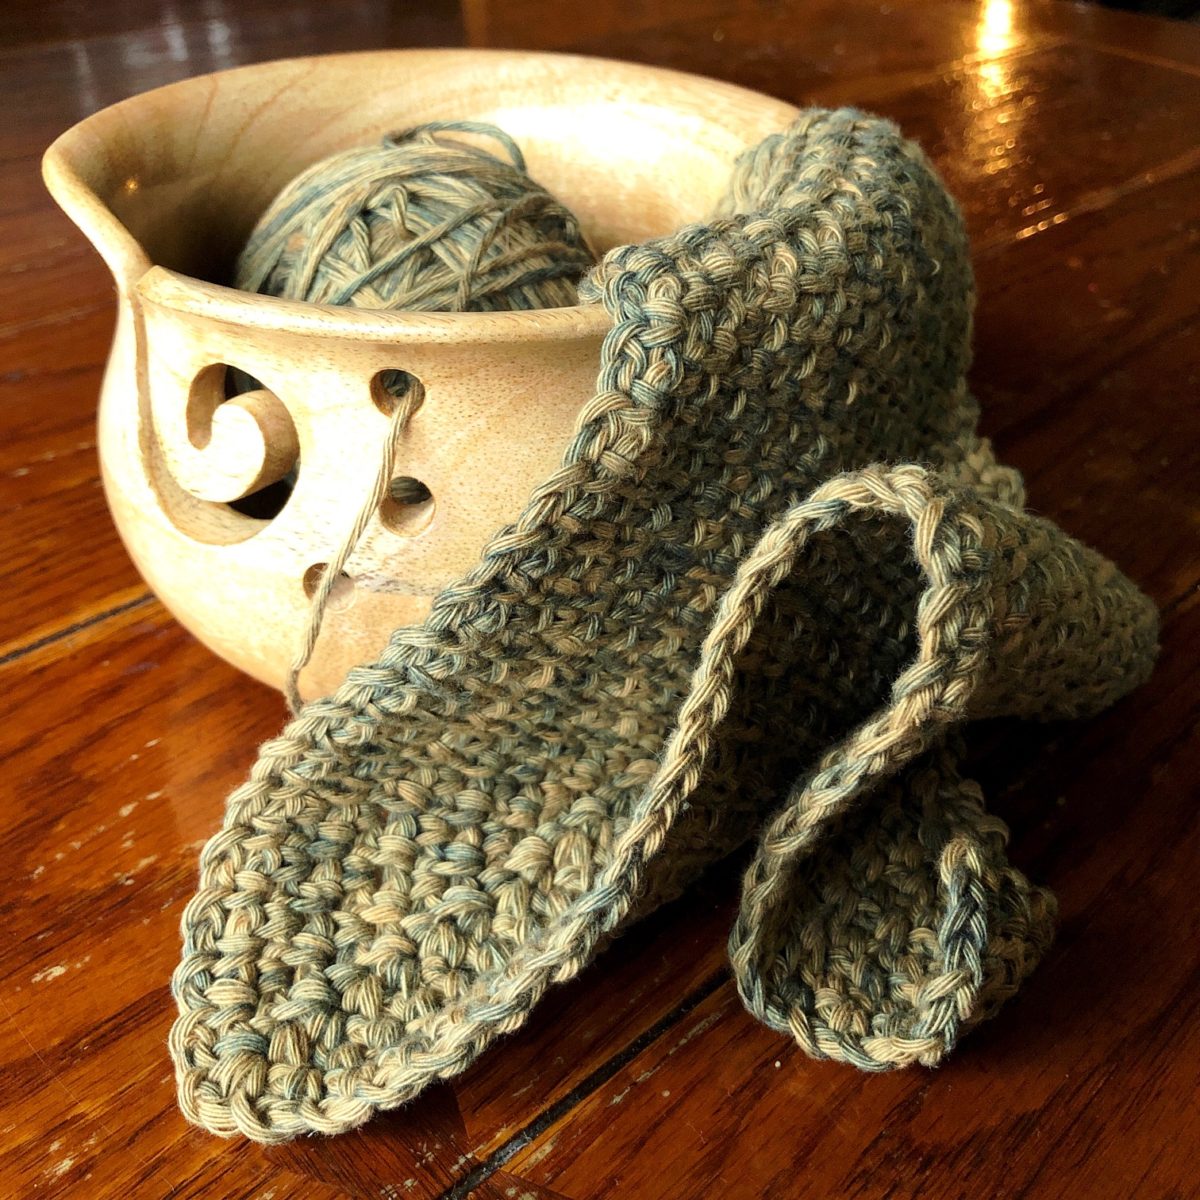
Why Catona? Well, I do have a wide variety of Scheepjes Yarns in my stash, so I did play around with a few different lines. There’s something about the drape and weight of Catona – plus the incredible stitch definition – that makes it so well behaved.
Not that it’s a heavy yarn, but it just lays nice and flat, and when you fold up your blanket, it’s just this perfectly neat, folded thing. I guess it’s just something about fingering weight 100% mercerized cotton that is so perfect.
I dug out my Catona Cutie Pie Colour Pack* and started to mess around with the greens, and then after I chose what I thought would be the final color scheme (what you see below) I ended up taking away a few greens (the more blue ones) and adding in others.
Order Yarn! (The fun part!)
Please order your yarn from one of the following links. I am affiliated with these shops, so by clicking the link below and buying any item, you will help support CypressTextiles and all of the content I produce – at no additional cost to you 🙂 Thank you for your support!
And here is a pretty photo of the greens that I did end up choosing for the final palette. I am also working this blanket up in the Spoonful of Yarn colorway of Our Tribe, which involves no color changes. As we do the CAL, I will be making the other versions of the Botanica Blanket, and I am so pumped!
So for this CAL design, I decided to make sure that all of the elements that makers have enjoyed in my previous works are in my blanket. It was super exciting to walk down memory lane and choose all of the best ingredients for my blanket recipe.
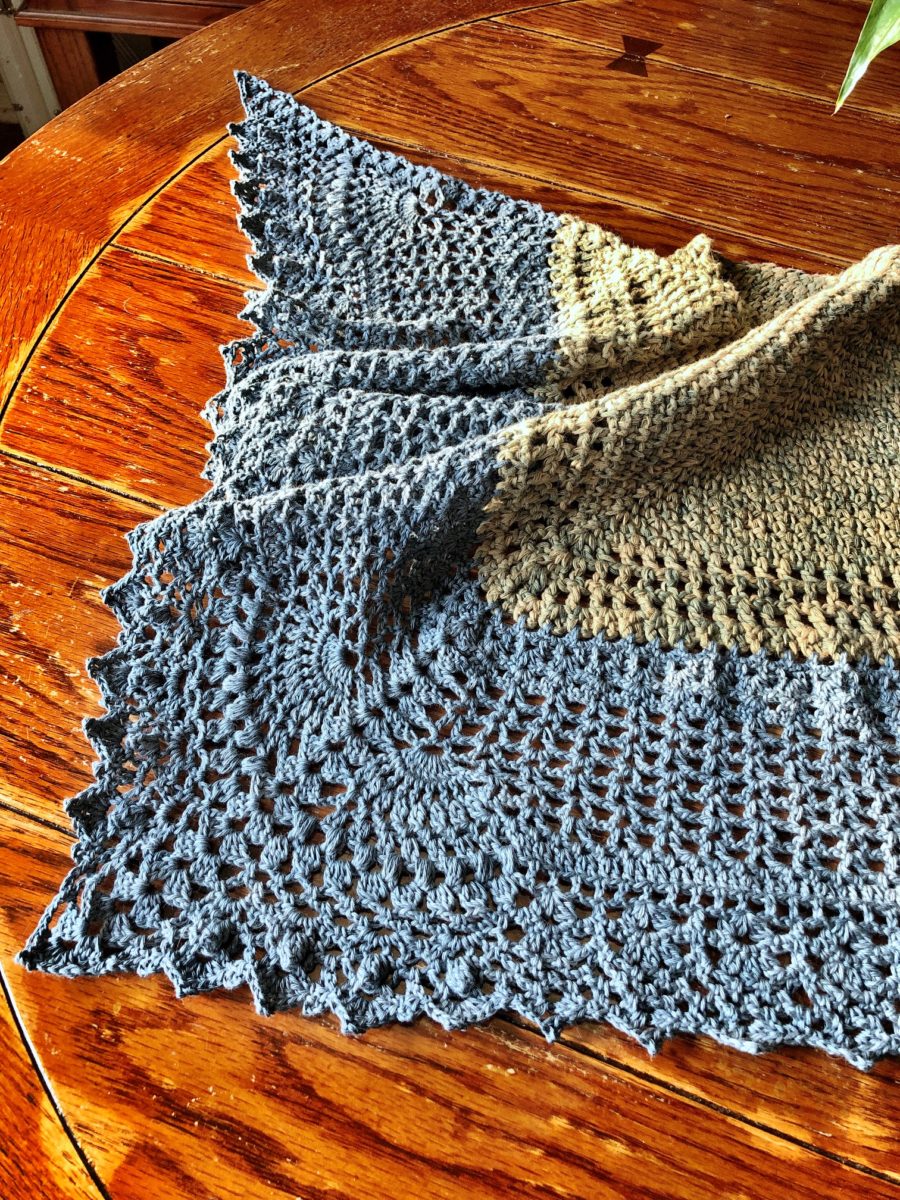
Check out the fill triangle, mixing motifs of different sizes, and the epic curved border corner.
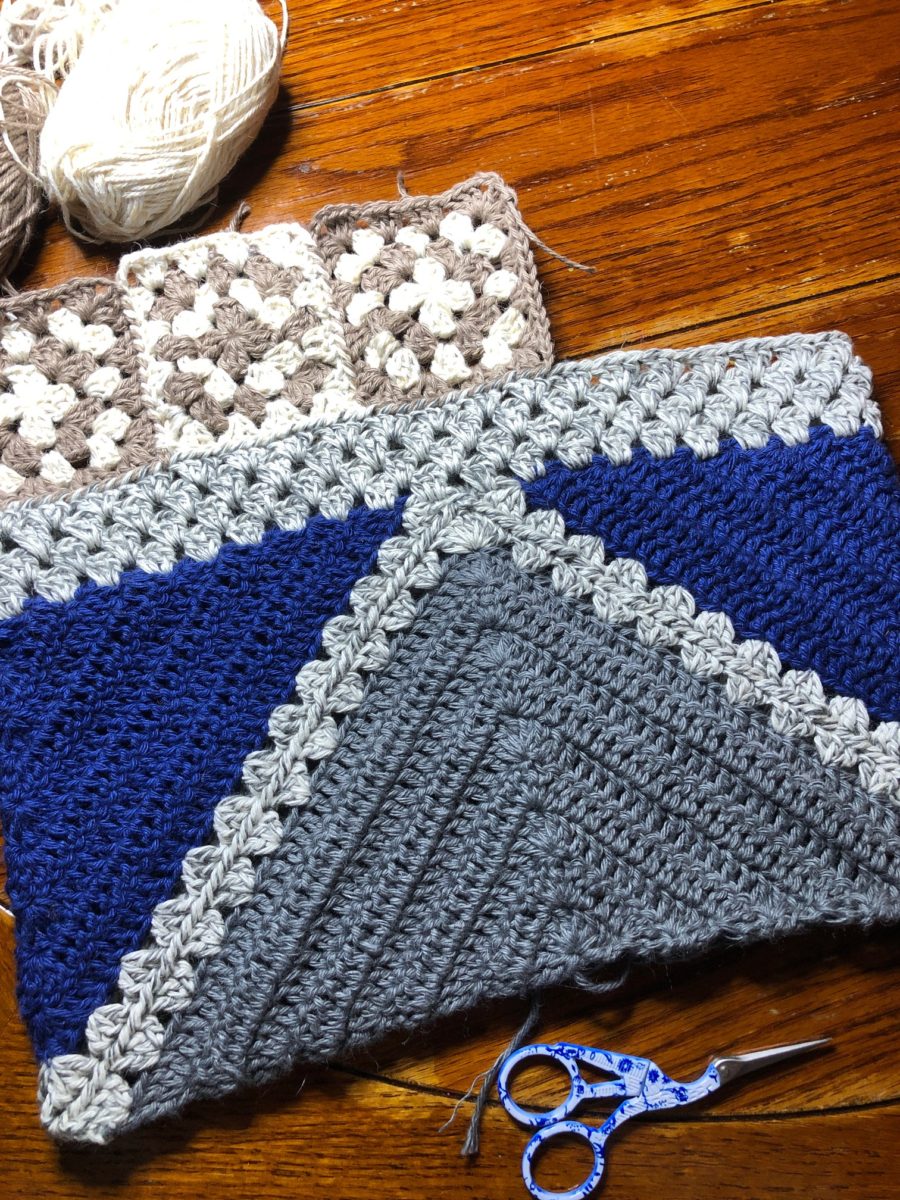
Fill Triangle
I use the fill triangle to square off a blanket when I’ve made half square triangle motifs to cut off the main body design at the corner. In 2016, I used the technique for my Wildflower Blanket, and everyone really seemed to love it.
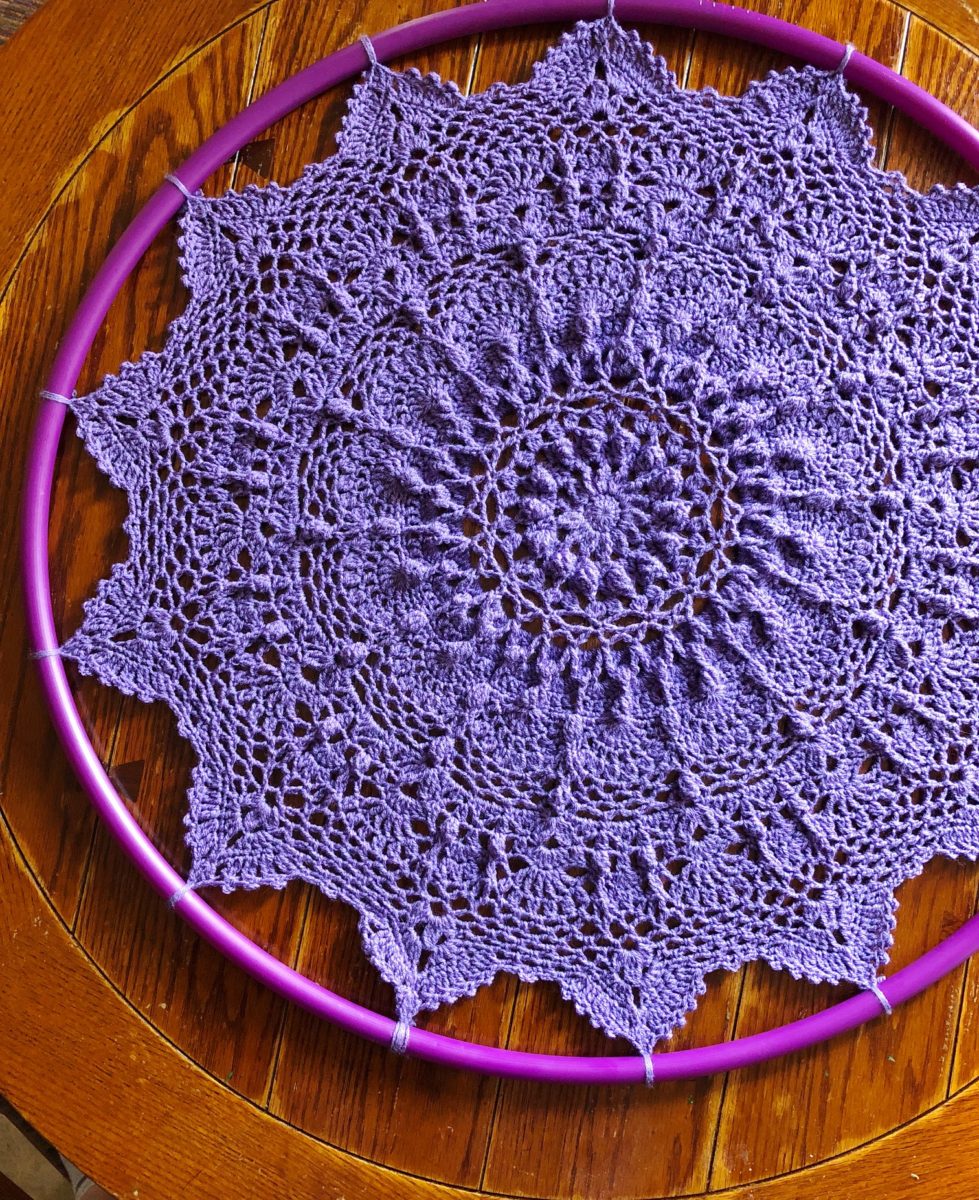
Motifs of Varying Sizes
Using all different sizes of motifs requires some math and some extra frogging, but that’s okay, because the maths are my favorite part of crochet design, and I actually find frogging to be very freeing.
A word on frogging: There’s something about knowing that your work is so fragile it can all be undone in just a few moments – it reminds me not to see my work as this huge daunting thing. Sometimes your inner crochet meanie feeds off feeling like your project is way more powerful than it really is, when at the end of the day, it’s just knots. It has no power over you. Obsessive perfection and Crafter anxiety entirely unnecessary. As I always say, crochet is meant to de-stress you, not re-stress you.
Okay, back to it! I’ve used different size motifs in a few blankets, but you really got excited about Desert Bloom and the Happy Folk Blanket. It’s just a blast when everything comes together.
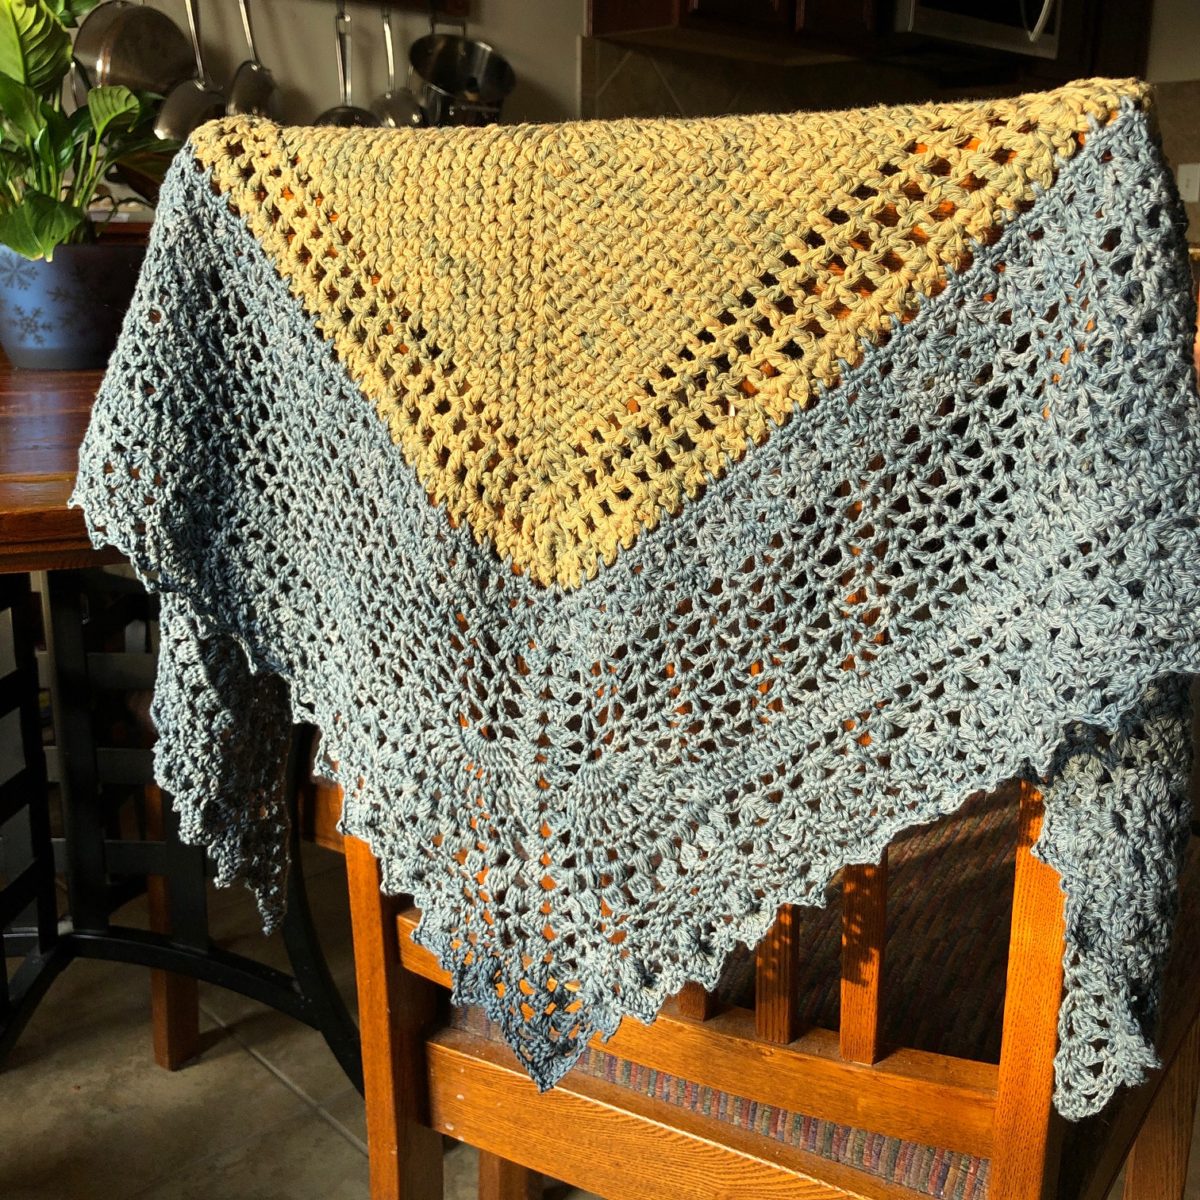
Ornate Curved Border Corner
This is a big one! Crafters absolutely loved the border of my 2016 VVCAL blanket design. It was a huge sense of pride and accomplishment when people used the border design on their other blankets. Seeing that pop up in my social media feeds still makes my day, and I knew Botanica needed to have curved corners too.
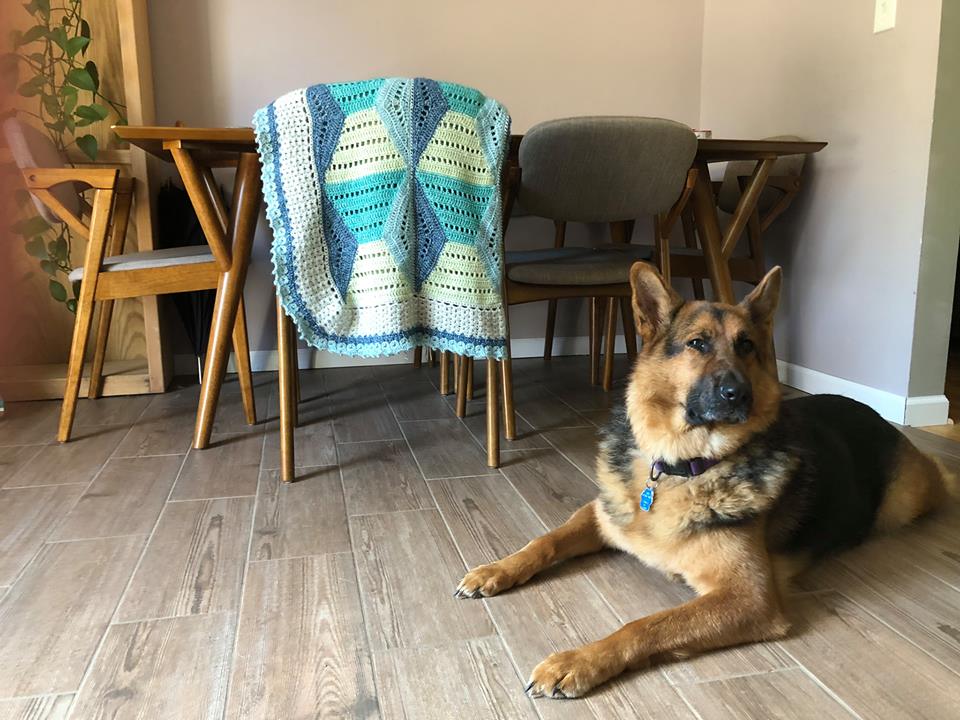
When you lay this blanket on a bed, and the corners hang down, it looks magnificent.
Thanks to you, I get to live my dream. When I started my business, I made custom blankets, and as you may know, I worked up over 300 blankets in a 3.5 year time period. Sometimes I was making two 36x36in baby blankets per week. My greatest joy was thinking of the recipient wrapping themselves in the blanket I made, like a warm hug.
That’s why I am so drawn to blankets. It’s the snuggle factor. Well fast forward to now, and my feeling has multiplied, because with my designs, makers can create blankets for their loved ones to wrap up in. The coze-factor grows exponentially.
The Botanica Blanket is perfect for the adventurous beginner or even the advanced artist just looking for some simple, yet pretty stitching. The adventure lies in the fun layout, so look forward to a fun make! You will discover there are times when you can craft in front of the television, and there are times when you need to concentrate a bit more. All of this makes for a nice engaging project.
Social Media
Hashtag #BotanicaBlanket and/or #cypresstextiles to tag social media WIP/FO pics. Please use these hashtags to keep all of the lovely WIP and FO pics together 🙂
{Garish} Schedule Map
See which parts will be made each week in the schedule map below so that you know exactly what to expect.
This week, we will be making 3 of “Motif 5” and 3 of “Motif 3”.
Included in this section, you will find:
Progress Tracker
Week 1 Stitch Guide
“Motif 5” instructions – Make 3
“Motif 3” Instructions – Make 3
Progress Tracker
Week 1 Stitch Guide (UK Terms)
2trcl (yoh, insert hook in st, yoh, pull up lp, yoh, draw yarn through 2 lps) 2 times, yoh, draw yarn through 3 lps
3dtrcl * yo 2 times, insert hook in st/sp, yo, pull up lp, (yo, draw yarn through 2 lps) 2 times, rep from * 2 times, yo, draw yarn through 4 lps
ch chain
beg beginning
beg tr (dc, ch 1) – counts as 1 tr
beg dtr (dc, ch 2) – counts as 1 dtr
dc double crochet – Important note: I do not chain up 1 for the first double crochet of a round.
dtr double treble crochet
ending tr2tog starting in same st, yoh, insert hook, yoh, pull up lp, yoh, draw yarn through 2 lps, sk 1 ch, yoh, insert hook in dc, yoh, pull up lp, yoh, draw yarn through 2 lps, yoh, draw yarn through all 3 lps on hook
lp(s) loop(s)
MR make ring: ch3, ss in third ch from hook
rep repeat
RS/WS right side/wrong side of work
sk skip
sp space
special tr2tog starting in st/ch indicated,yoh, insert hook, yoh, pull up lp, yoh, draw yarn through 2 lps, sk 2 chs, yoh, insert hook in next st/ch, yoh, pull up lp, yoh, draw yarn through 2 lps, yoh, draw yarn through all 3 lps on hook
ss slip stitch
st(s) stitch(es)
tr treble crochet
tr3tog (yoh insert hook into next st/sp, yoh, pull up lp, yoh, draw yarn through 2 lps) 3 times, yoh, draw yarn through 4 lps on hook
tr4tog (yoh, insert hook in next st, yoh, pull up lp, yoh, pull yarn through 2 lps) 4 times, yoh, pull yarn through 5 lps
yoh yarn over hook
Motif 5 (Make 3)
YouTube Video Tutorial
Note: Video is in US Terms.
Round 1 Using Yarn B, MR, beg tr (see Stitch Guide), tr – counts as 1 2trcl, (ch1, 2trcl) 7 times, ch1, ss in first full tr, cut yarn and weave tails. [8 2trcl, 8 sp]
Round 2 Join Yarn C with ss in first sp, beg dtr (see Stitch Guide), (3dtr in same sp, dtr in next sp) 8 times omitting final dtr, ss in beg dtr. [32 dtr]
Round 3 Beg tr in next st, (ch1, tr) 31 times, ch1, ss in beg tr. [32 tr, 32 sp]
Round 4 Ss in 1 ch, (beg tr, tr) in next tr – counts as 1 2trcl, (ch2, 2trcl in next tr) 31 times, ch2, ss in first full tr, cut yarn and weave tails. [32 2trcl, 32 sp]
Round 5 Join Yarn H with ss in first sp, 3dc in all sps around, ss in first dc. [96 dc]
Round 6 Beg tr in next st, * sk2, (tr, ch2, tr) in next st, rep from * 30 times, tr in same st as beg tr, ch2, ss in beg tr, cut yarn and weave tails. [64 tr, 64 sp]
Round 7 Join Yarn F with ss in first sp, beg tr, (3tr in same sp, tr in next sp) 32 times omitting final tr, do not join round. [128 tr]
Note: Round 7 will seem to ruffle, but this will be corrected on Round 8.
Round 8 Beg tr in beg tr of Round 7, tr3tog – counts as 1 tr4tog, (ch3, tr4tog) 31 times, ch3, ss in tr3tog, cut yarn and weave tails. [32 tr4tog, 32 sp]
Round 9 Join Yarn E with ss in first sp, 5dc in all sps around, ss in first dc. [160 dc]
Round 10 Ss in 1 st, (dc in next st, ch4, sk4) 32 times, ss in first dc. [32 dc, 32 sp]
Round 11 Ss in 2 chs, dc in same sp, * (ch4, dc in next sp) 6 times, 3dtrcl in next sp, (ch3, 3dtrcl in same sp) 3 times, dc in next sp, rep from * 3 times omitting final dc, ss in first dc, cut yarn and weave tails. [16 3dtrcl, 28 dc, 36 sp]
Round 12 Join Yarn G with ss in first sp, sc in same sp, * (ch4, dc in next sp) 5 times, 3dtrcl in next sp, (ch3, 3dtrcl in same sp) 2 times, (3dtrcl, ch4, 3dtrcl) in next sp, 3dtrcl in next sp, (ch3, 3dtrcl in same sp) 2 times, dc in next sp, rep from * 3 times omitting final dc, ss in first dc, cut yarn and weave tails. [32 3dtrcl, 24 dc, 40 sp]
Round 13 Join Yarn D with ss in first sp, * 5dc in 5 sps, 3sc in 2 sps, (5tr, ch3, 5tr) in next sp, 3dc in 2 sps, rep from * 3 times, ss in first dc. [40 tr, 148 dc, 4 sp]
Round 14 (Dc in all sts to corner, 3dc in corner) 4 times, dc in all sts to beginning, ss in first dc, cut yarn and leave 2 arm lengths tail for whip st join later on. Wind tail up and secure to prevent tangling. [200 dc]
Make 2 more of Motif 5, using the following yarn color order:
Yarn: G, I, F, D, H, B, C
Yarn: D, E, G, H, I, F, B
Motif 3 (Make 3)
YouTube Video Tutorial
Note: Video is in US Terms.
Row 1(RS) Using Yarn A, ch40, starting in 4th ch from hook note: this turning chain counts as 1 tr + ch1, make special tr2tog (refer to Stitch Guide), (ch2, starting in same ch as previous, make special tr2tog) 11 times, ch1, tr in same ch as previous, turn. [12 special tr2tog, 2 tr, 13 sp]
Row 2 Beg tr in tr, tr in special tr2tog, (ch2, starting in same st as previous, make special tr2tog) 11 times, ch2, make ending tr2tog, turn. [11 special tr2tog, 1 ending tr2tog, 2 tr, 12 sp]
Row 3 Beg tr in ending tr2tog, ch1, (starting in same st as previous, make special tr2tog, ch2) 12 times omitting final ch, tr in same st as previous, turn. [12 special tr2tog, 2 tr, 13 sp]
Rows 4-13 Rep Rows 2 and 3 5 times.
Motif Border Continuing with RS facing, work left edge as follows: treating the tr sts as ch-sps, (2dc in next 2 sps, 3dc in next sp) 4 times, 2dc in next sp, 3dc in corner, work bottom edge as follows: (3dc in next sp, 2dc in next sp) 6 times, 3dc in corner, work right edge as left edge, 3dc in corner, work top edge as bottom edge, 3dc in final corner, ss in first dc, cut yarn and weave tails. [132 dc]
Botanica Blanket Pattern: Week 2
This week, we will be making 4 of “Motif 1” and 6 of “Motif 2”.
Included in this section, you will find:
Progress Tracker
Week 2 Stitch Guide
“Motif 1” instructions – Make 4
“Motif 2” Instructions – Make 6
Weekly Progress Tracker
Week 1 Stitch Guide (UK Terms)
ch chain
beg beginning
beg tr (dc, ch 1) – counts as 1 tr
dc double crochet – Important note: I do not chain up 1 for the first double crochet of a round.
dtr double treble crochet
lp(s) loop(s)
MR make ring: ch3, ss in third ch from hook
rep repeat
RS/WS right side/wrong side of work
sk skip
sp space
ss slip stitch
st(s) stitch(es)
tr treble crochet
yoh yarn over hook
Motif 1 (Make 4)
YouTube Video Tutorial
Note: Video is in US Terms.
Round 1 (WS) Using Yarn A, MR, beg tr, (ch3, 3tr) 4 times omt final tr, ss in beg tr. [12 tr, 4 sp]
Round 2 Ss in first 2 chs, beg tr in same sp, turn, (ch3, 3tr in same sp, ch1, 3tr in next sp) 4 times omt final tr, ss in beg tr. [24 tr, 8 sp]
Rounds 3-8 Ss in first 2 chs, beg tr in same sp, turn * ch3, 3tr in same sp, (ch1, 3tr) in all ch-1 sps across to next ch-3 sp, ch1, 3tr in ch-3 sp, rep from * 3 times omt final tr, ss in beg tr. [96 tr, 32 sp]
Round 9 Continuing on RS, (3dc in ch-3 sp, sk 1 st, dc in 30 sts/sps across) 4 times, ss in first dc, cut yarn. [132 dc]
Motif 2 (Make 6)
YouTube Video Tutorial
Note: Video is in US Terms.
Row 1 (RS) Using Yarn A, MR, beg tr, ch1, 3tr, ch3, 3tr, ch1, dtr, turn. [1 dtr, 7 tr, 3 sp]
ow 2 Beg tr in dtr, ch1, 3tr in ch-1 sp, ch1, (3tr, ch3, 3tr) in ch-3 sp, ch1, 3tr in ch-1 sp, ch1, dtr in final st, turn. [1 dtr, 13 tr, 5 sp]
Rows 3-8 Beg tr in dtr, (ch1, 3tr) in all ch-1 sps across to ch-3 sp, ch1, (3tr, ch3, 3tr) in ch-3 sp, (ch1, 3tr) in all ch-1 sps across, ch1, dtr in final st, turn. [1 dtr, 49 tr, 17 sp]
Row 9 2dc in first sp, (sk 1 st, dc in 30 sts/sps across, 3dc in ch-3 sp) 2 times omt final dc, cut yarn. [67 dc]
Thank you so much for following along! Hope you enjoy this week. I have tried to offer the easiest motifs of the pattern first as the holiday season is upon us. No worries if you need to catch up in the New Year! Everyone is welcome to share pics in my Facebook Group.
Happy Crafting!
Rachele C.
Welcome to the third week of the Botanica Blanket CAL. This week may start out slow, but it’ll go by really fast once you have the square pattern down. We will be making 8 squares (Motif 4). No larger squares this week!
Quick Info
For many details on ordering kits, yarn colors, CAL schedule and much more, head to the info post for this CAL.
Etsy // Ravelry // My Shop – Conveniently condensed, ad-free PDF pattern – get it all at once, or follow the pace of the CAL for free!
dc double crochet – Important note: I do not chain up 1 for the first double crochet of a round.
dtr double treble crochet
lp(s) loop(s)
MR make ring: ch3, ss in third ch from hook
rep repeat
RS/WS right side/wrong side of work
sk skip
sp space
ss slip stitch
st(s) stitch(es)
tr treble crochet
yoh yarn over hook
Motif 4 (Make 8)
Video instruction will be uploaded soon!
Note: Motif is worked corner to corner, increasing to its widest point, and then decreasing back down to the opposite corner.
Row 1 (RS) Using Yarn A, MR, beg tr, (ch1, tr) 3 times, turn. [4 tr, 3 sp]
Note: Use a small piece of yarn (or a stitch marker) to mark Row 1 as the RS to avoid confusion.
Row 2 (Beg tr, ch1, tr) in first st, (ch1, tr in next tr) 2 times, ch1, (tr, ch1, tr) in final st, turn. [6 tr, 5 sp]
Row 3 Dc in every st/sp across, turn. [11 dc]
Row 4 Beg tr in first st, (ch1, tr in same st) 3 times, ch6, sk9, tr in final st, (ch1, tr in same st) 3 times, turn. [8 tr, 7 sp]
Row 5 (Beg tr, ch1, tr) in first st, (ch1, tr in next tr) 3 times, ch1, holding ch-6 lp at WS of work, dtr in 5th skipped dc from Row 3, (ch1, tr in next tr) 4 times, ch1, tr in same st, turn. [1 dtr, 10 tr, 10 sp]
Row 6 Dc in every st/sp across, but when working into dtr st, also put hook under ch-6 lp to grab it and secure at WS of work. [21 dc]
Row 7 Beg tr in first st, (ch1, tr in same st) 3 times, * ch6, sk9, tr in next st, (ch1, tr in same st) 3 times, rep from * 1 time, turn. [12 tr, 11 sp]
Row 8 (Beg tr, ch1, tr) in first st, (ch1, tr in next tr) 3 times, * ch1, holding ch-6 lp at WS of work, dtr in 5th skipped dc from Row 6, (ch1, tr in next tr) 4 times, rep from * 1 time, ch1, tr in same st, turn. [2 dtr, 14 tr, 15 sp]
Row 9 Rep Row 6. [31 dc]
Row 10 Beg tr in first st, (ch1, tr in same st) 3 times, * ch6, sk9, tr in next st, (ch1, tr in same st) 3 times, rep from * 2 times, turn. [16 tr, 15 sp]
Row 11 (Beg tr, ch1, tr) in first st, (ch1, tr in next tr) 3 times, * ch1, holding ch-6 lp at WS of work, dtr in 5th skipped dc from Row 9, (ch1, tr in next tr) 4 times, rep from * 2 times, ch1, tr in same st, turn. [3 dtr, 18 tr, 20 sp]
Row 12 Rep Row 6. [41 dc]
Note: From this point, the motif begins to decrease.
Row 13 Beg tr in first st, * ch6, sk9, tr in next st, (ch1, tr in same st) 3 times, rep from * 2 times, ch6, tr in final st, turn. [14 tr, 13 sp]
Row 14 Ss in 3 chs, * holding ch-6 lp at WS of work, dtr in 5th skipped dc from Row 12, (ch1, tr in next tr) 4 times, ch1, rep from * 2 times, dtr in 5th skipped dc from Row 12, turn. [4 dtr, 12 tr, 15 sp]
Row 15 Rep Row 6. [31 dc]
Row 16 Beg tr in first st, * ch6, sk9, tr in next st, (ch1, tr in same st) 3 times, rep from * 1 time, ch6, tr in final st, turn. [10 tr, 9 sp]
Row 17 Ss in 3 chs, * holding ch-6 lp at WS of work, dtr in 5th skipped dc from Row 15, (ch1, tr in next tr) 4 times, ch1, rep from * 1 time, dtr in 5th skipped dc from Row 15, turn. [3 dtr, 8 tr, 10 sp]
Row 18 Rep Row 6. [21 dc]
Row 19 Beg tr in first st, * ch6, sk9, tr in next st, (ch1, tr in same st) 3 times, ch6, tr in final st, turn. [6 tr, 5 sp]
Row 20 Ss in 3 chs, * holding ch-6 lp at WS of work, dtr in 5th skipped dc from Row 18, (ch1, tr in next tr) 4 times, ch1, dtr in 5th skipped dc from Row 18, turn. [2 dtr, 4 tr, 5 sp]
Row 21 Rep Row 6. [11 dc]
Row 22 Beg tr in first st, ch6, tr in final st, turn. [2 tr, 1 sp]
Row 23 Ss in 3 chs, dtr in 5th skipped dc from Row 21, turn. [1 dtr]
Row 24 dc in tr, turn. [1 dc]
Motif Border 3dc in corner, work left edge as follows: (5dc in sp, 3dc in dtr) 3 times, 6dc in sp, 3dc in corner, work bottom edge as follows: (2dc in sp, 3dc in sp, 3dc in dc) 3 times, 3dc in next 2 sps, 3dc in corner, work right edge as for bottom edge, 3dc in corner, work top edge as for left edge, ss in first dc, cut yarn. [132 dc]
Finished!
Thank you so much for following along! Hope you enjoy this week. I have tried to offer the easiest motifs of the pattern first as the holiday season is upon us. No worries if you need to catch up in the New Year! Everyone is welcome to share pics in my Facebook Group.
Happy Crafting!
Rachele C.
Welcome to the fourth week of the Botanica Blanket CAL. It’s another exciting week with the return of the larger squares! We will be making 6 squares, 3 large (Motif 6) and 3 small (Motif 3).
Quick Info
For many details on ordering kits, yarn colors, CAL schedule and much more, head to the info post for this CAL.
Etsy // Ravelry // My Shop – Conveniently condensed, ad-free PDF pattern – get it all at once, or follow the pace of the CAL for free!
2trcl 2tr cluster:(yoh, insert hook in st, yoh, pull up lp, yoh, draw yarn through 2 lps) 2 times, yoh, draw yarn through 3 lps
3dtrcl 3dtr cluster:* yoh 2 times, insert hook in st, yoh, pull up lp, (yoh, draw yarn through 2 lps) 2 times, rep from * 2 times, yoh, draw yarn through 4 lps
3trcl 3tr cluster:(yoh, insert hook in st/sp, yoh, pull up lp, yoh, draw yarn through 2 lps) 3 times, yoh, draw yarn through 4 lps
4trcl 4tr cluster:(yoh, insert hook in st/sp, yoh, pull up lp, yoh, draw yarn through 2 lps) 4 times, yoh, draw yarn through 5 lps
ch chain
beg beginning
beg dtr (dc, ch 2) – counts as 1 dtr
beg tr (dc, ch 1) – counts as 1 tr
dc double crochet – Important note: I do not chain up 1 for the first double crochet of a round.
dtr double treble crochet
ending tr2tog starting in same st, yoh, insert hook, yoh, pull up lp, yoh, draw yarn through 2 lps, sk 1 ch, yoh, insert hook in dc, yoh, pull up lp, yoh, draw yarn through 2 lps, yoh, draw yarn through all 3 lps on hook
lp(s) loop(s)
MR make ring: ch3, ss in third ch from hook
rep repeat
RS/WS right side/wrong side of work
sk skip
sp space
special tr2tog starting in st/ch indicated,yoh, insert hook, yoh, pull up lp, yoh, draw yarn through 2 lps, sk 2 chs, yoh, insert hook in next st/ch, yoh, pull up lp, yoh, draw yarn through 2 lps, yoh, draw yarn through all 3 lps on hook
ss slip stitch
st(s) stitch(es)
tr treble crochet
tr4tog (yoh, insert hook in next st/sp, yoh, pull up lp, yoh, draw yarn through 2 lps) 4 times, yoh, draw yarn through 5 lps
yoh yarn over hook
Motif 6 (Make 3)
Video instruction will be uploaded soon!
Instructions
Note: Sample in step by step photos is using random colors of Catona. Please use the yarn letters given in the written pattern.
Round 1 Using Yarn H, MR, beg dtr, (ch1, dtr) 11 times, ch1, ss in beg dtr. [12 dtr, 12 sp]
Round 2 (Beg tr, 2trcl) in first sp – counts as 1 3trcl, (ch 3, 3trcl in next sp) 11 times, ch3, ss in 2trcl, cut yarn. [12 3trcl, 12 sp]
Round 3 Join Yarn F with ss in first sp, 4dc in each sp around, ss in first dc. [48 dc]
Round 4 (Dc in next st, ch2, sk1) 24 times, ss in first dc. [24 dc, 24 sp]
Round 5 Dc in first sp, * ch5, (3dtrcl in next sp, ch2) 4 times, 3dtrcl in next sp, ch5, dc in next sp, rep from * 3 times omt final dc, ss in first dc, cut yarn. [20 3dtrcl, 4 dc, 24 sp]
Round 6 Join Yarn D with ss in final ch-sp of Round 5, dc in same sp, * ch5, dc in next sp, ch5, (4trcl in next sp, ch2) 3 times, 4trcl in next sp, ch5, dc in next sp, rep from * 3 times omt final dc, ss in first dc. [16 4trcl, 8 dc, 24 sp]
Round 7 Beg tr in first sp, * 8tr in same sp, dc in next sp, ch5, (4trcl in next sp, ch2) 2 times, 4trcl in next sp, ch5, dc in next sp, tr in next sp, rep from * 3 times omt final tr, ss in beg tr, cut yarn. [12 4trcl, 36 tr, 8 dc, 16 sp]
Round 8 Join Yarn C with ss in final sp of Round 7, dc in same sp, * (tr in next tr, ch1) 8 times, tr in next tr, dc in next sp, ch5, 4trcl in next sp, ch2, 4trcl in next sp, ch5, dc in next sp, rep from * 3 times omt final dc, ss in first dc, cut yarn. [8 4trcl, 36 tr, 8 dc, 44 sp]
Round 9 Join Yarn E with ss in final sp of Round 8, dc in same sp, * (3trcl in next tr, ch2) 8 times, 3trcl in next tr, dc in next sp, ch5, 4trcl in next sp, ch5, dc in next sp, rep from * 3 times omt final dc, ss in first dc, cut yarn. [4 4trcl, 36 3trcl, 8 dc, 40 sp]
Round 10 Join Yarn I with ss in any 4trcl, dc in same st, * ch5, 4tr in next 8 ch-2 sps, ch5, dc in 4trcl, rep from * 3 times omt final dc, ss in first dc. [128 tr, 4 dc, 8 sp]
Note: I don’t know how I didn’t snap a pic after joining the round here! But you can see the joined round on the first photo of Round 11 below.
Round 11 Dc in same st as join, * ch5, (tr4tog, ch3) 7 times, tr4tog, ch5, dc in next dc, rep from * 3 times omt final dc, ss in first dc, cut yarn. [32 tr4tog, 4 dc, 36 sp]
Round 12 Join Yarn G with ss in same st as join, dc in same st, * 6dc in next sp, 4dc in next 2 sps, 4tr in next sp, (4dtr, ch3, 4dtr) in next sp, 4tr in next sp, 4dc in next 2 sps, 6dc in next sp, dc in next dc, rep from * 3 times omt final dc, ss in first dc. [32 dtr, 32 tr, 116 dc, 4 sp]
Round 13 (Dc in all sts to next sp, 5dc in sp) 4 times, dc in all sts to beginning, ss in first dc, cut yarn leaving 2 arm lengths tail for whip st join later on. Wind tail up and secure to prevent tangling. [200 dc]
Make 2 more of Motif 6, using the following yarn color order:
1) B, C, F, H, E, G, D, and
2) I, D, G, H, B, E, F
Motif 3 (Make 3)
Note: This instruction is copied and pasted from Week 1 for quick reference.
YouTube Video Tutorial
Note: Video is in US Terms.
https://youtu.be/M3oeIIYEjYc
Row 1(RS) Using Yarn A, ch40, starting in 4th ch from hook note: this turning chain counts as 1 tr + ch1, make special tr2tog (refer to Stitch Guide), (ch2, starting in same ch as previous, make special tr2tog) 11 times, ch1, tr in same ch as previous, turn. [12 special tr2tog, 2 tr, 13 sp]
Row 2 Beg tr in tr, tr in special tr2tog, (ch2, starting in same st as previous, make special tr2tog) 11 times, ch2, make ending tr2tog, turn. [11 special tr2tog, 1 ending tr2tog, 2 tr, 12 sp]
Row 3 Beg tr in ending tr2tog, ch1, (starting in same st as previous, make special tr2tog, ch2) 12 times omitting final ch, tr in same st as previous, turn. [12 special tr2tog, 2 tr, 13 sp]
Rows 4-13 Rep Rows 2 and 3 5 times.
Motif Border Continuing with RS facing, work left edge as follows: treating the tr sts as ch-sps, (2dc in next 2 sps, 3dc in next sp) 4 times, 2dc in next sp, 3dc in corner, work bottom edge as follows: (3dc in next sp, 2dc in next sp) 6 times, 3dc in corner, work right edge as left edge, 3dc in corner, work top edge as bottom edge, 3dc in final corner, ss in first dc, cut yarn and weave tails. [132 dc]
Thank you so much for following along! Hope you enjoy this week. I have tried to offer the easiest motifs of the pattern first as the holiday season is upon us. No worries if you need to catch up in the New Year! Everyone is welcome to share pics in my Facebook Group.
Happy Crafting!
Rachele C.
Welcome to the fifth week of the Botanica Blanket CAL. It’s another exciting week with the return of the larger squares! We will be making 6 squares, 3 large (Motif 7) and 3 small (Motif 3).
Quick Info
For many details on ordering kits, yarn colors, CAL schedule and much more, head to the info post for this CAL.
Etsy // Ravelry // My Shop – Conveniently condensed, ad-free PDF pattern – get it all at once, or follow the pace of the CAL for free!
2dtrcl 2dtr cluster: * yoh 2 times, insert hook in st, yoh, pull up lp, (yoh, draw yarn through 2 lps) 2 times, rep from * 1 time, yoh, draw yarn through 3 lps
2trcl 2tr cluster:(yoh, insert hook in st, yoh, pull up lp, yoh, draw yarn through 2 lps) 2 times, yoh, draw yarn through 3 lps
3dtrcl 3dtr cluster:* yoh 2 times, insert hook in st, yoh, pull up lp, (yoh, draw yarn through 2 lps) 2 times, rep from * 2 times, yoh, draw yarn through 4 lps
3dtr-popcorn 3dtr in st/sp indicated, remove lp from hook, insert hook in first dtr, grab lp, pull lp through to close
ch chain
beg beginning
beg dtr (dc, ch 2) – counts as 1 dtr
beg tr (dc, ch 1) – counts as 1 tr
beg ttr (dc, ch 3) – counts as 1 ttr
dc double crochet – Important note: I do not chain up 1 for the first double crochet of a round.
dtr double treble crochet
ending tr2tog starting in same st, yoh, insert hook, yoh, pull up lp, yoh, draw yarn through 2 lps, sk 1 ch, yoh, insert hook in dc, yoh, pull up lp, yoh, draw yarn through 2 lps, yoh, draw yarn through all 3 lps on hook
lp(s) loop(s)
MR make ring: ch3, ss in third ch from hook
picot ch3, dc in top side of previous st – do not work into top of st as you would normally
rep repeat
RS/WS right side/wrong side of work
sk skip
sp space
special tr2tog starting in st/ch indicated,yoh, insert hook, yoh, pull up lp, yoh, draw yarn through 2 lps, sk 2 chs, yoh, insert hook in next st/ch, yoh, pull up lp, yoh, draw yarn through 2 lps, yoh, draw yarn through all 3 lps on hook
ss slip stitch
st(s) stitch(es)
tr treble crochet
ttr triple treble
yoh yarn over hook
Instructions
Note: Sample in step by step photos is using random colors of Catona. Please use the yarn letters given in the written pattern. First Motif is made using colors given in instructions, and color order for the second and third motifs is given at the end of the instructions.
Motif 7 (Make 3)
Video instruction will be uploaded soon!
Note: By working Round 2 and 5 from the WS, the tr sts make tiny “bobbles” on the RS.
Round 1 (RS) Using Yarn I, MR, beg ttr, 27ttr, ss in beg ttr, turn. [28 ttr]
Round 2 * Dc in next st, (dc, dtr) in next st, rep from * 13 times, ss in first dc, turn, cut yarn. [14 dtr, 28 dc]
Round 3 Join Yarn D with ss infirst dc of Round 2, dc in same st, (ch3, sk2, dc) 13 times, ch3, ss in first dc. [14 dc, 14 sp]
Round 4 Ss in first ch, ch 3 – does not count as a st, (3dtr-popcorn, ch2, 3dtr-popcorn, ch2) in 14 sps, ss in first 3dtr-popcorn, turn, cut yarn. [28 3dtrcl, 28 sp]
Round 5 Join Yarn B with ss in first sp, * (dc, dtr, dc) in sp, ch3, rep from * 27 times, ss in, turn. [28 dtr, 56 dc, 28 sp]
Round 6 (Beg dtr, dtr) in first sp – counts as 1 2dtrcl, (ch3, 2dtrcl in same sp, 2dtrcl in next sp) 28 times omt final 2dtrcl, ss in first full dtr, cut yarn. [56 2dtrcl, 28 sp]
Round 7 Join Yarn G with ss in first sp, dc in same sp, * (ch3, 3dtrcl, ch2, 3dtrcl, picot, ch2, 3dtrcl, ch3) in next sp, dc in next sp, ch3, 4tr in next sp, 4dc in next sp, ch1, 4dc in next sp, 4tr in next sp, ch3, dc in next sp, rep from * 3 times omt final dc, ss in first dc, cut yarn. [4 picot, 12 3dtrcl, 32 tr, 40 dc, 28 sp]
Round 8 Join Yarn F with ss in first sp, dc in same sp, * ch3, (2dtrcl, ch3, 2dtrcl, ch5, 2dtrcl, ch3, 2dtrcl) in picot, ch3, sk 1 sp, dc in next sp, ch3, sk 1 sp, dc in 17 sts/sps, ch3, sk 1 sp, dc in next sp, rep from * 3 times omt final dc, ss in first dc, cut yarn. [16 2dtrcl, 76 dc, 28 sp]
Round 9 Join Yarn H with ss in final sp of Round 8, dc in same sp, * (2trcl, ch2) 2 times in next sp, 2rcl in same sp, dc in next sp, (2trcl, ch2) 5 times in next sp, 2trcl in same sp, dc in next sp, (2trcl, ch2) 2 times in next sp, 2trcl in same sp, dc in next sp, ch3, (dc in next dc, sk2, ch3) 2 times, dc, ch3, sk3, (dc, ch3, sk2) 2 times, dc, ch3, dc in next sp, rep from * 3 times omt final dc, ss in first dc, cut yarn. [48 2trcl, 40 dc, 64 sp]
Round 10 Join Yarn C in first sp, (3dc in 9 ch-2 sps, 3tr in 7 ch-3 sps) 4 times, ss in first dc. [84 tr, 108 dc]
Round 11 (Dc in all sts to corner, 3dc in corner) 4 times, dc in all sts to beginning, ss in first dc, cut yarn and leave 2 arm lengths tail for whip st join later on. Wind tail up and secure to prevent tangling. [200 dc]
Make 2 more of Motif 7, using the following yarn color order: 1) H, F, D, C, E, I, G, and 2) D, E, G, H, I, F, B
Motif 3 (Make 3)
Note: This instruction is copied and pasted from Week 1 for quick reference.
YouTube Video Tutorial
Note: Video is in US Terms.
https://youtu.be/M3oeIIYEjYc
Row 1(RS) Using Yarn A, ch40, starting in 4th ch from hook note: this turning chain counts as 1 tr + ch1, make special tr2tog (refer to Stitch Guide), (ch2, starting in same ch as previous, make special tr2tog) 11 times, ch1, tr in same ch as previous, turn. [12 special tr2tog, 2 tr, 13 sp]
Row 2 Beg tr in tr, tr in special tr2tog, (ch2, starting in same st as previous, make special tr2tog) 11 times, ch2, make ending tr2tog, turn. [11 special tr2tog, 1 ending tr2tog, 2 tr, 12 sp]
Row 3 Beg tr in ending tr2tog, ch1, (starting in same st as previous, make special tr2tog, ch2) 12 times omitting final ch, tr in same st as previous, turn. [12 special tr2tog, 2 tr, 13 sp]
Rows 4-13 Rep Rows 2 and 3 5 times.
Motif Border Continuing with RS facing, work left edge as follows: treating the tr sts as ch-sps, (2dc in next 2 sps, 3dc in next sp) 4 times, 2dc in next sp, 3dc in corner, work bottom edge as follows: (3dc in next sp, 2dc in next sp) 6 times, 3dc in corner, work right edge as left edge, 3dc in corner, work top edge as bottom edge, 3dc in final corner, ss in first dc, cut yarn and weave tails. [132 dc]
Thank you so much for following along! Hope you enjoy this week. I have tried to offer the easiest motifs of the pattern first as the holiday season is upon us. No worries if you need to catch up in the New Year! Everyone is welcome to share pics in my Facebook Group.
Happy Crafting!
Rachele C.
Welcome to the sixth week of the Botanica Blanket CAL. It’s another exciting week with the return of the larger squares! We will be making 6 squares, 3 large (Motif 8) and 3 small (Motif 3).
Quick Info
For many details on ordering kits, yarn colors, CAL schedule and much more, head to the info post for this CAL.
Etsy // Ravelry // My Shop – Conveniently condensed, ad-free PDF pattern – get it all at once, or follow the pace of the CAL for free!
2dccl 2dc cluster:(yoh, insert hook in st, yoh, pull up lp, yoh, draw yarn through 2 lps) 2 times, yoh, draw yarn through 3 lps
2trcl 2tr cluster: * yoh 2 times, insert hook in st, yoh, pull up lp, (yoh, draw yarn through 2 lps) 2 times, rep from * 1 time, yoh, draw yarn through 3 lps
3dccl 3dc cluster:(yoh, insert hook in st/sp, yoh, pull up lp, yoh, draw yarn through 2 lps) 3 times, yoh, draw yarn through 4 lps
3trcl 3tr cluster:* yoh 2 times, insert hook in st, yoh, pull up lp, (yoh, draw yarn through 2 lps) 2 times, rep from * 2 times, yoh, draw yarn through 4 lps
4dccl 4dc cluster:(yoh, insert hook in st/sp, yoh, pull up lp, yoh, draw yarn through 2 lps) 4 times, yoh, draw yarn through 5 lps
ch chain
beg beginning
beg dc (sc, ch 1) – counts as 1 dc
beg tr (sc, ch 2) – counts as 1 tr
dc double crochet
dc4tog (yoh, insert hook in next st/sp, yoh, pull up lp, yoh, draw yarn through 2 lps) 4 times, yoh, draw yarn through 5 lps
dc5tog (yoh, insert hook in next st/sp, yoh, pull up lp, yoh, draw yarn through 2 lps) 5 times, yoh, draw yarn through 6 lps
ending dc2tog starting in same st, yoh, insert hook, yoh, pull up lp, yoh, draw yarn through 2 lps, sk 1 ch, yoh, insert hook in dc, yoh, pull up lp, yoh, draw yarn through 2 lps, yoh, draw yarn through all 3 lps on hook
lp(s) loop(s)
MR make ring: ch3, ss in third ch from hook
picot ch3, sc in top side of previous st – do not work into top of st as you would normally
rep repeat
RS/WS right side/wrong side of work
sc single crochet – Important note: I do not chain up 1 for the first single crochet of a round.
sk skip
sp space
special dc2tog starting in st/ch indicated,yoh, insert hook, yoh, pull up lp, yoh, draw yarn through 2 lps, sk 2 chs, yoh, insert hook in next st/ch, yoh, pull up lp, yoh, draw yarn through 2 lps, yoh, draw yarn through all 3 lps on hook
ss slip stitch
st(s) stitch(es)
tr treble crochet
yoh yarn over hook
Instructions
Note: Sample in step by step photos is using random colors of Catona. Please use the yarn letters given in the written pattern. First Motif is made using colors given in instructions, and color order for the second and third motifs is given at the end of the instructions.
Motif 8 (Make 3)
Video instruction will be uploaded soon!
Round 1 Using Yarn G, MR, beg dc, (3dc, ch5, dc) 4 times omt final dc, do not join. [16 dc, 4 sp]
Round 2 (Dc4tog, ch5) 4 times, ss in first dc4tog, cut yarn. [4 dc4tog, 4 sp]
Round 3 Hold both ch-5 sps from previous rounds together as one, join Yarn F with ss in sp, (beg tr, tr) in same sp – counts as 1 2trcl, * (ch2, 2trcl in same sp) 3 times, ch2, 2trcl in next sp, rep from * 3 times omt final 2trcl, ss in first full tr, cut yarn. [16 2trcl, 16 sp]
Round 4 Join Yarn H in final sp of Round 3, sc in same sp, (ch2, 5dc in next 3 sps, ch2, sc in next sp) 4 times omt final sc, ss in first sc. [60 dc, 4 sc, 8 ch]
Round 5 Ss in first ch, sc in same sp, * (ch5, dc5tog) 3 times, (ch5, sc in next sp) 2 times, rep from * 3 times omt final sc, ss in first sc, cut yarn. [12 dc5og, 8 sc, 20 sp]
Round 6 Join Yarn B with ss in first sp, sc in same sp, * ch3, (2dccl, ch2) 3 times in next sp, 2dccl in same sp, (2dccl, ch2) 3 times in next sp, 2dccl in same sp, (ch3, sc in next sp) 3 times, rep from * 3 times omt final sc, ss in first sc. [32 2dccl, 12 sc, 40 sp]
Round 7 Ss in first ch, sc in same sp, * (ch3, 4dccl in next sp) 6 times, (ch3, sc in next sp) 4 times, rep from * 3 times omt final sc, ss in first sc, cut yarn. [24 4dccl, 16 sc, 40 sp]
Note: Somehow I deleted the photo of the joining the round! On the next pic below you can see how it is joined.
Round 8 Join Yarn D with ss in first sp, sc in same sp, * (ch3, sc in next sp) 2 times, (3trcl, ch3) 3 times in next sp, 3trcl in same sp, (sc in next sp, ch3) 6 times, sc in next sp, rep from * 3 times omt final sc, ss in first sc, cut yarn. [16 3trcl, 36 sc, 44 sp]
Round 9 Join Yarn I with ss in first sp, * 3sc in 3 sps, 5sc in next sp, 3sc in 5 sps, sc in sc, 3sc in 2 sps, rep from * 3 times, ss in first sc. [144 sc]
Round 10 Beg dc in next st, * (ch1, sk1, dc) 5 times, ch3, dc in same st, (ch1, sk1, dc) 13 times, rep from * 3 times omt final dc, ss in beg dc. [76 dc, 76 sp]
Round 11 Ss in first ch, (beg dc, 2dccl) in next dc – counts as 1 3dccl, * (ch1, 3dccl in next dc) across to corner, (ch1, (3dccl, ch3, 3dccl) in corner, rep from * 3 times, (ch1, 3dccl in next sc) across to beginning, ch1, ss in 2dccl, cut yarn. [84 3dccl, 84 sp]
Round 12 Join Yarn E with ss in first sp, sc in same sp, * (ch2, sc in next sp) across to corner, ch2, (2sc, ch3, 2sc) in corner sp, rep from * 3 times, (ch2, sc in next sp) across to beginning, ch2, ss in first sc. [96 sc, 88 sp]
Round 13 (2sc in all sps to within 1 sp of corner, sc in next sp, sc in next 2 sc, 5sc in corner) 4 times, 2sc in all sps to beginning, ss in first sc, cut yarn and leave 2 arm lengths tail for whip st join later on. Wind tail up and secure to prevent tangling. [200 sc]
Make 2 more of Motif 8, using the following yarn color order: 1) I, G, D, H, F, E, B, and 2) F, I, G, C, B, D, E
Motif 3 (Make 3)
Note: This instruction is copied and pasted from Week 1 for quick reference.
YouTube Video Tutorial
https://youtu.be/M3oeIIYEjYc
Row 1(RS) Using Yarn A, ch40, starting in 4th ch from hook note: this turning chain counts as 1 dc + ch1, make special dc2tog (refer to Stitch Guide), (ch2, starting in same ch as previous, make special dc2tog) 11 times, ch1, dc in same ch as previous, turn. [12 special dc2tog, 2 dc, 13 sp]
Row 2 Beg dc in dc, dc in special dc2tog, (ch2, starting in same st as previous, make special dc2tog) 11 times, ch2, make ending dc2tog, turn. [11 special dc2tog, 1 ending dc2tog, 2 dc, 12 sp]
Row 3 Beg dc in ending dc2tog, ch1, (starting in same st as previous, make special dc2tog, ch2) 12 times omitting final ch, dc in same st as previous, turn. [12 special dc2tog, 2 dc, 13 sp]
Rows 4-13 Rep (Rows 2 and 3) 5 times.
Motif Border Continuing with RS facing, work left edge as follows: treating the dc sts as ch-sps, (2sc in next 2 sps, 3sc in next sp) 4 times, 2sc in next sp, 3sc in corner, work bottom edge as follows: (3sc in next sp, 2sc in next sp) 6 times, 3sc in corner, work right edge as left edge, 3sc in corner, work top edge as bottom edge, 3sc in final corner, ss in first sc, cut yarn and weave tails. [132 sc]
Thank you so much for following along! Hope you enjoy this week. I have tried to offer the easiest motifs of the pattern first as the holiday season is upon us. No worries if you need to catch up in the New Year! Everyone is welcome to share pics in my Facebook Group and on Instagram under hashtag #BotanicaBlanket – and #cypresstextiles as always
Happy Crafting!
Rachele C.
Hello! This week is a little different because we have moved on from the squares – whew what a feat! – and we are now joining all of the squares up to make 3 panels.
Quick Links
For many details on ordering kits, yarn colors, CAL schedule and much more, head to the info post for this CAL.
Etsy // Ravelry // My Shop – Conveniently condensed, ad-free PDF pattern – get it all at once, or follow the pace of the CAL for free!
Remember we are using hashtag #botanicablanket – so tag ’em if you got ’em!
Whip Stitch Join
For this project, we will be using whip stitch to join everything together in rows and then in columns. First, lay out all of your squares following the diagram below.
Remember, we are making 3 panels. Do not join the panels 2 and 3 onto the center panel yet. Of course, you will note that the center panel has the upper left and lower right corners notched out. These corners will be filled next time.
Layout Schematic
Written Instructions
Here is how I perform the Whip Stitch Join.
Lay out all Motifs 1-4 as shown in schematic. Whip stitch motifs together using instructions below, beginning with horizontal seams, then rotate and whip stitch all vertical seams.
Hold 2 motifs with wrong sides together, and attach a length of Yarn A at right edge.
Pull the entire yarn length through the corner sc (UK dc) of both motifs, back to front.
Insert the hook front to back through both loops of the next st to the left, on both motifs.
Grab the yarn and pull it all the way through to the front of the piece, allowing the whip st to rest flush against the top edge of the motifs.
Repeat steps 3 and 4 across, inserting the hook through both motifs from front to back in the next st to the left, and pulling the yarn through to the front.
When the next corner is reached, if there are no more subsequent squares to join, you can weave the excess yarn, cutting it down if necessary.
Important: Do not pull yarn to tighten whip stitches. I prefer to let the whip stitches rest flush and snug against the joined edge. Then when you open the motifs flat, you have cute little stitches for a neat and cozy handmade look.
I do have a video of how I join squares with whip stitch, but it is for a different project. However, I do think it will be a great lesson for this join, so you should watch it if you have any doubts!
Video Instruction
This video is one that I made for the Mateo’s Granny Square Blanket pattern, but it is a great description of how I work up Whip Stitch Join.
https://youtu.be/rsgXzUneNZ8
Joining Notes
It is important to note that I am working through both loops of the stitches, and I do not cinch up the yarn as I go. I let the stitches lie flush. Also, I don’t use a needle – I simply use my hook to grab the yarn and pull it to the front each stitch.
If you are not in love with whip stitch, you can use any join that does not add any length or width to the dimension of the panels. For example, you can slip stitch crochet through back loops only on the wrong side of the blanket if you wish.
Just know that if you bought a yarn kit from Deramores, and you do anything other than what I advise, you risk running out of yarn.
I hope you all use this week to catch up on squares and join them up!
Future Botanica CAL Schedule
Here is what you can look forward to for the next upcoming weeks!
Feb 7 – Week 8: Fill corners of center panel
Feb 14 – Week 9: Attach side panels to center panel
Feb 21 – Week 10: Begin border
Feb 28 – Week 11: Finish border
Mar 6 – Week 12: Wrap-up post
Side note: maybe I will finally have some Scheepjes Our Tribe * kits coming up?? I have gotten numerous requests, and I think even I will start making some Our Tribe Botanica squares! Yummmmmm – stay tuned!
Thank you!
Without you all, I could not keep living my yarny dreams to provide a comfortable life for my family, while producing delightful and helpful fiber funsies for you lovely people. I am so grateful for your support!
* Links marked with an asterisk are affiliate links, and purchasing through them will earn me a small commission to support my work – at no additional cost to you! Yay!
Welcome to the Eighth week of the Botanica Blanket CAL. This week is going to be so much fun! We will be filling the triangle cutouts on Panel 1. And I charted it for you! Yay!
Quick Info
For many details on ordering kits, yarn colors, CAL schedule and much more, head to the info post for this CAL.
Etsy // Ravelry // My Shop – Conveniently condensed, ad-free PDF pattern – get it all at once, or follow the pace of the CAL for free!
2dtrcl 2dtr cluster: * yoh 2 times, insert hook in st, yoh, pull up lp, (yoh, draw yarn through 2 lps) 2 times, rep from * 1 time, yoh, draw yarn through 3 lps
3trcl 3tr cluster:(yoh, insert hook in st/sp, yoh, pull up lp, yoh, draw yarn through 2 lps) 3 times, yoh, draw yarn through 4 lps
3dtrcl 3dtr cluster:* yoh 2 times, insert hook in st, yoh, pull up lp, (yoh, draw yarn through 2 lps) 2 times, rep from * 2 times, yoh, draw yarn through 4 lps
ch chain
beg beginning
beg tr (dc, ch 1) – counts as 1 tr
beg tr3tog beg tr, tr2tog – counts as 1 tr3tog
dc double crochet – Important note: I do not chain up 1 for the first double crochet of a row.
dtr double treble crochet
tr2tog (yoh, insert hook in next st/sp, yoh, pull up lp, yoh, draw yarn through 2 lps) 2 times, yoh, draw yarn through 3 lps
tr3tog (yoh, insert hook in next st/sp, yoh, pull up lp, yoh, draw yarn through 2 lps) 3 times, yoh, draw yarn through 4 lps
lp(s) loop(s)
rep repeat
RS/WS right side/wrong side of work
sk skip
sp space
ss slip stitch
st(s) stitch(es)
tr treble crochet
yoh yarn over hook
Chart Key – UK Terms
Instructions
Note: Fill Triangle is worked off “raw edge” of motif 2. The tr and dtr count as the 48 “sps” that Row 1 are worked onto.
Fill Triangle
Rows 1-6
Row 1 (RS) Hold blanket with RS facing and, beginning at raw edge of top-right Motif 2, join Yarn A with ss in first sp, dc in same sp, (ch3, dc in next sp) across, turn. [48 dc, 47 sp]
Row 2 Ss in 2 chs, dc in same sp, (ch3, dc in next sp) across, turn. [47 dc, 46 sp]
Row 3 2dc in first sp, 3dc in remaining sps across, turn. [137 dc]
Row 4 Beg tr3tog, (ch1, sk1, tr) across to final 4 sts/sps, ch1, sk1, tr3tog, turn. [2 tr3tog, 65 tr, 66 sp]
Row 5 Beg tr3tog over first 3 sts/sps, tr in all sts/sps to final 3 sts/sps, tr3tog, turn. [2 tr3tog, 127 tr]
Row 6 Sk tr3tog, dc, ch3, sk3, (dc, ch3, sk2) across to final st, dc, turn. [43 dc, 42 sp]
Rows 7-12
Rows 7 and 8 Rep Row 2. [41 dc, 40 sp]
Rows 9-12 Rep Rows 3-6, cut yarn. [37 dc, 36 sp]
Rows 13-20
Here is a closeup of the beginning of these rows.
And here is the entire length of the rows, start to finish. (Whoops, I only put 1 cross line instead of 2 on the 2dtrcl sts at the left hand side on Row 19. My mistake!)
Row 13 Join Yarn E with ss in first sp, 2dc in same sp, 3dc in all sps across to final sp, 2dc in final sp, turn. [106 dc]
Row 14 Rep Row 6. [36 dc, 35 sp]
Row 15 Ss in 2 chs, dc in same sp, * (ch3, dc in next sp) 2 times, tr in next sp, (ch1, tr in same sp) 5 times, (dc in next sp, ch3) 3 times, dc in next sp, rep from * to final sp, cut yarn. Do not turn. [30 tr, 30 dc, 49 sp]
Row 16 (RS) Join Yarn I with ss in first sp, dc in same sp, * ch3, dc in next sp, (3trcl in next sp, ch2) 4 times, 3trcl in next sp, (dc in next sp, ch3) 3 times, dc in next sp, rep from * to final sp, cut yarn. Do not turn. [25 3trcl, 24 dc, 38 sp]
Row 17 (RS) Join Yarn C with ss in first sp, dc in same sp, ch3, dc in next sp, ch3, * (3dtrcl, ch3, 3dtrcl, ch1) in next 3 sps omt final ch1, dc in next 2 sps, ch3, dc in next 2 sps, (3dtrcl, ch3, 3dtrcl, ch1) in next sp, rep from * 3 times, (3dtrcl, ch3, 3dtrcl, ch1) in next 2 sps omt final ch1, (ch3, dc in next sp) 2 times, cut yarn. Do not turn. [36 3dtrcl, 20 dc, 39 sp]
Row 18 (RS) Join Yarn A with ss in third sp, dc in same sp, * (ch3, dc in next sp) 4 times, (3dtrcl, ch3, 3dtrcl) in next sp, (dc in next sp, ch3) 2 times, dc in next sp, rep from * 3 times, (ch3, dc in next sp) 2 times, cut yarn. Do not turn. [8 3dtrcl, 31 dc, 30 sp]
Row 19 (RS) Join Yarn A with ss in first sp, dc in same sp, * (ch3, dc in next sp) 2 times, ch1, sk 1 sp, 2dtrcl in next sp, (ch3, 2dtrcl in same sp) 2 times, ch1, sk 1 sp, dc in next sp, ch3, dc in next sp, rep from * 3 times, ch3, dc in final sp, turn. [12 2dtrcl, 18 dc, 29 sp]
Row 20 Rep Row 2.
Rows 21-24
Rows 21-24 Rep Rows 3-6. [25 dc, 24 sp]
Rows 25-32
Row 25 and 26 Using Yarn D, rep Rows 13 and 14. [24 dc, 23 sp]
Row 27 Ss in 2 chs, dc in same sp, * (ch3, dc in next sp) 3 times, tr in next sp, (ch1, tr in same sp) 5 times, (dc in next sp, ch3) 2 times, dc in next sp, rep from * 2 times, ch3, dc in next sp, cut yarn. Do not turn. [18 dc, 20 sc, 31 sp]
Row 28 Join Yarn B with ss in first sp, dc in same sp, * (ch3, dc in next sp) 2 times, (3trcl in next sp, ch2) 4 times, 3trcl in next sp, (dc in next sp, ch3) 2 times, dc in next sp, rep from * 2 times, cut yarn. Do not turn. [15 3trcl, 16 dc, 24 sp]
Row 29 Join Yarn H with ss in first sp, dc in same sp, * dc in next sp, (3dtrcl, ch3, 3dtrcl, ch1) in next 4 sps omt final ch1, dc in next 2 sps, ch3, dc in next sp, rep from * 2 times, dc in final sp, cut yarn. Do not turn. [24 3dtrcl, 12 dc, 23 sp]
Row 30 Join Yarn A with ss in third sp, dc in same sp, * (ch3, dc in next sp) 4 times, (3dtrcl, ch3, 3dtrcl) in next sp, (dc in next sp, ch3) 2 times, dc in next sp, rep from * 1 time, (ch3, dc in next sp) 2 times, cut yarn. Do not turn. [4 3dtrcl, 17 dc, 16 sp]
Row 31 Join Yarn A with ss in first sp, dc in same sp, * (ch3, dc in next sp) 2 times, ch1, sk 1 sp, 2dtrcl in next sp, (ch3, 2dtrcl in same sp) 2 times, ch1, sk 1 sp, dc in next sp, ch3, dc in next sp, rep from * 1 time, ch3, dc in final sp, turn. [6 2dtrcl, 10 dc, 15 sp]
Row 32 Rep Row 2.
Rows 33-40
Row 33 Rep Row 3.
Row 34 Sk 1 dc, beg tr3tog, (ch1, sk1, tr) across to final 4 sts/sps, ch1, sk1, tr3tog, turn. [2 tr3tog, 16 tr, 17 sp]
Rows 35-36 Rep Rows 5-6. [11 dc, 10 sp]
Row 37 Rep Row 2, cut yarn. Do not turn. [10 dc, 9 sp]
Row 38 (RS) Join Yarn F with ss infirst sp, dc in same sp (ch3, dc in next sp) 2 times, dc in next sp, 3dtrcl in next sp, (ch3, 3dtrcl in same sp) 3 times, dc in next 2 sps, (ch3, dc in next sp) 2 times, cut yarn. Do not turn. [4 3dtrcl, 8 dc, 7 sp]
Row 39 (RS) Join Yarn G in first sp, dc in same sp, dc in next sp, (3dtrcl, ch3, 3dtrcl, ch1) in next 3 sps omt final ch1, dc in 2 sps, cut yarn. Do not turn.
Row 40 (RS) Join Yarn A with ss in first dc, dc in same st, (ch3, dc in next sp) 2 times, (3tr, ch3, 3tr) in next sp, (dc in next sp, ch3) 2 times, dc in final dc, cut yarn.
Here is a full chart of Rows 25-40 all together.
REPEAT Triangle Fill at opposite side of Panel 1.
Botanica Blanket: Week 9 Information
We will be prepping the 3 panels and then joining them together to complete the blanket body.
Included in this section, you will find:
Weekly Progress Tracker
Week 9 Stitch Guide UK Terms
UK Terms instructions to prep the panels, and join them.
Progress Tracker
Week 9 Stitch Guide (UK Terms)
2trcl 2tr cluster: (yoh, insert hook in st, yoh, pull up lp, yoh, draw yarn through 2 lps) 2 times, yoh, draw yarn through 3 lps
2dtrcl 2dtr cluster: * yoh 2 times, insert hook in st, yoh, pull up lp, (yoh, draw yarn through 2 lps) 2 times, rep from * 1 time, yoh, draw yarn through 3 lps
3trcl 3tr cluster: (yoh, insert hook in st/sp, yoh, pull up lp, yoh, draw yarn through 2 lps) 3 times, yoh, draw yarn through 4 lps
ch chain
beg beginning
beg dtr (dc, ch2) – counts as 1 dtr
beg tr (dc, ch 1) – counts as 1 tr
dc double crochet – Important note: I do not chain up 1 for the first double crochet of a row.
dtr double treble crochet
lp(s) loop(s)
rep repeat
RS/WS right side/wrong side of work
sk skip
sp space
ss slip stitch
st(s) stitch(es)
tr treble crochet
yoh yarn over hook
Panel 1 Border
Join Yarn A with ss in corner sp of Triangle Fill at top left, * (3dc in corner sp, dc 102 evenly across Triangle Fill, dc 204 evenly across remainder of side, 3dc in corner, dc 34 across first square on short edge of blanket, dc 102 evenly across Triangle Fill, rep from * 1 time, ss in first dc, cut yarn.
Panel 1 Side Edging
Row 1 Join Yarn G with ss in second dc of Panel 1 Border, dc in same st, (ch3, sk2, dc) across to end, placing final dc in bottom left corner dc of Panel 1 border, cut yarn. Do not turn.
Row 2 Join Yarn G with ss in first sp, (beg tr, tr) in same sp – counts as 1 2trcl, (ch2, 2trcl in same sp, 2trcl in next sp) across to end, ch2, 2trcl in same sp, cut yarn. Do not turn.
Row 3 Join Yarn F with ss in first sp, (beg dtr, dtr) in same sp – counts as 1 2dtrcl, (ch2, 2dtrcl in same sp, 2dtrcl in next sp) across to end, ch2, 2dtrcl in same sp, cut yarn. Do not turn.
Row 4 Join Yarn A with ss in first full dtr, (ch3, 3trcl in next sp) across to end, ch3, dc in final 2dtrcl, cut yarn. Do not turn.
Row 5 Join Yarn H with ss in first sp, 2dc in same sp, 3dc in all sps across to final sp, 2dc in final sp, cut yarn.
Repeat Side Edging on right hand side of Panel 1.
Join Panels 2 and 3 to Panel 1
Step 1 Hold Panel 2 with RS facing, and join Yarn H with ss in bottom right corner st, dc in same st and make dc evenly across, being sure to match the same amount of dc on Row 5 of Side Edging on Panel 1, cut yarn, do not turn.
Step 2 Reattach Yarn H with ss in first st, dc in same st, (ch3, sk 2, dc) across, placing last dc in final st, cut yarn. Line up this row and Row 5 from Side Edging of Panel 1.
Step 3 Join Yarn H with ss in first dc of Row 5 of Side Edging, dc in same st, (ch1, release lp from hook, insert hook front to back in adjacent ch-sp from Step 2 row, grab lp, pull lp through ch-sp, ch2, sk2, dc) across, joining in each sp with Pull Loop Through joining maneuver, ending with dc in final st, cut yarn.
Repeat to join Panel 3 to panel 1.
Botanica Blanket Pattern: Week 10
We will be making a start on about half of the border this week.
Included in this post, you will find:
Progress Tracker
Week 10 Stitch Guide UK Terms
UK Terms instructions to prep the panels, and join them.
Progress Tracker
Week 9 (UK Terms)
Week 9 Stitch Guide (UK Terms)
Looking for US Terms? Scroll up!
2trcl 2tr cluster: (yoh, insert hook in st, yoh, pull up lp, yoh, draw yarn through 2 lps) 2 times, yoh, draw yarn through 3 lps
2dtrcl 2dtr cluster: * yoh 2 times, insert hook in st, yoh, pull up lp, (yoh, draw yarn through 2 lps) 2 times, rep from * 1 time, yoh, draw yarn through 3 lps
ch chain
beg beginning
beg tr (dc, ch 1) – counts as 1 tr
dc double crochet – Important note: I do not chain up 1 for the first double crochet of a row.
lp(s) loop(s)
rep repeat
RS/WS right side/wrong side of work
sk skip
sp space
ss slip stitch
st(s) stitch(es)
tr treble crochet
tr5tog (yoh, insert hook in next st/sp, yoh, pull up lp, yoh, draw yarn through 2 lps) 5 times, yoh, draw yarn through 6 lps
yoh yarn over hook
Blanket Border
Round 1 Join Yarn H with ss in top right corner st of blanket, (3dc in corner st, dc evenly across to next corner) 4 times, being sure to make the same number of sts on opposing ends of the blanket, ss in first dc.
Tip: Shoot for about 245sc on the short sides of the blanket, and 295sc on the long sides of the blanket.
Round 2 Dc in corner st, (ch3, sk2, dc) around entire blanket to beginning, ch3, ss in first dc.
Round 3 Ss in first ch, (dc in sp, ch3) around entire blanket to final sp on Round 2, tr in first dc – tr counts as a ch-3 sp.
Round 4 (Beg tr, tr) in first sp – counts as 1 2trclhere and throughout this section, * (ch2, 2trcl in same sp) 3 times, sk 1 sp, 2dtrcl in next sp, (ch2, 2dtrcl in same sp) 3 times, sk 1 sp, (2trcl, ch1, tr) in all sps across to within 3 sps of corner, sk 1 sp, 2dtrcl in next sp, (ch2, 2dtrcl in same sp) 3 times, 2trcl in corner sp, rep from * 3 times omt final 2trcl, ss in first full tr.
Round 5 Ss in 2 chs, ss in 2trcl, (beg tr, tr) in next sp, * (ch2, 2trcl in same sp) 3 times, sk 1 sp, 5tr in next 3 sps, (tr, ch1, 2trcl) in all sps across to within 4 sps of corner, 5tr in next 3 sps, 2trcl in corner sp, rep from * 3 times omt final 2trcl, ss in first full tr.
Round 6 Ss in 2 chs, ss in 2trcl, (beg tr, tr) in next sp, * (ch2, 2trcl in same sp) 3 times, (ch3, tr5tog over next 5 tr) 3 times, ch3, (2trcl, ch1, tr) in all sps across until tr-5 groups from previous round are reached, (ch3, tr5tog) 3 times, ch3, 2trcl in corner sp, rep from * 3 times omt final 2trcl, ss in first full tr, cut yarn.
Botanica Blanket Pattern: Week 11
We will be finishing up the border this week.
Included in this section, you will find:
Progress Tracker
Week 11 Stitch Guide UK Terms
UK Terms instructions to prep the panels, and join them.
Progress Tracker
Stitch Guide (UK Terms)
2trcl 2tr cluster: (yoh, insert hook in st, yoh, pull up lp, yoh, draw yarn through 2 lps) 2 times, yoh, draw yarn through 3 lps
2dtrcl 2dtr cluster: * yoh 2 times, insert hook in st, yoh, pull up lp, (yoh, draw yarn through 2 lps) 2 times, rep from * 1 time, yoh, draw yarn through 3 lps
3dtr-popcorn 3dtr in st/sp indicated, remove lp from hook, insert hook in first dtr, grab lp, pull lp through to close
3trcl 3tr cluster:(yoh, insert hook in st/sp, yoh, pull up lp, yoh, draw yarn through 2 lps) 3 times, yoh, draw yarn through 4 lps
4dtr-popcorn 4dtr in st/sp indicated, remove lp from hook, insert hook in first dtr, grab lp, pull lp through to close
ch chain
beg beginning
beg tr (dc, ch 1) – counts as 1 tr
dc double crochet – Important note: I do not chain up 1 for the first double crochet of a row.
lp(s) loop(s)
picot ch3, dc in top side of previous st – do not work into top of st as you would normally
rep repeat
RS/WS right side/wrong side of work
sk skip
sp space
ss slip stitch
st(s) stitch(es)
tr treble crochet
tr3tog (yoh, insert hook in next st/sp, yoh, pull up lp, yoh, draw yarn through 2 lps) 3 times, yoh, draw yarn through 4 lps
tr5tog (yoh, insert hook in next st/sp, yoh, pull up lp, yoh, draw yarn through 2 lps) 5 times, yoh, draw yarn through 6 lps
yoh yarn over hook
Remainder of Blanket Border
Round 7 Join Yarn B with ss in corner sp, (beg tr, tr) in first sp, * (ch2, 2trcl in same sp) 3 times, sk 1 sp, 4tr in next 4 ch-3 sps, sk 1 sp, (tr, ch1, 2trcl) in all sps across to within 6 sps of corner, sk 1 sp, 4tr in next 4 ch-3 sps, 2trcl in corner sp, rep from * 3 times omt final 2trcl, ss in first full tr.
Round 8 Ss in 2 chs, ss in 2trcl, (beg tr, tr) in next sp, * (ch2, 2trcl in same sp) 3 times, sk 1 sp, (tr in next tr, ch1) 15 times, tr in next tr, sk 1 sp, (2trcl, ch1, tr) in all sps across until 1 sp before 4-tr groups from previous round are reached, sk 1 st, (tr in next tr, ch1) 15 times, tr in next tr, 2trcl in corner sp, rep from * 3 times omt final 2trcl, ss in first full tr, cut yarn.
Round 9 Join Yarn D with ss in corner sp, (beg tr, tr) in first sp, * (ch2, 2trcl in same sp) 3 times, sk 1 sp, (2trcl in next tr, ch2) 15 times, 2trcl in next tr, sk 1 sp, (3trcl in next sp, ch3) across all sps to within 18 sps of corner, 3trcl in next sp, sk 1 sp, sk 1 tr, (2trcl in next tr, ch2) 15 times, 2trcl in next tr, 2trcl in corner sp, rep from * 3 times omt final 2trcl, ss in first full tr, cut yarn.
Round 10 Join Yarn C with ss in corner sp, (beg tr, tr) in first sp, * (ch2, 2trcl in same sp) 3 times, sk 1 sp, (sk 1 sp, 2dtrcl in next sp, ch3, 2dtrcl in same sp) 7 times, sk 1 sp, dc in next sp, (2dc, ch3, 2dc) in all sps across to 1 sp before next 2trcl from previous round, dc in next sp, (sk 1 sp, 2dtrcl in next sp, ch3, 2dtrcl in same sp) 7 times, 2trcl in corner sp, rep from * 3 times omt final 2trcl, ss in first full tr, cut yarn.
Round 11 Join Yarn G with ss in corner sp, (beg tr, tr) in first sp, ** (ch2, 2trcl in same sp) 3 times, sk 1 sp, * 2trcl in next sp, (ch2, 2trcl in same sp) 2 times, rep from * 6 times, dc in next sp, ch2, (2dtrcl, ch2, 2dtrcl) in each sp across to within 1 sp of next 2dtrcl from previous round, ch2, dc in next sp, * 2trcl in next sp, (ch2, 2trcl in same sp) 2 times, rep from * 6 times, 2trcl in corner sp, rep from ** 3 times omt final 2trcl, ss in first full tr, cut yarn.
Round 12 Join Yarn E with ss in corner sp, (beg tr, tr) in first sp, * (ch2, 2trcl in same sp) 3 times, sk 1 sp, (4dtr-popcorn in next sp, ch2) 14 times omt final ch2, sk 1 sp, (2trcl, ch2, 2trcl) in all sps across to within 1 sp of next 2trcl from previous round, sk 1 sp, (4dtr-popcorn in next sp, ch2) 14 times omt final ch2, 2trcl in corner sp, rep from * 3 times omt final 2trcl, ss in first full tr, cut yarn.
Round 13 Join Yarn F with ss in corner sp, (beg tr, tr) in first sp, * (ch2, 2trcl in same sp) 3 times, ch3, sk 1 sp, (3dc in next sp, ch3) 13 times omt final ch3, 3tr in all sps across to next 4dtr-popcorn from previous round, (3dc in next sp, ch3) 13 times, 2trcl in corner sp, rep from * 3 times omt final 2trcl, ss in first full tr.
Round 14 Ss in 2 chs, ss in 2trcl, (beg tr, tr) in next sp, * (ch2, 2trcl in same sp) 3 times, ch1, sk 2 sps, (2dtrcl, ch2, 2dtrcl) in 12 sps, (tr3tog over next 3 tr, ch2) across to last 3-tr group of side, tr3tog, (2dtrcl, ch2, 2dtrcl) in next 12 sps, ch1, 2trcl in corner sp, rep from * 3 times omt final 2trcl, ss in first full tr, cut yarn.
Round 15 Join Yarn H with ss in corner sp, beg tr in same sp, * (tr, picot, tr) in same sp, (2tr, picot, tr) in next sp, sk 1 sp, (2tr, picot, tr) in next 12 sps, (dc, ch3, dc) in all sps across until next 2dtrcl from previous round is reached, (2tr, picot, tr) in next 12 sps, , sk 1 sp, (2tr, picot, tr) in next sp, tr in corner sp, rep from * 3 times omt final tr, ss in beg tr, cut yarn and weave all remaining ends.
To Finish
Block as necessary to open up lace.
You’re finished – yay! Give yourself a fist bump!
Thank you!
Without you all, I could not keep living my yarny dreams to provide a comfortable life for my family, while producing delightful and helpful fiber funsies for you lovely people. I am so grateful for your support!
* Links marked with an asterisk are affiliate links, and purchasing through them will earn me a small commission to support my work – at no additional cost to you! Yay!
Hello, gorgeous crafter! Today I am sharing the US Terms version of the Botanica Blanket CAL in its entirety. The CAL has ended, but I will still have this free pattern laid out in the weekly CAL chunks below. So if you want to follow that schedule, you’re more than welcome to! Or just work it in any order. I have copied all of the weekly Botanica Blanket US Terms CAL posts into this post and formatted them to make a full free pattern. Enjoy!
Inspired by the Copenhagen Botanical Garden, the Botanica Blanket features many different crochet techniques by using a few simple stitches, but combining them in an engaging and unique way. Lattice and lace motifs combine with leafy green ones to create the contrast of the famous spiral staircase in the Palm Room of the garden.
You can see when the Botanica Blanket is laid flat that it has so many interesting design elements, it will feel just as refreshing and energizing to make the blanket as it will to wrap it around you.
And don’t worry, even if you haven’t really worked with many stitches, you can still make the Botanica Blanket, as the pattern will include step by step photos, videos, and written instruction to ensure gorgeous blanket success. The last thing I want is for your blanket to end up in time-out at the bottom of the WIP pile!
My Instagram account – Post progress pics under hashtags #botanicablanket and/or #cypresstextiles
YouTube Channel (Subscribe!) – Here I will be posting CAL pattern videos weekly for the duration of the CAL – and I have loads of other tutorial videos too.
I was introduced to the Copenhagen Botanical Garden through the Instagram feed of @dori_the_plant_whisperer (YouTube)- here is the photo she posted, taken straight from her IG feed. Can you see why I was inspired?
Check out those filigree and lattice bits, and all of the different shades of green in the leaves. I was instantly smitten and knew I had to create a blanket. By now you probably know that I see a crochet blanket everywhere I look.
Photo from the Instagram feed of Dori the Plant Whisperer
I can’t help but post another shot of this staircase. Breathtaking!
Learn More
From the Natural History Museum of Denmark website, and why visiting the garden is now on my bucket list:
Visit the Palm House – a spectacular botanical collection
In the Palm House, you can view exotic and rare plants, which grow in different tropical and subtropical environments. Among other things, you can experience the greenhouses Aquatic and Mangrove Plants, Warm Subtropics, Dry Tropics, and Mediterranean House.
Giant Bamboo, large palms, spectacular flowers and carnivorous plants are just a small selection of the botanical collection you can experience in The Palm House.
You can also visit the Succulent and Cactus House with plants of all sorts and shapes, as well as The Butterfly House, where you can experience living butterflies during the summer months.
Why Catona? Well, I do have a wide variety of Scheepjes Yarns in my stash, so I did play around with a few different lines for the Botanica Blanket. There’s something about the drape and weight of Catona – plus the incredible stitch definition – that makes it so well behaved.
Not that it’s a heavy yarn, but it just lays nice and flat, and when you fold up your botanica blanket, it’s just this perfectly neat, folded thing. I guess it’s just something about fingering weight 100% mercerized cotton that is so perfect.
I dug out my Catona Cutie Pie Colour Pack* and started to mess around with the greens, and then after I chose what I thought would be the final color scheme (what you see below) I ended up taking away a few greens (the more blue ones) and adding in others.
Order Yarn! (The fun part!)
Please order your yarn for the botanica blanket from one of the following links. I am affiliated with these shops, so by clicking the link below and buying any item, you will help support CypressTextiles and all of the content I produce – at no additional cost to you 🙂 Thank you for your support!
And here is a pretty photo of the greens that I did end up choosing for the final palette. I am also working this blanket up in the Spoonful of Yarn colorway of Our Tribe, which involves no color changes. As we do the CAL, I will be making the other versions of the Botanica Blanket, and I am so pumped!
So for the Botanica Blanket CAL design, I decided to make sure that all of the elements that makers have enjoyed in my previous works are in my blanket. It was super exciting to walk down memory lane and choose all of the best ingredients for my blanket recipe.
Check out the fill triangle, mixing motifs of different sizes, and the epic curved border corner.
Fill Triangle
I use the fill triangle to square off a blanket when I’ve made half square triangle motifs to cut off the main body design at the corner. In 2016, I used the technique for my Wildflower Blanket, and everyone really seemed to love it.
Motifs of Varying Sizes
Using all different sizes of motifs requires some math and some extra frogging, but that’s okay, because the maths are my favorite part of crochet design, and I actually find frogging to be very freeing.
A word on frogging: There’s something about knowing that your work is so fragile it can all be undone in just a few moments – it reminds me not to see my work as this huge daunting thing. Sometimes your inner crochet meanie feeds off feeling like your project is way more powerful than it really is, when at the end of the day, it’s just knots. It has no power over you. Obsessive perfection and Crafter anxiety entirely unnecessary. As I always say, crochet is meant to de-stress you, not re-stress you.
Okay, back to it! I’ve used different size motifs in a few blankets, but you really got excited about Desert Bloom and the Happy Folk Blanket. It’s just a blast when everything comes together.
Ornate Curved Border Corner
This is a big one! Crafters absolutely loved the border of my 2016 VVCAL blanket design. It was a huge sense of pride and accomplishment when people used the border design on their other blankets. Seeing that pop up in my social media feeds still makes my day, and I knew Botanica needed to have curved corners too.
When you lay this blanket on a bed, and the corners hang down, it looks magnificent.
Thanks to you, I get to live my dream. When I started my business, I made custom blankets, and as you may know, I worked up over 300 blankets in a 3.5 year time period. Sometimes I was making two 36x36in baby blankets per week. My greatest joy was thinking of the recipient wrapping themselves in the blanket I made, like a warm hug.
That’s why I am so drawn to blankets. It’s the snuggle factor. Well fast forward to now, and my feeling has multiplied, because with my designs, makers can create blankets for their loved ones to wrap up in. The coze-factor grows exponentially.
The Botanica Blanket is perfect for the adventurous beginner or even the advanced artist just looking for some simple, yet pretty stitching. The adventure lies in the fun layout, so look forward to a fun make! You will discover there are times when you can craft in front of the television, and there are times when you need to concentrate a bit more. All of this makes for a nice engaging project.
Social Media
Hashtag #BotanicaBlanket and/or #cypresstextiles to tag social media WIP/FO pics. Please use these hashtags to keep all of the lovely WIP and FO pics together 🙂
{Garish} Botanica Blanket Schedule Map
If you make this blanket according to the “CAL” schedule, you can see in this graphic which parts would be made each week.
This week, we will be making 3 of “Motif 5” and 3 of “Motif 3”.
Included in this section, you will find:
Progress Tracker
Week 1 Stitch Guide
“Motif 5” instructions – Make 3
“Motif 3” Instructions – Make 3
Progress Tracker
Week 1 Stitch Guide (US Terms)
2dccl (yoh, insert hook in st, yoh, pull up lp, yoh, draw yarn through 2 lps) 2 times, yoh, draw yarn through 3 lps
3trcl * yo 2 times, insert hook in st/sp, yo, pull up lp, (yo, draw yarn through 2 lps) 2 times, rep from * 2 times, yo, draw yarn through 4 lps
ch chain
beg beginning
beg dc (sc, ch 1) – counts as 1 dc
beg tr (sc, ch 2) – counts as 1 tr
dc double crochet
dc3tog (yoh insert hook into next st/sp, yoh, pull up lp, yoh, draw yarn through 2 lps) 3 times, yoh, draw yarn through 4 lps on hook
dc4tog (yoh, insert hook in next st, yoh, pull up lp, yoh, pull yarn through 2 lps) 4 times, yoh, pull yarn through 5 lps
ending dc2tog starting in same st, yoh, insert hook, yoh, pull up lp, yoh, draw yarn through 2 lps, sk 1 ch, yoh, insert hook in dc, yoh, pull up lp, yoh, draw yarn through 2 lps, yoh, draw yarn through all 3 lps on hook
lp(s) loop(s)
MR make ring: ch3, ss in third ch from hook
rep repeat
RS/WS right side/wrong side of work
sc single crochet – Important note: I do not chain up 1 for the first single crochet of a round.
sk skip
sp space
special dc2tog starting in st/ch indicated,yoh, insert hook, yoh, pull up lp, yoh, draw yarn through 2 lps, sk 2 chs, yoh, insert hook in next st/ch, yoh, pull up lp, yoh, draw yarn through 2 lps, yoh, draw yarn through all 3 lps on hook
ss slip stitch
st(s) stitch(es)
tr treble crochet
yoh yarn over hook
Motif 5 (Make 3)
YouTube Video Tutorial
Round 1 Using Yarn B, MR, beg dc (see Stitch Guide), dc – counts as 1 2dccl, (ch1, 2dccl) 7 times, ch1, ss in first full dc, cut yarn and weave tails. [8 2dccl, 8 sp]
Round 2 Join Yarn C with ss in first sp, beg tr (see Stitch Guide), (3tr in same sp, tr in next sp) 8 times omitting final tr, ss in beg tr. [32 tr]
Round 3 Beg dc in next st, (ch1, dc) 31 times, ch1, ss in beg dc. [32 dc, 32 sp]
Round 4 Ss in 1 ch, (beg dc, dc) in next dc – counts as 1 2dccl, (ch2, 2dccl in next dc) 31 times, ch2, ss in first full dc, cut yarn and weave tails. [32 2dccl, 32 sp]
Round 5 Join Yarn H with ss in first sp, 3sc in all sps around, ss in first sc. [96 sc]
Round 6 Beg dc in next st, * sk2, (dc, ch2, dc) in next st, rep from * 30 times, dc in same st as beg dc, ch2, ss in beg dc, cut yarn and weave tails. [64 dc, 64 sp]
Round 7 Join Yarn F with ss in first sp, beg dc, (3dc in same sp, dc in next sp) 32 times omitting final dc, do not join round. [128 dc]
Note: Round 7 will seem to ruffle, but this will be corrected on Round 8.
Round 8 Beg dc in beg dc of Round 7, dc3tog – counts as 1 dc4tog, (ch3, dc4tog) 31 times, ch3, ss in dc3tog, cut yarn and weave tails. [32 dc4tog, 32 sp]
Round 9 Join Yarn E with ss in first sp, 5sc in all sps around, ss in first sc. [160 sc]
Round 10 Ss in 1 st, (sc in next st, ch4, sk4) 32 times, ss in first sc. [32 sc, 32 sp]
Round 11 Ss in 2 chs, sc in same sp, * (ch4, sc in next sp) 6 times, 3trcl in next sp, (ch3, 3trcl in same sp) 3 times, sc in next sp, rep from * 3 times omitting final sc, ss in first sc, cut yarn and weave tails. [16 3trcl, 28 sc, 36 sp]
Round 12 Join Yarn G with ss in first sp, sc in same sp * (ch4, sc in next sp) 5 times, 3trcl in next sp, (ch3, 3trcl in same sp) 2 times, (3trcl, ch4, 3trcl) in next sp, 3trcl in next sp, (ch3, 3trcl in same sp) 2 times, sc in next sp, rep from * 3 times omitting final sc, ss in first sc, cut yarn and weave tails. [32 3trcl, 24 sc, 40 sp]
Round 13 Join Yarn D with ss in first sp, * 5sc in 5 sps, 3sc in 2 sps, (5dc, ch3, 5dc) in next sp, 3sc in 2 sps, rep from * 3 times, ss in first sc. [40 dc, 148 sc, 4 sp]
Round 14 (Sc in all sts to corner, 3sc in corner) 4 times, sc in all sts to beginning, ss in first sc, cut yarn and leave 2 arm lengths tail for whip st join later on. Wind tail up and secure to prevent tangling. [200 sc]
Make 2 more of Motif 5, using the following yarn color order:
Yarn: G, I, F, D, H, B, C
Yarn: D, E, G, H, I, F, B
Motif 3 (Make 3)
YouTube Video Tutorial
Row 1(RS) Using Yarn A, ch40, starting in 4th ch from hook note: this turning chain counts as 1 dc + ch1, make special dc2tog (refer to Stitch Guide), (ch2, starting in same ch as previous, make special dc2tog) 11 times, ch1, dc in same ch as previous, turn. [12 special dc2tog, 2 dc, 13 sp]
Row 2 Beg dc in dc, dc in special dc2tog, (ch2, starting in same st as previous, make special dc2tog) 11 times, ch2, make ending dc2tog, turn. [11 special dc2tog, 1 ending dc2tog, 2 dc, 12 sp]
Row 3 Beg dc in ending dc2tog, ch1, (starting in same st as previous, make special dc2tog, ch2) 12 times omitting final ch, dc in same st as previous, turn. [12 special dc2tog, 2 dc, 13 sp]
Rows 4-13 Rep (Rows 2 and 3) 5 times.
Motif Border Continuing with RS facing, work left edge as follows: treating the dc sts as ch-sps, (2sc in next 2 sps, 3sc in next sp) 4 times, 2sc in next sp, 3sc in corner, work bottom edge as follows: (3sc in next sp, 2sc in next sp) 6 times, 3sc in corner, work right edge as left edge, 3sc in corner, work top edge as bottom edge, 3sc in final corner, ss in first sc, cut yarn and weave tails. [132 sc]
Botanica Blanket Pattern: Week 2
This week, we will be making 4 of “Motif 1” and 6 of “Motif 2”.
Included in this section, you will find:
Progress Tracker
Week 2 Stitch Guide
“Motif 1” instructions – Make 4
“Motif 2” Instructions – Make 6
Progress Tracker
Week 2 Stitch Guide (US Terms)
ch chain
beg beginning
beg dc (sc, ch 1) – counts as 1 dc
dc double crochet
lp(s) loop(s)
MR make ring: ch3, ss in third ch from hook
rep repeat
RS/WS right side/wrong side of work
sc single crochet – Important note: I do not chain up 1 for the first single crochet of a round.
sk skip
sp space
ss slip stitch
st(s) stitch(es)
tr treble crochet
yoh yarn over hook
Motif 1 (Make 4)
YouTube Video Tutorial
Round 1 (WS) Using Yarn A, MR, beg dc, (ch3, 3dc) 4 times omt final dc, ss in beg dc. [12 dc, 4 sp]
Round 2 Ss in first 2 chs, beg dc in same sp, turn, (ch3, 3dc in same sp, ch1, 3dc in next sp) 4 times omt final dc, ss in beg dc. [24 dc, 8 sp]
Rounds 3-8 Ss in first 2 chs, beg dc in same sp, turn * ch3, 3dc in same sp, (ch1, 3dc) in all ch-1 sps across to next ch-3 sp, ch1, 3dc in ch-3 sp, rep from * 3 times omt final dc, ss in beg dc. [96 dc, 32 sp]
Round 9 Continuing on RS, (3sc in ch-3 sp, sk 1 st, sc in 30 sts/sps across) 4 times, ss in first sc, cut yarn. [132 sc]
Motif 2 (Make 6)
YouTube Video Tutorial
Row 1 (RS) Using Yarn A, MR, beg dc, ch1, 3dc, ch3, 3dc, ch1, tr, turn. [1 tr, 7 dc, 3 sp]
Row 2 Beg dc in tr, ch1, 3dc in ch-1 sp, ch1, (3dc, ch3, 3dc) in ch-3 sp, ch1, 3dc in ch-1 sp, ch1, tr in final st, turn. [1 tr, 13 dc, 5 sp]
Rows 3-8 Beg dc in tr, (ch1, 3dc) in all ch-1 sps across to ch-3 sp, ch1, (3dc, ch3, 3dc) in ch-3 sp, (ch1, 3dc) in all ch-1 sps across, ch1, tr in final st, turn. [1 tr, 49 dc, 17 sp]
Row 9 2sc in first sp, (sk 1
st, sc in 30 sts/sps across, 3sc in ch-3 sp) 2 times omt final sc, cut yarn.
[67 sc]
Botanica Blanket Pattern: Week 3
This week, we will be making 8 of “Motif 4”
Included in this section, you will find:
Progress Tracker
Week 3 Stitch Guide
“Motif 4” instructions – Make 8
Progress Tracker
Week 3 Stitch Guide (US Terms)
ch chain
beg beginning
beg dc (sc, ch 1) – counts as 1 dc
dc double crochet
lp(s) loop(s)
MR make ring: ch3, ss in third ch from hook
rep repeat
RS/WS right side/wrong side of work
sc single crochet – Important note: I do not chain up 1 for the first single crochet of a round.
sk skip
sp space
ss slip stitch
st(s) stitch(es)
tr treble crochet
yoh yarn over hook
Motif 4 (Make 8)
Video instruction will be uploaded soon!
Note: Motif is worked corner to corner, increasing to its widest point, and then decreasing back down to the opposite corner.
Row 1 (RS) Using Yarn A, MR, beg dc, (ch1, dc) 3 times, turn. [4 dc, 3 sp]
Note: Use a small piece of yarn (or a stitch marker) to mark Row 1 as the RS to avoid confusion.
Row 2 (Beg dc, ch1, dc) in first st, (ch1, dc in next dc) 2 times, ch1, (dc, ch1, dc) in final st, turn. [6 dc, 5 sp]
Row 3 Sc in every st/sp across, turn. [11 sc]
Row 4 Beg dc in first st, (ch1, dc in same st) 3 times, ch6, sk9, dc in final st, (ch1, dc in same st) 3 times, turn. [8 dc, 7 sp]
Row 5 (Beg dc, ch1, dc) in first st, (ch1, dc in next dc) 3 times, ch1, holding ch-6 lp at WS of work, tr in 5th skipped sc from Row 3, (ch1, dc in next dc) 4 times, ch1, dc in same st, turn. [1 tr, 10 dc, 10 sp]
Row 6 Sc in every st/sp across, but when working into tr st, also put hook under ch-6 lp to grab it and secure at WS of work. [21 sc]
Row 7 Beg dc in first st, (ch1, dc in same st) 3 times, * ch6, sk9, dc in next st, (ch1, dc in same st) 3 times, rep from * 1 time, turn. [12 dc, 11 sp]
Row 8 (Beg dc, ch1, dc) in first st, (ch1, dc in next dc) 3 times, * ch1, holding ch-6 lp at WS of work, tr in 5th skipped sc from Row 6, (ch1, dc in next dc) 4 times, rep from * 1 time, ch1, dc in same st, turn. [2 tr, 14 dc, 15 sp]
Row 9 Rep Row 6. [31 sc]
Row 10 Beg dc in first st, (ch1, dc in same st) 3 times, * ch6, sk9, dc in next st, (ch1, dc in same st) 3 times, rep from * 2 times, turn. [16 dc, 15 sp]
Row 11 (Beg dc, ch1, dc) in first st, (ch1, dc in next dc) 3 times, * ch1, holding ch-6 lp at WS of work, tr in 5th skipped sc from Row 9, (ch1, dc in next dc) 4 times, rep from * 2 times, ch1, dc in same st, turn. [3 tr, 18 dc, 20 sp]
Row 12 Rep Row 6. [41 sc]
Note: From this point, the motif begins to decrease.
Row 13 Beg dc in first st, * ch6, sk9, dc in next st, (ch1, dc in same st) 3 times, rep from * 2 times, ch6, dc in final st, turn. [14 dc, 13 sp]
Row 14 Ss in 3 chs, * holding ch-6 lp at WS of work, tr in 5th skipped sc from Row 12, (ch1, dc in next dc) 4 times, ch1, rep from * 2 times, tr in 5th skipped sc from Row 12, turn. [4 tr, 12 dc, 15 sp]
Row 15 Rep Row 6. [31 sc]
Row 16 Beg dc in first st, * ch6, sk9, dc in next st, (ch1, dc in same st) 3 times, rep from * 1 time, ch6, dc in final st, turn. [10 dc, 9 sp]
Row 17 Ss in 3 chs, * holding ch-6 lp at WS of work, tr in 5th skipped sc from Row 15, (ch1, dc in next dc) 4 times, ch1, rep from * 1 time, tr in 5th skipped sc from Row 15, turn. [3 tr, 8 dc, 10 sp]
Row 18 Rep Row 6. [21 sc]
Row 19 Beg dc in first st, * ch6, sk9, dc in next st, (ch1, dc in same st) 3 times, ch6, dc in final st, turn. [6 dc, 5 sp]
Row 20 Ss in 3 chs, * holding ch-6 lp at WS of work, tr in 5th skipped sc from Row 18, (ch1, dc in next dc) 4 times, ch1, tr in 5th skipped sc from Row 18, turn. [2 tr, 4 dc, 5 sp]
Row 21 Rep Row 6. [11 sc]
Row 22 Beg dc in first st, ch6, dc in final st, turn. [2 dc, 1 sp]
Row 23 Ss in 3 chs, tr in 5th skipped sc from Row 21, turn. [1 tr]
Row 24 Sc in tr, turn. [1 sc]
Motif Border 3sc in corner, work left edge as follows: (5sc in sp, 3sc in tr) 3 times, 6sc in sp, 3sc in corner, work bottom edge as follows: (2sc in sp, 3sc in sp, 3sc in sc) 3 times, 3sc in next 2 sps, 3sc in corner, work right edge as for bottom edge, 3sc in corner, work top edge as for left edge, ss in first sc, cut yarn. [132sc]
Finished!
Botanica Blanket Pattern: Week 4
We will be making 6 squares, 3 large (Motif 6) and 3 small (Motif 3).
Included in this section, you will find:
Progress Tracker
Week 4 Stitch Guide
“Motif 6” instructions – Make 3
“Motif 3” instructions – Make 3
Progress Tracker
Botanica Blanket Week 4 Stitch Guide (US Terms)
2dccl 2dc cluster:(yoh, insert hook in st, yoh, pull up lp, yoh, draw yarn through 2 lps) 2 times, yoh, draw yarn through 3 lps
3dccl 3dc cluster:(yoh, insert hook in st/sp, yoh, pull up lp, yoh, draw yarn through 2 lps) 3 times, yoh, draw yarn through 4 lps
3trcl 3tr cluster:* yoh 2 times, insert hook in st, yoh, pull up lp, (yoh, draw yarn through 2 lps) 2 times, rep from * 2 times, yoh, draw yarn through 4 lps
4dccl 4dc cluster:(yoh, insert hook in st/sp, yoh, pull up lp, yoh, draw yarn through 2 lps) 4 times, yoh, draw yarn through 5 lps
ch chain
beg beginning
beg dc (sc, ch 1) – counts as 1 dc
beg tr (sc, ch 2) – counts as 1 tr
dc double crochet
dc4tog (yoh, insert hook in next st/sp, yoh, pull up lp, yoh, draw yarn through 2 lps) 4 times, yoh, draw yarn through 5 lps
ending dc2tog starting in same st, yoh, insert hook, yoh, pull up lp, yoh, draw yarn through 2 lps, sk 1 ch, yoh, insert hook in dc, yoh, pull up lp, yoh, draw yarn through 2 lps, yoh, draw yarn through all 3 lps on hook
lp(s) loop(s)
MR make ring: ch3, ss in third ch from hook
rep repeat
RS/WS right side/wrong side of work
sc single crochet – Important note: I do not chain up 1 for the first single crochet of a round.
sk skip
sp space
special dc2tog starting in st/ch indicated,yoh, insert hook, yoh, pull up lp, yoh, draw yarn through 2 lps, sk 2 chs, yoh, insert hook in next st/ch, yoh, pull up lp, yoh, draw yarn through 2 lps, yoh, draw yarn through all 3 lps on hook
ss slip stitch
st(s) stitch(es)
tr treble crochet
yoh yarn over hook
Motif 6 (Make 3)
Video instruction will be uploaded soon!
Instructions
Note: Sample in step by step photos is using random colors of Catona. Please use the yarn letters given in the written pattern.
Round 1 Using Yarn H, MR, beg tr, (ch1, tr) 11 times, ch1, ss in beg tr. [12 tr, 12 sp]
Round 2 (Beg dc, 2dccl) in first sp – counts as 1 3dccl, (ch 3, 3dccl in next sp) 11 times, ch3, ss in 2dccl, cut yarn. [12 3dccl, 12 sp]
Round 3 Join Yarn F with ss in first sp, 4sc in each sp around, ss in first sc. [48 sc]
Round 4 (Sc in next st, ch2, sk1) 24 times, ss in first sc. [24 sc, 24 sp]
Round 5 Sc in first sp, * ch5, (3trcl in next sp, ch2) 4 times, 3trcl in next sp, ch5, sc in next sp, rep from * 3 times omt final sc, ss in first sc, cut yarn. [20 3trcl, 4 sc, 24 sp]
Round 6 Join Yarn D with ss in final ch-sp of Round 5, sc in same sp, * ch5, sc in next sp, ch5, (4dccl in next sp, ch2) 3 times, 4dccl in next sp, ch5, sc in next sp, rep from * 3 times omt final sc, ss in first sc. [16 4dccl, 8 sc, 24 sp]
Round 7 Beg dc in first sp, * 8dc in same sp, sc in next sp, ch5, (4dccl in next sp, ch2) 2 times, 4dccl in next sp, ch5, sc in next sp, dc in next sp, rep from * 3 times omt final dc, ss in beg dc, cut yarn. [12 4dccl, 36 dc, 8 sc, 16 sp]
Round 8 Join Yarn C with ss in final sp of Round 7, sc in same sp, * (dc in next dc, ch1) 8 times, dc in next dc, sc in next sp, ch5, 4dccl in next sp, ch2, 4dccl in next sp, ch5, sc in next sp, rep from * 3 times omt final sc, ss in first sc, cut yarn. [8 4dccl, 36 dc, 8 sc, 44 sp]
Round 9 Join Yarn E with ss in final sp of Round 8, sc in same sp, * (3dccl in next dc, ch2) 8 times, 3dccl in next dc, sc in next sp, ch5, 4dccl in next sp, ch5, sc in next sp, rep from * 3 times omt final sc, ss in first sc, cut yarn. [4 4dccl, 36 3dccl, 8 sc, 40 sp]
Round 10 Join Yarn I with ss in any 4dccl, sc in same st, * ch5, 4dc in next 8 ch-2 sps, ch5, sc in 4dccl, rep from * 3 times omt final sc, ss in first sc. [128 dc, 4 sc, 8 sp]
Note: I don’t know how I didn’t snap a pic after joining the round here! But you can see the joined round on the first photo of Round 11 below.
Round 11 Sc in same st as join, * ch5, (dc4tog, ch3) 7 times, dc4tog, ch5, sc in next sc, rep from * 3 times omt final sc, ss in first sc, cut yarn. [32 dc4tog, 4 sc, 36 sp]
Round 12 Join Yarn G with ss in same st as join, sc in same st, * 6sc in next sp, 4sc in next 2 sps, 4dc in next sp, (4tr, ch3, 4tr) in next sp, 4dc in next sp, 4sc in next 2 sps, 6sc in next sp, sc in next sc, rep from * 3 times omt final sc, ss in first sc. [32 tr, 32 dc, 116 sc, 4 sp]
Round 13 (Sc in all sts to next sp, 5sc in sp) 4 times, sc in all sts to beginning, ss in first sc, cut yarn leaving 2 arm lengths tail for whip st join later on. Wind tail up and secure to prevent tangling. [200 sc]
Make 2 more of Motif 6, using the following yarn color order:
1) B, C, F, H, E, G, D, and
2) I, D, G, H, B, E, F
Motif 3 (Make 3)
SCROLL UP TO FIND MOTIF 3 INSTRUCTIONS AND MAKE 3 MORE.
Botanica Blanket Pattern: Week 5
We will be making 6 squares, 3 large (Motif 7) and 3 small (Motif 3).
Included in this section, you will find:
Progress Tracker
Week 5 Stitch Guide
“Motif 7” instructions – Make 3
“Motif 3” instructions – Make 3
Botanica Blanket Progress Tracker
Week 5 Stitch Guide (US Terms)
2dccl 2dc cluster:(yoh, insert hook in st, yoh, pull up lp, yoh, draw yarn through 2 lps) 2 times, yoh, draw yarn through 3 lps
2trcl 2tr cluster: * yoh 2 times, insert hook in st, yoh, pull up lp, (yoh, draw yarn through 2 lps) 2 times, rep from * 1 time, yoh, draw yarn through 3 lps
3tr-popcorn 3tr in st/sp indicated, remove lp from hook, insert hook in first tr, grab lp, pull lp through to close
3trcl 3tr cluster:* yoh 2 times, insert hook in st, yoh, pull up lp, (yoh, draw yarn through 2 lps) 2 times, rep from * 2 times, yoh, draw yarn through 4 lps
ch chain
beg beginning
beg dc (sc, ch 1) – counts as 1 dc
beg tr (sc, ch 2) – counts as 1 tr
beg dtr (sc, ch 3) – counts as 1 dtr
dc double crochet
dtr double treble
ending dc2tog starting in same st, yoh, insert hook, yoh, pull up lp, yoh, draw yarn through 2 lps, sk 1 ch, yoh, insert hook in dc, yoh, pull up lp, yoh, draw yarn through 2 lps, yoh, draw yarn through all 3 lps on hook
lp(s) loop(s)
MR make ring: ch3, ss in third ch from hook
picot ch3, sc in top side of previous st – do not work into top of st as you would normally
rep repeat
RS/WS right side/wrong side of work
sc single crochet – Important note: I do not chain up 1 for the first single crochet of a round.
sk skip
sp space
special dc2tog starting in st/ch indicated,yoh, insert hook, yoh, pull up lp, yoh, draw yarn through 2 lps, sk 2 chs, yoh, insert hook in next st/ch, yoh, pull up lp, yoh, draw yarn through 2 lps, yoh, draw yarn through all 3 lps on hook
ss slip stitch
st(s) stitch(es)
tr treble crochet
yoh yarn over hook
Instructions
Note: Sample in step by step photos is using random colors of Catona. Please use the yarn letters given in the written pattern. First Motif is made using colors given in instructions, and color order for the second and third motifs is given at the end of the instructions.
Motif 7 (Make 3)
Video instruction will be uploaded soon!
Note: By working Round 2 and 5 from the WS, the tr sts make tiny “bobbles” on the RS.
Round 1 (RS) Using Yarn I, MR, beg dtr, 27dtr, ss in beg dtr, turn. [28 dtr]
Round 2 * Sc in next st, (sc, tr) in next st, rep from * 13 times, ss in first
sc, turn, cut yarn. [14 tr, 28 sc]
Round 3 Join Yarn D with ss in first sc of Round 2, sc in same st, (ch3, sk2, sc) 13 times, ch3, ss in first sc. [14 sc, 14 sp]
Round 4 Ss in first ch, ch 3 – does
not count as a st, (3tr-popcorn,
ch2, 3tr-popcorn, ch2) in 14 sps, ss in first 3tr-popcorn, turn, cut yarn. [28
3trcl, 28 sp]
Round 5 Join Yarn B with ss in first sp, * (sc, tr, sc) in sp, ch3,
rep from * 27 times, ss in, turn. [28 tr, 56 sc, 28 sp]
Round 6 (Beg tr, tr)
in first sp – counts as 1 2trcl, (ch3, 2trcl in same sp, 2trcl in next
sp) 28 times omt final 2trcl, ss in first full tr, cut yarn. [56 2trcl, 28 sp]
Round 7 Join Yarn G with ss in first sp, sc in same sp, * (ch3, 3trcl,
ch2, 3trcl, picot, ch2, 3trcl, ch3) in next sp, sc in next sp, ch3, 4dc in next
sp, 4sc in next sp, ch1, 4sc in next sp, 4dc in next sp, ch3, sc in next sp,
rep from * 3 times omt final sc, ss in first sc, cut yarn. [4 picot, 12 3trcl,
32 dc, 40 sc, 28 sp]
Round 8 Join Yarn F with ss in first sp, sc in same sp, * ch3, (2trcl, ch3, 2trcl, ch5, 2trcl, ch3, 2trcl) in picot, ch3, sk 1 sp, sc in next sp, ch3, sk 1 sp, sc in 17 sts/sps, ch3, sk 1 sp, sc in next sp, rep from * 3 times omt final sc, ss in first sc, cut yarn. [16 2trcl, 76 sc 28 sp]
Round 9 Join Yarn H with ss in final sp of Round 8, sc in same sp, *
(2dccl, ch2) 2 times in next sp, 2dccl in same sp, sc in next sp, (2dccl, ch2)
5 times in next sp, 2dccl in same sp, sc in next sp, (2dccl, ch2) 2 times in
next sp, 2dccl in same sp, sc in next sp, ch3, (sc in next sc, sk2, ch3) 2
times, sc, ch3, sk3, (sc, ch3, sk2) 2 times, sc, ch3, sc in next sp, rep from *
3 times omt final sc, ss in first sc, cut yarn. [48 2dccl, 40 sc, 64 sp]
Round 10 Join Yarn C in first sp, (3sc in 9 ch-2 sps, 3dc in 7 ch-3
sps) 4 times, ss in first sc. [84 dc, 108 sc]
Round 11 (Sc in all sts to corner, 3sc in corner) 4 times, sc in all
sts to beginning, ss in first sc, cut yarn and leave 2 arm lengths tail for
whip st join later on. Wind tail up and secure to prevent tangling. [200 sc]
Make 2 more of Motif 7, using the following yarn color order: 1) H, F, D, C, E, I, G, and 2) D, E, G, H, I, F, B
Motif 3 (Make 3)
SCROLL UP TO FIND MOTIF 3 INSTRUCTIONS AND MAKE 3 MORE.
Botanica Blanket Pattern: Week 6
We will be making 6 squares, 3 large (Motif 8) and 3 small (Motif 3).
Included in this section, you will find:
Progress Tracker
Week 6 Stitch Guide
“Motif 8” instructions – Make 3
“Motif 3” instructions – Make 3
Botanica Blanket Progress Tracker
Week 6 Stitch Guide (US Terms)
2dccl 2dc cluster:(yoh, insert hook in st, yoh, pull up lp, yoh, draw yarn through 2 lps) 2 times, yoh, draw yarn through 3 lps
2trcl 2tr cluster: * yoh 2 times, insert hook in st, yoh, pull up lp, (yoh, draw yarn through 2 lps) 2 times, rep from * 1 time, yoh, draw yarn through 3 lps
3dccl 3dc cluster:(yoh, insert hook in st/sp, yoh, pull up lp, yoh, draw yarn through 2 lps) 3 times, yoh, draw yarn through 4 lps
3trcl 3tr cluster:* yoh 2 times, insert hook in st, yoh, pull up lp, (yoh, draw yarn through 2 lps) 2 times, rep from * 2 times, yoh, draw yarn through 4 lps
4dccl 4dc cluster:(yoh, insert hook in st/sp, yoh, pull up lp, yoh, draw yarn through 2 lps) 4 times, yoh, draw yarn through 5 lps
ch chain
beg beginning
beg dc (sc, ch 1) – counts as 1 dc
beg tr (sc, ch 2) – counts as 1 tr
dc double crochet
dc4tog (yoh, insert hook in next st/sp, yoh, pull up lp, yoh, draw yarn through 2 lps) 4 times, yoh, draw yarn through 5 lps
dc5tog (yoh, insert hook in next st/sp, yoh, pull up lp, yoh, draw yarn through 2 lps) 5 times, yoh, draw yarn through 6 lps
ending dc2tog starting in same st, yoh, insert hook, yoh, pull up lp, yoh, draw yarn through 2 lps, sk 1 ch, yoh, insert hook in dc, yoh, pull up lp, yoh, draw yarn through 2 lps, yoh, draw yarn through all 3 lps on hook
lp(s) loop(s)
MR make ring: ch3, ss in third ch from hook
picot ch3, sc in top side of previous st – do not work into top of st as you would normally
rep repeat
RS/WS right side/wrong side of work
sc single crochet – Important note: I do not chain up 1 for the first single crochet of a round.
sk skip
sp space
special dc2tog starting in st/ch indicated,yoh, insert hook, yoh, pull up lp, yoh, draw yarn through 2 lps, sk 2 chs, yoh, insert hook in next st/ch, yoh, pull up lp, yoh, draw yarn through 2 lps, yoh, draw yarn through all 3 lps on hook
ss slip stitch
st(s) stitch(es)
tr treble crochet
yoh yarn over hook
Instructions
Note: Sample in step by step photos is using random colors of Catona. Please use the yarn letters given in the written pattern. First Motif is made using colors given in instructions, and color order for the second and third motifs is given at the end of the instructions.
Motif 8 (Make 3)
Video instruction will be uploaded soon!
Round 1 Using Yarn G, MR, beg dc, (3dc, ch5, dc) 4 times omt final dc, do not join. [16 dc, 4 sp]
Round 2 (Dc4tog, ch5) 4 times, ss in first dc4tog, cut yarn. [4
dc4tog, 4 sp]
Round 3 Hold both ch-5 sps from previous rounds together as one, join Yarn F
with ss in sp, (beg tr, tr)
in same
sp – counts as 1 2trcl, * (ch2, 2trcl in same sp) 3
times, ch2, 2trcl in next sp, rep from * 3 times omt final 2trcl, ss in first
full tr, cut yarn. [16 2trcl, 16 sp]
Round 4 Join Yarn H in final sp of Round 3, sc in same sp, (ch2, 5dc
in next 3 sps, ch2, sc in next sp) 4 times omt final sc, ss in first sc. [60
dc, 4 sc, 8 ch]
Round 5 Ss in first ch, sc in same sp, * (ch5, dc5tog) 3 times, (ch5,
sc in next sp) 2 times, rep from * 3 times omt final sc, ss in first sc, cut
yarn. [12 dc5og, 8 sc, 20 sp]
Round 6 Join Yarn B with ss in first sp, sc in same sp, * ch3,
(2dccl, ch2) 3 times in next sp, 2dccl in same sp, (2dccl, ch2) 3 times in next
sp, 2dccl in same sp, (ch3, sc in next sp) 3 times, rep from * 3 times omt
final sc, ss in first sc. [32 2dccl, 12 sc, 40 sp]
Round 7 Ss in first ch, sc in same sp, * (ch3, 4dccl in next sp) 6
times, (ch3, sc in next sp) 4 times, rep from * 3 times omt final sc, ss in
first sc, cut yarn. [24 4dccl, 16 sc, 40 sp]
Note: Somehow I deleted the photo of the joining the round! On the next pic below you can see how it is joined.
Round 8 Join Yarn D with ss in first sp, sc in same sp, * (ch3, sc in next sp) 2 times, (3trcl, ch3) 3 times in next sp, 3trcl in same sp, (sc in next sp, ch3) 6 times, sc in next sp, rep from * 3 times omt final sc, ss in first sc, cut yarn. [16 3trcl, 36 sc, 44 sp]
Round 9 Join Yarn I with ss in first sp, * 3sc in 3 sps, 5sc in next
sp, 3sc in 5 sps, sc in sc, 3sc in 2 sps, rep from * 3 times, ss in first sc. [144
sc]
Round 10 Beg dc in next st, * (ch1, sk1, dc) 5 times, ch3, dc in same st, (ch1, sk1, dc)
13 times, rep from * 3 times omt final dc, ss in beg dc. [76 dc, 76 sp]
Round 11 Ss in first ch, (beg dc, 2dccl) in next dc – counts as 1
3dccl, * (ch1, 3dccl in next dc) across to corner, (ch1, (3dccl, ch3,
3dccl) in corner, rep from * 3 times, (ch1, 3dccl in next sc) across to
beginning, ch1, ss in 2dccl, cut yarn. [84 3dccl, 84 sp]
Round 12 Join Yarn E with ss in first sp, sc in same sp, * (ch2, sc in
next sp) across to corner, ch2, (2sc, ch3, 2sc) in corner sp, rep from * 3
times, (ch2, sc in next sp) across to beginning, ch2, ss in first sc. [96 sc,
88 sp]
Round 13 (2sc in all sps to within 1 sp of corner, sc in next sp, sc
in next 2 sc, 5sc in corner) 4 times, 2sc in all sps to beginning, ss in first
sc, cut yarn and leave 2 arm lengths tail for whip st join later on. Wind tail
up and secure to prevent tangling. [200 sc]
Make 2 more of Motif 8, using the following yarn color order: 1) I, G, D, H, F, E, B, and 2) F, I, G, C, B, D, E
Motif 3 (Make 3)
SCROLL UP TO FIND MOTIF 3 INSTRUCTIONS AND MAKE 3 MORE.
Whip Stitch Join
For this project, we will be using whip stitch to join everything together in rows and then in columns. First, lay out all of your squares following the diagram below.
Remember, we are making 3 panels. Do not join the panels 2 and 3 onto the center panel yet. Of course, you will note that the center panel has the upper left and lower right corners notched out. These corners will be filled next time.
Botanica Blanket Layout Schematic
Written Instructions
Here is how I perform the Whip Stitch Join.
Lay out all Motifs 1-4 as shown in schematic. Whip stitch motifs together using instructions below, beginning with horizontal seams, then rotate and whip stitch all vertical seams.
Hold 2 motifs with wrong sides together, and attach a length of Yarn A at right edge.
Pull the entire yarn length through the corner sc (UK dc) of both motifs, back to front.
Insert the hook front to back through both loops of the next st to the left, on both motifs.
Grab the yarn and pull it all the way through to the front of the piece, allowing the whip st to rest flush against the top edge of the motifs.
Repeat steps 3 and 4 across, inserting the hook through both motifs from front to back in the next st to the left, and pulling the yarn through to the front.
When the next corner is reached, if there are no more subsequent squares to join, you can weave the excess yarn, cutting it down if necessary.
Important: Do not pull yarn to tighten whip stitches. I prefer to let the whip stitches rest flush and snug against the joined edge. Then when you open the motifs flat, you have cute little stitches for a neat and cozy handmade look.
I do have a video of how I join squares with whip stitch, but it is for a different project. However, I do think it will be a great lesson for this join, so you should watch it if you have any doubts!
Video Instruction
This video is one that I made for the Mateo’s Granny Square Blanket pattern, but it is a great description of how I work up Whip Stitch Join.
Joining Notes
It is important to note that I am working through both loops of the stitches, and I do not cinch up the yarn as I go. I let the stitches lie flush. Also, I don’t use a needle – I simply use my hook to grab the yarn and pull it to the front each stitch. If you are not in love with whip stitch, you can use any join that does not add any length or width to the dimension of the panels. For example, you can slip stitch crochet through back loops only on the wrong side of the blanket if you wish.
Just know that if you bought a yarn kit from Deramores, and you do anything other than what I advise, you risk running out of yarn.
Side note: maybe I will finally have some Scheepjes Our Tribe * kits coming up?? I have gotten numerous requests, and I think even I will start making some Our Tribe Botanica squares! Yummmmmm – stay tuned!
Botanica Blanket: Week 8 Information
We will be working the Fill Triangles today.
Included in this section, you will find:
Progress Tracker
Week 8 Stitch Guide
“Fill Triangle” Instructions, charted and written
Progress Tracker
Week 8 Stitch Guide (US Terms)
2trcl 2tr cluster: * yoh 2 times, insert hook in st, yoh, pull up lp, (yoh, draw yarn through 2 lps) 2 times, rep from * 1 time, yoh, draw yarn through 3 lps
3dccl 3dc cluster:(yoh, insert hook in st/sp, yoh, pull up lp, yoh, draw yarn through 2 lps) 3 times, yoh, draw yarn through 4 lps
3trcl 3tr cluster:* yoh 2 times, insert hook in st, yoh, pull up lp, (yoh, draw yarn through 2 lps) 2 times, rep from * 2 times, yoh, draw yarn through 4 lps
ch chain
beg beginning
beg dc (sc, ch 1) – counts as 1 dc
beg dc3tog beg dc, dc2tog – counts as 1 dc3tog
dc double crochet
dc2tog (yoh, insert hook in next st/sp, yoh, pull up lp, yoh, draw yarn through 2 lps) 2 times, yoh, draw yarn through 3 lps
dc3tog (yoh, insert hook in next st/sp, yoh, pull up lp, yoh, draw yarn through 2 lps) 3 times, yoh, draw yarn through 4 lps
lp(s) loop(s)
rep repeat
RS/WS right side/wrong side of work
sc single crochet – Important note: I do not chain up 1 for the first single crochet of a row.
sk skip
sp space
ss slip stitch
st(s) stitch(es)
tr treble crochet
yoh yarn over hook
Chart Key – US Terms
Instructions
Note: Fill Triangle is worked off “raw edge” of motif 2. The dc and tr count as the 48 “sps” that Row 1 are worked onto.
Fill Triangle
Rows 1-6
Row 1 (RS) Hold blanket with RS facing and, beginning at raw edge of top-right Motif 2, join Yarn A with ss in first sp, sc in same sp, (ch3, sc in next sp) across, turn. [48 sc, 47 sp]
Row 2 Ss in 2 chs, sc in same sp, (ch3, sc in next sp) across, turn. [47 sc, 46 sp]
Row 3 2sc in first sp, 3sc in remaining sps across, turn. [137 sc]
Row 4 Beg dc3tog, (ch1, sk1, dc) across to final 4 sts/sps, ch1, sk1, dc3tog, turn. [2 dc3tog, 65 dc, 66 sp]
Row 5 Beg dc3tog over first 3 sts/sps, dc in all sts/sps to final 3 sts/sps, dc3tog, turn. [2 dc3tog, 127 dc]
Row 6 Sk dc3tog, sc, ch3, sk3, (sc, ch3, sk2) across to final st, sc, turn. [43 sc, 42 sp]
Rows 7-12
Rows 7 and 8 Rep Row 2. [41 sc, 40 sp]
Rows 9-12 Rep Rows 3-6, cut yarn. [37 sc, 36 sp]
Rows 13-20
Here is a closeup of the beginning of these rows.
And here is the entire length of the rows, start to finish. (Whoops, I only put 1 cross line instead of 2 on the 2trcl sts at the left hand side on Row 19. My mistake!)
Row 13 Join Yarn E with ss in first sp, 2sc in same sp, 3sc in all sps across to final sp, 2sc in final sp, turn. [106 sc]
Row 14 Rep Row 6. [36 sc, 35 sp]
Row 15 Ss in 2 chs, sc in same sp, * (ch3, sc in next sp) 2 times, dc in next sp, (ch1, dc in same sp) 5 times, (sc in next sp, ch3) 3 times, sc in next sp, rep from * to final sp, cut yarn. Do not turn. [30 dc, 30 sc, 49 sp]
Row 16 (RS) Join Yarn I with ss in first sp, sc in same sp, * ch3, sc in next sp, (3dccl in next sp, ch2) 4 times, 3dccl in next sp, (sc in next sp, ch3) 3 times, sc in next sp, rep from * to final sp, cut yarn. Do not turn. [25 3dccl, 24 sc, 38 sp]
Row 17 (RS) Join Yarn C with ss in first sp, sc in same sp, ch3, sc in next sp, ch3, * (3trcl, ch3, 3trcl, ch1) in next 3 sps omt final ch1, sc in next 2 sps, ch3, sc in next 2 sps, (3trcl, ch3, 3trcl, ch1) in next sp, rep from * 3 times, (3trcl, ch3, 3trcl, ch1) in next 2 sps omt final ch1, (ch3, sc in next sp) 2 times, cut yarn. Do not turn. [36 3trcl, 20 sc, 39 sp]
Row 18 (RS) Join Yarn A with ss in third sp, sc in same sp, * (ch3, sc in next sp) 4 times, (3trcl, ch3, 3trcl) in next sp, (sc in next sp, ch3) 2 times, sc in next sp, rep from * 3 times, (ch3, sc in next sp) 2 times, cut yarn. Do not turn. [8 3trcl, 31 sc, 30 sp]
Row 19 (RS) Join Yarn A with ss in first sp, sc in same sp, * (ch3, sc in next sp) 2 times, ch1, sk 1 sp, 2trcl in next sp, (ch3, 2trcl in same sp) 2 times, ch1, sk 1 sp, sc in next sp, ch3, sc in next sp, rep from * 3 times, ch3, sc in final sp, turn. [12 2trcl, 18 sc, 29 sp]
Row 20 Rep Row 2.
Rows 21-24
Rows 21-24 Rep Rows 3-6. [25 sc, 24 sp]
Rows 25-32
Row 25 and 26 Using Yarn D, rep Rows 13 and 14. [24 sc, 23 sp]
Row 27 Ss in 2 chs, sc in same sp, * (ch3, sc in next sp) 3 times, dc in next sp, (ch1, dc in same sp) 5 times, (sc in next sp, ch3) 2 times, sc in next sp, rep from * 2 times, ch3, sc in next sp, cut yarn. Do not turn. [18 dc, 20 sc, 31 sp]
Row 28 Join Yarn B with ss in first sp, sc in same sp, * (ch3, sc in next sp) 2 times, (3dccl in next sp, ch2) 4 times, 3dccl in next sp, (sc in next sp, ch3) 2 times, sc in next sp, rep from * 2 times, cut yarn. Do not turn. [15 3dccl, 16 sc, 24 sp]
Row 29 Join Yarn H with ss in first sp, sc in same sp, * sc in next sp, (3trcl, ch3, 3trcl, ch1) in next 4 sps omt final ch1, sc in next 2 sps, ch3, sc in next sp, rep from * 2 times, sc in final sp, cut yarn. Do not turn. [24 3trcl, 12 sc, 23 sp]
Row 30 Join Yarn A with ss in third sp, sc in same sp, * (ch3, sc in next sp) 4 times, (3trcl, ch3, 3trcl) in next sp, (sc in next sp, ch3) 2 times, sc in next sp, rep from * 1 time, (ch3, sc in next sp) 2 times, cut yarn. Do not turn. [4 3trcl, 17 sc, 16 sp]
Row 31 Join Yarn A with ss in first sp, sc in same sp, * (ch3, sc in next sp) 2 times, ch1, sk 1 sp, 2trcl in next sp, (ch3, 2trcl in same sp) 2 times, ch1, sk 1 sp, sc in next sp, ch3, sc in next sp, rep from * 1 time, ch3, sc in final sp, turn. [6 2trcl, 10 sc, 15 sp]
Row 32 Rep Row 2.
Rows 33-40
Row 33 Rep Row 3.
Row 34 Sk 1 sc, beg dc3tog, (ch1, sk1, dc) across to final 4 sts/sps, ch1, sk1, dc3tog, turn. [2 dc3tog, 16 dc, 17 sp]
Rows 35-36 Rep Rows 5-6. [11 sc, 10 sp]
Row 37 Rep Row 2, cut yarn. Do not turn. [10 sc, 9 sp]
Row 38 (RS) Join Yarn F with ss in first sp, sc in same sp (ch3, sc in next sp) 2 times, sc in next sp, 3trcl in next sp, (ch3, 3trcl in same sp) 3 times, sc in next 2 sps, (ch3, sc in next sp) 2 times, cut yarn. Do not turn. [4 3trcl, 8 sc, 7 sp]
Row 39 (RS) Join Yarn G in first sp, sc in same sp, sc in next sp, (3trcl, ch3, 3trcl, ch1) in next 3 sps omt final ch1, sc in 2 sps, cut yarn. Do not turn.
Row 40 (RS) Join Yarn A with ss in first sc, sc in same st, (ch3, sc in next sp) 2 times, (3dc, ch3, 3dc) in next sp, (sc in next sp, ch3) 2 times, sc in final sc, cut yarn.
Here is a full chart of Rows 25-40 all together.
REPEAT Triangle Fill at opposite side of Panel 1.
Weave all ends!
Botanica Blanket Pattern: Week 9
We will be prepping the 3 panels and then joining them together to complete the blanket body.
Included in this section, you will find:
Progress Tracker
Week 9 Stitch Guide US Terms
US Terms instructions to prep the panels, and join them.
Progress Tracker
Week 9 Stitch Guide (US Terms)
2dccl 2dc cluster:(yoh, insert hook in st, yoh, pull up lp, yoh, draw yarn through 2 lps) 2 times, yoh, draw yarn through 3 lps
2trcl 2tr cluster: * yoh 2 times, insert hook in st, yoh, pull up lp, (yoh, draw yarn through 2 lps) 2 times, rep from * 1 time, yoh, draw yarn through 3 lps
3dccl 3dc cluster:(yoh, insert hook in st/sp, yoh, pull up lp, yoh, draw yarn through 2 lps) 3 times, yoh, draw yarn through 4 lps
ch chain
beg beginning
beg dc (sc, ch 1) – counts as 1 dc
beg tr (sc, ch2) – counts as 1 tr
dc double crochet
lp(s) loop(s)
rep repeat
RS/WS right side/wrong side of work
sc single crochet – Important note: I do not chain up 1 for the first single crochet of a row.
sk skip
sp space
ss slip stitch
st(s) stitch(es)
tr treble crochet
yoh yarn over hook
Panel 1 Border
Join Yarn A with ss in corner sp of Triangle Fill at top left, * (3sc in corner sp, sc 102 evenly across Triangle Fill, sc 204 evenly across remainder of side, 3sc in corner, sc 34 across first square on short edge of blanket, sc 102 evenly across Triangle Fill, rep from * 1 time, ss in first sc, cut yarn.
Panel 1 Side Edging
Row 1 Join Yarn G with ss in second sc of Panel 1 Border, sc in same st,
(ch3, sk2, sc) across to end, placing final sc in bottom left corner sc of
Panel 1 border, cut yarn. Do not turn.
Row 2 Join Yarn G with ss in first sp, (beg dc, dc) in same sp – counts as 1 2dccl, (ch2, 2dccl in same sp, 2dccl in next sp) across to end, ch2, 2dccl
in same sp, cut yarn. Do not turn.
Row 3 Join Yarn F with ss in first sp, (beg tr, tr) in same sp – counts as 1 2trcl, (ch2, 2trcl in same sp, 2trcl in next sp) across to end, ch2, 2trcl in same sp, cut yarn. Do not turn.
Row 4 Join Yarn A with ss in first full tr, (ch3, 3dccl in next sp) across to end, ch3, sc in final 2trcl, cut yarn. Do not turn.
Row 5 Join Yarn H with ss in first sp, 2sc in same sp, 3sc in all sps across to final sp, 2sc in final sp, cut yarn.
Repeat Side Edging on right hand side of Panel 1.
Join Panels 2 and 3 to Panel 1
Step 1 Hold Panel 2 with RS facing, and join Yarn H with ss in bottom right corner st, sc in same st and make sc evenly across, being sure to match the same amount of sc on Row 5 of Side Edging on Panel 1, cut yarn, do not turn.
Step 2 Reattach Yarn H with ss in first st, sc in same st, (ch3, sk 2, sc)
across, placing last sc in final st, cut yarn. Line up this row and Row 5 from
Side Edging of Panel 1.
Step 3 Join Yarn H with ss in first sc of Row 5 of Side Edging, sc in same st, (ch1, release lp from hook, insert hook front to back in adjacent ch-sp from Step 2 row, grab lp, pull lp through ch-sp, ch2, sk2, sc) across, joining in each sp with Pull Loop Through joining maneuver, ending with sc in final st, cut yarn.
Repeat to join Panel 3 to panel 1.
Botanica Blanket Pattern: Week 10
We will be making a start on about half of the border this week.
Included in this section, you will find:
Progress Tracker
Week 10 Stitch Guide US Terms
US Terms instructions to prep the panels, and join them.
Progress Tracker
Week 10 Stitch Guide (US Terms)
2dccl 2dc cluster:(yoh, insert hook in st, yoh, pull up lp, yoh, draw yarn through 2 lps) 2 times, yoh, draw yarn through 3 lps
2trcl 2tr cluster: * yoh 2 times, insert hook in st, yoh, pull up lp, (yoh, draw yarn through 2 lps) 2 times, rep from * 1 time, yoh, draw yarn through 3 lps
ch chain
beg beginning
beg dc (sc, ch 1) – counts as 1 dc
dc double crochet
dc5tog (yoh, insert hook in next st/sp, yoh, pull up lp, yoh, draw yarn through 2 lps) 5 times, yoh, draw yarn through 6 lps
lp(s) loop(s)
rep repeat
RS/WS right side/wrong side of work
sc single crochet – Important note: I do not chain up 1 for the first single crochet of a row.
sk skip
sp space
ss slip stitch
st(s) stitch(es)
yoh yarn over hook
Botanica Blanket Border
Round 1 Join Yarn H with ss in top right corner st of blanket, (3sc in corner st, sc evenly across to next corner) 4 times, being sure to make the same number of sts on opposing ends of the blanket, ss in first sc.
Tip: Shoot for about 245sc on the short sides of the blanket, and 295sc on the long sides of the blanket.
Round 2 Sc in corner st, (ch3, sk2, sc) around entire blanket to
beginning, ch3, ss in first sc.
Round 3 Ss in first ch, (sc in sp, ch3) around entire blanket to final sp on
Round 2, dc in first sc – dc
counts as a ch-3 sp.
Round 4 (Beg dc, dc) in first sp – counts as 1 2dcclhere and throughout this section, * (ch2, 2dccl in same sp) 3 times, sk 1 sp, 2trcl in next sp, (ch2, 2trcl in same sp) 3 times, sk 1 sp, (2dccl, ch1, dc) in all sps across to within 3 sps of corner, sk 1 sp, 2trcl in next sp, (ch2, 2trcl in same sp) 3 times, 2dccl in corner sp, rep from * 3 times omt final 2dccl, ss in first full dc.
Round 5 Ss in 2 chs, ss in 2dccl, (beg dc, dc) in next sp, * (ch2, 2dccl in
same sp) 3 times, sk 1 sp, 5dc in next 3 sps, (dc, ch1, 2dccl) in all sps
across to within 4 sps of corner, 5dc in next 3 sps, 2dccl in corner sp, rep
from * 3 times omt final 2dccl, ss in first full dc.
Round 6 Ss in 2 chs, ss in 2dccl, (beg dc, dc) in next sp, * (ch2, 2dccl in same sp) 3 times, (ch3, dc5tog over next 5 dc) 3 times, ch3, (2dccl, ch1, dc) in all sps across until dc-5 groups from previous round are reached, (ch3, dc5tog) 3 times, ch3, 2dccl in corner sp, rep from * 3 times omt final 2dccl, ss in first full dc, cut yarn.
Botanica Blanket Pattern: Week 11
We will be finishing up the border this week.
Included in this section, you will find:
Progress Tracker
Week 11 Stitch Guide US Terms
US Terms instructions to prep the panels, and join them.
Progress Tracker
Stitch Guide (US Terms)
2dccl 2dc cluster:(yoh, insert hook in st, yoh, pull up lp, yoh, draw yarn through 2 lps) 2 times, yoh, draw yarn through 3 lps
2trcl 2tr cluster: * yoh 2 times, insert hook in st, yoh, pull up lp, (yoh, draw yarn through 2 lps) 2 times, rep from * 1 time, yoh, draw yarn through 3 lps
3dccl 3dc cluster:(yoh, insert hook in st/sp, yoh, pull up lp, yoh, draw yarn through 2 lps) 3 times, yoh, draw yarn through 4 lps
3tr-popcorn 3tr in st/sp indicated, remove lp from hook, insert hook in first tr, grab lp, pull lp through to close
4tr-popcorn 4tr in st/sp indicated, remove lp from hook, insert hook in first tr, grab lp, pull lp through to close
ch chain
beg beginning
beg dc (sc, ch 1) – counts as 1 dc
dc double crochet
dc3tog (yoh, insert hook in next st/sp, yoh, pull up lp, yoh, draw yarn through 2 lps) 3 times, yoh, draw yarn through 4 lps
dc5tog (yoh, insert hook in next st/sp, yoh, pull up lp, yoh, draw yarn through 2 lps) 5 times, yoh, draw yarn through 6 lps
lp(s) loop(s)
picot ch3, sc in top side of previous st – do not work into top of st as you would normally
rep repeat
RS/WS right side/wrong side of work
sc single crochet – Important note: I do not chain up 1 for the first single crochet of a row.
sk skip
sp space
ss slip stitch
st(s) stitch(es)
yoh yarn over hook
Remainder of Botanica Blanket Border
Round 7 Join Yarn B with ss in corner sp, (beg dc, dc) in first sp, * (ch2,
2dccl in same sp) 3 times, sk 1 sp, 4dc in next 4 ch-3 sps, sk 1 sp, (dc, ch1,
2dccl) in all sps across to within 6 sps of corner, sk 1 sp, 4dc in next 4 ch-3
sps, 2dccl in corner sp, rep from * 3 times omt final 2dccl, ss in first full
dc.
Round 8 Ss in 2 chs, ss in 2dccl, (beg dc, dc) in next sp, * (ch2, 2dccl in
same sp) 3 times, sk 1 sp,
(dc in next dc, ch1) 15 times, dc in next dc, sk 1 sp, (2dccl, ch1, dc) in all
sps across until 1 sp before 4-dc groups from previous round are reached, sk 1
st, (dc in next dc, ch1) 15 times, dc in next dc, 2dccl in corner sp, rep from
* 3 times omt final 2dccl, ss in first full dc, cut yarn.
Round 9 Join Yarn D with ss in corner sp, (beg dc, dc) in first sp, * (ch2,
2dccl in same sp) 3 times, sk 1 sp, (2dccl in next dc, ch2) 15 times, 2dccl in
next dc, sk 1 sp, (3dccl in next sp, ch3) across all sps to within 18 sps of
corner, 3dccl in next sp, sk 1 sp, sk 1 dc, (2dccl in next dc, ch2) 15 times,
2dccl in next dc, 2dccl in corner sp, rep from * 3 times omt final 2dccl, ss in
first full dc, cut yarn.
Round 10 Join Yarn C with ss in corner sp, (beg dc, dc) in first sp, * (ch2,
2dccl in same sp) 3 times, sk 1 sp, (sk 1 sp, 2trcl in next sp, ch3, 2trcl in
same sp) 7 times, sk 1 sp, sc in next sp, (2sc, ch3, 2sc) in all sps across to
1 sp before next 2dccl from previous round, sc in next sp, (sk 1 sp, 2trcl in next sp, ch3, 2trcl in same sp) 7
times, 2dccl in corner sp, rep from * 3 times omt final 2dccl, ss in first full
dc, cut yarn.
Round 11 Join Yarn G with ss in corner sp, (beg dc, dc) in first sp, ** (ch2,
2dccl in same sp) 3 times, sk 1 sp, * 2dccl in next sp, (ch2, 2dccl in same sp)
2 times, rep from * 6 times, sc in next sp, ch2, (2trcl, ch2, 2trcl) in each sp
across to within 1 sp of next 2trcl from previous round, ch2, sc in next sp, * 2dccl in next sp, (ch2, 2dccl in same sp)
2 times, rep from * 6 times, 2dccl in corner sp, rep from ** 3 times omt final
2dccl, ss in first full dc, cut yarn.
Round 12 Join Yarn E with ss in corner sp, (beg dc, dc) in first sp, * (ch2,
2dccl in same sp) 3 times, sk 1 sp, (4tr-popcorn in next sp, ch2) 14 times omt
final ch2, sk 1 sp, (2dccl, ch2, 2dccl) in all sps across to within 1 sp of
next 2dccl from previous round, sk 1 sp, (4tr-popcorn in next sp, ch2) 14 times
omt final ch2, 2dccl in corner sp, rep from * 3 times omt final 2dccl, ss in
first full dc, cut yarn.
Round 13 Join Yarn F with ss in corner sp, (beg dc, dc) in first sp, * (ch2,
2dccl in same sp) 3 times, ch3, sk 1 sp, (3sc in next sp, ch3) 13 times omt
final ch3, 3dc in all sps across to next 4tr-popcorn from previous round, (3sc
in next sp, ch3) 13 times, 2dccl in corner sp, rep from * 3 times omt final
2dccl, ss in first full dc.
Round 14 Ss in 2 chs, ss in 2dccl, (beg dc, dc) in next sp, * (ch2, 2dccl in
same sp) 3 times, ch1, sk 2
sps, (2trcl, ch2, 2trcl) in 12 sps, (dc3tog over next 3 dc, ch2) across to last
3-dc group of side, dc3tog, (2trcl, ch2, 2trcl) in next 12 sps, ch1, 2dccl in
corner sp, rep from * 3 times
omt final 2dccl, ss in first full dc, cut yarn.
Round 15 Join Yarn H with ss in corner sp, beg dc in same sp, * (dc, picot, dc)
in same sp, (2dc, picot, dc) in next sp, sk 1 sp, (2dc, picot, dc) in next 12
sps, (sc, ch3, sc) in all sps across until next 2trcl from previous round is
reached, (2dc, picot, dc) in next 12 sps, , sk 1 sp, (2dc, picot, dc) in next
sp, dc in corner sp, rep from * 3 times omt final dc, ss in beg dc, cut yarn
and weave all remaining ends.
To Finish Your Botanica Blanket
Block Botanica Blanket as necessary to open up lace.
You’re finished your Botanica Blanket – yay! Give yourself a fist bump!
My Instagram account – Post progress pics under hashtags #botanicablanket and/or #cypresstextiles
YouTube Channel (Subscribe!) – Here I will be posting CAL pattern videos weekly for the duration of the CAL – and I have loads of other tutorial videos too.
Without you all, I could not keep living my yarny dreams to provide a comfortable life for my family, while producing delightful and helpful fiber funsies for you lovely people. I am so grateful for your support! Hope you enjoy the Botanica Blanket!
* Links marked with an asterisk are affiliate links, and purchasing through them will earn me a small commission to support my work – at no additional cost to you! Yay!
Hello, and welcome to my FAQ, where I give you a long, luscious post that answers all of your burning questions. The first FAQ to answer is “Do you have any crochet pattern bundles?”
Crochet Pattern Bundles
Folks often ask me if I have pattern bundles in my shops, which just makes me so happy! I know how long it takes to crochet a blanket, and for crafters to buy multiple blanket patterns at once just tickles me pink. As a kick-off to my FAQ series, I decided to list all of the ways to save with CypressTextiles, separated by shop.
Etsy Crochet Pattern Bundles
Currently, there are five ways to save on CypressTextiles Etsy crochet patterns. These are pre-made crochet pattern bundles, as opposed to making crafters use a discount code or purchase multiple patterns. I bundled these patterns based on statistics of general buying habits of my Etsy customers.
My most popular crochet pattern bundle ever! I noticed many folks purchase my 2016 VVCAL and 2018 VVCAL patterns together at once, so I decided to wrap them in a bundle with some other goodies.
Perfect for…
Gifting! Baby shower, wedding, house-warming, birthday, you name it. Use this bundle to work up a quick and traditional blanket filled with love, that the recipient will treasure forever.
Battling Boredom! This crochet pattern bundle has over 70 different square patterns that are all the same size. Even if you only made one of each, you would still have a decent-sized blanket. If you easily get bored with making the same motifs again and again, you will love this bundle.
Crochet Pattern Bundle Contents
67 VVCAL squares, all with the same final stitch count – mix and match!
4 BONUS Floral squares to coordinate with the 67
4 Joining methods including my popular Celtic Lace Join (I designed this join in 2013 and it’s still going strong!)
2 Wide Borders that are written to be able to use on any size blanket
Blanket sellers! I created this bundle in response to trends I noticed among crafters who use my patterns to make and sell (or gift!) blankets. These 3 patterns are the most popular – by far – among folks creating blankets for these purposes.
Crochet beginners! Crafters who make blankets to gift or sell need quick, easy, simple patterns which do not involve complex stitches or construction. Because of that, these crochet blanket patterns are also great for folks who are just starting on their crochet adventure.
Crochet Pattern Bundle Contents
These are the 3 crochet blanket patterns included in this bundle. You can click the link to find the blanket pattern sold individually in my shop or just to see more photos and decide if this is a value for you.
If you are a beginner, a seller, a gifter who wants to have five great crochet blanket patterns to choose from, I made this bundle for you! Included are all of the blanket patterns from the 3 Blankets to Make and Sell bundle, plus 2 more that are also perfect for those purposes.
Perfect for…
Blanket sellers! I created this bundle in response to trends I noticed among crafters who use my patterns to make and sell (or gift!) blankets. These 5 patterns are the most popular – by far – among folks creating blankets for these purposes.
Crochet beginners! Crafters who make blankets to gift or sell need quick, easy, simple patterns which do not involve complex stitches or construction. Because of that, these crochet blanket patterns are also great for folks who are just starting on their crochet adventure.
Crochet Pattern Bundle Contents
These are the 5 crochet blanket patterns included in this bundle. You can click the link to find the blanket pattern sold individually in my shop or just to see more photos and decide if this is a value for you.
My Relaxghan Series is my second most popular crochet pattern bundle on Etsy. I decided to create a series of blanket patterns that were designed with an air of peacefulness and tranquility. Patterns that you can work on whenever you like, without stressing over any element. I’ve been saying lately: Crochet is meant to de-stress you, not re-stress you!
Perfect for…
Stash busting! These 5 crochet blankets are the perfect makes for busting through your stash and yarn remnants, and making it look great. One of the main points of my Relaxghans Series is for crafters to let go of their fears and obsessions with color selection and color placement.
Creative makers! All of the crochet blanket patterns in this bundle are geared toward making a creative mind very happy. Choose and mix bright colors without a care, channeling and indulging your inner creative spirit with every stitch.
Crochet Pattern Bundle Contents
These are the 5 crochet blanket patterns included in this bundle. You can click the link to find the blanket pattern sold individually in my shop or just to see more photos and decide if this is a value for you.
My Relaxghan Series is my second most popular crochet pattern bundle on Etsy. I decided to create a series of blanket patterns that were designed with an air of peacefulness and tranquility. Patterns that you can work on whenever you like, without stressing over any element. I’ve been saying lately: Crochet is meant to de-stress you, not re-stress you!
Perfect for…
Slow living! These 5 crochet blankets are perfect for when you want to take your time and craft something slowly to savor the process. Slow living has become a priority for more crafters, and these projects are a great fit for the relaxed lifestyle.
Color lovers! All of the crochet blanket patterns in this bundle include many colors, which is great for crafters who love mixing unique palettes in their crochet blanket projects.
Crochet Pattern Bundle Contents
These are the 5 crochet blanket patterns included in this bundle. You can click the link to find the blanket pattern sold individually in my shop or just to see more photos and decide if this is a value for you.
Hello, lovely! Today I want to introduce you to one of the crochet blanket patterns in my book, The Art of Crochet Blankets. I named it Sun and Sky because of the beautiful colors featured in the two corner-to-corner (C2C) panels. I hope you enjoy this little presentation of my crochet pattern.
In this post, I will:
Show photos of the Sun and Sky Blanket
Reveal the woven wall hanging that inspired Sun and Sky
Tell you about the yarns used in Sun and Sky
Give you a crochet schedule to make this blanket in 8 weeks
Give you ways to share your WIP/FO on Facebook, Ravelry, and Instagram
Show you my book, The Art of Crochet Blankets
Thank you for reading!
Sun and Sky Crochet Blanket
The texture of this crochet blanket is just so fun. It is perfect for a baby for tummy time, and even as a throw for a sitting room with white decor. The large bobbles are just YUM!
If you have followed me for any length of time, you know I am a sucker for a splash of color, and having the warm tones together on one panel, and the cool tones on the other had me absolutely smitten.
I’m adding some more shots for you to see the detail. I had actually never worked a corner-to-corner (C2C) design before this project, and let me tell you, it was a ton of fun! I highly recommend this method, and in the book there is a small chart included for you to see how to make the stitches. Gorgeous!
The Inspiration Behind Sun and Sky
Sun and Sky is in the Weaving chapter of my book, and it is inspired by a project from the hands of Maryanne Moodie. You can see her work on Instagram, or visit her website for more information about her works.
Here is lovely Maryanne in her studio:
This is the project I chose as inspiration for my Sun and Sky piece. Isn’t it just gorgeous and so unique? I just loved the texture in this wall hanging, and it was so fun translating it to a crochet pattern.
You can probably see how right away, I chose corner-to-corner crochet for the two color panels. The panels really lend themselves to that method. And then the generously-sized bobbles made with two strands of yarn held together mimic the roving woven portions at top, middle, and bottom.
Buy Yarn to Make Sun and Sky
Use the yarns and quantities listed in the book (Scheepjes Merino Soft and Scheepjes Colour Crafter), or use the following suggested alternate yarn. This section has affiliate links marked with an asterisk. Ordering through these links will gain me a small commission (at no additional cost to you) and helps to support my free patterns.
Follow me on Instagram @cypresstextiles and use hashtags for your pics (see below)
Weekly Crochet Timeline (8 Weeks)
As stated, I have omitted dates here in this sample timeline, and shifted the focus from deadline-based to increment-based. This way you can focus on chunking the blanket up into bite-sized pieces and it doesn’t seem so overwhelming.
Week 1: Work half of first c2c panel
Week 2: Work second half of first c2c panel
Week 3: Work half of second c2c panel
Week 4: Work second half of second c2c panel
Week 5: Work top bobble panel
Week 6: Work middle bobble panel
Week 7: Work bottom bobble panel
Week 8: Join panels and work small border
All done!
Get involved!
Ways to share your WIP pics (and any concerns!) with others in this community.
Step 1: Take photos of your progress each week and make note of any questions you have.
Step 2: Share your photos and questions in any or all of the following ways. I recommend choosing the same day each week to post
Facebook
Post in my Facebook Group where the CALers will meet weekly to check in. PLEASE INCLUDE in your post:
The name of the blanket – This way a simple search in the group will pull up all of the posts for that blanket. (Remember all 18 of the pattern CALs are going on at the same time.)
What Week you are on in the CAL timeline
Example: If you’re on Week 3, put “Cozy Corner Blanket – Week 3” somewhere in your post.
Instagram
Post on Instagram using all three of these hashtags. This is important because it will help me see and share your posts on Instagram. It will also allow folks to click the hashtags and see everyone’s posts together in one place.
#cypresstextiles
#theartofcrochetblankets
#cozycornerblanket
Ravelry
Here is the page for Sun and Sky. Interacting with the Ravelry page will help people find my book page and grow the CAL community. Plus, folks who are outside my social media circles can see your projects and be inspired. Go ahead and do the following two things.
Put it in your favorites!
Add your project so others can be inspired.
Other ways to get involved with and support my book
Do you like my book? Add a nice review on Amazon.com.
Share a review of my book on your blog if you like! Head to my book info page to see the Press Release and Media Kit PDFs for all the deets. Send me the link to my email cypresstextiles @ gmail . com, and I will add a snippet of your review and link to your blog in the Reviews section.
The Art of Crochet Blankets
I still can’t believe it sometimes that I wrote a crochet pattern book! The Art of Crochet Blankets will help you create your own colorful crochet blankets as unique works of art for your home. Inside, you’ll find details on how to translate art to hook with 18 bold and one-of-a-kind crochet afghan patterns influenced by the works of their feature artist.
Discover the inspiration that lies beyond the world of crochet with The Art of Crochet Blankets.
Details on how to translate art to hook with 18 bold and unique crochet afghan patterns.
Modern quilts, fabric designs, tapestry weaving, digital art, and more become the source of unique projects for a more artful home.
Biographies and beautiful photos profiling 6 inspiring modern makers–Tula Pink, April Rhodes, Maryanne Moodie, Fransisco Valle, Maud Vantours, and Caitline Dowe-Sandes.
Non-Crochet Artists Featured
My book is divided into six chapters, each one with a different artist representing six different non-crochet art mediums.
Hi, there and welcome to my ever-changing WIP Gallery! I get asked questions about my current projects often, so to make things easier, I decided to put a short introduction to them all in one place. Here I will show you what I am working on, tell you a bit about it, and let you know where you can get the supplies to make your own.
Here’s the deets on all my current WIPs!
Note: I am affiliated with the shops that I link, which means I make a small commission on anything you decide to purchase, at no additional cost to you, and rest assured I would never promote anything I am not head over heals in love with.
Botanica Blanket CAL
The Botanica Blanket is perfect for the adventurous beginner or the advanced artist looking for some simple, yet pretty stitching. The adventure lies in the fun layout, so look forward to this make! Measures 60x72in.
The VVCAL is my favorite thing that I do out of all the many things I crochet. Measures about 62x85in. 2016 VVCAL, 2018 VVCAL.
Runs from May 1, 2020 to Sept 10, 2020
Find all of the info on the Main Page – coming soon
Made with Catona 10g Colour Pack, among others
Where to buy the yarn?
Complete yarn packs are being dreamed up, but if you’d like to make this using the Colour Pack, see below. Background color and qty will be released in early April.
After you work up the Soulful Sierra Blanket, it will become your go-to project any time you need a sophisticated piece made quickly. Measures 56x62in.
Gloria is a blanket that has been in the works since about 2015.. Finally it is being released this year! As part of my You can crochet this! series which celebrates newbies as rock stars.
Dates TBD / Measurements TBD
Find all of the info on the Main Page – coming soon
Made with Metropolis 10g Colour Pack, among others
Where to buy the yarn?
Complete yarn packs are being dreamed up, but if you’d like to make this using the Metropolis 10g Colour Pack, see below.
* Links marked with an asterisk are affiliate links, and by shopping through them, your purchase will gain me a small commission that helps me pay for website fees, all at no additional cost to you! Yowza!
Heyooooo! Today’s post is about you and everything you dislike about chevron crochet blanket patterns. The stuff you don’t like about them is the same stuff I aimed to resolve for myself when I set out to design the perfect chevron blanket. Let’s get to it!
The two blankets we will talk about today are Chevron2.0 and Soulful Sierra. The basics of these two designs are the same, but Chevron2.0 is a normal height chevron, and then Soulful Sierra is a deeeeep chevron.
The Chevron2.0 is so popular among custom-blanket-making crafters that I have added it in my pattern bundle on Etsy that is specially curated for folks who want to make a sell or gift blankets. Essentially, the patterns are simple and classic, and they’re crowd-pleasers. Chevron2.0 fits the bill!
3 Blankets to Make and Sell (etsy link). I have done the research and these are the top three CypressTextiles patterns that people use for making and selling/gifting custom blankets. You can see Chevron2.0 is there looking pretty!
5 Blankets to Make and Sell (etsy link) – This bundle includes two more very popular crochet blanket patterns for gifting and selling.
So What’s Wrong With Other Crochet Chevron Blankets???
Okay, here is a short list of things you may not have even realized you don’t like about chevroning, but these things grind your gears, trust me.
First (this is a biggie) – Chaining a zillion to start the blanket. Chaining a zillion, and then working across the chains, while your eyesight blurs, and your hands cramp is just no fun.
Second – Working 5dc all into one chain – or 2dc, ch2, 2dc, or whatever increase your pattern calls for – to start the foundation of your “peaks”. It never comes out neat enough. That chain stretches out to an unholy size, and it just looks messy. Also, if you have to frog your first row, you can forget about working into those giant stretched out chains again. you’re forced to frog back the whole chain and start over. What a mess!
Third – The unruly snake that your blanket is after just 3 rounds or so. That curled up, snakey mess that your blanket looks like at first – it’s just not desirable…
Fourth – Some folks think of the holes at the increases as a design element, but I really prefer a solid chevron for a more modern look. Holes at the increase or decrease bugs me! This one is personal preference, I guess.
You may think I am making a big deal, but chaining over a hundred can stop me from even starting a project, y’all!! That baby is going to be born already by the time I hype myself up to make that long chain and work across it. The struggle is real, and I have a sneaking suspicion I’m not the only one!
For a baby shower gift, you can just abandon the chevron and switch to a different style of blanket, but what if you want to sell blankets and you get requests for chevron? What if your gift recipient asks for a chevron blanket specifically? What if you’re just really in love with the look of that gorgeous zig-zag and you really want to make one?
A Better Chevron with Base Triangles
How do I eliminate the first three things on the list above? Two words: Base triangles. Base triangles will change your life. You’ll never go back to the long unruly chain!
On the Soulful Sierra deep chevron example below, I have outlined in purple where the base triangle is. There are only 3 triangles for this blanket and it is 50in square! That is because the base triangles are so large, and that’s what also causes the chevron height to be so deep/tall.
I really love the look of the deep chevron. It’s just so modern and simple looking, and has a more mature, sophisticated look than the regular short zig-zag chevron, I feel.
This is an old photo taken with a potato in 2013, but the base triangles are those adorable little blue pieces with the tails hanging down. The chevron is then worked off from there as you can see, and since the triangles are small, the chevron height is short.
In both of these patterns, the top edge of the blanket is squared off so that the blanket has 4 straight edges. Lovely!
Side note: Base triangles also solve the unruly snake problem – life is good!
No More Holes at Peak and Valley
In 2012, I was already making base triangles. You can see the pretty colored pieces in the photos below. BUT, as you can see, I had not quite yet figured out how to make a chevron have increases and decreases without any holes.
Then I worked it out in 2013 and started making beauties like this. (And years later I upgraded from the potato camera lol) The increases and decreases I added in Chevron2.0 and Soulful Sierra are hole-free so that you can enjoy the look of a solid blanket and not worry about little baby toes and fingers poking through.
The decreases I now use involve working a dc 5 together, instead of the previous way which was to just skip 2 or 4 stitches at the “valley”. The increases that I use now are just 5 dc worked into the peak stitch of each chevron, versus the old way of making (2dc, ch2, 2dc) at the peaks. The old methods create holes, while the new way makes a nice solid “fabric”.
Recap
Solve your crochet chevron blanket frustrations!
Make base triangles as instructed in my Chevron2.0 and Soulful Sierra patterns to avoid having to make a long foundation chain. This eliminates a plethora of crochet chevron struggles (okay 3 or 4 at most, but still).
Use the increases and decreases provided in these two patterns which create a more modern solid look, instead of having a chevron blanket with holes at the peaks and valleys.
Bonus WIP: Making Soulful Sierra in Our Tribe Yarn
Above you can see how I used the larger base triangles to make the foundation of this blanket.
This colorway is so pretty; I just love the regal and romantic colors. Perfect for a newlywed couple!
Thank you for stopping in to see how to improve your crochet chevron blanket experience with my two patterns, Chevron2.0 and Soulful Sierra. You really will never want to go back to making that loooooong starting chain, I promise.
Hello, gorgeous crafter! Let me tell you a story. One day I became absolutely obsessed with the idea of turning printed tessellation designs into crochet blankets and a few sketches later, this blanket design was born!
Dimensions is a 3D illusion piece, so you should choose your colors accordingly if you want the 3D effect. (You can see what I mean if you look at the photo of the blanket laid flat.) Otherwise, have at it! Go wild! And enjoy this fun make.
You will need the following colors in the the quantities listed.
Yarn A: 814 x 4
Yarn B: 815 x 4
Yarn C: 819 x 4
Yarn D: 805 x 4
Yarn E: 813 x 4
Shop Stone Washed
To shop this yarn, click below – I will receive a small commission on any purchase made, at no additional cost to you. Every little bit helps to support my work.
To keep the 3 Dimensional effect, you can use some of the suggest color combinations below!
From left to right, top to bottom, here are the color numbers for these four suggested combos. You will need 4 balls of each, plus 4 balls of background color (total 20 balls of Stone Washed).
820, 836, 835, 807
801, 831, 833, 832
819, 817, 812, 806
808, 810, 830, 803
Notions and Sizing
US size 4.25mm hook for blanket body / US size 3.75mm hook for border
Finished piece measures 42x52in and is easily resized
Stitch Guide (US Terms)
2dccl (yoh, insert hook into sp, yoh, pull up lp, draw yarn through 2 lps) 2 times, yoh, draw yarn through 3 all lps
2trcl * yoh 2 times, insert hook in st/sp, yoh, pull up lp, (yoh, draw yarn through 2 lps) 2 times, rep from * 1 time in same st/sp, yoh, draw yarn through all 3 lps
ch chain
beg beginning
beg dc (sc, ch 1) – counts as 1 dc
beg dc2tog beginning dc 2 together: beg dc, dc in next st (note: beg dc does not count as a st in this case)
beg split dc3tog beg dc, sk 1, dc (note: beg dc does not count as a st here)
beg tr (sc, ch2) – counts as 1 tr
dc double crochet
dc2tog dc 2 together: (yoh, insert hook in next st/sp, yoh, pull up lp, yoh, draw through 2 lps) 2 times, yoh, draw through all 3 lps
dc3tog dc 3 together: (yoh, insert hook in next st/sp, yoh, pull up lp, yoh, draw through 2 lps) 3 times, yoh, draw through all 4 lps
dc5tog dc 5 together: (yoh, insert hook in next st/sp, yoh, pull up lp, yoh, draw through 2 lps) 5 times, yoh, draw through all 6 lps
lp(s) loop(s)
rem remaining
rep repeat
RS/WS right side/wrong side of work
sc single crochet
sk skip
sp space
split dc3tog *yoh, insert hook in next st/sp, yoh, pull up lp, yoh, draw through 2 lps** sk 1, rep from * to ** 1 time, yoh, draw through all 3 lps
ss slip stitch
st(s) stitch(es)
yoh yarn over hook
Instructions
Note: Six short horizontal panels are made as follows: the portions labeled B and C in the schematic are worked first, in a continuous strip from the right side to the left side of the blanket. Then, the triangle gaps labeled D and E are filled in across the strip and an sc row is worked across the top and bottom edges of the strip to complete the panel with a neat edge. Panels are joined with color A, and a simple border is added to complete the piece.
Panel (Make 6)
Center portion of panel
Row 1 (WS) With Yarn B, sl knot, ch 32, sc in second st from
hook, and in all 31 rem chs, turn. [31 sc]
Row 2 Beg dc2tog, dc in all sts across to final 2 sts,
dc2tog, turn. [2 dc2tog, 27 dc]
Row 3 Sc in all sts, turn. [29 sc]
Row 4 Beg split dc3tog, (ch 1, sk 1, dc) across to final 3
sts, ch 1, split dc3tog, turn. [2 split dc3tog, 11 dc, 12 ch-sp]
Row 5 Rep Row 3, turn. [25 sc]
Rows 6-15 Rep Rows 2-5 2 times, then work Rows 2 and 3 once
more, do not turn, cut yarn. [11 sc on Row 15]
Mark the beg dc2tog of Row
14 (mark the dc, not the beg dc)
Row 16 (WS) With Yarn C, ss in first st, rep Row 3, turn. [11 sc]
Row 17 (Beg dc, dc) in first st, dc across to final st, 2 dc,
turn. [13 dc]
Row 18 Rep Row 3, turn. [13 sc]
Row 19 (Beg dc, ch 1, dc) in first st, (ch 1, sk 1, dc)
across to final st, ch 1, dc in same st as last dc, turn. [9 dc, 8 ch-sp]
Row 20 Rep Row 3, turn. [17 sc]
Rows 21-30 Rep Rows 17-20 2 times, then work Rows 17 and 18 once
more, do not turn, cut yarn. [31 sc on Row 30]
Row 31 Using Yarn B, ss in first st, 31 sc, turn.
Rows 32-120 Rep Rows 2-31 2 times, and then Rows 2-30 1 time. Continue to fill triangle gaps.
Fill triangle gaps
Row 1 With RS facing and using Yarn D, ss in side bars of
final sc on Row 1 from “Center portion of panel.” Sc in same st, and sc 24 sts
evenly across, placing final sc in marked st, (insert hook inside bars of sc on
next row, pull up lp) 2 times, yoh draw through all 3 lps. Sc 25 sts evenly
across, placing final sc in side bars of final sc on Row 30, turn. [1 decrease
at center, 50 sc]
Row 2 Sk 1, ss in 2 sts, 2 sc, 2 hdc, 17 dc, dc3tog, 17 dc,
2 hdc, 2 sc, turn. [1 dc3tog, 34 dc, 4 hdc, 4 sc]
Row 3 Sk 1, ss in 2 sts, 2 sc, 2 hdc, 12 dc, dc5tog, 12 dc,
2 hdc, 2 sc, turn. [1 dc5tog, 24 dc, 4 hdc, 4 sc]
Row 4 Sk 1, ss in 2 sts, 2 sc, 2 hdc, (dc, ch 1, sk 1) 4 times, dc3tog, (ch 1, sk 1, dc) 4 times, 2 hdc, 2 sc, turn. [1 dc5tog, 8 dc, 4 hdc, 4 sc]
Row 5 Sk 1, ss in 2 sts, 2 sc, 2 hdc, 4 dc, dc3tog, 4 dc, 2 hdc, 2 sc, cut yarn.
Rep for rem 3 triangle gaps on this side, and then rotate panel to fill lower 4 triangle gaps in the same manner, using Yarn E. Continue to edge top and bottom.
Edge top and bottom
With panel RS facing and using Yarn D, ss in top right corner. Sc in all sts across to top left corner (including all slipped sts), cut yarn. Rotate piece, join Yarn E with a ss in the top right corner, sc in all sts across, being sure that you have the same amount of sts as the opposite side, cut yarn. 1 panel is complete.
Make remaining 5 panels.
Sew 6 panels together to form blanket body
Using Yarn A, whip st panels together to form blanket body as shown in schematic.
To whip st the pieces:
Cut a long length of yarn, about 2 arm lengths if you like.
Holding panels with wrong sides together, ss with Yarn A through both loops of first st on both panels, insert hook in next st front to back through both panels, treating them as one, being sure to go through both loops of sts.
Grab yarn and pull entire length of yarn through to the front side.
Repeat across, pulling yarn to the front side in each stitch, sewing the panels together.
Note: Let the whip sts rest along the top edge of the seam, and do not “cinch” the sts tight. When you open the panels, and lie flat, you should see the nice neat sts.
Add Border
Rnd 1 Using Yarn A and smaller hook, ss in top right corner, (3sc in corner, sc evenly across being sure to make a multiple of 3) 4 times, ss in first sc.
Rnd 2 * (Sc, ch3, sc) in corner st, (ch3, sk2, sc) across to corner, ch3, rep from * 3 times, ss in first sc.
Rnds 3-7 Ss in first ch, (sc, dc in sp) – counts as a 2dccl here, * ch3, 2dccl in same sp, (2dccl, ch2, 2dccl) in all sps across to next corner sp, 2dccl in corner sp, rep from * 3 times omitting final 2dccl, ss in dc st, cut yarn after rnd 7.
Rnd 8 Using Yarn D, ss in top right corner sp of blanket, (beg tr, tr) in sp – counts as first 2trcl, * (ch2, 2trcl) 3 times in same sp, (2trcl, ch2, 2trcl) in all sps to next corner, 2trcl in corner sp, rep from * 3 times omitting final 2trcl, sk beg tr, ss in tr, cut yarn.
Rnd 9 Using Yarn E, ss in top right corner sp of blanket, repeat Rnd 3, do not cut yarn.
Rnd 10 Beg dc in corner sp (dc, ch3, ss in third ch from hook, 3dc) in same sp, (2dc, ch3, ss in third ch from hook, 3dc) in all sps around to beginning, ss in beg dc, cut yarn.
Yay! All done! Weave ends, block, and give yourself a fist bump!
Note: Sample blanket and all photography are by the talented and lovely Andrea Grimaldi.
Copyright Information
No pattern or other material may be reproduced — mechanically, electronically, or by any other means, including photocopying — without written permission of Rachele Carmona. This applies to all content on CypressTextiles.net, BabyLoveBrand.net, and all other sites used by Rachele Carmona. Paid patterns are for personal use only. You may sell your finished crocheted items, but do not use my photos to sell your items.
Thank you!! Your support means the world, and I am living the dream of practicing my art while putting food on the table, all because you guys and gals enjoy my designs. Wild, huh? Well, I’m forever grateful. 🙂
This yarn is called Mighty for a reason! It is perfect for any project where you will need strong, durable material, just like this crochet bag I am creating. Shop this yarn at the links below, or read more about it at my official review.
Shop Mighty at WoolWarehouse (Use this affiliate link to purchase and I’ll receive a small commission to help keep CypressTextiles running – all at no additional cost to you!)
Color Combinations
Scheepjes Mighty has a limited color range at this moment. There are six neutral and earthy unicolours, three two-tone twisted blends, and two indigo shades.
Here is the color combination that I used for this sample bag. I was sent these five colors to play with from Scheepjes headquarters, and something just screamed “try your first bag!” at me. The material is perfect for a rugged and durable bag.
The first two colors I used for the large triangles at the bottom of the bag, the center as an accent, and the final two shades for the granny squares at the top.
If I could choose colors to make a second bag, I would use the ones below! The tans for the triangles, the darker two-tone as the accent, and then a couple of pale grey/blue to use for the granny squares at the top. I think this would be so pretty and very sophisticated. Actually, this project is so fast and fun, I have considered making and selling these bags in my shop as finished objects. I could make one per day, it is so quick!
Work in Progress
I took a few in-progress shots so you can get an idea of how this bag came together. I crochet joined these triangles together for the bottom of the bag. So at the center of the blue triangles will be the “side seams” of the bag.
Here is a close-up of how I sewed the bag together. I am using a technique that I created in 2012 called “PLT Join” which is really a great method when you want to join pieces as you go, in a tight and flat manner.
You can see how the join turns out below. I love using the two-tone yarn as this joining accent! It came out so pretty.
I also took a few shots of the granny square crochet at the top of the bag. It is something I had to end up pulling out in the end, because I miscalculated the width of the granny squares and it turned out that I should have made 8 squares instead of 10. But it all worked out in the end and the bag turned out lovely (stay tuned for the final reveal).
Learn New Skills
These are just some of the skills you will learn as you create your Learner bag. This pattern will be designed for folks who have never made a crochet bag and are quite intimidated by the idea of constructing the bag and then lining it and adding handles. Trust me, I felt the same way! Now I feel like I could make a hundred more of them!
Granny square with no visible starting corner
Solid chevron (half square triangle) with no holes at “peak”
PLT Join – a totally flat join-as-you-go method
Make a project by building on previous pieces – completely no-sew crochet
Line a bag using an old pillowcase
Attach leather handles to bag
You can see below that for this project, each piece builds off of the previous section. So you don’t have to sew a bunch of pieces together, which for me means this crochet bag is just the bees knees!
Also pictured are my blue and white scissors, which were gifted to me at our Scheepjes Bloggers’ Days in the Fall 2019 – you can find Scheepjes scissors here, and there are often different colors and metals to choose from.
I collect blue and white china, so these scissors were really a special gift!
One more shot for you of the construction process for this crochet bag. I am truly chuffed to be able to bring you this pattern in the future! It really is for someone who has never made a bag and is scared to try. Actually when I began telling crafters I was making a bag that was lined and with handles, many gave me the feedback that they have always been scared to line their bags – well it is a must, I assure you! What a game changer it is!
So never fear, this Learner Bag is the perfect starter pattern for you. Free pattern coming later in the month!
Thank you for popping in and checking out something I have been working on! I appreciate it 🙂
Hello, lovely! Today I wanted to introduce you to something I have had in the vault for some time. Ever since I had a weird idea to make a few blankets from tessellations. Two years ago, in January 2018, I started sketching out ideas for a few tessellation blankets. One of them became the Dimensions Blanket! Made using beautiful and popular Scheepjes Stone Washed.*
Dimensions Blanket Pattern
The Dimensions Blanket pattern is already available on Etsy and Ravelry, if you’d like to check it out! Or it also will be available to everyone next week!
Social Media: Use hashtags #DimensionsBlanket and of course #CypressTextiles
The lovely sample blanket and all blanket photography is by the talented Andrea Grimaldi.
Designing Dimensions
Here is the actual inspiration tessellation image I used to create this design. I love the illusion that appears because of the four different shades, but it would still look cute in any colors.
The first scraps of designy bits! This is when I was just beginning to see how I would create the shapes, and I just used any colors of Stone Washed that I had on hand.
Choosing a Color Combo
The colors I used for this blanket are in the photo below – and what a gorgeous pile, I must say! You’ll choose 4 colors for the main blanket body design, and then 1 as a “background color”, which is the pale grey in the photo below.
These colors are:
Yarn A: 814 x 4 balls (Background)
Yarn B: 815 x 4 balls
Yarn C: 819 x 4 balls
Yarn D: 805 x 4 balls
Yarn E: 813 x 4 balls
I’ve picked out a few more color combos that you may like for this blanket! Just choose a background color to go with them and you’re all set.
From left to right, top to bottom, here are the color numbers for these four suggested combos. You will need 4 balls of each, plus 4 balls of background color (total 20 balls of Stone Washed).
820, 836, 835, 807
801, 831, 833, 832
819, 817, 812, 806
808, 810, 830, 803
Shop Scheepjes Stone Washed
Find Stone Washed at the following retail stores, using these affiliate links. Shopping through these links will gain me a small commission to help support my work, at no additional cost to you!
This blanket was a pleasure to design, and it was so fun working with Andrea who tested everything for me, sight unseen. I love the edging of this one, because it looks like it would fit so well in a nursery. The blanket is perfect for a baby to crawl on with its opulent shapes.
Plus, Andrea caught this great shot of Dimensions with her gorgeous dog, Nesta in the foreground. This may be the highlight of my crochet career, I tell you! What a regal fur-baby.
Thank you as always for stopping in and checking out my latest offering. I appreciate you!
Hey, you! There’s a new project on my hook, as I’ve been gifted Scheepjes Mighty – a brand new yarn for me to work with and try out. I have been on a roll this year with the projects.
You may know I took a lot of breaks last year, but when 2020 hit I made a big list of all the things I want to finish this year and wouldn’t you know, there were 20 of them! So here’s to finishing 20 in 2020! I can cross off one of them when this quick little project is complete.
Let me tell you a bit about Mighty – available at WoolWarehouse*, and then I’ll show you a sneak peek of my new WIP.
Introducing Scheepjes Mighty!
Today I’m sharing with you the Jute and Cotton blend powerhouse of the century. Seriously this yarn is perfect for any rugged project that must be made in strong and durable yarn. You could make baskets, macrame, stuffed toys, trivets, place-mats, shopping bags, and more. Available here!*
So what is Jute?
I did not even know what Jute was, and nobody that I showed Mighty to knew what it was either. But I have to say, after doing some research, it sounds like an environmentally friendly fiber.
This natural, wastewater created and plant-based yarn fuses the extreme durability, tensile strength and sturdiness of Jute fibre with the softness of Cotton, allowing you to make usable accessories, such as handbags and homeware items, that will withstand frequent use and last a lifetime.
Jute has many advantages as a home textile, either replacing cotton or blending with it. It is a strong, durable, color and light-fast fiber. Its UV protection, sound and heat insulation, low thermal conduction and anti-static properties make it a wise choice in home décor. Also, fabrics made of jute fibers are carbon-dioxide neutral and naturally decomposable. These properties are also why jute can be used in high performance technical textiles.
Moreover, jute can be grown in 4–6 months with a huge amount of cellulose being produced from the jute hurd (inner woody core or parenchyma of the jute stem) that can meet most of the wood needs of the world. Jute is the major crop among others that is able to protect deforestation by industrialization.
Thus, jute is the most environment-friendly fiber starting from the seed to expired fiber, as the expired fibers can be recycled more than once.
Known as the ‘golden fibre’ jute is one of the longest and most used natural fibre for various textile applications. Jute fibre is 100% bio-degradable and recyclable and thus environmentally friendly. A hectare of jute plants consumes about 15 tonnes of carbon dioxide and releases 11 tonnes of oxygen. Cultivating jute in crop rotations enriches the fertility of the soil for the next crop. Jute also does not generate toxic gases when burnt.
Yarny Details
Fiber Content: 32% Jute, 68% Cotton
Needle / Hook Size: 4-4.5mm
Yarn Weight: Sport
Ball Weight: 50g
Length: 80m
I felt so special to be able to try out Mighty that I pulled out my Namaste Maker’s Backpack and my shiny new planner too. Feeling so spoiled – all the heart eyes! Peep my fabulous 2020 planner. This is the 17-Month Do It All Planner by Orange Circle Studio – I got this on Amazon. You can browse them here at my affiliate link, and I get a small commission at no additional cost to you!
I’m Totally Famous Now
Here is the promo shot used for Mighty – and guess what! My Shavasana Motif is featured – d’aaaawwww so lovely. No paparazzi please, hehe. Find the free pattern for the Shavasana Motif here.
Mighty Color Range
And finally, here is the breakdown of the color range for Scheepjes Mighty Yarn. There are 6 lovely solid neutrals, 3 two-tone twisted blends, and 2 indigo shades. So pretty!
I took a closer pic of the two-toned shades that I have, and they are lovely! Reminiscent of twine, but this yarn is so much more than just twine. It has a really special quality when worked up.
And here are the two solid color tones that I have. I also have a grey solid tone, but I have used it all up in my project WIP!
A Mighty Work in Progress
Here’s the sneak peek of what I decided to make with this yarn! I used all of the grey ball in this portion of the piece. I asked around what everyone thought it was, and lots of folks said blanket or shawl, since wow I am really just a one-trick pony, and very predictable. BUT – drum roll please – this is a bag! Yaasssss!
Whoop whoop! Another peek at the bag in progress… I absolutely cannot wait to share more of this with you. Look for more progress pics coming soon.
* Links marked with an asterisk are affiliate links, and by shopping through them, your purchase will gain me a small commission that helps me pay for website fees, all at no additional cost to you! Yowza!
These are all affiliate links, which means that if you shop through them, I get a small commission to keep things running – at no additional cost to you!
2dccl (yoh, insert hook into sp, yoh, pull up lp, draw yarn through 2 lps) 2 times, yoh, draw yarn through all 3 lps
3dccl (yoh, insert hook into sp, yoh, pull up lp, draw yarn through 2 lps) 3 times, yoh, draw yarn through all 4 lps
4dccl (yoh, insert hook into sp, yoh, pull up lp, draw yarn through 2 lps) 4 times, yoh, draw yarn through all 5 lps
4-dc popcorn 4dc in st/sp indicated, remove lp from hook, insert hook front to back through first dc, grab lp, pull lp to front to close popcorn
ch chain
beg beginning
beg dc (sc, ch 1) – counts as 1 dc
dc double crochet
lp(s) loop(s)
picot ch3, sc in previous st/ch
puff st (yoh, insert hook in st/sp indicated, yoh, pull up lp) 3 times, yoh, draw yarn through all lps
rem remaining
rep repeat
RS/WS right side/wrong side of work
sc single crochet
sk skip
sp space
ss slip stitch
st(s) stitch(es)
yoh yarn over hook
Instructions
Note: I do not chain 1 before the first sc of a row. I just begin with the sc in the st/sp indicated, without a “turning ch1.”
Row 1 (RS) With SKIES Heavy and 5mm hook, sl knot, ch3, ss in
third ch from hook to make ring, all in ring: (sc, ch1) 3 times, sc, turn. [4
sc, 3 sp]
Row 2 (Sc, ch1, sc, ch1) in each of 3 sp omitting final ch1,
turn. [6 sc, 5 sp]
Note: On Row 2, the third sp
is the corner sp.
Rows 3-36 (Sc, ch1, sc, ch1) in first sp, (sc, ch1) in all sps
across to corner sp, (sc, ch1, sc, ch1) in corner sp, (sc, ch1) in all sps to
final sp, (sc, ch1, sc) in final sp, turn. [74 sc, 73 sp]
Row 37 (Beg dc, ch1, 2dc) in first ch, (ch1, dc in next sp)
across to corner sp, ch1, (2dc, ch2, 2dc) in corner sp, (ch1, dc in next sp)
across to final sp, ch1, (2dc, ch1, 2dc) in final sp, turn. [80 dc, 75 sp]
Rows 38 and 39 (Beg dc, ch1, 2dc) in first ch, ch1, sk1, dc, (ch1, dc in next dc) across to next corner sp, ch1, (2dc, ch2, 2dc) in corner sp, ch1, sk1, dc, (ch1, dc in next dc) across to final sp, ch1, (2dc, ch1, dc) in final sp, turn. [88 dc, 83 sp]
Row 40 (Sc, ch3, sc) in every sp across, cut yarn. [166 sc,
83 sp]
Row 41 With WS facing and using 3mm hook, join SKIES Light
with ss in first sp, (sc, ch3, sc) in same sp, (ch3, sc in next sp) across to
corner sp, ch3, (sc, ch3, sc) in corner sp, (ch3, sc in next sp) across to
final sp, ch3, (sc, ch3, sc) in final sp, turn. [86 sc, 85 sp]
Row 42 2sc in first sp, 3sc in all sps to final sp, 2sc in
final sp, turn. [253 sc]
Row 43 (Sc, ch3, sc) in first sc, (ch2, sk1, sc) across to corner sc, ch2, (sc, ch3, sc) in corner sc, (ch2, sk1, sc) across to final sc, ch2, (sc, ch3, sc) in final sc, turn. [130 sc, 129 sp]
Row 44 (Beg dc, ch1, 3dc) in first sp, * sk 1 sp, (2dc, ch1,
2dc) in next sp, rep from * across to corner sp (3dc, ch3, 3dc) in corner sp,
** sk 1 sp, (2dc, ch1, 2dc) in next sp, rep from ** across to final sp (3dc,
ch1, dc) in final sp, turn. [262 dc, 65 sp]
Row 45 (Beg dc, ch1, 3dc) in first sp, (2dc, ch1, 2dc) in all
sps across to corner sp, (3dc, ch3, 3dc) in corner sp, (2dc, ch2, 2dc) in all
sps across to final sp, (3dc, ch1, dc) in final sp, turn. [262 dc, 65 sp]
Row 46 (Beg dc, ch1, 3dc) in first sp, (ch1, dc, ch2, dc) in
all sps across to corner sp, ch1, (3dc, ch3, 3dc) in corner sp, (ch1, dc, ch2,
dc) in all sps across to final sp, ch1, (3dc, ch1, dc) in final sp, turn. [138
dc, 129 sp]
Rows 47-49 (Beg dc, ch1, 3dc) in first sp, (ch1, dc, ch2, dc) in all
ch-2 sps across to corner sp, ch1, (3dc, ch3, 3dc) in corner sp, (ch1, dc, ch2,
dc) in all ch-2 sps across to final sp, ch1, (3dc, ch1, dc) in final
sp, turn. [138 dc, 129 sp]
Row 50 (Beg dc, ch1, 3dc) in first sp, ch1, 9dc in first ch-2 sp, (ch1, dc, ch2, dc) in all ch-2 sps across to within 1 ch-2 sp before corner sp, ch1, 9dc in ch-2 sp, ch1, (3dc, ch3, 3dc) in corner sp, ch1, 9dc in ch-2 sp, (ch1, dc, ch2, dc) in all ch-2 sps across to within 1 ch-2 sp before final sp, ch1, 9dc in ch-2 sp, ch1, (3dc, ch1, dc) in final sp, turn. [166 dc, 125 sp]
Row 51 (Beg dc, ch1, 3dc) in first sp, sk 3 dc, (ch1, dc in next dc) 9 times, (ch1, dc, ch2, dc) in all ch-2 sps across to 9-dc group, sk 1 dc, (ch1, dc in next dc) 9 times, ch1, (3dc, ch3, 3dc) in corner sp, sk 3 dc, (ch1, dc in next dc) 9 times, (ch1, dc, ch2, dc) in all ch-2 sps across to 9-dc group, sk 1 dc, (ch1, dc in next dc) 9 times, ch1, (3dc, ch1, dc) in final sp, turn. [166 dc, 157 sp]
Row 52 (Beg dc, ch1, 3dc) in first sp, ch1, sk 1 sp, (2dccl in next sp, ch2) 8 times omitting final ch, dc in next ch-2 sp, (ch1, dc, ch2, dc) in all ch-2 sps across to within 1 ch-2 sp before corner sp, ch1, dc in ch-2 sp, ch1, sk 1 sp, (2dccl in next sp, ch2) 8 times omitting final ch, (3dc, ch3, 3dc) in corner sp, ch1, sk 1 sp, (2dccl in next sp, ch2) 8 times omitting final ch, dc in next ch-2 sp, (ch1, dc, ch2, dc) in all ch-2 sps across to within 1 ch-2 sp before final sp, ch1, dc in ch-2 sp, ch1, sk 1 sp, (2dccl in next sp, ch2) 8 times omitting final ch, (3dc, ch1, dc) in final sp, turn. [32 2dccl, 126 dc, 149 sp]
Row 53 (Beg dc, ch1, 3dc) in first sp, sk 1 sp, (ch2, sc in
next sp) across to within 1 sp before corner sp, sk 1 sp, ch2, (3dc, ch3, 3dc)
in corner sp, sk 1 sp, (ch2, sc in next sp) across to within 1 sp before final
sp, sk 1 sp, ch2, (3dc, ch1, dc) in final sp, turn. [14 dc, 142 sc, 147 cp]
Row 54 (Beg dc, ch1, 3dc) in first sp, sk 1 sp, (ch1, 2dc in
next sp) 7 times, ch1, sk 1 sp, 2dc in all sps across to within 9 ch-2 sps of
corner sp, sk 1 sp, (ch1, 2dc in next sp) 7 times, ch1, (3dc, ch3, 3dc) in
corner sp, sk 1 sp, (ch1, 2dc in next sp) 7 times, ch1, sk 1 sp, 2dc in all sps
across to within 9 ch-2 sps of final sp, sk 1 sp, (ch1, 2dc in next sp) 7
times, ch1, (3dc, ch3, 3dc) in final sp, turn. [286 dc, 35 sp]
Row 55 (Beg dc, ch1, 3dc) in first sp, ch1, (puff st in next sp, ch2) 8 times, sk 2 dc, (dc, ch1, sk1) across to within 8 sp of corner sp, (puff st in next sp, ch2) 8 times, (3dc, ch3, 3dc) in corner sp, ch1, (puff st in next sp, ch2) 8 times, sk 2 dc, (dc, ch1, sk1) across to within 8 sp of final sp, (puff st in next sp, ch2) 8 times, (3dc, ch1, dc) in final sp, turn. [32 puff st, 120 dc, 143 sp]
Row 56 (Beg dc, ch1, 3dc) in first sp, ch1, (4dccl in next
sp, ch3) 9 times, (sk 1 dc, sc in next dc, ch3, sk 1 dc, 3dccl in next dc, ch3,
3dccl in same dc, ch3) across to next puff st, sk 1 dc and 1 sp, (4dccl in next
sp, ch3) 8 times omitting final 2 ch, (3dc, ch3, 3dc) in corner sp, ch1, (4dccl
in next sp, ch3) 8 times, (sk 1 dc, 3dccl in next dc, ch3, 3dccl in same dc,
ch3, sk 1 dc, sc in next dc, ch3) across to within 1 sp of next puff st, (4dccl
in next sp, ch3) 9 times omitting final 2 ch, (3dc, ch1, dc) in final sp, turn.
[34 4dccl, 52 3dccl, 14 dc, 26 sc, 117 sp]
Row 57 (Beg dc, ch1, 3dc) in first sp, (ch3, sc in next sp)
10 times, (ch1, 2sc in next sp, 5sc in next sp, 2sc in next sp) across to next
4dccl, ch1, (sc in next sp, ch3) 8 times, (3dc, ch3, 3dc) in corner sp, (ch3, sc
in next sp) 8 times, (ch1, 2sc in next sp, 5sc in next sp, 2sc in next sp) across
to within 1 sp of next 4dccl, ch1, (sc in next sp, ch3) 10 times, (3dc, ch1, dc)
in corner sp, turn. [14 dc, 270 sc, 67 sp]
Row 58 (Beg dc, ch1, 3dc) in first sp, (ch3, sc in next sp)
10 times, * sc in next ch-1 sp, sk 3 sc, (ch2, 2dccl in next sc) 3 times, ch2,
sk 3 sc, rep from * across to within 8 sps of corner sp, (sc in next sp, ch3) 8
times, (3dc, ch3, 3dc) in corner sp, (ch3, sc in next sp) 8 times, ** sc in next
ch-1 sp, sk 3 sc, (ch2, 2dccl in next sc) 3 times, ch2, sk 3 sc, rep from **
across to within 10 sps of final sp, (sc in next sp, ch3) 10 times, (3dc, ch1,
dc) in final sp, turn. [78 2dccl, 14 dc, 64 sc, 73 sp]
Row 59 (beg dc, ch1, 3dc) in first sp, ch3, * sc in next sp, dc
in next sp, (ch1, dc in same sp) 3 times, rep from * 4 times, ** (sc in next
sp, ch3) 3 times, sc in next sp, rep from ** across to within 8 sps of corner
sp, *** dc in next sp, (ch1, dc in same sp) 3 times, sc in next sp, rep from
*** 3 times, ch3, (3dc, ch3, 3dc) in corner sp, ch3, **** sc in next sp, dc in
next sp, (ch1, dc in same sp) 3 times, rep from **** 3 times, ***** (sc in next
sp, ch3) 3 times, sc in next sp, rep from ***** across to within 10 sps of final
sp, ****** dc in next sp, (ch1, dc in same sp) 3 times, sc in next sp, rep from
****** 4 times, ch3, (3dc, ch1, dc) in corner sp turn. [86 dc, 122 sc, 139 sp]
Row 60 (Beg dc, ch3, 3dc) in first sp, (ch3, sc in next sp,
ch2, sc in next sp, ch3, 4-dc popcorn in next sp), 5 times, (ch3, sc in next sp)
across to next dc, ch3, (sc in next sp, ch3, 4-dc popcorn in next sp, ch3, sc
in next sp, ch2) 4 times, sc in next sp, ch3, (3dc, ch3, 3dc) in corner sp, (ch3,
sc in next sp, ch2, sc in next sp, ch3, 4-dc popcorn in next sp) 4 times, (ch3,
sc in next sp) across to next dc, ch3, (sc in next sp, ch3, 4-dc popcorn in
next sp, ch3, sc in next sp, ch2) 5 times, sc in next sp, ch3, (3dc, ch1, dc)
in final sp, turn. [18 4-dc popcorn, 14 dc, 118 sc, 141 sp]
Row 61 (Beg dc, ch1, 3dc) in first sp, (ch3, sc in next sp)
across to corner sp, ch3, (3dc, ch3, 3dc) in corner sp, (ch3, sc in next sp)
across to final sp, ch3, (3dc, ch1, dc) in final sp, turn. [14 dc, 138 sc, 143
sp]
Row 62 (Beg dc, picot, 3dc) in first sp, (ch3, sc in next sp) 2 times, * picot, sc in next sp, (3dc, picot, 3dc) in next sp, sc in next sp, rep from * 4 times, ** ch1, sc in next sp, (2dccl, ch2, picot, ch2, 2dccl) in next sp, sc in next sp, rep from ** across to within 14 sps of corner sp, ch1, *** sc in next sp, (3dc, picot, 3dc) in next sp, sc in next sp, picot, rep from *** 3 times, (sc in next sp, ch3) 2 times, (3dc, picot, 3dc) in corner sp, (ch3, sc in next sp) 2 times, **** picot, sc in next sp, (3dc, picot, 3dc) in next sp, sc in next sp, rep from **** 3 times, ***** ch1, sc in next sp, (2dccl, ch2, picot, ch2, 2dccl) in next sp, sc in next sp, rep from ***** across to within 17 sps of corner sp, ch1, ****** sc in next sp, (3dc, picot, 3dc) in next sp, sc in next sp, picot, rep from ****** 4 times, (sc in next sp, ch3) 2 times, (3dc, picot, dc) in final sp, cut yarn. [65 picot, 120 dc, 52 2dccl, 96 sc, 88 sp]
Yay! All done! Weave ends, block, and give yourself a fist bump!
Copyright Information
No pattern or other material may be reproduced — mechanically, electronically, or by any other means, including photocopying — without written permission of Rachele Carmona. This applies to all content on CypressTextiles.net, BabyLoveBrand.net, and all other sites used by Rachele Carmona. Paid patterns are for personal use only. You may sell your finished crocheted items, but do not use my photos to sell your items. Take your own photos please.
Remember this WIP from December? I have been working on this shawlette for a little while and have really enjoyed making something that’s quasi-blanketarian, but a smaller and faster project. It’s like a small half blanket and just as engaging and lovely. I mentioned this once or thrice, but expect more shawl patterns in my future!
Links marked with an asterisk and links in the shopping info sections are all affiliate links, and shopping through them will help support my work – at no additional cost to you! How cool is that?!
Made from an all-natural 100% Premium Blend cotton, the Scheepjes SKIES yarns are so soft you’d think you were holding a cloud. Dyed using beautiful shades of Indigo; a textile dye dating back to 4000BC, these yarns feature subtle colour contrasts and a hand dyed appearance. Ranging from the pale blue of a partially overcast Spring morning, to the deep Indigo of a midday Summer sky, transforming then to the sinister olive greens which overcome grassy pastures in the midst of a storm, capture the beauty and volatility of our glorious atmosphere with SKIES.
The Scheepjes SKIES collection encompasses 2 lines of yarn; Scheepjes SKIES Heavy and Scheepjes SKIES Light. With each sharing the same fibre content and range of colours, their differentiating feature is their weight, being DK and fingering respectively. When washing for the first time, we highly recommend using a colour catcher as there may be small amounts of residual dye.
One hank of each Heavy and Light are needed for this project. The color range is beautiful, so any two will look gorgeous. The two hanks pictured in the photo above are:
And now, introducing: the Skyfall Crochet Shawlette! She is a little crochet number that I cooked up when I decided to use the KISS method for designing, and then half-way through, I went all lace on it… Well, hopefully it’s still a fairly simple pattern! I know you like a low-concentration one every now and then.
Hashtags: #SkyfallShawlette and #CypressTextiles as always
But once the SKIES Heavy hank is used up, its time to turn off the TV and turn on the podcast… You have to pay a little more attention on the lacy part, but it isn’t anything too complex.
VVCAL 2016 Border Revival
I based this lacy edging on my 2016 VVCAL Blanket border because everyone really seemed to love it, and loads of folks have used that border on various other blankets. I wanted to use a blanket border for this shawlette edging to prove to myself that a shawl with this construction is just a blanket cut on the diagonal. Turns out, it’s true!
After all this time making blankets and being intimidated by non-blanket makes, I now have a new project obsession. Of course this only comes after I finally got hula hoop mandalas out of my system – only 12 hula hoops later, haha.
Here is Skyfall Shawlette in all her glory.
I had about a million projects brewing in my mind while I was working on Skyfall, and I really wanted to put it aside and start any one of them. But, guess what! Before I could do that, suddenly I was finished. Shawlettes are made of magic.
An Over-the-Shoulder Wonder
Eeeep! I’m enchanted by this piece, and SKIES Light is the best lace yarn I have ever worked with, as the drape is phenomenal and the hand is lovely.
My eldest daughter, Rebecca (13), modeled Skyfall for me – of course she is hiding the fact that she’s just stuffed an entire chocolate chip cookie in her mouth at once, and then casually smiled for the pic.
Skyfall is that perfect little something for Spring just to keep the breeze off your shoulders. It took me a few days to work up, and that’s with a bunch of frogging to get the pattern just right.
With another mouthful of cookies, you can see her modelling the shawlette with the upper edge folded down like a small collar. I do love this look as well!
Thank you for stopping in to see my FO reveal. I’ll release the free pattern on Tuesday!
Introducing, the Namaste Hula Hoop Mandala in DK weight Colour Crafter. Ain’t she purdy?
Information
Scroll down for the free pattern – the first 20 or so rounds are the same as the Chunky Monkey aran weight version, but written without all of the color changes. Then some additional rounds are added here to account for the gauge difference of the yarns, and the fact that we are still using a 36in hula hoop.
Yarn: Colour Crafter – 2 balls any color
Shop this yarn at your favorite shops (affiliate links)
(ETSY / RAVELRY) Find this pattern in a convenient condensed PDF file – NOTE: I have included both Aran wt (note: written for multicolor) and DK wt (note: written for solid color) in one listing. So buying it will get you both yarn weight PDFs! 2 in 1!
2dccl all in st/sp indicated:* yo insert hook, yo, pull up lp, yo, draw yarn through 2 lps on hook, rep from * 1 time, yo, draw yarn through all 3 lps on hook
3dccl all in st/sp indicated:* yo insert hook, yo, pull up lp, yo, draw yarn through 2 lps on hook, rep from * 2 times, yo, draw yarn through all 4 lps on hook
2trcl all in st/sp indicated:* yo 2 times, insert hook, yo, draw up lp, (yo, draw yarn through 2 lps on hook) 2 times, rep from * 1 time, yo, draw yarn through all 3 lps on hook
3trcl all in st/sp indicated:* yo 2 times, insert hook, yo, draw up lp, (yo, draw yarn through 2 lps on hook) 2 times, rep from * 2 times, yo, draw yarn through all 4 lps on hook
4dc-popcorn make 4 dc in st/sp indicated, drop lp from hook, insert hook front to back through first dc, grab lp, pull lp through to front of work to make popcorn
4tr-popcorn make 4 tr in st/sp indicated, drop lp from hook, insert hook front to back through first tr, grab lp, pull lp through to front of work to make popcorn
beg beginning
beg 3dccl all in st/sp indicated:beg dc* yo, insert hook, yo, pull up lp, yo, draw yarn through 2 lps on hook, rep from * 2 times, yo, draw yarn through 4 lps on hook – note: beg dc does not count as a st in this case
beg 3trcl All in st/sp indicated: beg tr, * yo 2 times, insert hook, yo, pull up lp, (yo, draw yarn through 2 lps on hook) 2 times, rep from * 1 time, yo, draw yarn through all 3 lps – note: beg tr does not count as a st in this case
beg dc OR beg hdc beginning double crochet OR beginning half double crochet: sc, ch 1 – note: counts as 1 dc OR 1 hdc
beg dc3tog beg dc, dc2tog – note:beg dc does not count as a st in this case
beg tr beginning treble crochet: sc, ch 2 – note: counts as 1 tr
bet between
ch(s) chain(s)
ch-1 sp(s) chain 1 space(s): number denotes number of chains in chain space
dc double crochet
dc2tog double crochet 2 together: (yo, insert hook in next st/sp, yo, pull up loop, yo, draw through 2 loops) twice, yo, draw through all loops
“dc2tog over…” make first “leg” of decrease in first indicated st/sp, and second leg in next indicated st/sp
dc3tog double crochet 3 together: (yo, insert hook in next st/sp, yo, pull up loop, yo, draw through 2 loops) 3 times, yo, draw through all loops
fp front post – note: fp-(st) for example: fp-tr, means to work that type of st around the fp on the indicated st
hdc half double crochet
lp(s) loop(s)
picot ch 3, sc in top side bars of previous stitch
rep(s) repeat(s)
sc single crochet
sc2tog single crochet 2 together: (insert hook in next st/sp, yo, pull up loop) twice, yo, draw through all loops
“sc2tog over…” make first “leg” of decrease in first indicated st/sp, and second leg in indicated st/sp
ss slip stitch(es)
st(s) stitch(es)
tog together
tr treble crochet
v-st (dc, ch 1, dc) in st/sp indicated
yo yarn over
Instructions
Rnd 1 Sl knot, ch3, ss in third ch from hook to make ring. All in ring: Beg dc, 13dc, ss in beg dc. [14 dc]
Rnd 2 Beg 3trcl in
next st, (ch2, 3trcl) 13 times, hdc in beg 3trcl. Note: this hdc acts as a ch-sp. [14 3trcl, 14 sp]
Rnd 3 (Beg dc, ch1, dc, ch1) in first ch-sp,
* dc2tog over this and next ch-sp, (ch1, dc, ch1) in same sp as second leg of
last dc2tog, rep from * 13 times, but instead of making final dc2tog, dc then
ss in beg dc – first and last dc together count as 1 dc2tog. [14 dc, 14
dc2tog, 28 sp]
Rnd 4 (Beg dc, ch1, dc) in same dc2tog – counts as 1 v-st, * ch1, 4tr-popcorn around post of next dc from Rnd 3, ch1, v-st in next dc2tog, rep from * 13 times omitting final v-st on last rep, ss in first st. [14 v-st, 14 4tr-popcorn, 28 sp]
Rnd 5 Ss in first ch-sp, (beg 3dccl, ch3, 3dccl) in same sp, * ch1, (3dccl, ch 3, 3dccl) in next v-st ch-sp, rep from * 13 times omitting final 3dccl on last rep, ss in first st. [28 3dccl, 28 sp]
Rnd 6 Ss in first ch of ch-3 sp, sc in same ch-sp, * (ch3, dc in side bars of previous sc, ch3, dc in top side bars of previous dc, sc in next ch-3 sp, rep from * 13 times omitting sc of last rep, ss in first st. [28 dc, 14 sc, 28 sp]
Rnd 7 Ss in ch-3 sp, sc in same ch-sp, (ch3, sc in next ch-sp) 27 times, ch3, ss in first sc. [28 sc, 28 sp]
Rnd 8 Ss in first ch of ch-sp, (beg hdc, dc, ch2, dc, hdc) in same ch-sp, * sc2tog over same and next ch-sp, (hdc, dc, ch2, dc, hdc) in same ch-sp, rep from * 26 times, sc2tog over final and first ch-sps, ss in first st. [28 sc2tog, 56 dc, 56 hdc, 28 sp]
Rnd 9 Ss in ch-sp,
beg 3dccl in same sp, * ch2, (fp-tr, ch2, fp-tr) around next sc from Rnd 7, ch2, 3dccl in next ch-sp, rep from * 27
times omitting 3dccl on last rep, ss in beg 3dccl. [28 3dccl, 56 fp-tr, 84 sp]
Rnd 10 Sc in same st, * sk 1 ch-sp, 5dc in next ch-sp, sc in 3dccl, rep from * 27 times omitting final sc on last rep, ss in first st. [28 5-dc groups, 28 sc]
Rnd 11 Ss in all sts to center dc of 5-dc group, beg dc in same st, * dc, sk 1, fp-tr around top of 3dccl from Rnd 9, sk1, dc in next 2 sts, rep from * 27 times omitting final dc on last rep, ss in beg dc. [28 3-dc groups, 28 fp-tr]
Rnd 12
Ss in all sts to center dc of any 3-dc group, sc in same st, * sc in next st,
ch1, 4tr-popcorn around fp of next
fp-tr, ch1, sc in next 3 dc, ch1, fp-sc around next fp-tr, ch1, sc in next 2
sts, rep from * 13 times omitting final sc on last rep, ss in first st. [28
3-sc groups, 14 fp-sc, 14 fp 4tr-popcorn, 56 sp]
Rnd 13
Ss in center dc 3-sc group, sc in same st, sc in next st, * ch2, sk fp-sc, sc
in next 2 sc, 8tr in next 4tr-popcorn, sk 1 sc, sc in next 2sc, rep from *
around to beg until final 8-tr “shell” is complete, ss in first st. [14 8-tr
“shell”, 56 sc, 14 sp]
Rnd 14 Ss in all sts to first tr of 8-tr “shell”, beg dc in same st, * (c1, dc in next st) 7 times, sk 1 sc, sc in next sc, ch2, sc in next sc, dc in next tr, rep from * 13 times omitting final dc of last rep, ss in first st. [14 8-dc “shell”, 28 sc, 14 sp]
Rnd 15
Sc in same st, * (ch2, 3dccl in next st) 6 times, ch2, sc in next dc, ch1,
3trcl in next fp-sc from Rnd 12, ch1, sc in next dc, rep from * around to beg
omitting final sc on last rep, ss in first st. [84 3dccl, 14 3trcl, 28 sc, 126
sp]
Rnd 16
Ss in first ch, sc in same ch-sp, * (ch3, sc in next ch-sp) 6 times, fp-sc
around top of 3trcl from Rnd 15, sc in next ch-sp, rep from * around to beg
omitting final sc of last rep, ss in first st. [98 sc, 14 fp-sc, 84 sp]
Rnd 17
Ss in first ch of ch-sp, sc in same ch-sp, * (ch3, sc in next ch-sp), 4 times,
dc2tog over next 2 ch-sps, rep from * around to beg but instead of final dc2tog
on last rep, dc in next ch-sp and ss in first ch of the rnd – counts as 1
dc2tog. [56 sc, 14 dc2tog, 70 sp]
Rnd 18
Ss in first ch of ch-sp, sc in same ch-sp, (ch3, sc in next ch-sp) around to
beg, ch3, ss in first sc. [70 sc, 70 sp]
Rnd 19
Ss in first ch, sc in same ch-sp, * (ch3, sc in next ch-sp) 3 times, ch1,
4tr-popcorn around top of dc2tog from
Rnd 17, ch1, sc in next ch-sp, rep from * around to beg omitting final sc on
last rep, ss in first st. [14 4tr-popcorn, 56 sc, 70 sp]
Rnd 20
Ss in first ch, (beg hdc, dc, ch2, dc, hdc) in same ch-sp, * [sc2tog over same
and next ch-sp, (hdc, dc, ch2, dc, hdc) in same ch-sp] 2 times, sc2tog over
same ch-sp and ch-1 sp, ch1, sc2tog over ch-1 sp and next ch-sp, (hdc, dc, ch2,
dc, hdc) rep from * around to beg, placing final sc2tog over final and first
ch-sps, ss in beg hdc. [84 dc, 84 hdc, 56 sc2tog, 56 sp]
Rnd 21
Ss in all sts to ch-2 sp, sc in same ch-sp, * (ch2, 2dccl in sc2tog, ch2, sc in
ch-2 sp) 2 times, ch1, (3trcl, ch3, 3trcl) in ch-1 sp, ch1, sc in ch-2 sp, rep
from * around to beg omitting final sc, ss in first st. [28 3trcl, 28 2dccl, 42
sc, 98 sp]
Rnd 22
Beg 3dccl in same st, * ch1, 4dc-popcorn in 2dccl, ch2, 3dccl in sc, ch2, 4dc-popcorn
in 2dccl, ch1, 3dccl in sc, 7dc in ch-3 sp, 3dccl in sc, rep from * around to
beg omitting final 3dccl, ss in first st. [28 4dc-popcorn, 42 3dccl, 98 dc, 56
sp]
Rnd 23
*Sc in sp, ch2, sc in next sp, 5dc in 3dccl, sc in next sp, ch2, sc in next
sp, ch2, sk 2 dc, (tr, ch1, tr, ch1) in next 3 dc omitting final ch1, ch2, sc
in sp, rep from * around to beg, ss in first sc. [84 tr, 70 dc, 56 sc, 126 sp]
Rnd 24 *
Sc in next sp, ch3, sk 1 dc, (2dccl, ch2) in next 3 dc omitting final ch2, ch3,
sc in next sp, ch3, (2dccl, ch3) in next 6 tr, sk 1 sp, rep from * around to
beg, ss in first sc. [126 2dccl, 28 sc, 154 sp]
Rnd 25 *
(Sc in next sp, ch3) 3 times, sc in next sp, fp-tr around 4dc-popcorn from Rnd
22, (sc in next sp, ch3) 6 times, sc in next sp, fp-tr around 4dc-popcorn from
Rnd 22, rep from * around to beg, ss in first sc. [28 fp-tr, 154 sc, 126 sp]
Rnd 26 Ss
in first ch, beg dc in same sp, * ch3, sc in next sp, ch3, dc2tog over next 2
sps, (ch3, sc in next sp) 4 times, ch3, dc2tog over next 2 sps, rep from *
around to beg omitting final dc2tog, dc in final sp, ss in beg dc – counts as
1 dc2tog. [28 dc2tog, 70 sc, 98 sp]
Rnd 27 Ss
in first sp, sc in same sp, (ch3, sc in next sp) around to beg, ch3, ss in
first sc.[98 sc, 98
sp]
Rnd 28 Beg
3dccl in sp, * ch3, 3trcl in same sp, ch3, 3dccl in same sp, ch2, (sc in next
sp, ch3) 5 times, sc in next sp, ch2, 3dccl in next sp, rep from * around to
beg omitting final 3dccl, ss in beg 3dccl. [14 3trcl, 28 3dccl, 84 sc, 126 sp]
Rnd 29 Beg
dc in sp, * 4dc in same sp, ch1, 5dc in same sp, sk 1 sp, (sc in next sp, ch3)
4 times, sc in next sp, sk 1 sp, dc in next sp, rep from * around to beg
omitting final dc, ss in beg dc. [140 dc, 70 sc, 70 sp]
Rnd 30 *
Sc in 5 dc, 3sc in ch-1 sp, sc in 5 dc, ch1, sc in next sp, (ch3, sc) 3 times,
ch1, rep from * around to beg, ss in first sc. [238 sc, 70 sp]
Rnd 31 (Beg tr, tr) in next sp – counts as 1 2trcl, * (picot, 2trcl in next sc) 3 times, sk 1 sc, (2dc, ch1, 2dc) in next sc, sk 1 sc, (2trcl in next sc, picot) 4 times, 2trcl in next sc, sk 1 sp, sc in next sp, ch2, sc in next sp, ch3, sc in same sp, ch2, sc in next sp, sk 1 sc, 2trcl in next sc, rep from * around to beg omitting final 2trcl, ss in beg 2trcl, cut yarn and finish off. [112 picot, 140 2trcl, 56 dc, 56 sc, 56 sp]
Attach mandala to 36in hula hoop
by wrapping short lengths of yarn around the peak ch-2 sps and around the hula
hoop, and tying a knot. Make sure the 14 peaks are the same distance apart
around the hoop. Weave ends, wrap the hoop with ribbon if desired, and display.
Copyright Information
No pattern or other material may be reproduced — mechanically, electronically, or by any other means, including photocopying — without written permission of Rachele Carmona. This applies to all content on CypressTextiles.net, BabyLoveBrand.net, and all other URLs and social media used by Rachele Carmona. Paid patterns are for personal use only.
Bonus!
When I first made this DK weight version mandala, I used a size 4.25mm hook with Colour Crafter, and the resulting mandala is below. I stopped before the final round, and I did modify it a little bit. But I wanted a little more oomph at the end, so I went down a hook and added that last round!
This color of yarn and the red hoop gives me all the feels, but I did end up wrapping the hoop in white ribbon.
My favorite shot: how the Namaste Hula Hoop Mandala looks when you hold it up in the window light.
Hello, beautiful crafter! Hope you’ve managed to find some moments of peace during the holiday season. We were still reeling from Christmas festivities when the New Year knocked us on our bums.. But now I have had a breath of fresh air and had a nice long think about how I want my first shawlette to look.
A Look Back at Preparations
Actually, this thing doesn’t even have a name yet! Okay, I’ll have to sleep on that one… For now, you remember the yarn I am using for this project, Scheepjes Skies – both Heavy * and Light * weights. Here are the 2 hanks with the swift I used to wind them up.
And here are the yarn balls, all ready to go. I even decided to use a yarn bowl! You an find this beautiful yarn bowl at WoolWarehouse.*
Scheepjes Skies
By some modern miracle, I’ve worked through most of the ball of yarn in my little yarn bowl. Here you can see the fruits of my labor, a dinky half-pint ball. This part of very “stare at the TV”, as it’s just linen stitch, but I have hardly had a chance to sit down long enough to work up more than 5 rows at a time.
Well, here you have it! Like I said, it’s just linen stitch for now, so not very exciting. It must seem weird that I chose such a simple stitch, but I have a couple of reasons.. First, I decided to make a shawlette for the crafters who love simple mindless projects (don’t worry if you like to sink your teeth into projects, the bottom half of the shawlette is lacy, so there will be some engaging parts!).
Many of my projects are sort of on the complex side, and truthfully the maths are my favorite part of design, so sometimes I do get carried away with challenging myself to make a tricky pattern and still have the numbers work out. However, I know there are loads of crafters who just love a simple, rhythmic project. And I love them too! So this one’s for you.
And second, I decided to start with an easy design for my first shawlette. I do have a few scarves, but nothing shaped like a triangle – okay I designed that one weird shaped shawl, but even that started out as motifs! For this one, I wanted to make it start at the center of the shawl, and then grow into a larger triangle from there. Super simple!
In fact, that’s what I keep reminding myself every time I want to add in a flourish or a new stitch on this portion of the piece. I remind myself that I am using the Keep It Simple, Stupid method, and I just stick to the linen stitch.. Okay I may add a little something different at the very end of this part, but nothing too crazy.
Check out the humble WIP, laid out. My favorite part is that the way I start and end linen stitch, it has a nice little bumpy and decorative zig-zag at the top edge of the triangle, that you can already see very well in the photo below.
Coming Up: Lacy Bits!
I am still hatching a plan for the lace edging of the shawlette, but trust me, it will be in the simple realm as I truly don’t want to make anyone work too hard on this one. Just pure post-holiday-chaos bliss is what I am going for. Pick up your hook and yarn, and just zone right out.
The blue ball of Skies Light * is staring at me longingly, but for now I have a few more rows left of the linen stitch to go.
One last beauty show because my WIP just keeps posing for me!
See you tomorrow for Week 3 of my Botanica Blanket CAL! It’s a fun one!