
Find my Hearthside crochet blanket pattern in an ad-free, easy to print PDF for a small fee on:
Ravelry // Craftsy // Etsy
Or scroll down for the free pattern!
Hearthside is also featured on AllFreeCrochet.com AND on AllFreeCrochetAfghanPatterns.
Kaelyn of iiirdwind (on Etsy, Instagram, Facebook) has graciously finished her eye-catching sample blanket to test my free Hearthside pattern, and what a beauty! She has also provided all of the breathtaking photos for this post. Thank you, Kaelyn!
 When Scheepjes added solid colors to their Secret Garden line, I positively had to have all of them. And what’re a bunch of solid colors missing? A bunch of variegated colors of course. More is more and less is a bore, right?!? (Shop Secret Garden: LoveKnitting (US), WoolWarehouse (UK), KnottyHouse (CA) ❤️)*
You can read about my love for Secret Garden yourself, but I will say it’s like working with a special handspun yarn. Every stitch is a joy, and I cannot wait to release this free pattern to you lovely lot. It’s nearly done! For now, enjoy these gorgeous photos of Kaelyn’s Hearthside blanket.
Pre-edging
My absolute favorite photo of Hearthside, ever:

And lounging on the backyard fence:

Here she is with the red and purple bobble edge. Totally honored to have the bohemian beauty photographed in Kaelyn’s nursery. I may have fallen love with the heavy texture of this room by the way. A textile dream!


Close-up of the bobble edging:

This free pattern is coming soon! Keep a lookout for Hearthside, and subscribe in the sidebar to get every post delivered straight to your inbox! ❤️
*This post has affiliate links, and when you shop through them I can receive a small commission that helps keep CypressTextiles going. Thank you for your support!
Seriously. I’ve had some convos recently about how quick I am to frog something that’s just not doing it for me, so y’all know I cannot stand having WIPs laying around… But this yarn is so fun to work with, I had to jump into a project knowing full well I’d have to promptly cast it aside.

At least the play time was fun!! Read my full review of Scheepjes Secret Garden, and see for yourself how beautiful it is. I describe it as a sort of thick and thin tweed.. and it has all these marly bits. Every stitch is a surprise 🙂

Maybe the most fun part of this WIP (and also the saddest… but really the funnest!) is the fact that I sent all the yarn off to a lovely member of my NEW CypressTextiles Tester Tribe! I’ll have the page introducing everyone up and running soon.
Now Robyn Axelrod is testing the pattern, and for that I am so thankful. Her work is really beautiful and I know she has a detail-oriented mind to give me feedback and criticism. Head to her Facebook page. Come for the crochet, stay for the horses and lush greenery. ❤
The Tester Tribe is complete for now, but it could grow in the future! It took a long time, and I’m so fortunate to work with a group of talented and genuine ladies. And just look at Robyn’s photos… (PS, her table has me swooning 😍😍)
When her Secret Garden yarn arrived:

Comparing different granny square styles. Check out how the “traditional grannies” on the left show a gradual color change with the variegated Secret Garden, and then how it looks to the right when you flip the square after each round. Both squares are absolutely beautiful, and to tell the truth you could just work SC back and forth and still have a gorgeous blanket with Secret Garden.

Another yummy granny square photo by Robyn because why not?!

Here’s Robyn’s blanket currently! I have a special connection to this piece because the yarn and design are just so cozy, and I cannot wait for Robyn to reveal more squares. I’m in love with the colors!

When everything is wrapped up and I have all my pattern feedback, this will be released as a free pattern, both here and on Ravelry. Yippee-yay!!
Look out for the Hearthside Blanket pattern coming soon! ❤❤❤
Introduction
Hearthside is a cozy, colorful piece that will put a smile on your face every time you snuggle underneath. No hearth required, but it will definitely enhance the coze factor. Made in Scheepjes Secret Garden, this blanket is as delightful to make as it is to wrap up in. Have fun using all of the solid colors and three coordinating multis for two classic squares, a lovely texture granny square, and a beautiful bobble square. Finish it all off with a framing border that you’ll want to use for many projects to come. Check out the WIP and FO posts for Hearthside to see more glorious photos.

This pattern was tested by the wonderful Kaelyn Guerin of iiirdwind, who has provided the brilliant photography for this pattern and all of the related blog posts on this site. Find Kaelyn on Etsy, Facebook, and Instagram for a beautiful scrolling experience <3

Materials
Yarn: Scheepjes Secret Garden (20% Silk, 20% Cotton, 60% Polyester; 93m/50g)
See my review of Secret Garden, or shop Secret Garden at WoolWarehouse (UK), KnottyHouse (CA), or LoveKnitting (US) and other Scheepjes retailers.
Yarn quantities needed for a 60x64in blanket:
- 3 Balls each of the following for Bobble Motif:
- Yarn A: 732 Weeping Willow
- Yarn B: 736 Bird Bath
- Yarn C: 735 Wishing Well
- Yarn D: 734 Picket Fence
- Yarn E: 737 Shady Courtyard
- Yarn F: 731 Dappled Sunlight
- 5 Balls each of the following for Granny Square Motif:
- Yarn G: 708 Rose Arch
- Yarn H: 705 Rambling Blooms
- Yarn I: 706 Blossom
- 3 Balls each of the following for border:
- Yarn J: 738 Whimsical Topiary
- Yarn K: 733 Wisteria Arch

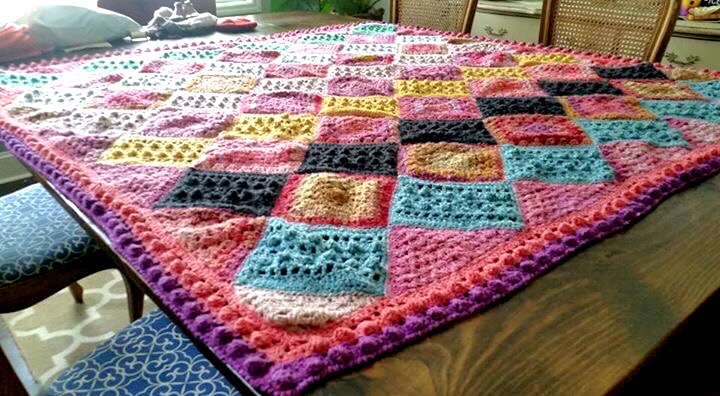
Enjoy this beauty! I made a couple of squares for it, and fellow tester tribe member Robyn of 4ply Designs made a few, and then lovely tester Kaelyn made the majority of the piece and finished it off with that cozy bobble frame border. What a special make this was to be shared amongst us crafters. Love it!

The border is just the perfect frame. I’m so proud of how this piece turned out.
It’s a bit of an odd feeling when I have a vision for a pattern, and I choose a yarn brand, and palette. Then I make a couple of “rough draft” motifs, send everything off, draft the pattern, and then walk through everything working closely with the tester. I never actually make the blanket before it gets tested, but when it is finished, I know it’s just exactly as I imagined it. The odd feeling is that I get a numbing sensation in my hands when I look at the FO, because it comes from my vision. I get a sensation that I made it, but I know I didn’t… and that disconnect is really quite weird!

Special Abbreviations
- beg dc beginning double crochet: sc, ch 1 (counts as 1 sc)
- Bobble (YO, insert hook in st, YO, pull up loop, YO, draw yarn through 2 loops) 5 times all in same st, YO, draw yarn through all 6 loops on hook
Instructions
Note: Refer to Schematic on final page when working Motifs. Green, blue, and red markings are shown on “demo” Motifs, which will be explained in detail as examples of their kind. Rem motifs are worked in the same manner as these different demo Motifs, as explained in instructions. Note the orientation of Bobble Motifs, each one being oriented with bobble rows diagonal as shown on Schematic.
Schematic

Motif 1 (Bobble Motif)
Row 1 (WS) Using Yarn A, ch 26, sc in second ch from hook (turning ch does not count as st), sc in 24 rem chs, turn. [25 sc]
Row 2 Beg dc in first st, dc in all sts across, turn. [25 dc]
Row 3 Beg dc in first st, (ch 1, sk 1, dc) 12 times, turn. [13 dc, 12 ch-sps]
Row 4 Rep Row 2
Row 5 Sc in first 2 sts, (make Bobble, sc in next 3 sts) 5 times, make Bobble, sc in final 2 sts, turn. [6 Bobbles, 19 sc]
Note: Bobbles are worked on WS of work, but should show up on RS.
Rows 6-9 Rep Rows 2-5
Rows 10-12 Rep Rows 2-4
Row 13 Sc in all sts across, ch 1 and tighten ch to secure end of Row 13, turn. [25 sc]
Border Rnd 2 sc in first st, * sc in 23 sts, 3 sc in final st of row, rotate motif, work 23 sc evenly down side, 3 sc in sc corner st, rep from * once, omitting final 3-sc corner, sc in first corner to complete it, join with ss in first sc, cut yarn and finish off. [104 SC]
Motif 2 (Granny Square Motif)
Rnd 1 (RS) Using Yarn G, sl knot, ch 3, join with ss in third ch from hook to make ring. All in ring: beg dc, (ch 1, 3 dc) 3 times, ch 1, 2 dc, join with ss in beg dc.
Rnd 2 Ss and beg dc in ch-sp, ch 1, turn work, 3 dc in same ch-sp, (3 dc, ch 1, 3 dc) in next ch-sp to make Corner 3 times, 2 dc in first ch-sp to complete the Corner, join with ss in beg dc.
Rnds 3-7 Ss and beg dc in ch-sp, turn work, 3 dc in same ch-sp, (make 3 dc bet all 3-dc groups across to ch-sp, make Corner in ch-sp) 4 times, omitting Corner on fourth repeat, 2 dc in first ch-sp to complete the Corner, join with ss in beg dc.
Border Rnd 2 sc in ch-sp. Sc in 3 sts, sc bet this and next sts, sc in 15 sts, sc bet this and next sts, sc in 3 sts – “plain side” made, 2 sc in ch-sp, pick up Motif 1 and line up with Motif 2 as placement is shown in Schematic, work PLT join (Pull Loop Through join) as folls: release lp from hook, insert hook front to back in corresponding st on completed motif (in this case, it is the center sc of the adjacent corner on Motif 1), pick up lp, pull lp through to front side of work, sc in ch-sp on Motif 2 to complete that corner, PLT in corresponding st on Motif 1 (the next sc), (sc, PLT) in next 3 sts, sc bet this and next st, PLT, (sc, PLT) in next 15 sts, sc bet this and next st, PLT, (sc, PLT) in next 3 sts, – “join side” made, (sc, PLT) twice in corner st, Sc in same corner to complete it, work 2 plain sides to first corner. Sc in first corner to complete it, join with ss to first sc, cut yarn and finish off.
Motif 3
Rows 1-13 Work as for Motif 1.
Border Rnd 2 sc in first st. Sc in 23 sts – “plain side” made, 2 SC in final st of Row, PLT in center sc of adjacent corner on Motif 2, sc in same st to complete corner, PLT in corresponding st on Motif 2, (sc, PLT) 23 sts evenly across side – “join side” made, (sc in corner st, PLT on Motif 2) twice, SC in same corner to complete it, make plain side, 3 sc in corner, make plain side, sc in first corner to complete it, join with ss in first sc, cut yarn and finish off.
Motifs 4-11 Work in same manner as Motifs 2 and 3, joining as you go on Border Rnd.
Motif 12
Rows 1-13 Using yarn color shown on Schematic, work as for Motif 1.
Border Rnd 2 sc in first st, make plain side, 3 sc in final st for corner, make plain side evenly across, 3 sc for corner, make plain side, 2 sc in corner, PLT in corner st on Motif 2, join side, sc in first corner to complete it, PLT in corresponding st on Motif 2, join with ss in first sc of rnd, cut yarn and finish off.
Motif 13
Rows 1-13 Using Yarn B, work as for Motif 1.
Border Rnd 2 sc in first st, make plain side, 3 sc to make corner, make plain side, 2 sc in first st, PLT in center sc of corner on Motif 2, join side to Motif 2, SC in corner, PLT to Motif 2, SC in same st, make “special corner” as folls: release lp from hook, insert hook front to back through center sc of corner on Motif 4, insert hook back to front through center sc of corner on Motif 2, pick up lp, pull lp through both sts, sc in same corner to complete it, PLT in corresponding st on Motif 4, join side to Motif 4, sc in first corner to complete it, PLT in Motif 4, join with ss in first sc, cut yarn and finish off.
Note: Special corner is marked with a red circle on demo Motifs, and are worked when the fourth square is joining three squares whose corners already meet.
Motifs 14-17 Using Yarn B, work as for Motif 13. Note: On Motif 17, you will join only 1 side.
Motifs 18-61 Using Yarn indicated on Schematic, work as for demo Motifs 12 and 13.
Motif 62
Row 1 (RS) Using Yarn G: sl knot, ch 3, ss in third ch from hook to make ring. All in ring: Beg dc, ch 1, (3 dc, ch 1) twice, dc, turn.
Row 2 Beg dc in first st, ch 1, 3 dc in ch-sp, (3 dc, ch 1, 3 dc) in next ch-sp, 3 dc in final ch-sp, ch 1, dc in final st, turn.
Rows 3-7 Beg dc in first st, ch 1, 3 dc in first ch-sp, 3 dc bet 3-dc groups across to next ch-sp, (3 dc, ch 1, 3 dc) in ch-sp, 3 dc bet 3-dc groups across to final ch-sp, 3 dc in final ch-sp, ch 1, dc in final st, turn. Cut yarn and finish off after Row 7.
Row 8 With RS still facing, rejoin yarn with ss in first st, sc in same st, PLT in center sc of corner on Motif 1, sc in ch-sp, PLT in next st on Motif 1, join side, sc in ch-sp, PLT to Motif 1, make special corner, sc in same st to finish corner, PLT to Motif 12, join side, sc in ch-sp, PLT in Motif 12, sc in final st, PLT in corner sc on Motif 12, cut yarn and finish off.
Motifs 63-81
Rows 1-8 Using Yarn indicated in Schematic, work as for Motif 62.
Motif 82
Row 1 (RS) Using Yarn I, sl knot, ch 3, ss in third ch from hook to make ring. All in ring: Beg dc, ch 1, 3 dc, ch 1, dc, turn.
Row 2 Beg dc in first st, ch 1, 3 dc in next 2 ch-sps, ch 1, dc in final st, turn.
Rows 3-7 Beg dc in first st, ch 1, 3 dc bet all 3-dc groups across to ch-sp, 3 dc in ch-sp, ch 1, dc in final st, turn. Cut yarn and finish off after Row 7.
Row 8 With RS still facing, rejoin yarn with ss in first st, sc in same st, PLT in center st of corner on Motif 1, sc in ch-sp, PLT in next st on Motif 1, join side, sc in ch-sp, PLT to Motif 1, sc in final st, PLT in corner st of Motif 1, cut yarn and finish off.
Motifs 83-85 Work as for Motif 82.
Work 9-round blanket border
Rnd 1 Join Yarn J with ss in the top right corner ring of the blanket, 3 sc in the same ring, and sc 183 sts evenly across side as follows: sc 14 across first triangle, 31 across next 5 triangles, and 14 across last triangle. (3 sc in corner ring, sc 183) 3 times, ss in first st.
Tip: Avoid making sts in the “ditch” or the dip in between triangles. This will help the sides lay straight instead of dipping in.
Rnd 2 (3 sc in corner st, sc in all sts across to corner st) 4 times, ss in first st.
Rnd 3 (Beg dc, ch 2, 2 dc) in corner st, * (ch 1, sk 1, dc) across until 2 sts rem, ch 1, (2 dc, ch 2, 2 dc) in corner st, rep from * 3 times, omitting final corner. Dc in first corner to complete it, ss in beg dc, turn.
Rnd 4 (WS) Switch to size smaller hook for remainder of border. Beginning in same st as ss join, * (sc in 3 sts/sps, make bobble in next st) across until 1 ch-sp and 2 dc rem before the corner ch-sp, sc in next 3 sts/sps, 3 sc in corner ch-sp, rep from * 3 times, ss in first st, turn.
Rnd 5 Rep Rnd 2, cut yarn and finish off.
Rnd 6 Join Yarn K with ss in corner st. (Beg dc, ch 2, 3 dc) in corner st, * ch 1, sk 2, dc, (ch 1, sk 1, dc) across to final 3 sts, ch 1, (3 dc, ch 2, 3 dc) in corner st, rep from * 3 times, omitting final corner. 2 dc in first corner to complete it, ss in beg dc, turn.
Rnd 7 Beginning in same st as ss join, * sc in 2 sts, (bobble in next st, sc in 3 sts/sps) across until 3 dc of next corner, and corner ch-sp remain. Bobble in next st, sc in 2 sts, (sc, make bobble, sc) in corner ch-sp, rep from * 3 times, ss in first st, turn.
Rnd 8 (3 sc in corner bobble, sc in all sts to next corner) 4 times, ss in first st, turn.
Rnd 9 Work one round of reverse sc, or “crab st”, making a st in every sc, without any extra sts in the corners for a nice rounded corner effect. If you have never worked reverse sc before, you’re in for a treat! Head to YouTube for many excellent tutorials!

Disclosure: This post has affiliate links to online yarn stores, and shopping through them is of no extra cost to you, but will support CypressTextiles.net greatly as that I may continue to bring you content. Thank you so much! Y’all rock!