Hey, gorgeous crafter! Today I am sharing the first alternate joining method for the 2020 VVCAL. This join is perfect for the suggested yarn amounts of the Scheepjes Stone Washed and River Washed 10g Colour Pack version. It’s also great if you want a simple and narrow join, or if you don’t have a whole lot of yarn for joining.
SC JAYG/CJAYG with PLT Join
It’s a mouthful, but this is the Single Crochet join as-you-go and continuous join as-you-go featuring my PLT (pull loop through) Join.
I’ve published these 2 methods previously, and you can find them here:
I have also formatted these 2 joining methods into an ad-free condensed PDF file if it’s more convenient. You can find that on Etsy and Ravelry.
The cool thing is, you can a lot of mix and match versatility with these joining techniques. You can make a DC JAYG with PLT Join, or an SC CJAYG with PLT Join, and really mix it up any way you want. Even a granny stitch with work! But that is a spoiler for the next alternate joining method…
What’s the Difference?
So what’s the difference between the JAYG and the CJAYG?
JAYG just means Join as-you-go, which means that on the final round of your square edging, you join the square onto the blanket, and then complete your round, and cut the yarn. So, after you join each square on, you cut the yarn and start to join on the next square.
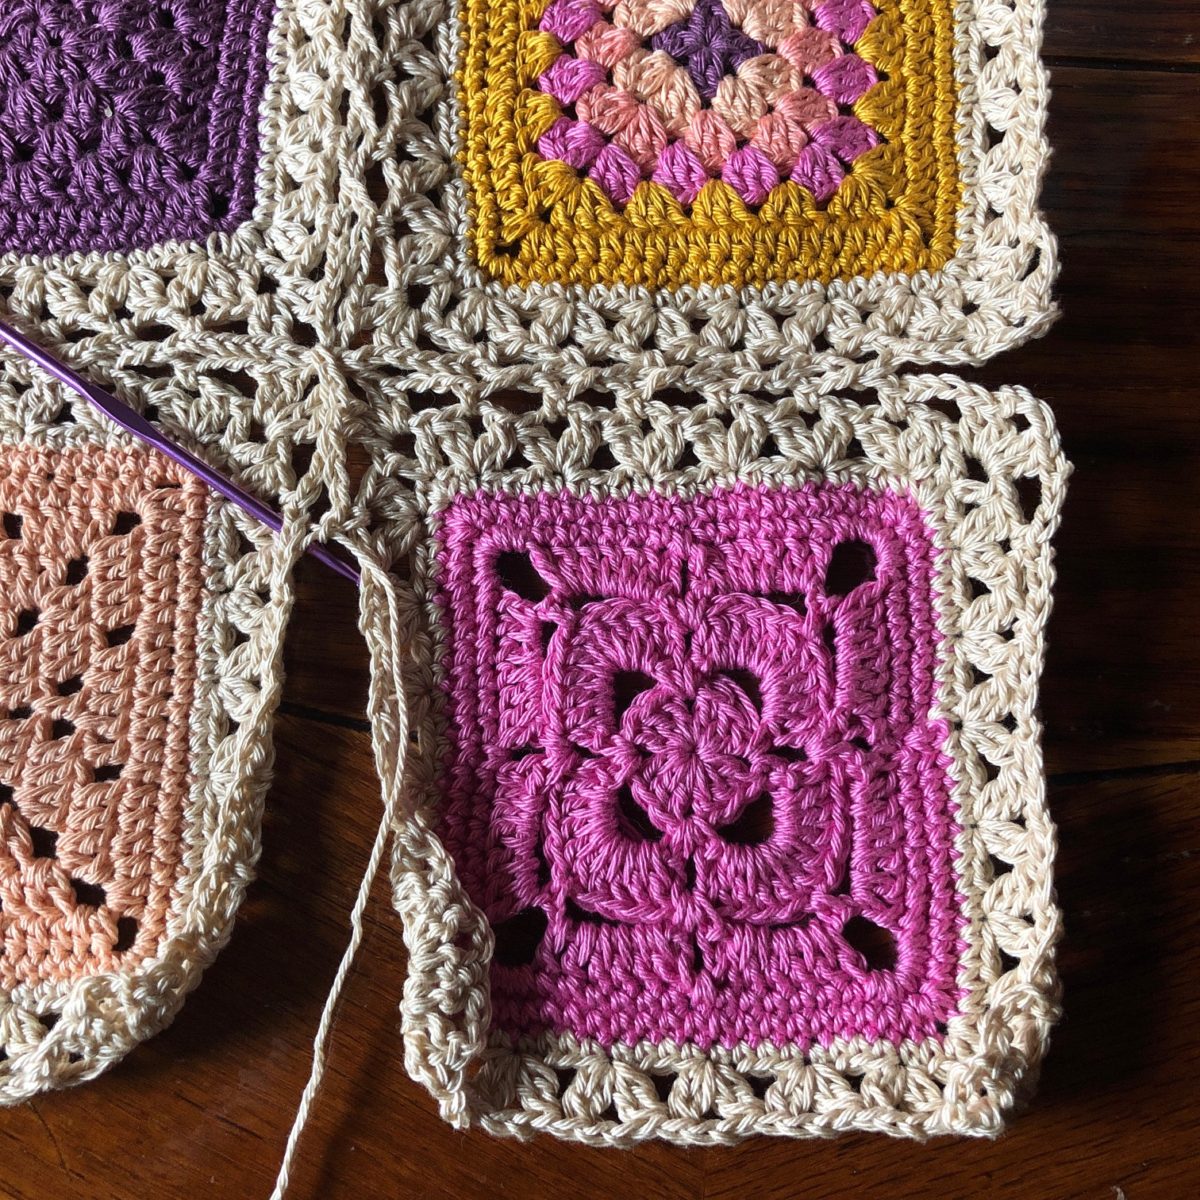
For this pattern, with JAYG, I am edging the squares with a round of single crochet, and joining every side that is adjacent to a completed square. See the photo below, the next square to join will be the lavender square with aqua edging. You can see that with these (2016 VVCAL) squares, I have edged them in contrast color with DC, but the concept doesn’t change.
Squares Joined with JAYG method
CJAYG means Continuous Join as-you-go, and it is a little more complicated than the regular JAYG, but once it “clicks” you will love it!
The best way I can describe this CJAYG pattern is that you are making a single crochet path around the squares like if you were drawing around them without picking up your pencil. The path makes it seem like all 4 sides of the square were edged at once when the blanket is done, but it’s just a Jedi mind trick..
Note the difference in the photo below versus the photo above. In the above photo, the squares are joined one at a time, and in the below photo, they are joined one whole column at a time.
Squares Joined with CJAYG method
You can pick which method you prefer! Want to go with what you know? The JAYG is just right! Feel like an adventure? The CJAYG is for you!
I’ve published these 2 methods previously, and you can find them here:
Either way, whether you choose the JAYG method or the CJAYG method, your blanket will end up looking joined like this.
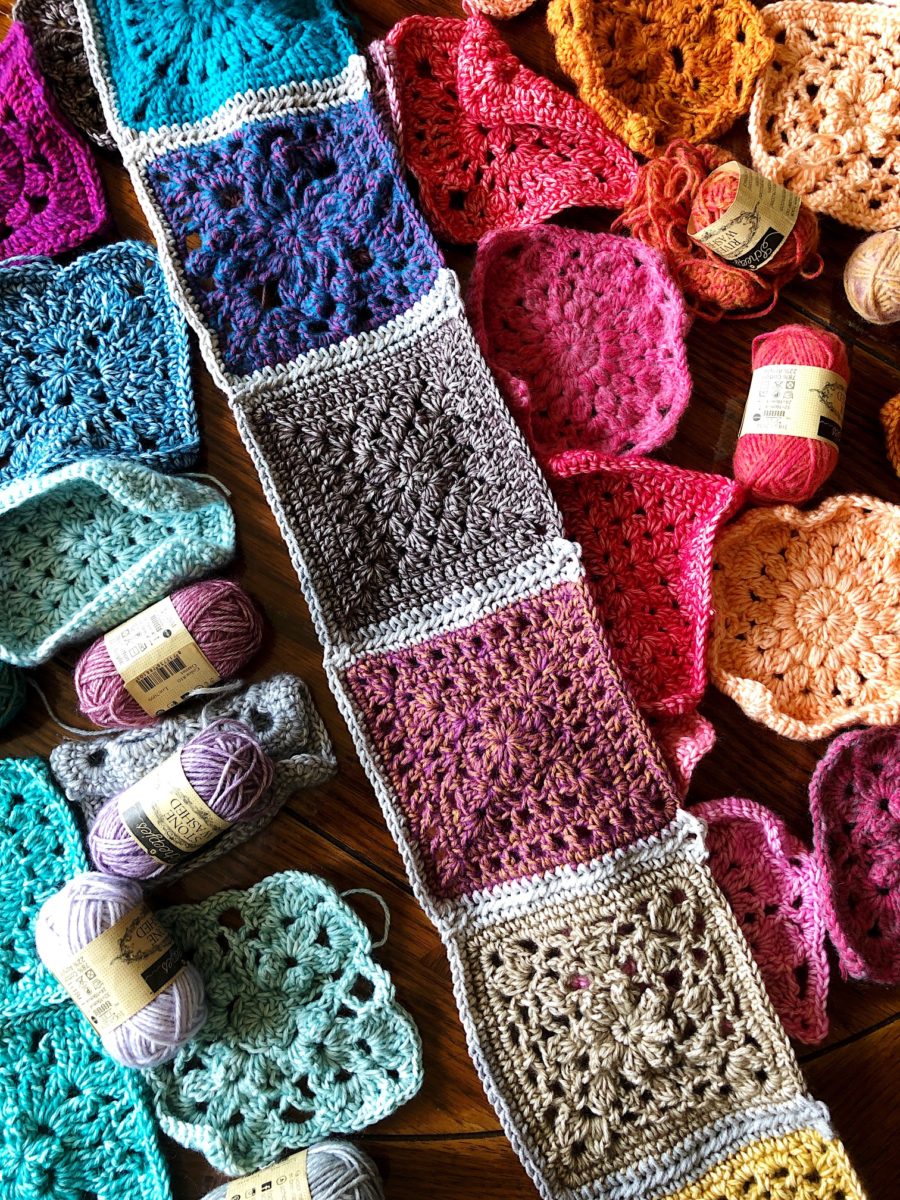
2020 VVCAL Demo Blanket
Alrighty! So let’s see how my little demo blanket looks with this join. And I have some close-up pics to share too.
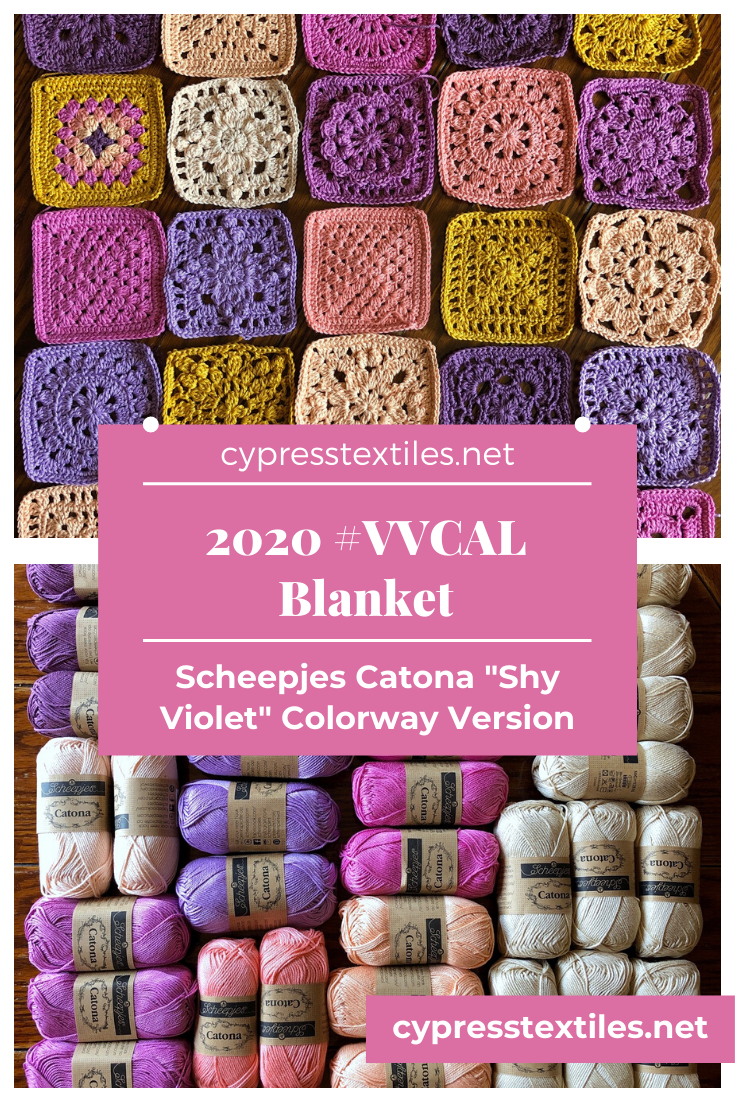
For this demo, I gathered some of the squares I made for the Scheepjes Stone Washed and River Washed 10g colour pack version of the 2020 VVCAL blanket.
Shop SW/RW Colour Pack
Purchasing through these affiliate links will earn me a small commission to help support CypressTextiles at no additional cost to you!
Of course I had to lay out the squares in a color fade. This time I chose to cut the rainbow in between the blue greens and the yellow greens, so that the pinks and reds are in the middle of the blanket.
I am only using 63 squares (7×9) for this layout because it’s just the join demo blanket. You can see the actual 108 square layout for this blanket on the post for this version.
I just love playing with this yarn. As I always say, it makes me feel like more of an artist when I work with Stone Washed and River Washed because they feel so lush and artful. The saturation and the juiciness of the colors is really lovely.
There were a zillion pics on my phone, y’all. Choosing just a few was tough!
Okay, I am doing the continuous JAYG for this sample. Of course the detailed instructions are on the blog posts for the JAYG and CJAYG, but I have these close-up pics for more views of what’s going on.
Here is how the join starts out. Just edge 3 sides of your square – simple!
Then you make a start on the first edge of your next square… And here is a little refresher on my PLT Join as well.
Release the loop from the hook,
Insert the hook front to back through the corresponding stitch on the previous motif, and grab the loop,
Pull the Loop Through to the front of the work. PLT Join mission accomplished!
Now just work the next st as normal. In this case it’s a single crochet. There is a common mistake made where folks think you need to make a chain after you PLT, or where they think that a slip stitch is involved somehow. But just the act of pulling that loop through after every stitch (or every other stitch for a braided effect) is what joins the squares together.
Here you can see I have worked (sc, PLT) across in every stitch until the first sc of the 3sc corner is worked. I also stopped making PLT for those last couple of sts, but that is all explained in the pattern post.
Now, instead of making the corner sc in the square in progress, you hold the motifs wrong sides together and make the sc in the corner st of the previous motif. see below that sc I have made will face the wrong side of the work.
And here’s what it looks like when you make that third sc of the 3sc corner, and then continue down the edge.
Finish out the 3 sides of the square now – easy peasy.
And keep joining on squares this way. Doesn’t it look cool? I love continuous JAYG.
Hello, fellow 2020 VVCALer! I decided to create a separate post for each version of the blanket that I am posting each week. There are 5 versions, all in Scheepjes Yarns:
The full 2020 VVCAL PDF pattern is up on Ravelry and Etsy! Includes entire pattern – squares, join, and border, and BOTH US and UK Terms PDFs are included. Yay!! The response has been overwhelming. I humbly thank you for your support.
What to Expect Today
2 blog posts, each with a square – Vienna Square (this post), and Vancouver Square
Scroll down on the Plain Granny Square page and find the “Week 14” section to see which granny squares to make for this week
Patterns include written instructions in US and UK Terms, chart, step-by-step photos, and YouTube video (US Terms).
Social Media Hashtags: #VVCAL and #CypressTextiles
CypressTextiles Tree Huggers Facebook Group – This is my main FB group (join!). Share your VVCAL progress pics in this group if you like, and I will share CAL highlights here, but the weekly action will be in the other group linked above.
Vienna is the only capital city in the world to produce significant quantities of wine within its city limits. Home to over 1,700 acres of vineyards and 320 vintners, the Viennese love their wine.
Vienna is often called The City of Music, or the World’s Capital of Music, as more famous composers have lived here than in any other city in the world. And 4 of the top 10 classical composers in history worked in Vienna between 1750 and 1825. Wolfgang Amadeus Mozart, Ludwig van Beethoven, Joseph Haydn, Franz Schubert, Johann Straus and Johannes Brahms are just a few who called Vienna home.
The croissant, a famous French pastry, actually has Viennese origins. They are based on the Austrian kipferl, which means crescent in German. In 1770, when Maria Antoinette of Austria married King Louis XVI of France, she introduced her favorite pastry to France. The French made a few changes, and called it a croissant.
Pez, the fun little tablet candies that we all know and love, were invented in Vienna in 1927. The name Pez is an abbreviation on the German word “pfefferminz”, meaning peppermint. Because the original PEZ candies only came in that one flavor! The dispenser was invented in 1949, designed to look like a lighter. Smoking was prohibited at that time, so the Pez slogan was “No Smoking – PEZing Allowed.”
The snow globe was also invented in Vienna. In 1900, Erwin Perzy, a fine instruments mechanic, was trying to improve the brightness of lightbulbs for a surgical lamp. But instead, he accidentally invented a snow globe.
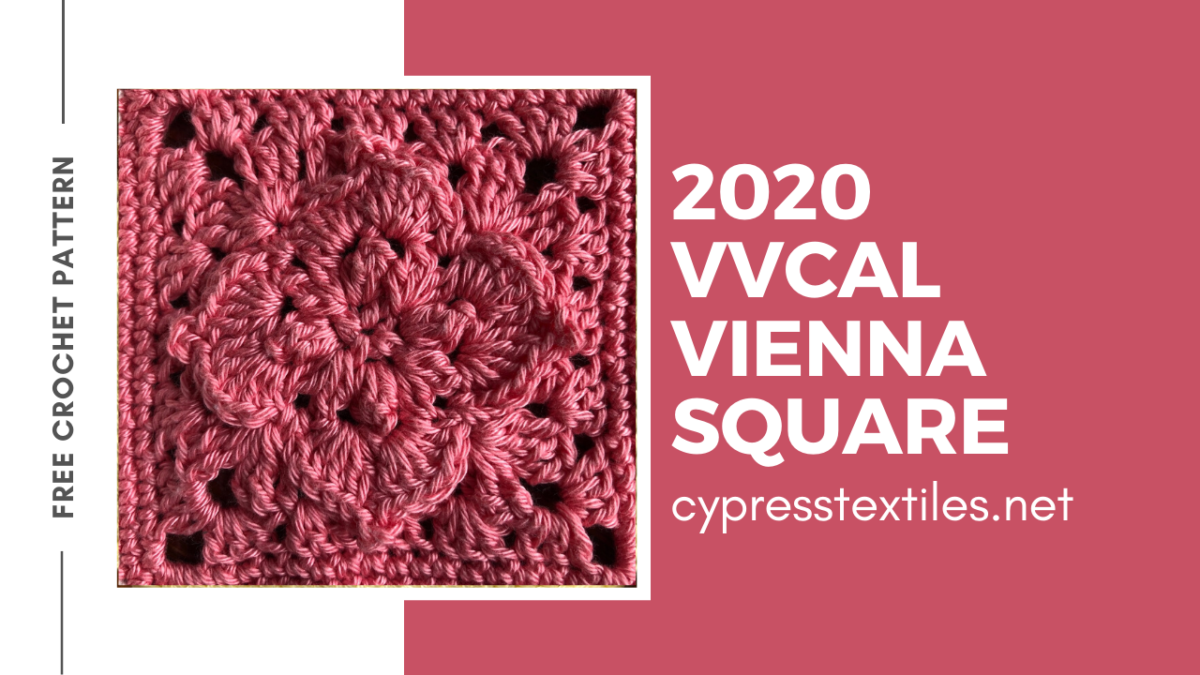
Vienna
Vienna Square Pattern
“Catona 10g Colour Pack” Version: Make 2 – Use colors 222 and 110
Catona “Shy Violet” Version: Make 2 – Use colors 519 and 398
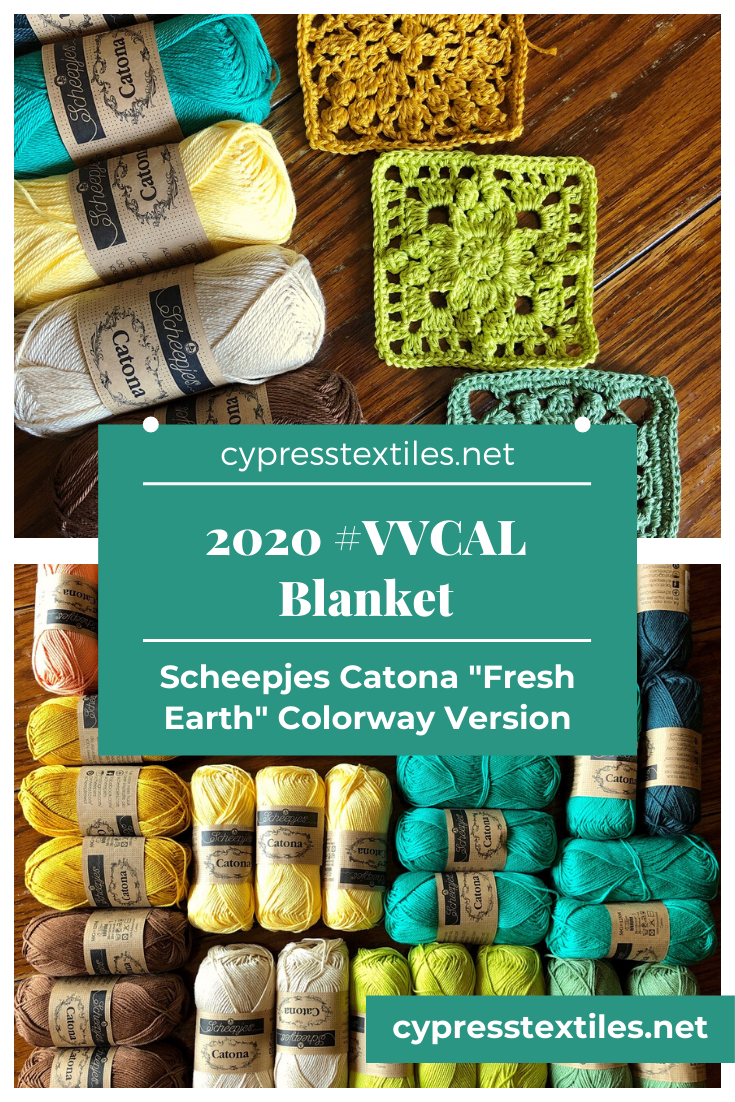
Catona “Fresh Earth” Version: Make 2 – Use colors 245 and 157
Colour Crafter Version: Make 1 Note: I’m just using my stash.
Stone Washed / River Washed 10g Colour Pack Version: Make 2 – Use colors 801 and 942
Measurements and Materials
Measurements: Blanket will measure about 64x72in for all colorways/yarns
Gauge: Squares measure 4.25in for Catona, 6in for Colour Crafter, 4.5in for Stone Washed/River Washed
Notions: US Size 3mm hook for Catona, 4.25mm hook for Colour Crafter, 3mm for Stone Washed’/River Washed
2dccl (yo, insert hook in st, yo, pull up lp, yo, draw yarn through 2 lps) 2 times, yo, draw yarn through 3 lps
4dc-pcorn 4dc in st/sp indicated, remove lp from hook, insert hook in first dc, grab lp, pull lp through to close popcorn
beg beginning
beg 4dc-pcorn (beg dc, 3dc) in st/sp indicated, remove lp from hook, insert hook in beg dc, grab lp, pull lp through to close popcorn – Counts as 1 4dc-pcorn
beg dc (sc, ch1) – counts as 1 dc
chN chain N number of times
dc double crochet
lp loop
MR make ring: slip knot, ch3, ss in third ch from hook
picot ch3, sc in top side bars of previous st
rep repeat
rnd round
sc single crochet
sp space (chain space)
ss slip stitch
st stitch
tr treble crochet
yoh yarn over hook
Written Instructions & Step-by-step Photos (US Terms)
Rnd 1 MR, (sc, ch1) 4 times, ss in first sc. [4 sc, 4 sp]
Rnd 2 Beg 4dc-pcorn in first sc, * ch2, (2dccl, ch2, 2dccl) in next sp, ch2, 4dc-pcorn in sc, rep from * 3 times omitting final 4dc-pcorn, ss in beg 4dc-pcorn. [4 4dc-pcorn, 8 2dccl, 12 sp]
Rnd 3 Beg dc in first sp, * 4dc in same sp, ch1, sk 1 sp, 5dc in next sp, picot, dc in next sp, rep from * 3 times omitting final dc, ss in beg dc. [4 picot, 40 dc, 4 sp]
Rnd 4 Ss in next 4 dc, * sc around ch-sps from 2 previous rnds treating them as one, ch4, sc around 4dc-pcorn of Rnd 2 working behind “petal” from Rnd 3, ch4, rep from * 3 times, ss in first sc. [8 sc, 8 sp]
Rnd 5 Ss in 1 ch, beg dc in same sp, * 2dc in same sp, ch1, 3dc in next sp, ch1, (3tr, ch3, 3tr) in next sc, ch1, dc in next sp, rep from * 3 times omitting final dc, ss in beg dc. [24 tr, 24 dc, 16 sp]
Rnd 6 Ss in first 2 dc, beg dc in sp, (2dc in same sp, 3dc in next 2 sps, ch3, 3dc in same sp, 3dc in next sp, dc in next sp) 4 times omitting final dc, ss in beg dc. [60 dc, 4 sp]
Rnd 7 (Sc in all sts to corner sp, 5sc in sp) 4 times, sc in all sts to beginning, ss in first sc. [80 sc]
Rnd 8 (Sc in all sts to corner st, 3sc in corner st) 4 times, sc in all sts to beginning, ss in first sc, cut yarn and weave ends. [88 sc]
Stitch Guide (UK Terms)
Note: Scroll up for US Terms.
2trcl (yo, insert hook in st, yo, pull up lp, yo, draw yarn through 2 lps) 2 times, yo, draw yarn through 3 lps
4tr-pcorn 4tr in st/sp indicated, remove lp from hook, insert hook in first dc, grab lp, pull lp through to close popcorn
begbeginning
beg 4tr-pcorn (beg tr, 3tr) in st/sp indicated, remove lp from hook, insert hook in beg tr, grab lp, pull lp through to close popcorn – Counts as 1 4tr-pcorn
beg tr(dc, ch1) – counts as 1 tr
chNchain N number of times
dcdouble crochet
dtr double treble crochet
lploop
MR make ring: slip knot, ch3, ss in third ch from hook
picot ch3, sc in top side bars of previous st
rep repeat
rndround
sp space (chain space)
ss slip stitch
st stitch
tr treble crochet
yoh yarn over hook
Written Instructions & Step-by-step Photos (UK Terms)
Rnd 1 MR, (dc, ch1) 4 times, ss in first dc. [4 dc, 4 sp]
Rnd 2 Beg 4tr-pcorn in first dc, * ch2, (2trcl, ch2, 2trcl) in next sp, ch2, 4tr-pcorn in dc, rep from * 3 times omitting final 4tr-pcorn, ss in beg 4tr-pcorn. [4 4tr-pcorn, 8 2trcl, 12 sp]
Rnd 3 Beg tr in first sp, * 4tr in same sp, ch1, sk 1 sp, 5tr in next sp, picot, tr in next sp, rep from * 3 times omitting final tr, ss in beg tr. [4 picot, 40 tr, 4 sp]
Rnd 4 Ss in next 4 tr, * dc around ch-sps from 2 previous rnds treating them as one, ch4, dc around 4tr-pcorn of Rnd 2 working behind “petal” from Rnd 3, ch4, rep from * 3 times, ss in first dc. [8 dc, 8 sp]
Rnd 5 Ss in 1 ch, beg tr in same sp, * 2tr in same sp, ch1, 3tr in next sp, ch1, (3dtr, ch3, 3dtr) in next dc, ch1, tr in next sp, rep from * 3 times omitting final tr, ss in beg tr. [24 dtr, 24 tr, 16 sp]
Rnd 6 Ss in first 2 tr, beg tr in sp, (2tr in same sp, 3tr in next 2 sps, ch3, 3tr in same sp, 3tr in next sp, tr in next sp) 4 times omitting final tr, ss in beg tr. [60 tr, 4 sp]
Rnd 7 (Dc in all sts to corner sp, 5dc in sp) 4 times, dc in all sts to beginning, ss in first dc. [80 dc]
Rnd 8 (Dc in all sts to corner st, 3sdc in corner st) 4 times, dc in all sts to beginning, ss in first dc, cut yarn and weave ends. [88 dc]
CypressTextiles Tree Huggers Facebook Group – This is my main FB group (join!). Share your VVCAL progress pics in this group if you like, and I will share CAL highlights here, but the weekly action will be in the other group linked above.
The full 2020 VVCAL PDF pattern is up on Ravelry and Etsy! Includes entire pattern – squares, join, and border, and BOTH US and UK Terms PDFs are included. Yay!! The response has been overwhelming. I humbly thank you for your support.
What to Expect Today
2 blog posts, each with a square – Vancouver Square (this post), and Vienna Square
Scroll down on the Plain Granny Square page and find the “Week 14” section to see which granny squares to make for this week
Patterns include written instructions in US and UK Terms, chart, step-by-step photos, and YouTube video (US Terms).
Social Media Hashtags: #VVCAL and #CypressTextiles
CypressTextiles Tree Huggers Facebook Group – This is my main FB group (join!). Share your VVCAL progress pics in this group if you like, and I will share CAL highlights here, but the weekly action will be in the other group linked above.
Vancouver is the largest film production center in North America after Los Angeles and New York City
Greenpeace, one of the world’s oldest and most successful environmental groups was established in Vancouver.
Vancouver was recently ranked as the third most “livable place in the world” for its high standard of living and quality of life. While it is ranked as the 10th cleanest city in the world.
Home to Canada’s longest pool. Measuring 137.5 meters (451 feet), it is nearly the size of three Olympic pools. This outdoor, saltwater pool is a major tourist attraction and is open year round.
Vancouver has the highest real estate prices in Canada. In 2011, the average price of a detached home was a staggering $1,204,587.
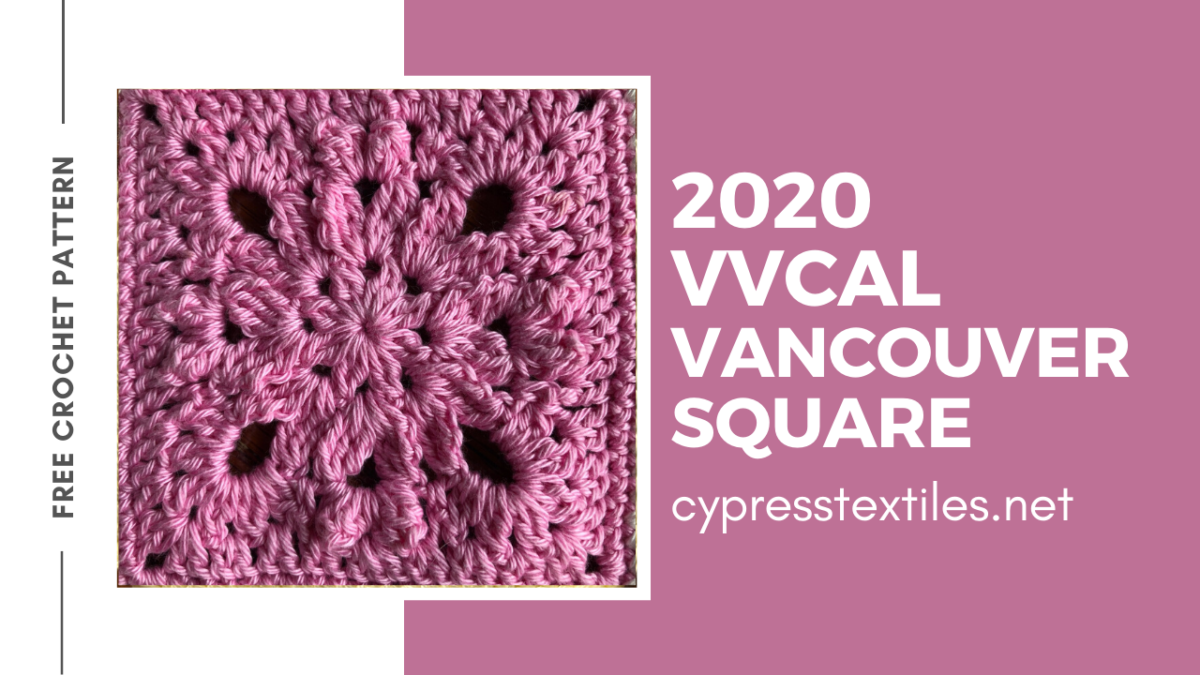
Vancouver Square Pattern
“Catona 10g Colour Pack” Version: Make 2 – Use colors 164 and 162
Catona “Shy Violet” Version: Make 2 – Use colors 240 and 414
Catona “Fresh Earth” Version: Make 2 – Use colors 388 and 524
Colour Crafter Version: Make 1 Note: I’m just using my stash.
Stone Washed / River Washed 10g Colour Pack Version: Make 2 – Use colors 955 and 803
Measurements and Materials
Measurements: Blanket will measure about 64x72in for all colorways/yarns
Gauge: Squares measure 4.25in for Catona, 6in for Colour Crafter, 4.5in for Stone Washed/River Washed
Notions: US Size 3mm hook for Catona, 4.25mm hook for Colour Crafter, 3mm for Stone Washed’/River Washed
2dccl (yo, insert hook in st, yo, pull up lp, yo, draw yarn through 2 lps) 2 times, yo, draw yarn through 3 lps
3trcl * yoh 2 times, insert hook in st, yoh pull through, (yoh, pull through 2 lps on hook) 2 times, rep from * 2 times, yoh and pull through all 4 lps
4dc-pcorn 4dc in st/sp indicated, remove lp from hook, insert hook in first dc, grab lp, pull lp through to close popcorn
beg beginning
beg 2dccl(beg dc, dc) in sp/st – Counts as 1 2dccl
beg 3trclbeg tr, * yoh 2 times, insert hook in st, yoh pull through, (yoh, pull through 2 lps on hook) 2 times, rep from * 2 times, yoh and pull through all 3 lps – Counts as 1 3trcl
beg 4dc-pcorn (beg dc, 3dc) in st/sp indicated, remove lp from hook, insert hook in beg dc, grab lp, pull lp through to close popcorn – Counts as 1 4dc-pcorn
beg dc (sc, ch1) – counts as 1 dc
beg tr (sc, ch2) – Counts as 1 tr
chN chain N number of times
dc double crochet
lp loop
MR make ring: slip knot, ch3, ss in third ch from hook
rep repeat
rnd round
sc single crochet
sp space (chain space)
ss slip stitch
st stitch
tr treble crochet
yoh yarn over hook
Written Instructions & Step-by-step Photos (US Terms)
Step by Step photos coming 3pm CST
Rnd 1 MR, beg 2dccl, (ch2, 2dccl) 7 times, ch2, ss in beg 2dccl. [8 2dccl, 8 sp]
Rnd 2 Beg 3trcl in first sp, (ch2, 3trcl in same sp, ch2, 3trcl in next sp, ch5, 3trcl in same sp, ch2, 3trcl in next sp) 4 times omitting final 3trcl, ss in beg 3trcl. [16 3trcl, 16 sp]
Rnd 3 Beg 4dc-pcorn in first sp, * ch2, 4dc-pcorn in same sp, ch3, sc in next sp, 2dccl in next sp, (ch2, 2dccl in same sp) 5 times, sc in next sp, ch3, 4dc-pcorn in next sp, rep from * 3 times omitting final 4dc-pcorn, ss in beg 4dc-pcorn. [8 4dc-pcorn, 24 2dccl, 8 sc, 32 sp]
Rnd 4 Beg dc in first sp, * 2dc in same sp, 2dc in next 3 sps, (2dc, ch2, 2dc) in corner sp, 2dc in next 3 sps, dc in next sp, rep from * 3 times omitting final dc, ss in beg dc. [76 dc, 4 sp]
Rnd 5 (Sc in all sts across to corner, 3sc in corner sp) 4 times, sc in all sts to beginning, ss in first sc, cut yarn and weave ends. [88 sc]
Stitch Guide (UK Terms)
Note: Scroll up for US Terms.
2trcl (yo, insert hook in st, yo, pull up lp, yo, draw yarn through 2 lps) 2 times, yo, draw yarn through 3 lps
3dtrcl * yoh 2 times, insert hook in st, yoh pull through, (yoh, pull through 2 lps on hook) 2 times, rep from * 2 times, yoh and pull through all 4 lps
4tr-pcorn 4dc in st/sp indicated, remove lp from hook, insert hook in first dc, grab lp, pull lp through to close popcorn
beg beginning
beg 2trcl (beg tr, tr) in sp/st – Counts as 1 2trcl
beg 3dtrcl beg dtr, * yoh 2 times, insert hook in st, yoh pull through, (yoh, pull through 2 lps on hook) 2 times, rep from * 2 times, yoh and pull through all 3 lps – Counts as 1 3dtrcl
beg 4tr-pcorn (beg tr, 3tr) in st/sp indicated, remove lp from hook, insert hook in beg dc, grab lp, pull lp through to close popcorn – Counts as 1 4tr-pcorn
beg tr (dc, ch1) – counts as 1 tr
beg dtr (dc, ch2) – Counts as 1 dtr
chN chain N number of times
dc double crochet
dtr double treble crochet
lp loop
MR make ring: slip knot, ch3, ss in third ch from hook
rep repeat
rnd round
sp space (chain space)
ss slip stitch
st stitch
tr treble crochet
yoh yarn over hook
Written Instructions & Step-by-step Photos (UK Terms)
Step by Step photos coming 3pm CST
Rnd 1 MR, beg 2trcl, (ch2, 2trcl) 7 times, ch2, ss in beg 2trcl. [8 2trcl, 8 sp]
Rnd 2 Beg 3dtrcl in first sp, (ch2, 3dtrcl in same sp, ch2, 3dtrcl in next sp, ch5, 3dtrcl in same sp, ch2, 3dtrcl in next sp) 4 times omitting final 3dtrcl, ss in beg 3dtrcl. [16 3dtrcl, 16 sp]
Rnd 3 Beg 4tr-pcorn in first sp, * ch2, 4tr-pcorn in same sp, ch3, dc in next sp, 2trcl in next sp, (ch2, 2trcl in same sp) 5 times, dc in next sp, ch3, 4tr-pcorn in next sp, rep from * 3 times omitting final 4tr-pcorn, ss in beg 4tr-pcorn. [8 4tr-pcorn, 24 2trcl, 8 dc, 32 sp]
Rnd 4 Beg tr in first sp, * 2tr in same sp, 2tr in next 3 sps, (2tr, ch2, 2tr) in corner sp, 2tr in next 3 sps, tr in next sp, rep from * 3 times omitting final tr, ss in beg tr. [76 tr, 4 sp]
Rnd 5 (Dc in all sts across to corner, 3dc in corner sp) 4 times, dc in all sts to beginning, ss in first dc, cut yarn and weave ends. [88 dc]
CypressTextiles Tree Huggers Facebook Group – This is my main FB group (join!). Share your VVCAL progress pics in this group if you like, and I will share CAL highlights here, but the weekly action will be in the other group linked above.
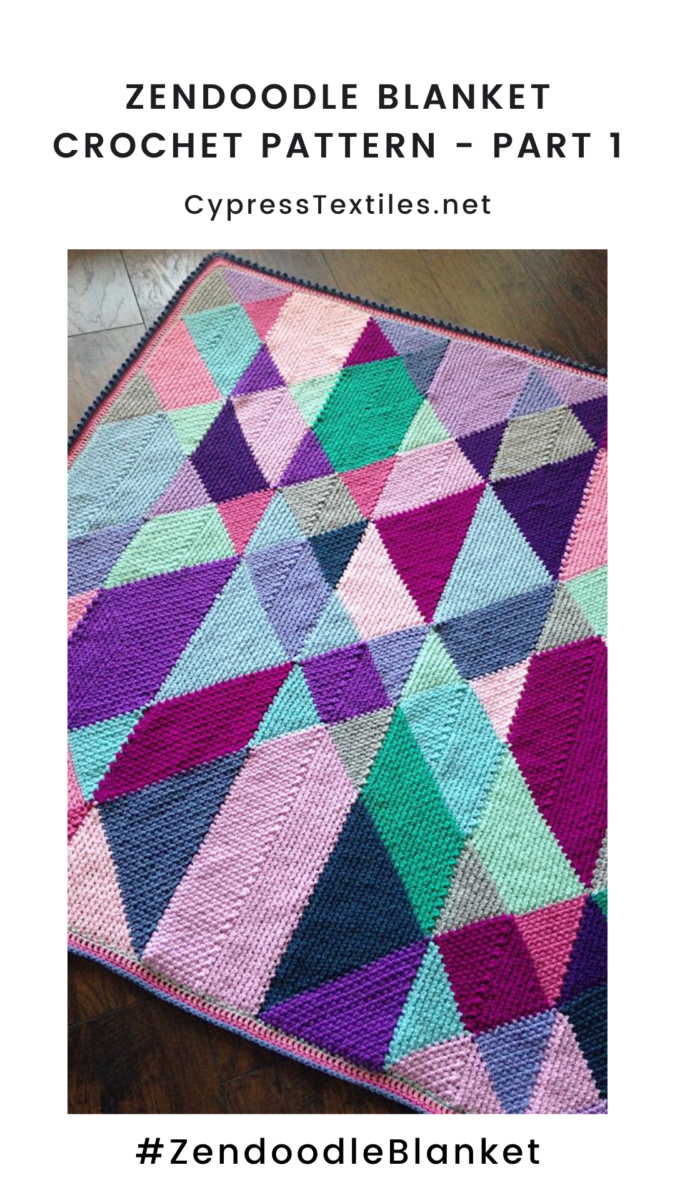
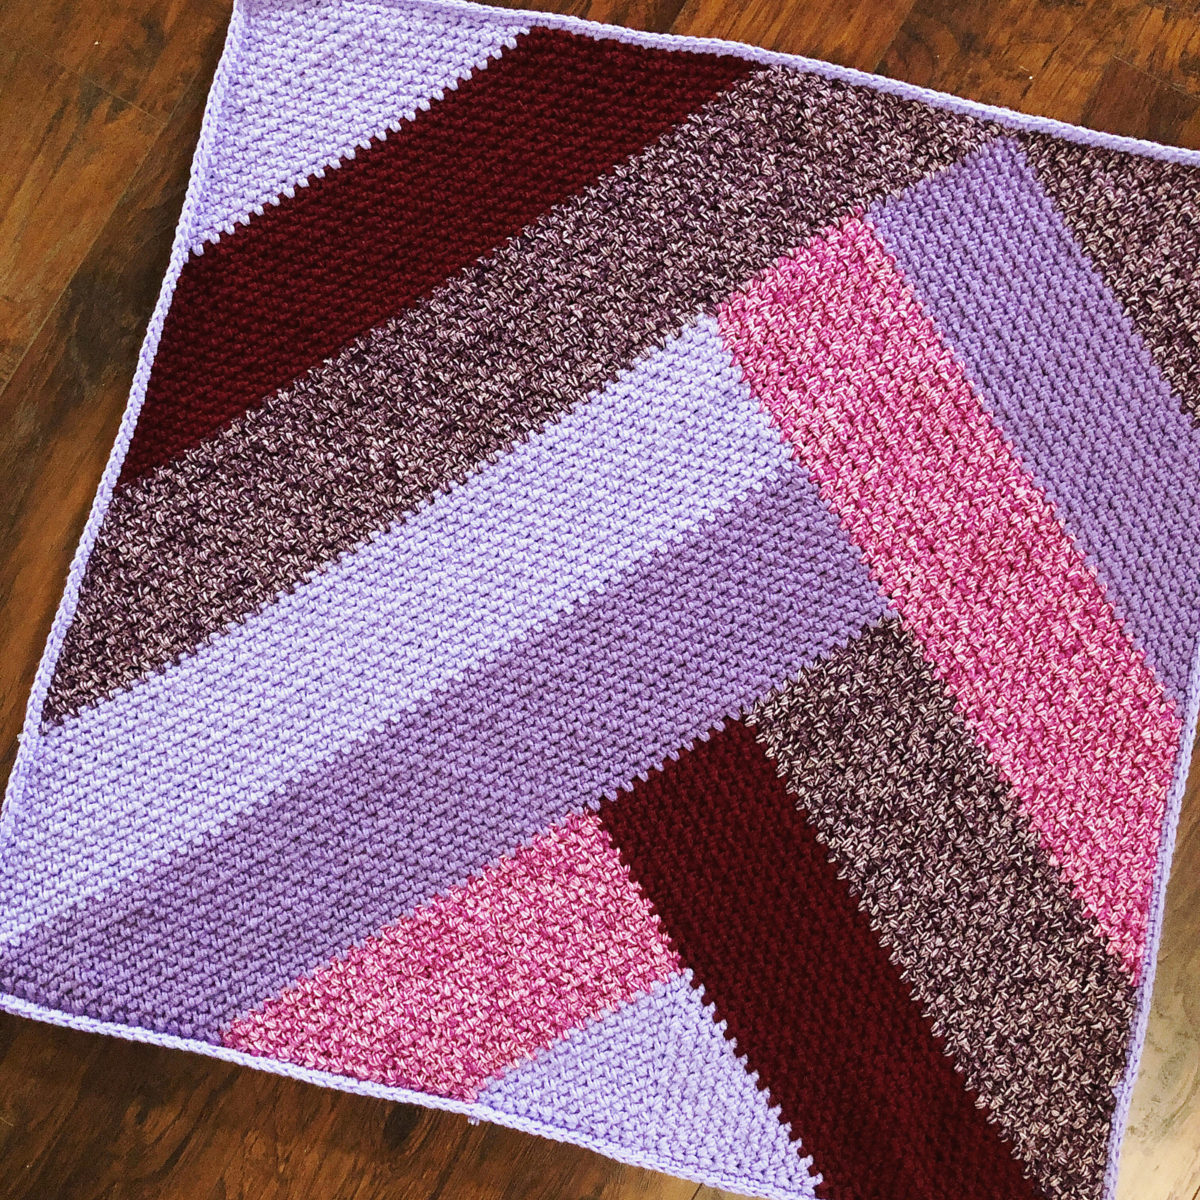
Welcome to PART 2 of the second free pattern of my five-blanket Linen Stitch series. Zendoodle Blanket is a pattern you may recognize. I released it in 2015, and five years later it was in need of a huge makeover as well as clarifying and simplification, so now I am re-releasing it as part of this exciting series!
Here are links to the 4 parts of this free pattern:
Find this pattern in a condensed ad-free PDF for a small fee on Etsy, and Ravelry. Both square and rectangle version PDFs are included!
Update: I have started a rectangle version tutorial also and it will be a 4-part series like this one! Check out Part 1! Here’s what that schematic looks like – it’s in Scheepjes Softfun ranges.
Note: If you have previously purchased my Zendoodle Blanket on Etsy or Ravelry, I will send the updated PDF as soon as I am finished with it. Thank you!
Use this hashtag to keep all of the Zendoodle Blankets progress photos together.
#ZendoodleBlanket
Coming soon! Find this pattern in a condensed ad-free PDF for a small fee on Etsy, and Ravelry. Coloring pages for layouts are also included.
Zendoodle Blanket
Part 2: Strips 2 and 3
Note: Head to Part 1 to see blanket details and yarn amounts, etc.
Order Scheepjes Colour Crafter
These are affiliate links. When purchases are made through them, I will receive a small commission at no additional cost to you.
Note: This pattern is in US Terms, but there is only 1 stitch used: single crochet, so if you are used to reading UK Terms, please know that you are using UK dc for this entire project. (US) sc = (UK) dc
chN chain N number of times
MR make ring: slip knot, ch3, ss in third ch from hook
PLT Join “Pull Loop Through” join (See more info within pattern)
Rep repeat
Rnd round
RS right side
sc single crochet
sk skip
sp space (chain space)
ss slip stitch
st stitch
WS wrong side
yoh yarn over hook
Instructions
Zendoodle is worked in strips from bottom edge to top edge. I give two options to construct this blanket. You can either work the first strip complete and then join all subsequent strips on as you go, or you can make all of the strips complete (separately) and then sew them together using my instructions. I provide full instruction for the join-as-you-go strips method, and then I give notes for the sewn strips method.
Choosing a Construction Method
Should you join-as-you-go, or should you sew the separate strips together?
Join-as-you-go Strips: Make Strip 1 complete, and then join all subsequent strips as you go.
Love a no-sew project? This method is for you!
Want to learn my popular PLT Join method? Choose this method!
Sewn Strips: Work all strips complete (separately) and then sew them together when you’re done.
Want to take your project on the go? Choose this method!
Don’t mind a bit of sewing? This method is for you!
Note: If you are working the blanket join-as-you-go, then this strip is joined onto Strip 1 at the left hand edge as per the instructions. Notes will be given if you’d like to work all of the strips separately and then sew them together.
Step 1: House
Note: The House shape is made by working up a Base Triangle as for Strip 1, but instead of cutting the yarn after the Base Triangle, continue vertically as to make the House shape as instructed.
Row 1WS Using Yarn A, MR, (sc, ch1) 3 times, sc, turn. [4 sc, 3 sp] (Mark this row as the WS – this pattern is reversible and tough to tell which side is which.)
Row 2 (Sc, ch1, sc) in first sp, * ch1, (sc, ch1, sc) in next sp, rep from * 1 time, turn. [6 sc, 5 sp]
Rows 3-10 (Sc, ch1, sc) in first sp, (ch1, sc in next sp) across to center sp, ch1, (sc, ch1, sc) in center sp, (ch1, sc in next sp) across to final sp, ch1, (sc, ch1, sc) in final sp, turn. DO NOT cut yarn after Row 10. [22 sc, 21 sp]
If you are working Join-as-you-go strips, join to Strip 1 at this point as follows:
Turn both Strip 1 and Base Triangle to the WS, and align them as in the photo below.
Release the loop from the hook, insert the hook front to back through the left corner of the base triangle on strip 1, and grab the loop. Now your work should look like the photo below.
Pull Loop Through to the front like in the second photo below. PLT Join maneuver complete!
This is how you will join Strip 2 to Strip 1 as you go. Before every WS Row, when the row touches the completed strip, you will work the PLT maneuver in the space of the corresponding row that you are about to work. I have plenty of photos, don’t worry.
If you are working the strips separately and sewing them afterward, simply omit this PLT Join maneuver and work the strips as instructed.
Rows 11-31 Sc in first sp, (ch1, sc in next sp) 9 times, ch1, (sc, ch1, sc) in next sp, (ch1, sc in next sp) 9 times, ch1, sc in final sp, turn [22 sc, 21 sp]
Here are some photos of the PLT Join process for the House shape.
This photo shows that before you begin Row 13, you release the loop to prepare to PLT Join.
This next photo shows the PLT Join in progress. You can see that the loop is being pulled through the corresponding row that is about to be worked.
Here is Row 3 being worked, and you can see that the first sc of Row 3 is simply continued after the PLT Join maneuver is worked. It is a common mistake to make a chain after you pull the loop through. Instead, you just work the first sc of the next row.
Here is the House shape when it’s done! The work is turned to the RS in this photo. You can see that the House shape is joined on the left hand side, before every WS Row, when the row touches the completed
Step 2: Bow Tie
First triangle of Bow Tie
Joining Note: There is no joining on this part, because the first triangle does not touch strip 1 at all.
Row 1 With RS facing, join Yarn F with ss in first sp, sc in same sp, (ch1, sc in next sp) 10 times, turn. [11 sc, 10 sp]
Row 2 (Ch1, sc in next sp) 10 times, turn. [10 sc, 10 sp]
Row 3 (Sc in next sp, ch1) 9 times, sc in final sp, turn. [10 sc, 9 sp]
Rows 4-21 Rep Rows 2 and 3. Cut yarn after row 21. [1 sc]
Second triangle of Bow Tie
Joining Note: If you are Joining as-you-go, then before you work all odd-numbered rows, be sure and work the PLT Join maneuver as shown in the photos below.
Rows 1-21 With WS facing and Yarn N, work as for first triangle of Bow Tie. Weave all ends.
Here is a photo of the work right before Row 1, with PLT Join in progress. This is an important photo because it shows that the PLT is worked before EVERY WS row – even is that means the first row. After you join your yarn with a slip st, you make the PLT Join maneuver.
Here is the second triangle in progress, and you can see the PLT Join worked before each odd-numbered row. Remember, this photo shows the WS of the work, because the PLT is always worked with WS facing.
Step 3: Diamond
Joining Note: There is no joining on this part, because the Diamond does not touch strip 1 at all.
Row 1 With RS facing, join yarn E in final sc of first triangle of Bow Tie from Step 2, sc in same st, (ch1, sc) 9 times evenly across using photo as a guide, ch1, sc in center sp of House shape from Step 1, (ch1, sc) 9 times evenly across, ch1, sc in final sc of second triangle on Bow Tie from Step 2, turn. [21 sc, 20 ch]
Rows 2-21 (Ch1, sc in next sp) up to final sp before center st, ch1, sc2tog as follows: (Insert hook in next sp, yoh, pull up loop) 2 times, yoh, draw yarn through all 3 lps – sc2tog made, (ch1, sc in next sp) to end, placing final sc in last sp. On Row 21, work sc in ch-sp, cut yarn, and finish off. [1 sc]
Step 4: Bow Tie
First triangle of Bow Tie
Joining Note: There is no joining on this part, because the first triangle does not touch strip 1 at all.
Row 1 With RS facing, join Yarn H with ss in final sc of first triangle on Bow Tie from Step 2, sc in same sp, (ch1, sc) 10 times evenly across placing final sc in final sc of Diamond from Step 3, turn. [11 sc, 10 sp]
Row 2 (Ch1, sc in next sp) 10 times, turn. [10 sc, 10 sp]
Row 3 (Sc in next sp, ch1) 9 times, sc in final sp, turn. [10 sc, 9 sp]
Rows 4-21 Rep Rows 2 and 3. Cut yarn after row 21. [1 sc]
Second triangle of Bow Tie
Joining Note: If you are Joining as-you-go, then before you work all odd-numbered rows, be sure and work the PLT Join maneuver.
Rows 1-21 With WS facing, join Yarn M with ss in final sc of second triangle on Bow Tie from Step 2, and work as for first triangle. Weave all ends.
Step 5: Arrow A, Tail pointing left
Joining Note: Be sure to work PLT Join before each WS row, unless you are making all your strips up and then sewing them together..
Row 1 With WS facing, join yarn I in final sc of second triangle on Bow Tie from Step 4, (sc, ch1, sc) in same st, (ch1, sc) 9 times evenly across to just before center, ch1, sc in final sc of Diamond from Step 3, (ch1, sc) 9 times evenly across to just before end, ch1, (sc, ch1, sc) in final st of first triangle on Bow Tie from Step 4, turn. [21 sc, 20 ch]
Row 2 (Sc, ch1, sc) in first sp, (ch1, sc in next sp) 9 times, ch1, sc2tog over the next 2 sps, (ch1, sc in next sp) 9 times, ch1, (sc, ch1, sc) in final sp, turn. [21 sc, 21 ch, 1 sc2tog]
Rows 4-20 Rep Row 2.
Row 21 (Sc, ch1, sc) in first sp, (ch1, sc in next sp) 9 times, ch1, sc2tog over next 2 sps, (ch1, sc in next sp) across to end, turn. [21 sc, 21 sp, 1 sc2tog]
Row 22 (Ch1, sc in next sp) across to ch-sp just before sc2tog, ch1, sc2tog over next 2 sps, (ch1, sc in next sp) 9 times, (sc, ch1, sc) in final sp, turn. [20 sc, 21 sp, 1 sc2tog]
Rows 23-40 Rep Rows 21 and 22, using chart as a guide. [11 sc, 12 sp, 1 sc2tog]
Row 41 (Sc, ch1, sc) in first sp, (ch1, sc in next sp) 9 times, ch1, sc2tog, cut yarn and weave ends. [11 sc, 11 sp, 1 sc2tog]
Step 6: Large Triangle, Tail pointing right
Joining Note: There is no PLT joining on this shape, because it does not touch the completed strip.
Row 1 With RS facing, join Yarn J with ss in final sc of Row 21 on Arrow A from Step 5, sc in same st, (ch1, sc) 20 times evenly across placing final sc in first sp on Row 41 of Arrow A, turn. [21 sc, 20 sp]
Row 2 (Ch1, sc in next sp) across to end, turn. [20 sc, 20 sp]
Row 3 (Sc in next sp, ch1) across to final sp, sc in final sp, turn. [20 sc, 19 sp]
Rows 4-41 Rep Rows 2 and 3, cutting yarn after Row 41. [1 sc]
Step 7: Trapezoid B, Tail pointing left
This Trapezoid B in the photo is worked after a Trapezoid A, but the concept is the same.
Joining Note: Be sure to work PLT Join before every WS row, unless you are making all your strips up and then sewing them together. .
Row 1 With WS facing, join Yarn A with ss in first sp of Row 41 of Arrow A from Step 5, sc in same sp, (ch1, sc) 20 times evenly across placing final sc in last st of Large Triangle from Step 6, turn. [21 sc, 20 sp]
Rows 2-20 Work exactly as for Large Triangle from Step 6 stopping after Row 20, cut yarn and weave all ends. [11 sc, 11 sp]
Step 8: Bow Tie
First triangle of Bow Tie
Joining Note: There is no joining on this shape as it does not touch the completed strip.
Row 1 With RS facing, join Yarn G with ss in final sc of Large Triangle from Step 6, sc in same st, (ch1, sc) 10 times evenly across placing final sc in first sp of Row 20 on Trapezoid B from Step 7, turn. [11 sc, 10 sp]
Rows 2–21 Work as for First Triangle of Bow Tie as normal.
Second triangle of Bow Tie
Joining Note: Be sure to make the PLT Join maneuver before each WS row, unless you are making all your strips up and then sewing them together.
Row 1 With WS facing, join Yarn I with ss in first sp of Row 20 of Trapezoid B from Step 7, sc in same sp, (ch1, sc in next sp) 10 times, turn. [11 sc, 10 sp]
Rows 2-21 Work as for Second Triangle of Bow Tie as normal.
Step 9: Diamond
Joining Note: There is no joining on this part, because the Diamond does not touch the completed strip.
Row 1 With RS facing, join yarn K in final sc of first triangle of Bow Tie from Step 8, sc in same st, (ch1, sc) 9 times evenly across using photo as a guide, ch1, sc in center st of Trapezoid B from Step 7, (ch1, sc) 9 times evenly across, ch1, sc in final sc of second triangle on Bow Tie from Step 8, turn. [21 sc, 20 ch]
Rows 2-21 (Ch1, sc in next sp) up to final sp before center st, ch1, sc2tog as follows: (Insert hook in next sp, yoh, pull up loop) 2 times, yoh, draw yarn through all 3 lps – sc2tog made, (ch1, sc in next sp) to end, placing final sc in last sp. On Row 21, work sc in ch-sp, cut yarn, and finish off. [1 sc]
Step 10: Bow Tie
First triangle of Bow Tie
Joining Note: There is no joining on this shape as it does not touch the completed strip.
Row 1 With RS facing, join Yarn E with ss in final sc of First Triangle on Bow Tie from Step 8, sc in same st, (ch1, sc) 10 times evenly across placing final sc in final st of Diamond from Step 9, turn. [11 sc, 10 sp]
Rows 2–21 Work as for First Triangle of Bow Tie as normal.
Second triangle of Bow Tie
Joining Note: Be sure to make the PLT Join maneuver before each WS row, unless you are making all your strips up and then sewing them together.
Row 1 With WS facing, join Yarn M with ss in final sc of Second Triangle on Bow Tie from Step 8, sc in same st, (ch1, sc) 10 times evenly across placing final sc in final st of Diamond from Step 9, turn. [11 sc, 10 sp]
Rows 2-21 Work as for Second Triangle of Bow Tie as normal.
Step 11: Fill Triangle B
Joining Note: There is no joining on this shape because it doesn’t touch the completed strip.
Row 1 With RS facing, join yarn I with ss in final st of first triangle of Bow Tie from step 10, sc in same st, (ch1, sc) 9 times evenly across, ch1, sc in final st of Diamond from step 9, (ch1, sc) 10 times evenly across placing final sc in final st of second triangle on Bow Tie from step 10, turn [21 sc, 20 sp]
Row 2-9 (Sc in next sp, ch1) across to just sp just before center st, sc2tog over next 2 sps, (ch1, sc in next sp) to end, turn. [4 sc, 4 sp, 1 sc2tog]
Row 10 Sc in sp, ch1, sc2tog over next 2 sps, ch1, sc in final sp, turn. [2 sc, 2 sp, 1 sc2tog]
Row 11 Sc2tog over 2 sps, cut yarn and weave ends.
Strip 2 is complete! Do a happy dance!
Strip 3
Note: If you are working the blanket join-as-you-go, then this strip is joined onto Strip 2 at the left hand edge as per the instructions. Notes will be given if you’d like to work all of the strips separately and then sew them together.
Step 1: Base Triangle
Joining note: there is no joining on this shape because it doesn’t touch the completed strip.
Row 1WS Using Yarn K, MR, (sc, ch1) 3 times, sc, turn. [4 sc, 3 sp] (Mark this row as the WS – this pattern is reversible and tough to tell which side is which.)
Row 2 (Sc, ch1, sc) in first sp, * ch1, (sc, ch1, sc) in next sp, rep from * 1 time, turn. [6 sc, 5 sp]
Rows 3-10 (Sc, ch1, sc) in first sp, (ch1, sc in next sp) across to center sp, ch1, (sc, ch1, sc) in center sp, (ch1, sc in next sp) across to final sp, ch1, (sc, ch1, sc) in final sp, turn. Cut yarn after Row 10. [22 sc, 21 sp]
Step 2: Bow Tie
First triangle of Bow Tie
Joining Note: There is no joining on this part, because the first triangle does not touch strip 2 at all.
Row 1 With RS facing, join Yarn F with ss in first sp, sc in same sp, (ch1, sc in next sp) 10 times, turn. [11 sc, 10 sp]
Row 2 (Ch1, sc in next sp) 10 times, turn. [10 sc, 10 sp]
Row 3 (Sc in next sp, ch1) 9 times, sc in final sp, turn. [10 sc, 9 sp]
Rows 4-21 Rep Rows 2 and 3. Cut yarn after row 21. [1 sc]
Second triangle of Bow Tie
Joining Note: If you are Joining as-you-go, then before you work all WS rows, be sure and work the PLT Join maneuver.
Rows 1-21 With WS facing and Yarn N, work as for first triangle of Bow Tie. Weave all ends.
Step 3: Trapezoid A, Tail pointing left
Joining Note: If you are joining strips as-you-go, be sure to work the PLT Join maneuver before each WS row.
Row 1 With WS facing, join Yarn C with ss in final st of second triangle on Bow Tie from Step 2, (sc, ch1, sc) in same st, (ch1, sc) 9 times evenly across, ch1, sc in center sp of Row 10 of Base Triangle from Step 1, (ch1, sc) 10 times evenly across placing final sc in final st of first triangle of Bow Tie from Step 2, turn. [22 sc, 21 sp]
Row 2 (Ch1, sc in next sp) 9 times, sc2tog as follows: (Insert hook in next sp, yoh, pull up loop) 2 times, yoh, draw yarn through all 3 lps – sc2tog made, (ch1, sc in next sp) 9 times, ch1, (sc, ch1, sc) in final sp, turn. [20 sc, 20 sp, 1 sc2tog]
Row 3 (Sc, ch1, sc) in first sp, (ch1, sc in next sp) 9 times, ch1, sc2tog, (ch1, sc in next sp) across to end, placing final sc in final sp, turn. [20 sc, 20 sp, 1 sc2tog]
Row 4 (Ch1, sc in next sp) across to within 1 sp of sc2tog, sc2tog across next 2 sps, (ch1, sc in next sp) 9 times, ch1, (sc, ch1, sc) in final sp, turn. [19 sc, 20 sp, 1 sc2tog]
Rows 5-20 Rep Rows 3 and 4, using chart as a guide when needed. [11 sc, 12 sp, 1 sc2tog]
Row 21 (Sc, ch1, sc) in first sp, (ch1, sc in next sp) 10 times, ch1, join with ss to sc2tog of Row 20, cut yarn and weave ends. [11 sc, 11 sp, 1 sc2tog]
Step 4: Large Triangle, Tail pointing right
Joining Note: There is no joining on this part, because the Large Triangle does not touch strip 2 at all.
Row 1 With RS facing, join Yarn D with ss in final sc of first triangle of Bow Tie from Step 2, sc in same st, (ch1, sc) 20 times evenly across placing final sc in first sp on Row 21 of Trapezoid A from Step 3, turn. [21 sc, 20 sp]
Row 2 (Ch1, sc in next sp) across to end, turn. [20 sc, 20 sp]
Row 3 (Sc in next sp, ch1) across to final sp, sc in final sp, turn. [20 sc, 19 sp]
Rows 4-41 Rep Rows 2 and 3, cutting yarn after Row 41. [1 sc]
Step 5: Trapezoid B
The Trapezoid B in the photo is worked after a trapezoid A, but the concept is the same.
Joining Note: Be sure to work PLT Join before every WS row, unless you are making all your strips up and then sewing them together.
Row 1 With WS facing, join Yarn B with ss in first sp of Row 21 of Trapezoid A from Step 3, sc in same sp, (ch1, sc) 20 times evenly across placing final sc in last st of Large Triangle from Step 4, turn. [21 sc, 20 sp]
Rows 2-20 Work exactly as for Large Triangle stopping after Row 20, cut yarn and weave all ends. [11 sc, 11 sp]
Step 6: Bow Tie
First triangle of Bow Tie
Joining Note: There is no joining on this part, because the first triangle does not touch strip 2 at all.
Row 1 With RS facing, join Yarn J with ss in final st of Large Triangle from Step 4, sc in same st, (ch1, sc) 10 times evenly across placing final sc in first sp of Row 20 on Trapezoid B from Step 5, turn. [11 sc, 10 sp]
Row 2 (Ch1, sc in next sp) 10 times, turn. [10 sc, 10 sp]
Row 3 (Sc in next sp, ch1) 9 times, sc in final sp, turn. [10 sc, 9 sp]
Rows 4-21 Rep Rows 2 and 3. Cut yarn after row 21. [1 sc]
Second triangle of Bow Tie
Joining Note: If you are Joining as-you-go, then before you work all WS rows, be sure and work the PLT Join maneuver.
Rows 1-21 With WS facing and Yarn E, work as for first triangle of Bow Tie. Weave all ends.
Step 7: Arrow A, Tail pointing left
Joining Note: Be sure to work PLT Join before each WS row, unless you are making all your strips up and then sewing them together..
Row 1 With WS facing, join yarn F in final sc of second triangle on Bow Tie from Step 6, (sc, ch1, sc) in same st, (ch1, sc) 9 times evenly across to just before center, ch1, sc in first sp of row 20 on Trapezoid B from Step 5, (ch1, sc) 9 times evenly across to just before end, ch1, (sc, ch1, sc) in final st of first triangle on Bow Tie from Step 6, turn. [21 sc, 20 ch]
Row 2 (Sc, ch1, sc) in first sp, (ch1, sc in next sp) 9 times, ch1, sc2tog over the next 2 sps, (ch1, sc in next sp) 9 times, ch1, (sc, ch1, sc) in final sp, turn. [21 sc, 21 ch, 1 sc2tog]
Rows 4-20 Rep Row 2.
Row 21 (Sc, ch1, sc) in first sp, (ch1, sc in next sp) 9 times, ch1, sc2tog over next 2 sps, (ch1, sc in next sp) across to end, turn. [21 sc, 21 sp, 1 sc2tog]
Row 22 (Ch1, sc in next sp) across to ch-sp just before sc2tog, ch1, sc2tog over next 2 sps, (ch1, sc in next sp) 9 times, (sc, ch1, sc) in final sp, turn. [20 sc, 21 sp, 1 sc2tog]
Rows 23-40 Rep Rows 21 and 22, using chart as a guide. [11 sc, 12 sp, 1 sc2tog]
Row 41 (Sc, ch1, sc) in first sp, (ch1, sc in next sp) 9 times, ch1, sc2tog, cut yarn and weave ends. [11 sc, 11 sp, 1 sc2tog]
Step 8: Trapezoid B, Tail pointing right
Joining Note: There is no joining on this shape because it doesn’t touch the completed strip.
Row 1 With RS facing, join Yarn B with ss in final st of Row 21 of Arrow A from Step 7, sc in same st, (ch1, sc) 20 times evenly across placing final sc in first sp of Row 41 of Arrow A from Step 7, turn. [21 sc, 20 sp]
Rows 2-20 Work exactly as for Large Triangle stopping after Row 20, cut yarn and weave all ends. [11 sc, 11 sp]
Step 9: Bow Tie
Note: this bow tie is worked after a diamond shape, but the idea is the same.
First triangle of Bow Tie
Joining Note: There is no joining on this shape as it does not touch the completed strip.
Row 1 With RS facing, join Yarn J with ss in final sc of Trapezoid B from Step 9, sc in same st, (ch1, sc) 10 times evenly across placing final sc in first sp of Row 20 on Trapezoid B from Step 9, turn. [11 sc, 10 sp]
Rows 2–21 Work as for First Triangle of Bow Tie as normal.
Second triangle of Bow Tie
Joining Note: Be sure to make the PLT Join maneuver before each WS row, unless you are making all your strips up and then sewing them together.
Rows 1-21 With WS facing and Yarn E, work as for first triangle of Bow Tie. Weave all ends.
Step 10: Diamond
Joining Note: There is no joining on this part, because the Diamond does not touch the completed strip.
Row 1 With RS facing, join yarn F in final sc of first triangle of Bow Tie from Step 9, sc in same st, (ch1, sc) 9 times evenly across using photo as a guide, ch1, sc in center st of Trapezoid B from Step 8, (ch1, sc) 9 times evenly across, ch1, sc in final sc of second triangle on Bow Tie from Step 9, turn. [21 sc, 20 ch]
Rows 2-21 (Ch1, sc in next sp) up to final sp before center st, ch1, sc2tog as follows: (Insert hook in next sp, yoh, pull up loop) 2 times, yoh, draw yarn through all 3 lps – sc2tog made, (ch1, sc in next sp) to end, placing final sc in last sp. On Row 21, work sc in ch-sp, cut yarn, and finish off. [1 sc]
Step 11: Bow Tie
First triangle of Bow Tie
Joining Note: There is no joining on this shape as it does not touch the completed strip.
Row 1 With RS facing, join Yarn N with ss in final sc of First Triangle on Bow Tie from Step 9, sc in same st, (ch1, sc) 10 times evenly across placing final sc in final st of Diamond from Step 10, turn. [11 sc, 10 sp]
Rows 2–21 Work as for First Triangle of Bow Tie as normal.
Second triangle of Bow Tie
Joining Note: Be sure to make the PLT Join maneuver before each WS row, unless you are making all your strips up and then sewing them together.
Row 1 With WS facing, join Yarn L with ss in final sc of Second Triangle on Bow Tie from Step 9, sc in same st, (ch1, sc) 10 times evenly across placing final sc in final st of Diamond from Step 10, turn. [11 sc, 10 sp]
Rows 2-21 Work as for Second Triangle of Bow Tie as normal.
Step 12: Fill Triangle B
Joining Note: There is no joining on this shape because it doesn’t touch the completed strip.
Row 1 With RS facing, join yarn E with ss in final st of first triangle of Bow Tie from step 11, sc in same st, (ch1, sc) 9 times evenly across, ch1, sc in final st of Diamond from step 10, (ch1, sc) 10 times evenly across placing final sc in final st of second triangle on Bow Tie from step 11, turn [21 sc, 20 sp]
Row 2-9 (Sc in next sp, ch1) across to just sp just before center st, sc2tog over next 2 sps, (ch1, sc in next sp) to end, turn. [4 sc, 4 sp, 1 sc2tog]
Row 10 Sc in sp, ch1, sc2tog over next 2 sps, ch1, sc in final sp, turn. [2 sc, 2 sp, 1 sc2tog]
Row 11 Sc2tog over 2 sps, cut yarn and weave ends.
Strip 3 is finished!! Woohoo! Give yourself a fist bump!
I can’t wait to share more with you, but for now, Part 2 is finished!
The full 2020 VVCAL PDF pattern is up on Ravelry and Etsy! Includes entire pattern – squares, join, and border, and BOTH US and UK Terms PDFs are included. Yay!! The response has been overwhelming. I humbly thank you for your support.
What to Expect Today
2 blog posts, each with a square – Rome Square (this post), and Shanghai Square
Scroll down on the Plain Granny Square page and find the “Week 13” section to see which granny squares to make for this week
Patterns include written instructions in US and UK Terms, chart, step-by-step photos, and YouTube video (US Terms).
Social Media Hashtags: #VVCAL and #CypressTextiles
CypressTextiles Tree Huggers Facebook Group – This is my main FB group (join!). Share your VVCAL progress pics in this group if you like, and I will share CAL highlights here, but the weekly action will be in the other group linked above.
There is a law in Rome that permits cats to live where they were born without disturbance. While visiting Rome, you will be able to see hundreds of cats resting in the ruins of the Forum and walking on the walls of the Colosseum.
3,000 Euros are collected from the bottom of the Trevi Fountain every night. All this money is donated to a catholic charity, Caritas, who uses the money to help needy families in Rome.
Today, Rome contains 280 fountains and over 900 churches that tourists and locals can enjoy year round.
The symbol SPQR, which is found all over the city of Rome, stands for “Senatus Populusque Romanus” which means, “The senate and the people of Rome”.
The Roman Emperor Trajan built the first ever shopping mall. It contained multiple levels and over 150 outlets that sold everything ranging from food to clothes.
Photo Taken In Italy, Roma
Rome Square Pattern
“Catona 10g Colour Pack” Version: Make 2 – Use colors 411 and 128
Catona “Shy Violet” Version: Make 2 – Use colors 249 and 414
Catona “Fresh Earth” Version: Make 2 – Use colors 245 and 522
Colour Crafter Version: Make 1 Note: I’m just using my stash.
Stone Washed / River Washed 10g Colour Pack Version: Make 2 – Use colors 811 and 810
Measurements and Materials
Measurements: Blanket will measure about 64x72in for all colorways/yarns
Gauge: Squares measure 4.25in for Catona, 6in for Colour Crafter, 4.5in for Stone Washed/River Washed
Notions: US Size 3mm hook for Catona, 4.25mm hook for Colour Crafter, 3mm for Stone Washed’/River Washed
2dccl (yo, insert hook in st, yo, pull up lp, yo, draw yarn through 2 lps) 2 times, yo, draw yarn through 3 lps
beg beginning
beg 2dccl(beg dc, dc) in sp/st – Counts as 1 2dccl
beg dc (sc, ch1) – counts as 1 dc
beg tr (sc, ch2) – Counts as 1 tr
chN chain N number of times
dc double crochet
lp loop
MR make ring: slip knot, ch3, ss in third ch from hook
rep repeat
rnd round
sc single crochet
sp space (chain space)
ss slip stitch
st stitch
tr treble crochet
yoh yarn over hook
Written Instructions & Step-by-step Photos (US Terms)
Rnd 1 MR, beg 2dccl, (ch3, 2dccl) 5 times, ch3, ss in beg 2dccl. [6 2dccl, 6 sp]
Rnd 2 Beg tr in sp, (5tr in same sp, tr in next sp) 6 times omitting final tr, ss in beg tr. [36 tr]
Rnd 3 Beg 2dccl in next st, (ch3, 2dccl in same st, ch1, sk2, 2dccl in next st) 12 times omitting final 2dccl, ss in beg 2dccl. [24 2dccl, 24 sp]
Rnd 4 Ss in first ch, sc in same sp * ch4, (3tr, ch3, 3tr) in next ch-3 sp, ch4, sc in next ch-3 sp, ch3, sc in ch-1 sp, ch3, sc in next ch-3 sp, rep from * 3 times omitting final sc, ss in first sc. [24 tr, 12 sc, 20 sp]
Rnd 5 * 2sc in next sp, sc in next 3 sts, 5sc in corner sp, sc in next 3 sts, (2sc in next sp, sc in sc) 3 times, rep from * 3 times, ss in first sc, cut yarn and weave ends. [88 sc]
Stitch Guide (UK Terms)
Note: Scroll up for US Terms.
2trcl (yo, insert hook in st, yo, pull up lp, yo, draw yarn through 2 lps) 2 times, yo, draw yarn through 3 lps
begbeginning
beg 2trcl (beg tr, tr) in st/sp – Counts as 1 2trcl
beg tr(dc, ch1) – counts as 1 tr
beg dtr(dc, ch2) – Counts as 1 dtr
chNchain N number of times
dcdouble crochet
dtr double treble crochet
lploop
MR make ring: slip knot, ch3, ss in third ch from hook
rep repeat
rndround
sp space (chain space)
ss slip stitch
st stitch
tr treble crochet
yoh yarn over hook
Written Instructions & Step-by-step Photos (UK Terms)
Rnd 1 MR, beg 2trcl, (ch3, 2trcl) 5 times, ch3, ss in beg 2trcl. [6 2trcl, 6 sp]
Rnd 2 Beg dtr in sp, (5dtr in same sp, dtr in next sp) 6 times omitting final dtr, ss in beg dtr. [36 dtr]
Rnd 3 Beg 2trcl in next st, (ch3, 2trcl in same st, ch1, sk2, 2trcl in next st) 12 times omitting final 2trcl, ss in beg 2trcl. [24 2trcl, 24 sp]
Rnd 4 Ss in first ch, dc in same sp * ch4, (3dtr, ch3, 3dtr) in next ch-3 sp, ch4, dc in next ch-3 sp, ch3, dc in ch-1 sp, ch3, dc in next ch-3 sp, rep from * 3 times omitting final dc, ss in first dc. [24 dtr, 12 dc, 20 sp]
Rnd 5 * 2dc in next sp, dc in next 3 sts, 5dc in corner sp, dc in next 3 sts, (2dc in next sp, dc in dc) 3 times, rep from * 3 times, ss in first dc, cut yarn and weave ends. [88 dc]
CypressTextiles Tree Huggers Facebook Group – This is my main FB group (join!). Share your VVCAL progress pics in this group if you like, and I will share CAL highlights here, but the weekly action will be in the other group linked above.
The full 2020 VVCAL PDF pattern is up on Ravelry and Etsy! Includes entire pattern – squares, join, and border, and BOTH US and UK Terms PDFs are included. Yay!! The response has been overwhelming. I humbly thank you for your support.
What to Expect Today
2 blog posts, each with a square – Rome Square, and Shanghai Square
Scroll down on the Plain Granny Square page and find the “Week 13” section to see which granny squares to make for this week
Patterns include written instructions in US and UK Terms, chart, step-by-step photos, and YouTube video (US Terms).
Social Media Hashtags: #VVCAL and #CypressTextiles
CypressTextiles Tree Huggers Facebook Group – This is my main FB group (join!). Share your VVCAL progress pics in this group if you like, and I will share CAL highlights here, but the weekly action will be in the other group linked above.
More people live in this one city than in the entire country of New Zealand. Shanghai’s population — more than 23 million people — is over five times as large. Shanghai is the largest city in the world when measured by population within the city limits.
The name Shanghai means “on the sea,” which is appropriate given the city’s location at the mouth of the Huangpu River.
Unlike Peking opera, Shanghai opera usually casts women in both male and female roles.
You can go skiing in Shanghai at Yinqixing Indoor Skiing Site, one of the largest indoor skiing facilities on the planet.
Shanghai receives fewer average hours of sunlight per year and has a greater average annual rainfall than Portland, Oregon, so pack your umbrella.
Shanghai skyline at sunny day, China.
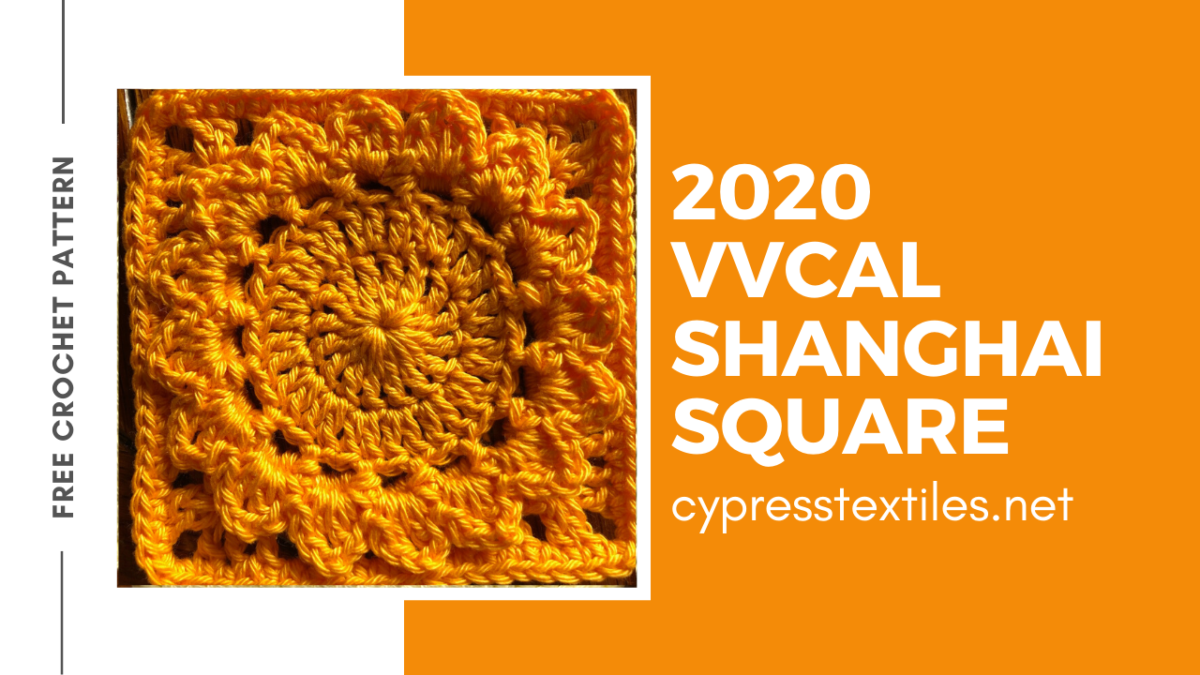
Shanghai Square Pattern
“Catona 10g Colour Pack” Version: Make 2 – Use colors 511 and 392
Catona “Shy Violet” Version: Make 2 – Use colors 240 and 398
Catona “Fresh Earth” Version: Make 2 – Use colors 249 and 388
Colour Crafter Version: Make 1 Note: I’m just using my stash.
Stone Washed / River Washed 10g Colour Pack Version: Make 2 – Use colors 828 and 802
Measurements and Materials
Measurements: Blanket will measure about 64x72in for all colorways/yarns
Gauge: Squares measure 4.25in for Catona, 6in for Colour Crafter, 4.5in for Stone Washed/River Washed
Notions: US Size 3mm hook for Catona, 4.25mm hook for Colour Crafter, 3mm for Stone Washed’/River Washed
MR make ring: slip knot, ch3, ss in third ch from hook
rep repeat
rnd round
sc single crochet
sk skip
sp space (chain space)
ss slip stitch
st stitch
tr treble crochet
yoh yarn over hook
Written Instructions & Step-by-step Photos (US Terms)
Rnd 1 MR, beg tr, 15tr, ss in beg tr. [16 tr]
Rnd 2 (Beg dc, dc) in next st, 2dc in 15 sts, ss in beg dc. [32 dc]
Rnd 3 (Sc, ch3, sk1) 16 times, ss in first sc. [16 sc, 16 sp]
Rnd 4 (Sc, ch1, dc, ch1, dc, ch1, sc) in all 16 sps around, ss in first sc. [32 dc, 32 sc, 48 sp]
Rnd 5 Remove hook from work, insert hook front to back between first and last sts of Rnd 4, grab lp, pull lp to back of work, (sc around sc of Rnd 3 working behind “petals”, ch3) 16 times, ss in first sc, turn work to RS. [16 sc, 16 sp]
Rnd 6 (3sc in next sp, 3hdc in next sp, 3dc in next sp, ch2, 3dc in same sp, 3hdc in next sp) 4 times, ss in first sc. [24 dc, 24 hdc, 12 sc, 4 sp]
Rnd 7 Beg dc in next sc, * (ch1, sk1, dc) 3 times, ch1, (2dc, ch2, 2dc) in sp, (ch1, sk1, dc) 4 times, rep from * 3 times omitting final dc, ss in beg dc. [44 dc, 36 sp]
Rnd 8 (Sc in all sts/sps across to corner sp, 3sc in corner sp) 4 times, sc in all sts/sps across to beginning, ss in first sc, cut yarn and weave ends. [88 sc]
Stitch Guide (UK Terms)
Note: Scroll up for US Terms.
beg beginning
beg tr (dc, ch1) – counts as 1 tr
beg dtr (dc, ch2) – Counts as 1 dtr
chN chain N number of times
dc double crochet
dtr double treble crochet
htr half treble crochet
lp loop
MR make ring: slip knot, ch3, ss in third ch from hook
rep repeat
rnd round
sk skip
sp space (chain space)
ss slip stitch
st stitch
tr treble crochet
yoh yarn over hook
Written Instructions & Step-by-step Photos (UK Terms)
Rnd 1 MR, beg dtr, 15dtr, ss in beg dtr. [16 dtr]
Rnd 2 (Beg tr, tr) in next st, 2tr in 15 sts, ss in beg tr. [32 tr]
Rnd 3 (Dc, ch3, sk1) 16 times, ss in first dc. [16 dc, 16 sp]
Rnd 4 (Dc, ch1, tr, ch1, tr, ch1, dc) in all 16 sps around, ss in first dc. [32 tr, 32 dc, 48 sp]
Rnd 5 Remove hook from work, insert hook front to back between first and last sts of Rnd 4, grab lp, pull lp to back of work, (dc around dc of Rnd 3 working behind “petals”, ch3) 16 times, ss in first dc, turn work to RS. [16 dc, 16 sp]
Rnd 6 (3dc in next sp, 3htr in next sp, 3tr in next sp, ch2, 3tr in same sp, 3htr in next sp) 4 times, ss in first dc. [24 tr, 24 htr, 12 dc, 4 sp]
Rnd 7 Beg tr in next dc, * (ch1, sk1, tr) 3 times, ch1, (2tr, ch2, 2tr) in sp, (ch1, sk1, tr) 4 times, rep from * 3 times omitting final tr, ss in beg tr. [44 tr, 36 sp]
Rnd 8 (Dc in all sts/sps across to corner sp, 3dc in corner sp) 4 times, dc in all sts/sps across to beginning, ss in first dc, cut yarn and weave ends. [88 dc]
CypressTextiles Tree Huggers Facebook Group – This is my main FB group (join!). Share your VVCAL progress pics in this group if you like, and I will share CAL highlights here, but the weekly action will be in the other group linked above.
Hello, lovely! Welcome to the second free pattern of my five-blanket Linen Stitch series. Zendoodle Blanket is a pattern you may recognize. I released it in 2015, and five years later it was in need of a huge makeover as well as clarifying and simplification, so now I am re-releasing it as part of this exciting series!
Here are links to the 4 parts of this free pattern:
Find this pattern in a condensed ad-free PDF for a small fee on Etsy, and Ravelry.
Update: I have started a rectangle version tutorial also and it will be a 4-part series like this one! Check out Part 1! Here’s what that schematic looks like – it’s in Scheepjes Softfun ranges.
Note: If you have previously purchased my Zendoodle Blanket on Etsy or Ravelry, I will send the updated PDF as soon as I am finished with it. Thank you!
Use this hashtag to keep all of the Zendoodle Blankets progress photos together.
#ZendoodleBlanket
Coming soon! Find this pattern in a condensed ad-free PDF for a small fee on Etsy, and Ravelry. Coloring pages for layouts are also included.
Zendoodle Blanket Crochet Pattern
Blanket Details
Zendoodle Blanket is an update of a pattern I released in 2015. It is a fun, engaging pattern that explores the geometric possibilities of Linen Stitch.
Blanket measures about 54x54in square
Yarn is Scheepjes Colour Crafter
Hook size: 5mm hook
Thicker yarn and larger hook will result in a larger blanket.
Important note about hook size: Whichever hook you would normally use for a certain yarn, you should go up a hook size for this project. Linen stitch tends to “pull in” so your project may be too stiff if you use your normal hook size. If you are trying a yarn for the first time, look at the ball band and then go up a hook size from the recommended. For example, if your ball band recommends size 3mm hook, go up to 3.5m.
Yarn Information
Scheepjes Colour Crafter – 14 colors x 1 ball each
Yarn A: No. 2015
Yarn B: No. 1316
Yarn C: No. 1023
Yarn D: No. 2006
Yarn E: No. 1080
Yarn F: No. 1827
Yarn G: No. 2001
Yarn H: No. 2003
Yarn I: No. 1432
Yarn J: No. 1203
Yarn K: No. 1011
Yarn L: No. 1302
Yarn M: No. 1019
Yarn N: No. 1034
Order Scheepjes Colour Crafter
These are affiliate links. When purchases are made through them, I will receive a small commission at no additional cost to you.
Note: This pattern is only in US Terms, but there is only 1 stitch used: single crochet, so if you are used to reading UK Terms, please know that you are using UK dc for this entire project. (US) sc = (UK) dc
chN chain N number of times
MR make ring: slip knot, ch3, ss in third ch from hook
PLT Join “Pull Loop Through” join (See more info within pattern)
Rep repeat
Rnd round
RS right side
sc single crochet
sk skip
sp space (chain space)
ss slip stitch
st stitch
WS wrong side
yoh yarn over hook
Instructions
Zendoodle is worked in strips from bottom edge to top edge. I give two options to construct this blanket. You can either work the first strip complete and then join all subsequent strips on as you go, or you can make all of the strips complete (separately) and then sew them together using my instructions. I provide full instruction for the join-as-you-go strips method, and then I give notes for the sewn strips method.
Choosing a Construction Method
Should you join-as-you-go, or should you sew the separate strips together?
Join-as-you-go Strips: Make Strip 1 complete, and then join all subsequent strips as you go.
Love a no-sew project? This method is for you!
Want to learn my popular PLT Join method? Choose this method!
Sewn Strips: Work all strips complete (separately) and then sew them together when you’re done.
Want to take your project on the go? Choose this method!
Don’t mind a bit of sewing? This method is for you!
Tips for Neat Edges
For neater edges, follow these tips. Please watch the Base Triangle video below, as I explain these tips and demonstrate them. The video is for my French Braid Blanket Base Triangle, but the methods are exactly the same for the Base Triangle of this blanket.
I do not “chain up” for the first sc of the row, so you will work the first sc of the row directly into a chain space without chaining 1.
Be sure to turn your work the same way each time. If you are looking down on your work from the top edge, you will turn the work counter-clockwise. In other words, you will turn the right edge of the piece toward you to flip the work over.
Work “over” the working yarn for your first sc stitch, instead of carrying it up the edge.
Schematic
Strip 1
Note: This is a prototype and the stitch count in this sample is slightly different from the actual pattern.
Note: This strip is worked all the way through from bottom to top, without any joining or sewing.
Step 1: Base Triangle
Row 1WS Using Yarn A, MR, (sc, ch1) 3 times, sc, turn. [4 sc, 3 sp] (Mark this row as the WS – this pattern is reversible and tough to tell which side is which.)
Row 2 (Sc, ch1, sc) in first sp, * ch1, (sc, ch1, sc) in next sp, rep from * 1 time, turn. [6 sc, 5 sp]
Rows 3-10 (Sc, ch1, sc) in first sp, (ch1, sc in next sp) across to center sp, ch1, (sc, ch1, sc) in center sp, (ch1, sc in next sp) across to final sp, ch1, (sc, ch1, sc) in final sp, turn. Cut yarn after Row 10. [22 sc, 21 sp]
Note: This video is for the Base Triangle of my French Braid Blanket so the size is different, but the methods are the same. I highly recommend watching it to see the techniques.
Step 2: Bow Tie
Note: I started the Base Triangle in this photo a bit differently, just ignore that!
First triangle of Bow Tie
Row 1 With RS facing, join Yarn L with ss in first sp, sc in same sp, (ch1, sc in next sp) 10 times, turn. [11 sc, 10 sp]
Row 2 (Ch1, sc in next sp) 10 times, turn. [10 sc, 10 sp]
Row 3 (Sc in next sp, ch1) 9 times, sc in final sp, turn. [10 sc, 9 sp]
Rows 4-21 Rep Rows 2 and 3. Cut yarn after row 21. [1 sc]
Second triangle of Bow Tie
Rows 1-21 With WS facing and Yarn B, work as for first triangle of Bow Tie. Weave all ends.
Step 3: Trapezoid A, Tail pointing right
Row 1 With RS facing, join Yarn D with ss in first sp, (sc, ch1, sc) in same sp, (ch1, sc) 9 times evenly using above photo as a guide, ch1, sc in center sp of Row 10 of Base Triangle, (ch1, sc) 9 times evenly using above photo as a guide, ch1, sc in final sp, turn. [22 sc, 21 sp]
Row 2 (Ch1, sc in next sp) 9 times, sc2tog as follows: (Insert hook in next sp, yoh, pull up loop) 2 times, yoh, draw yarn through all 3 lps – sc2tog made, (ch1, sc in next sp) 9 times, ch1, (sc, ch1, sc) in final sp, turn. [20 sc, 20 sp, 1 sc2tog]
Row 3 (Sc, ch1, sc) in first sp, (ch1, sc in next sp) 9 times, ch1, sc2tog, (ch1, sc in next sp) across to end, placing final sc in final sp, turn. [20 sc, 20 sp, 1 sc2tog]
Row 4 (Ch1, sc in next sp) across to within 1 sp of sc2tog, sc2tog across next 2 sps, (ch1, sc in next sp) 9 times, ch1, (sc, ch1, sc) in final sp, turn. [19 sc, 20 sp, 1 sc2tog]
Rows 5-20 Rep Rows 3 and 4, using chart as a guide when needed. [11 sc, 12 sp, 1 sc2tog]
Row 21 (Sc, ch1, sc) in first sp, (ch1, sc in next sp) 10 times, ch1, join with ss to sc2tog of Row 20, cut yarn and weave ends. [11 sc, 11 sp, 1 sc2tog]
Step 4: Large Triangle, Tail pointing left
Row 1 With WS facing, join Yarn K with ss in final sc of second triangle of Bow Tie from Step 2, sc in same st, (ch1, sc in next sp) 20 times evenly across placing final sc in last sp of Trapezoid A using photo as a guide, turn. [21 sc, 20 sp]
Row 2 (Ch1, sc in next sp) across to end, turn. [20 sc, 20 sp]
Row 3 (Sc in next sp, ch1) across to final sp, sc in final sp, turn. [20 sc, 19 sp]
Rows 4-41 Rep Rows 2 and 3, cutting yarn after Row 41. [1 sc]
Step 5: Parallelogram, Tail pointing left
Row 1 With RS facing, join Yarn J in the first sp of Row 21 of Trapezoid A from Step 3, sc in same sp, (ch1, sc in next sp) 19 times evenly across, ch1, (sc, ch1, sc) in final sc of Large Triangle, turn. [22 sc, 21 sp]
Row 2 (Sc, ch1, sc) in first sp, (ch1, sc in next sp) 20 times, turn. [22 sc, 21 sp]
Row 3 (Sc in next sp, ch1) across to final sp, (sc, ch1, sc) in final sp, turn. [22 sc, 21 sp]
Row 4-21 Rep Rows 2 and 3 for pattern, cut yarn and weave ends. [22 sc, 21 sp]
Step 6: Large Triangle, Tail pointing right
Row 1 With RS facing, join Yarn H with ss in first sp of Row 21 of Parallelogram from Step 5, sc in same sp, (ch1, sc in next sp) 20 times across, turn. [21 sc, 20 sp]
Rows 2-41 Work as for Large Triangle from Step 4. Weave all ends.
Step 7: Trapezoid B, Tail pointing left
Row 1 With WS facing, join Yarn I with ss in first sp of Row 21 of Parallelogram from Step 5, sc in same sp, (ch1, sc) 20 times evenly across placing final sc in last st of Large Triangle from Step 6, turn. [21 sc, 20 sp]
Rows 2-20 Work exactly as for Large Triangle from Step 4 stopping after Row 20, cut yarn and finish off. [11 sc, 11 sp]
Step 8: Bow Tie
First triangle of Bow Tie
Row 1 With RS facing, join Yarn N with ss in final sc of Large Triangle from Step 6, sc in same st, (ch1, sc) 10 times evenly across, turn. [11 sc, 10 sp]
Rows 2–21 Work as for First Triangle of Bow Tie in Step 2.
Second triangle of Bow Tie
Row 1 With WS facing, join Yarn M with ss in first sp of Row 20 of Trapezoid B from Step 7, sc in same sp, (ch1, sc in next sp) 10 times, turn. [11 sc, 10 sp]
Rows 2-21 Work as for Second Triangle of Bow Tie in Step 2.
Step 9: Trapezoid A, Tail pointing right
Rows 1-21 With RS facing and using Yarn L, work as for Trapezoid A from Step 3.
Step 10: Large Triangle, Tail pointing left
Light pink triangle is large triangle. Dark pink fill triangle is made in the next step.
Row 1 With WS facing, join Yarn E with ss in final sc of second triangle of Bow Tie from Step 8, sc in same st, (ch1, sc) 20 times evenly across placing final sc in last sp of Trapezoid A from Step 9 using photo as a guide, turn. [21 sc, 20 sp]
Rows 2-41 Work as for Large Triangle in Step 4. Weave all ends.
Step 11: Fill Triangle A, Tail pointing right
Row 1 With RS facing, join Yarn Join yarn C in the first sp of Row 21 of Trapezoid A from Step 9, sc in same sp, (ch1, sc) 20 times evenly across, turn. [21 sc, 20 sp]
Row 2-21 Sc in first sp, (ch1, sc in next sp) across, turn. Work until 1 sc remains, cut yarn and weave ends.
Strip 1 is complete!!! I can’t wait to share more with you, but for now, Part 1 is finished!
The full 2020 VVCAL PDF pattern is up on Ravelry and Etsy! Includes entire pattern – squares, join, and border, and BOTH US and UK Terms PDFs are included. Yay!! The response has been overwhelming. I humbly thank you for your support.
What to Expect Today
2 blog posts, each with a square – Madrid Square, and Seville Square (This Post)
Scroll down on the Plain Granny Square page and find the “Week 12” section to see which granny squares to make for this week
Patterns include written instructions in US and UK Terms, chart, step-by-step photos, and YouTube video (US Terms).
Social Media Hashtags: #VVCAL and #CypressTextiles
CypressTextiles Tree Huggers Facebook Group – This is my main FB group (join!). Share your VVCAL progress pics in this group if you like, and I will share CAL highlights here, but the weekly action will be in the other group linked above.
The tapas scene is one of the main cultural attractions of the city: people go from one bar to another, enjoying small dishes called tapas (literally “lids” or “covers” in Spanish, referring to their probable origin as snacks served on small plates used to cover drinks).
A very old story says that the city was started by the famous hero of Greece, Hercules.
The Cathedral of Saint Mary of the See, better known as Seville Cathedral, is a Roman Catholic cathedral in Seville. It is the tenth-largest church in the world as well as the largest Gothic church.
In 1519, Ferdinand Magellan departed from Seville for the first circumnavigation of the Earth.
Seville isapproximately 2,200 years old. The passage of the various civilizations instrumental in its growth has left the city with a distinct personality, and a large and well-preserved historical center.
The Plaza de España, in Seville, is one of the most emblematic places of the Andalusian capital and has been the scene of several cinematographic productions due to its great photogenicity. Its symmetry and color make the place one of the most visited in Spain.
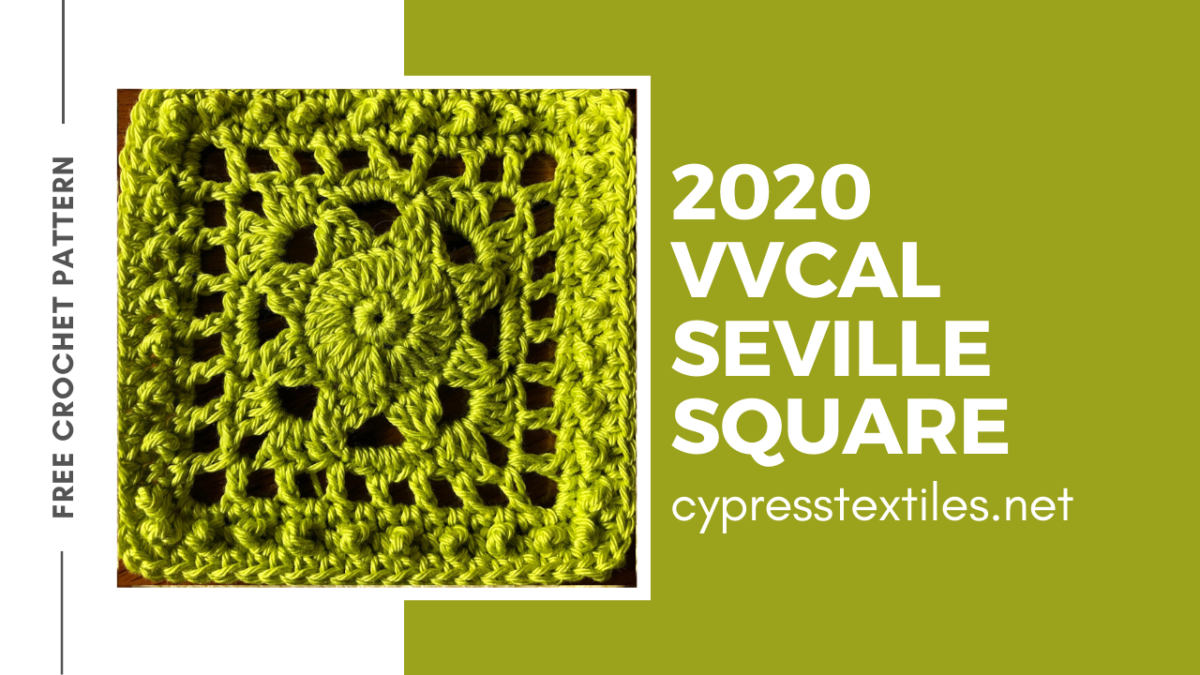
Seville Square Pattern
“Catona 10g Colour Pack” Version: Make 2 – Use colors 389 and 409
Catona “Shy Violet” Version: Make 2 – Use colors 398 and 520
Catona “Fresh Earth” Version: Make 2 – Use colors 249 and 157
Colour Crafter Version: Make 1 Note: I’m just using my stash.
Stone Washed / River Washed 10g Colour Pack Version: Make 2 – Use colors 835 and 956
Measurements and Materials
Measurements: Blanket will measure about 64x72in for all colorways/yarns
Gauge: Squares measure 4.25in for Catona, 6in for Colour Crafter, 4.5in for Stone Washed/River Washed
Notions: US Size 3mm hook for Catona, 4.25mm hook for Colour Crafter, 3mm for Stone Washed’/River Washed
dc3tog (yoh insert hook into next st/sp, yoh, pull up lp, yoh, draw yarn through 2 lps) 3 times, yoh, draw yarn through 4 lps on hook
beg beginning
beg dc3tog beg dc, (yoh insert hook into next st/sp, yoh, pull up lp, yoh, draw yarn through 2 lps) 2 times, yoh, draw yarn through 3 lps on hook
beg dc (sc, ch1) – counts as 1 dc
chN chain N number of times
dc double crochet
lp loop
MR make ring: slip knot, ch3, ss in third ch from hook
rep repeat
rnd round
sc single crochet
sp space (chain space)
ss slip stitch
st stitch
tr treble crochet
yoh yarn over hook
Written Instructions & Step-by-step Photos (US Terms)
Rnd 1 MR, 8sc, ss in first sc. [8 sc]
Rnd 2 Beg dc in next sc, (2dc in same st, dc in next st) 8 times omitting final dc, ss in beg dc. [24 dc]
Rnd 3 Beg dc3tog over first 3 sts, (ch4, dc3tog) 7 times, ch4, ss in beg dc3tog. [8 dc3tog, 8 sp]
Rnd 4 * 5sc in next sp, (3dc, ch2, 3dc) in next sp, rep from * 3 times, ss in first sc. [24 dc, 20 sc, 4 sp]
Rnd 5 Beg dc in next st, * (ch1, sk1, dc) 3 times, ch1, (dc, ch2, dc) in corner sp, ch1, dc in next dc, (ch1, sk1, dc) 2 times, rep from * 3 times omitting final dc, ss in beg dc. [32 dc, 32 sp]
Rnd 6 (Sc in all sts/sps to corner st, 3sc in corner st) 4 times, sc in all sts/sps to beginning, ss in first sc. [72 sc]
Rnd 7 * (Sc in next st, tr in next st) 4 times, (sc, tr, sc) in corner st, (tr in next st, sc in next st) 4 times, tr in next st, rep from * 3 times, ss in first sc. [40 tr, 40 sc]
Rnd 8 (Sc in all sts/sps to corner st, 3sc in corner st) 4 times, sc in all sts/sps to beginning, ss in first sc, cut yarn and weave ends. [88 sc]
Stitch Guide (UK Terms)
Note: Scroll up for US Terms.
tr3tog (yoh insert hook into next st/sp, yoh, pull up lp, yoh, draw yarn through 2 lps) 3 times, yoh, draw yarn through 4 lps on hook
beg beginning
beg tr3tog beg dc, (yoh insert hook into next st/sp, yoh, pull up lp, yoh, draw yarn through 2 lps) 2 times, yoh, draw yarn through 3 lps on hook
beg tr (dc, ch1) – counts as 1 tr
chN chain N number of times
dc double crochet
dtr double treble
lp loop
MR make ring: slip knot, ch3, ss in third ch from hook
rep repeat
rnd round
sp space (chain space)
ss slip stitch
st stitch
tr treble crochet
yoh yarn over hook
Written Instructions & Step-by-step Photos (UK Terms)
Rnd 1 MR, 8dc, ss in first dc. [8 dc]
Rnd 2 Beg tr in next dc, (2tr in same st, tr in next st) 8 times omitting final tr, ss in beg tr. [24 tr]
Rnd 3 Beg tr3tog over first 3 sts, (ch4, tr3tog) 7 times, ch4, ss in beg tr3tog. [8 tr3tog, 8 sp]
Rnd 4 * 5dc in next sp, (3tr, ch2, 3tr) in next sp, rep from * 3 times, ss in first dc. [24 tr, 20 dc, 4 sp]
Rnd 5 Beg tr in next st, * (ch1, sk1, tr) 3 times, ch1, (tr, ch2, tr) in corner sp, ch1, tr in next tr, (ch1, sk1, tr) 2 times, rep from * 3 times omitting final tr, ss in beg tr. [32 tr, 32 sp]
Rnd 6 (Dc in all sts/sps to corner st, 3dc in corner st) 4 times, dc in all sts/sps to beginning, ss in first dc. [72 dc]
Rnd 7 * (Dc in next st, dtr in next st) 4 times, (dc, dtr, dc) in corner st, (dtr in next st, dc in next st) 4 times, dtr in next st, rep from * 3 times, ss in first dc. [40 dtr, 40 dc]
Rnd 8 (dc in all sts/sps to corner st, 3dc in corner st) 4 times, dc in all sts/sps to beginning, ss in first dc, cut yarn and weave ends. [88 dc]
CypressTextiles Tree Huggers Facebook Group – This is my main FB group (join!). Share your VVCAL progress pics in this group if you like, and I will share CAL highlights here, but the weekly action will be in the other group linked above.
The full 2020 VVCAL PDF pattern is up on Ravelry and Etsy! Includes entire pattern – squares, join, and border, and BOTH US and UK Terms PDFs are included. Yay!! The response has been overwhelming. I humbly thank you for your support.
What to Expect Today
2 blog posts, each with a square – Madrid Square (this post), and Seville Square
Scroll down on the Plain Granny Square page and find the “Week 12” section to see which granny squares to make for this week
Patterns include written instructions in US and UK Terms, chart, step-by-step photos, and YouTube video (US Terms).
Social Media Hashtags: #VVCAL and #CypressTextiles
CypressTextiles Tree Huggers Facebook Group – This is my main FB group (join!). Share your VVCAL progress pics in this group if you like, and I will share CAL highlights here, but the weekly action will be in the other group linked above.
Most people don’t consider Madrid when thinking of cities perched up among the clouds, But they should! Madrid lies at the highest altitude of any capital in Europe at 667 metres/2,188 ft!
There are various explanations as to how Madrid got its name, but the most trusted explanation is that it’s over 2000 years old according to Arabic records, ‘Mayrit’ or ‘Magerit’ were the old names of Madrid which mean ‘place of abundant water’ which then evolved to the Madrid we know now.
Madrid’s official symbol is ‘El Oso y El Madroño’ which means ‘The Bear and The Strawberry Tree’ it shows a bear on its hind legs eating from the tree.
Madrid enjoys more cloudless days than any other city in Europe, around 250 days on average.
Madrid has the oldest restaurant in the world according to the Guinness book of records, the Sobrino de Botín restaurant was founded in 1725 and is still running today.
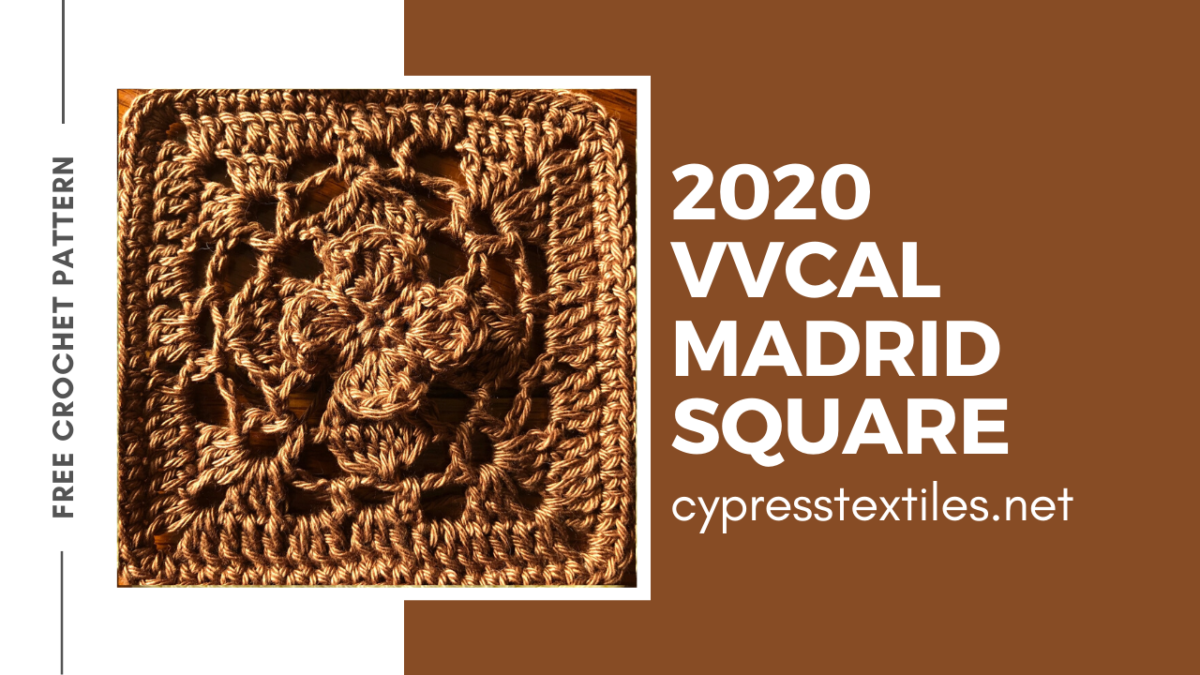
Madrid Square Pattern
“Catona 10g Colour Pack” Version: Make 2 – Use colors 527 and 406
Catona “Shy Violet” Version: Make 2 – Use colors 240 and 414
Catona “Fresh Earth” Version: Make 2 – Use colors 245 and 522
Colour Crafter Version: Make 1 Note: I’m just using my stash.
Stone Washed / River Washed 10g Colour Pack Version: Make 2 – Use colors 828 and 809
Measurements and Materials
Measurements: Blanket will measure about 64x72in for all colorways/yarns
Gauge: Squares measure 4.25in for Catona, 6in for Colour Crafter, 4.5in for Stone Washed/River Washed
Notions: US Size 3mm hook for Catona, 4.25mm hook for Colour Crafter, 3mm for Stone Washed’/River Washed
beg dc6tog beg dc, (yoh, insert hook in next st, yoh, pull up lp, yoh, draw yarn through 2 lps) 5 times, yoh, draw yarn through 6 lps on hook
chN chain N number of times
dc double crochet
dc6tog (yoh, insert hook into next st, yoh, pull up lp, yoh, draw yarn through 2 lps) 6 times, yoh, draw yarn through 7 lps on hook
lp loop
MR make ring: slip knot, ch3, ss in third ch from hook
rep repeat
rnd round
sc single crochet
sp space (chain space)
ss slip stitch
st stitch
yoh yarn over hook
Written Instructions & Step-by-step Photos (US Terms)
Rnd 1 MR, (sc, ch1) 4 times, ss in first sc. [4 sc, 4 sp]
Rnd 2 * (Sc, ch1, 3dc, ch1, sc) in sc, ch1, sk 1 sp, rep from * 3 times, ss in first sc. [12 dc, 8 sc, 12 sp]
Rnd 3 Release lp from hook, insert hook back to front through same sc, pull lp to back of work, (ch4, sc around ch-1 sps from 2 previous rnds treating them as one) 4 times, do not join. [4 sc, 4 sp]
Rnd 4 Beg dc sp, (5dc in same sp, ch3, dc in next sp) 4 times omitting final dc, ss in beg dc. [24 dc, 4 sp]
Rnd 5 Beg dc6tog across first 6 sts, * ch4, (dc, ch2, dc) in sp, ch4, dc6tog, rep from * 3 times omitting final dc6tog, ss in beg dc6tog. [4 dc6tog, 8 dc, 12 sp]
Rnd 6 * Sc in next sp, ch3, (3dc, ch2, 3dc) in ch-2 sp, ch3, sc in next sp, ch2, rep from * 3 times, ss in first sc. [24 dc, 8 sc, 16 sp]
Rnd 7 Beg dc in first sp, * 2dc in same sp, dc in 3 sts, (2dc, ch2, 2dc) in corner sp, dc in 3 sts, 3dc in next 2 sps, dc in next sp, rep from * 3 times omitting final dc, ss in beg dc. [76 dc, 4 sp]
Rnd 8 (Sc in all sts to corner sp, 3sc in corner sp) 4 times, sc in all sts to beg, ss in first sc, cut yarn and weave ends. [88 sc]
Stitch Guide (UK Terms)
Note: Scroll up for US Terms.
beg beginning
beg tr (dc, ch1) – counts as 1 tr
beg tr6tog beg tr, (yoh, insert hook in next st, yoh, pull up lp, yoh, draw yarn through 2 lps) 5 times, yoh, draw yarn through 6 lps on hook
chN chain N number of times
dc double crochet
tr6tog (yoh, insert hook into next st, yoh, pull up lp, yoh, draw yarn through 2 lps) 6 times, yoh, draw yarn through 7 lps on hook
lp loop
MR make ring: slip knot, ch3, ss in third ch from hook
rep repeat
rnd round
sp space (chain space)
ss slip stitch
st stitch
tr treble crochet
yoh yarn over hook
Written Instructions & Step-by-step Photos (UK Terms)
Rnd 1 MR, (dc, ch1) 4 times, ss in first dc. [4 dc, 4 sp]
Rnd 2 * (Dc, ch1, 3tr, ch1, dc) in dc, ch1, sk 1 sp, rep from * 3 times, ss in first dc. [12 tr, 8 dc, 12 sp]
Rnd 3 Release lp from hook, insert hook back to front through same dc, pull lp to back of work, (ch4, dc around ch-1 sps from 2 previous rnds treating them as one) 4 times, do not join. [4 dc, 4 sp]
Rnd 4 Beg tr in sp, (5tr in same sp, ch3, tr in next sp) 4 times omitting final tr, ss in beg tr. [24 tr, 4 sp]
Rnd 5 Beg tr6tog across first 6 sts, * ch4, (tr, ch2, tr) in sp, ch4, tr6tog, rep from * 3 times omitting final tr6tog, ss in beg tr6tog. [4 tr6tog, 8 tr, 12 sp]
Rnd 6 * Dc in next sp, ch3, (3tr, ch2, 3tr) in ch-2 sp, ch3, dc in next sp, ch2, rep from * 3 times, ss in first dc. [24 tr, 8 dc, 16 sp]
Rnd 7 Beg tr in first sp, * 2tr in same sp, tr in 3 sts, (2tr, ch2, 2tr) in corner sp, tr in 3 sts, 3tr in next 2 sps, tr in next sp, rep from * 3 times omitting final tr, ss in beg tr. [76 tr, 4 sp]
Rnd 8 (Dc in all sts to corner sp, 3dc in corner sp) 4 times, dc in all sts to beg, ss in first dc, cut yarn and weave ends. [88 dc]
CypressTextiles Tree Huggers Facebook Group – This is my main FB group (join!). Share your VVCAL progress pics in this group if you like, and I will share CAL highlights here, but the weekly action will be in the other group linked above.
If it’s convenient for you, I have made my Celtic Lace Join, Junior, Mini, and Mini II into PDF files and they are all 4 together in one place at Ravelry and Etsy.
Celtic Lace Mini II Join
This join is used on the 3 Catona yarn versions.
The Stone Washed/River Washed 10g Colour pack version uses the SC, PLT join – regular or continuous join as-you-go. Your choice! There isn’t enough join/border yarn in the recommended quantity to make the Celtic Lace Mini II Join. If you want to use it, you can always buy extra join/border yarn!
Shop Scheepjes Catona Yarn
Note: These are affiliate links – shopping through them will gain me a small commission at no additional cost to you. This helps support my free patterns!
Note: Since there are so many large photos, I have put US terms and UK terms one after another in each section, clearly labeled.
Stitch Guide (US Terms)
2dccl 2dc cluster: (yoh, insert hook in st/sp, yoh, pull up lp, yoh, draw yarn through 2 lps) 2 times, yoh, draw yarn through 3 lps
beg beginning
beg dc (sc, ch1) – counts as 1 dc
chN chain N number of times
dc double crochet
lp loop
MR make ring: slip knot, ch3, ss in third ch from hook
rep repeat
rnd round
sc single crochet
sp space (chain space)
ss slip stitch
st stitch
yoh yarn over hook
Stitch Guide (UK Terms)
2trcl (yoh, insert hook in st/sp, yoh, pull up lp, yoh, draw yarn through 2 lps) 2 times, yoh, draw yarn through 3 lps
beg beginning
beg tr (dc, ch1) – counts as 1 tr
chN chain N number of times
dc double crochet
lp loop
MR make ring: slip knot, ch3, ss in third ch from hook
rep repeat
rnd round
sp space (chain space)
ss slip stitch
st stitch
tr treble crochet
yoh yarn over hook
Instructions
Lay your squares out in the order that you want to join them. We will be joining them in rows, working from top to bottom, left to right.
Video
Top Row, 1st Square: Work complete, no joining.
[US Terms] Rnd 1 Join indicated yarn with ss in any corner st, (3sc in corner st, 21sc) 4 times, ss in first sc. [96 sc]
[UK Terms] Rnd 1 Join indicated yarn with ss in any corner st, (3dc in corner st, 21dc) 4 times, ss in first dc. [96 dc]
[US Terms] Rnd 2 Beg dc in corner st, * ch2, dc in same st, sk1, (2dccl in next st, ch2, 2dccl in same st, sk3) 6 times until corner st is reached, dc in corner st, rep from * 3 times omitting final dc, ss in beg dc. [48 2dccl, 8 dc, 28 sp]
[UK Terms] Rnd 2 Beg tr in corner st, * ch2, tr in same st, sk1, (2trcl in next st, ch2, 2trcl in same st, sk3) 6 times until corner st is reached, tr in corner st, rep from * 3 times omitting final tr, ss in beg tr. [48 2trcl, 8 tr, 28 sp]
[US Terms] Rnd 3 Ss in first ch, beg dc in sp, * ch3, 2dc in same sp, (ch3, sc in next sp) 6 times, ch3, 2dc in corner sp, rep from * 3 times omitting final dc, ss in beg dc, cut yarn and weave ends. [16 dc, 24 sc, 32 sp]
[UK Terms] Rnd 3 Ss in first ch, beg tr in sp, * ch3, 2tr in same sp, (ch3, dc in next sp) 6 times, ch3, 2tr in corner sp, rep from * 3 times omitting final tr, ss in beg tr, cut yarn and weave ends. [16 tr, 24 dc, 32 sp]
Top Row, 2nd – 9th Squares: Join 1 side.
Rnds 1 and 2 Work as for 1st Square of Top Row.
[US Terms] Rnd 3 Ss in first ch, beg dc in sp, ch3, 2dc in same sp, (ch3, sc in next sp) 6 times, ch3, 2dc in corner sp, ch1, “PLT” as follows: release lp from hook, insert hook front to back into corner sp on adjacent completed square, grab lp, Pull Loop Through ch-sp, ch2 – note: ch-sps are joined with PLT maneuver, 2dc in same corner sp, ch3, (sc in next sp, ch1, PLT in adjacent ch-sp on completed square, ch2) 5 times, sc in next sp, ch3, (2dc, ch3, 2dc) in corner sp – note: this corner to remain un-joined, work remaining 2 sides plain, cut yarn and weave ends.
[UK Terms] Rnd 3 Ss in first ch, beg tr in sp, ch3, 2tr in same sp, (ch3, dc in next sp) 6 times, ch3, 2tr in corner sp, ch1, “PLT” as follows: release lp from hook, insert hook front to back into corner sp on adjacent completed square, grab lp, Pull Loop Through ch-sp, ch2 – note: ch-sps are joined with PLT maneuver, 2tr in same corner sp, ch3, (dc in next sp, ch1, PLT in adjacent ch-sp on completed square, ch2) 5 times, dc in next sp, ch3, (2tr, ch3, 2tr) in corner sp – note: this corner to remain un-joined, work remaining 2 sides plain, cut yarn and weave ends.
2nd Row, 1st Square: Join 1 side.
Rnds 1 and 2 Work as for 1st Square of Top Row.
[US Terms] Rnd 3 Ss in first ch, beg dc in sp, ch3, 2dc in same sp, (ch3, sc in next sp) 6 times, ch3, 2dc in corner sp, ch1, PLT in un-joined corner sp from 2nd Square of Top Row, ch2, 2dc in same corner sp, ch3, (sc in next sp, ch1, PLT in adjacent ch-sp on completed square, ch2) 5 times, sc in next sp, ch3, (2dc, ch1, PLT, ch2, 2dc) in corner sp, joining to corner of 1st Square on Top Row, work remaining 2 sides plain, cut yarn and weave ends.
[UK Terms] Rnd 3 Ss in first ch, beg tr in sp, ch3, 2tr in same sp, (ch3, dc in next sp) 6 times, ch3, 2tr in corner sp, ch1, PLT in un-joined corner sp from 2nd Square of Top Row, ch2, 2tr in same corner sp, ch3, (dc in next sp, ch1, PLT in adjacent ch-sp on completed square, ch2) 5 times, dc in next sp, ch3, (2tr, ch1, PLT, ch2, 2tr) in corner sp, joining to corner of 1st Square on Top Row, work remaining 2 sides plain, cut yarn and weave ends.
3rd Row, 2nd – 9th Squares: Join 2 sides.
Rnds 1 and 2 Work as for 1st Square of Top Row.
[US Terms] Rnd 3 Ss in first ch, beg dc in sp, ch3, 2dc in same sp, (ch3, sc in next sp) 6 times, ch3, 2dc in corner sp, ch1, PLT in diagonally-located corner of square on Top Row, ch2, 2dc in same corner sp, ch3, (sc in next sp, ch1, PLT in adjacent ch-sp on completed square, ch2) 5 times, sc in next sp, ch3, (2dc, ch1, PLT, ch2, 2dc) in corner sp, joining to diagonally-located corner of 1st Square on Top Row, ch3, (sc in next sp, ch1, PLT in adjacent ch-sp on completed square, ch2) 5 times, sc in next sp, ch3, (2dc, ch3, 2dc) in corner sp, work remaining side plain, cut yarn and weave ends.
[UK Terms] Rnd 3 Ss in first ch, beg tr in sp, ch3, 2tr in same sp, (ch3, dc in next sp) 6 times, ch3, 2tr in corner sp, ch1, PLT in diagonally-located corner of square on Top Row, ch2, 2tr in same corner sp, ch3, (dc in next sp, ch1, PLT in adjacent ch-sp on completed square, ch2) 5 times, dc in next sp, ch3, (2tr, ch1, PLT, ch2, 2tr) in corner sp, joining to diagonally-located corner of 1st Square on Top Row, ch3, (dc in next sp, ch1, PLT in adjacent ch-sp on completed square, ch2) 5 times, dc in next sp, ch3, (2tr, ch3, 2tr) in corner sp, work remaining side plain, cut yarn and weave ends.
Note: for 9th Square, when working first joined corner, instead of joining in diagonally-located corner sp (since there isn’t one), you will join in the adjacent corner space.
Join all remaining squares in this manner, until final row of squares is reached. On final row of squares, do not leave any corners un-joined. Join all corners on the bottom edge of the blanket, since there will not be another row of squares to pick up those un-joined corners.
A note on joining corners: Remember that all corners located on the perimeter of the blanket are joined up immediately. All corners that are on the “inside body” of the blanket are joined up to the diagonally located square on the next row.
I will post more pics of this join as I go, but with this guide you have all of the tools you need in order to join all of the squares in your blanket.
Thank you for reading! I hope you enjoy the Celtic Lace Mini II Join!
Hello, fellow 2020 VVCALer! I decided to create a separate post for each version of the blanket that I am posting each week. There are 5 versions, all in Scheepjes Yarns:
Hello, gorgeous crafter! Today I am sharing the final installment of my French Braid Blanket. The MEGA version!
Find the Mini and Mondo free crochet pattern at this blog post. You can find all 3 PDF files, the Mini, Mondo, and Mega versions in one pattern at my Etsy Shop and Ravelry Page. All 3 PDF files are included in the French Braid Blanket pattern.
French Braid Blanket, Mega Square Version
This pattern will be great to make blankets and sell them because some customers are looking for handmade blankets that have less of a “traditional crochet” look, and more of a modern look. French Braid Blanket, Mega Version really delivers!
Use this hashtag, whether you make the Mega Square, Mondo Square version or the Mini Square version, just to keep all of the French Braid Blankets together.
#FrenchBraidBlanket
Pattern Includes Adjustments
How to make the blanket any size
How to use any yarn weight to get your desired blanket size
How to make the Mega version a rectangle instead of a square
Mini Version
Make a bunch of squares, using small remnants of yarn – great for zero waste projects.
Mondo Version
Make fewer (bigger) squares using larger amounts of yarn – great for stash busting.
New! Mega Version
Make 1 giant square using multiple balls of the same color, DK/light weight yarn held triple or super bulky weight – great for stash busting!
Find this pattern in a condensed ad-free PDF for a small fee on Etsy, and Ravelry. MEGA, MONDO, and MINI Square versions PDFs are included! Coloring pages for layout are also included.
Note: this post contains affiliate links marked with an asterisk. Purchasing through these links gains me a small commission at no additional cost to you.
To Mega, Mondo, or Mini?
Make the Mega version if:
You have at least 2 100g balls of each color
You want fewer ends to weave (the blanket is literally one huge square)
You don’t want to sew squares together
Make the Mondo version if:
You have larger quantities of each color
You want fewer ends to weave (the squares are larger so you need to make fewer of them for the same size blanket)
You want to make fewer motifs to reach your desired blanket size
Make the Mini version if:
You are working with small amounts of yarn, for a zero-waste project (remnants busting)
You want each motif to be quicker for instant gratification
You like the look of many motifs or want more color variety
French Braid Blanket, Mega Square Version
Head to this blog post for the French Braid Blanket, Mondo and Mini square versions free crochet patterns.
Find this pattern in a condensed ad-free PDF for a small fee on Etsy, and Ravelry. MEGA, MONDO, and MINI Square versions PDFs are included! Coloring pages for layout are also included.
Materials
Size 10mm hook
Scheepjes Colour Crafter and Velvet Yarn (held triple using a fun trick)
Yarn: Scheepjes Colour Crafter + Velvet
Here are the exact yarn amounts I used for my small 42x42in French Braid Blanket, made in the Mega version (1 large square):
Note: This pattern is in US Terms, but there is only 1 stitch used: single crochet, so if you are used to reading UK Terms, please know that you are using dc for this entire project. (US) sc = (UK) dc
chN chain N number of times
MR make ring: slip knot, ch3, ss in third ch from hook
Rep repeat
Rnd round
sc single crochet
sp space (chain space)
ss slip stitch
st stitch
yoh yarn over hook
Instructions
Important note: This pattern is worked with Scheepjes Colour Crafter DK weight yarn held triple. I use 1 ball of yarn at a time to avoid tangling. Also, for some colors, only 2 balls are required, so holding 1 thread from each of 3 balls would not be logical. Use the following tip to hold the yarn triple while using just one ball.
“Chain Ply” or “Long Chain Method” – start with an elongated “S” to start the 3 strands held together, and then loop the yarn through and pull a long length of yarn through to continue the “S” chain, and continue holding 3 strands together.
Blanket construction notes: First a base triangle is made, and then each section is worked off the previous ones to create the design, in a log cabin type fashion.
French Braid Blanket, Mega Square Version
Note: For neater edges follow these tips. Please watch the “Video: Section 1 (Base Triangle)”below, as I explain these tips and demonstrate them.
I do not “chain up” for the first sc of the row, so you will work the first sc of the row directly into a chain space without chaining 1.
Be sure to turn your work the same way each time. If you are looking down on your work from the top edge, you will turn the work counter-clockwise. In other words, you will turn the right edge of the piece toward you to flip the work over.
Work “over” the working yarn for your first sc stitch, instead of carrying it up the edge.
Section 1 (Base Triangle)
On all section graphics, green spot shows where section begins, and arrow indicates the direction the work grows. I tried my best on these graphics, but the lines are a little off… Look at the photos to see how it’s supposed to line up.
Row 1 (RS) Using Yarn A, MR, (sc, ch1) 3 times, sc, turn. [4 sc, 3 sp]
Mark Row 1 as the RS of the square to make things easier later. This stitch pattern is reversible and it is hard to tell front from back.
Row 2 (Sc, ch1, sc) in first sp, ch1, (sc, ch1, sc) in next sp, ch1, (sc, ch1, sc) in final sp, turn. [6 sc, 5 sp]
Rows 3-13 (Sc, ch1, sc) in first sp, (ch1, sc in next sp) across to center sp, ch1, (sc, ch1, sc) in center sp, (ch1, sc in next sp) across to final sp, ch1, (sc, ch1, sc) in final sp, turn. Cut yarn after Row 13. [28 sc, 27 sp]
Video: Section 1 (Base Triangle)
Note: These videos are of the Mondo version, but it will really help to watch it, to understand the method of the French Braid Blanket in general.
Section 2
Row 1 With WS facing, join Yarn E with ss in the first sp, (sc, ch1, sc) in first sp, (ch1, sc in next sp) 13 times, turn. [15 sc, 14 sp]
Row 2 Ch1, sc in first sp, (ch1, sc in next sp) across to final sp, ch1, (sc, ch1, sc) in final sp, turn. [15 sc, 15 sp]
Row 3 (Sc, ch1, sc) in first sp, (ch1, sc in next sp) across to end, turn. [16 sc, 15 sp]
Rows 4-19 Rep Rows 2 and 3, cut yarn after Row 19. [24 sc, 23 sp]
Video: Section 2
Section 3
This section is similar to section 2.
Row 1 With RS facing, join Yarn C with ss in the first sp, (sc, ch1, sc) in first sp, (ch1, sc in next sp) 12 times, ch1, sc into final sc of Row 1 of Section 2 – note: watch “Video: Sections 3 and 4” (below) for demo, (ch1, sc in final sc of next odd numbered row of Section 2) 9 times, turn. [24 sc, 23 sp]
Rows 2-19 Work repeating Rows 2 and 3 as for Section 2, cut yarn after Row 19. [33 sc, 32 sp]
Video: Sections 3 and 4
Section 4
Row 1 With WS facing, join Yarn D with ss in the final sc of Section 3 – note: watch “Video: Sections 3 and 4” (above) for demo, ch1, sc in first sp, (ch1, sc in next sp) across to end, turn. [32 sc, 32 sp]
Row 2 Sc in first sp, (ch1, sc in next sp) across to end, turn. [32 sc, 31 sp]
Row 3 Ch1, sc in first sp, (ch1, sc in next sp) across to end, turn. [31 sc, 31 sp]
Rows 4-19 Rep Rows 2 and 3, cut yarn after Row 19. [23 sc, 23 sp]
NOTE: There are no videos of the next sections, but the first 3 videos should be very helpful to see how the square is constructed.
Section 5
This section is similar to sections 2 and 3.
Row 1 With WS facing, join Yarn B with ss in the first sp, (sc, ch1, sc) in first sp, (ch1, sc in next sp) 22 times, ch1, sc into final sc of Row 1 of Section 3, (ch1, sc in final sc of next odd numbered row of Section 3) 9 times, ch1, sc into first sp of Row 1 of Section 4, (ch1, sc in first sp of next odd numbered row of Section 4) 9 times, turn. [44 sc, 43 sp]
Rows 2-19 Work repeating Rows 2 and 3 as for Section 2, cut yarn after Row 19. [53 sc, 52 sp]
Section 6
This section is similar to section 4.
Row 1 With RS facing, join Yarn A with ss in the final sc of Section 5, ch1, sc in first sp, (ch1, sc in next sp) across to end, turn. [52 sc, 52 sp]
Rows 2-19 Work repeating Rows 2 and 3 as for Section 4, cut yarn after Row 19. [43 sc, 43 sp]
Section 7
Row 1 With RS facing, join Yarn E with ss in the first sp, sc in first sp, (ch1, sc in next sp) 21 times, ch1, sc into final sc of Row 1 of Section 5, (ch1, sc in final sc of next odd numbered row of Section 5) 9 times, ch1, sc into first sp of Row 1 of Section 6, (ch1, sc in first sp of next odd numbered row of Section 6) 9 times, turn. [42 sc, 41 sp]
Row 2 Ch1, sc in first sp, (ch1, sc in next sp) across to end, turn. [41 sc, 41 sp]
Row 3 Sc in first sp, (ch1, sc in next sp) across to end, turn. [41 sc, 40 sp]
Rows 4-19 Repeat Rows 2 and 3, cut yarn after Row 19. [33 sc, 32 sp]
Section 8
This section is the exact same as section 4.
Rows 1-19 With WS facing and Yarn B, work exactly as for Section 4.
Section 9
Row 1 With RS facing, join Yarn D with ss in the first sp, sc in first sp, (ch1, sc in next sp) 22 times, turn. [23 sc, 22 sp]
Rows 2-23 Sc in first sp, (ch1, sc in next sp) across to end, turn. Cut yarn after Row 23. [1 sc]
Sections 10-12
Row 1 With WS facing, join Yarn D with ss in first sp, sc in first sp, (ch1, sc in next sp) 41 times, ch1, sc into final sc of Row 1 of Section 7, (ch1, sc in final sc of next odd numbered row of Section 7) 9 times, ch1, sc into first sp of Row 1 of Section 8, (ch1, sc in first sp of next odd numbered row of Section 8) 9 times, turn. [62 sc, 61 sp]
Rows 2-19 Sc in first sp, (ch1, sc in next sp) across to end, turn. Cut yarn after Row 19. [44 sc, 43 sp]
Rows 20-38 With RS facing, join Yarn C with ss in first sp, work as for Row 2. Cut yarn after Row 38. [25 sc, 24 sp]
Rows 39-62 With WS facing, join Yarn A with ss in first sp, work as for Row 2. Cut yarn after Row 62. [1 sc]
Weave ends! Alternatively, use a surgeon’s knot as shown below. This will not come undone, and you can cut the ends short. I add in an extra pass on the top also.
Border
Make simple 2-round border as follows:
Rnd 1With RS facing, join contrast color yarn with ss in final sc of section 9, (make 83 ss across, working into sc sts, ss in corner) 4 times, ss in first ss.
Rnd 2Working under entire ss (working in both lps of ss), (make 83 sc across. make 3 sc in corner ss) 4 times, ss in first sc, cut yarn and weave ends.
Leave as is, or add any border you like! I prefer to let the neat layout do the talking for this piece.
Additional Pattern Adjustments
How to make the blanket any size
How to use any yarn weight to get your desired blanket size
How to make the Mega version a rectangle instead of a square
Any size, using any yarn weight
This seems like a long process, but follow the steps, and you can make your Mega blanket any size, with any weight yarn. Yes!!!
I recommend you make the Mega Version as it is written one time before you try these steps – even if you use waste DK yarn – just to get a feel for the method.
Step 1: Determine what width you want your blanket to be (it will end up a square if you follow these steps. If you want a rectangle, scroll down for those instructions.) Let’s say you want you blanket 60in square.
Step 2: Multiply that measurement by .28 so in our example .28 x 60 equals 16.8in. You can round this number to make it easier, so I will use 17in for this example.
Step 3: Work Section 1 of your blanket until the bottom edge of your base triangle measures as close to 17in as possible, ending with a RS (odd-numbered) row. For our example, I will say it took me 25 rows to reach 17in. It’s okay if you’re a little over or under your measurement.
Step 4: Take the number of Rows you have in Section 1, and multiply that number by 1.57 and round it to the nearest odd whole number. So for our example, 25 rows x 1.57 equals 39.25, so I will round to 39 rows.
Step 5: This number of rows from Step 4 is how many rows each of your Sections 2-12 will be. My example would be 39 rows for Sections 2-12.
Now you can make your blanket following the methods of the Mega Version, using the Section 1 Row count, and then the row counts of sections 2-12.
If you want to use any weight yarn to make any size French Braid Blanket square, you can start with the desired measurement of your square, and then follow the same steps above. Let’s say you want a blanket that is 3x4ft, and you want to make 12 squares (3 x 4 square formation) – this means each square will be about 12in. Taking this measurement through the steps above:
Step 1: 12in desired square measurement
Step 2: 12in x .28 = 3.36in
Step 3: Using DK weight yarn (not held triple), Section 1 is a little over 3in after 7 rows
Step 4: 7 rows x 1.57 = 11 rows
Step 5: Sections 2-12 are 11 rows wide
Once you do it, it gets easier every time!
Make a Rectangle Blanket
Make the French Braid Blanket, Mega Version into a rectangle instead of a square
I recommend making the original square version one time, just to get used to the methods.
Use the methods from the square version to continue the blanket upward, making 16 sections instead of 12, as shown in the schematic above.
I hope you enjoyed this pattern! You will love every moment of this one. It’s such a fast and fun make.
THANK YOU for your support, and remember you can find this French Braid Blanket pattern at my Etsy Shop and Ravelry Page. All 3 PDFs are included – Mini, Mondo, and Mega.
The full 2020 VVCAL PDF pattern is up on Ravelry and Etsy! Includes entire pattern – squares, join, and border, and BOTH US and UK Terms PDFs are included. Yay!! The response has been overwhelming. I humbly thank you for your support.
What to Expect Today
2 blog posts, each with a square – Hong Kong Square, and Copenhagen Square (this post)
Scroll down on the Plain Granny Square page and find the “Week 11” section to see which granny squares to make for this week
Patterns include written instructions in US and UK Terms, chart, step-by-step photos, and YouTube video (US Terms).
Social Media Hashtags: #VVCAL and #CypressTextiles
CypressTextiles Tree Huggers Facebook Group – This is my main FB group (join!). Share your VVCAL progress pics in this group if you like, and I will share CAL highlights here, but the weekly action will be in the other group linked above.
It was originally a fishing village known as “Havn” or “harbor.” The herring was plentiful, but the village was vulnerable to attacks from pirates.
It’s one of the greenest cities in the world, with plans to be carbon neutral by 2025. Over the past decade, Copenhagen has cut its emissions by nearly a third through the use of wind and solar power, as well as heating systems that recycle waste material.
Copenhageners love their bicycles. More than half of the city’s residents, from hourly workers to members of Parliament, commute by bike along Copenhagen’s 250 miles of bike lanes.
In 2000, engineers completed the 10-mile long Øresund Bridge connecting Copenhagen to Malmö, Sweden.
In Copenhagen, cemeteries often double as park spaces, which means it’s not uncommon to see couples lounging next to tombstones, or a family having a picnic near a mausoleum.
Colorful Traditional Houses in Copenhagen old Town Nyhavn at Sunset
Copenhagen Square Pattern
“Catona 10g Colour Pack” Version: Make 2 – Use colors 386 and 241
Catona “Shy Violet” Version: Make 2 – Use colors 398 and 520
Catona “Fresh Earth” Version: Make 2 – Use colors 157 and 524
Colour Crafter Version: Make 1 – Note: I’m just using my stash.
Stone Washed / River Washed 10g Colour Pack Version: Make 2 – Use colors 830 and 818
Measurements and Materials
Measurements: Blanket will measure about 64x72in for all colorways/yarns
Gauge: Squares measure 4.25in for Catona, 6in for Colour Crafter, 4.5in for Stone Washed/River Washed
Notions: US Size 3mm hook for Catona, 4.25mm hook for Colour Crafter, 3mm for Stone Washed’/River Washed
2dccl (yoh, insert hook in st/sp, yoh, pull up lp, yoh, draw yarn through 2 lps) 2 times, yoh, draw yarn through 3 lps
2trcl * yoh 2 times, insert hook in st, yoh pull through, (yoh, pull through 2 lps on hook) 2 times, rep from * 1 time, yoh and pull through all 3 lps
beg beginning
beg 2dccl beg dc, dc – Counts as 1 2dccl
beg 2trcl beg tr, tr – counts as 1 2trcl
beg dc (sc, ch1) – counts as 1 dc
beg tr (sc, ch2) – counts as 1 tr
chN chain N number of times
dc double crochet
lp loop
MR make ring: slip knot, ch3, ss in third ch from hook
rep repeat
rnd round
sc single crochet
sp space (chain space)
ss slip stitch
st stitch
tr treble crochet
yoh yarn over hook
Written Instructions & Step-by-step Photos (US Terms)
Rnd 1 MR, beg 2trcl, (ch2, 2trcl) 7 times, ch2, ss in beg 2trcl. [8 2trcl, 8 sp]
Rnd 2 Beg dc in sp, * (dc, ch1, 2dc, ch1) in same sp, dc in next sp, rep from * 7 times omitting final dc, ss in beg dc. [32 dc, 16 sp]
Rnd 3 Ss in next dc, (sc in next sp, ch3) 16 times, ss in first sc. [16 sc, 16 sp]
Rnd 4 Ss in first ch, beg 2dccl in same sp, * ch2, 2dccl in same sp, ch2, (2trcl, ch2, 2trcl) in next sp, ch2, (2dccl, ch2, 2dccl) in next sp, ch2, sc in next sp, ch2, 2dccl in next sp, rep from * 3 times omitting final 2dccl, ss in beg 2dccl. [8 2trcl, 16 2dccl, 4 sc, 28 sp]
Rnd 5 (3sc in next 5 sps, 2sc in next sp, sc in sc, 2sc in next sp) 4 times, ss in first sc. [80 sc]
Rnd 6 (Sc in all sts to corner st, 3sc in corner st) 4 times, sc in all sts to beginning, ss in first sc, cut yarn and weave ends. [88 sc]
Stitch Guide (UK Terms)
Note: Scroll up for US Terms.
2trcl (yoh, insert hook in st/sp, yoh, pull up lp, yoh, draw yarn through 2 lps) 2 times, yoh, draw yarn through 3 lps
2dtrcl * yoh 2 times, insert hook in st, yoh pull through, (yoh, pull through 2 lps on hook) 2 times, rep from * 1 time, yoh and pull through all 3 lps
beg beginning
beg 2trclbeg tr, tr – Counts as 1 2trcl
beg 2dtrcl beg dtr, dtr – Counts as 1 2dtrcl
beg tr(dc, ch1) – counts as 1 tr
beg dtr (dc, ch2) – counts as 1 dtr
chNchain N number of times
dcdouble crochet
dtr double treble crochet
lploop
MRmake ring: slip knot, ch3, ss in third ch from hook
rep repeat
rndround
spspace (chain space)
ss slip stitch
ststitch
trtreble crochet
yohyarn over hook
Written Instructions & Step-by-step Photos (UK Terms)
Rnd 1 MR, beg 2dtrcl, (ch2, 2dtrcl) 7 times, ch2, ss in beg 2dtrcl. [8 2dtrcl, 8 sp]
Rnd 2 Beg tr in sp, * (tr, ch1, 2tr, ch1) in same sp, tr in next sp, rep from * 7 times omitting final tr, ss in beg tr. [32 tr, 16 sp]
Rnd 3 Ss in next tr, (dc in next sp, ch3) 16 times, ss in first dc. [16 dc, 16 sp]
Rnd 4 Ss in first ch, beg 2trcl in same sp, * ch2, 2trcl in same sp, ch2, (2dtrcl, ch2, 2dtrcl) in next sp, ch2, (2trcl, ch2, 2trcl) in next sp, ch2, dc in next sp, ch2, 2trcl in next sp, rep from * 3 times omitting final 2trcl, ss in beg 2trcl. [8 2dtrcl, 16 2trcl, 4 dc, 28 sp]
Rnd 5 (3dc in next 5 sps, 2dc in next sp, dc in dc, 2dc in next sp) 4 times, ss in first dc. [80 dc]
Rnd 6 (Dc in all sts to corner st, 3dc in corner st) 4 times, dc in all sts to beginning, ss in first dc, cut yarn and weave ends. [88 dc]
CypressTextiles Tree Huggers Facebook Group – This is my main FB group (join!). Share your VVCAL progress pics in this group if you like, and I will share CAL highlights here, but the weekly action will be in the other group linked above.
The full 2020 VVCAL PDF pattern is up on Ravelry and Etsy! Includes entire pattern – squares, join, and border, and BOTH US and UK Terms PDFs are included. Yay!! The response has been overwhelming. I humbly thank you for your support.
What to Expect Today
2 blog posts, each with a square – Hong Kong Square (this post), and Copenhagen Square
Scroll down on the Plain Granny Square page and find the “Week 11” section to see which granny squares to make for this week
Patterns include written instructions in US and UK Terms, chart, step-by-step photos, and YouTube video (US Terms).
Social Media Hashtags: #VVCAL and #CypressTextiles
CypressTextiles Tree Huggers Facebook Group – This is my main FB group (join!). Share your VVCAL progress pics in this group if you like, and I will share CAL highlights here, but the weekly action will be in the other group linked above.
Hong Kong boasts the world’s longest covered escalator. The Mid-Levels Escalator runs for a half-mile.
Hong Kong Island steals the limelight, but there are actually 263 islands in Hong Kong. Some of them, like Lantau, Cheung Chau and Lamma, are accessible by ferry while others are totally uninhabited and virtually unreachable.
Dim sum originated here in southern China and means “touch the heart”. These tiny bites of goodness were created as snack food for travellers and today are an essential part of local culture.
The majority of Hong Kong’s Chinese population speaks Cantonese. The language has nine tones and a system of Romanisation called Jyutping.
A famous Hong Kong landmark, the bronze Big Buddha located on Lantau Island. The Big Buddha, one of the world’s largest seated Buddhas, towers over visitors at 34 metres high.
Traditional junk boat sailing across Victoria Harbour, Hong Kong.
Hong Kong Square Pattern
“Catona 10g Colour Pack” Version: Make 2 – Use colors 388 and 115
Catona “Shy Violet” Version: Make 2 – Use colors 519 and 264
Catona “Fresh Earth” Version: Make 2 – Use colors 245 and 522
Colour Crafter Version: Make 1 Note: I’m just using my stash.
Stone Washed / River Washed 10g Colour Pack Version: Make 2 – Use colors 820 and 944
Measurements and Materials
Measurements: Blanket will measure about 64x72in for all colorways/yarns
Gauge: Squares measure 4.25in for Catona, 6in for Colour Crafter, 4.5in for Stone Washed/River Washed
Notions: US Size 3mm hook for Catona, 4.25mm hook for Colour Crafter, 3mm for Stone Washed’/River Washed
3dccl (yoh, insert hook in st/sp, yoh, pull up lp, yoh, draw yarn through 2 lps) 3 times, yoh, draw yarn through 4 lps
beg beginning
beg 3dccl beg dc, (yoh, insert hook in st/sp, yoh, pull up lp, yoh, draw yarn through 2 lps) 2 times, yoh, draw yarn through 3 lps – Counts as 1 3dccl
beg dc (sc, ch1) – counts as 1 dc
beg tr (sc, ch2) – counts as 1 tr
chN chain N number of times
dc double crochet
lp loop
MR make ring: slip knot, ch3, ss in third ch from hook
rep repeat
rnd round
sc single crochet
sp space (chain space)
ss slip stitch
st stitch
tr treble crochet
yoh yarn over hook
Written Instructions & Step-by-step Photos (US Terms)
Rnd 1 MR, beg tr, 15tr, ss in beg tr. [16 tr]
Rnd 2 Beg 3dccl in first st, (ch3, 3dccl) 15 times, ch3, ss in beg 3dccl. [16 3dccl, 16 sp]
Rnd 3 Ss in first ch, sc in same sp, * ch3, (sc, ch7, sc) in next sp, ch3, sc in next sp, 7dc in next sp, sc in next sp, rep from * 3 times omitting final sc, ss in first sc. [28 dc, 16 sc, 12 sp]
Rnd 4 Ss in first 2 chs, * sc in ch-3 sp, ch2, ss in ch-7 sp, ch2, sc in ch-3 sp, (ch1, dc in next dc) 7 times, ch1, rep from * 3 times, ss in first sc. [28 dc, 8 sc, 4 ss, 40 sp]
Rnd 5 Ss in 2 chs, * sc in ch-2 sp, sc in ch-7 sp from Rnd 3, sc in ch-2 sp, sk sc, dc in next 7 st/sp, (dc, ch3, dc) in next st to make corner, dc in next 7 st/sp, rep from * 3 times, ss in first sc. [64 dc, 12 sc, 4 sp]
Rnd 6 (Sc in all sts to corner, 3 sc in corner) 4 times, sc in all sts to beg, ss in first sc, cut yarn and weave ends. [88 sc]
Stitch Guide (UK Terms)
Note: Scroll up for US Terms.
3trcl (yoh, insert hook in st/sp, yoh, pull up lp, yoh, draw yarn through 2 lps) 3 times, yoh, draw yarn through 4 lps
beg beginning
beg 3trclbeg tr, (yoh, insert hook in st/sp, yoh, pull up lp, yoh, draw yarn through 2 lps) 2 times, yoh, draw yarn through 3 lps – Counts as 1 3trcl
beg tr(dc, ch1) – counts as 1 tr
beg dtr (dc, ch2) – counts as 1 dtr
chNchain N number of times
dcdouble crochet
dtr double treble crochet
lploop
MRmake ring: slip knot, ch3, ss in third ch from hook
rep repeat
rndround
spspace (chain space)
ss slip stitch
ststitch
trtreble crochet
yohyarn over hook
Written Instructions & Step-by-step Photos (UK Terms)
Rnd 1 MR, beg dtr, 15dtr, ss in beg dtr. [16 dtr]
Rnd 2 Beg 3trcl in first st, (ch3, 3trcl) 15 times, ch3, ss in beg 3trcl. [16 3trcl, 16 sp]
Rnd 3 Ss in first ch, dc in same sp, * ch3, (dc, ch7, dc) in next sp, ch3, dc in next sp, 7tr in next sp, dc in next sp, rep from * 3 times omitting final dc, ss in first dc. [28 tr, 16 dc, 12 sp]
Rnd 4 Ss in first 2 chs, * dc in ch-3 sp, ch2, ss in ch-7 sp, ch2, dc in ch-3 sp, (ch1, tr in next tr) 7 times, ch1, rep from * 3 times, ss in first dc. [28 tr, 8 dc, 4 ss, 40 sp]
Rnd 5 Ss in 2 chs, * dc in ch-2 sp, dc in ch-7 sp from Rnd 3, dc in ch-2 sp, sk dc, tr in next 7 st/sp, (tr, ch3, tr) in next st to make corner, tr in next 7 st/sp, rep from * 3 times, ss in first dc. [64 tr, 12 dc, 4 sp]
Rnd 6 (dc in all sts to corner, 3 dc in corner) 4 times, dc in all sts to beg, ss in first dc, cut yarn and weave ends. [88 dc]
CypressTextiles Tree Huggers Facebook Group – This is my main FB group (join!). Share your VVCAL progress pics in this group if you like, and I will share CAL highlights here, but the weekly action will be in the other group linked above.