
Welcome to PART 2 of the second free pattern of my five-blanket Linen Stitch series. Zendoodle Blanket is a pattern you may recognize. I released it in 2015, and five years later it was in need of a huge makeover as well as clarifying and simplification, so now I am re-releasing it as part of this exciting series!
Here are links to the 4 parts of this free pattern:
- Part 1: Strip 1
- Part 2: Strips 2 and 3 (This post)
- Part 3: Strips 4 and 5
- Part 4: Strips 6-8 and Border
Find this pattern in a condensed ad-free PDF for a small fee on Etsy, and Ravelry. Both square and rectangle version PDFs are included!
Update: I have started a rectangle version tutorial also and it will be a 4-part series like this one! Check out Part 1! Here’s what that schematic looks like – it’s in Scheepjes Softfun ranges.

Note: If you have previously purchased my Zendoodle Blanket on Etsy or Ravelry, I will send the updated PDF as soon as I am finished with it. Thank you!
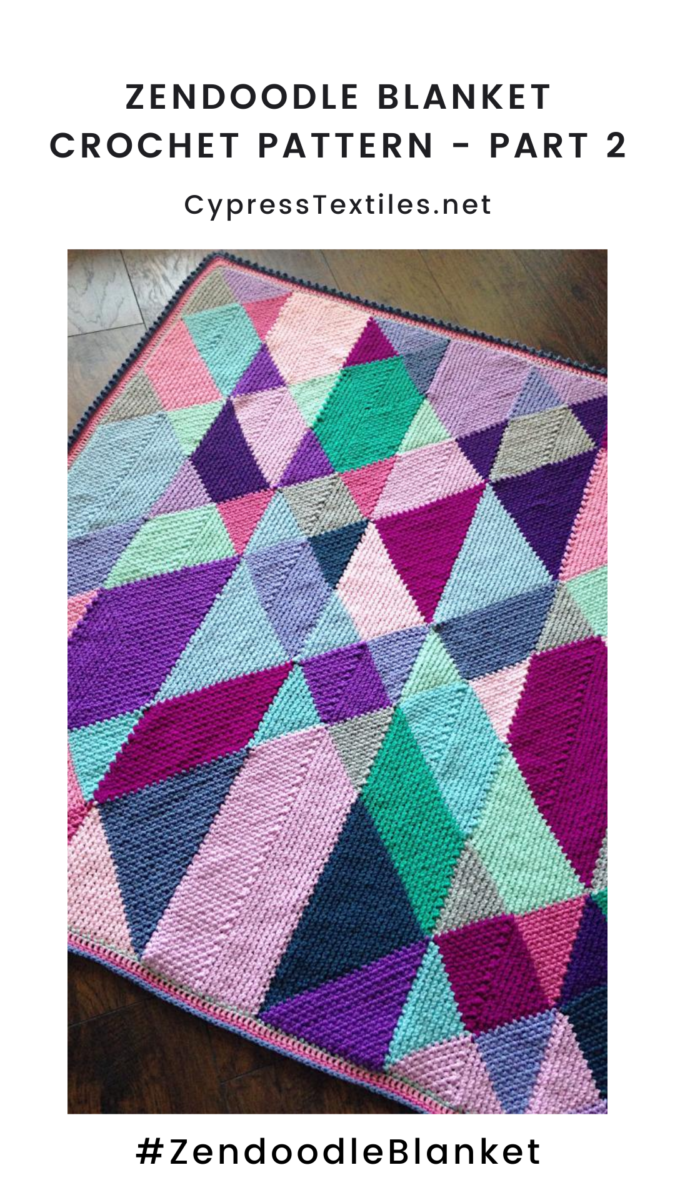
Use this hashtag to keep all of the Zendoodle Blankets progress photos together.
#ZendoodleBlanket
Coming soon! Find this pattern in a condensed ad-free PDF for a small fee on Etsy, and Ravelry. Coloring pages for layouts are also included.
Zendoodle Blanket

Part 2: Strips 2 and 3
Note: Head to Part 1 to see blanket details and yarn amounts, etc.
Order Scheepjes Colour Crafter
These are affiliate links. When purchases are made through them, I will receive a small commission at no additional cost to you.
Or you can head to the Scheepjes website to find a retailer near you!

Stitch Guide (US Terms)
Note: This pattern is in US Terms, but there is only 1 stitch used: single crochet, so if you are used to reading UK Terms, please know that you are using UK dc for this entire project. (US) sc = (UK) dc
- chN chain N number of times
- MR make ring: slip knot, ch3, ss in third ch from hook
- PLT Join “Pull Loop Through” join (See more info within pattern)
- Rep repeat
- Rnd round
- RS right side
- sc single crochet
- sk skip
- sp space (chain space)
- ss slip stitch
- st stitch
- WS wrong side
- yoh yarn over hook
Instructions
Zendoodle is worked in strips from bottom edge to top edge. I give two options to construct this blanket. You can either work the first strip complete and then join all subsequent strips on as you go, or you can make all of the strips complete (separately) and then sew them together using my instructions. I provide full instruction for the join-as-you-go strips method, and then I give notes for the sewn strips method.
Choosing a Construction Method
Should you join-as-you-go, or should you sew the separate strips together?
Join-as-you-go Strips: Make Strip 1 complete, and then join all subsequent strips as you go.
- Love a no-sew project? This method is for you!
- Want to learn my popular PLT Join method? Choose this method!
Sewn Strips: Work all strips complete (separately) and then sew them together when you’re done.
- Want to take your project on the go? Choose this method!
- Don’t mind a bit of sewing? This method is for you!
Tips for Neat Edges
- Head to Part 1 for these tips!
Schematic

Strip 2
Note: If you are working the blanket join-as-you-go, then this strip is joined onto Strip 1 at the left hand edge as per the instructions. Notes will be given if you’d like to work all of the strips separately and then sew them together.
Step 1: House

Note: The House shape is made by working up a Base Triangle as for Strip 1, but instead of cutting the yarn after the Base Triangle, continue vertically as to make the House shape as instructed.

Row 1 WS Using Yarn A, MR, (sc, ch1) 3 times, sc, turn. [4 sc, 3 sp] (Mark this row as the WS – this pattern is reversible and tough to tell which side is which.)
Row 2 (Sc, ch1, sc) in first sp, * ch1, (sc, ch1, sc) in next sp, rep from * 1 time, turn. [6 sc, 5 sp]
Rows 3-10 (Sc, ch1, sc) in first sp, (ch1, sc in next sp) across to center sp, ch1, (sc, ch1, sc) in center sp, (ch1, sc in next sp) across to final sp, ch1, (sc, ch1, sc) in final sp, turn. DO NOT cut yarn after Row 10. [22 sc, 21 sp]
If you are working Join-as-you-go strips, join to Strip 1 at this point as follows:
- Turn both Strip 1 and Base Triangle to the WS, and align them as in the photo below.
- Release the loop from the hook, insert the hook front to back through the left corner of the base triangle on strip 1, and grab the loop. Now your work should look like the photo below.
- Pull Loop Through to the front like in the second photo below. PLT Join maneuver complete!


This is how you will join Strip 2 to Strip 1 as you go. Before every WS Row, when the row touches the completed strip, you will work the PLT maneuver in the space of the corresponding row that you are about to work. I have plenty of photos, don’t worry.
If you are working the strips separately and sewing them afterward, simply omit this PLT Join maneuver and work the strips as instructed.
Rows 11-31 Sc in first sp, (ch1, sc in next sp) 9 times, ch1, (sc, ch1, sc) in next sp, (ch1, sc in next sp) 9 times, ch1, sc in final sp, turn [22 sc, 21 sp]
Here are some photos of the PLT Join process for the House shape.
This photo shows that before you begin Row 13, you release the loop to prepare to PLT Join.

This next photo shows the PLT Join in progress. You can see that the loop is being pulled through the corresponding row that is about to be worked.


Here is Row 3 being worked, and you can see that the first sc of Row 3 is simply continued after the PLT Join maneuver is worked. It is a common mistake to make a chain after you pull the loop through. Instead, you just work the first sc of the next row.

Here is the House shape when it’s done! The work is turned to the RS in this photo. You can see that the House shape is joined on the left hand side, before every WS Row, when the row touches the completed

Step 2: Bow Tie


First triangle of Bow Tie
Joining Note: There is no joining on this part, because the first triangle does not touch strip 1 at all.
Row 1 With RS facing, join Yarn F with ss in first sp, sc in same sp, (ch1, sc in next sp) 10 times, turn. [11 sc, 10 sp]
Row 2 (Ch1, sc in next sp) 10 times, turn. [10 sc, 10 sp]
Row 3 (Sc in next sp, ch1) 9 times, sc in final sp, turn. [10 sc, 9 sp]
Rows 4-21 Rep Rows 2 and 3. Cut yarn after row 21. [1 sc]
Second triangle of Bow Tie
Joining Note: If you are Joining as-you-go, then before you work all odd-numbered rows, be sure and work the PLT Join maneuver as shown in the photos below.
Rows 1-21 With WS facing and Yarn N, work as for first triangle of Bow Tie. Weave all ends.
Here is a photo of the work right before Row 1, with PLT Join in progress. This is an important photo because it shows that the PLT is worked before EVERY WS row – even is that means the first row. After you join your yarn with a slip st, you make the PLT Join maneuver.

Here is the second triangle in progress, and you can see the PLT Join worked before each odd-numbered row. Remember, this photo shows the WS of the work, because the PLT is always worked with WS facing.

Step 3: Diamond


Joining Note: There is no joining on this part, because the Diamond does not touch strip 1 at all.
Row 1 With RS facing, join yarn E in final sc of first triangle of Bow Tie from Step 2, sc in same st, (ch1, sc) 9 times evenly across using photo as a guide, ch1, sc in center sp of House shape from Step 1, (ch1, sc) 9 times evenly across, ch1, sc in final sc of second triangle on Bow Tie from Step 2, turn. [21 sc, 20 ch]
Rows 2-21 (Ch1, sc in next sp) up to final sp before center st, ch1, sc2tog as follows: (Insert hook in next sp, yoh, pull up loop) 2 times, yoh, draw yarn through all 3 lps – sc2tog made, (ch1, sc in next sp) to end, placing final sc in last sp. On Row 21, work sc in ch-sp, cut yarn, and finish off. [1 sc]
Step 4: Bow Tie


First triangle of Bow Tie
Joining Note: There is no joining on this part, because the first triangle does not touch strip 1 at all.
Row 1 With RS facing, join Yarn H with ss in final sc of first triangle on Bow Tie from Step 2, sc in same sp, (ch1, sc) 10 times evenly across placing final sc in final sc of Diamond from Step 3, turn. [11 sc, 10 sp]
Row 2 (Ch1, sc in next sp) 10 times, turn. [10 sc, 10 sp]
Row 3 (Sc in next sp, ch1) 9 times, sc in final sp, turn. [10 sc, 9 sp]
Rows 4-21 Rep Rows 2 and 3. Cut yarn after row 21. [1 sc]
Second triangle of Bow Tie
Joining Note: If you are Joining as-you-go, then before you work all odd-numbered rows, be sure and work the PLT Join maneuver.
Rows 1-21 With WS facing, join Yarn M with ss in final sc of second triangle on Bow Tie from Step 2, and work as for first triangle. Weave all ends.
Step 5: Arrow A, Tail pointing left


Joining Note: Be sure to work PLT Join before each WS row, unless you are making all your strips up and then sewing them together..
Row 1 With WS facing, join yarn I in final sc of second triangle on Bow Tie from Step 4, (sc, ch1, sc) in same st, (ch1, sc) 9 times evenly across to just before center, ch1, sc in final sc of Diamond from Step 3, (ch1, sc) 9 times evenly across to just before end, ch1, (sc, ch1, sc) in final st of first triangle on Bow Tie from Step 4, turn. [21 sc, 20 ch]
Row 2 (Sc, ch1, sc) in first sp, (ch1, sc in next sp) 9 times, ch1, sc2tog over the next 2 sps, (ch1, sc in next sp) 9 times, ch1, (sc, ch1, sc) in final sp, turn. [21 sc, 21 ch, 1 sc2tog]
Rows 4-20 Rep Row 2.
Row 21 (Sc, ch1, sc) in first sp, (ch1, sc in next sp) 9 times, ch1, sc2tog over next 2 sps, (ch1, sc in next sp) across to end, turn. [21 sc, 21 sp, 1 sc2tog]
Row 22 (Ch1, sc in next sp) across to ch-sp just before sc2tog, ch1, sc2tog over next 2 sps, (ch1, sc in next sp) 9 times, (sc, ch1, sc) in final sp, turn. [20 sc, 21 sp, 1 sc2tog]
Rows 23-40 Rep Rows 21 and 22, using chart as a guide. [11 sc, 12 sp, 1 sc2tog]
Row 41 (Sc, ch1, sc) in first sp, (ch1, sc in next sp) 9 times, ch1, sc2tog, cut yarn and weave ends. [11 sc, 11 sp, 1 sc2tog]
Step 6: Large Triangle, Tail pointing right


Joining Note: There is no PLT joining on this shape, because it does not touch the completed strip.
Row 1 With RS facing, join Yarn J with ss in final sc of Row 21 on Arrow A from Step 5, sc in same st, (ch1, sc) 20 times evenly across placing final sc in first sp on Row 41 of Arrow A, turn. [21 sc, 20 sp]
Row 2 (Ch1, sc in next sp) across to end, turn. [20 sc, 20 sp]
Row 3 (Sc in next sp, ch1) across to final sp, sc in final sp, turn. [20 sc, 19 sp]
Rows 4-41 Rep Rows 2 and 3, cutting yarn after Row 41. [1 sc]
Step 7: Trapezoid B, Tail pointing left


Joining Note: Be sure to work PLT Join before every WS row, unless you are making all your strips up and then sewing them together. .
Row 1 With WS facing, join Yarn A with ss in first sp of Row 41 of Arrow A from Step 5, sc in same sp, (ch1, sc) 20 times evenly across placing final sc in last st of Large Triangle from Step 6, turn. [21 sc, 20 sp]
Rows 2-20 Work exactly as for Large Triangle from Step 6 stopping after Row 20, cut yarn and weave all ends. [11 sc, 11 sp]
Step 8: Bow Tie


First triangle of Bow Tie
Joining Note: There is no joining on this shape as it does not touch the completed strip.
Row 1 With RS facing, join Yarn G with ss in final sc of Large Triangle from Step 6, sc in same st, (ch1, sc) 10 times evenly across placing final sc in first sp of Row 20 on Trapezoid B from Step 7, turn. [11 sc, 10 sp]
Rows 2–21 Work as for First Triangle of Bow Tie as normal.
Second triangle of Bow Tie
Joining Note: Be sure to make the PLT Join maneuver before each WS row, unless you are making all your strips up and then sewing them together.
Row 1 With WS facing, join Yarn I with ss in first sp of Row 20 of Trapezoid B from Step 7, sc in same sp, (ch1, sc in next sp) 10 times, turn. [11 sc, 10 sp]
Rows 2-21 Work as for Second Triangle of Bow Tie as normal.
Step 9: Diamond


Joining Note: There is no joining on this part, because the Diamond does not touch the completed strip.
Row 1 With RS facing, join yarn K in final sc of first triangle of Bow Tie from Step 8, sc in same st, (ch1, sc) 9 times evenly across using photo as a guide, ch1, sc in center st of Trapezoid B from Step 7, (ch1, sc) 9 times evenly across, ch1, sc in final sc of second triangle on Bow Tie from Step 8, turn. [21 sc, 20 ch]
Rows 2-21 (Ch1, sc in next sp) up to final sp before center st, ch1, sc2tog as follows: (Insert hook in next sp, yoh, pull up loop) 2 times, yoh, draw yarn through all 3 lps – sc2tog made, (ch1, sc in next sp) to end, placing final sc in last sp. On Row 21, work sc in ch-sp, cut yarn, and finish off. [1 sc]
Step 10: Bow Tie


First triangle of Bow Tie
Joining Note: There is no joining on this shape as it does not touch the completed strip.
Row 1 With RS facing, join Yarn E with ss in final sc of First Triangle on Bow Tie from Step 8, sc in same st, (ch1, sc) 10 times evenly across placing final sc in final st of Diamond from Step 9, turn. [11 sc, 10 sp]
Rows 2–21 Work as for First Triangle of Bow Tie as normal.
Second triangle of Bow Tie
Joining Note: Be sure to make the PLT Join maneuver before each WS row, unless you are making all your strips up and then sewing them together.
Row 1 With WS facing, join Yarn M with ss in final sc of Second Triangle on Bow Tie from Step 8, sc in same st, (ch1, sc) 10 times evenly across placing final sc in final st of Diamond from Step 9, turn. [11 sc, 10 sp]
Rows 2-21 Work as for Second Triangle of Bow Tie as normal.
Step 11: Fill Triangle B


Joining Note: There is no joining on this shape because it doesn’t touch the completed strip.
Row 1 With RS facing, join yarn I with ss in final st of first triangle of Bow Tie from step 10, sc in same st, (ch1, sc) 9 times evenly across, ch1, sc in final st of Diamond from step 9, (ch1, sc) 10 times evenly across placing final sc in final st of second triangle on Bow Tie from step 10, turn [21 sc, 20 sp]
Row 2-9 (Sc in next sp, ch1) across to just sp just before center st, sc2tog over next 2 sps, (ch1, sc in next sp) to end, turn. [4 sc, 4 sp, 1 sc2tog]
Row 10 Sc in sp, ch1, sc2tog over next 2 sps, ch1, sc in final sp, turn. [2 sc, 2 sp, 1 sc2tog]
Row 11 Sc2tog over 2 sps, cut yarn and weave ends.
Strip 2 is complete! Do a happy dance!
Strip 3
Note: If you are working the blanket join-as-you-go, then this strip is joined onto Strip 2 at the left hand edge as per the instructions. Notes will be given if you’d like to work all of the strips separately and then sew them together.
Step 1: Base Triangle

Joining note: there is no joining on this shape because it doesn’t touch the completed strip.
Row 1 WS Using Yarn K, MR, (sc, ch1) 3 times, sc, turn. [4 sc, 3 sp] (Mark this row as the WS – this pattern is reversible and tough to tell which side is which.)
Row 2 (Sc, ch1, sc) in first sp, * ch1, (sc, ch1, sc) in next sp, rep from * 1 time, turn. [6 sc, 5 sp]
Rows 3-10 (Sc, ch1, sc) in first sp, (ch1, sc in next sp) across to center sp, ch1, (sc, ch1, sc) in center sp, (ch1, sc in next sp) across to final sp, ch1, (sc, ch1, sc) in final sp, turn. Cut yarn after Row 10. [22 sc, 21 sp]
Step 2: Bow Tie


First triangle of Bow Tie
Joining Note: There is no joining on this part, because the first triangle does not touch strip 2 at all.
Row 1 With RS facing, join Yarn F with ss in first sp, sc in same sp, (ch1, sc in next sp) 10 times, turn. [11 sc, 10 sp]
Row 2 (Ch1, sc in next sp) 10 times, turn. [10 sc, 10 sp]
Row 3 (Sc in next sp, ch1) 9 times, sc in final sp, turn. [10 sc, 9 sp]
Rows 4-21 Rep Rows 2 and 3. Cut yarn after row 21. [1 sc]
Second triangle of Bow Tie
Joining Note: If you are Joining as-you-go, then before you work all WS rows, be sure and work the PLT Join maneuver.
Rows 1-21 With WS facing and Yarn N, work as for first triangle of Bow Tie. Weave all ends.
Step 3: Trapezoid A, Tail pointing left


Joining Note: If you are joining strips as-you-go, be sure to work the PLT Join maneuver before each WS row.
Row 1 With WS facing, join Yarn C with ss in final st of second triangle on Bow Tie from Step 2, (sc, ch1, sc) in same st, (ch1, sc) 9 times evenly across, ch1, sc in center sp of Row 10 of Base Triangle from Step 1, (ch1, sc) 10 times evenly across placing final sc in final st of first triangle of Bow Tie from Step 2, turn. [22 sc, 21 sp]
Row 2 (Ch1, sc in next sp) 9 times, sc2tog as follows: (Insert hook in next sp, yoh, pull up loop) 2 times, yoh, draw yarn through all 3 lps – sc2tog made, (ch1, sc in next sp) 9 times, ch1, (sc, ch1, sc) in final sp, turn. [20 sc, 20 sp, 1 sc2tog]
Row 3 (Sc, ch1, sc) in first sp, (ch1, sc in next sp) 9 times, ch1, sc2tog, (ch1, sc in next sp) across to end, placing final sc in final sp, turn. [20 sc, 20 sp, 1 sc2tog]
Row 4 (Ch1, sc in next sp) across to within 1 sp of sc2tog, sc2tog across next 2 sps, (ch1, sc in next sp) 9 times, ch1, (sc, ch1, sc) in final sp, turn. [19 sc, 20 sp, 1 sc2tog]
Rows 5-20 Rep Rows 3 and 4, using chart as a guide when needed. [11 sc, 12 sp, 1 sc2tog]
Row 21 (Sc, ch1, sc) in first sp, (ch1, sc in next sp) 10 times, ch1, join with ss to sc2tog of Row 20, cut yarn and weave ends. [11 sc, 11 sp, 1 sc2tog]
Step 4: Large Triangle, Tail pointing right


Joining Note: There is no joining on this part, because the Large Triangle does not touch strip 2 at all.
Row 1 With RS facing, join Yarn D with ss in final sc of first triangle of Bow Tie from Step 2, sc in same st, (ch1, sc) 20 times evenly across placing final sc in first sp on Row 21 of Trapezoid A from Step 3, turn. [21 sc, 20 sp]
Row 2 (Ch1, sc in next sp) across to end, turn. [20 sc, 20 sp]
Row 3 (Sc in next sp, ch1) across to final sp, sc in final sp, turn. [20 sc, 19 sp]
Rows 4-41 Rep Rows 2 and 3, cutting yarn after Row 41. [1 sc]
Step 5: Trapezoid B


Joining Note: Be sure to work PLT Join before every WS row, unless you are making all your strips up and then sewing them together.
Row 1 With WS facing, join Yarn B with ss in first sp of Row 21 of Trapezoid A from Step 3, sc in same sp, (ch1, sc) 20 times evenly across placing final sc in last st of Large Triangle from Step 4, turn. [21 sc, 20 sp]
Rows 2-20 Work exactly as for Large Triangle stopping after Row 20, cut yarn and weave all ends. [11 sc, 11 sp]
Step 6: Bow Tie


First triangle of Bow Tie
Joining Note: There is no joining on this part, because the first triangle does not touch strip 2 at all.
Row 1 With RS facing, join Yarn J with ss in final st of Large Triangle from Step 4, sc in same st, (ch1, sc) 10 times evenly across placing final sc in first sp of Row 20 on Trapezoid B from Step 5, turn. [11 sc, 10 sp]
Row 2 (Ch1, sc in next sp) 10 times, turn. [10 sc, 10 sp]
Row 3 (Sc in next sp, ch1) 9 times, sc in final sp, turn. [10 sc, 9 sp]
Rows 4-21 Rep Rows 2 and 3. Cut yarn after row 21. [1 sc]
Second triangle of Bow Tie
Joining Note: If you are Joining as-you-go, then before you work all WS rows, be sure and work the PLT Join maneuver.
Rows 1-21 With WS facing and Yarn E, work as for first triangle of Bow Tie. Weave all ends.
Step 7: Arrow A, Tail pointing left


Joining Note: Be sure to work PLT Join before each WS row, unless you are making all your strips up and then sewing them together..
Row 1 With WS facing, join yarn F in final sc of second triangle on Bow Tie from Step 6, (sc, ch1, sc) in same st, (ch1, sc) 9 times evenly across to just before center, ch1, sc in first sp of row 20 on Trapezoid B from Step 5, (ch1, sc) 9 times evenly across to just before end, ch1, (sc, ch1, sc) in final st of first triangle on Bow Tie from Step 6, turn. [21 sc, 20 ch]
Row 2 (Sc, ch1, sc) in first sp, (ch1, sc in next sp) 9 times, ch1, sc2tog over the next 2 sps, (ch1, sc in next sp) 9 times, ch1, (sc, ch1, sc) in final sp, turn. [21 sc, 21 ch, 1 sc2tog]
Rows 4-20 Rep Row 2.
Row 21 (Sc, ch1, sc) in first sp, (ch1, sc in next sp) 9 times, ch1, sc2tog over next 2 sps, (ch1, sc in next sp) across to end, turn. [21 sc, 21 sp, 1 sc2tog]
Row 22 (Ch1, sc in next sp) across to ch-sp just before sc2tog, ch1, sc2tog over next 2 sps, (ch1, sc in next sp) 9 times, (sc, ch1, sc) in final sp, turn. [20 sc, 21 sp, 1 sc2tog]
Rows 23-40 Rep Rows 21 and 22, using chart as a guide. [11 sc, 12 sp, 1 sc2tog]
Row 41 (Sc, ch1, sc) in first sp, (ch1, sc in next sp) 9 times, ch1, sc2tog, cut yarn and weave ends. [11 sc, 11 sp, 1 sc2tog]
Step 8: Trapezoid B, Tail pointing right


Joining Note: There is no joining on this shape because it doesn’t touch the completed strip.
Row 1 With RS facing, join Yarn B with ss in final st of Row 21 of Arrow A from Step 7, sc in same st, (ch1, sc) 20 times evenly across placing final sc in first sp of Row 41 of Arrow A from Step 7, turn. [21 sc, 20 sp]
Rows 2-20 Work exactly as for Large Triangle stopping after Row 20, cut yarn and weave all ends. [11 sc, 11 sp]
Step 9: Bow Tie


First triangle of Bow Tie
Joining Note: There is no joining on this shape as it does not touch the completed strip.
Row 1 With RS facing, join Yarn J with ss in final sc of Trapezoid B from Step 9, sc in same st, (ch1, sc) 10 times evenly across placing final sc in first sp of Row 20 on Trapezoid B from Step 9, turn. [11 sc, 10 sp]
Rows 2–21 Work as for First Triangle of Bow Tie as normal.
Second triangle of Bow Tie
Joining Note: Be sure to make the PLT Join maneuver before each WS row, unless you are making all your strips up and then sewing them together.
Rows 1-21 With WS facing and Yarn E, work as for first triangle of Bow Tie. Weave all ends.
Step 10: Diamond

Joining Note: There is no joining on this part, because the Diamond does not touch the completed strip.
Row 1 With RS facing, join yarn F in final sc of first triangle of Bow Tie from Step 9, sc in same st, (ch1, sc) 9 times evenly across using photo as a guide, ch1, sc in center st of Trapezoid B from Step 8, (ch1, sc) 9 times evenly across, ch1, sc in final sc of second triangle on Bow Tie from Step 9, turn. [21 sc, 20 ch]
Rows 2-21 (Ch1, sc in next sp) up to final sp before center st, ch1, sc2tog as follows: (Insert hook in next sp, yoh, pull up loop) 2 times, yoh, draw yarn through all 3 lps – sc2tog made, (ch1, sc in next sp) to end, placing final sc in last sp. On Row 21, work sc in ch-sp, cut yarn, and finish off. [1 sc]
Step 11: Bow Tie


First triangle of Bow Tie
Joining Note: There is no joining on this shape as it does not touch the completed strip.
Row 1 With RS facing, join Yarn N with ss in final sc of First Triangle on Bow Tie from Step 9, sc in same st, (ch1, sc) 10 times evenly across placing final sc in final st of Diamond from Step 10, turn. [11 sc, 10 sp]
Rows 2–21 Work as for First Triangle of Bow Tie as normal.
Second triangle of Bow Tie
Joining Note: Be sure to make the PLT Join maneuver before each WS row, unless you are making all your strips up and then sewing them together.
Row 1 With WS facing, join Yarn L with ss in final sc of Second Triangle on Bow Tie from Step 9, sc in same st, (ch1, sc) 10 times evenly across placing final sc in final st of Diamond from Step 10, turn. [11 sc, 10 sp]
Rows 2-21 Work as for Second Triangle of Bow Tie as normal.
Step 12: Fill Triangle B

Joining Note: There is no joining on this shape because it doesn’t touch the completed strip.
Row 1 With RS facing, join yarn E with ss in final st of first triangle of Bow Tie from step 11, sc in same st, (ch1, sc) 9 times evenly across, ch1, sc in final st of Diamond from step 10, (ch1, sc) 10 times evenly across placing final sc in final st of second triangle on Bow Tie from step 11, turn [21 sc, 20 sp]
Row 2-9 (Sc in next sp, ch1) across to just sp just before center st, sc2tog over next 2 sps, (ch1, sc in next sp) to end, turn. [4 sc, 4 sp, 1 sc2tog]
Row 10 Sc in sp, ch1, sc2tog over next 2 sps, ch1, sc in final sp, turn. [2 sc, 2 sp, 1 sc2tog]
Row 11 Sc2tog over 2 sps, cut yarn and weave ends.
Strip 3 is finished!! Woohoo! Give yourself a fist bump!
I can’t wait to share more with you, but for now, Part 2 is finished!

I hope you enjoy working on your strips!!
Happy crafting,
Rachele C.
Linen Stitch Blanket Pattern Series
Have a look at the other blankets in this series! They are all free patterns, releasing on the last day of each month from May through September.
- French Braid Blanket
- Zendoodle Blanket (Part 1)
- LissMiss Blanket (Coming July 31)
- Beach Hut Blanket (Coming August 31)
- Chevronnie Blanket (Coming September 30)
6 Comments