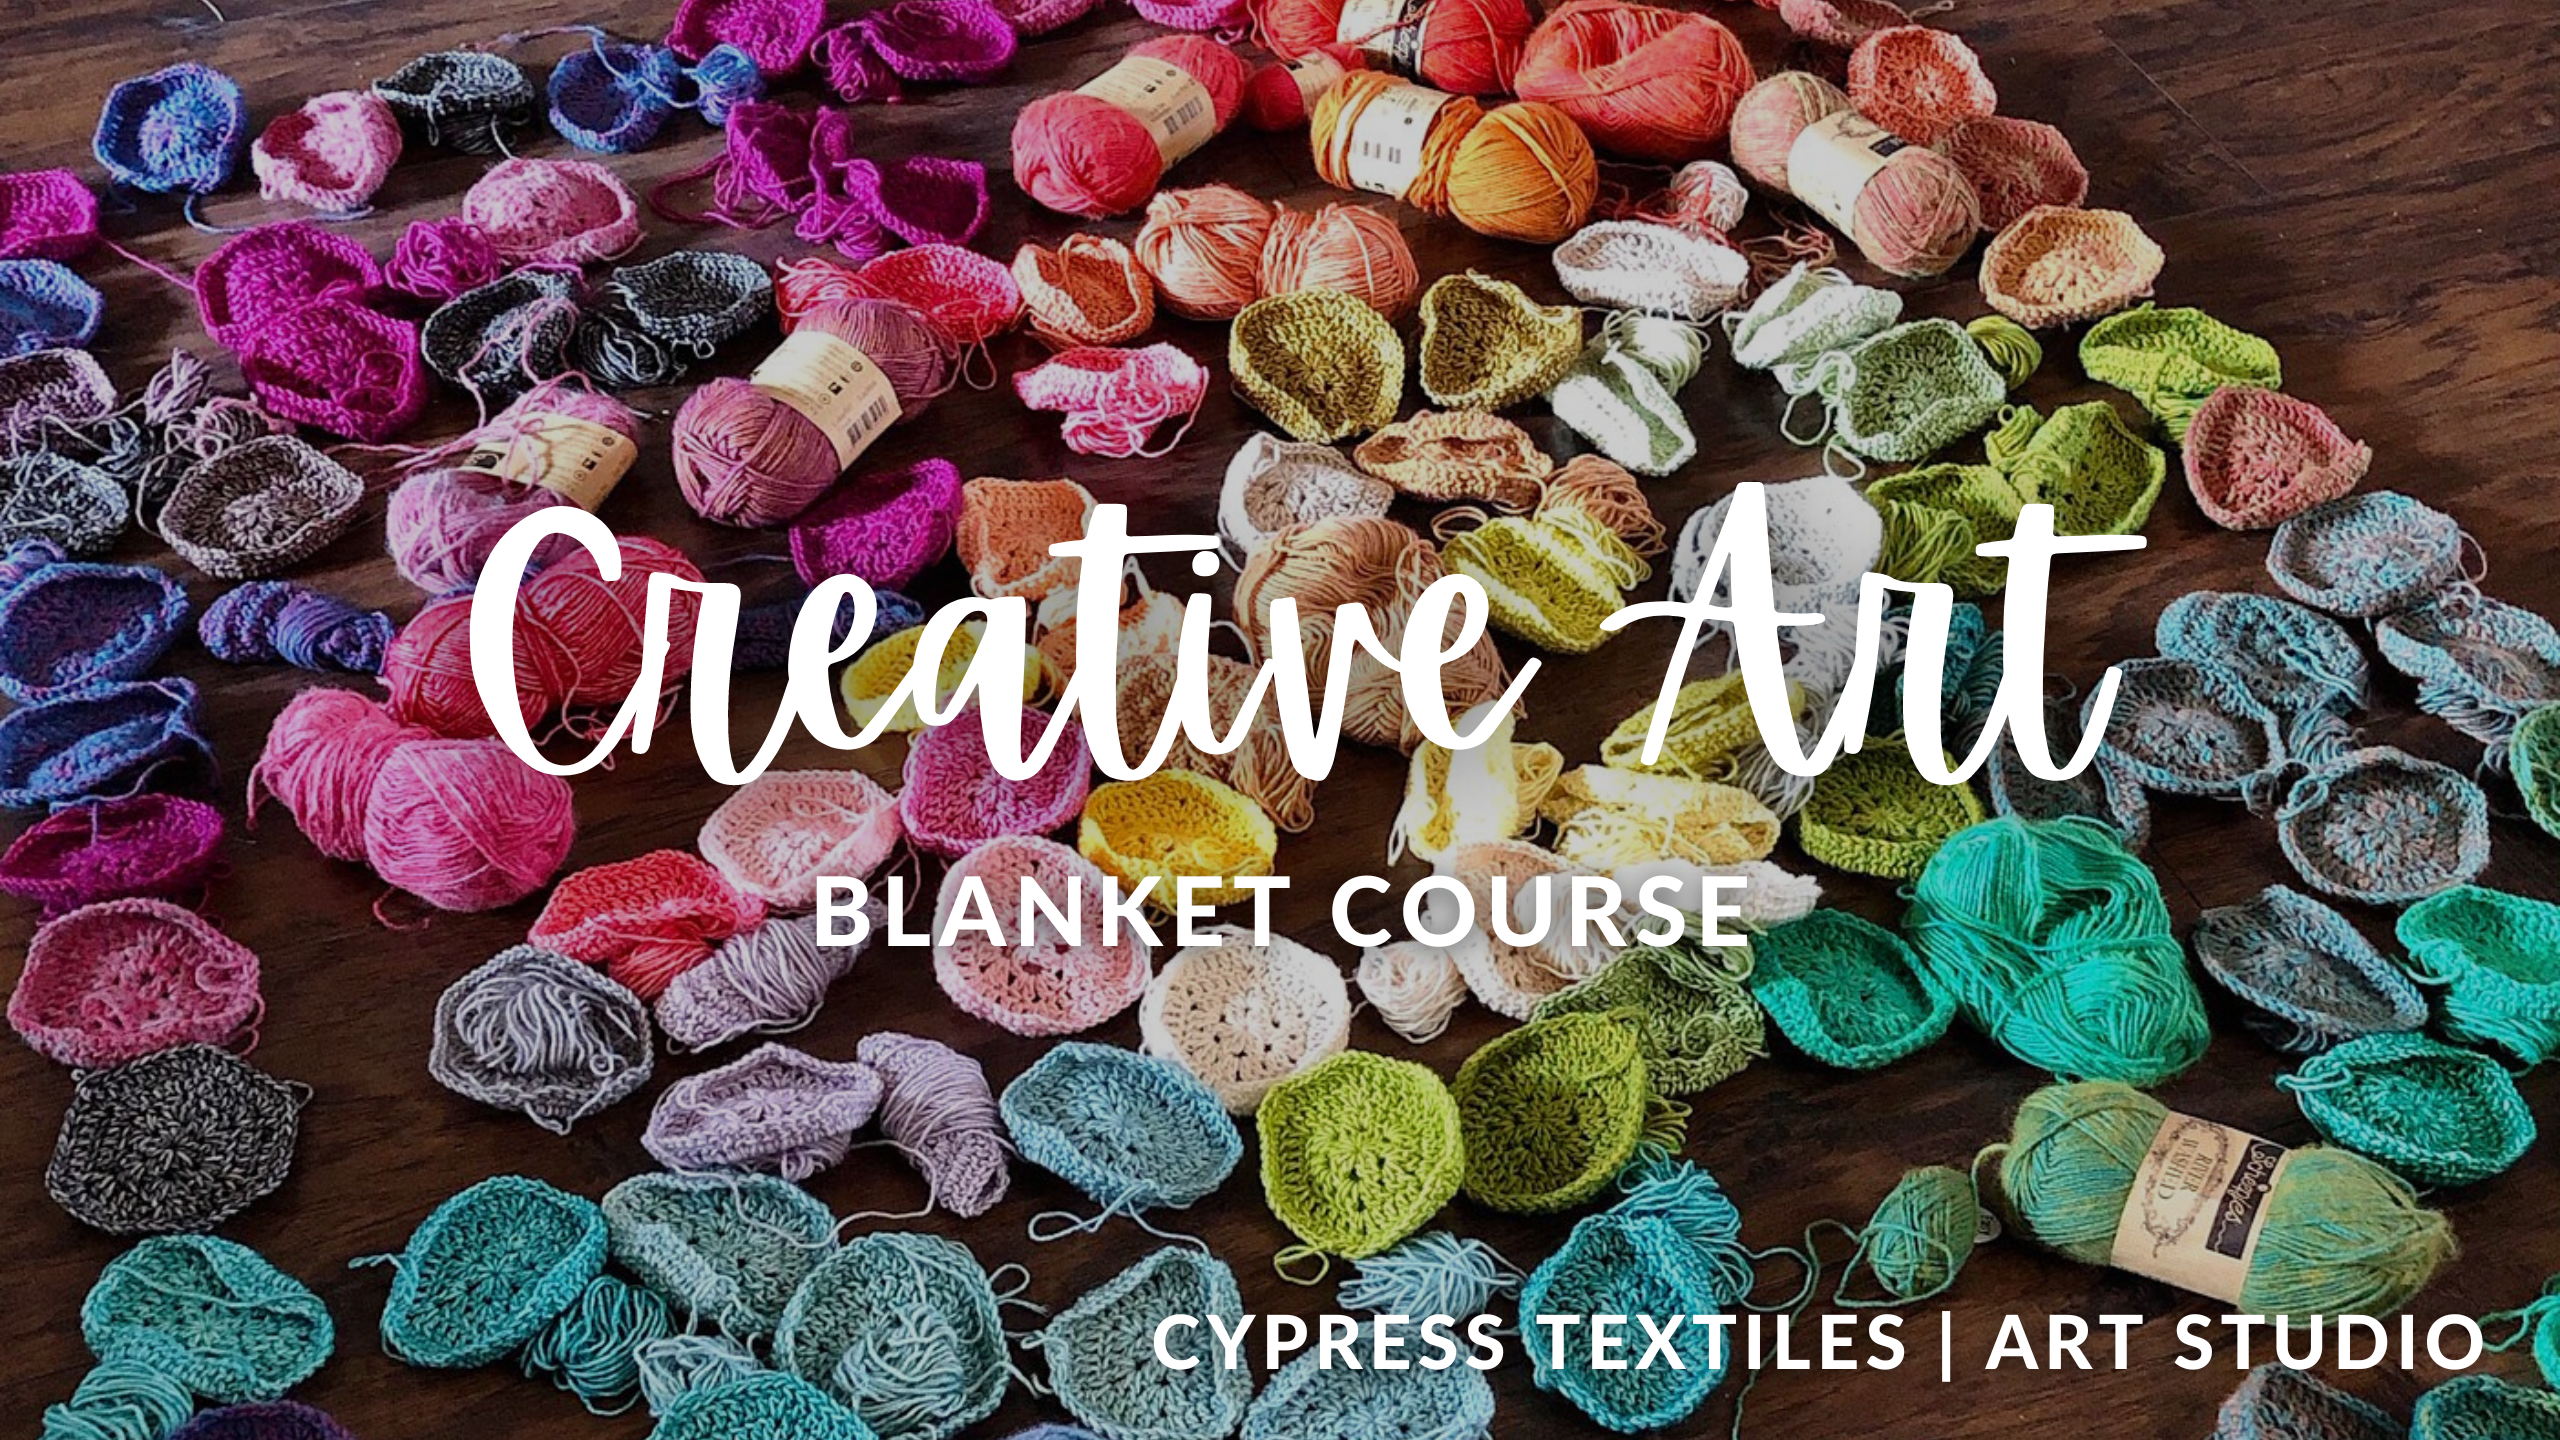
Hi, friend! Today, I have something very special to share with you! After a few years of thinking and notebook scrawling, I have officially opened up CypressTextiles Art Studio, an online school where I can offer digital courses.
My first offering is a Creative Art Blanket Course, and it’s available now!
Quick Links to Each Week of the Dutch Rose Blanket CAL: 1/2/3/4/5/6&7/8
Introduction
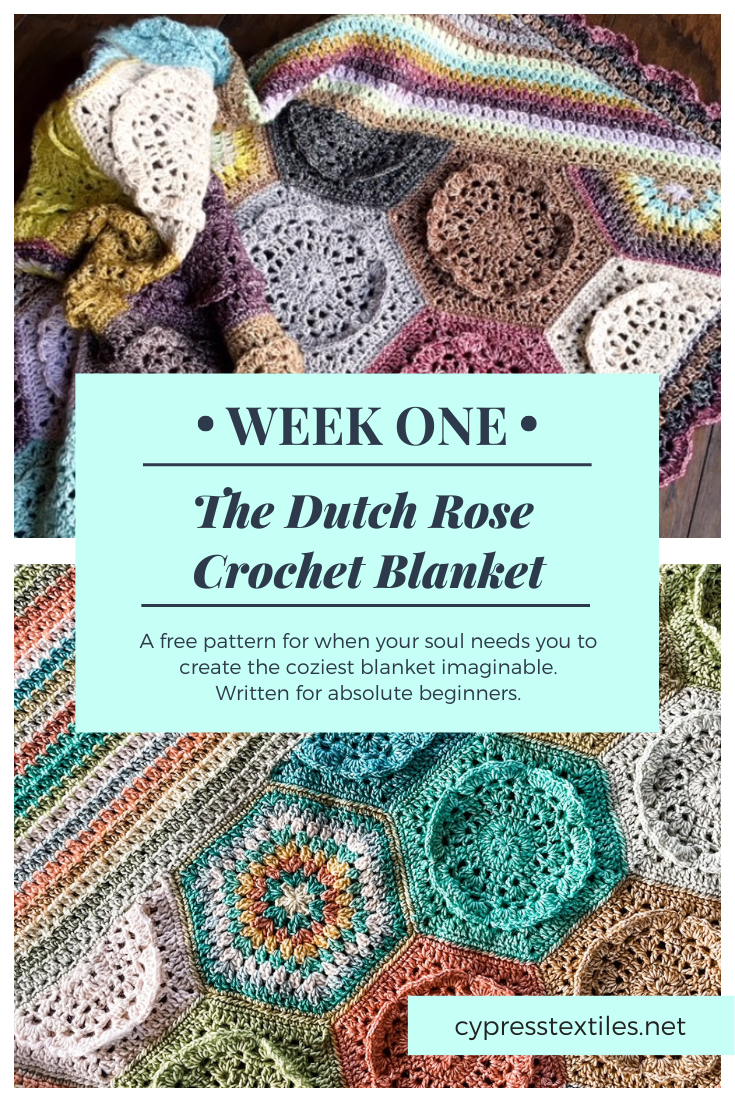
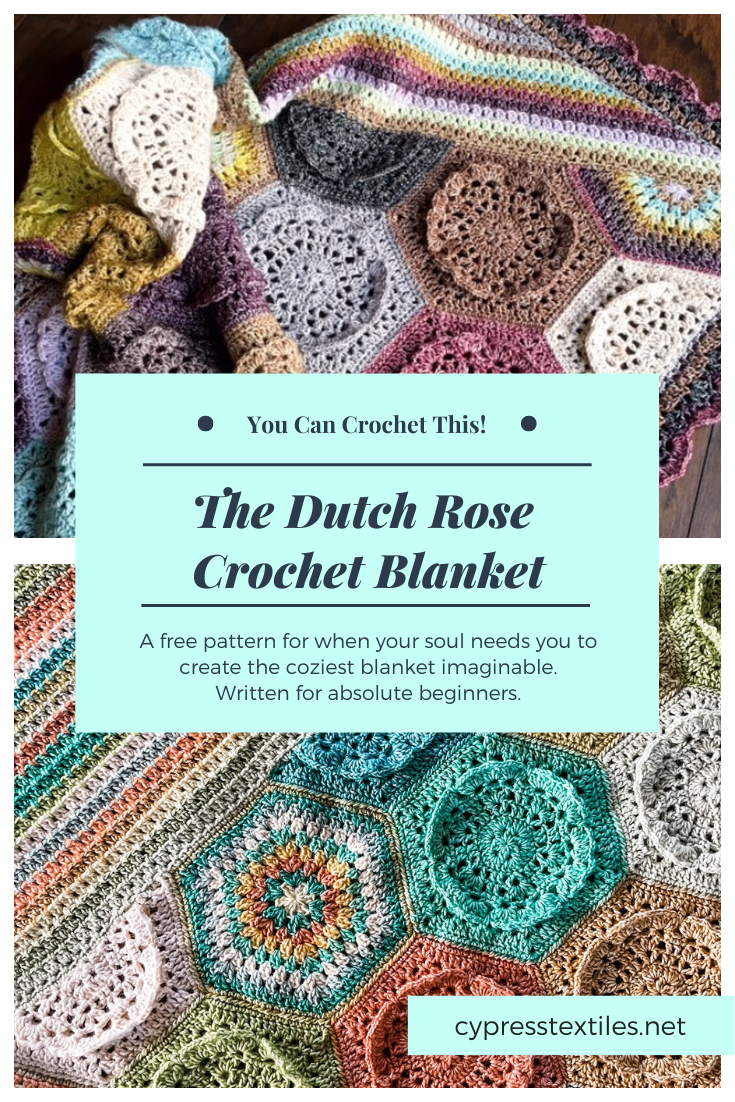
Hello, gorgeous crafter! Today I am shouting out the announcement for my Dutch Rose Blanket CAL Reboot! In 2018, I designed Dutch Rose, and it became one of my favorite designs I ever created. So many of you loved it that I decided to host a Crochet-Along and it was a hit!
In the wake of the 2022 VVCAL, I thought it might be neat to keep the CAL ball rolling and host a reboot of the Dutch Rose Blanket CAL. Now folks who missed out on the first one can participate, or folks who just want to make the coziest blanket ever can join along.
PDF Version
The Dutch Rose Blanket PDF is available to purchase from Etsy and Ravelry. During this CAL, I will be updating the pattern for clarity and making a few construction changes, but the way the blanket turns out will be just the same as in the current PDF. Once the CAL is about halfway through, I will update the PDF with the clarified version.
Social Media Hashtags: #DutchRoseBlanket and #CypressTextiles
This page will be updated with new information every Wednesday from now until the CAL is over on October 26th. The CAL is only 8 weeks long, so it’s perfect for the in-between time from now until deep Fall!
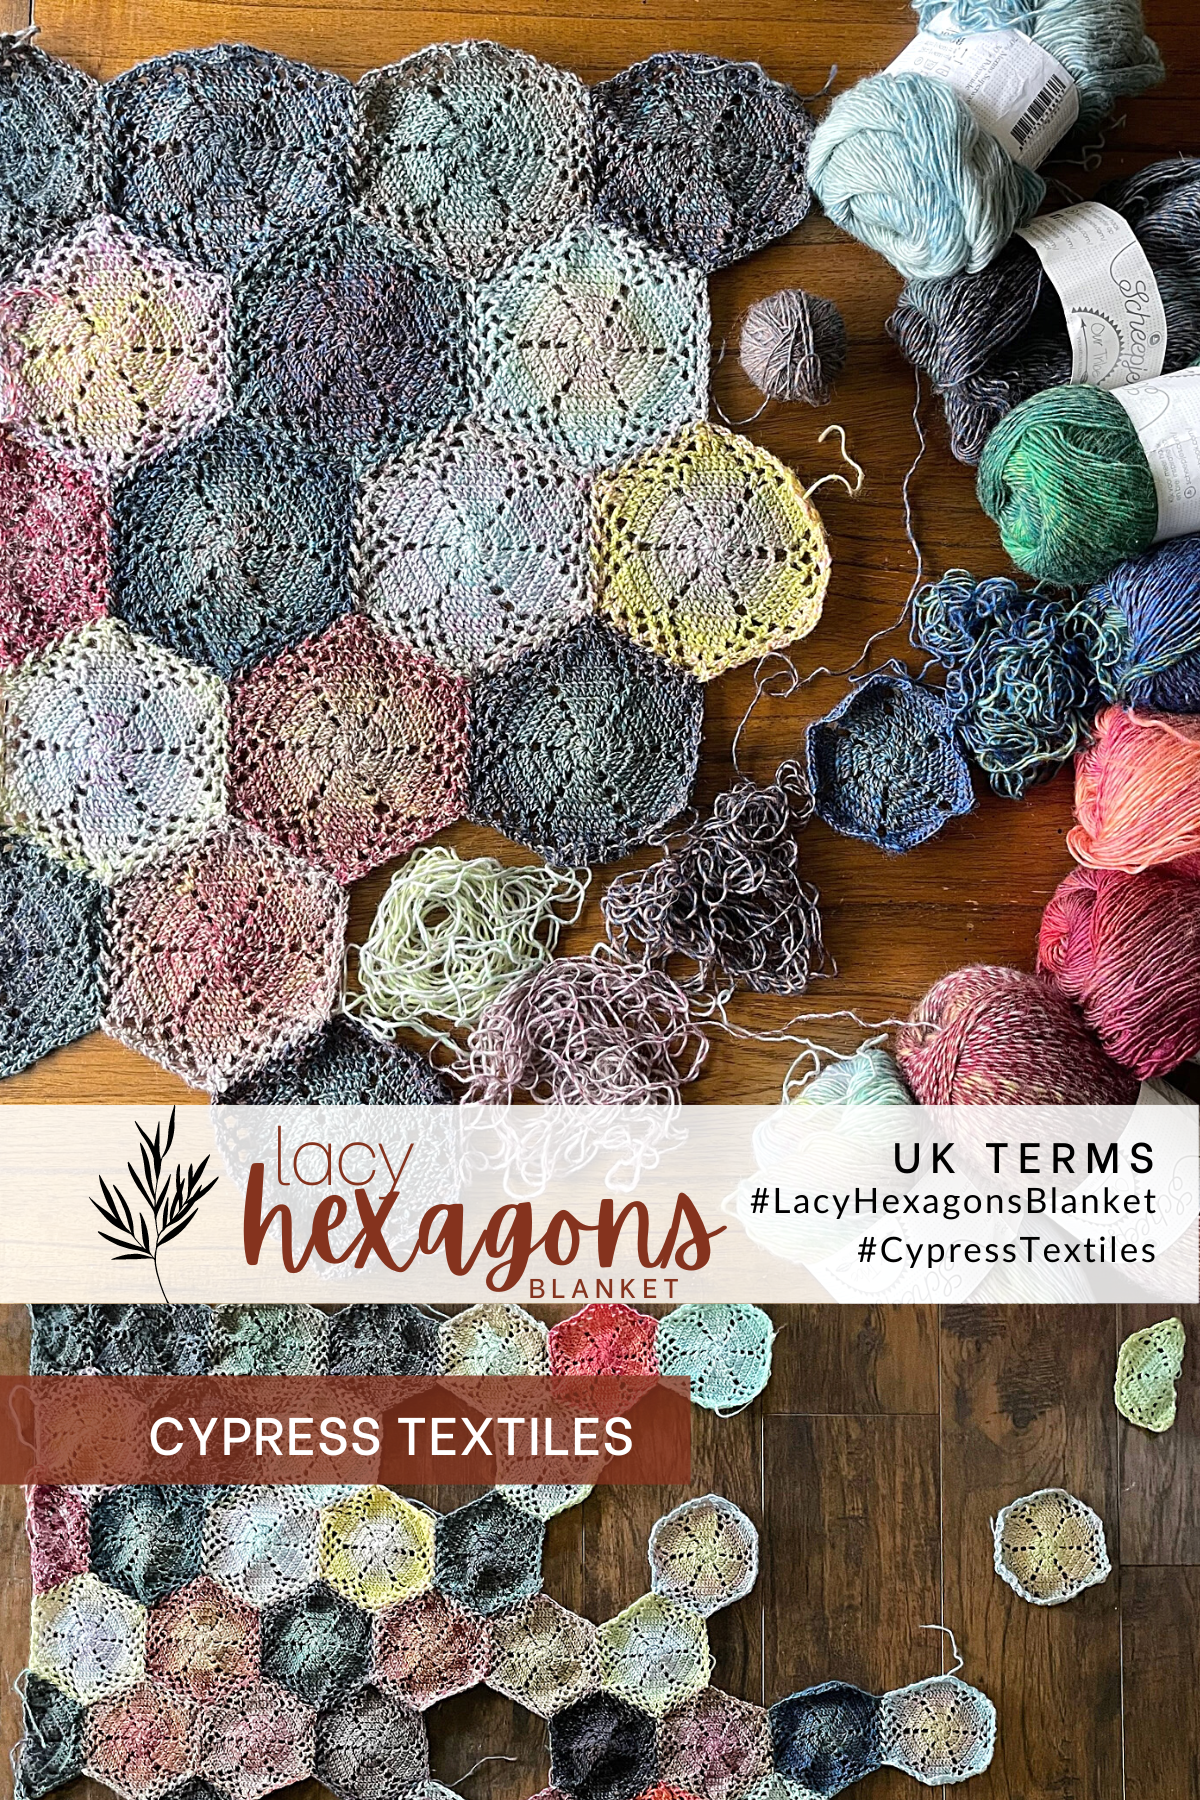
Hello, gorgeous crafter! I have a special free pattern for you today: the Lacy Hexagons Blanket! Some crafters in my community have already gotten their hands on the PDF version of this pattern, since I released it along with the FO reveal last week. Today, I’m releasing the free version! Scroll down for UK Terms, or click here for US Terms.
PDF Version
Find this pattern in a condensed ad-free PDF for a small fee in my Etsy Shop and on Ravelry. Pattern PDFs for US and UK Terms are both included in the purchase. Help support my work by purchasing this convenient PDF if you like, but just being here on the website is plenty of support as well. 🙂
Hello, gorgeous crafter! I have a special free pattern for you today: the Lacy Hexagons Blanket! Some crafters in my community have already gotten their hands on the PDF version of this pattern, since I released it along with the FO reveal last week. Today, I’m releasing the free version! Scroll down for US Terms, or click here for UK Terms.
PDF Version
Find this pattern in a condensed ad-free PDF for a small fee in my Etsy Shop and on Ravelry. Pattern PDFs for US and UK Terms are both included in the purchase. Help support my work by purchasing this convenient PDF if you like, but just being here on the website is plenty of support as well. 🙂
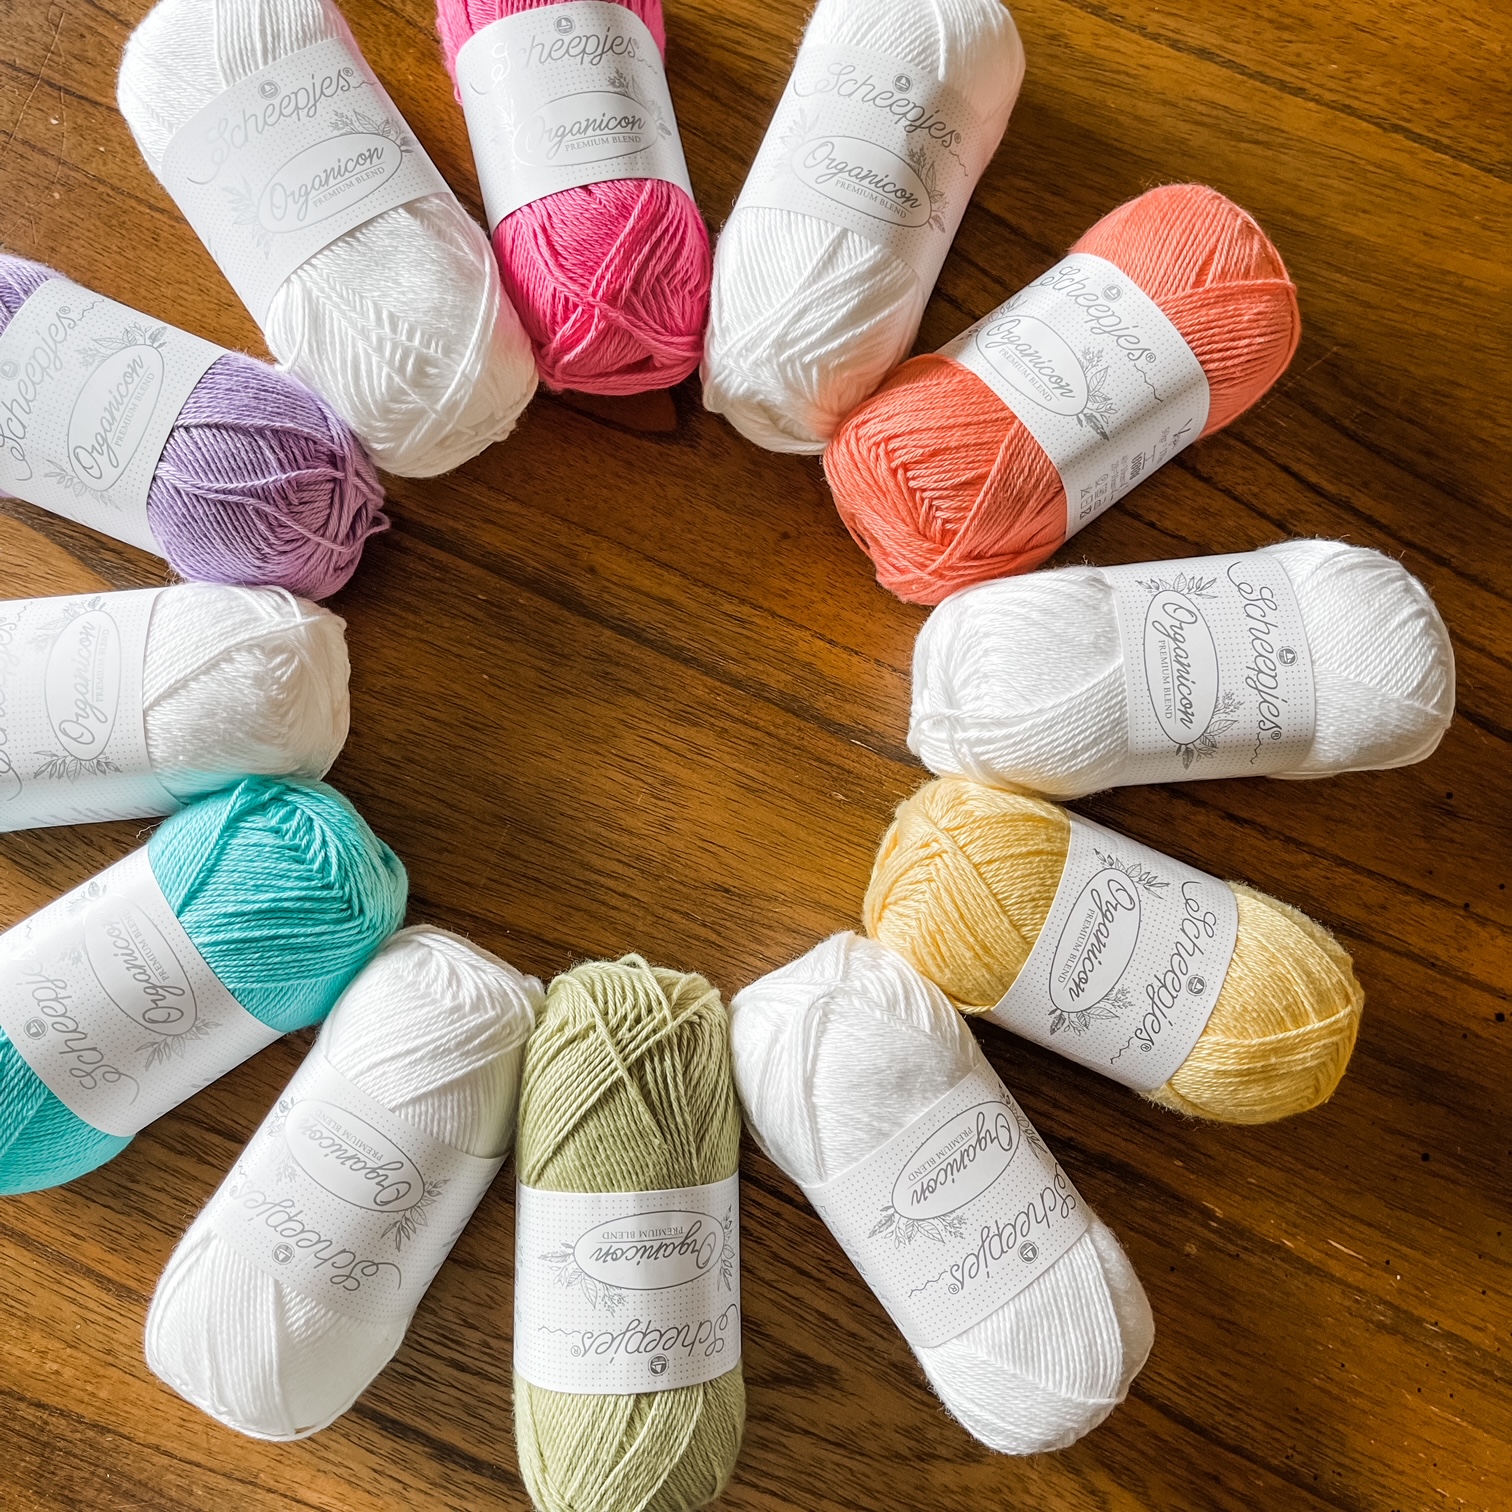
Hello, lovely! Today I am sharing some new yarny goodness that came in the mail via Scheepjes! This is Organicon Yarn, which is an eco-conscious, sustainable, and vegan-friendly yarn that comes in 21 yummy shades. I am using it for my latest project, which happens to be very special.
Recently, I decided to create a Start Here page to help welcome new-comers and OG fans to navigate my website and to see the latest and most popular patterns. In that process, I typed out every pattern I have ever written, and organized them by category in ABC order. Whew, there were a LOT!
Hey there, awesome yarn artist! There is so much to share today! Once in a while someone in my crafty community stumbles upon a photo of an old make of mine, and asks me “where is this pattern?” And it’s true!
I just did not get around to writing up the pattern for everything I made, but every time I get a request like this, it motivates me to dig up those old makes and refresh them, and maybe even get the pattern written. So today I have to show you an old make of mine, and the new spin I am putting on it!
Lacy Hexagons Blanket PDF Pattern
If you would like to purchase the PDF version of this pattern, you can do so in my Etsy Shop or on Ravelry.
You will receive a condensed, convenient PDF perfect if you choose to print. Both US Terms and UK Terms PDFs are included in the purchase. It helps to support my work, and as a bonus, you get early access to the pattern! Of course showing up for the free pattern next Thursday will be enough support if snagging the PDF is just not in the cards. I appreciate you!
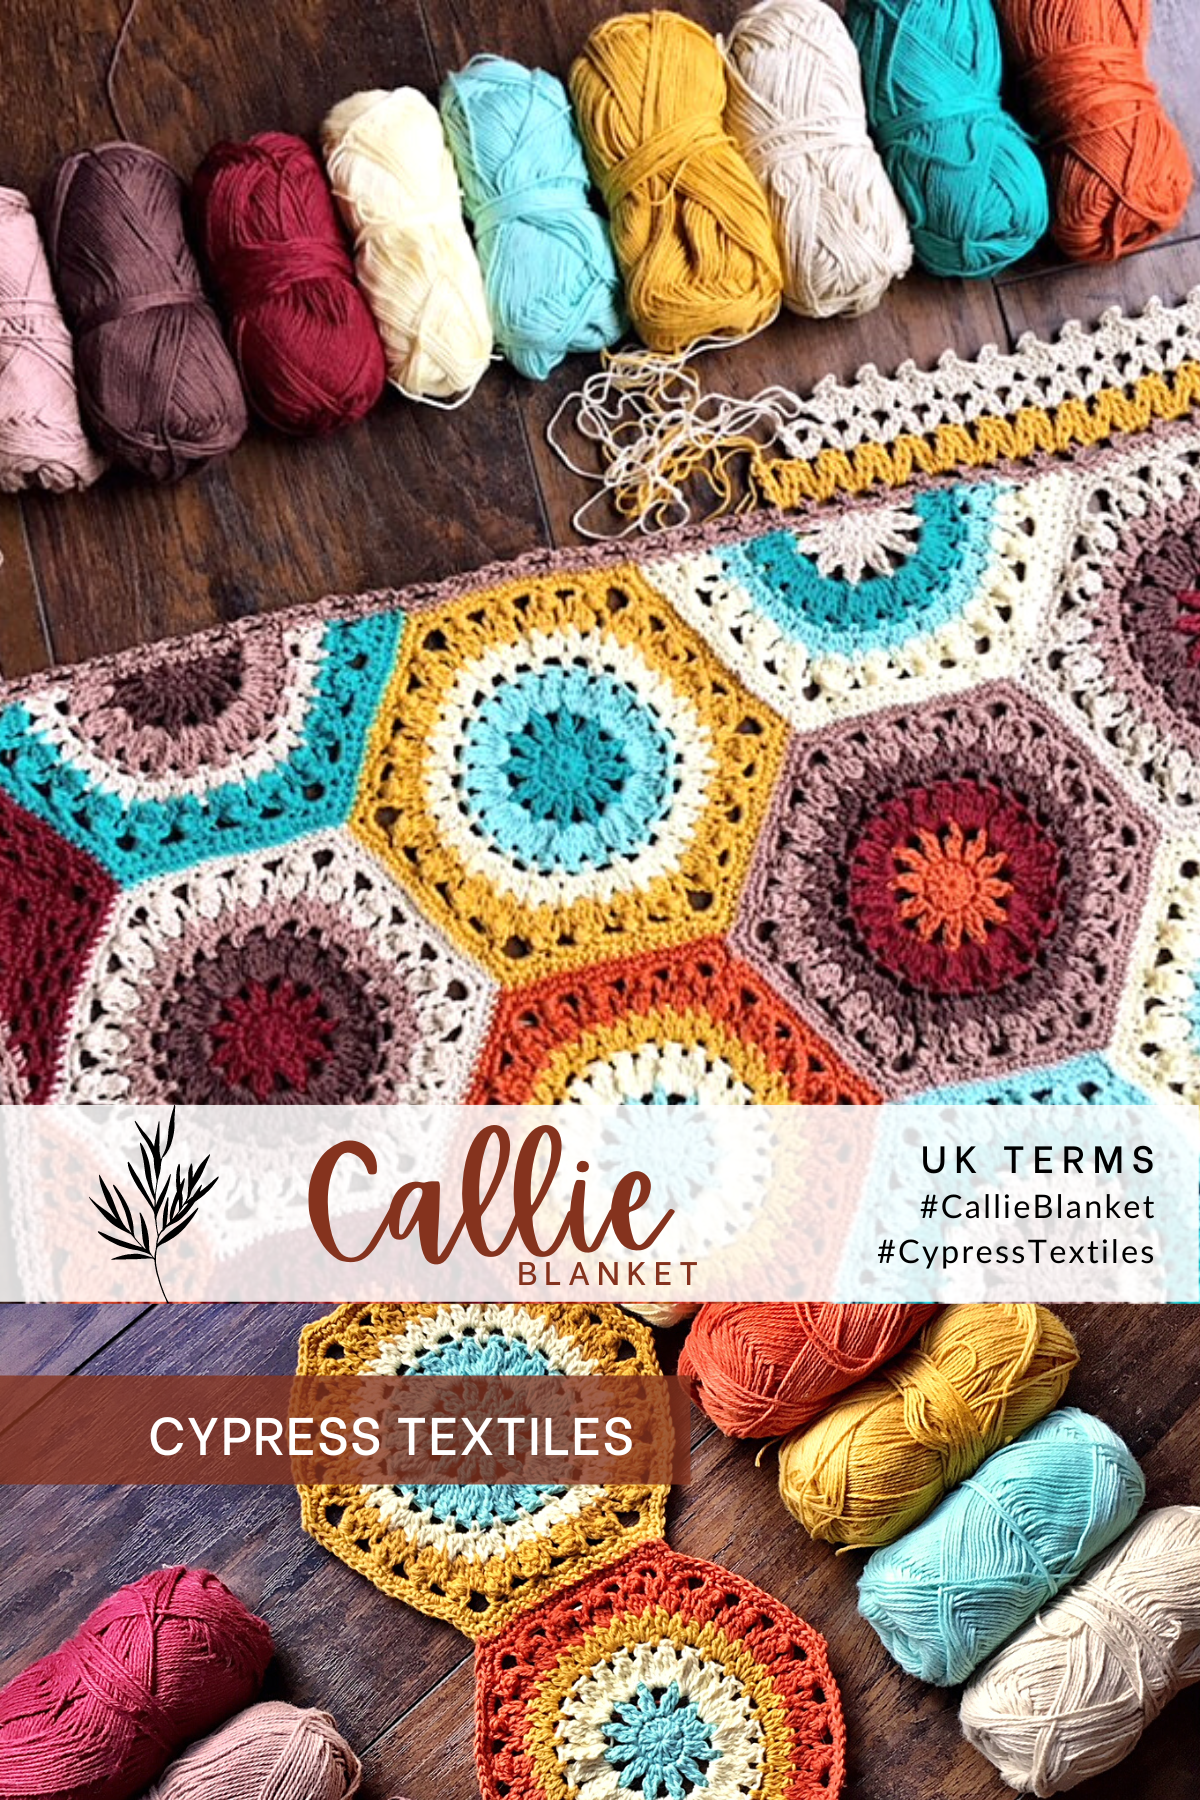
Hello, gorgeous crafter! I hope your week has been going well, and you’ve been able to get some hooky in. Working toward my efforts to make sure everyone has access to my crochet patterns, I am slowly making sure every single pattern of mine has a free version here on my website. Today, I want to offer my popular Callie Crochet Blanket Pattern now as a freebie! Scroll down for UK Terms, or click here for US Terms.
PDF Version
Find this pattern in a condensed ad-free PDF for a small fee in my Etsy Shop and on Ravelry. Pattern PDFs for US and UK Terms are both included in the purchase. Help support my work by purchasing this convenient PDF if you like, but just being here on the website is plenty of support as well. 🙂
Hello, gorgeous crafter! I hope your week has been going well, and you’ve been able to get some hooky in. Working toward my efforts to make sure everyone has access to my crochet patterns, I am slowly making sure every single pattern of mine has a free version here on my website. Today, I want to offer my popular Callie Crochet Blanket Pattern now as a freebie! Scroll down for US Terms, or click here for UK Terms.
PDF Version
Find this pattern in a condensed ad-free PDF for a small fee in my Etsy Shop and on Ravelry. Pattern PDFs for US and UK Terms are both included in the purchase. Help support my work by purchasing this convenient PDF if you like, but just being here on the website is plenty of support as well. 🙂
Hello, friend! I hope you are having a great week so far. Have you gotten any hooky in? If not, be sure to prioritize your interests and make some time for yourself.
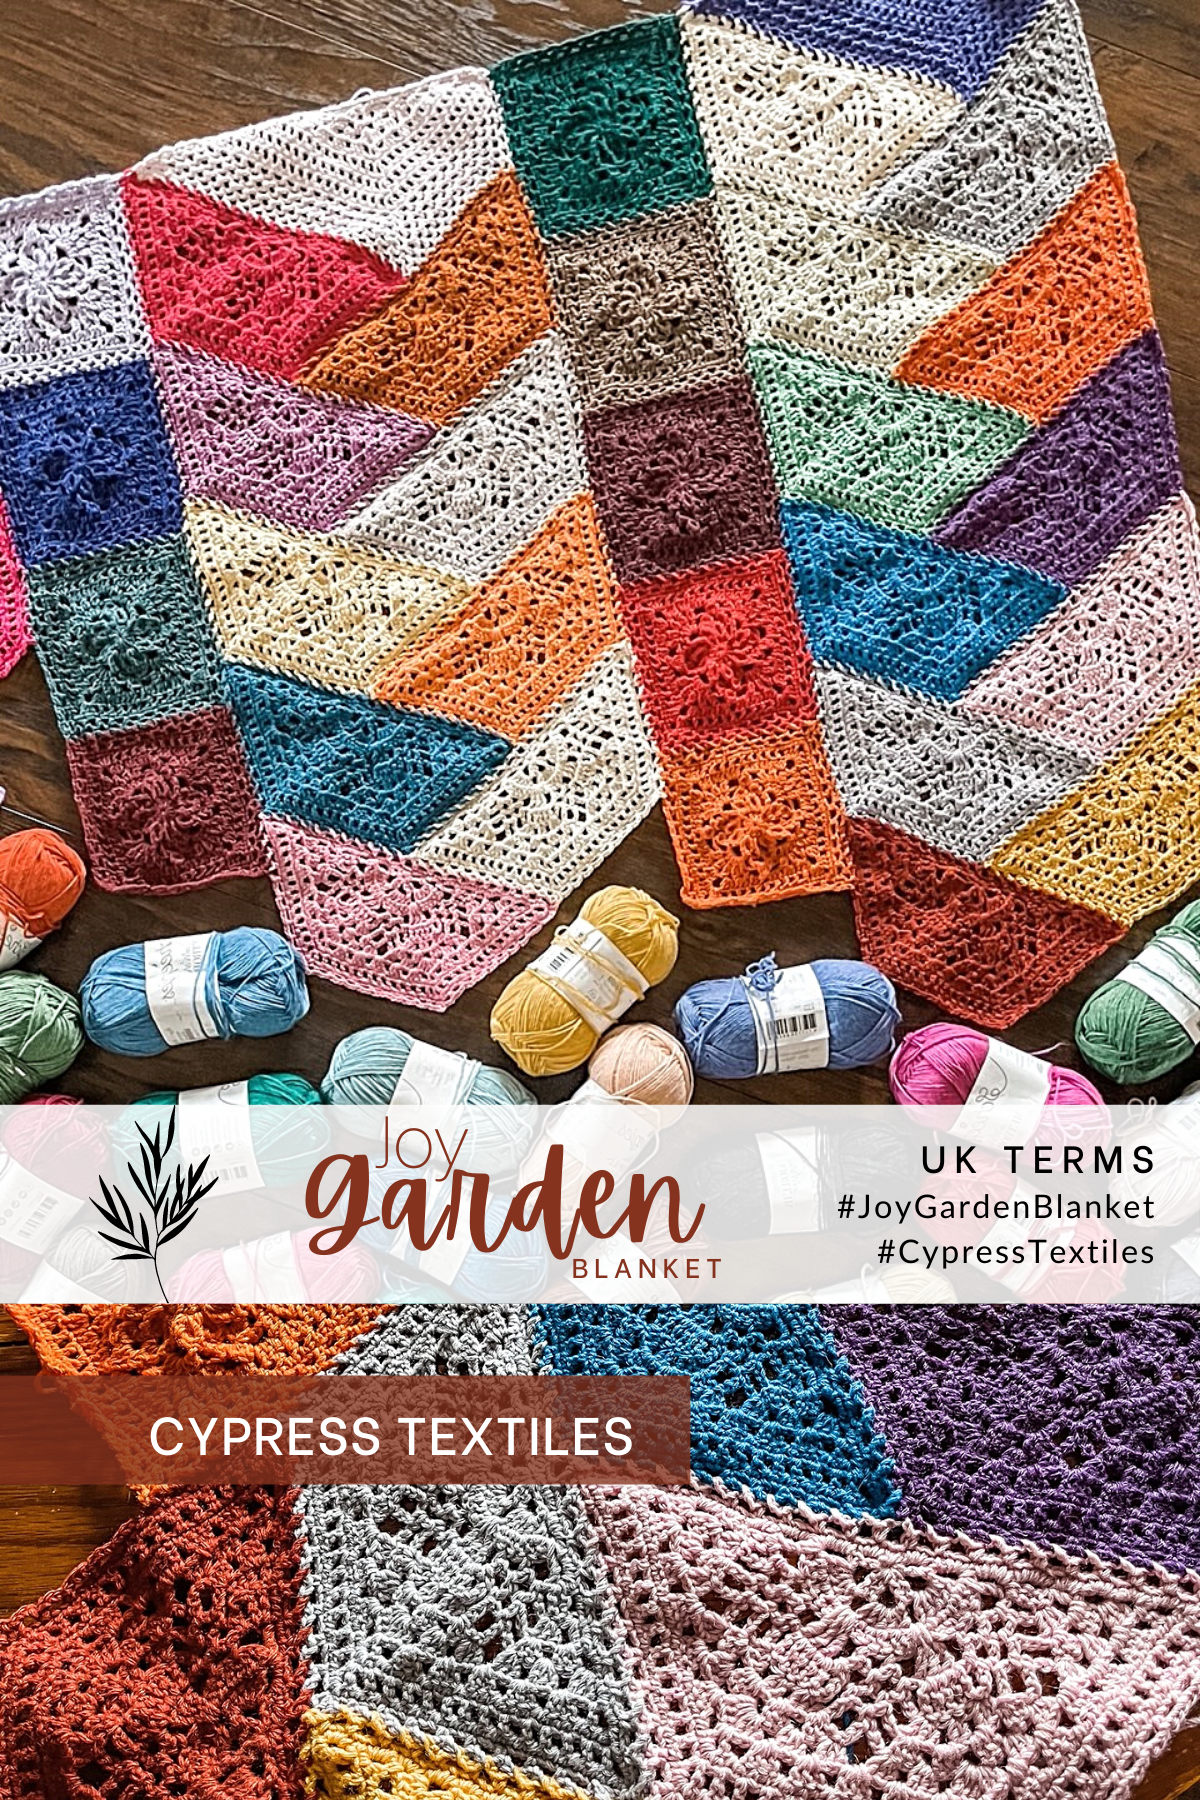
Today, I have a special offering that is long overdue! My Joy Garden Crochet Blanket progress photos have been a hit on my social media, and I am so proud to bring the pattern to you today. This pattern uses 1 x Scheepjes Metropolis 10g colour pack and 3 x 50g balls of a border color, but you can use any yarn that you prefer with the appropriate hook for that yarn.
Find this pattern in a condensed ad-free PDF for a small fee in my Etsy Shop and on Ravelry. Pattern PDFs for US and UK Terms are both included in the purchase. Help support my work with this convenient PDF.
Hello, friend! I hope you are having a great week so far. Have you gotten any hooky in? If not, be sure to prioritize your interests and make some time for yourself.
Today, I have a special offering that is long overdue! My Joy Garden Crochet Blanket progress photos have been a hit on my social media, and I am so proud to bring the pattern to you today. This pattern uses 1 x Scheepjes Metropolis 10g colour pack and 3 x 50g balls of a border color, but you can use any yarn that you prefer with the appropriate hook for that yarn.
Find this pattern in a condensed ad-free PDF for a small fee in my Etsy Shop and on Ravelry. Pattern PDFs for US and UK Terms are both included in the purchase. Help support my work with this convenient PDF.
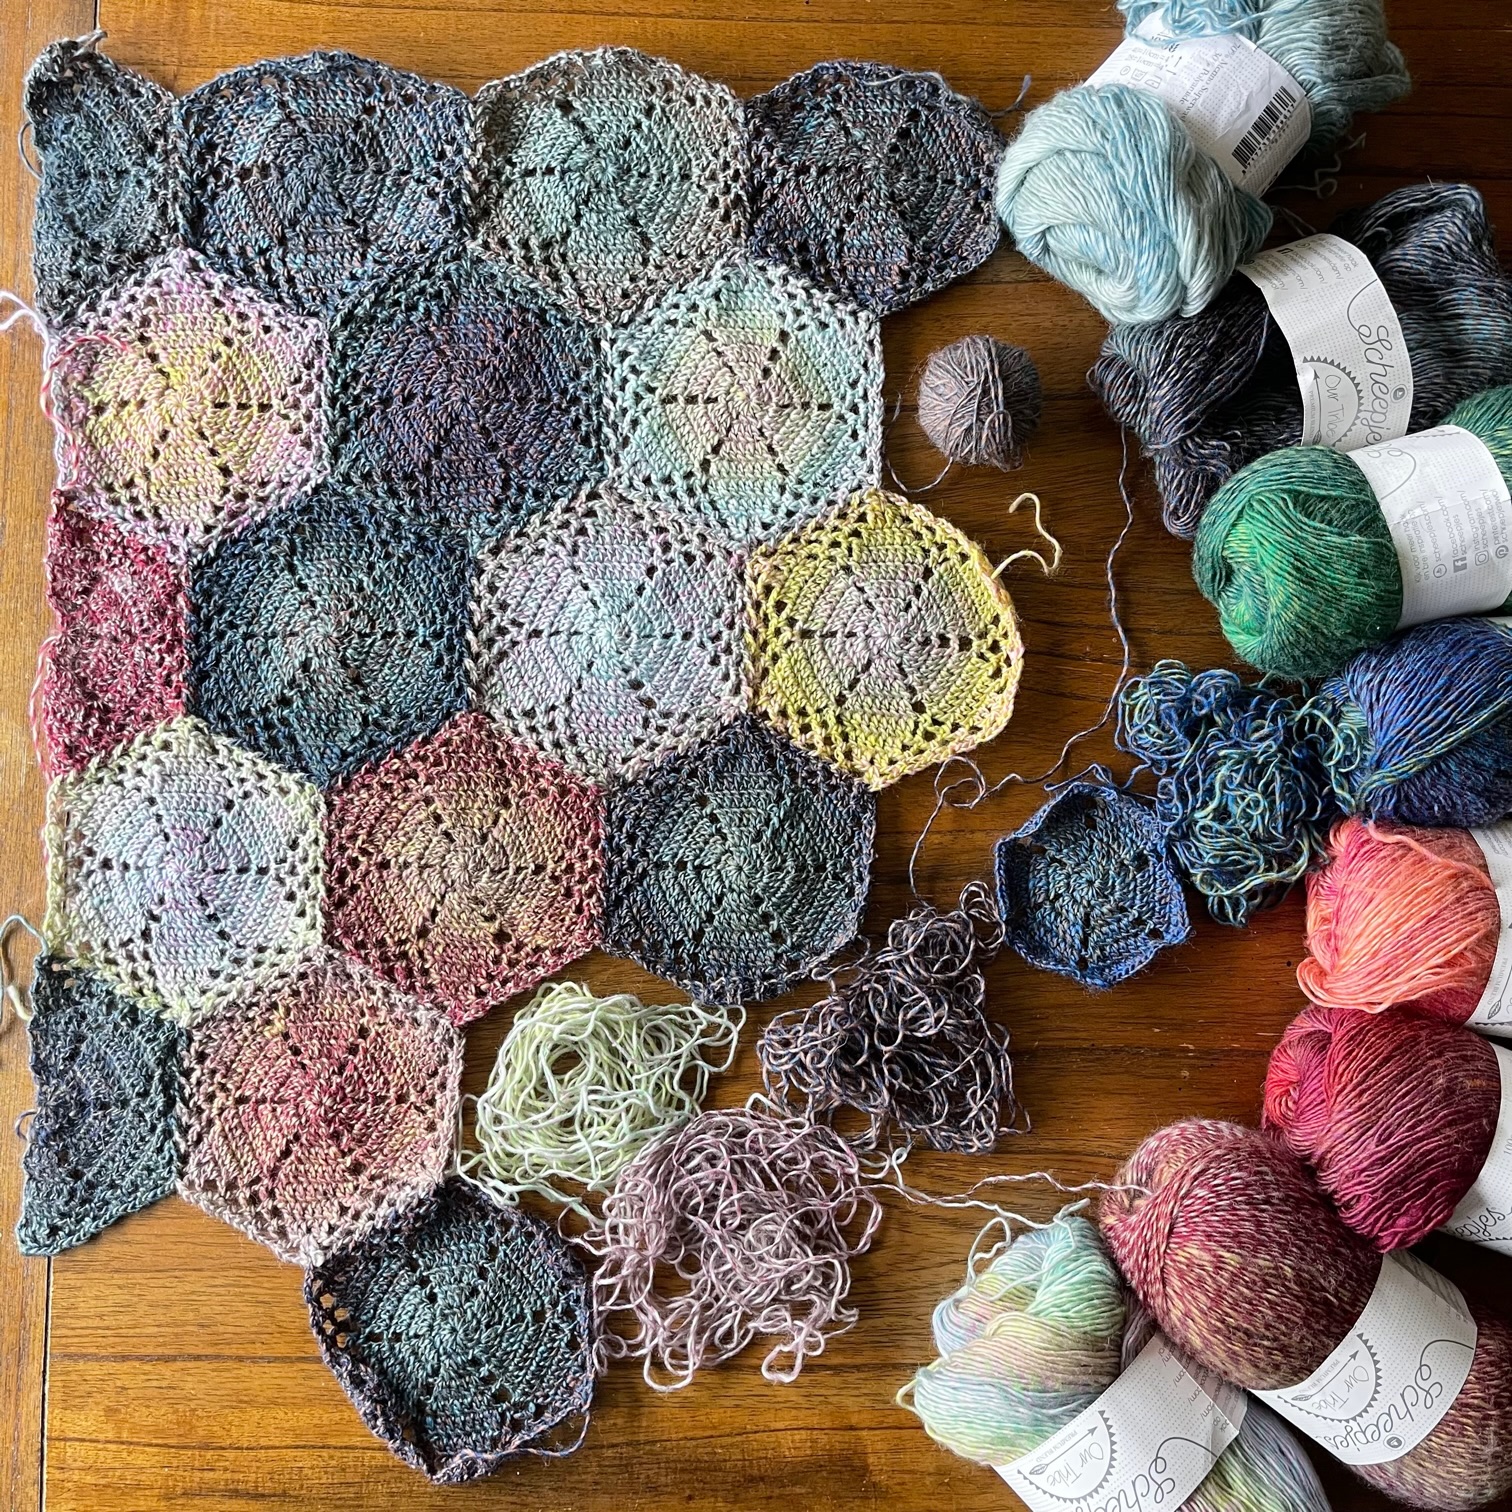
Hello, lovely! Today I wanted to share a finish with you! The Joy Garden Crochet Blanket in Scheepjes Metropolis is an idea that I had years ago. My goal was to create a blanket using half hexagons in a braid pattern that would be worked up in join as you go panels. The final outcome is superb! Read on to see more!
PDF Version
Find the PDF crochet pattern for Joy Garden on Ravelry and Etsy and have early access to the pattern. BOTH US and UK Terms PDFs are included in the purchase.
Hello, and a huge welcome to Week 19 of the 2022 Vibrant Vintage Crochet-A-Long (VVCAL)! I’m so glad you’re here, and I can’t wait to start joining. There is only 1 post this week, with the BORDER! Yay! You have Weeks 19 and 20 to work on the join and border of your blanket. I am giving you the complete border today!
I hope you have enjoyed this VVCAL! Next year, I will be hosting a reboot of the 2016 VVCAL, and I’m so excited!
Find the border instructions below, in both US and UK terms. There won’t be a video for this border but it is quite simple. Thank you for your support during the VVCAL! If you would like to buy the full pattern in condensed PDF format, look to the Etsy and Ravelry links below.
PDF Version
Announcement! The 2022 VVCAL full PDF is now available to purchase from Etsy and Ravelry.
42-Page PDF of the entire 2022 VVCAL
36 full mix-and-match hexagons plus 2 half hexagons
2 joining options plus border
All motifs have charted and written instructions
2.5 pages of tips and tricks
Full layouts, motif progress tracker checklist, and yarn information for Scheepjes Catona Colour Pack, SW/RW Colour Pack (1 or 2 packs), and Metropolis Pack
Guidance and blank layout for Colour Crafter and Chunky Monkey stash yarn
CypressTextiles Tree Huggers Facebook Group – This is my main FB group (join!). Share your VVCAL progress pics in this group if you like, and I will share CAL highlights here, but the weekly action will be in the other group linked above.
The Official join for the 2022 VVCAL is Celtic Lace Join for Hexagons.
Written Instruction
Stitch Guide (US Terms)
Scroll down for UK Terms.
2trcl 2tr cluster: * yoh twice, insert hook in st/sp, yoh, pull up lp, (yoh, draw yarn through 2 lps) twice, rep from * once, yoh, draw yarn through 3 lps
2dccl 2dc cluster: (yoh, insert hook in st/sp, yoh, pull up lp, yoh, draw yarn through 2 lps) 2 times, yoh, draw yarn through 3 lps
beg beginning
beg 2dccl (beg dc, dc) in st/sp indicated – when joining rnd, ss into full dc st
beg 2trcl (beg tr, 1tr) in st/sp – Counts as 1 2trcl
beg dc (sc, ch1) – counts as 1 dc
chN chain N number of times
dc double crochet
lp loop
MR make ring: slip knot, ch3, ss in third ch from hook
rep repeat
rnd round
sc single crochet
sp space (chain space)
ss slip stitch
st stitch
yoh yarn over hook
For this method, we will join the full hexagons 1 by 1 in rows, moving from top to bottom of the blanket. Half hexagons will be joined onto the blanket body after all full hexagons are joined together.
Blanket Border
Rnd 1 * (1sc, ch3, 1sc) in corner st, [ch3, sk2, 1sc] across to within 2 sts of next corner sc skipping 1 extra st or 1 fewer st if the count is off, rep from * 3 times, ss in first sc. Double check that opposing sides have the same amount of ch-3 sps.
Rnd 2 Beg 2dccl in first ch-sp * (ch2, 2dccl in same ch-sp) 3 times, (2dccl, ch2, 2dccl) in each ch-sp across to next corner sp, 2dccl in corner ch-sp, rep from * 3 times omt final 2dccl, ss in beg 2dccl.
Rnd 3 Beg 2trcl in first ch-sp, [ch1, 2trcl in same ch-sp, 2trcl in next ch-sp] rep around all 4 sides of blanket until first ch-sp is reached omt final 2trcl, ss in beg 2trcl.
Rnd 4 (1sc, ch2, 1sc, ch1) in all ch-sps around blanket, ss in first sc, cut yarn and weave ends.
Your 2022 VVCAL Blanket is complete! Give yourself a fist bump!
Stitch Guide (UK Terms)
Scroll down for UK Terms.
2trcl 2tr cluster: (yoh, insert hook in st/sp, yoh, pull up lp, yoh, draw yarn through 2 lps) 2 times, yoh, draw yarn through 3 lps
2dtrcl 2dtr cluster: * yoh twice, insert hook in st/sp, yoh, pull up lp, (yoh, draw yarn through 2 lps) twice, rep from * once, yoh, draw yarn through 3 lps beg beginning
beg 2dtrcl (beg dtr, 1dtr) in st/sp – Counts as 1 2dtrcl
beg 2trcl (beg tr, 1tr) in st/sp indicated – when joining rnd, ss into full tr st
beg tr (1dc, ch1) – counts as 1 tr
chN chain N number of times
dc double crochet
lp loop
MR make ring: slip knot, ch3, ss in third ch from hook
rep repeat
rnd round
sp space (chain space)
ss slip stitch
st stitch
tr treble crochet
yoh yarn over hook
Blanket Border
Rnd 1 * (1dc, ch3, 1dc) in corner st, [ch3, sk2, 1dc] across to within 2 sts of next corner dc skipping 1 extra st or 1 fewer st if the count is off, rep from * 3 times, ss in first dc. Double check that opposing sides have the same amount of ch-3 sps.
Rnd 2 Beg 2trcl in first ch-sp * (ch2, 2trcl in same ch-sp) 3 times, (2trcl, ch2, 2trcl) in each ch-sp across to next corner sp, 2trcl in corner ch-sp, rep from * 3 times omt final 2trcl, ss in beg 2trcl.
Rnd 3 Beg 2dtrcl in first ch-sp, [ch1, 2dtrcl in same ch-sp, 2dtrcl in next ch-sp] rep around all 4 sides of blanket until first ch-sp is reached omt final 2dtrcl, ss in beg 2dtrcl.
Rnd 4 (1dc, ch2, 1dc, ch1) in all ch-sps around blanket, ss in first dc, cut yarn and weave ends.
Your 2022 VVCAL Blanket is complete! Give yourself a fist bump!
Thank you so much for stopping in for Week 19/20 of the 2022 VVCAL! I will do a wrap-up post next week!
CypressTextiles Tree Huggers Facebook Group – This is my main FB group (join!). Share your VVCAL progress pics in this group if you like, and I will share CAL highlights here, but the weekly action will be in the other group linked above.
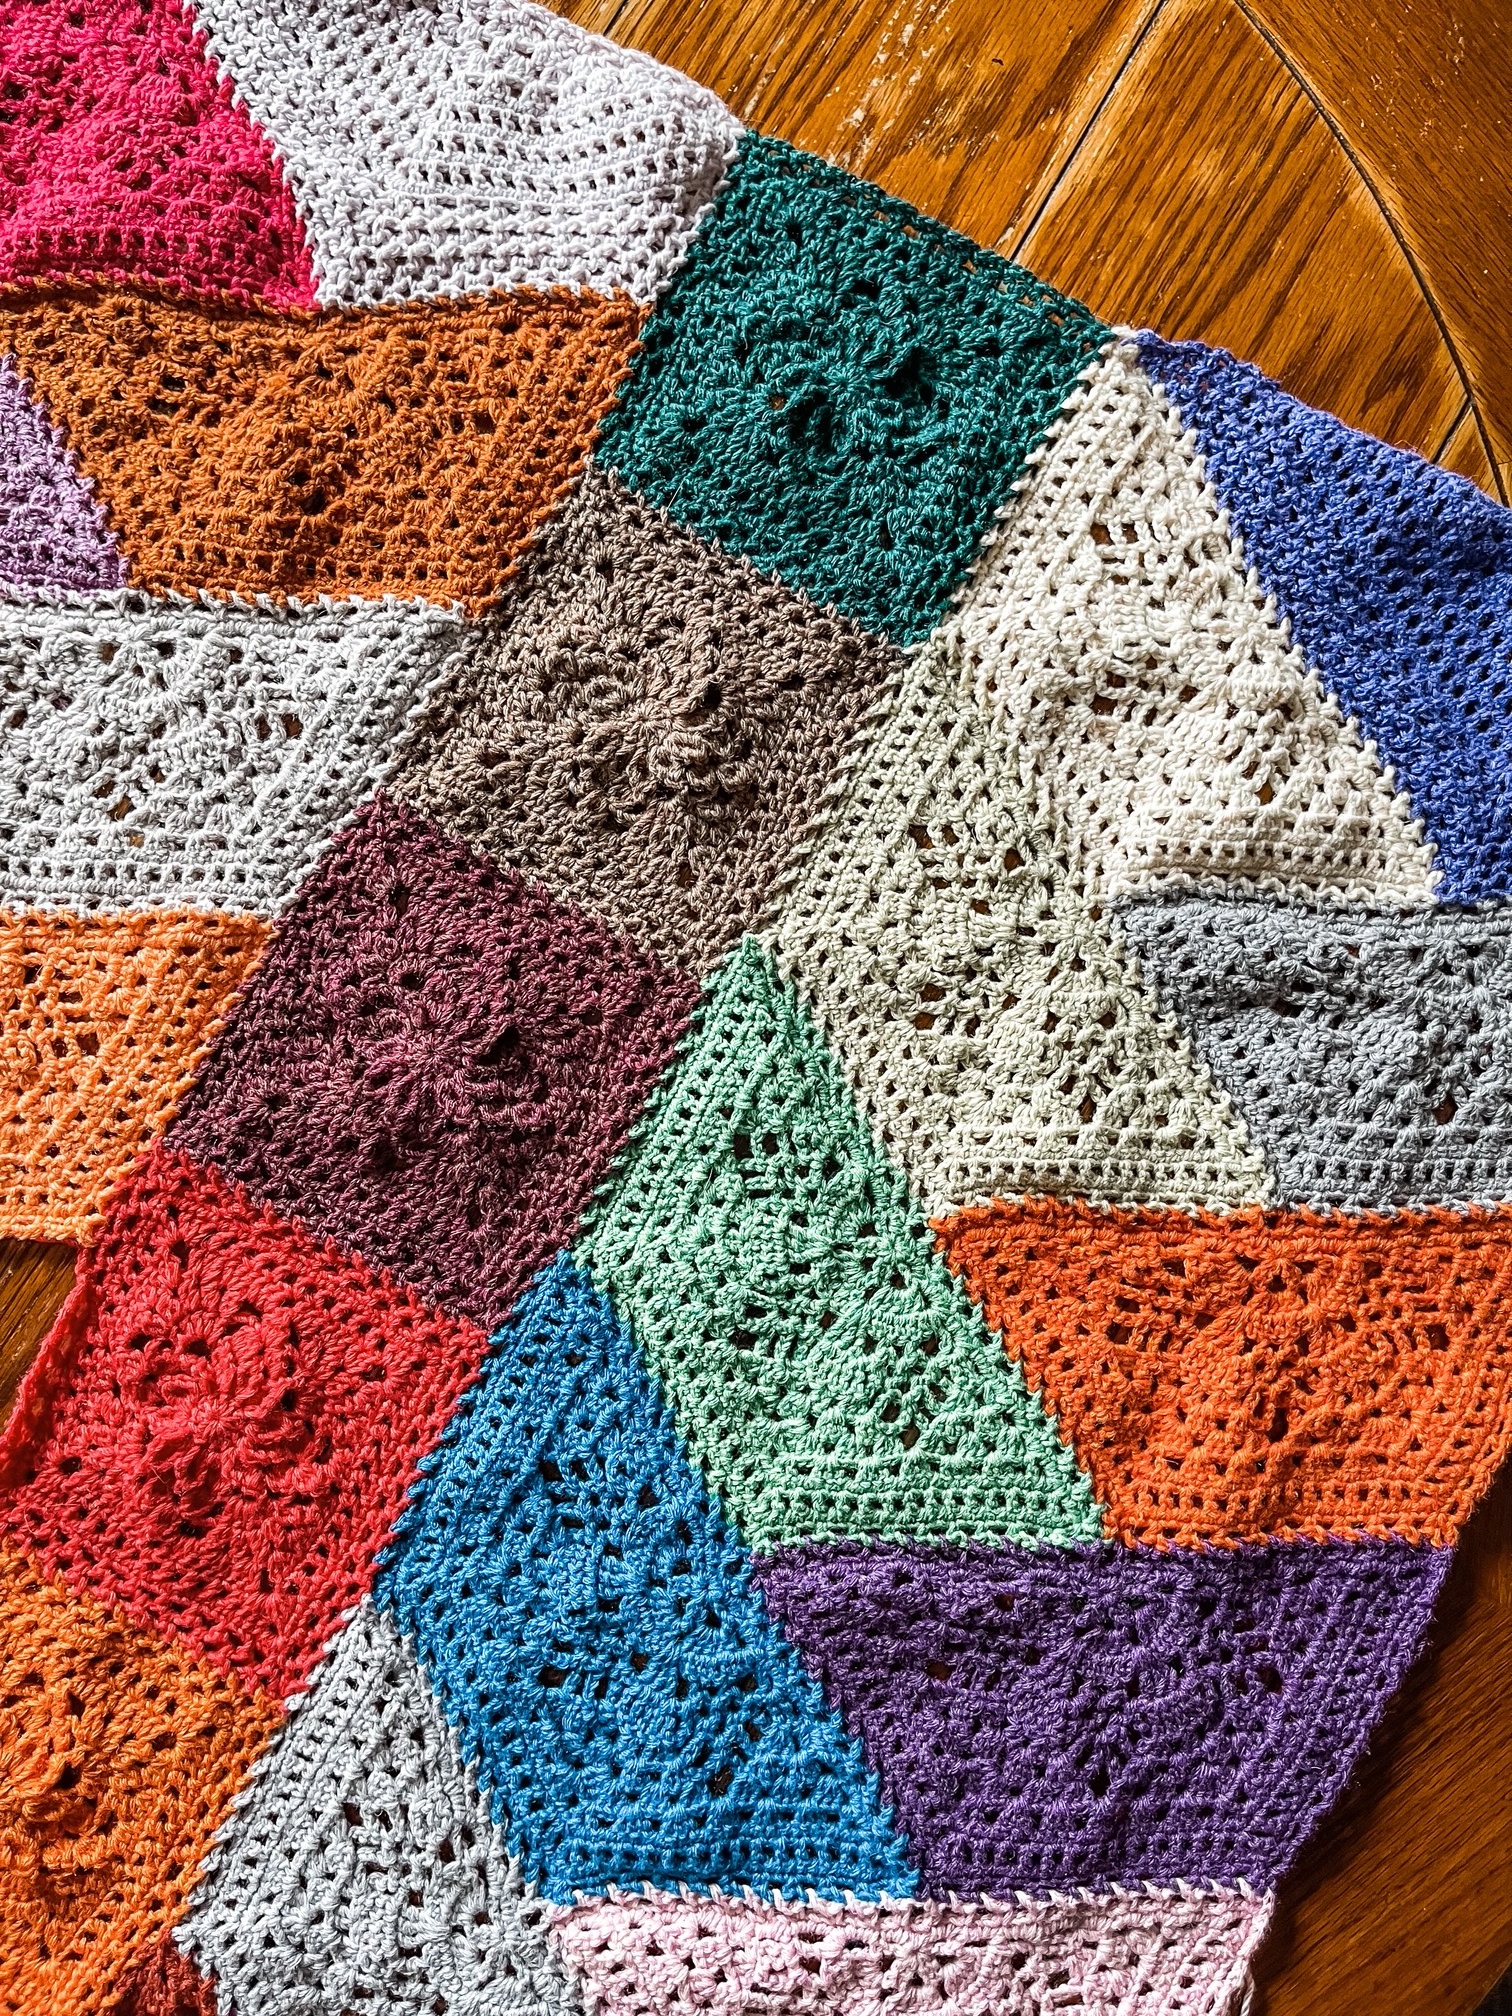
Hello, and a huge welcome to Week 18 of the 2022 Vibrant Vintage Crochet-A-Long (VVCAL)! I’m so glad you’re here, and I can’t wait to start joining. There is only 1 post this week, with all of the joining options. Scroll down for a nice collection of your makes!
PDF Version
Announcement! The 2022 VVCAL full PDF is now available to purchase from Etsy and Ravelry.
42-Page PDF of the entire 2022 VVCAL
36 full mix-and-match hexagons plus 2 half hexagons
2 joining options plus border
All motifs have charted and written instructions
2.5 pages of tips and tricks
Full layouts, motif progress tracker checklist, and yarn information for Scheepjes Catona Colour Pack, SW/RW Colour Pack (1 or 2 packs), and Metropolis Pack
Guidance and blank layout for Colour Crafter and Chunky Monkey stash yarn
CypressTextiles Tree Huggers Facebook Group – This is my main FB group (join!). Share your VVCAL progress pics in this group if you like, and I will share CAL highlights here, but the weekly action will be in the other group linked above.
2022 VVCAL Made with Scheepjes Colour Crafter from Stash
2022 VVCAL Made with Scheepjes Chunky Monkey from Stash
Joining Methods
There are a few joining methods recommended for the 2022 VVCAL Hexies. Scroll down for all of the patterns.
Official Join – Celtic Lace Join for Hexagons
Official Join – SC Continuous JAYG with PLT Join for Hexagons
Alternate Join – Continuous Flat Braid JAYG for Hexagons
Alternate Join – Whip Stitch Join
Once the videos go up, the links to them will be added in.
Celtic Lace Join for Hexagons
The Official join for the 2022 VVCAL is Celtic Lace Join for Hexagons.
Written Instruction
Stitch Guide (US Terms)
Scroll down for UK Terms.
2dccl 2dc cluster: (yoh, insert hook in st/sp, yoh, pull up lp, yoh, draw yarn through 2 lps) 2 times, yoh, draw yarn through 3 lps
beg beginning
beg dc (sc, ch1) – counts as 1 dc
chN chain N number of times
dc double crochet
lp loop
MR make ring: slip knot, ch3, ss in third ch from hook
rep repeat
rnd round
sc single crochet
sp space (chain space)
ss slip stitch
st stitch
yoh yarn over hook
For this method, we will join the full hexagons 1 by 1 in rows, moving from top to bottom of the blanket. Half hexagons will be joined onto the blanket body after all full hexagons are joined together.
First Full Hexagon Motif
Rnd 1 Join background yarn with ss in corner st, [3sc in corner st, 1sc in all sts across to next corner] 4 times, ss in first sc. [96 sc]
Rnd 2 Beg dc in corner st, * ch1, 1dc in same st, sk1, [(1dc, ch3, 1dc) in next st, sk3] 3 times, (1dc, ch3, 1dc) in next st, 1dc in corner st, rep from * 5 times omt final dc, ss in beg dc. [60 dc, 30 sp]
Rnd 3 Beg dc in corner sp, [ch1, 1dc in same sp, 5dc in next 4 ch-sps, 1dc in next ch-sp] 6 times omt final dc, ss in beg dc. [132 dc, 6 sp]
Rnd 4 * (1sc, ch5, 1sc) in corner sp, ch3, sk3, 1sc, [ch3, sk4, 1sc] 3 times, ch3, rep from * 5 times, ss in first sc, cut yarn and weave ends. [36 sc, 36 sp]
Second Full Hexagon Motif
Rnds 1-3 Work as for First Motif.
Rnd 4 (1sc, ch5, 1sc) in corner sp, ch3, sk3, 1sc, [ch3, sk4, 1sc] 3 times, ch3, 1sc in corner sp, ch2, PLT in ch-5 corner sp of adjacent completed motif, ch3, 1sc in same corner sp on motif in progress, ch3, sk3, [1sc, ch1, PLT in corresponding ch-3 sp on adjacent motif, ch2, sk4] 3 times, 1sc, ch3, 1sc in corner sp, ch2, PLT in ch-5 corner sp on adjacent completed motif, ch3, 1sc in same corner sp, work rem 4 sides plain without joining, ss in first sc, cut yarn and weave ends.
Work remaining full hexagons of the top row as for second motif.
First Motif of next row
Rnds 1-4 Work as for Second Motif.
Second Motif of row
Rnds 1-3 Work as before.
Rnd 4 (1sc, ch5, 1sc) in corner sp, ch3, sk3, 1sc, [ch3, sk4, 1sc] 3 times, ch3, 1sc in corner sp, ch2, PLT in ch-5 corner sp of adjacent completed motif, ch3, 1sc in same corner sp on motif in progress, ch3, sk3, [1sc, ch1, PLT in corresponding ch-3 sp on adjacent motif, ch2, sk4] 3 times, 1sc, ch3, 1sc in corner sp, ch2, join to 2 previously joined ch-sps as follows: remove lp from hook, insert hook front to back through left-hand corner sp and back to front through right-hand corner sp, PLT so that the PLT lp goes through both corner sps, ch3, 1sc in same corner sp, join next side as before, join next corner as for previous corner, join next side as before, join next corner with PLT in adjacent corner sp, work rem 2 sides plain without joining, ss in first sc, cut yarn and weave ends.
With these techniques, you can join all remaining hexagons to make blanket body. Next, we will join the half hexies onto the blanket body. Joining method will be abbreviated in the instruction, because the same techniques as above are used.
Join the Half Hexie Motifs onto the Blanket Body
The first 3 rows on every half hexagon are the same, and the 4th row is the joining row, just as for the full hexagons.
Row 1 (RS) Join yarn with ss in first st, 2sc in same st, [1sc in all sts across to next corner, 3sc in corner st] 3 times omt final sc, turn. [49 sc]
Row 2 Beg dc in first st, * ch1, 1dc in same st, sk1, [(1dc, ch3, 1dc) in next st, sk3] 3 times, (1dc, ch3, 1dc) in next st, 1dc in corner st, rep from * 2 times, ch1, 1dc in same st, turn. [32 dc, 31 sp]
Row 3 Beg dc in first sp, [ch1, 1dc in same sp, 5dc in next 4 ch-sps, 1dc in next ch-sp] 3 times, ch1, 1dc in same sp, cut yarn and weave ends. [132 dc, 6 sp]
There are 3 different situations you will encounter when joining your half hexies. Either you are joining the first 2 sides only, the second 2 sides only, or you are joining all 3 sides, depending on where the motif is located in the blanket schematic. The “raw” edge is not joined. This edge will be part of the outside border of your blanket.
Joining the first 2 sides only: With RS still facing, join yarn with ss in first sp, 1sc in same sp, ch2, PLT in corresponding ch-5 sp on adjacent motif, join side as before, join corner as before, join second side, join next corner, work final side plain without joining, finishing with (1sc, ch5, 1sc) in final sp, cut yarn and weave ends. [20 sc, 19 sp]
Joining the second 2 sides only: Join yarn with ss in first sp, (1sc, ch5, 1sc) in same sp, work across first side as before, join next corner, join next side, join next corner, join next side, join final corner, cut yarn and weave ends.
Joining all 3 sides: Join yarn with ss in first st, [join corner, join side] 3 times, join final corner, cut yarn and weave ends.
Now it is time to fill in the triangle gaps at the top and bottom of your blanket.
Fill the Triangle Gaps
The top and bottom edge of your blanket is a zig-zag making triangle gaps that should be filled to make a squared-off edge. For Rows 1-5, use the remnants from a color that is in the “family” of the position of the triangle gap in the schematic.
Triangle Gap A
Row 1 (RS) Using remnant as instructed, MR, beg dc, [ch3, 1sc] 3 times omt final sc, 1dc, turn. [2 dc, 2 sc, 3 sp]
Row 2 1sc in first st, [ch3, 1sc in next ch-sp] 3 times, ch3, 1sc in final st, turn. [5 sc, 4 sp]
Row 3 Beg dc in first st, [ch3, 1sc in next ch-sp] 2 times, ch3, (1sc, ch3, 1sc) in next sc, [ch3, 1sc in next ch-sp] 2 times, ch3, 1dc in final st, turn. [2 dc, 6 sc, 7 sp]
Row 4 Beg dc in first st, [ch3, 1sc in next ch-sp] 4 times, ch3, 1sc in same st, [ch3, 1sc in next ch-sp] 3 times, ch3, 1dc in final st, turn. [2 dc, 8 sc, 9 sp]
Row 5 2sc in first st, [2sc in next ch-sp, 1sc in next sc] 3 times, 2sc in next ch-sp, 3sc in next ch-sp, [2sc in next ch-sp, 1sc in next sc] 3 times, 2sc in next ch-sp, 2sc in final st, cut yarn and weave ends. [29 sc]
Row 6 With RS still facing, join background yarn with ss in first st, 2sc in same st, 13sc, 3sc in next st, 13sc, 2sc in final st, turn. [33 sc]
Row 7 Beg dc in first st, * ch1, 1dc in same st, sk1, [(1dc, ch3, 1dc) in next st, sk3] 3 times, (1dc, ch3, 1dc) in next st, 1dc in corner st, rep from * 1 time, ch1, 1dc in same st, turn. [22 dc, 11 sp]
Row 8 Beg dc in first sp, [ch1, 1dc in same sp, 5dc in next 4 ch-sps, 1dc in next ch-sp] 2 times, ch1, 1dc in same sp, cut yarn and weave ends. [46 dc, 3 sp]
Row 9 With RS still facing, join yarn with ss in first sp, [join corner, join side] 2 times, join corner, cut yarn and weave ends. [14 sc, 13 sp]
Triangle Gap B
Row 1 (RS) Using remnant as instructed, MR, beg dc, ch1, 1sc, ch3, 1dc, turn. [2 dc, 1 sc, 2 sp]
Row 2 1sc in first st, ch3, 1sc in next ch-sp, ch3, 1sc in final st, turn. [3 sc, 2 sp]
Row 3 Beg dc in first st, ch1, 1sc in same st, [ch3, 1sc in next ch-sp] 2 times, ch3, 1dc in final st, turn. [2 dc, 3 sc, 4 sp]
Row 4 Beg dc in first st, [ch3, 1sc in next ch-sp] 4 times, ch1, 1dc in same st, turn. [2dc, 4 sc, 5 sp]
Row 5 2sc in first 2 sps, [1sc in next sc, 2sc in next ch-sp] 3 times, 2sc in final st, cut yarn and weave ends. [15 sc]
Row 6 With RS still facing, join background yarn with ss in first st, 2sc in same st, 13sc, 2sc in final st, turn. [17 sc]
Row 7 Beg dc in first st, * ch1, 1dc in same st, sk1, [(1dc, ch3, 1dc) in next st, sk3] 3 times, (1dc, ch3, 1dc) in next st, (1dc, ch1, 1dc) in final st, turn. [12 dc, 6 sp]
Row 8 Beg dc in first sp, ch1, 1dc in same sp, 5dc in next 4 ch-sps, (1dc, ch1, 1dc) in next ch-sp, cut yarn and weave ends. [24 dc, 2 sp]
Row 9 With RS still facing, join yarn with ss in first sp, join corner, join side, join corner, cut yarn and weave ends. [8 sc, 7 sp]
Triangle Gap C
Row 1 (RS) Using remnant as instructed, MR, beg dc, ch3, 1sc, ch1, 1dc, turn. [2 dc, 1 sc, 2 sp]
Row 2 1sc in first st, ch3, 1sc in next ch-sp, ch3, 1sc in final st, turn. [3 sc, 2 sp]
Row 3 Beg dc in first st, [ch3, 1sc in next ch-sp] 2 times, ch3, (1sc, ch1, 1dc) in final st, turn. [2 dc, 3 sc, 4 sp]
Row 4 Beg dc in first st, ch1, 1sc in same st, [ch3, 1sc in next ch-sp] 3 times, ch3, 1dc in final st, turn. [2dc, 4 sc, 5 sp]
Row 5 2sc in first st, [2sc in next ch-sp, 1sc in next sc] 3 times, 2sc in next 2 ch-sps, cut yarn and weave ends. [15 sc]
Rows 6-9 Work as for Triangle Gap B.
Fill all triangle gaps until all sides of the blanket are squared off.
Single Crochet Border Foundation Round
Make an sc border around the blanket as follows, before continuing to the border section.
On the SC Border Round, you will place sc sts evenly across each edge. Here is a guide to how I placed the sc sts.
2 sides with Triangle Gaps: Place 2sc in each ch-sp, including around dc sts, treating them as ch-sps
2 sides with Half Hexagons: Place 2sc in all ch-sps across triangle gaps at corners and half hexies, place 3sc in the ch-sps of the full hexagon sides
SC Border Round: Join background yarn with ss in corner sc, [3sc in corner st, 1sc in all sts evenly across to next corner] 4 times, ss in first sc. Double check that opposing sides have an equal amount of sts and adjust as necessary.
Move on to “Blanket Border” sectionnext week!
Stitch Guide (UK Terms)
Scroll down for UK Terms.
2trcl 2tr cluster: (yoh, insert hook in st/sp, yoh, pull up lp, yoh, draw yarn through 2 lps) 2 times, yoh, draw yarn through 3 lps
beg beginning
beg tr (1dc, ch1) – counts as 1 tr
chN chain N number of times
dc double crochet
lp loop
MR make ring: slip knot, ch3, ss in third ch from hook
rep repeat
rnd round
sp space (chain space)
ss slip stitch
st stitch
tr treble crochet
yoh yarn over hook
For this method, we will join the full hexagons 1 by 1 in rows, moving from top to bottom of the blanket. Half hexagons will be joined onto the blanket body after all full hexagons are joined together.
First Full Hexagon Motif
Rnd 1 Join background yarn with ss in corner st, [3dc in corner st, 1dc in all sts across to next corner] 4 times, ss in first dc. [96 dc]
Rnd 2 Beg tr in corner st, * ch1, 1tr in same st, sk1, [(1tr, ch3, 1tr) in next st, sk3] 3 times, (1tr, ch3, 1tr) in next st, 1tr in corner st, rep from * 5 times omt final tr, ss in beg tr. [60 tr, 30 sp]
Rnd 3 Beg tr in corner sp, [ch1, 1tr in same sp, 5tr in next 4 ch-sps, 1tr in next ch-sp] 6 times omt final tr, ss in beg tr. [132 tr, 6 sp]
Rnd 4 * (1dc, ch5, 1dc) in corner sp, ch3, sk3, 1dc, [ch3, sk4, 1dc] 3 times, ch3, rep from * 5 times, ss in first dc, cut yarn and weave ends. [36 dc, 36 sp]
Second Full Hexagon Motif
Rnds 1-3 Work as for First Motif.
Rnd 4 (1dc, ch5, 1dc) in corner sp, ch3, sk3, 1dc, [ch3, sk4, 1dc] 3 times, ch3, 1dc in corner sp, ch2, PLT in ch-5 corner sp of adjacent completed motif, ch3, 1dc in same corner sp on motif in progress, ch3, sk3, [1dc, ch1, PLT in corresponding ch-3 sp on adjacent motif, ch2, sk4] 3 times, 1dc, ch3, 1dc in corner sp, ch2, PLT in ch-5 corner sp on adjacent completed motif, ch3, 1dc in same corner sp, work rem 4 sides plain without joining, ss in first dc, cut yarn and weave ends.
Work remaining full hexagons of the top row as for second motif.
First Motif of next row
Rnds 1-4 Work as for Second Motif.
Second Motif of row
Rnds 1-3 Work as before.
Rnd 4 (1dc, ch5, 1dc) in corner sp, ch3, sk3, 1dc, [ch3, sk4, 1dc] 3 times, ch3, 1dc in corner sp, ch2, PLT in ch-5 corner sp of adjacent completed motif, ch3, 1dc in same corner sp on motif in progress, ch3, sk3, [1dc, ch1, PLT in corresponding ch-3 sp on adjacent motif, ch2, sk4] 3 times, 1dc, ch3, 1dc in corner sp, ch2, join to 2 previously joined ch-sps as follows: remove lp from hook, insert hook front to back through left-hand corner sp and back to front through right-hand corner sp, PLT so that the PLT lp goes through both corner sps, ch3, 1dc in same corner sp, join next side as before, join next corner as for previous corner, join next side as before, join next corner with PLT in adjacent corner sp, work rem 2 sides plain without joining, ss in first dc, cut yarn and weave ends.
With these techniques, you can join all remaining hexagons to make blanket body. Next, we will join the half hexies onto the blanket body. Joining method will be abbreviated in the instruction, because the same techniques as above are used.
Join the Half Hexie Motifs onto the Blanket Body
The first 3 rows on every half hexagon are the same, and the 4th row is the joining row, just as for the full hexagons.
Row 1 (RS) Join yarn with ss in first st, 2dc in same st, [1dc in all sts across to next corner, 3dc in corner st] 3 times omt final dc, turn. [49 dc]
Row 2 Beg tr in first st, * ch1, 1tr in same st, sk1, [(1tr, ch3, 1tr) in next st, sk3] 3 times, (1tr, ch3, 1tr) in next st, 1tr in corner st, rep from * 2 times, ch1, 1tr in same st, turn. [32 tr, 31 sp]
Row 3 Beg tr in first sp, [ch1, 1tr in same sp, 5tr in next 4 ch-sps, 1tr in next ch-sp] 3 times, ch1, 1tr in same sp, cut yarn and weave ends. [132 tr, 6 sp]
There are 3 different situations you will encounter when joining your half hexies. Either you are joining the first 2 sides only, the second 2 sides only, or you are joining all 3 sides, depending on where the motif is located in the blanket schematic. The “raw” edge is not joined. This edge will be part of the outside border of your blanket.
Joining the first 2 sides only: With RS still facing, join yarn with ss in first sp, 1dc in same sp, ch2, PLT in corresponding ch-5 sp on adjacent motif, join side as before, join corner as before, join second side, join next corner, work final side plain without joining, finishing with (1dc, ch5, 1dc) in final sp, cut yarn and weave ends. [20 dc, 19 sp]
Joining the second 2 sides only: Join yarn with ss in first sp, (1dc, ch5, 1dc) in same sp, work across first side as before, join next corner, join next side, join next corner, join next side, join final corner, cut yarn and weave ends.
Joining all 3 sides: Join yarn with ss in first st, [join corner, join side] 3 times, join final corner, cut yarn and weave ends.
Now it is time to fill in the triangle gaps at the top and bottom of your blanket.
Fill the Triangle Gaps
For Rows 1-5, use the remnants from a color that is in the “family” of the position of the triangle gap in the schematic.
Triangle Gap A
Row 1 (RS) Using remnant as instructed, MR, beg tr, [ch3, 1dc] 3 times omt final dc, 1tr, turn. [2 tr, 2 dc, 3 sp]
Row 2 1dc in first st, [ch3, 1dc in next ch-sp] 3 times, ch3, 1dc in final st, turn. [5 dc, 4 sp]
Row 3 Beg tr in first st, [ch3, 1dc in next ch-sp] 2 times, ch3, (1dc, ch3, 1dc) in next dc, [ch3, 1dc in next ch-sp] 2 times, ch3, 1r in final st, turn. [2 tr, 6 dc, 7 sp]
Row 4 Beg tr in first st, [ch3, 1dc in next ch-sp] 4 times, ch3, 1dc in same st, [ch3, 1dc in next ch-sp] 3 times, ch3, 1dc in final st, turn. [2 tr, 8 dc, 9 sp]
Row 5 2dc in first st, [2dc in next ch-sp, 1dc in next dc] 3 times, 2dc in next ch-sp, 3dc in next ch-sp, [2dc in next ch-sp, 1dc in next dc] 3 times, 2dc in next ch-sp, 2dc in final st, cut yarn and weave ends. [29 dc]
Row 6 With RS still facing, join background yarn with ss in first st, 2dc in same st, 13dc, 3dc in next st, 13dc, 2dc in final st, turn. [33 dc]
Row 7 Beg tr in first st, * ch1, 1tr in same st, sk1, [(1tr, ch3, 1tr) in next st, sk3] 3 times, (1tr, ch3, 1tr) in next st, 1tr in corner st, rep from * 1 time, ch1, 1tr in same st, turn. [22 tr, 11 sp]
Row 8 Beg tr in first sp, [ch1, 1tr in same sp, 5tr in next 4 ch-sps, 1tr in next ch-sp] 2 times, ch1, 1tr in same sp, cut yarn and weave ends. [46 tr, 3 sp]
Row 9 With RS still facing, join yarn with ss in first sp, [join corner, join side] 2 times, join corner, cut yarn and weave ends. [14 dc, 13 sp]
Triangle Gap B
Row 1 (RS) Using remnant as instructed, MR, beg tr, ch1, 1dc, ch3, 1tr, turn. [2 tr, 1 dc, 2 sp]
Row 2 1dc in first st, ch3, 1dc in next ch-sp, ch3, 1dc in final st, turn. [3 dc, 2 sp]
Row 3 Beg tr in first st, ch1, 1dc in same st, [ch3, 1dc in next ch-sp] 2 times, ch3, 1tr in final st, turn. [2 tr, 3 dc, 4 sp]
Row 4 Beg tr in first st, [ch3, 1dc in next ch-sp] 4 times, ch1, 1tr in same st, turn. [2 tr, 4 dc, 5 sp]
Row 5 2dc in first 2 sps, [1dc in next dc, 2dc in next ch-sp] 3 times, 2dc in final st, cut yarn and weave ends. [15 dc]
Row 6 With RS still facing, join background yarn with ss in first st, 2dc in same st, 13dc, 2dc in final st, turn. [17 dc]
Row 7 Beg tr in first st, * ch1, 1tr in same st, sk1, [(1tr, ch3, 1tr) in next st, sk3] 3 times, (1tr, ch3, 1tr) in next st, (1tr, ch1, 1tr) in final st, turn. [12 tr, 6 sp]
Row 8 Beg tr in first sp, ch1, 1tr in same sp, 5tr in next 4 ch-sps, (1tr, ch1, 1tr) in next ch-sp, cut yarn and weave ends. [24 tr, 2 sp]
Row 9 With RS still facing, join yarn with ss in first sp, join corner, join side, join corner, cut yarn and weave ends. [8 dc, 7 sp]
Triangle Gap C
Row 1 (RS) Using remnant as instructed, MR, beg tr, ch3, 1dc, ch1, 1tr, turn. [2 tr, 1 dc, 2 sp]
Row 2 1dc in first st, ch3, 1dc in next ch-sp, ch3, 1dc in final st, turn. [3 dc, 2 sp]
Row 3 Beg tr in first st, [ch3, 1dc in next ch-sp] 2 times, ch3, (1dc, ch1, 1tr) in final st, turn. [2 tr, 3 dc, 4 sp]
Row 4 Beg tr in first st, ch1, 1dc in same st, [ch3, 1dc in next ch-sp] 3 times, ch3, 1tr in final st, turn. [2 tr, 4 dc, 5 sp]
Row 5 2dc in first st, [2dc in next ch-sp, 1dc in next dc] 3 times, 2dc in next 2 ch-sps, cut yarn and weave ends. [15 dc]
Rows 6-9 Work as for Triangle Gap B.
Fill all triangle gaps until all sides of the blanket are squared off.
Double Crochet Border Foundation Round
Make a dc border around the blanket as follows, before continuing to the border section.
On the DC Border Round, you will place dc sts evenly across each edge. Here is a guide to how I placed the dc sts.
2 sides with Triangle Gaps: Place 2dc in each ch-sp, including around dc sts, treating them as ch-sps
2 sides with Half Hexagons: Place 2dc in all ch-sps across triangle gaps at corners and half hexies, place 3dc in the ch-sps of the full hexagon sides
SC Border Round: Join background yarn with ss in corner dc, [3dc in corner st, 1dc in all sts evenly across to next corner] 4 times, ss in first dc. Double check that opposing sides have an equal amount of sts and adjust as necessary.
Move on to “Blanket Border” sectionnext week!
Celtic Lace Join for Hexagons – Video Instruction (3 Parts)
Part 1
Part 2
Part 3
SC Continuous JAYG with PLT Join for Hexagons
This is a more narrow official join for the VVCAL.
Written Instructions
Stitch Guide (US Terms)
For UK Terms, remember that single crochet (US) = double crochet (UK).
beg beginning
chN chain N number of times
lp loop
MR make ring: slip knot, ch3, ss in third ch from hook
rep repeat
rnd round
sc single crochet
sp space (chain space)
ss slip stitch
st stitch
yoh yarn over hook
Here is Part 1 of the videos for this join. It is a previous project, but the same general join. All 3 parts live in a playlist in my YouTube channel called Joining Methods.
For this method, we will join the full hexagons continuously in rows from the top to the bottom. Start at the top left motif, and work across the rows, moving down to join on each subsequent row as instructed. Half hexagons will be joined onto the blanket body after all full hexagons are joined together.
Below is a small diagram of the joining path. The blue portions of the path are the motif sides that are joined as you go. The motifs in the diagram are numbered in the order that you will join them onto the blanket.
In the diagram, Motif 1 represents the first motif in the top row. Motif 2 represents all of the motifs between the first and last motif in the row. Motif 3 represents the last motif in the row.
Motif 1: Join your background yarn with ss in any corner st, (3sc in corner st, 1sc in all sts across to the next corner st) 4 times, 2sc in corner st,
Motif 2: 2sc in any corner st, release lp from hook, insert hook front to back through corresponding mirrored st on adjacent motif (motif 1 in this case), grab lp, Pull Loop Through to the front – PLT Join made, (1sc, PLT) in all sts across to next corner st, 1sc in corner st, PLT, 2sc in same corner st, (1sc in all sts across to next corner st, 3sc in corner st) 3 times omitting the final sc,
Join other motifs in this row in the same manner as for Motif 2 until there is 1 motif left in the row,
Motif 3 (Final motif in the row): Join on as for previous motif, but stop after 3 total sides of the motif are worked, as shown in the diagram, being sure to finish the last side with 2sc in the corner st,
The first row of hexagons is now joined!
Motif 4: 2sc in any corner st, release lp from hook, insert hook front to back through corresponding mirrored st on adjacent motif (motif 3 in this case), PLT, (1sc, PLT) in all sts across to next corner st, 1sc in corner st, PLT, ch1,
Motif 5: 1sc in corner st, sk center st on the adjacent motif, PLT in next st, (1sc, PLT) in all sts across to next corner st, 1sc in next corner st, PLT, 1sc in same corner st, PLT inserting hook through both center sc from adjacent motifs, 1sc in same corner st, PLT, (1sc, PLT) in all sts across to next corner st, 1sc in corner st, PLT, ch1,
Motif 6: Work exactly as for Motif 5,
Join remaining motifs in this manner, just as for Motif 6, until there is 1 motif in the row,
Motif 7 (Final motif in the row): Join 1 side of the motif just as for Motif 6, 1sc in corner st, PLT, work around next 5 sides of the motif plain, without joining as shown in the diagram, 2sc in corner st, PLT inserting hook through both previously skipped center st, and ch1 space,
At this point, you will work around all remaining sides of each motif, making your way down the row until all motifs in this row are completely joined.
Motif 6: 2sc in corner st, PLT, (1sc, PLT) across side, 1sc in corner st, PLT, 2sc in same corner st, work around 3 more sides of the motif plain without joining, 1sc in corner st, PLT through center st and ch1 sp as before,
Join all remaining sides of the motifs in this row until the final motif is reached – labelled Motif 4 in the diagram
Motif 4: Join 1 side as before, work 1 side plain, 2sc in corner st,
Now this row is complete!
Motif 8: 2sc in corner st, PLT, (1sc, PLT) in all sts across to next corner st, 1sc in corner st, PLT as before,
Motif 9: 1sc in corner st, sk center st on adjacent motif, PLT in next st, (1sc, PLT) in all sts across to next corner st,
Now you have all of the techniques needed to join on the rest of the rows of your hexagons. Please watch the videos linked above if you need a visual. Once it clicks, you will be cruising!
When all of the full motifs are joined together, work your way around the remaining 2 “raw” sides of the blanket, being sure to make your corners when you come to them. Work your way back to the spot that you started as shown in the diagram, and you can ss in the first sc, cut yarn and weave ends.
Next, we will join the half hexies onto the blanket body.
Join the Half Hexie Motifs onto the Blanket Body
There are 3 different situations you will encounter when joining your half hexies. Either you are joining the first 2 sides only, the second 2 sides only, or you are joining all 3 sides, depending on where the motif is located in the blanket schematic. The “raw” edge is not joined. This edge will be part of the outside border of your blanket.
Joining the first 2 sides only: Join yarn with ss in first st, 2sc in same st, PLT, (1sc, PLT) across to next corner, 2sc in corner st, PLT as before, 1sc in same corner st, PLT, repeat for second side, 1sc in corner st, PLT, 2sc in same corner st, work final side plain without joining, 2sc in final corner st, cut yarn and weave ends.
Joining the second 2 sides only: Join yarn with ss in first st, 2sc in same st, work across side plain, 1sc in corner st, PLT, 2sc in same corner st, PLT, join second 2 sides as before, 2sc in final corner st, cut yarn and weave ends.
Joining all 3 sides: Join yarn with ss in first st, 2sc same st, PLT, join all 3 sides as before, 2sc in final st, cut yarn and weave ends.
Now it is time to fill in the triangle gaps at the top and bottom of your blanket. Before we do that, here is an alternate simpler join that mimics the Continuous SC JAYG.
Fill the Triangle Gaps
The top and bottom edge of your blanket is a zig-zag making triangle gaps that should be filled to make a squared-off edge.
Triangle Gap A
Row 1 With RS facing, join background yarn with ss in corner sc of the motif at the right-hand side of the gap, 1sc in next 2 sts, 1hdc, 11dc, sk4, 11dc, 1hdc, 2sc, turn. [22 dc, 2 hdc, 4 sc]
Row 2 Ss in first 3 sts, 2sc, 1hdc, 7dc, sk2, 7dc, 1hdc, 2sc, turn. [14 dc, 2 hdc, 4 sc]
Row 3 Ss in first 3 sts, 2sc, 1hdc, 3dc, sk2, 3dc, 1hdc, 2sc, turn. [6 dc, 2 hdc, 4 sc]
Row 4 Ss in first 3 sts, 2sc, sk2, 2sc, cut yarn and weave ends.
Triangle Gap B
Row 1 With RS facing, join background yarn with ss in right-most corner st of motif, beg dc in same st, sk1, 11dc, 1hdc, 2sc, turn. [12 dc, 1 hdc, 2 sc]
Row 2 Ss in first 3 sts, 2sc, 1hdc, 7dc, sk1, 1dc, turn. [8 dc, 1 hdc, 2 sc]
Row 3 Beg dc in first st, sk2, 3dc, 1hdc, 2sc, turn. [4 dc, 1 hdc, 2 sc]
Row 4 Ss in first 3 sts, 2sc, sk1, 1sc, cut yarn and weave ends.
Triangle Gap C
Row 1 With RS facing, join background yarn with ss in right-most corner st of motif, 1sc in next 2 sts, 1hdc, 11dc, sk1, 1dc, turn. [12 dc, 1 hdc, 2 sc]
Row 2 Beg dc in first st, sk1, 7dc, 1hdc, 2sc, turn. [8 dc, 1 hdc, 2 sc]
Row 3 Ss in first 3 sts, 2sc, 1hdc, 3dc, sk1, 1dc, turn. [4 dc, 1 hdc, 2 sc]
Row 4 1sc, sk1, 2sc, cut yarn and weave ends.
Fill all triangle gaps until all sides of the blanket are squared off.
Single Crochet Border Foundation Round
Make sc border around the blanket as follows, before continuing to the border section.
SC Border Round: Join background yarn with ss in corner sc, [3sc in corner st, 1sc evenly in all sts across to next corner] 4 times, ss in first sc. Double check that opposing sides have an equal amount of sts and adjust as necessary.
Move on to “Blanket Border” next week!
Continuous Flat Braid Join for Hexagons
Another alternate join I have seen folks wanting to use for a lacy but more narrow join is the Continuous Flat Braid Join for Hexagons. I love Flat Braid Join, and the continuous version is so fun and fast!
Here is an example of the Flat Braid Join for hexagons on the Autumn Blues Blanket.
Autumn Blues Blanket – CypressTextiles Pattern
Video Part 1
Video Part 2
Whip Stitch Join
This join will make your project look a lot like it would if you were using the SC Continuous JAYG for hexagons. Here is how the whip stitch join looks with the Dutch Rose Blanket.
If the continuous sc joining method is too difficult, you can edge all of your hexagons separately in your background color with an extra round of sc, placing 3sc in each corner, then whip stitch them together with the background color following these instructions:
Hold 2 motifs with wrong sides together, and use the background color yarn.
Pull the yarn through the center corner sc of both motifs, back to front, slip st to anchor yarn,
Insert the hook front to back through both loops of the next st to the left, on both motifs.
Grab the long tail and pull it all the way through to the front of the piece, allowing the whip st to rest flush against the top edge of the motifs.
Repeat steps 3 and 4 across, inserting the hook through both motifs from front to back in the next st to the left, and pulling the yarn through to the front.
When the next corner is reached, if there are no more subsequent sides to join, you can weave the excess tail, cutting it down if necessary.
If there are more sides to join, do so, then cut yarn shorter if needed and weave in.
Important: Do not pull yarn tail to tighten whip sts. I prefer to let the whip sts rest flush and snug against the joined edge. Then when you open the motifs flat, you can see the neat stitches.
Join all of the full hexagon motifs in this manner and now you have the blanket body complete and you are ready to join the half hexies onto the blanket.
Make another row on the half hexie in the background yarn as follows: Join yarn in first st with ss, 2sc in first st, (1sc in all sts to next corner st, 3sc in corner st) 3 times omitting final sc, cut yarn and weave ends. Whip st the half hexies onto the blanket body.
At this point, head to the SC Continuous JAYG for Hexagons pattern, and proceed to the Fill the Triangle Gaps portion. Finish the blanket using the remainder of the instructions for that join.
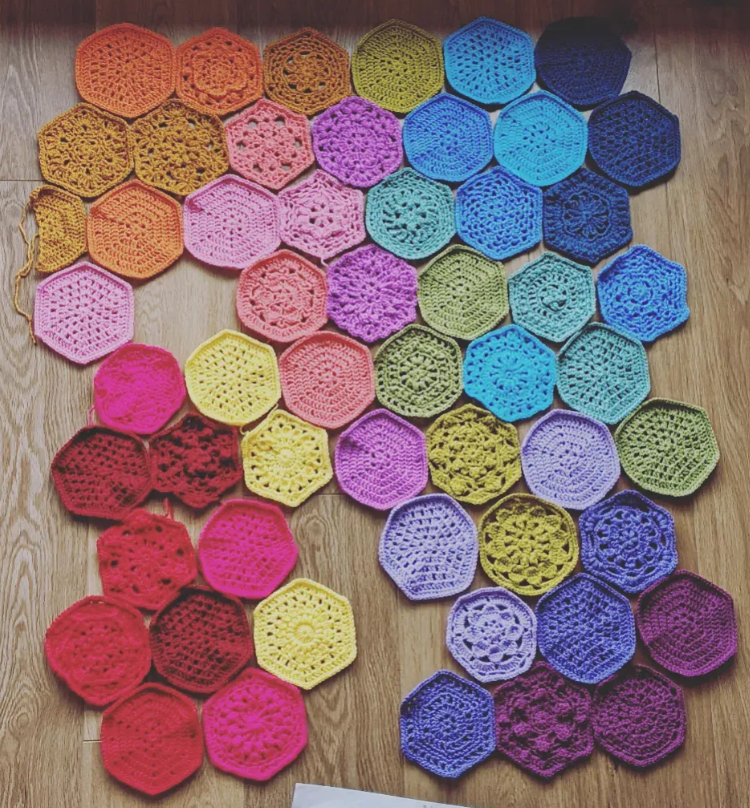
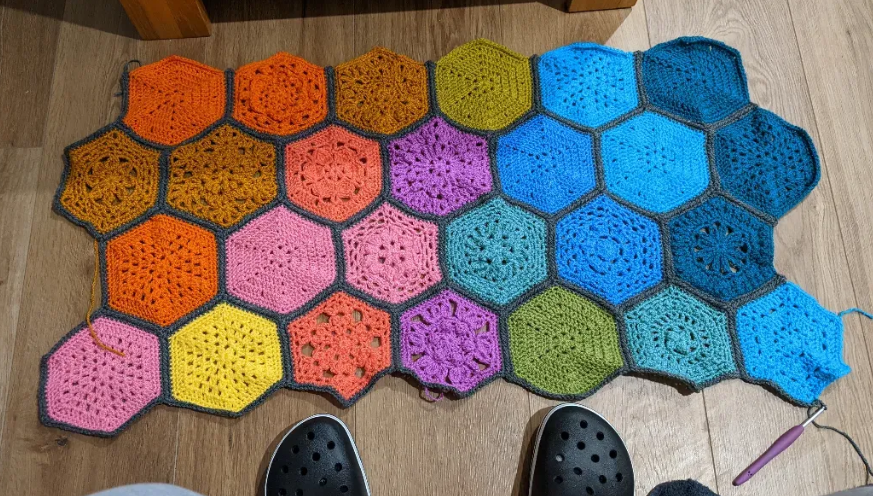
Community Makes
Many makers are already joining their squares and some are laying them out ready to join! Here are just a few, picked from Instagram and Facebook. Keep sharing your photos as we all enjoy seeing them!
Makes from the VVCAL Facebook Group
You might just see your own!
Maker: Linda Finnin
Maker: Kamille Dowse
Maker: Laura Skillen
Maker: Leanne Amy Schumacher
Maker: Manuela Van Veldhoven
Maker: Beth Lau Loviscek
Maker: Amber Ratliff Taitingfong
Makes Selected from Instagram
Maker: @rebekahlaw
Maker:@abs_crochet
Maker:@aberrycrafts
Maker: @dagmar_dadas
!
Maker: @keporiginals
Maker: @mysans_corner
Maker: @pulli365daysofstuff
Maker: @read.crochet.repeat
Maker: @weav.made
Maker: @schmoosmom
Thank you so much for stopping in for Week 18 of the 2022 VVCAL!
CypressTextiles Tree Huggers Facebook Group – This is my main FB group (join!). Share your VVCAL progress pics in this group if you like, and I will share CAL highlights here, but the weekly action will be in the other group linked above.
Announcement! The 2022 VVCAL full PDF is now available to purchase from Etsy and Ravelry.
42-Page PDF of the entire 2022 VVCAL
36 full mix-and-match hexagons plus 2 half hexagons
2 joining options plus border
All motifs have charted and written instructions
2.5 pages of tips and tricks
Full layouts, motif progress tracker checklist, and yarn information for Scheepjes Catona Colour Pack, SW/RW Colour Pack (1 or 2 packs), and Metropolis Pack
Guidance and blank layout for Colour Crafter and Chunky Monkey stash yarn
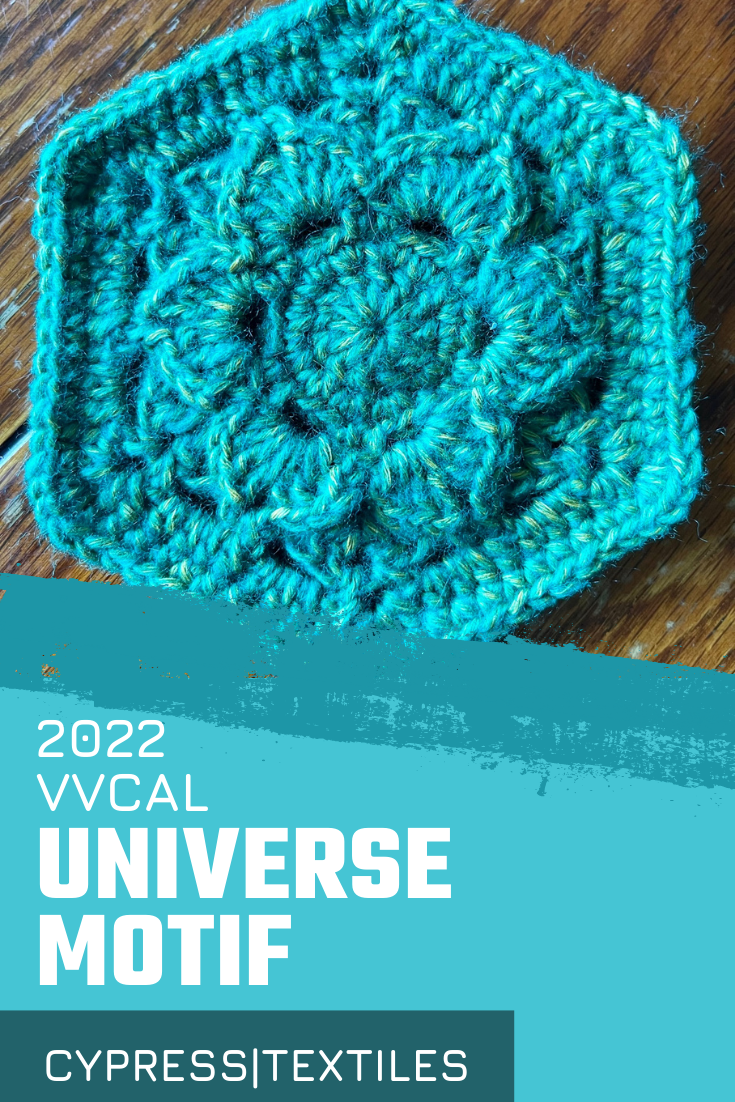
Attention!
If you have not yet seen the Week 17 Instruction post, please head there first and see the instructions for the version that you are working. Below, you will find the Universe Motif pattern, in US, and UK Terms, Chart, Video, and Step by step photos.
Social Media Hashtags: #VVCAL and #CypressTextiles
CypressTextiles Tree Huggers Facebook Group – This is my main FB group (join!). Share your VVCAL progress pics in this group if you like, and I will share CAL highlights here, but the weekly action will be in the other group linked above.
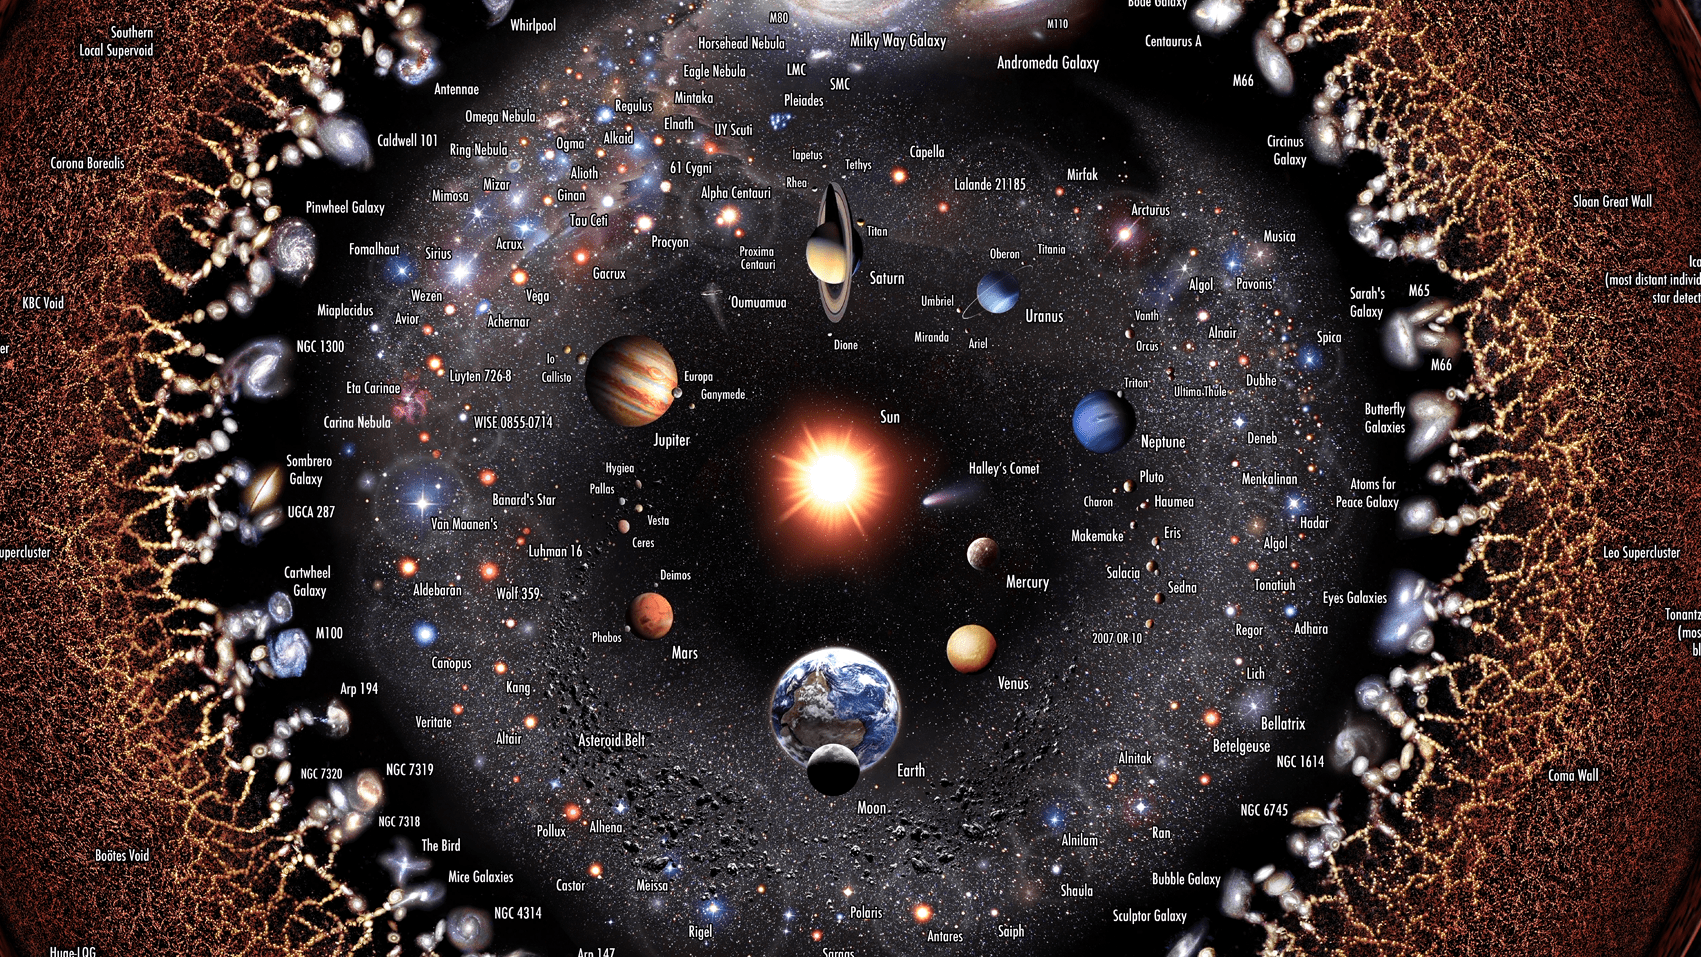
The Universe”, to paraphrase the British biologist JBS Haldane, “is not stranger than we imagine. It is stranger than we can imagine.” Here are some interesting facts about The Universe!
From its expansion and acceleration to dark matter and energy, the universe continues to amaze and perplex astronomers. The universe began with the Big Bang, and is estimated to be approximately 13.7 billion years old (plus or minus 130 million years). Astronomers calculated this figure by measuring the composition of matter and energy density in the universe, which enabled them to determine how fast the universe expanded in the past. As a result, researchers could turn back the hands of time and pinpoint when the Big Bang occurred. The time in between that explosion and now makes up the age of the universe. In the 1920s, astronomer Edwin Hubble made the discovery that the universe is expanding. But, it was long thought that the gravity of matter in the universe would slow this expansion or even cause it to contract. In 1998, the Hubble Space Telescope studied very distant supernovas and found that, a long time ago, the universe was expanding more slowly than it is today. This puzzling discovery suggested that an inexplicable force, called dark energy, is driving the accelerating expansion of the universe. While dark energy is thought to be the strange force that is pulling the cosmos apart at ever-increasing speeds, it remains one of the greatest mysteries in science because its detection remains elusive to scientists. The majority of the mass in the universe is dark matter that cannot be seen. [More]
The Universe was hot when it was young. In fact, even only within minutes of Big Bang expansion, scientists predict its temperature to have been about a billion Kelvin. Moving backward to 1 second, it is said to have been at 10 billion Kelvin. For comparison, today’s universe is found to have an average temperature of only 2.725 Kelvin. The Universe will be cold when it grows old. Observations made especially on galaxies farthest from us show that the Universe is expanding at an accelerated rate. This, and data that show that the Universe is cooling allows us to believe that the most probable ending for our universe is that of a Big Freeze or Heat Death. That is, it will be devoid of any usable heat (energy). Measurements made by the Wilkinson Microwave Anisotropy Probe (WMAP) on the current geometry and density of the Universe favor such an ending. [More]
There are 5 eras in the universe’s lifecycle. Right now, we’re in the second era. Astronomers find these five chapters to be a handy way of conceiving the universe’s incredibly long lifespan. First published in 1999 in their book The Five Ages of the Universe: Inside the Physics of Eternity, Fred Adams and Gregory Laughlin divided the universe’s life story into five eras. The book was last updated according to current scientific understandings in 2013.
Primordial era: Within a second after the Big Bang finished Big Banging, inflation began, a sudden ballooning of the universe into 100 trillion trillion times its original size. Within minutes, the plasma began cooling, and subatomic particles began to form and stick together. In the 20 minutes after the Big Bang, atoms started forming in the super-hot, fusion-fired universe.
Stellferous era: The smaller irregularities that survived eventually enlarged, pooling in denser areas of energy that served as seeds for star formation—their gravity pulled in dark matter and matter that eventually coalesced into the first stars. The era we know, the age of stars, in which most matter existing in the universe takes the form of stars and galaxies during this active period.
Degenerate era: Will begin about 1 quintillion years after the Big Bang, and last until 1 duodecillion after it. This is the period during which the remains of stars we see today will dominate the universe. Were we to look up — we’ll assuredly be outta here long before then — we’d see a much darker sky with just a handful of dim pinpoints of light remaining: white dwarfs, brown dwarfs, and neutron stars. These ”degenerate stars” are much cooler and less light-emitting than what we see up there now.
Black Hole era: Protons, having been around since the beginning of the universe will start dying off, dissolving matter, leaving behind a universe of subatomic particles, unclaimed radiation…and black holes. For a considerable length of time, black holes will dominate the universe, pulling in what mass and energy still remain.
Dark era: Eventually, though, black holes evaporate, albeit super-slowly, leaking small bits of their contents as they do. When a black hole finally drips to its last drop, a small pop of light occurs letting out some of the only remaining energy in the universe. At that point, at 1092, the universe will be pretty much history, containing only low-energy, very weak subatomic particles and photons. We can sum this up pretty easily. Lights out. Forever. [More]
Image based on logarithmic maps of the Universe put together by Princeton University researchers, and images produced by NASA based on observations made by their telescopes and roving spacecraft
Universe Motif Pattern
Scroll down past written instruction for chart and video.
beg dc OR beg hdc (1sc, ch1) – counts as 1 dc OR 1 hdc
chN chain N number of times
dc double crochet
hdc half double crochet
lp loop
MR make ring: slip knot, ch3, ss in third ch from hook
sc single crochet
sp space (ch-sp = chain space)
ss slip stitch
st stitch
tr treble crochet
yoh yarn over hook
Written Instructions & Step-by-step Photos (US Terms)
Rnd 1MR, beg dc, 11dc, ss in beg dc. [12 dc]
Rnd 22sc in 12 sts, ss in first sc. [24 sc]
Rnd 3 1sc in same st, [ch3, sk2, 1sc, ch3, 1sc in next st] 6 times omt final sc, ss in first sc. [12 sc, 12 sp]
Rnd 4 [(1sc, ch1, 3dc, ch3, 3dc, ch1, 1sc) in next ch-sp, sk 1 ch-sp] 6 times, ss in first sc. [36 dc, 12 sc, 12 sp]
Rnd 5 Pull lp through to back of work, [(1sc, ch3, 1sc) in skipped ch-sp from previous Rnd,ch3] 6 times, ss in first sc. [12 sc, 12 sp]
Rnd 6 Beg dc in first ch-sp, [(1dc, ch2, 2dc) in same ch-sp, 3dc in next ch-sp, 1dc in next ch-sp] 6 times omt final dc, ss in beg dc. [42 dc, 6 sp]
Rnd 7 [(1sc, ch3, 1sc) in next ch-sp, ch3, sk3, 1sc in both next st and ch-3 sp from “petal” treating them as one to anchor petal, ch3] 6 times, ss in first sc. [18 sc, 18 sp]
Rnd 8 Beg hdc in first ch-sp, [ch1, 2hdc in same ch-sp, 3hdc in next ch-sp, 1hdc in next sc, 3hdc in next ch-sp, 2hdc in next ch-sp] 6 times omt final hdc, ss in beg hdc. [66 hdc, 6 ch-sp]
Rnd 9 [3sc in next ch-sp, 11sc] 6 times, ss in first sc, cut yarn and weave ends. [84 sc]
Stitch Guide (UK Terms)
begbeginning
beg tr OR beg htr (1dc, ch1) – counts as 1 trOR 1 htr
chNchain N number of times
dc double crochet
htr half treble crochet
lploop
MRmake ring: slip knot, ch3, ss in third ch from hook
spspace (ch-sp = chain space)
ssslip stitch
ststitch
tr treble crochet
yohyarn over hook
Written Instructions & Step-by-step Photos (UK Terms)
Rnd 1MR, beg tr, 11tr, ss in beg tr. [12 tr]
Rnd 22dc in 12 sts, ss in first dc. [24 dc]
Rnd 3 1dc in same st, [ch3, sk2, 1dc, ch3, 1dc in next st] 6 times omt final dc, ss in first dc. [12 dc, 12 sp]
Rnd 4 [(1dc, ch1, 3tr, ch3, 3tr, ch1, 1dc) in next ch-sp, sk 1 ch-sp] 6 times, ss in first dc. [36 tr, 12 dc, 12 sp]
Rnd 5 Pull lp through to back of work, [(1dc, ch3, 1dc) in skipped ch-sp from previous Rnd,ch3] 6 times, ss in first dc. [12 dc, 12 sp]
Rnd 6 Beg tr in first ch-sp, [(1tr, ch2, 2tr) in same ch-sp, 3tr in next ch-sp, 1tr in next ch-sp] 6 times omt final tr, ss in beg tr. [42 tr, 6 sp]
Rnd 7 [(1dc, ch3, 1dc) in next ch-sp, ch3, sk3, 1dc in both next st and ch-3 sp from “petal” treating them as one to anchor petal, ch3] 6 times, ss in first dc. [18 dc, 18 sp]
Rnd 8 Beg htr in first ch-sp, [ch1, 2htr in same ch-sp, 3htr in next ch-sp, 1htr in next sc, 3htr in next ch-sp, 2htr in next ch-sp] 6 times omt final htr, ss in beg htr. [66 htr, 6 ch-sp]
Rnd 9[3dc in next ch-sp, 11dc] 6 times, ss in first dc, cut yarn and weave ends. [84 dc]
Chart
Note: Chart is meant as a visual guide to the written instruction and might not be able to stand alone due to special stitches.
Video
Note: Video is spoken in US Terms. Watch on mute to avoid confusion for UK Terms,
CypressTextiles Tree Huggers Facebook Group – This is my main FB group (join!). Share your VVCAL progress pics in this group if you like, and I will share CAL highlights here, but the weekly action will be in the other group linked above.