
Hello, and a huge welcome to Week 18 of the 2022 Vibrant Vintage Crochet-A-Long (VVCAL)! I’m so glad you’re here, and I can’t wait to start joining. There is only 1 post this week, with all of the joining options. Scroll down for a nice collection of your makes!
PDF Version
Announcement! The 2022 VVCAL full PDF is now available to purchase from Etsy and Ravelry.
- 42-Page PDF of the entire 2022 VVCAL
- 36 full mix-and-match hexagons plus 2 half hexagons
- 2 joining options plus border
- All motifs have charted and written instructions
- 2.5 pages of tips and tricks
- Full layouts, motif progress tracker checklist, and yarn information for Scheepjes Catona Colour Pack, SW/RW Colour Pack (1 or 2 packs), and Metropolis Pack
- Guidance and blank layout for Colour Crafter and Chunky Monkey stash yarn
Quick Links to Each Week: 1/2/3/4/5/6/7/8/9/10/11/12/13/14/15/16/17/18/19/20
What to Expect Today
- 1 blog post: Today’s post includes all layouts, joining options. Scroll down to find your option!
- Patterns include written instructions in US and UK Terms, some simple photos, and YouTube video (US Terms).
Social Media Hashtags: #VVCAL and #CypressTextiles
2022 VVCAL Quick Links
- 2022 VVCAL Main Information Page
- 2022 VVCAL Tips and Tricks Page
- 2022 VVCAL Ravelry ebook Motifs link back to their blog posts. Favorite the hexagon, add it to your Ravelry queue, see others’ projects, and more!
- Vibrant Vintage CAL (Official) Facebook Group Post VVCAL WIP/FO pics, ask questions, post your FO pic of the previous years’ VVCAL blankets.
- CypressTextiles Tree Huggers Facebook Group – This is my main FB group (join!). Share your VVCAL progress pics in this group if you like, and I will share CAL highlights here, but the weekly action will be in the other group linked above.
- YouTube Channel (Subscribe!) – Here I will be posting CAL pattern videos weekly for the duration of the CAL.
Layouts
Scheepjes Catona 10g Colour Pack – Layout

1 x Scheepjes Stone Washed and River Washed 10g Colour Pack – Layout

2 x Scheepjes Stone Washed and River Washed 10g Colour Packs – Layout

Scheepjes Catona Metropolis 10g Colour Pack – Layout

2022 VVCAL Made with Scheepjes Colour Crafter from Stash

2022 VVCAL Made with Scheepjes Chunky Monkey from Stash

Joining Methods
There are a few joining methods recommended for the 2022 VVCAL Hexies. Scroll down for all of the patterns.
- Official Join – Celtic Lace Join for Hexagons
- Official Join – SC Continuous JAYG with PLT Join for Hexagons
- Alternate Join – Continuous Flat Braid JAYG for Hexagons
- Alternate Join – Whip Stitch Join
Once the videos go up, the links to them will be added in.
Celtic Lace Join for Hexagons
The Official join for the 2022 VVCAL is Celtic Lace Join for Hexagons.

Written Instruction
Stitch Guide (US Terms)
Scroll down for UK Terms.
- 2dccl 2dc cluster: (yoh, insert hook in st/sp, yoh, pull up lp, yoh, draw yarn through 2 lps) 2 times, yoh, draw yarn through 3 lps
- beg beginning
- beg dc (sc, ch1) – counts as 1 dc
- chN chain N number of times
- dc double crochet
- lp loop
- MR make ring: slip knot, ch3, ss in third ch from hook
- rep repeat
- rnd round
- sc single crochet
- sp space (chain space)
- ss slip stitch
- st stitch
- yoh yarn over hook
For this method, we will join the full hexagons 1 by 1 in rows, moving from top to bottom of the blanket. Half hexagons will be joined onto the blanket body after all full hexagons are joined together.

First Full Hexagon Motif
Rnd 1 Join background yarn with ss in corner st, [3sc in corner st, 1sc in all sts across to next corner] 4 times, ss in first sc. [96 sc]
Rnd 2 Beg dc in corner st, * ch1, 1dc in same st, sk1, [(1dc, ch3, 1dc) in next st, sk3] 3 times, (1dc, ch3, 1dc) in next st, 1dc in corner st, rep from * 5 times omt final dc, ss in beg dc. [60 dc, 30 sp]
Rnd 3 Beg dc in corner sp, [ch1, 1dc in same sp, 5dc in next 4 ch-sps, 1dc in next ch-sp] 6 times omt final dc, ss in beg dc. [132 dc, 6 sp]
Rnd 4 * (1sc, ch5, 1sc) in corner sp, ch3, sk3, 1sc, [ch3, sk4, 1sc] 3 times, ch3, rep from * 5 times, ss in first sc, cut yarn and weave ends. [36 sc, 36 sp]
Second Full Hexagon Motif
Rnds 1-3 Work as for First Motif.
Rnd 4 (1sc, ch5, 1sc) in corner sp, ch3, sk3, 1sc, [ch3, sk4, 1sc] 3 times, ch3, 1sc in corner sp, ch2, PLT in ch-5 corner sp of adjacent completed motif, ch3, 1sc in same corner sp on motif in progress, ch3, sk3, [1sc, ch1, PLT in corresponding ch-3 sp on adjacent motif, ch2, sk4] 3 times, 1sc, ch3, 1sc in corner sp, ch2, PLT in ch-5 corner sp on adjacent completed motif, ch3, 1sc in same corner sp, work rem 4 sides plain without joining, ss in first sc, cut yarn and weave ends.
Work remaining full hexagons of the top row as for second motif.
First Motif of next row
Rnds 1-4 Work as for Second Motif.
Second Motif of row
Rnds 1-3 Work as before.
Rnd 4 (1sc, ch5, 1sc) in corner sp, ch3, sk3, 1sc, [ch3, sk4, 1sc] 3 times, ch3, 1sc in corner sp, ch2, PLT in ch-5 corner sp of adjacent completed motif, ch3, 1sc in same corner sp on motif in progress, ch3, sk3, [1sc, ch1, PLT in corresponding ch-3 sp on adjacent motif, ch2, sk4] 3 times, 1sc, ch3, 1sc in corner sp, ch2, join to 2 previously joined ch-sps as follows: remove lp from hook, insert hook front to back through left-hand corner sp and back to front through right-hand corner sp, PLT so that the PLT lp goes through both corner sps, ch3, 1sc in same corner sp, join next side as before, join next corner as for previous corner, join next side as before, join next corner with PLT in adjacent corner sp, work rem 2 sides plain without joining, ss in first sc, cut yarn and weave ends.
With these techniques, you can join all remaining hexagons to make blanket body. Next, we will join the half hexies onto the blanket body. Joining method will be abbreviated in the instruction, because the same techniques as above are used.
Join the Half Hexie Motifs onto the Blanket Body

The first 3 rows on every half hexagon are the same, and the 4th row is the joining row, just as for the full hexagons.
Row 1 (RS) Join yarn with ss in first st, 2sc in same st, [1sc in all sts across to next corner, 3sc in corner st] 3 times omt final sc, turn. [49 sc]
Row 2 Beg dc in first st, * ch1, 1dc in same st, sk1, [(1dc, ch3, 1dc) in next st, sk3] 3 times, (1dc, ch3, 1dc) in next st, 1dc in corner st, rep from * 2 times, ch1, 1dc in same st, turn. [32 dc, 31 sp]
Row 3 Beg dc in first sp, [ch1, 1dc in same sp, 5dc in next 4 ch-sps, 1dc in next ch-sp] 3 times, ch1, 1dc in same sp, cut yarn and weave ends. [132 dc, 6 sp]
There are 3 different situations you will encounter when joining your half hexies. Either you are joining the first 2 sides only, the second 2 sides only, or you are joining all 3 sides, depending on where the motif is located in the blanket schematic. The “raw” edge is not joined. This edge will be part of the outside border of your blanket.
Joining the first 2 sides only: With RS still facing, join yarn with ss in first sp, 1sc in same sp, ch2, PLT in corresponding ch-5 sp on adjacent motif, join side as before, join corner as before, join second side, join next corner, work final side plain without joining, finishing with (1sc, ch5, 1sc) in final sp, cut yarn and weave ends. [20 sc, 19 sp]
Joining the second 2 sides only: Join yarn with ss in first sp, (1sc, ch5, 1sc) in same sp, work across first side as before, join next corner, join next side, join next corner, join next side, join final corner, cut yarn and weave ends.
Joining all 3 sides: Join yarn with ss in first st, [join corner, join side] 3 times, join final corner, cut yarn and weave ends.
Now it is time to fill in the triangle gaps at the top and bottom of your blanket.
Fill the Triangle Gaps
The top and bottom edge of your blanket is a zig-zag making triangle gaps that should be filled to make a squared-off edge. For Rows 1-5, use the remnants from a color that is in the “family” of the position of the triangle gap in the schematic.

Triangle Gap A

Row 1 (RS) Using remnant as instructed, MR, beg dc, [ch3, 1sc] 3 times omt final sc, 1dc, turn. [2 dc, 2 sc, 3 sp]
Row 2 1sc in first st, [ch3, 1sc in next ch-sp] 3 times, ch3, 1sc in final st, turn. [5 sc, 4 sp]
Row 3 Beg dc in first st, [ch3, 1sc in next ch-sp] 2 times, ch3, (1sc, ch3, 1sc) in next sc, [ch3, 1sc in next ch-sp] 2 times, ch3, 1dc in final st, turn. [2 dc, 6 sc, 7 sp]
Row 4 Beg dc in first st, [ch3, 1sc in next ch-sp] 4 times, ch3, 1sc in same st, [ch3, 1sc in next ch-sp] 3 times, ch3, 1dc in final st, turn. [2 dc, 8 sc, 9 sp]
Row 5 2sc in first st, [2sc in next ch-sp, 1sc in next sc] 3 times, 2sc in next ch-sp, 3sc in next ch-sp, [2sc in next ch-sp, 1sc in next sc] 3 times, 2sc in next ch-sp, 2sc in final st, cut yarn and weave ends. [29 sc]
Row 6 With RS still facing, join background yarn with ss in first st, 2sc in same st, 13sc, 3sc in next st, 13sc, 2sc in final st, turn. [33 sc]
Row 7 Beg dc in first st, * ch1, 1dc in same st, sk1, [(1dc, ch3, 1dc) in next st, sk3] 3 times, (1dc, ch3, 1dc) in next st, 1dc in corner st, rep from * 1 time, ch1, 1dc in same st, turn. [22 dc, 11 sp]
Row 8 Beg dc in first sp, [ch1, 1dc in same sp, 5dc in next 4 ch-sps, 1dc in next ch-sp] 2 times, ch1, 1dc in same sp, cut yarn and weave ends. [46 dc, 3 sp]
Row 9 With RS still facing, join yarn with ss in first sp, [join corner, join side] 2 times, join corner, cut yarn and weave ends. [14 sc, 13 sp]
Triangle Gap B

Row 1 (RS) Using remnant as instructed, MR, beg dc, ch1, 1sc, ch3, 1dc, turn. [2 dc, 1 sc, 2 sp]
Row 2 1sc in first st, ch3, 1sc in next ch-sp, ch3, 1sc in final st, turn. [3 sc, 2 sp]
Row 3 Beg dc in first st, ch1, 1sc in same st, [ch3, 1sc in next ch-sp] 2 times, ch3, 1dc in final st, turn. [2 dc, 3 sc, 4 sp]
Row 4 Beg dc in first st, [ch3, 1sc in next ch-sp] 4 times, ch1, 1dc in same st, turn. [2dc, 4 sc, 5 sp]
Row 5 2sc in first 2 sps, [1sc in next sc, 2sc in next ch-sp] 3 times, 2sc in final st, cut yarn and weave ends. [15 sc]
Row 6 With RS still facing, join background yarn with ss in first st, 2sc in same st, 13sc, 2sc in final st, turn. [17 sc]
Row 7 Beg dc in first st, * ch1, 1dc in same st, sk1, [(1dc, ch3, 1dc) in next st, sk3] 3 times, (1dc, ch3, 1dc) in next st, (1dc, ch1, 1dc) in final st, turn. [12 dc, 6 sp]
Row 8 Beg dc in first sp, ch1, 1dc in same sp, 5dc in next 4 ch-sps, (1dc, ch1, 1dc) in next ch-sp, cut yarn and weave ends. [24 dc, 2 sp]
Row 9 With RS still facing, join yarn with ss in first sp, join corner, join side, join corner, cut yarn and weave ends. [8 sc, 7 sp]
Triangle Gap C

Row 1 (RS) Using remnant as instructed, MR, beg dc, ch3, 1sc, ch1, 1dc, turn. [2 dc, 1 sc, 2 sp]
Row 2 1sc in first st, ch3, 1sc in next ch-sp, ch3, 1sc in final st, turn. [3 sc, 2 sp]
Row 3 Beg dc in first st, [ch3, 1sc in next ch-sp] 2 times, ch3, (1sc, ch1, 1dc) in final st, turn. [2 dc, 3 sc, 4 sp]
Row 4 Beg dc in first st, ch1, 1sc in same st, [ch3, 1sc in next ch-sp] 3 times, ch3, 1dc in final st, turn. [2dc, 4 sc, 5 sp]
Row 5 2sc in first st, [2sc in next ch-sp, 1sc in next sc] 3 times, 2sc in next 2 ch-sps, cut yarn and weave ends. [15 sc]
Rows 6-9 Work as for Triangle Gap B.
Fill all triangle gaps until all sides of the blanket are squared off.
Single Crochet Border Foundation Round
Make an sc border around the blanket as follows, before continuing to the border section.
On the SC Border Round, you will place sc sts evenly across each edge. Here is a guide to how I placed the sc sts.
- 2 sides with Triangle Gaps: Place 2sc in each ch-sp, including around dc sts, treating them as ch-sps
- 2 sides with Half Hexagons: Place 2sc in all ch-sps across triangle gaps at corners and half hexies, place 3sc in the ch-sps of the full hexagon sides
SC Border Round: Join background yarn with ss in corner sc, [3sc in corner st, 1sc in all sts evenly across to next corner] 4 times, ss in first sc. Double check that opposing sides have an equal amount of sts and adjust as necessary.
Move on to “Blanket Border” section next week!

Stitch Guide (UK Terms)
Scroll down for UK Terms.
- 2trcl 2tr cluster: (yoh, insert hook in st/sp, yoh, pull up lp, yoh, draw yarn through 2 lps) 2 times, yoh, draw yarn through 3 lps
- beg beginning
- beg tr (1dc, ch1) – counts as 1 tr
- chN chain N number of times
- dc double crochet
- lp loop
- MR make ring: slip knot, ch3, ss in third ch from hook
- rep repeat
- rnd round
- sp space (chain space)
- ss slip stitch
- st stitch
- tr treble crochet
- yoh yarn over hook
For this method, we will join the full hexagons 1 by 1 in rows, moving from top to bottom of the blanket. Half hexagons will be joined onto the blanket body after all full hexagons are joined together.

First Full Hexagon Motif
Rnd 1 Join background yarn with ss in corner st, [3dc in corner st, 1dc in all sts across to next corner] 4 times, ss in first dc. [96 dc]
Rnd 2 Beg tr in corner st, * ch1, 1tr in same st, sk1, [(1tr, ch3, 1tr) in next st, sk3] 3 times, (1tr, ch3, 1tr) in next st, 1tr in corner st, rep from * 5 times omt final tr, ss in beg tr. [60 tr, 30 sp]
Rnd 3 Beg tr in corner sp, [ch1, 1tr in same sp, 5tr in next 4 ch-sps, 1tr in next ch-sp] 6 times omt final tr, ss in beg tr. [132 tr, 6 sp]
Rnd 4 * (1dc, ch5, 1dc) in corner sp, ch3, sk3, 1dc, [ch3, sk4, 1dc] 3 times, ch3, rep from * 5 times, ss in first dc, cut yarn and weave ends. [36 dc, 36 sp]
Second Full Hexagon Motif
Rnds 1-3 Work as for First Motif.
Rnd 4 (1dc, ch5, 1dc) in corner sp, ch3, sk3, 1dc, [ch3, sk4, 1dc] 3 times, ch3, 1dc in corner sp, ch2, PLT in ch-5 corner sp of adjacent completed motif, ch3, 1dc in same corner sp on motif in progress, ch3, sk3, [1dc, ch1, PLT in corresponding ch-3 sp on adjacent motif, ch2, sk4] 3 times, 1dc, ch3, 1dc in corner sp, ch2, PLT in ch-5 corner sp on adjacent completed motif, ch3, 1dc in same corner sp, work rem 4 sides plain without joining, ss in first dc, cut yarn and weave ends.
Work remaining full hexagons of the top row as for second motif.
First Motif of next row
Rnds 1-4 Work as for Second Motif.
Second Motif of row
Rnds 1-3 Work as before.
Rnd 4 (1dc, ch5, 1dc) in corner sp, ch3, sk3, 1dc, [ch3, sk4, 1dc] 3 times, ch3, 1dc in corner sp, ch2, PLT in ch-5 corner sp of adjacent completed motif, ch3, 1dc in same corner sp on motif in progress, ch3, sk3, [1dc, ch1, PLT in corresponding ch-3 sp on adjacent motif, ch2, sk4] 3 times, 1dc, ch3, 1dc in corner sp, ch2, join to 2 previously joined ch-sps as follows: remove lp from hook, insert hook front to back through left-hand corner sp and back to front through right-hand corner sp, PLT so that the PLT lp goes through both corner sps, ch3, 1dc in same corner sp, join next side as before, join next corner as for previous corner, join next side as before, join next corner with PLT in adjacent corner sp, work rem 2 sides plain without joining, ss in first dc, cut yarn and weave ends.
With these techniques, you can join all remaining hexagons to make blanket body. Next, we will join the half hexies onto the blanket body. Joining method will be abbreviated in the instruction, because the same techniques as above are used.
Join the Half Hexie Motifs onto the Blanket Body

The first 3 rows on every half hexagon are the same, and the 4th row is the joining row, just as for the full hexagons.
Row 1 (RS) Join yarn with ss in first st, 2dc in same st, [1dc in all sts across to next corner, 3dc in corner st] 3 times omt final dc, turn. [49 dc]
Row 2 Beg tr in first st, * ch1, 1tr in same st, sk1, [(1tr, ch3, 1tr) in next st, sk3] 3 times, (1tr, ch3, 1tr) in next st, 1tr in corner st, rep from * 2 times, ch1, 1tr in same st, turn. [32 tr, 31 sp]
Row 3 Beg tr in first sp, [ch1, 1tr in same sp, 5tr in next 4 ch-sps, 1tr in next ch-sp] 3 times, ch1, 1tr in same sp, cut yarn and weave ends. [132 tr, 6 sp]
There are 3 different situations you will encounter when joining your half hexies. Either you are joining the first 2 sides only, the second 2 sides only, or you are joining all 3 sides, depending on where the motif is located in the blanket schematic. The “raw” edge is not joined. This edge will be part of the outside border of your blanket.
Joining the first 2 sides only: With RS still facing, join yarn with ss in first sp, 1dc in same sp, ch2, PLT in corresponding ch-5 sp on adjacent motif, join side as before, join corner as before, join second side, join next corner, work final side plain without joining, finishing with (1dc, ch5, 1dc) in final sp, cut yarn and weave ends. [20 dc, 19 sp]
Joining the second 2 sides only: Join yarn with ss in first sp, (1dc, ch5, 1dc) in same sp, work across first side as before, join next corner, join next side, join next corner, join next side, join final corner, cut yarn and weave ends.
Joining all 3 sides: Join yarn with ss in first st, [join corner, join side] 3 times, join final corner, cut yarn and weave ends.
Now it is time to fill in the triangle gaps at the top and bottom of your blanket.
Fill the Triangle Gaps

For Rows 1-5, use the remnants from a color that is in the “family” of the position of the triangle gap in the schematic.
Triangle Gap A

Row 1 (RS) Using remnant as instructed, MR, beg tr, [ch3, 1dc] 3 times omt final dc, 1tr, turn. [2 tr, 2 dc, 3 sp]
Row 2 1dc in first st, [ch3, 1dc in next ch-sp] 3 times, ch3, 1dc in final st, turn. [5 dc, 4 sp]
Row 3 Beg tr in first st, [ch3, 1dc in next ch-sp] 2 times, ch3, (1dc, ch3, 1dc) in next dc, [ch3, 1dc in next ch-sp] 2 times, ch3, 1r in final st, turn. [2 tr, 6 dc, 7 sp]
Row 4 Beg tr in first st, [ch3, 1dc in next ch-sp] 4 times, ch3, 1dc in same st, [ch3, 1dc in next ch-sp] 3 times, ch3, 1dc in final st, turn. [2 tr, 8 dc, 9 sp]
Row 5 2dc in first st, [2dc in next ch-sp, 1dc in next dc] 3 times, 2dc in next ch-sp, 3dc in next ch-sp, [2dc in next ch-sp, 1dc in next dc] 3 times, 2dc in next ch-sp, 2dc in final st, cut yarn and weave ends. [29 dc]
Row 6 With RS still facing, join background yarn with ss in first st, 2dc in same st, 13dc, 3dc in next st, 13dc, 2dc in final st, turn. [33 dc]
Row 7 Beg tr in first st, * ch1, 1tr in same st, sk1, [(1tr, ch3, 1tr) in next st, sk3] 3 times, (1tr, ch3, 1tr) in next st, 1tr in corner st, rep from * 1 time, ch1, 1tr in same st, turn. [22 tr, 11 sp]
Row 8 Beg tr in first sp, [ch1, 1tr in same sp, 5tr in next 4 ch-sps, 1tr in next ch-sp] 2 times, ch1, 1tr in same sp, cut yarn and weave ends. [46 tr, 3 sp]
Row 9 With RS still facing, join yarn with ss in first sp, [join corner, join side] 2 times, join corner, cut yarn and weave ends. [14 dc, 13 sp]
Triangle Gap B

Row 1 (RS) Using remnant as instructed, MR, beg tr, ch1, 1dc, ch3, 1tr, turn. [2 tr, 1 dc, 2 sp]
Row 2 1dc in first st, ch3, 1dc in next ch-sp, ch3, 1dc in final st, turn. [3 dc, 2 sp]
Row 3 Beg tr in first st, ch1, 1dc in same st, [ch3, 1dc in next ch-sp] 2 times, ch3, 1tr in final st, turn. [2 tr, 3 dc, 4 sp]
Row 4 Beg tr in first st, [ch3, 1dc in next ch-sp] 4 times, ch1, 1tr in same st, turn. [2 tr, 4 dc, 5 sp]
Row 5 2dc in first 2 sps, [1dc in next dc, 2dc in next ch-sp] 3 times, 2dc in final st, cut yarn and weave ends. [15 dc]
Row 6 With RS still facing, join background yarn with ss in first st, 2dc in same st, 13dc, 2dc in final st, turn. [17 dc]
Row 7 Beg tr in first st, * ch1, 1tr in same st, sk1, [(1tr, ch3, 1tr) in next st, sk3] 3 times, (1tr, ch3, 1tr) in next st, (1tr, ch1, 1tr) in final st, turn. [12 tr, 6 sp]
Row 8 Beg tr in first sp, ch1, 1tr in same sp, 5tr in next 4 ch-sps, (1tr, ch1, 1tr) in next ch-sp, cut yarn and weave ends. [24 tr, 2 sp]
Row 9 With RS still facing, join yarn with ss in first sp, join corner, join side, join corner, cut yarn and weave ends. [8 dc, 7 sp]
Triangle Gap C

Row 1 (RS) Using remnant as instructed, MR, beg tr, ch3, 1dc, ch1, 1tr, turn. [2 tr, 1 dc, 2 sp]
Row 2 1dc in first st, ch3, 1dc in next ch-sp, ch3, 1dc in final st, turn. [3 dc, 2 sp]
Row 3 Beg tr in first st, [ch3, 1dc in next ch-sp] 2 times, ch3, (1dc, ch1, 1tr) in final st, turn. [2 tr, 3 dc, 4 sp]
Row 4 Beg tr in first st, ch1, 1dc in same st, [ch3, 1dc in next ch-sp] 3 times, ch3, 1tr in final st, turn. [2 tr, 4 dc, 5 sp]
Row 5 2dc in first st, [2dc in next ch-sp, 1dc in next dc] 3 times, 2dc in next 2 ch-sps, cut yarn and weave ends. [15 dc]
Rows 6-9 Work as for Triangle Gap B.
Fill all triangle gaps until all sides of the blanket are squared off.
Double Crochet Border Foundation Round
Make a dc border around the blanket as follows, before continuing to the border section.
On the DC Border Round, you will place dc sts evenly across each edge. Here is a guide to how I placed the dc sts.
- 2 sides with Triangle Gaps: Place 2dc in each ch-sp, including around dc sts, treating them as ch-sps
- 2 sides with Half Hexagons: Place 2dc in all ch-sps across triangle gaps at corners and half hexies, place 3dc in the ch-sps of the full hexagon sides
SC Border Round: Join background yarn with ss in corner dc, [3dc in corner st, 1dc in all sts evenly across to next corner] 4 times, ss in first dc. Double check that opposing sides have an equal amount of sts and adjust as necessary.
Move on to “Blanket Border” section next week!

Celtic Lace Join for Hexagons – Video Instruction (3 Parts)
Part 1
Part 2
Part 3
SC Continuous JAYG with PLT Join for Hexagons
This is a more narrow official join for the VVCAL.

Written Instructions
Stitch Guide (US Terms)
For UK Terms, remember that single crochet (US) = double crochet (UK).
- beg beginning
- chN chain N number of times
- lp loop
- MR make ring: slip knot, ch3, ss in third ch from hook
- rep repeat
- rnd round
- sc single crochet
- sp space (chain space)
- ss slip stitch
- st stitch
- yoh yarn over hook
Here is Part 1 of the videos for this join. It is a previous project, but the same general join. All 3 parts live in a playlist in my YouTube channel called Joining Methods.
For this method, we will join the full hexagons continuously in rows from the top to the bottom. Start at the top left motif, and work across the rows, moving down to join on each subsequent row as instructed. Half hexagons will be joined onto the blanket body after all full hexagons are joined together.
Below is a small diagram of the joining path. The blue portions of the path are the motif sides that are joined as you go. The motifs in the diagram are numbered in the order that you will join them onto the blanket.

In the diagram, Motif 1 represents the first motif in the top row. Motif 2 represents all of the motifs between the first and last motif in the row. Motif 3 represents the last motif in the row.
Motif 1: Join your background yarn with ss in any corner st, (3sc in corner st, 1sc in all sts across to the next corner st) 4 times, 2sc in corner st,
Motif 2: 2sc in any corner st, release lp from hook, insert hook front to back through corresponding mirrored st on adjacent motif (motif 1 in this case), grab lp, Pull Loop Through to the front – PLT Join made, (1sc, PLT) in all sts across to next corner st, 1sc in corner st, PLT, 2sc in same corner st, (1sc in all sts across to next corner st, 3sc in corner st) 3 times omitting the final sc,
Join other motifs in this row in the same manner as for Motif 2 until there is 1 motif left in the row,
Motif 3 (Final motif in the row): Join on as for previous motif, but stop after 3 total sides of the motif are worked, as shown in the diagram, being sure to finish the last side with 2sc in the corner st,
The first row of hexagons is now joined!
Motif 4: 2sc in any corner st, release lp from hook, insert hook front to back through corresponding mirrored st on adjacent motif (motif 3 in this case), PLT, (1sc, PLT) in all sts across to next corner st, 1sc in corner st, PLT, ch1,
Motif 5: 1sc in corner st, sk center st on the adjacent motif, PLT in next st, (1sc, PLT) in all sts across to next corner st, 1sc in next corner st, PLT, 1sc in same corner st, PLT inserting hook through both center sc from adjacent motifs, 1sc in same corner st, PLT, (1sc, PLT) in all sts across to next corner st, 1sc in corner st, PLT, ch1,
Motif 6: Work exactly as for Motif 5,
Join remaining motifs in this manner, just as for Motif 6, until there is 1 motif in the row,
Motif 7 (Final motif in the row): Join 1 side of the motif just as for Motif 6, 1sc in corner st, PLT, work around next 5 sides of the motif plain, without joining as shown in the diagram, 2sc in corner st, PLT inserting hook through both previously skipped center st, and ch1 space,
At this point, you will work around all remaining sides of each motif, making your way down the row until all motifs in this row are completely joined.
Motif 6: 2sc in corner st, PLT, (1sc, PLT) across side, 1sc in corner st, PLT, 2sc in same corner st, work around 3 more sides of the motif plain without joining, 1sc in corner st, PLT through center st and ch1 sp as before,
Join all remaining sides of the motifs in this row until the final motif is reached – labelled Motif 4 in the diagram
Motif 4: Join 1 side as before, work 1 side plain, 2sc in corner st,
Now this row is complete!
Motif 8: 2sc in corner st, PLT, (1sc, PLT) in all sts across to next corner st, 1sc in corner st, PLT as before,
Motif 9: 1sc in corner st, sk center st on adjacent motif, PLT in next st, (1sc, PLT) in all sts across to next corner st,
Now you have all of the techniques needed to join on the rest of the rows of your hexagons. Please watch the videos linked above if you need a visual. Once it clicks, you will be cruising!

When all of the full motifs are joined together, work your way around the remaining 2 “raw” sides of the blanket, being sure to make your corners when you come to them. Work your way back to the spot that you started as shown in the diagram, and you can ss in the first sc, cut yarn and weave ends.
Next, we will join the half hexies onto the blanket body.
Join the Half Hexie Motifs onto the Blanket Body
There are 3 different situations you will encounter when joining your half hexies. Either you are joining the first 2 sides only, the second 2 sides only, or you are joining all 3 sides, depending on where the motif is located in the blanket schematic. The “raw” edge is not joined. This edge will be part of the outside border of your blanket.
Joining the first 2 sides only: Join yarn with ss in first st, 2sc in same st, PLT, (1sc, PLT) across to next corner, 2sc in corner st, PLT as before, 1sc in same corner st, PLT, repeat for second side, 1sc in corner st, PLT, 2sc in same corner st, work final side plain without joining, 2sc in final corner st, cut yarn and weave ends.
Joining the second 2 sides only: Join yarn with ss in first st, 2sc in same st, work across side plain, 1sc in corner st, PLT, 2sc in same corner st, PLT, join second 2 sides as before, 2sc in final corner st, cut yarn and weave ends.
Joining all 3 sides: Join yarn with ss in first st, 2sc same st, PLT, join all 3 sides as before, 2sc in final st, cut yarn and weave ends.
Now it is time to fill in the triangle gaps at the top and bottom of your blanket. Before we do that, here is an alternate simpler join that mimics the Continuous SC JAYG.
Fill the Triangle Gaps
The top and bottom edge of your blanket is a zig-zag making triangle gaps that should be filled to make a squared-off edge.


Triangle Gap A
Row 1 With RS facing, join background yarn with ss in corner sc of the motif at the right-hand side of the gap, 1sc in next 2 sts, 1hdc, 11dc, sk4, 11dc, 1hdc, 2sc, turn. [22 dc, 2 hdc, 4 sc]
Row 2 Ss in first 3 sts, 2sc, 1hdc, 7dc, sk2, 7dc, 1hdc, 2sc, turn. [14 dc, 2 hdc, 4 sc]
Row 3 Ss in first 3 sts, 2sc, 1hdc, 3dc, sk2, 3dc, 1hdc, 2sc, turn. [6 dc, 2 hdc, 4 sc]
Row 4 Ss in first 3 sts, 2sc, sk2, 2sc, cut yarn and weave ends.
Triangle Gap B
Row 1 With RS facing, join background yarn with ss in right-most corner st of motif, beg dc in same st, sk1, 11dc, 1hdc, 2sc, turn. [12 dc, 1 hdc, 2 sc]
Row 2 Ss in first 3 sts, 2sc, 1hdc, 7dc, sk1, 1dc, turn. [8 dc, 1 hdc, 2 sc]
Row 3 Beg dc in first st, sk2, 3dc, 1hdc, 2sc, turn. [4 dc, 1 hdc, 2 sc]
Row 4 Ss in first 3 sts, 2sc, sk1, 1sc, cut yarn and weave ends.
Triangle Gap C
Row 1 With RS facing, join background yarn with ss in right-most corner st of motif, 1sc in next 2 sts, 1hdc, 11dc, sk1, 1dc, turn. [12 dc, 1 hdc, 2 sc]
Row 2 Beg dc in first st, sk1, 7dc, 1hdc, 2sc, turn. [8 dc, 1 hdc, 2 sc]
Row 3 Ss in first 3 sts, 2sc, 1hdc, 3dc, sk1, 1dc, turn. [4 dc, 1 hdc, 2 sc]
Row 4 1sc, sk1, 2sc, cut yarn and weave ends.
Fill all triangle gaps until all sides of the blanket are squared off.
Single Crochet Border Foundation Round
Make sc border around the blanket as follows, before continuing to the border section.
SC Border Round: Join background yarn with ss in corner sc, [3sc in corner st, 1sc evenly in all sts across to next corner] 4 times, ss in first sc. Double check that opposing sides have an equal amount of sts and adjust as necessary.
Move on to “Blanket Border” next week!
Continuous Flat Braid Join for Hexagons
Another alternate join I have seen folks wanting to use for a lacy but more narrow join is the Continuous Flat Braid Join for Hexagons. I love Flat Braid Join, and the continuous version is so fun and fast!
Here is an example of the Flat Braid Join for hexagons on the Autumn Blues Blanket.


Video Part 1
Video Part 2
Whip Stitch Join
This join will make your project look a lot like it would if you were using the SC Continuous JAYG for hexagons. Here is how the whip stitch join looks with the Dutch Rose Blanket.

If the continuous sc joining method is too difficult, you can edge all of your hexagons separately in your background color with an extra round of sc, placing 3sc in each corner, then whip stitch them together with the background color following these instructions:
- Hold 2 motifs with wrong sides together, and use the background color yarn.
- Pull the yarn through the center corner sc of both motifs, back to front, slip st to anchor yarn,
- Insert the hook front to back through both loops of the next st to the left, on both motifs.
- Grab the long tail and pull it all the way through to the front of the piece, allowing the whip st to rest flush against the top edge of the motifs.
- Repeat steps 3 and 4 across, inserting the hook through both motifs from front to back in the next st to the left, and pulling the yarn through to the front.
- When the next corner is reached, if there are no more subsequent sides to join, you can weave the excess tail, cutting it down if necessary.
- If there are more sides to join, do so, then cut yarn shorter if needed and weave in.
- Important: Do not pull yarn tail to tighten whip sts. I prefer to let the whip sts rest flush and snug against the joined edge. Then when you open the motifs flat, you can see the neat stitches.
Join all of the full hexagon motifs in this manner and now you have the blanket body complete and you are ready to join the half hexies onto the blanket.
Make another row on the half hexie in the background yarn as follows: Join yarn in first st with ss, 2sc in first st, (1sc in all sts to next corner st, 3sc in corner st) 3 times omitting final sc, cut yarn and weave ends. Whip st the half hexies onto the blanket body.
At this point, head to the SC Continuous JAYG for Hexagons pattern, and proceed to the Fill the Triangle Gaps portion. Finish the blanket using the remainder of the instructions for that join.
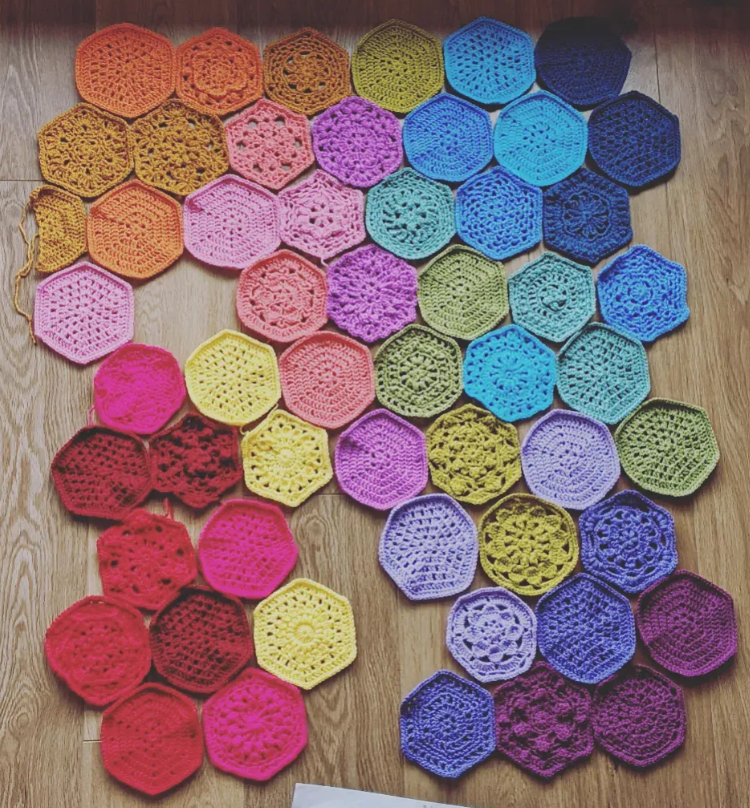
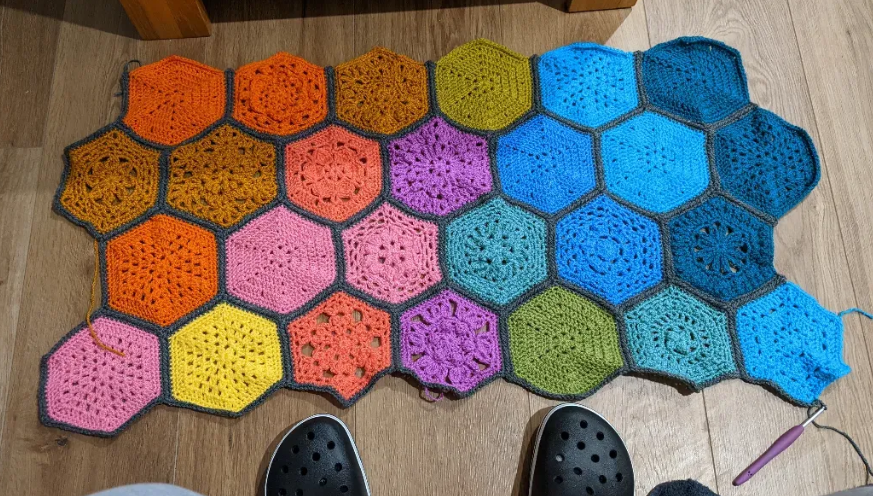
Community Makes
Many makers are already joining their squares and some are laying them out ready to join! Here are just a few, picked from Instagram and Facebook. Keep sharing your photos as we all enjoy seeing them!
Makes from the VVCAL Facebook Group
You might just see your own!
Maker: Linda Finnin

Maker: Kamille Dowse

Maker: Laura Skillen

Maker: Leanne Amy Schumacher

Maker: Manuela Van Veldhoven

Maker: Beth Lau Loviscek

Maker: Amber Ratliff Taitingfong

Makes Selected from Instagram
Maker: @rebekahlaw

Maker: @abs_crochet


Maker: @aberrycrafts

Maker: @dagmar_dadas

Maker: @keporiginals

Maker: @mysans_corner

Maker: @pulli365daysofstuff
Maker: @read.crochet.repeat


Maker: @weav.made

Maker: @schmoosmom


Thank you so much for stopping in for Week 18 of the 2022 VVCAL!
Happy Crafting,
Rachele C. – The Art of Crochet Blankets
2022 VVCAL Quick Links
- 2022 VVCAL Main Information Page
- 2022 VVCAL Tips and Tricks Page
- 2022 VVCAL Ravelry ebook Motifs link back to their blog posts. Favorite the hexagon, add it to your Ravelry queue, see others’ projects, and more!
- Vibrant Vintage CAL (Official) Facebook Group Post VVCAL WIP/FO pics, ask questions, post your FO pic of the previous years’ VVCAL blankets.
- CypressTextiles Tree Huggers Facebook Group – This is my main FB group (join!). Share your VVCAL progress pics in this group if you like, and I will share CAL highlights here, but the weekly action will be in the other group linked above.
- YouTube Channel (Subscribe!) – Here I will be posting CAL pattern videos weekly for the duration of the CAL.