Author: Rachele Carmona

Continuous Join As You Go: Master Post

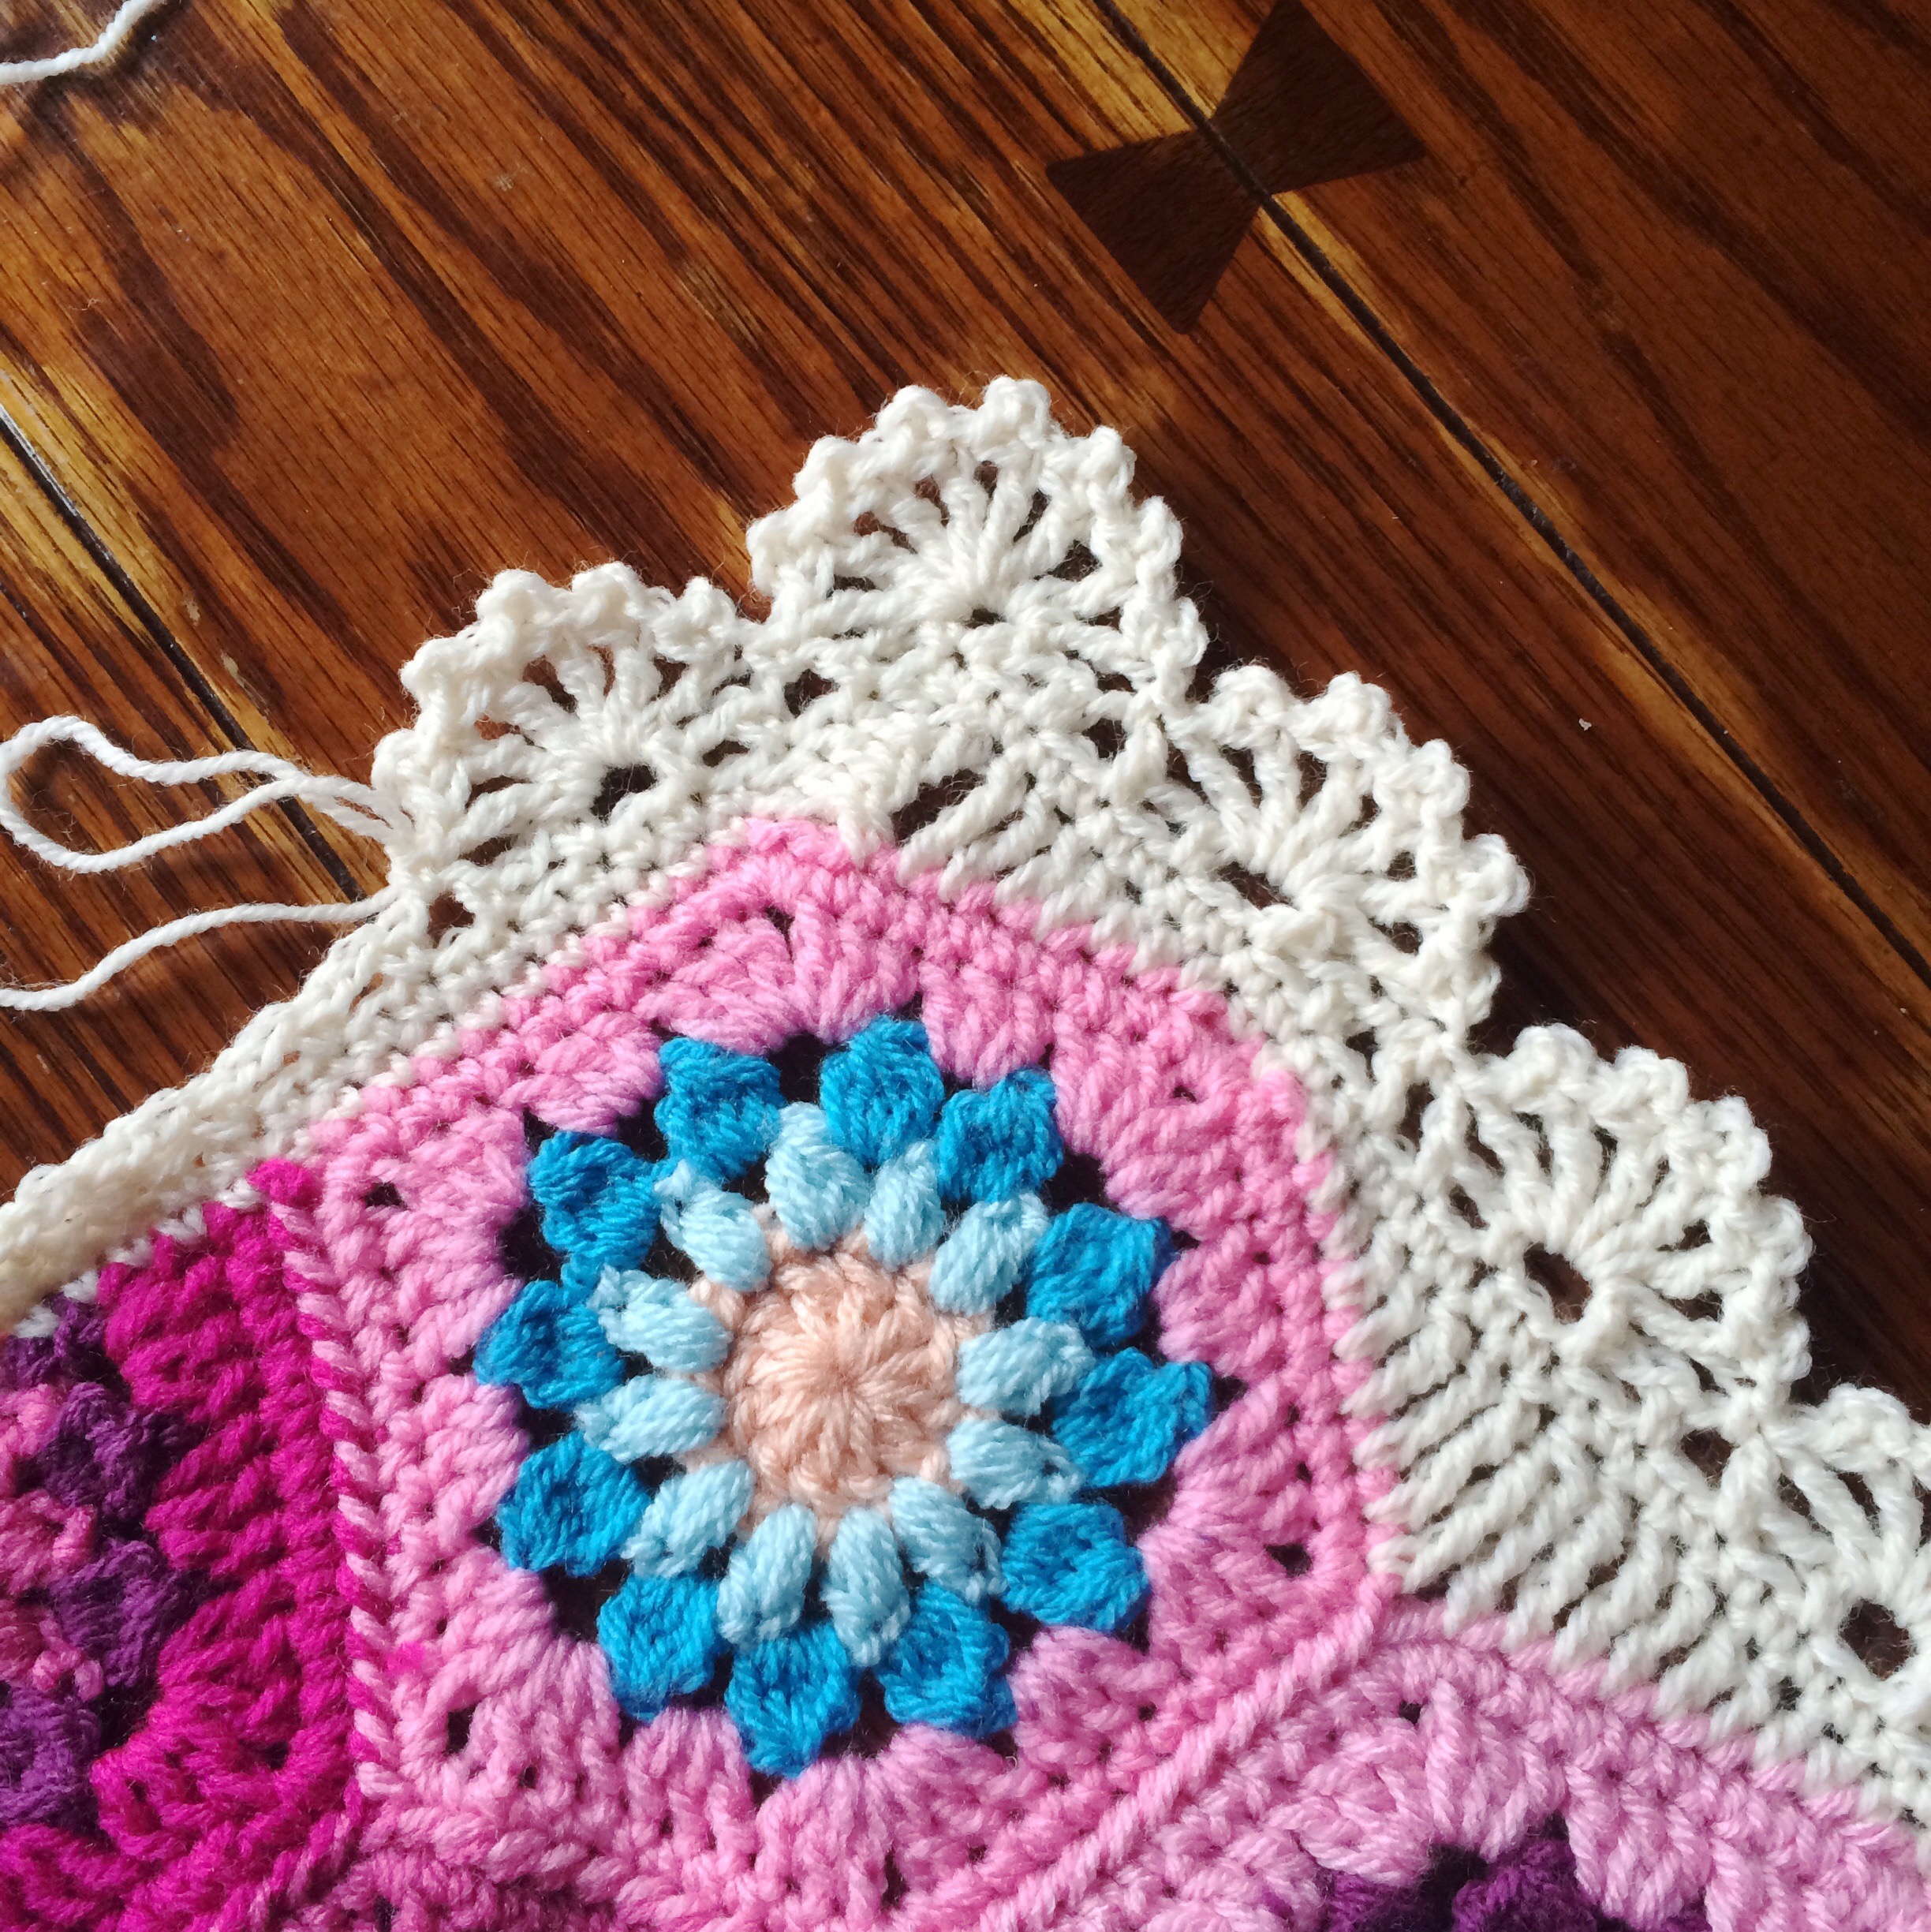
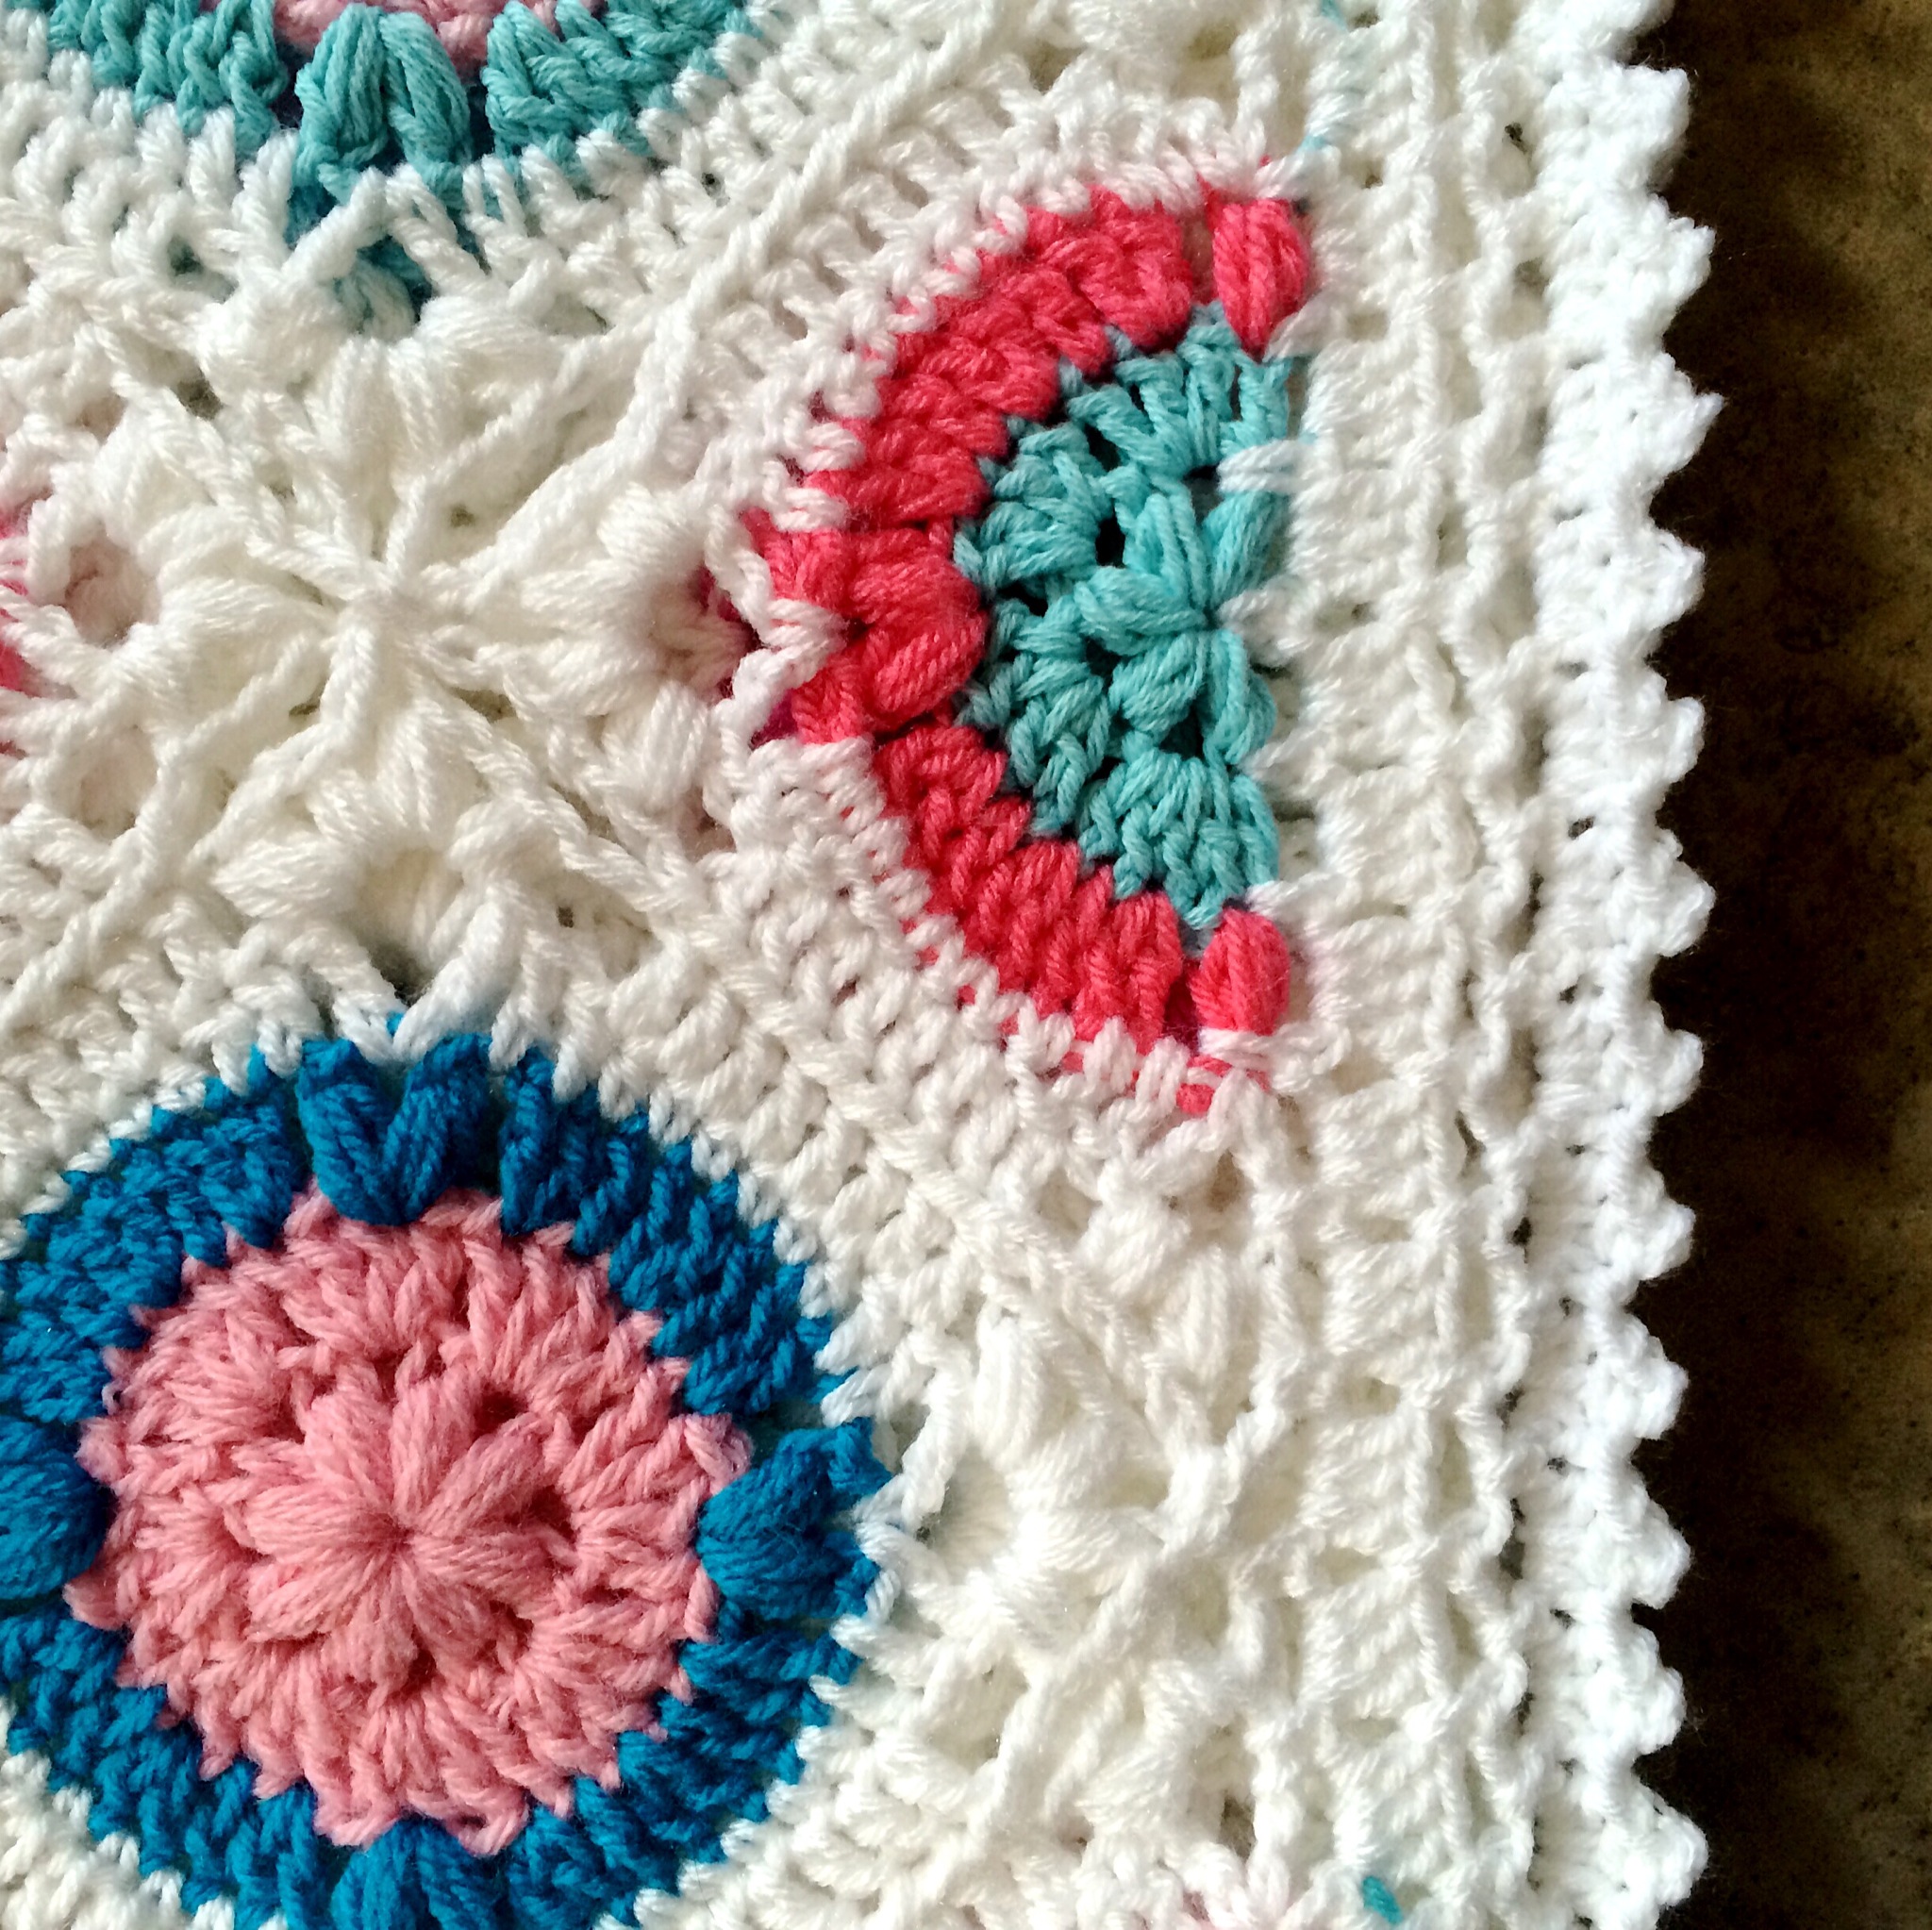
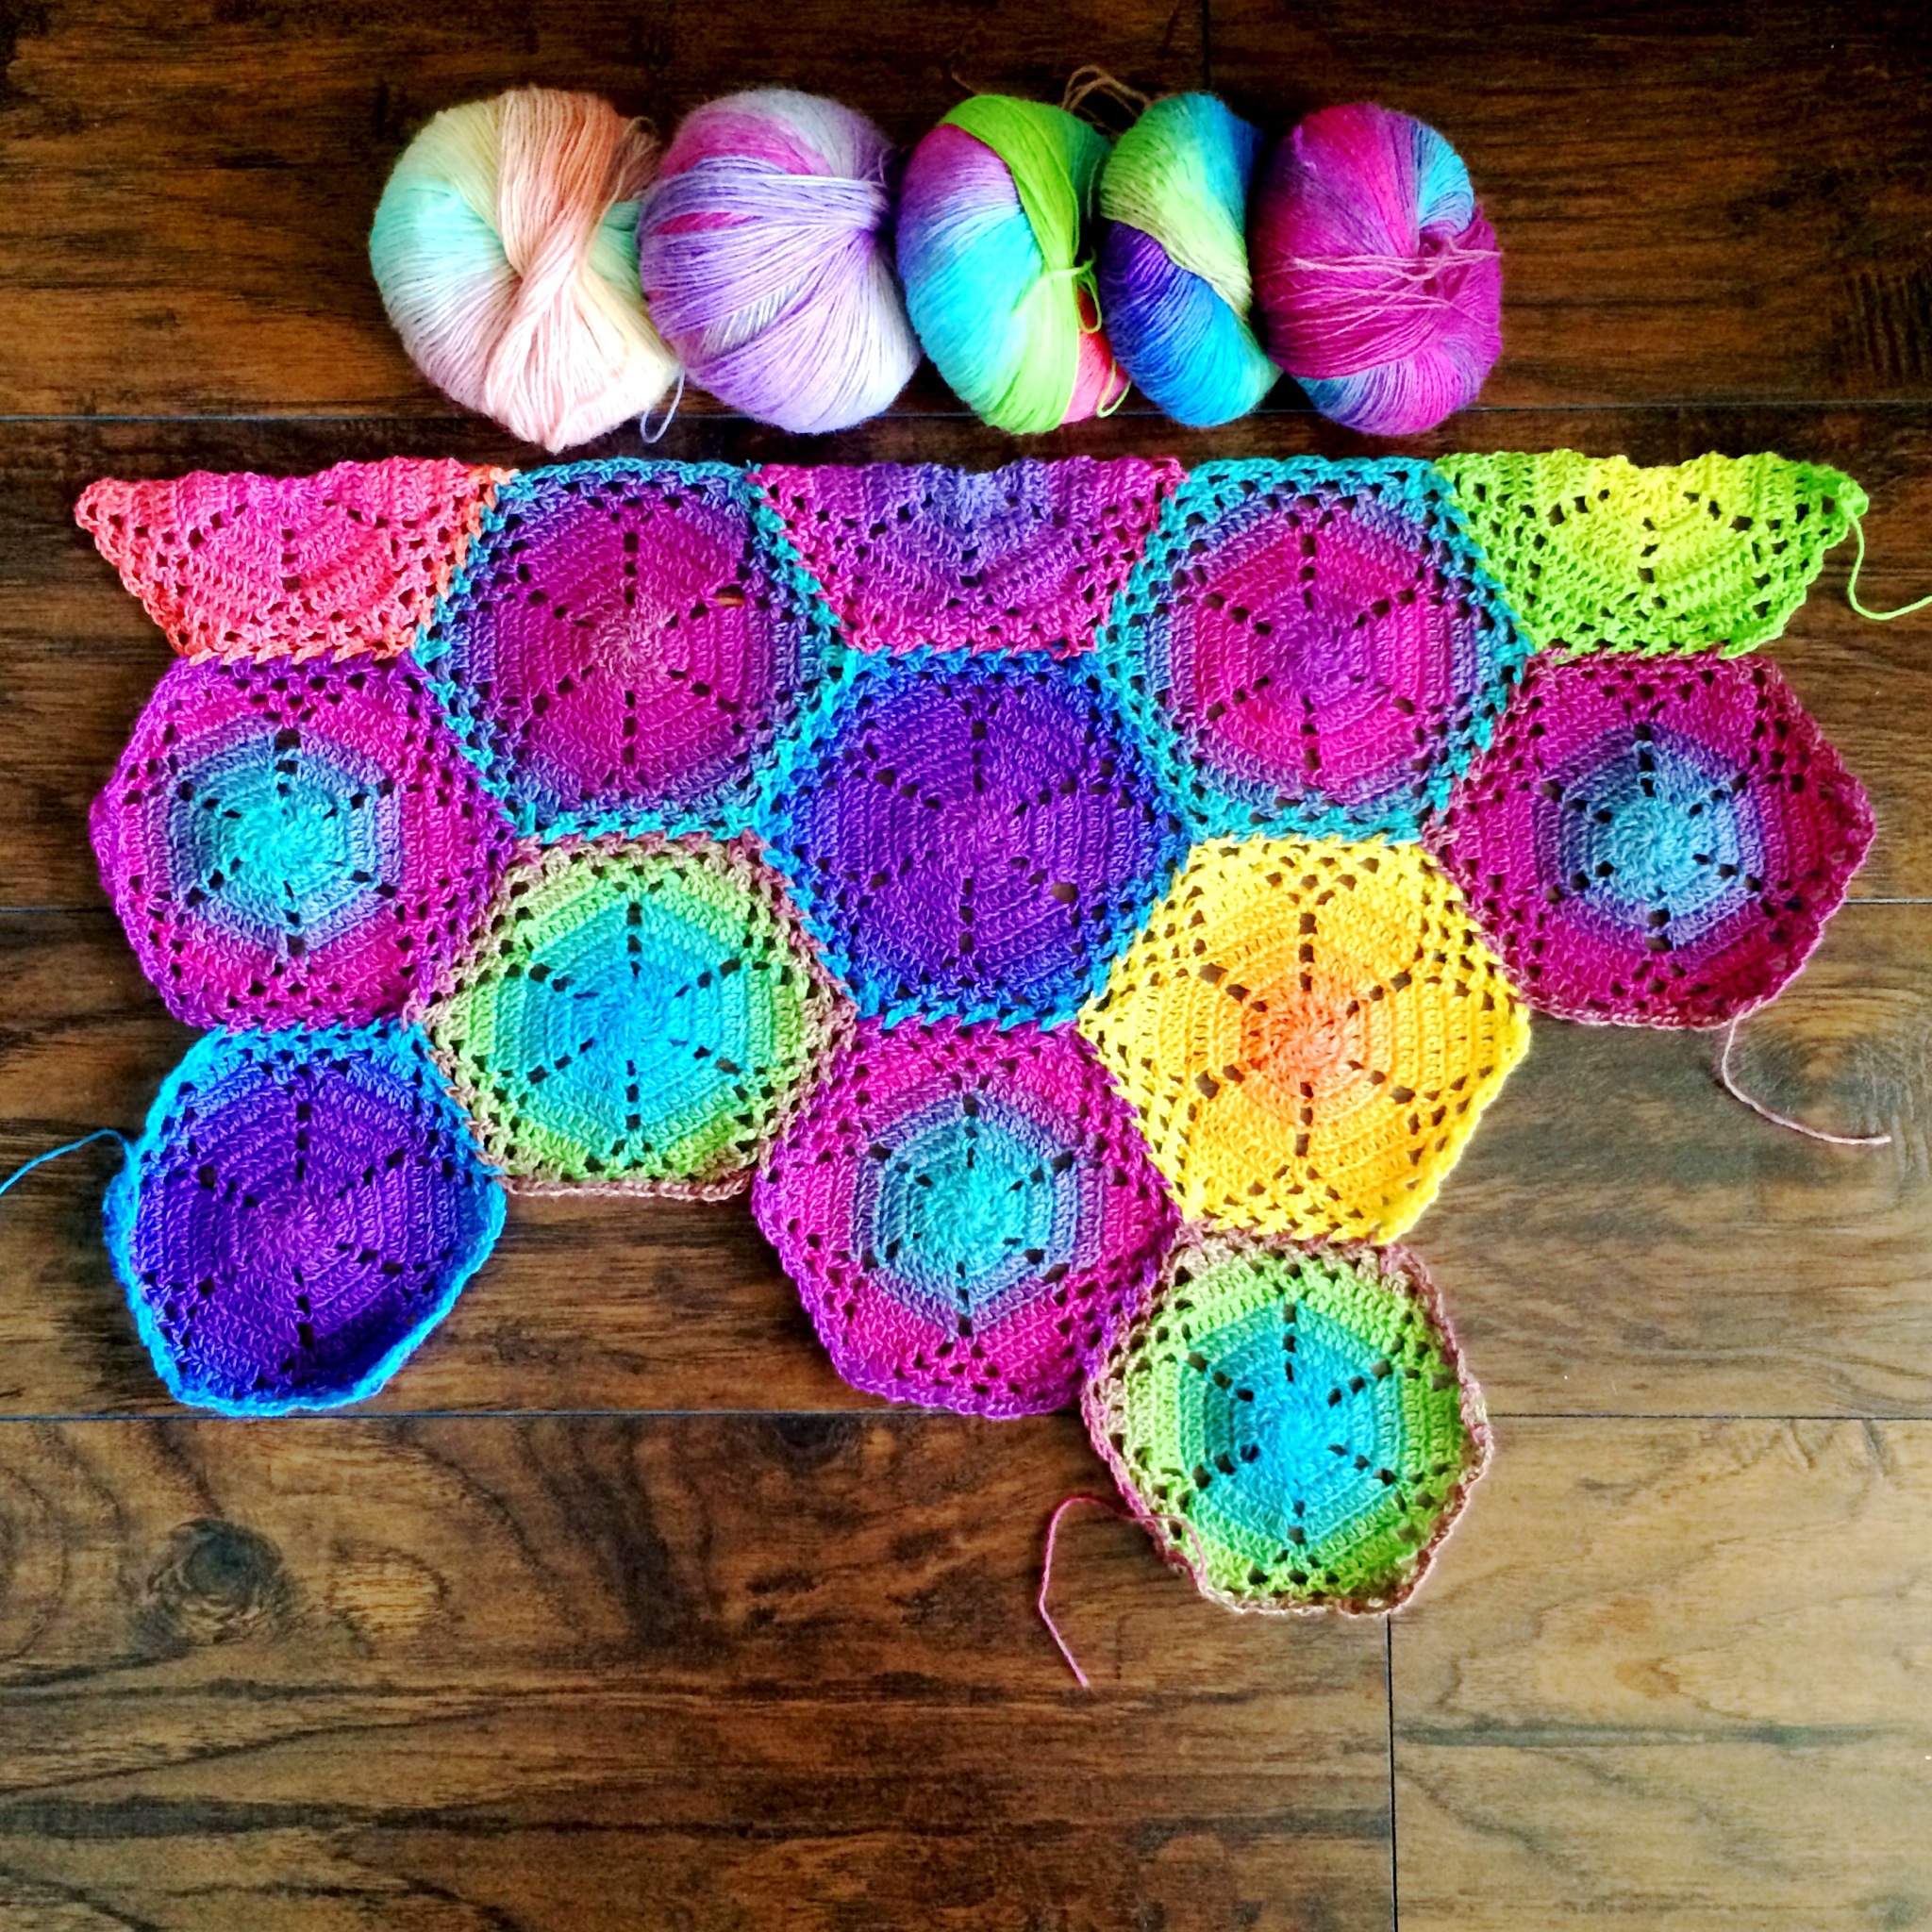
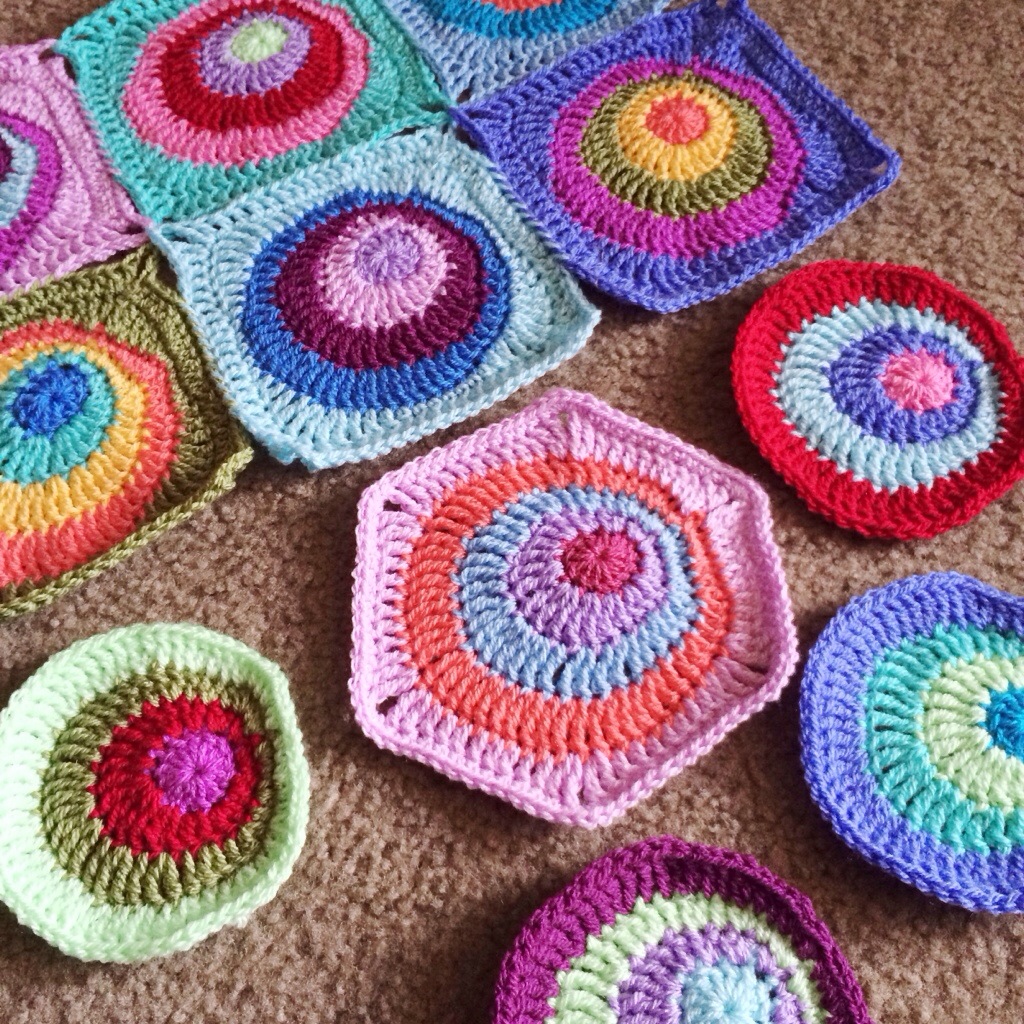
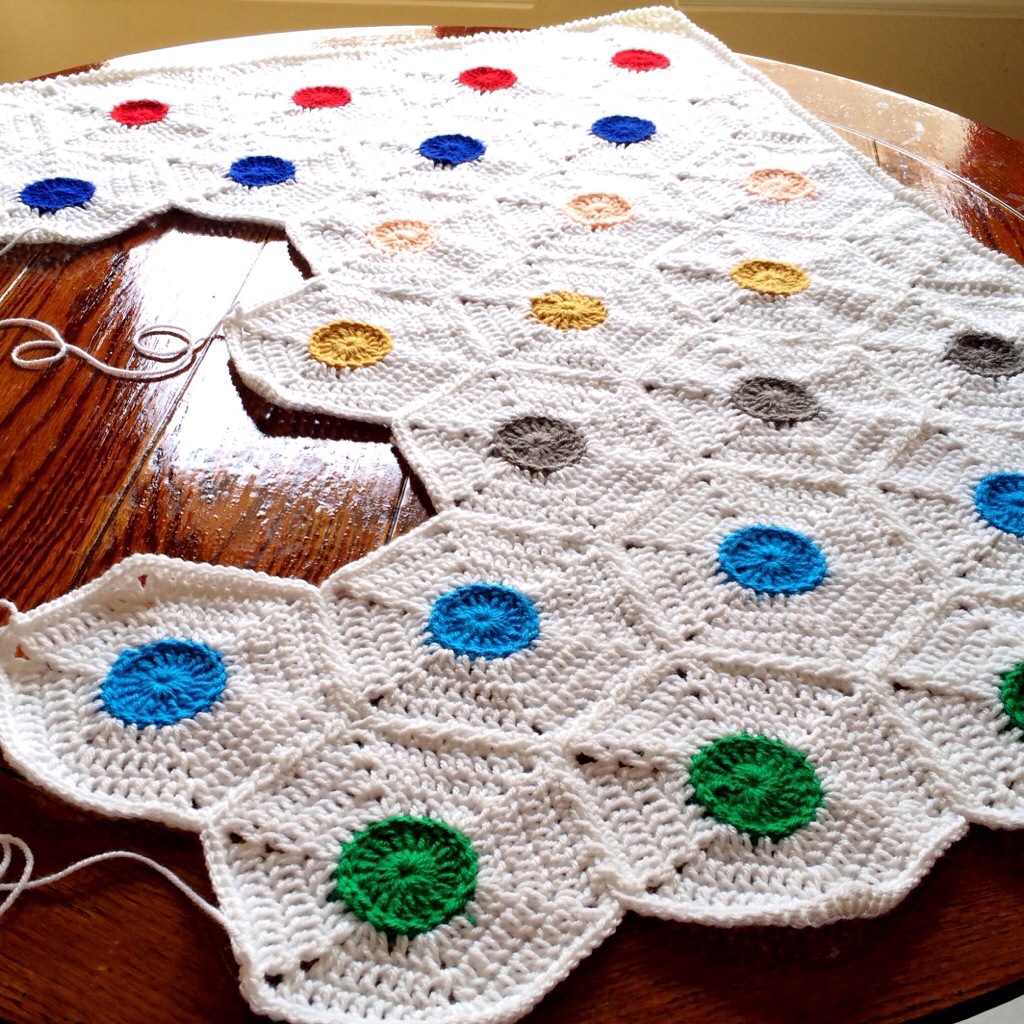
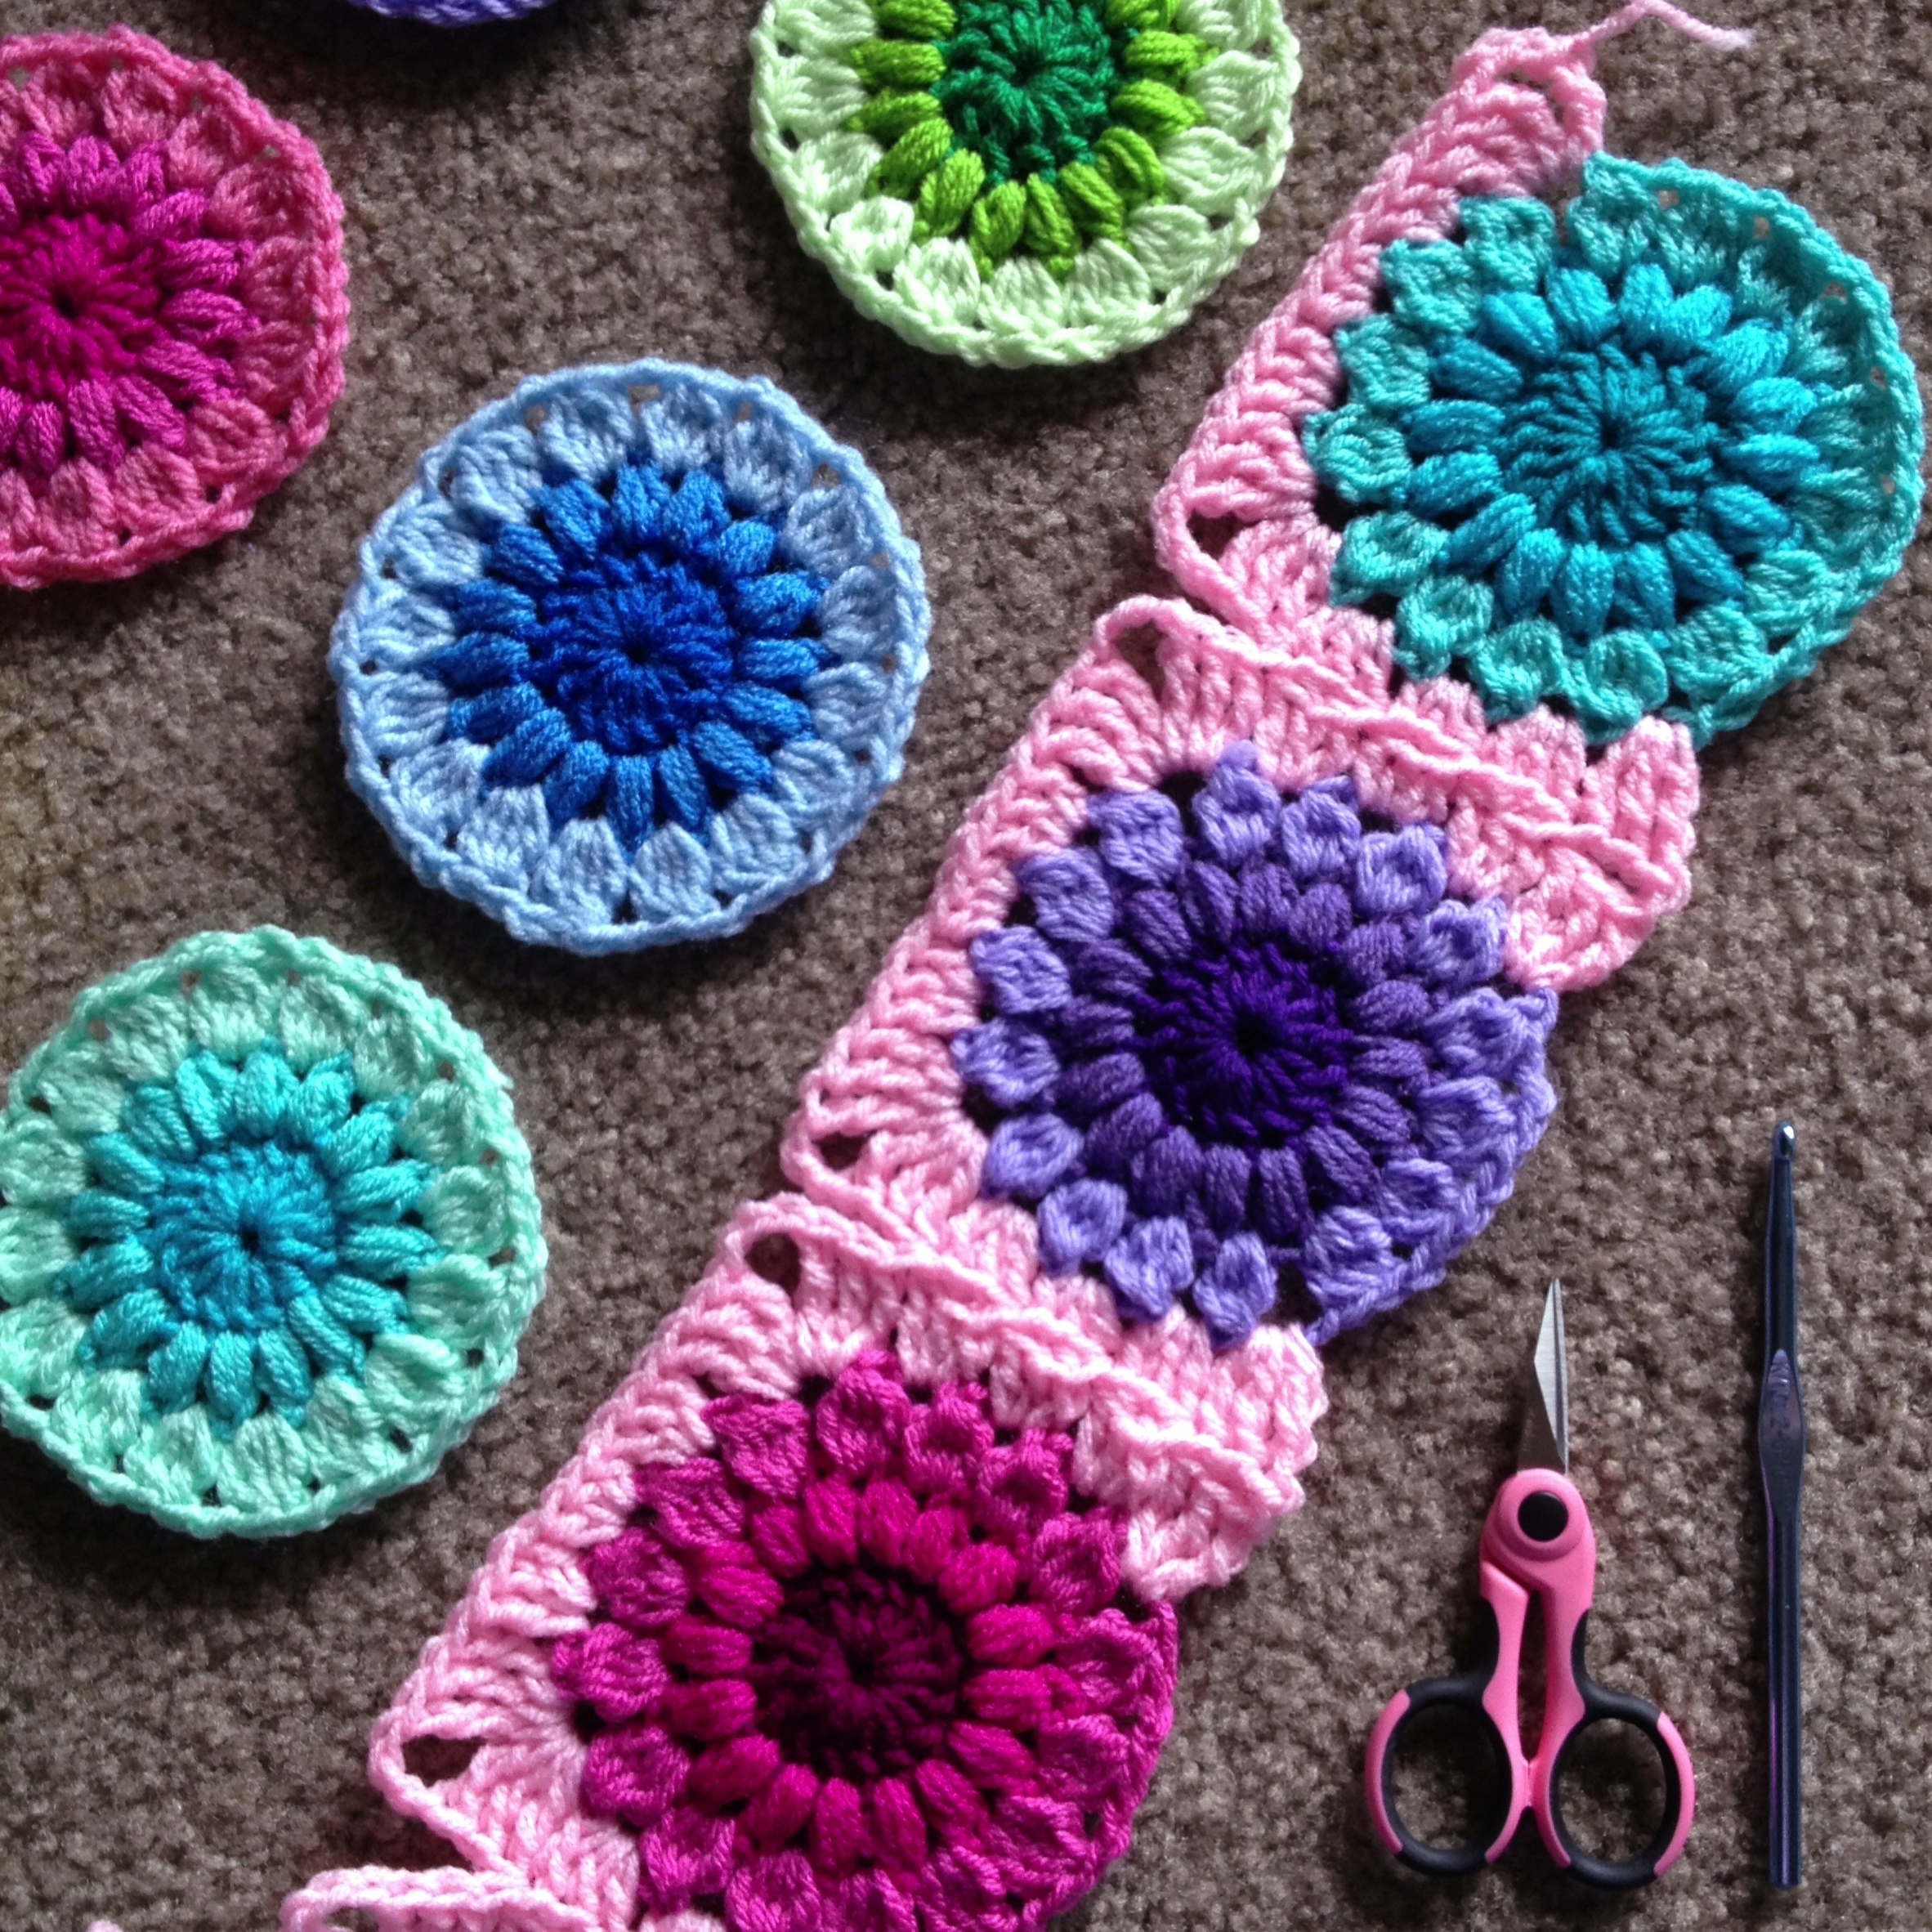
I love this join so much that it I decided to dedicate a complete post to it. Where can I learn it? Find the YouTube tutorial here (by Crochet Cabana). It would be easiest to get some granny squares that you need to join and actually follow along with the video. When I learned it I had to pause and rewind a bunch! See a flat braid version here (by my YouTube crochet idol – Bethintx1). ***** I made 2 tutorials so far whilst using the join on 2 projects. See the original tutorial here (pink Sunburst Granny). See my second *most popular!* tutorial here (green cushion cover). See my Partial CJAYG for Squares HERE See the Hexagon version of the Partial CJAYG HERE ***** Why should I love it? CJAYG is a no-sew join with a ton of integrity. Without all the fastening off and re-joining of the yarn, you have a neat, durable, and professional join. I have increased my speed with this join because it’s more of an over-all completion process versus a one-at-a-time process. …

Crochet Plain Granny Square, One Color or Multi-Color

Plain Granny Square: Solid Related Links (2016) Charted instruction: Written instruction US Terms: For UK Terms and Video Instruction, scroll down. Foundation: Ch-3 and join in first Ch to make ring. You may also make a magic circle if you prefer that method. Also feel free to chain more stitches if you are used to chaining 4 or 5. I like to chain 3 for my ring, because I like the center hole to disappear when I weave ends. Work 7 Rounds as follows… Round 1: All in ring, working over center tail so as to pull center circle closed tight when square is complete: Beg DC, Ch-1, (2DC, Ch-1) 3 times, DC, join with a slip stitch in top chain of Beg DC _8 DC, 4 Ch-1 total_ Round 2: In chain space: (Beg DC, Ch-1, 3DC), (3DC, Ch-1, 3DC) in next chain space -corner made- repeat corner 2 times more, 2DC in first chain space to complete corner, join with a slip stitch in top chain of Beg DC _24 DC, 4 Ch-1 total_ Round …

VVCAL Vibrant Vintage Crochet Blanket – Main Info Page (2016 CAL)

VVCAL Pages 2020 VVCAL Main Page 2018 VVCAL Main Page 2016 VVCAL Main Page Pin Me! Welcome to the Vibrant Vintage CAL (VVCAL) Information Page! The Crochet Along is long over (2016!), so I have completely reformatted this page so that it is easy to locate all the blog posts for the squares, joining methods, and border. All yarn info and weekly CAL info, and any other variety extras have been removed from this page to make the pattern as clear as possible. If you want to see all the cool things people have done with this blanket, join the Vibrant Vintage Blanket CAL Facebook group linked below. Loads of support and pretty pics in there! Folks are still finishing their projects too. Hashtag #VVCAL on social media so I can see your pretty WIP and FO pics. VVCAL Blanket Info

Continuous Flat Braid Join Tutorial

Part 1: How to join all of your squares up to the final column. Part 2 will include your final left-hand column of squares plus finishing the border. Many of you will say this is confusing and crazy! There is definitely a “light-bulb” moment that has to go off, and then its smooth sailing, and before you know it, you’ll be trying to convert every join so it’s continuous. I’m not technologically advanced enough to make videos, but check our YouTube “continuous granny square join” for some great views of the process. The “continuous” method will be very similar, but obviously the join has a different look since this is flat braid. To begin, you will need finished squares ready to join. My blanket is 4 x 4 12″ squares (16 total). My chosen square is the Circle of Friends square by Priscilla Hewitt (worked with worsted weight yarn held double and a size 9mm hook), plus one DC round (DC in every stitch around, placing 5 DC in all 4 corners). See my adjustments to …

Textured Circles: An Expansion on the Circle of Friends Square

  Important Links: Circle of Friends – what a wonderful free pattern written by my crochet idol, Priscilla Hewitt. Check out my Textured Circles Blanket master post for all the different ways I’ve played with this square over here. It incudes different joins, block modifications, and borders! Today, I’d like to share a pattern to expand this square by 5 rounds to 11″ – using worsted weight yarn and a size K (6.5mm) hook. 5-Round Expansion for Circle of Friends Square After you have completed your final SC round of the Circle of Friends square, you are ready to begin. Round 1: Join new yarn with a slip stitch in Back Loop Only (BLO) of corner stitch. Work (SC, Chain 1) – this stands in for the first DC – 2 DC in that same BLO spot, work DC all around the square in BLO of all stitches, putting 3DC in BLO in the corners. Join to the beginning DC. Finish off. Round 2: Join new yarn with slip stitch in any corner DC. (SC, Chain 2, SC) in same corner stitch. …

Treble Scallop Edging: Free Pattern

Treble Scallop Edging! This edge starts with a foundation round of (SC, Chain 2, Skip 1 stitch) repeated, with (SC, Chain 2, SC) in the corners. Check out the before pic below to see this in action. Here is what your piece will look like before each scallop. Try this pretty edging in a built tough, but super soft DK weight yarn like: Scheepjes Colour Crafter Knitpicks Brava Sport Stylecraft Special DK Step 1: Skip 1 Chain loop, Treble Crochet in the next Chain loop, Chain 2 Step 2: Single Crochet in the top side bars of the Treble Crochet that you’ve already done – (Picot made) Step 3: Continue to make (Treble, Picot) until you have 5 Picots made. Treble Crochet once more to finish the Scallop Step 4: Skip 1 Chain loop, SC in the next Chain loop to anchor the Scallop That’s it! Easy-peasy 1 round scallop/picot lace edging 🙂 Now for the corners.. If you’re a mega planner, then you’ve made your foundation round to have the correct amount of Chain …

Lacy Peaks Edging: Free Pattern

Lacy Peaks Edging Tutorial This is a fabulous (and easy!) 5-round border option to work on my “Candy Puffs Blanket” pattern as pictured in the photos. Make Picot: Chain 2, SC in side bar of the previous HDC  just made. Foundation Rnd: On Rnd 1 (the next round), you will be working groups of 3DC all around, so your Foundation Rnd needs to set that up. In most cases, you can go ahead and work an SC or DC Foundation round, with 3SC or (3DC, Ch-2, 3DC) in the corners. On my blanket, I have a raw edge with puffs, chain loops, sideways DC stitches, and the lot (hopefully you can somewhat see this in the photos), so my raw edge here was not suitable for an SC or DC Foundation round. I chose instead to work (SC, Ch-3) repeat around, with the plan of making my Rnd 1 3DC groups in each Ch-3 loop. Rnd 1: If you have started with an SC or DC round, then work evenly spaced (3DC in next St, Skip 2 St) repeats …

Lace Flower Hexagon: Half Motif

I’ve been playing with my Knit Picks Chroma Yarn* – Fingering weight – and this lacy flower hexagon chart that I found online. After showing some photos of this heavenly blanket on Instagram and Facebook, I received some questions regarding the half-hexagon. I made it up, but here is the written pattern! Lacy Flower Hexagon: Half Motif Row 1: Chain 3 and join to make a ring. All in Ring, (SC, Chain 1) counts as first DC here and throughout, (Chain 1, DC) 7 times. 8 DC total. Turn work Row 2: (SC, Chain 1) in first stitch, Skip chain space here and throughout. 2 DC in next stitch, (Chain 2, 2 DC in next 2 stitches) 2 times, Chain 2, 2 DC in next stitch, DC in final stitch (which will be the top of your beginning DC). 14 DC and 3 Chain-2 spaces total. Turn work Row 3: (SC, Chain 1) in first stitch, DC, 2 DC, (Chain 2, 2 DC, DC in next 2 stitches, 2 DC) 2 times, Chain 2, 2 DC, …

Playful Lace Scallop Edging

Your blankie is sure to be a hit with this super cute edging! Foundation: Your first round will be a chain loop round. So if your final blanket round is an SC round, then (SC, skip 1 stitch, chain 2) repeat around – in all 4 corners, work (SC, chain 2, SC). If your final round is chain loops, just make sure you can work (SC, chain 2) loops around, putting (SC, chain 2, SC) in the 4 corners. It will help if between corner chain loops, you have a number of chain that is a multiple of 6 + 5. Example: 35 chain loops between corners. Playful Scallop Edging Count 2 chain loops before any corner and join yarn. SC in same chain loop, treble crochet (TR) in corner chain loop, (chain 3, SC in top of TR) – Picot made – (TR, Picot) 6 more times, TR, skip 1 chain loop, SC in next chain loop. 7-Picot Scallop Corner made. In next chain loop: 3 DC, Picot, 3 DC, SC in next chain …

Heart Mandala: Octagon to Square

  This Heart Mandala is absolutely addictive and completely, divinely beautiful! I’m in love with it 🙂 Check out the related links at the end of this post. Try this fun pattern in a built tough, but super soft DK weight yarn like: Scheepjes Colour Crafter Knitpicks Brava Sport Stylecraft Special DK  Square Off Heart Mandala Special Stitches (American terms) DC Cluster:  In the same stitch, work 2 DC stitches up to the final step, leaving behind a loop each time. YO and draw yarn through all 3 loops on hook. TR Cluster: In the same stitch, work 3 TR stitches up to the final step, leaving behind a loop each time. YO and draw yarn through all 4 loops on hook. DTR stitch: Wrap yarn around hook 3 times. YO and pull through 2 loops on hook until all loops are used (4 times total). 2DCdec: Make a DC cluster, but instead of working both “legs” in the same stitch, work them in the two stitches indicated. 2SCdec: Decrease the 2 indicated stitches together by working (insert hook …

Zipper Stripe Blanket

The Zipper Stripe Blanket came about when I wanted to make a unisex design – it’s kind of like a Granny Stripe, but I didn’t want to use the word “Granny” 🙂 To make the blanket, I like to use the yarn held double, but it isn’t necessary. Pattern (US Terms): Foundation Chain: Start off by chaining an even number of stitches plus 3 (for turning) I make my chain a tad smaller than what I want my final measurement to be because this blanket has a tendency to expand on row 2. Row 1: DC in the 3rd chain from hook and in all chains across. You should have an odd number of stitches. Chain 2 and turn work. I also recommend an alternate method: Turn work without chaining up, work SC in first DC and chain 1. This is what I do. Row 2 (Pattern row): Work DC *between* the first and second DC of the row below. Skip 2 DC, and 2DC between the DC of the row below. Repeat across blanket until you reach the final …

Offset Circles Crochet Blanket Pattern

Offset Circles just might be my favorite design yet! I made it with a size H hook in my beloved Stylecraft DK Lucy Pack – perfect!! I can’t wait to make it in neutral, sandy tones with pale blues… Luuushh! Available on three convenient crafty websites! Etsy || Ravelry || Craftsy Pattern includes: Offset Circle – Square Motif Offset Circle – Hexagon Motif Half-hexagon gap filler (Offset Circle chopped down the center!) Join as you go instructions! Three great border options! Go get it and fall in love with this funky piece!

Polka Dot Blanket Crochet Pattern

Polka Dot Blanket Pattern now available on three convenient sites Etsy, Ravelry, and Craftsy! The Polka Dot is a great way to add a fresh breeze to any room décor. I have included three different sizes of hexagon, and the smaller the hex, the more polka dots will fit in your blanket size. I just adore this pattern and will be making it in a variety of colors! Anything will work! Check pattern for ideas to brainstorm. Color placement on sample blanket inspired by the Crazy Circus Wall Decals of WallsNeedLove.etsy.com 🙂