
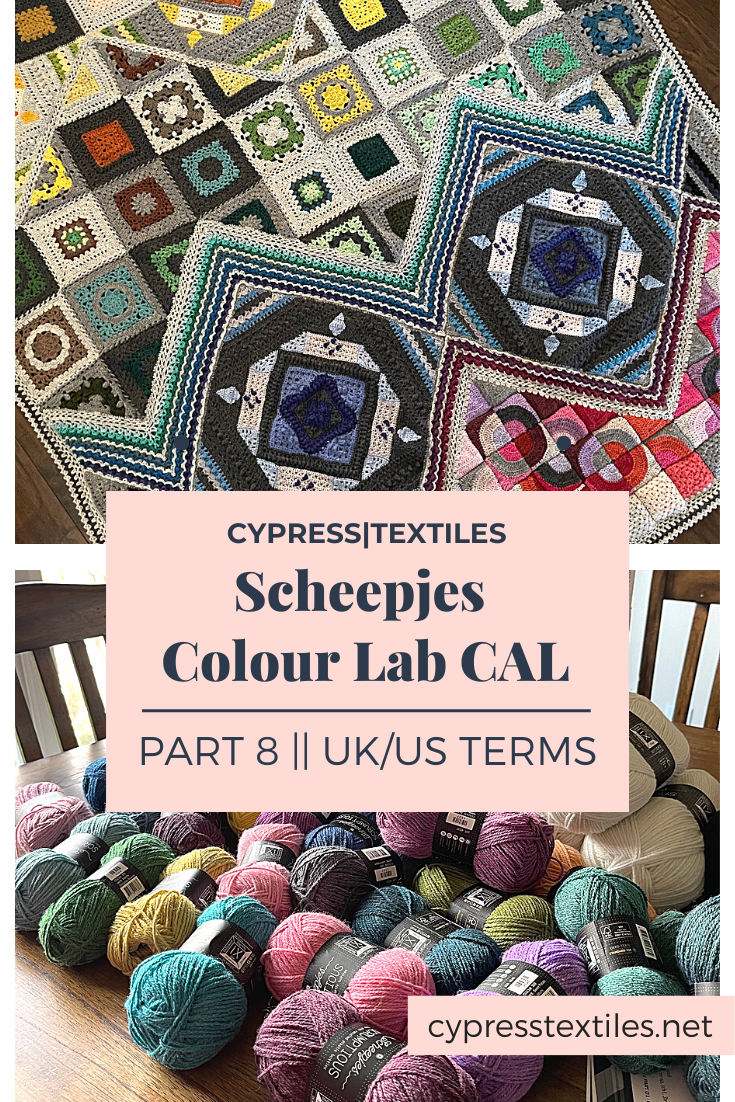
Hello lovely crafter! Welcome to Part 8 of the Colour Lab CAL! I’m so excited that this next part is finally released, and we can all get started working on it together. I published a Main Page and a Tips and Tricks page (US Terms // UK Terms), so if you haven’t read through those, you may wan to check them out!
If you don’t have your yarn yet, you can still get a kit, and that information is below. Be sure to read this whole post very carefully, including the Measurements and Gauge section for this part, as it has important information. There are tips throughout the post, so be sure to take a look at everything.
This post does not have stitch-specific instruction, so I have labeled the post usable for both US and UK Terms.
Buy an Official Kit!
To purchase a kit, you can see if there is a Scheepjes Retailer near you, or please consider heading to one of the links below, as I am personally affiliated with these two shops. Purchasing through these links will gain me a small commission to help support my work, at no additional cost to you. I appreciate your support!
- USA: Jimmy Beans Wool Metropolis Kit / Scrumptious Kit
- UK/Worldwide: WoolWarehouse Metropolis Kit / Scrumptious Kit

Related Links
As these sites become live, I will hyperlink them.
- Main Page with yarny info, kit info, and more
- Colour Lab CAL Blog Posts UK Terms: Main Page, Part 1, Part 2, Part 3, Part 4, Part 5, Part 6, Part 7 US/UK Terms, Part 8 US/UK Terms (You are here!), Bonus Project
- Colour Lab CAL Blog Posts US Terms: Main Page, Part 1, Part 2, Part 3, Part 4, Part 5, Part 6, Part 7 US/UK Terms, Part 8 US/UK Terms (You are here!), Bonus Project
- The Scheepjes website page for the CAL
- Scheepjes official Tips and Tricks PDF
- My Tips and Tricks Post US Terms with some photo tutorials of tricky stitches
- My Tips and Tricks Post UK Terms with some photo tutorials of tricky stitches
- Scheepjes International Facebook Group
- Scheepjes Dutch Facebook Group
- YouTube videos for the CAL (Videos are in UK Terms): Right-Handed // Left-Handed
- Ravelry Pattern Page
- USA: Jimmy Beans Wool Metropolis Kit / Scrumptious Kit
- UK/Worldwide: WoolWarehouse Metropolis Kit / Scrumptious Kit
- View the Scheepjes Shops page to find a retailer near you!
Where to Find Me
- Instagram: @cypresstextiles
- Facebook Page: CypressTextiles
- YouTube Channel: Rachele Carmona
- Pinterest: CypressTextiles
- Tumblr: CypressTextiles
- Etsy: CypressTextiles
- Ravelry: Rachele Carmona
- Teachable: Creative Art Blanket Course

Where to Get Support
During the CAL, if you need pattern support, there is definitely a ton of help out there! It has been proven time and time again that the Scheepjes CALs turn beginners into rock stars. Please do not worry if the pattern looks complicated, as this safety net of support points will be there for you, just a click away.
- Tips and Tricks Post (US Terms // UK Terms)- Your question could be answered here! (Gauge discussed as well)
- Facebook Group Support – Definitely join the Scheepjes Facebook Groups, so you can post progress pics, get inspired by others, and of course, ask for help. The groups are wonderful and very supportive! Worldwide: Scheepjes International Facebook Group and for Dutchies: Scheepjes Dutch Facebook Group
- CypressTextiles Website Support – For each pattern release week, I will make a blog post here on the CypressTextiles website where I will include many, many step-by-step photos of any possibly tricky parts. The entire pattern won’t be photographed here, but I will do my best to make everything clear in my still photos.
- YouTube Support – The very talented Esther of It’s All in a Nutshell has graciously made videos for this CAL which will appear weekly on her YouTube Channel. Her videos are well known worldwide, and she is an absolute treasure.

Pattern Release Timeline

Scheepjes will share the free individual patterns on Wednesday 12:00h CET on their website and in the Official Facebook Groups. Because some motifs require more work than others, some patterns take up a week, others two weeks. Here is an overview for you to mark your calendars!

Contents of this Post
Here is a short list of what you will find below:
- Blanket Pattern: Where to find the pattern and videos
- Yarn Colors: Which yarn colors are used in this part, so you can pull them out
- Blanket Progress: What will be worked in this part
- Measurement and Gauge: Things to keep in mind with your tension
- Tricky Parts and Weaving Ends: List of possible tricky bits and photos with explanations, and how to weave ends for this part
Be sure to read through everything before you get started, as some information may be good to know before you begin.
Blanket Pattern
The full Colour Lab CAL pattern will not be shared here on this blog, because the copyright lies with Scheepjes. The pattern for this part can be found on the Scheepjes Website or in the Scheepjes Facebook Group (International // Dutch). Esther from It’s All in a Nutshell has also published tutorial videos (Right-Handed // Left-Handed).
Please note that the original Scheepjes Pattern and the videos are all in UK Terms, but there are also US Terms patterns available, and on my website, I will publish both US and UK Terms blog posts for each part.

Blanket Progress
Here is a general minimalistic schematic of what your blanket in progress will look like after this part. The small motifs of Part 7 will be joined to the Part 8 small triangles and granny square motifs to make Panel 4, and then a simple border completes the piece – and you are all done!!

In the photo below, Part 8 is the red-outlined portion. This includes making the solid triangles and granny squares and joining all of your little motifs together! The border will also be worked in this part. This is why we have a full 2 weeks to finish.

My Demo Version
I’m making the Scrumptious version with randomized color layout. I’ll talk more about this in a separate blog post – yay!! This is my favorite part of the Colour Lab CAL, that there will be so many different blankets to marvel at, with everyone experimenting on their own layout.
Side note: This Scrumptious eye candy! Note: This kit is exclusive to the CAL – I recommend scooping it up if you are able!

Measurement and Gauge
MEASUREMENTS
Metropolis version: Solid Triangle Motifs (unjoined) measure 6.5 x 9cm; Granny Square
Motifs (unjoined) measure 6.5 x 7cm
Scrumptious version: Solid Triangle Motifs (unjoined) measure 8.5 x 10cm; Granny Square
Motifs (unjoined) measure 8.5 x 8.7cm

Tricky Parts and Weaving Ends
Note: If something has been covered in a previous part, I have not included it here, so make sure to read all posts as you go.
Some of the instruction for this part could potentially be tricky, so I have photo tutorials for them below. This is not a substitute for the original pattern, of course. In addition, as promised, I will show you how I weave my ends along the way. Note: I am right-handed, so these tutorials will be from a right-handed perspective. If you’re a lefty, you may need to adjust accordingly.
A Few General Notes
Here are some things that will be helpful as you work.
***Notes on weaving ends:
Weaving ends can be overwhelming. For this part, there are a number of yarn ends to weave in. I do not recommend leaving them to weave in when you’re done with the project. They need to be woven along the way so that when you’re done, you can really be done.
Also, seeing a zillion yarn ends hanging off of your project while you work can leave you frazzled and frustrated. Weaving them in as you go will help you stay positive and clear-minded and through any possibly tricky bits. Think of it as organizing your workspace.
You can use the tapestry needle provided for all of the ends as you go, which is what I instruct here. But remember, anytime you work a row of just dc, you can work over ends and they will be very well hidden and in my experience shouldn’t work themselves loose. Take advantage of these opportunities to work over your yarn ends if you like!
***Consider working in an assembly line manner to save time:
This isn’t part of the instruction, and it isn’t required. Just a little speed tip if you like! Sections 1-3 of the center motifs are identical, just with different color placements. If you have more experience with patterns and won’t be confused by this, you can work the motifs in assembly line fashion so that you have each line of instruction fresh in your mind and you can just work it 2 times in succession. This saves time and also keeps you from checking the pattern so much.
Let’s get started!
Part 8 has a variety of activities to wrap up your beautiful project. I cannot believe we are on Part 8 already!
In Part 8, we will:
- Make the Solid Triangles
- Make the Granny Square Motifs
- Join Motifs from Part 7 and 8 to make Panel 4 and add Granny Stitch Edging
- Join Panel 4 to the Blanket Body
- Add the Blanket Border
- Weave all ends and block your blanket!

Solid Triangles
(Make 20 in the colors shown in Schematic 1 in the pattern.)
This is a very simple 4-row motif! Here is a visual check of each of the rows after they are completed.
Row 1

Row 2

Row 3

Row 4

Granny Square Motifs
(Make 20 in the colors shown in Schematic 1 in the pattern.)
The great this about this motif is that it is the same as the center of the motifs from Part 1!
Rounds 1 and 2

Round 3


Round 4

Round 5


Join Motifs from Part 7 and 8 to make Panel 4 and add Granny Stitch Edging
Join the motifs from Part 7 and Part 8 in this manner. The motifs are held with RS together and then slip stitched across the joining side.
Vertical Seams
Following the red arrows in the diagram below, slip stitch non-stop from top edge to bottom edge. You can join along the seams in any order, but I prefer to work across the blanket from right to left, until all of the vertical seams are joined up.
Horizontal Seams
Following the blue arrows in the diagram below, slip stitch non-stop from left edge to right edge of the blanket until all of the horizontal seams are joined up.
Cut the yarn and rejoin as needed and then weave all of the ends in. Then, when the panel is completely joined together, move on to the Granny Stitch Edging.

Add Granny Stitch Edging
This granny stitch round is used to increase the size of the panel so that it fits the blanket better. In the photo below, I have marked where the Granny Stitch Edging is with red arrows.

Join Panel 4 to the Blanket Body
First, another granny stitch row will be added to the left and right sides of the panel. This will follow the purple lines on Schematic 16.
Next, Panel 4 is Joined to Panel 3 following the blue line on Schematic 16, exactly as the previous panels have been joined.

Blanket Border
After all of the panels are joined together, a simple 5-round border completes the blanket. In this border, there aren’t any new stitches, so as long as you pay close attention on the first round, the rest of the border will have a great foundation. Otherwise, this is a straight-forward border pattern.
To finish the blanket, weave in any extra ends, and then block the blanket. And you are all done!

And that’s all for Part 8 y’all! I cannot wait fort the bonus project!
Thank you so much for following along with the Colour Lab CAL, it’s been so fun seeing everyone’s creative color layouts, and I am amazed at your progress! If you are on team sloth, that’s perfectly okay too 🙂
Happy crafting!
Rachele C.
The Art of Crochet Blankets (affiliate)
Support My Work
You’re supporting by just being here! You can read my blog (Start Here!), like and comment on socials, and message me for a chat. All of this supports my work free of charge!
- Affiliate links – Shopping through my links supports me at no additional cost to you as I get a small commission through my affiliates. Jimmy Beans Wool // WoolWarehouse // Amazon.com
- Buy my pattern book – I wrote a super neat crochet blanket pattern book, published under Penguin Random House. You can buy it here!
- Browse my self-published patterns – I have over a hundred patterns on Etsy and Ravelry
- Creative Art Blanket Course – Check it out on Teachable
Related Links
As these sites become live, I will hyperlink them.
- Main Page with yarny info, kit info, and more
- Colour Lab CAL Blog Posts UK Terms: Main Page, Part 1, Part 2, Part 3, Part 4, Part 5, Part 6, Part 7 US/UK Terms, Part 8 US/UK Terms (You are here!), Bonus Project
- Colour Lab CAL Blog Posts US Terms: Main Page, Part 1, Part 2, Part 3, Part 4, Part 5, Part 6, Part 7 US/UK Terms, Part 8 US/UK Terms (You are here!), Bonus Project
- The Scheepjes website page for the CAL
- Scheepjes official Tips and Tricks PDF
- My Tips and Tricks Post US Terms with some photo tutorials of tricky stitches
- My Tips and Tricks Post UK Terms with some photo tutorials of tricky stitches
- Scheepjes International Facebook Group
- Scheepjes Dutch Facebook Group
- YouTube videos for the CAL (Videos are in UK Terms): Right-Handed // Left-Handed
- Ravelry Pattern Page
- USA: Jimmy Beans Wool Metropolis Kit / Scrumptious Kit
- UK/Worldwide: WoolWarehouse Metropolis Kit / Scrumptious Kit
- View the Scheepjes Shops page to find a retailer near you!