
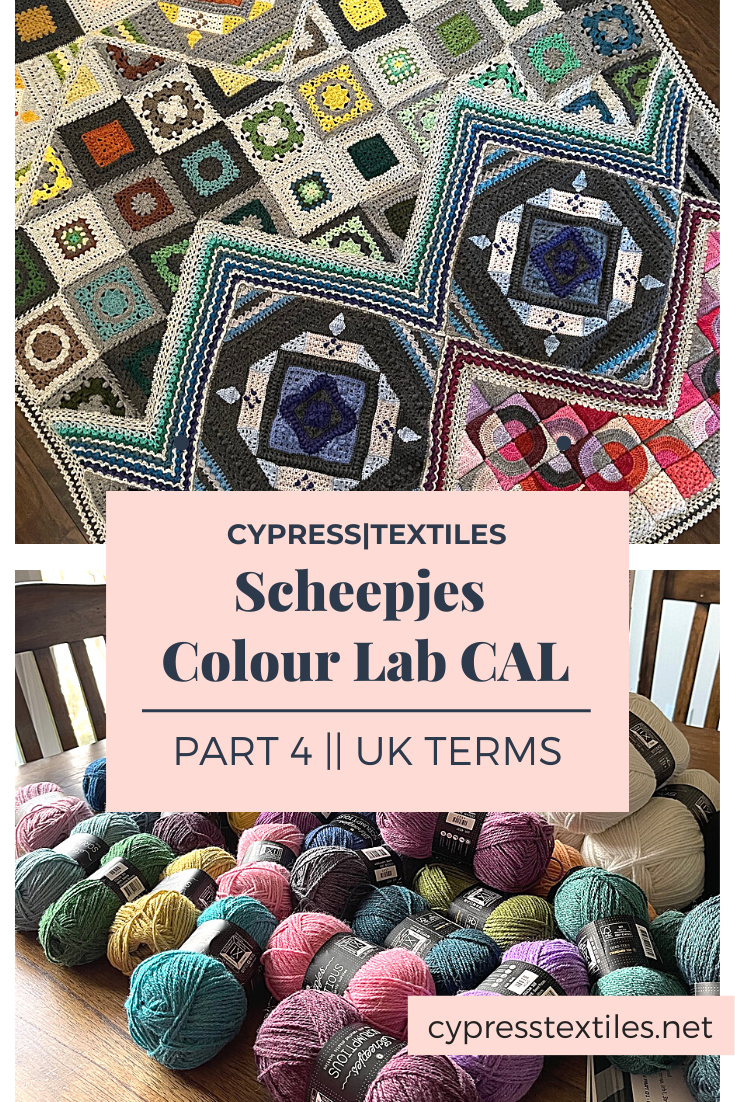
Hello lovely crafter! Welcome to Part 4 of the Colour Lab CAL! I’m so excited that this next part is finally released, and we can all get started working on it together. I published a Main Page and a Tips and Tricks page (US Terms // UK Terms), so if you haven’t read through those, you may wan to check them out!
If you don’t have your yarn yet, you can still get a kit, and that information is below. Be sure to read this whole post very carefully, including the Measurements and Gauge section for this part, as it has important information. There are tips throughout the post, so be sure to take a look at everything.
This tutorial is in UK Terms. If you are looking for US Terms, click here!

Related Links
As these sites become live, I will hyperlink them.
- Main Page with yarny info, kit info, and more
- Colour Lab CAL Blog Posts UK Terms: Main Page, Part 1, Part 2, Part 3, Part 4, Part 5, Part 6, Part 7 US/UK Terms, Part 8 US/UK Terms, Bonus Project
- Colour Lab CAL Blog Posts US Terms: Main Page, Part 1, Part 2, Part 3, Part 4, Part 5, Part 6, Part 7 US/UK Terms, Part 8 US/UK Terms, Bonus Project
- The Scheepjes website page for the CAL
- Scheepjes official Tips and Tricks PDF
- My Tips and Tricks Post US Terms with some photo tutorials of tricky stitches
- My Tips and Tricks Post UK Terms with some photo tutorials of tricky stitches
- Scheepjes International Facebook Group
- Scheepjes Dutch Facebook Group
- YouTube videos for the CAL (Videos are in UK Terms): Right-Handed // Left-Handed
- Ravelry Pattern Page
- USA: Jimmy Beans Wool Metropolis Kit / Scrumptious Kit
- UK/Worldwide: WoolWarehouse Metropolis Kit / Scrumptious Kit
- View the Scheepjes Shops page to find a retailer near you!
Where to Find Me
- Instagram: @cypresstextiles
- Facebook Page: CypressTextiles
- YouTube Channel: Rachele Carmona
- Pinterest: CypressTextiles
- Tumblr: CypressTextiles
- Etsy: CypressTextiles
- Ravelry: Rachele Carmona
- Teachable: Creative Art Blanket Course

Where to Get Support
During the CAL, if you need pattern support, there is definitely a ton of help out there! It has been proven time and time again that the Scheepjes CALs turn beginners into rock stars. Please do not worry if the pattern looks complicated, as this safety net of support points will be there for you, just a click away.
- Tips and Tricks Post (US Terms // UK Terms)- Your question could be answered here! (Gauge discussed as well)
- Facebook Group Support – Definitely join the Scheepjes Facebook Groups, so you can post progress pics, get inspired by others, and of course, ask for help. The groups are wonderful and very supportive! Worldwide: Scheepjes International Facebook Group and for Dutchies: Scheepjes Dutch Facebook Group
- CypressTextiles Website Support – For each pattern release week, I will make a blog post here on the CypressTextiles website where I will include many, many step-by-step photos of any possibly tricky parts. The entire pattern won’t be photographed here, but I will do my best to make everything clear in my still photos.
- YouTube Support – The very talented Esther of It’s All in a Nutshell has graciously made videos for this CAL which will appear weekly on her YouTube Channel. Her videos are well known worldwide, and she is an absolute treasure.

Pattern Release Timeline

Scheepjes will share the free individual patterns on Wednesday 12:00h CET on their website and in the Official Facebook Groups. Because some motifs require more work than others, some patterns take up a week, others two weeks. Here is an overview for you to mark your calendars!

Contents of this Post
Here is a short list of what you will find below:
- Blanket Pattern: Where to find the pattern and videos
- Yarn Colors: Which yarn colors are used in this part, so you can pull them out
- Blanket Progress: What will be worked in this part
- Measurement and Gauge: Things to keep in mind with your tension
- Tricky Parts and Weaving Ends: List of possible tricky bits and photos with explanations, and how to weave ends for this part
Be sure to read through everything before you get started, as some information may be good to know before you begin.
Blanket Pattern
The full Colour Lab CAL pattern will not be shared here on this blog, because the copyright lies with Scheepjes. The pattern for this part can be found on the Scheepjes Website or in the Scheepjes Facebook Group (International // Dutch). Esther from It’s All in a Nutshell has also published tutorial videos (Right-Handed // Left-Handed).
Please note that the original Scheepjes Pattern and the videos are all in UK Terms, but there are also US Terms patterns available, and on my website, I will publish both US and UK Terms blog posts for each part.

Blanket Progress
Here is a general minimalistic schematic of what your blanket in progress will look like after this part – all of these 4 parts will be joined together – They make up Panel 1 and Panel 2, and so this means Panel 1 and 2 can finally be joined together!

In the photo below, Part 4 is the red-outlined portion.

My Demo Version
I’m making the Scrumptious version with randomized color layout. I’ll talk more about this in a separate blog post – yay!! This is my favorite part of the Colour Lab CAL, that there will be so many different blankets to marvel at, with everyone experimenting on their own layout.
Side note: This Scrumptious eye candy! Note: This kit is exclusive to the CAL – I recommend scooping it up if you are able!

Measurement and Gauge
Part 3 and 4 together make up Panel 2. Part 4 make up the triangle motifs that will complete the second panel.
Metropolis version: 13.5 x 13.5cm including joining round
Scrumptious version: 16 x 16cm including joining round
To maintain your gauge for this part, make sure your triangles are the same width as the squares in Part 3, after the joining row.
Important Note about Gauge
Now that we are on Part 4, you may be more comfortable with gauge. All of the discussions I have had on Gauge and Measurements in the previous parts apply here.
One last note… If the thought of gauge absolutely puts you off, and you are working from your own yarn stash (not a kit) then you only need to make sure that each part lines up with the previous parts as you go.

Tricky Parts and Weaving Ends
Note: If something has been covered in a previous part, I have not included it here, so make sure to read all posts as you go.
Some of the instruction for this part could potentially be tricky, so I have photo tutorials for them below. This is not a substitute for the original pattern, of course. In addition, as promised, I will show you how I weave my ends along the way. Note: I am right-handed, so these tutorials will be from a right-handed perspective. If you’re a lefty, you may need to adjust accordingly.
A Few General Notes
Here are some things that will be helpful as you work this part.
***Notes on working a large number of sts evenly across a long distance:
Check how many sts you need to make and over how much space you need to make them. Place a marker at the center, and then markers at the quarter midpoints, and you can divide the number of sts you need to make so that they are truly even. This takes the guesswork out, so that you don’t get to the end and realize you’ve run out of space or have too much space left. It will save you from frogging!
***Working stitches down the side of a “raw edge”
When you have to work stitches evenly down the side of a previous part, you will wonder where to place those stitches. It is neater to work “into” the tr stitches for example, rather than “around” them treating them like a ch-sp, because this can make a hole appear. I recommend working 1 st in a dc, and 2-3 sts into a decrease or a tr. this should work for your stitch counts as well as you work a certain number of sts across a side.
***Notes on weaving ends:
Weaving ends can be overwhelming. For this part, there are a number of yarn ends to weave in. I do not recommend leaving them to weave in when you’re done with the project. They need to be woven along the way so that when you’re done, you can really be done.
Also, seeing a zillion yarn ends hanging off of your project while you work can leave you frazzled and frustrated. Weaving them in as you go will help you stay positive and clear-minded and through any possibly tricky bits. Think of it as organizing your workspace.
You can use the tapestry needle provided for all of the ends as you go, which is what I instruct here. But remember, anytime you work a row of just dc, you can work over ends and they will be very well hidden and in my experience shouldn’t work themselves loose. Take advantage of these opportunities to work over your yarn ends if you like!
Let’s get started!

Notes on Joining As You Go
There are 20 triangles to be made in this section, and they are joined as you go on the final ch-3 space row using a Flat Braid Join method. Review the schematic below. The triangles are numbered and this is the order in which they are joined.
There are a total of 4 different squares which appear 5 times each to make the 20, and so as you progress through the instructions, if a triangle has previously appeared in the instructions, the only new information will be the joining row. Because of this, the instructions get simpler as they progress.
As you make each triangle, refer to this schematic as it will help you get a sense of how to join them as you go.

Tricky Parts
For this part, you have a break from dissecting the tricky parts of the design, because Part 4 is a lot like Part 3! These are simply the exact squares used in Part 3, but the patterns are sliced on the diagonal, meaning your motifs will be worked back and forth, instead of in the round.
I do have a few tips for you and then I will show you some photos of Part 4 on my Whirl version, in case you missed that blog post!
Tips for Part 4
- Pay attention to the pattern instructions and whether they tell you to turn your work or not after each row. Sometimes, you will cut the yarn, but instead of turning your work, you will join the new color at the beginning of the row, keeping the RS still facing.
- On this part, all of the corners will be linked up, so you do not have to worry about joining some, and not joining others.
- There were 5 different motifs on Part 3, but there are only 4 different motifs this time, because I have no “granny style” triangle motif.
- Some crafters in the Facebook groups had questions about the stitch count on the long zig-zag joining rows that are worked when you are ready to join the panels together. They wondered what to do if you mistakenly worked, for example, 100 sts where the pattern said to work 99 sts evenly. Our advice was that you did not have to frog your work, rather when you skip sts for your chain loop row, you would skip an extra stitch to make up for your extra stitch. Or however you needed to compensate for a minor counting error. This hopefully takes some stress off, as it’s no fun to frog, and those rows are long!
- Placing markers can also help to break up the long joining rows and make it so that you are less likely to have a counting error.
- As always, if you are struggling with the written instruction, Esther’s videos are a huge help. I recommend having them on while you read the instructions so that you can clarify certain parts.
- If you are working from a kit, and feeling overwhelmed with where to place the colors, and it’s making you get behind, or it has you frustrated with the project, then I suggest mixing it up a bit! You can still follow the color placement chart, but you don’t need to be so precise with which green you grab, or which teal. The blanket will still come out looking amazing, and the color fade shouldn’t change that much!
Now let’s look at some of my photos from Part 4 of my Whirl Version of the Colour Lab CAL!
Part 4 – Whirl Style!
In the photo below, the Part 4 motifs are in purple and white. It is a lot of fun to work these fresh motifs, with that familiarity of the stitches from the full squares in Part 3.

I love how this project lends itself to so many versatile color layouts. This Lemon Cassis Cream Whirl looks incredible!

For the bottom edge of triangle motifs, I made them in a sort of assembly line instead of making each one individually and joining it on like in the pattern.

How I did this was by leaving the final color change to be worked. For me, that is the white color, but if you have a kit, it will be any of the three background colors. This way I could get a start on all of the motifs, and then join them on all at once.

For this angle you can see the entirety of Part 4. I enjoyed stepping away from Part 1 and 2 when we worked Part 3. Since it wasn’t yet joined to the blanket, it was almost like working on a completely different project!
But now that we are working these triangles and joining the panels together, I have a feeling we are all going to be pleasantly surprised at how much of the blanket is complete. I cannot believe we are halfway already!

And that’s all for Part 4! Thank you so much for following along with the Colour Lab CAL, it’s been so fun seeing everyone’s color layouts coming to life!
Happy crafting!
Rachele C.
The Art of Crochet Blankets (affiliate)
Support My Work
You’re supporting by just being here! You can read my blog (Start Here!), like and comment on socials, and message me for a chat. All of this supports my work free of charge!
- Affiliate links – Shopping through my links supports me at no additional cost to you as I get a small commission through my affiliates. Jimmy Beans Wool // WoolWarehouse // Amazon.com
- Buy my pattern book – I wrote a super neat crochet blanket pattern book, published under Penguin Random House. You can buy it here!
- Browse my self-published patterns – I have over a hundred patterns on Etsy and Ravelry
- Creative Art Blanket Course – Check it out on Teachable
Related Links
As these sites become live, I will hyperlink them.
- Main Page with yarny info, kit info, and more
- Colour Lab CAL Blog Posts UK Terms: Main Page, Part 1, Part 2, Part 3, Part 4, Part 5, Part 6, Part 7 US/UK Terms, Part 8 US/UK Terms, Bonus Project
- Colour Lab CAL Blog Posts US Terms: Main Page, Part 1, Part 2, Part 3, Part 4, Part 5, Part 6, Part 7 US/UK Terms, Part 8 US/UK Terms, Bonus Project
- The Scheepjes website page for the CAL
- Scheepjes official Tips and Tricks PDF
- My Tips and Tricks Post US Terms with some photo tutorials of tricky stitches
- My Tips and Tricks Post UK Terms with some photo tutorials of tricky stitches
- Scheepjes International Facebook Group
- Scheepjes Dutch Facebook Group
- YouTube videos for the CAL (Videos are in UK Terms): Right-Handed // Left-Handed
- Ravelry Pattern Page
- USA: Jimmy Beans Wool Metropolis Kit / Scrumptious Kit
- UK/Worldwide: WoolWarehouse Metropolis Kit / Scrumptious Kit
- View the Scheepjes Shops page to find a retailer near you!