
Hello lovely crafter! Welcome to Part 6 of the Colour Lab CAL! I’m so excited that this next part is finally released, and we can all get started working on it together. I published a Main Page and a Tips and Tricks page (US Terms // UK Terms), so if you haven’t read through those, you may wan to check them out!
If you don’t have your yarn yet, you can still get a kit, and that information is below. Be sure to read this whole post very carefully, including the Measurements and Gauge section for this part, as it has important information. There are tips throughout the post, so be sure to take a look at everything.
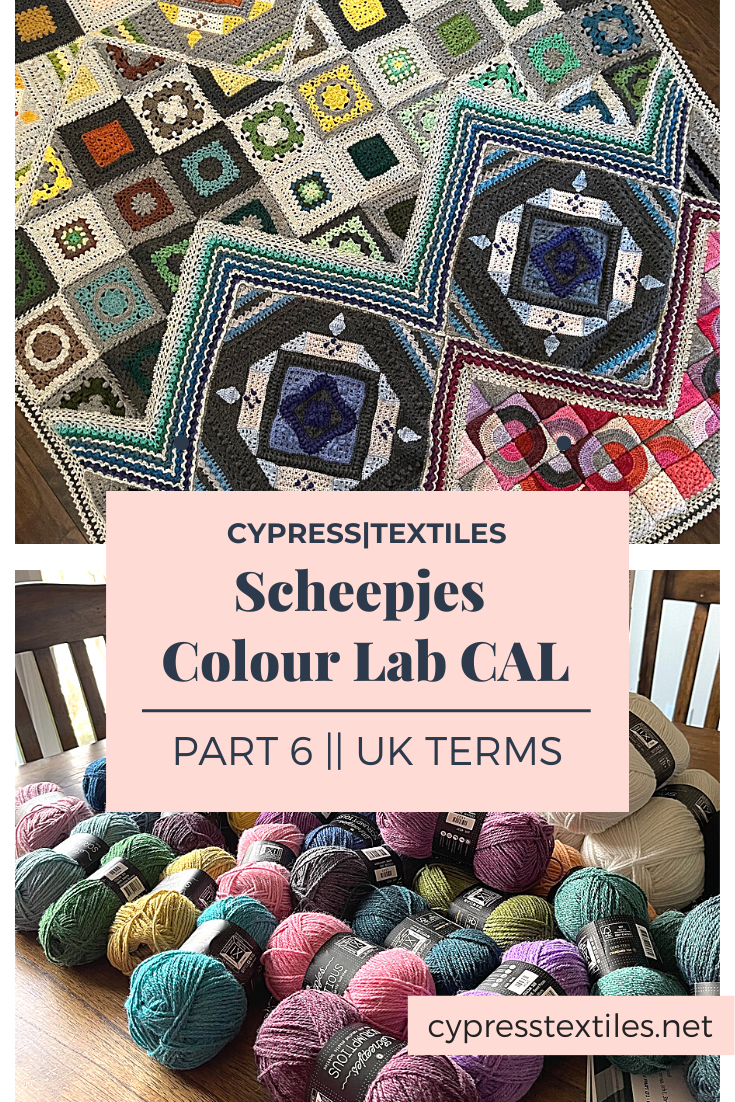
This tutorial is in UK Terms. If you are looking for US Terms, click here!

Related Links
As these sites become live, I will hyperlink them.
- Main Page with yarny info, kit info, and more
- Colour Lab CAL Blog Posts UK Terms: Main Page, Part 1, Part 2, Part 3, Part 4, Part 5, Part 6, Part 7 US/UK Terms, Part 8 US/UK Terms, Bonus Project
- Colour Lab CAL Blog Posts US Terms: Main Page, Part 1, Part 2, Part 3, Part 4, Part 5, Part 6, Part 7 US/UK Terms, Part 8 US/UK Terms, Bonus Project
- The Scheepjes website page for the CAL
- Scheepjes official Tips and Tricks PDF
- My Tips and Tricks Post US Terms with some photo tutorials of tricky stitches
- My Tips and Tricks Post UK Terms with some photo tutorials of tricky stitches
- Scheepjes International Facebook Group
- Scheepjes Dutch Facebook Group
- YouTube videos for the CAL (Videos are in UK Terms): Right-Handed // Left-Handed
- Ravelry Pattern Page
- USA: Jimmy Beans Wool Metropolis Kit / Scrumptious Kit
- UK/Worldwide: WoolWarehouse Metropolis Kit / Scrumptious Kit
- View the Scheepjes Shops page to find a retailer near you!
Where to Find Me
- Instagram: @cypresstextiles
- Facebook Page: CypressTextiles
- YouTube Channel: Rachele Carmona
- Pinterest: CypressTextiles
- Tumblr: CypressTextiles
- Etsy: CypressTextiles
- Ravelry: Rachele Carmona
- Teachable: Creative Art Blanket Course

Where to Get Support
During the CAL, if you need pattern support, there is definitely a ton of help out there! It has been proven time and time again that the Scheepjes CALs turn beginners into rock stars. Please do not worry if the pattern looks complicated, as this safety net of support points will be there for you, just a click away.
- Tips and Tricks Post (US Terms // UK Terms)- Your question could be answered here! (Gauge discussed as well)
- Facebook Group Support – Definitely join the Scheepjes Facebook Groups, so you can post progress pics, get inspired by others, and of course, ask for help. The groups are wonderful and very supportive! Worldwide: Scheepjes International Facebook Group and for Dutchies: Scheepjes Dutch Facebook Group
- CypressTextiles Website Support – For each pattern release week, I will make a blog post here on the CypressTextiles website where I will include many, many step-by-step photos of any possibly tricky parts. The entire pattern won’t be photographed here, but I will do my best to make everything clear in my still photos.
- YouTube Support – The very talented Esther of It’s All in a Nutshell has graciously made videos for this CAL which will appear weekly on her YouTube Channel. Her videos are well known worldwide, and she is an absolute treasure.

Pattern Release Timeline

Scheepjes will share the free individual patterns on Wednesday 12:00h CET on their website and in the Official Facebook Groups. Because some motifs require more work than others, some patterns take up a week, others two weeks. Here is an overview for you to mark your calendars!

Contents of this Post
Here is a short list of what you will find below:
- Blanket Pattern: Where to find the pattern and videos
- Yarn Colors: Which yarn colors are used in this part, so you can pull them out
- Blanket Progress: What will be worked in this part
- Measurement and Gauge: Things to keep in mind with your tension
- Tricky Parts and Weaving Ends: List of possible tricky bits and photos with explanations, and how to weave ends for this part
Be sure to read through everything before you get started, as some information may be good to know before you begin.
Blanket Pattern
The full Colour Lab CAL pattern will not be shared here on this blog, because the copyright lies with Scheepjes. The pattern for this part can be found on the Scheepjes Website or in the Scheepjes Facebook Group (International // Dutch). Esther from It’s All in a Nutshell has also published tutorial videos (Right-Handed // Left-Handed).
Please note that the original Scheepjes Pattern and the videos are all in UK Terms, but there are also US Terms patterns available, and on my website, I will publish both US and UK Terms blog posts for each part.

Blanket Progress
Here is a general minimalistic schematic of what your blanket in progress will look like after this part. I can’t believe how far we have come! The blanket is really progressing now.

In the photo below, Part 6 is the red-outlined portion.

My Demo Version
I’m making the Scrumptious version with randomized color layout. I’ll talk more about this in a separate blog post – yay!! This is my favorite part of the Colour Lab CAL, that there will be so many different blankets to marvel at, with everyone experimenting on their own layout.
Side note: This Scrumptious eye candy! Note: This kit is exclusive to the CAL – I recommend scooping it up if you are able!

Measurement and Gauge
During Part 6, we will take a break from motifs, and work back and forth on the motifs that we made during Part 5.
MEASUREMENTS
Metropolis version
Section 1: 9.5cm high
Section 2: 4.5cm high
Scrumptious version
Section 1: 11cm high
Section 2: 5.5cm high
As you work Part 6, you can match it up to the other parts periodically, and this will ensure that when you are ready to join them together next week, they are the same width.

Important Note about Gauge
For Part 6, I decided to give everyone a break from motifs, and instead we will work back and forth. While you are working, pay attention that your rows are not getting smaller due to lack of correct stitch count, and make sure that your work doesn’t start to shrink due to gauge tightening.
Tricky Parts and Weaving Ends
Note: If something has been covered in a previous part, I have not included it here, so make sure to read all posts as you go.
Some of the instruction for this part could potentially be tricky, so I have photo tutorials for them below. This is not a substitute for the original pattern, of course. In addition, as promised, I will show you how I weave my ends along the way. Note: I am right-handed, so these tutorials will be from a right-handed perspective. If you’re a lefty, you may need to adjust accordingly.
A Few General Notes
Here are some things that will be helpful as you work.
***Notes on working a large number of sts evenly across a long distance:
Check how many sts you need to make and over how much space you need to make them. Place a marker at the center, and then markers at the quarter midpoints, and you can divide the number of sts you need to make so that they are truly even. This takes the guesswork out, so that you don’t get to the end and realize you’ve run out of space or have too much space left. It will save you from frogging!
***Working stitches down the side of a “raw edge”
When you have to work stitches evenly down the side of a previous part, you will wonder where to place those stitches. It is neater to work “into” the tr stitches for example, rather than “around” them treating them like a ch-sp, because this can make a hole appear. I recommend working 1 st in a dc, and 2-3 sts into a decrease or a tr. this should work for your stitch counts as well as you work a certain number of sts across a side.
***Notes on weaving ends:
Weaving ends can be overwhelming. For this part, there are a number of yarn ends to weave in. I do not recommend leaving them to weave in when you’re done with the project. They need to be woven along the way so that when you’re done, you can really be done.
Also, seeing a zillion yarn ends hanging off of your project while you work can leave you frazzled and frustrated. Weaving them in as you go will help you stay positive and clear-minded and through any possibly tricky bits. Think of it as organizing your workspace.
You can use the tapestry needle provided for all of the ends as you go, which is what I instruct here. But remember, anytime you work a row of just dc, you can work over ends and they will be very well hidden and in my experience shouldn’t work themselves loose. Take advantage of these opportunities to work over your yarn ends if you like!
***Consider working in an assembly line manner to save time:
This isn’t part of the instruction, and it isn’t required. Just a little speed tip if you like! Sections 1-3 of the center motifs are identical, just with different color placements. If you have more experience with patterns and won’t be confused by this, you can work the motifs in assembly line fashion so that you have each line of instruction fresh in your mind and you can just work it 2 times in succession. This saves time and also keeps you from checking the pattern so much.
Let’s get started!
For the demo, I am going to use photos from my Whirl Project! In the photo below, my Section 1 is ready to join, and my Section 2 is in progress.

Section 1
This is the section that is along the upper edge of the motifs that we worked in Part 5.
Row 1
Row 1 will feel familiar as you should be getting the hang of making these long dc foundation rows in order to even out the “raw” edges to get ready for the next row. For this row, you will work 518 total dc and 3 dc2tog.
In the image below, the red arrow is pointing to the beginning of Row 1, where the yarn is joined with a slip stitch, and the dc row begins.
Helpful Tips:
- Be careful to make the correct number of sts between 3dc increases and dc2tog decreases. To make the stitches fall evenly across, you can bisect each side with a stitch marker, and then place another stitch marker at the halfway points so you have 4 sections, then divide the desired number of sts by 4 and work that amount of sts between each stitch marker. This way you know that you are placing your sts evenly.
- When you work across long stretches of “raw” edges like this, it is neater to work “into” the sides of the sts rather than working around them as if they were a chain space. I like to place 2 dc into the side of a tr st, and I put 1dc in the top half of the st, and 1dc in the bottom half of the st. This way, you aren’t creating holes in the project, and you have a neater look overall.

Row 2
Row 2 is a simple chain space row. You will be creating chain loops by making slip st, chaining, skipping sts, repeated across the row to the end. Note that you are starting the row with a slip stitch at the beginning again, with RS facing, rather than turning your work after Row 1.
In the photo below, you can see I have traced this chain loop row.
Helpful Tips:
- Pay attention to how many chain loops you end up with, as the number of chain spaces you have on each “leg” of the row are given to you in the pattern.
- If while you are working Row 2, you realize that you have made an incorrect number of dc sts on Row 1, I would advise that you simply “fudge” how many sts you are skipping when you make the chain loops, if your count is only off by 1-3 sts. The important thing is that you count your chain loops, and that the peak and valley sts are in the correct spot.
- Note that you are making slip st in this row, instead of dc. This is because on the next row, you will work over the slip st with a dc st. I wanted to bulk up the chain loop row by duplicating it, so to make it easier to create the dc sts on the next row, we are making ss instead.

Row 3
Row 3 is exactly the same as Row 2, but using dc sts instead of slip sts. If you look at the photo above, you can see the third row chain loops just above the row that I traced in red.
Row 4
Row 4 is the start of a 4-row repeat that will be repeated a total of 3 times over this and the next 11 rows. For this row, you will use tr sts and 2tr clusters.
In the photo below, I have circled the first st, which is a bit special to keep the stitch count. I have also marked out the 4 repeats of “(ch1, 2tr-cl, ch2, 2tr-cl) in next two dc” and then “ch1, (1tr, ch2, 1tr) in next dc“.
Along the bottom edge, you can see that the repeat reverses, but I have marked those repeats out for you as well.
Helpful Tips:
- Counting stitches will not be as important for this row because the sts are worked into the dc sts that you made in Row 3.
- Important: Pay attention to the repeats, to make sure you are working the correct sts. For example, you may look back at your work and realize that you worked 3 pairs of 2tr clusters in a row instead of 2 pairs in a row like you should be working. Try and avoid this by chanting your repeat as you work, or by looking back at your work after every “leg” of the row. This could alleviate a lot of frogging, as I found this row to be tedious due to the repeats. I was making mistakes left and right if I didn’t pay attention.

Row 5
Row 5 is worked from the WS, so you will have turned your work after Row 4. In this row, dtr bobbles are made by working dtr sts in between dc sts, just like on some of the squares we have worked in previous parts of the blanket.
If you look at the photo above you can see the bobbles that are worked in the chain space of the little “v-sts”. I made 2 dtr sts in the chain space of the 2tr cluster pairs, and then 1 dtr st in the chain space between 2 tr sts.
Row 6
Row 6 is very similar to Row 2, in that it is a chain loop row with slip sts. This row is straight forward and will zoom by!
I have marked with a red arrow the start of this row in the photo below. The contrast of the yarn colors makes the row easy to see.

Row 7
Row 7 is just like Row 3. The dc sts are worked over the slip sts so that you are actually working into the ch-sps of Row 5.
Rows 8-15
For these 8 rows, you will repeat Rows 4-7 twice, paying attention to what color to use.
Rows 16-18
For these 3 rows, you will use a different color each row, and work using the same 2tr cluster pairs and tr pairs that you made in Rows 4, 8, and 12.
In the photo below, I mark the section containing Rows 16-18. You can see that there may be a bit of misbehaving at the edges, but all will resolve when the piece is joined together and blocked.

Row 19
This row is a chain loop row made with dc sts. Count your chain loops to see if your numbers match the ones given in the pattern.

Section 2
This section is just like Section 1, but shorter. It is worked along the bottom edge of the motifs made in Part 5, and there are only 10 rows instead of the full 19 rows in Section 1. I omitted a couple of row repeats for this section.
In the photo below, I have made a start on Section 2. PS, that pink – whew, I love Whirl.

Panel Edging Round
This will be another dc round where we even everything out to get ready for the joining rows. Pay attention that you have the same amount of sts. There is a special section in the pattern for stitch counts for the panel edging round.
Join Panel 3 to Panel 2
This should feel very familiar! Join just as for joining Panel 2 to Panel 1, after you worked Part 4.
Bottom edge of Panel 4 – Chain Loop Row
The chain loop row is just like you worked previously as well. This is just to set up this panel for when you are ready to join the next panel onto it.
And that’s all for Part 6! Thank you so much for following along with the Colour Lab CAL, it’s been so fun seeing everyone’s creative color layouts, and I am amazed at your progress! If you are team sloth, that’s perfectly okay too 🙂
Happy crafting!
Rachele C.
The Art of Crochet Blankets (affiliate)
Support My Work
You’re supporting by just being here! You can read my blog (Start Here!), like and comment on socials, and message me for a chat. All of this supports my work free of charge!
- Affiliate links – Shopping through my links supports me at no additional cost to you as I get a small commission through my affiliates. Jimmy Beans Wool // WoolWarehouse // Amazon.com
- Buy my pattern book – I wrote a super neat crochet blanket pattern book, published under Penguin Random House. You can buy it here!
- Browse my self-published patterns – I have over a hundred patterns on Etsy and Ravelry
- Creative Art Blanket Course – Check it out on Teachable
Related Links
As these sites become live, I will hyperlink them.
- Main Page with yarny info, kit info, and more
- Colour Lab CAL Blog Posts UK Terms: Main Page, Part 1, Part 2, Part 3, Part 4, Part 5, Part 6, Part 7 US/UK Terms, Part 8 US/UK Terms, Bonus Project
- Colour Lab CAL Blog Posts US Terms: Main Page, Part 1, Part 2, Part 3, Part 4, Part 5, Part 6, Part 7 US/UK Terms, Part 8 US/UK Terms, Bonus Project
- The Scheepjes website page for the CAL
- Scheepjes official Tips and Tricks PDF
- My Tips and Tricks Post US Terms with some photo tutorials of tricky stitches
- My Tips and Tricks Post UK Terms with some photo tutorials of tricky stitches
- Scheepjes International Facebook Group
- Scheepjes Dutch Facebook Group
- YouTube videos for the CAL (Videos are in UK Terms): Right-Handed // Left-Handed
- Ravelry Pattern Page
- USA: Jimmy Beans Wool Metropolis Kit / Scrumptious Kit
- UK/Worldwide: WoolWarehouse Metropolis Kit / Scrumptious Kit
- View the Scheepjes Shops page to find a retailer near you!