Latest Posts

Cozy Corner Crochet Blanket

Welcome to the Cozy Corner crochet blanket beginner’s guide and CAL page. This page is meant to be a supplement to folks who purchased my book and would like some gentle support with their pattern. If you are looking for alternate yarn selection, videos to help with tricky stitches, and the fun that comes with working up a project in a group, then this is the page for you.

My plan is to break the blanket up into weekly segments, then list all of the weeks below. Dates will not be assigned, so you can jump in at any time and flow through the project. Ways to connect with the community are provided on this page. I can’t wait to get started!

[Jump back to main CAL page.]

Before you begin

Gather your materials

Use the yarn listed in the book, or use the following suggested alternate yarn. This section has affiliate links marked with an asterisk. Ordering through these links will gain me a small commission (at no additional cost to you) and helps to support my free patterns.

Alternate Yarn Option

I don’t have any particular alternate yarn option for this blanket as I think it looks so good in Colour Crafter, but you could definitely replace a few balls of color with the Velvet yarn to make a more dimensional piece. Have a look through the Velvet colors * – they’re great!

Colour Crafter Supplier

  WoolWarehouse*, Deramores*, Black Sheep Wools* or find a Scheepjes Retailer near you!


Weekly CAL timeline (11 Weeks)

As stated, I have omitted dates here, and shifted the focus from deadline-based to increment-based. This way you can focus on chunking the blanket up into bite-sized pieces and it doesn’t seem so overwhelming.

Don’t forget to take a photo of your progress each week so you can share it with everyone! (See “Get involved!” below.) I will choose 1 of your photos from Ravelry each week as the “model.”

  • Week 1: Work center panel of squares
  • Week 2: Work first solid color rounds
  • Week 3: Work about half of the next ring of squares
  • Week 4: Continue with the remainder of this ring of squares
  • Week 5: Work about half of the next ring of solid color
  • Week 6: Continue with the remainder of this ring of solid color
  • Week 7: Work about one-third of the squares on the final square ring
  • Week 8: Continue with the next third of the square ring
  • Week 9: Complete this ring of squares
  • Week 10: Work about half of the border
  • Week 11: Weave any remaining ends and finish Blanket Border. Block if desired or necessary.
  • All done! Head back to the book CAL main page to pick your next project!

Beginner’s guide

This section includes videos of tricky stitches where applicable, and any other significant notes to supplement your book.

If you are looking for a list of the basic stitches used in the book (with videos), head to the main book CAL page. There, you will also find tips like how I weave in my ends, how I block my work, and other general tips to make your work shine. There are no especially complex stitches for this project.

Get involved!

Ways to share your WIP pics (and any concerns!) with others in this CAL community.

Step 1: Take photos of your progress each week and make note of any questions you have.

Step 2: Share your photos and questions in any or all of the following ways. I recommend choosing the same day each week to post

Facebook

Post in my Facebook Group where the CALers will meet weekly to check in. PLEASE INCLUDE in your post:

  1. The name of the blanket – This way a simple search in the group will pull up all of the posts for that blanket. (Remember all 18 of the pattern CALs are going on at the same time.)
  2. What Week you are on in the CAL timeline

Example: If you’re on Week 3, put “Cozy Corner Blanket – Week 3” somewhere in your post.

Instagram

Post on Instagram using all three of these hashtags. This is important because it will help me see and share your posts on Instagram. It will also allow folks to click the hashtags and see everyone’s posts together in one place.

  1. #cypresstextiles
  2. #theartofcrochetblankets
  3. #cozycornerblanket

Ravelry

Here is the page for Cozy Corner. Interacting with the Ravelry page will help people find my book page and grow the CAL community. Plus, folks who are outside my social media circles can see your projects and be inspired. Go ahead and do the following two things.

  1. Put it in your favorites!
  2. Add your project to enter in the weekly giveaway. Each week I will select someone from the projects on Ravelry as a giveaway winner. More details to come!

Other ways to get involved with and support my book

  • Do you like my book? Add a nice review on Amazon.com.
  • Share a review of my book on your blog if you like! Head to my book info page to see the Press Release and Media Kit PDFs for all the deets. Send me the link to my email cypresstextiles @ gmail . com, and I will add a snippet of your review and link to your blog in the Reviews section.

Wanderlust Crochet Blanket

Welcome to the Wanderlust crochet blanket beginner’s guide and CAL page. This page is meant to be a supplement to folks who purchased my book and would like some gentle support with their pattern. If you are looking for alternate yarn selection, videos to help with tricky stitches, and the fun that comes with working up a project in a group, then this is the page for you.

My plan is to break the blanket up into weekly segments, then list all of the weeks below. Dates will not be assigned, so you can jump in at any time and flow through the project. Ways to connect with the community are provided on this page. I can’t wait to get started!

[Jump back to main CAL page.]

Before you begin

Gather your materials

Use the yarn listed in the book, or use the following suggested alternate yarn. This section has affiliate links marked with an asterisk. Ordering through these links will gain me a small commission (at no additional cost to you) and helps to support my free patterns.

Alternate yarn option

Scheepjes Colour Crafter (100% premium acrylic; 328 yd [300 m]/3.5 oz [100 g]):

  • #1123 Roermond (A), 1 ball
  • #1081 Gouda (B), 1 ball
  • #1130 Sittard (C), 1 ball
  • #1709 Burum (D), 1 ball
  • #1099 Wolvega (E), 2 balls
  • #1004 Veendam (F), 2 balls
  • #1001 Weert (G), 3 balls
  • #1722 Alphen (H), 1 ball
  • #2018 Pollare (I), 2 balls
  • #1080 Venlo (J), 1 ball

Supplier: WoolWarehouse*, Deramores*, Black Sheep Wools* or find a Scheepjes Retailer near you!

Colour Crafter has a great range of shades – feel free to mix and match different color schemes!

Weekly CAL timeline (9 Weeks)

As stated, I have omitted dates here, and shifted the focus from deadline-based to increment-based. This way you can focus on chunking the blanket up into bite-sized pieces and it doesn’t seem so overwhelming.

Don’t forget to take a photo of your progress each week so you can share it with everyone! (See “Get involved!” below.) I will choose 1 of your photos from Ravelry each week as the “model.”

  • Week 1: Make all of the Full Hexagon 1
  • Week 2: Make all of the Full Hexagon 2 and the Half Hexagons
  • Week 3: Join the Hexagons and Fill zig-zag sides.
  • Week 4: Work about half of Panel 2
  • Week 5: Continue with the remainder of Panel 2
  • Week 6: Make Triangles 1-5
  • Week 7: Work Chevron portion
  • Week 8: Square off Chevron
  • Week 9: Join Panels together and work border. Weave any remaining ends and block if desired or necessary.
  • All done! Head back to the book CAL main page to pick your next project!

Beginner’s guide

This section includes videos of tricky stitches where applicable, and any other significant notes to supplement your book.

If you are looking for a list of the basic stitches used in the book (with videos), head to the main book CAL page. There, you will also find tips like how I weave in my ends, how I block my work, and other general tips to make your work shine.

Special stitches for this pattern are listed in the Stitch Guide below.

Stitch Guide Videos

  • Beg Cluster over first 3 sts
  • Cluster over 3 sts
  • Large Cluster over # of sts indicated

Get involved!

Ways to share your WIP pics (and any concerns!) with others in this CAL community.

Step 1: Take photos of your progress each week and make note of any questions you have.

Step 2: Share your photos and questions in any or all of the following ways. I recommend choosing the same day each week to post

Facebook

Post in my Facebook Group where the CALers will meet weekly to check in. PLEASE INCLUDE in your post:

  1. The name of the blanket – This way a simple search in the group will pull up all of the posts for that blanket. (Remember all 18 of the pattern CALs are going on at the same time.)
  2. What Week you are on in the CAL timeline

Example: If you’re on Week 3, put “Wanderlust Blanket – Week 3” somewhere in your post.

Instagram

Post on Instagram using all three of these hashtags. This is important because it will help me see and share your posts on Instagram. It will also allow folks to click the hashtags and see everyone’s posts together in one place.

  1. #cypresstextiles
  2. #theartofcrochetblankets
  3. #wanderlustblanket

Ravelry

Here is the page for Wanderlust. Interacting with the Ravelry page will help people find my book page and grow the CAL community. Plus, folks who are outside my social media circles can see your projects and be inspired. Go ahead and do the following two things.

  1. Put it in your favorites!
  2. Add your project to enter in the weekly giveaway. Each week I will select someone from the projects on Ravelry as a giveaway winner. More details to come!

Other ways to get involved with and support my book

  • Do you like my book? Add a nice review on Amazon.com.
  • Share a review of my book on your blog if you like! Head to my book info page to see the Press Release and Media Kit PDFs for all the deets. Send me the link to my email cypresstextiles @ gmail . com, and I will add a snippet of your review and link to your blog in the Reviews section.

Multifaceted Crochet Blanket

Welcome to the Multifaceted crochet blanket beginner’s guide and CAL page. This page is meant to be a supplement to folks who purchased my book and would like some gentle support with their pattern. If you are looking for alternate yarn selection, videos to help with tricky stitches, and the fun that comes with working up a project in a group, then this is the page for you.

My plan is to break the blanket up into weekly segments, then list all of the weeks below. Dates will not be assigned, so you can jump in at any time and flow through the project. Ways to connect with the community are provided on this page. I can’t wait to get started!

[Jump back to main CAL page.]

Before you begin

Gather your materials

Use the yarn listed in the book, or use the following suggested alternate yarn. This section has affiliate links marked with an asterisk. Ordering through these links will gain me a small commission (at no additional cost to you) and helps to support my free patterns.

Alternate yarn option

Scheepjes Catona (100% cotton mercerized; 137 yd [125 m]/3.5 oz [100 g]):

  • #509 Baby Blue (A), 4 balls
  • #402 Silver Green (B), 2 balls
  • #399 Lilac Mist (C), 4 balls
  • #526 Ashes (D), 4 balls
  • #517 Ruby (E), 2 balls
  • #162 Black Coffee (F), 2 balls
  • #282 Ultra Violet (G), 2 balls
  • #242 Metal Grey (H), 2 balls
  • #528 Silver Blue (I), 2 balls
  • #406 Soft Beige (J), 2 balls
  • #238 Powder Pink (K), 2 balls
  • #391 Deep Ocean Green (L), 2 balls
  • #074 Mercury (M), 2 balls

Supplier: WoolWarehouse*, Deramores*, Knotty House*, Black Sheep Wools* or find a Scheepjes Retailer near you!


Weekly CAL timeline (14 Weeks)

As stated, I have omitted dates here, and shifted the focus from deadline-based to increment-based. This way you can focus on chunking the blanket up into bite-sized pieces and it doesn’t seem so overwhelming.

Don’t forget to take a photo of your progress each week so you can share it with everyone! (See “Get involved!” below.) I will choose 1 of your photos from Ravelry each week as the “model.”

  • Week 1: Work and join Motifs 1-19
  • Week 2:Work and join Motifs 20-38
  • Week 3: Work third row of Motifs
  • Week 4: Work fourth row of Motifs
  • Week 5: Work fifth row of Motifs
  • Week 6: Work sixth row of Motifs
  • Week 7: Work seventh row of Motifs
  • Week 8: Work eighth row of Motifs
  • Week 9: Work ninth row of Motifs
  • Week 10: Work tenth row of Motifs
  • Week 11:Work eleventh row of Motifs
  • Week 12: Work twelfth row of Motifs
  • Week 13: Fill zig-zag sides
  • Week 14: Work border and weave any remaining ends. Block if desired or necessary.
  • All done! Head back to the book CAL main page to pick your next project!

Beginner’s guide

This section includes videos of tricky stitches where applicable, and any other significant notes to supplement your book.

If you are looking for a list of the basic stitches used in the book (with videos), head to the main book CAL page. There, you will also find tips like how I weave in my ends, how I block my work, and other general tips to make your work shine.

Special stitches for this pattern are listed in the Stitch Guide below.

Stitch Guide

  • Beg Puff st and Puff st Video
  • Picot Video

Get involved!

Ways to share your WIP pics (and any concerns!) with others in this CAL community.

Step 1: Take photos of your progress each week and make note of any questions you have.

Step 2: Share your photos and questions in any or all of the following ways. I recommend choosing the same day each week to post

Facebook

Post in my Facebook Group where the CALers will meet weekly to check in. PLEASE INCLUDE in your post:

  1. The name of the blanket – This way a simple search in the group will pull up all of the posts for that blanket. (Remember all 18 of the pattern CALs are going on at the same time.)
  2. What Week you are on in the CAL timeline

Example: If you’re on Week 3, put “Multifaceted Blanket – Week 3” somewhere in your post.

Instagram

Post on Instagram using all three of these hashtags. This is important because it will help me see and share your posts on Instagram. It will also allow folks to click the hashtags and see everyone’s posts together in one place.

  1. #cypresstextiles
  2. #theartofcrochetblankets
  3. #multifacetedblanket

Ravelry

Here is the page for Multifaceted. Interacting with the Ravelry page will help people find my book page and grow the CAL community. Plus, folks who are outside my social media circles can see your projects and be inspired. Go ahead and do the following two things.

  1. Put it in your favorites!
  2. Add your project to enter in the weekly giveaway. Each week I will select someone from the projects on Ravelry as a giveaway winner. More details to come!

Other ways to get involved with and support my book

  • Do you like my book? Add a nice review on Amazon.com.
  • Share a review of my book on your blog if you like! Head to my book info page to see the Press Release and Media Kit PDFs for all the deets. Send me the link to my email cypresstextiles @ gmail . com, and I will add a snippet of your review and link to your blog in the Reviews section.

City Sunrise Crochet Blanket

Welcome to the City Sunrise crochet blanket beginner’s guide and CAL page. This page is meant to be a supplement to folks who purchased my book and would like some gentle support with their pattern. If you are looking for alternate yarn selection, videos to help with tricky stitches, and the fun that comes with working up a project in a group, then this is the page for you.

My plan is to break the blanket up into weekly segments, then list all of the weeks below. Dates will not be assigned, so you can jump in at any time and flow through the project. Ways to connect with the community are provided on this page. I can’t wait to get started!

[Jump back to main CAL page.]

Before you begin

Gather your materials

Use the yarn listed in the book, or use the following suggested alternate yarn. This section has affiliate links marked with an asterisk. Ordering through these links will gain me a small commission (at no additional cost to you) and helps to support my free patterns.

Alternate yarn option

Scheepjes Colour Crafter (100% premium acrylic; 328 yd [300 m]/3.5 oz [100 g]):

  • #1820 Goes (A), 2 balls

One ball each of the following colors:

  • #1034 Urk (B)
  • #1722 Alphen (C)
  • #1422 Eelde (D)
  • #2015 Bastogne (E)
  • #1710 Ermelo (F)
  • #1420 Bergen (G)
  • #1823 Coevorden (H)
  • #1709 Burum (I)
  • #1130 Sittard (J)
  • #1432 Heerlen (K)
  • #2006 Luik (L)
  • #1246 Maastricht (M)
  • #2009 Kortrijk (N)
  • #1256 The Hague (O)
  • #1711 Leeuwarden (P)
  • #1029 Breda (Q)
  • #1132 Leek (R)
  • #1723 Vlissingen (S)

Supplier: WoolWarehouse*, Deramores*, Black Sheep Wools* or find a Scheepjes Retailer near you!

Here is how the colors in Colour Crafter will look together:

Weekly CAL timeline (12 Weeks)

As stated, I have omitted dates here, and shifted the focus from deadline-based to increment-based. This way you can focus on chunking the blanket up into bite-sized pieces and it doesn’t seem so overwhelming.

Don’t forget to take a photo of your progress each week so you can share it with everyone! (See “Get involved!” below.) I will choose 1 of your photos from Ravelry each week as the “model.”

Photos and work by Ekaterina Havela. Thank you!

  • Week 1: Work about half of Block 1

  • Week 2: Continue with the remainder of Block 1

  • Week 3: Work about half of Block 2

  • Week 4: Continue with the remainder of Block 2

  • Week 5: Work about half of Block 3

  • Week 6: Continue with the remainder of Block 3
  • Week 7: Work about half of Block 4
  • Week 8: Continue with the remainder of Block 4
  • Week 9: Work all of Block 5
  • Week 10: Join the blocks on the horizontal seams
  • Week 11: Join the blocks on the vertical seams
  • Week 12: Work Border
  • All done! Head back to the book CAL main page to pick your next project!

Beginner’s guide

This section includes videos of tricky stitches where applicable, and any other significant notes to supplement your book.

If you are looking for a list of the basic stitches used in the book (with videos), head to the main book CAL page. There, you will also find tips like how I weave in my ends, how I block my work, and other general tips to make your work shine. There are no difficult stitches in this pattern.

Get involved!

Ways to share your WIP pics (and any concerns!) with others in this CAL community.

Step 1: Take photos of your progress each week and make note of any questions you have.

Step 2: Share your photos and questions in any or all of the following ways. I recommend choosing the same day each week to post

Facebook

Post in my Facebook Group where the CALers will meet weekly to check in. PLEASE INCLUDE in your post:

  1. The name of the blanket – This way a simple search in the group will pull up all of the posts for that blanket. (Remember all 18 of the pattern CALs are going on at the same time.)
  2. What Week you are on in the CAL timeline

Example: If you’re on Week 3, put “City Sunrise Blanket – Week 3” somewhere in your post.

Instagram

Post on Instagram using all three of these hashtags. This is important because it will help me see and share your posts on Instagram. It will also allow folks to click the hashtags and see everyone’s posts together in one place.

  1. #cypresstextiles
  2. #theartofcrochetblankets
  3. #citysunriseblanket

Ravelry

Here is the page for City Sunrise. Interacting with the Ravelry page will help people find my book page and grow the CAL community. Plus, folks who are outside my social media circles can see your projects and be inspired. Go ahead and do the following two things.

  1. Put it in your favorites!
  2. Add your project to enter in the weekly giveaway. Each week I will select someone from the projects on Ravelry as a giveaway winner. More details to come!

Other ways to get involved with and support my book

  • Do you like my book? Add a nice review on Amazon.com.
  • Share a review of my book on your blog if you like! Head to my book info page to see the Press Release and Media Kit PDFs for all the deets. Send me the link to my email cypresstextiles @ gmail . com, and I will add a snippet of your review and link to your blog in the Reviews section.

Ombre Stripe Crochet Blanket

Welcome to the Ombre Stripe crochet blanket beginner’s guide and CAL page. This page is meant to be a supplement to folks who purchased my book and would like some gentle support with their pattern. If you are looking for alternate yarn selection, videos to help with tricky stitches, and the fun that comes with working up a project in a group, then this is the page for you.

My plan is to break the blanket up into weekly segments, then list all of the weeks below. Dates will not be assigned, so you can jump in at any time and flow through the project. Ways to connect with the community are provided on this page. I can’t wait to get started!

[Jump back to main CAL page.]

Before you begin

Gather your materials

Use the yarn listed in the book, or use the following suggested alternate yarn. This section has affiliate links marked with an asterisk. Ordering through these links will gain me a small commission (at no additional cost to you) and helps to support my free patterns.

Alternate yarn option

Scheepjes Whirl (60% Cotton, 40% Acrylic; 1094 yd [1000 m]/7.6 oz [215 g])

  • I believe 5 Whirls will be enough for this size – pick any 5 colors, but I recommend the Ombre collection or the Aurora collection as they are amazing and will suit this project very well.
  • The gauge of Whirl is thinner than the gauge of the recommended yarn, but you can easily adapt the pattern to account for this difference. It is a very flexible pattern.

Supplier: WoolWarehouse*, Deramores*, Knotty House*, Black Sheep Wools* or find a Scheepjes Retailer near you!

Weekly CAL timeline (18 Weeks)

As stated, I have omitted dates here, and shifted the focus from deadline-based to increment-based. This way you can focus on chunking the blanket up into bite-sized pieces and it doesn’t seem so overwhelming.

Don’t forget to take a photo of your progress each week so you can share it with everyone! (See “Get involved!” below.) I will choose 1 of your photos from Ravelry each week as the “model.”

  • Weeks 1-18: Work 1 Strip per week! Easy peasy!


Beginner’s guide

This section includes videos of tricky stitches where applicable, and any other significant notes to supplement your book.

If you are looking for a list of the basic stitches used in the book (with videos), head to the main book CAL page. There, you will also find tips like how I weave in my ends, how I block my work, and other general tips to make your work shine.

Get involved!

Ways to share your WIP pics (and any concerns!) with others in this CAL community.

Step 1: Take photos of your progress each week and make note of any questions you have.

Step 2: Share your photos and questions in any or all of the following ways. I recommend choosing the same day each week to post

Facebook

Post in my Facebook Group where the CALers will meet weekly to check in. PLEASE INCLUDE in your post:

  1. The name of the blanket – This way a simple search in the group will pull up all of the posts for that blanket. (Remember all 18 of the pattern CALs are going on at the same time.)
  2. What Week you are on in the CAL timeline

Example: If you’re on Week 3, put “Ombre Stripe Blanket – Week 3” somewhere in your post.

Instagram

Post on Instagram using all three of these hashtags. This is important because it will help me see and share your posts on Instagram. It will also allow folks to click the hashtags and see everyone’s posts together in one place.

  1. #cypresstextiles
  2. #theartofcrochetblankets
  3. #ombrestripeblanket

Ravelry

Here is the page for Ombre Stripe. Interacting with the Ravelry page will help people find my book page and grow the CAL community. Plus, folks who are outside my social media circles can see your projects and be inspired. Go ahead and do the following two things.

  1. Put it in your favorites!
  2. Add your project to enter in the weekly giveaway. Each week I will select someone from the projects on Ravelry as a giveaway winner. More details to come!

Other ways to get involved with and support my book

  • Do you like my book? Add a nice review on Amazon.com.
  • Share a review of my book on your blog if you like! Head to my book info page to see the Press Release and Media Kit PDFs for all the deets. Send me the link to my email cypresstextiles @ gmail . com, and I will add a snippet of your review and link to your blog in the Reviews section.

Sweet Spring Crochet Blanket

Welcome to the Sweet Spring crochet blanket beginner’s guide and CAL page. This page is meant to be a supplement to folks who purchased my book and would like some gentle support with their pattern. If you are looking for alternate yarn selection, videos to help with tricky stitches, and the fun that comes with working up a project in a group, then this is the page for you.

My plan is to break the blanket up into weekly segments, then list all of the weeks below. Dates will not be assigned, so you can jump in at any time and flow through the project. Ways to connect with the community are provided on this page. I can’t wait to get started!

[Jump back to main CAL page.]

Before you begin

Gather your materials

Use the yarn listed in the book, or use the following suggested alternate yarn. This section has affiliate links marked with an asterisk. Ordering through these links will gain me a small commission (at no additional cost to you) and helps to support my free patterns.

Alternate yarn option

Scheepjes Cahlista (100% natural cotton; 93 yd [85 m]/1.75 oz [50 g]):

  • #105 Bridal White (A), 18 balls
  • #282 Ultra Violet (B), 4 balls
  • #512 Lime (C), 5 balls
  • #115 Hot Red (D), 6 balls
  • #515 Emerald (E), 4 balls
  • #252 Watermelon (F), 4 balls
  • #114 Shocking Pink (G), 6 balls
  • #521 Deep Violet (H), 4 balls
  • #398 Coral Rose (I), 6 balls

Supplier: WoolWarehouse*, Deramores*, Knotty House*, Black Sheep Wools* or find a Scheepjes Retailer near you!

Here is what these yarn colors look like in Cahlista. Of course replace them as you see fit. Cahlista has a wide range of color!

Weekly CAL timeline (19 Weeks)

As stated, I have omitted dates here, and shifted the focus from deadline-based to increment-based. This way you can focus on chunking the blanket up into bite-sized pieces and it doesn’t seem so overwhelming.

Don’t forget to take a photo of your progress each week so you can share it with everyone! (See “Get involved!” below.) I will choose 1 of your photos from Ravelry each week as the “model.”

Work and photo by Gwen Kok (IG user @stitchgwen)

  • Week 1: Work all of Blocks A-C
  • Week 2: Work all of Blocks D-F
  • Week 3: Work all of Blocks G-I
  • Week 4: Work all of Blocks J-L
  • Week 5: Work all of Blocks M-O
  • Week 6: Work all of Blocks P-R
  • Week 7: Work all of Blocks S-U
  • Week 8: Work all of Blocks V-X
  • Week 9: Work all of Blocks Y, Z, AA, and BB
  • Week 10: Work Block CC
  • Week 11: Join about half of the Blocks
  • Week 12: Continue joining Blocks until complete
  • Week 13: Make Foundation Rnds
  • Week 14: Work Fill Space 1
  • Week 15: Work Fill Space 2
  • Week 16: Work Fill Space 3
  • Week 17: Work Fill Space 4
  • Week 18: Work Foundation Rnd and first Granny-Stripe section of Border
  • Week 19: Work second Granny-Stripe section of Border and Final Border
  • All done! Head back to the book CAL main page to pick your next project!

Beginner’s guide

This section includes videos of tricky stitches where applicable, and any other significant notes to supplement your book.

If you are looking for a list of the basic stitches used in the book (with videos), head to the main book CAL page. There, you will also find tips like how I weave in my ends, how I block my work, and other general tips to make your work shine.

Special stitches for this pattern are listed in the Stitch Guide below.

Stitch Guide

  • beg dc4tog [over 5 sts] video
  • dc2tog [over 3 sts] video
  • dc4tog [over 5 sts] video
  • sc2tog [over 3 sts] video

Get involved!

Ways to share your WIP pics (and any concerns!) with others in this CAL community.

Step 1: Take photos of your progress each week and make note of any questions you have.

Step 2: Share your photos and questions in any or all of the following ways. I recommend choosing the same day each week to post

Facebook

Post in my Facebook Group where the CALers will meet weekly to check in. PLEASE INCLUDE in your post:

  1. The name of the blanket – This way a simple search in the group will pull up all of the posts for that blanket. (Remember all 18 of the pattern CALs are going on at the same time.)
  2. What Week you are on in the CAL timeline

Example: If you’re on Week 3, put “Sweet Spring – Week 3” somewhere in your post.

Instagram

Post on Instagram using all three of these hashtags. This is important because it will help me see and share your posts on Instagram. It will also allow folks to click the hashtags and see everyone’s posts together in one place.

  1. #cypresstextiles
  2. #theartofcrochetblankets
  3. #sweetspringblanket

Ravelry

Here is the page for Sweet Spring. Interacting with the Ravelry page will help people find my book page and grow the CAL community. Plus, folks who are outside my social media circles can see your projects and be inspired. Go ahead and do the following two things.

  1. Put it in your favorites!
  2. Add your project to enter in the weekly giveaway. Each week I will select someone from the projects on Ravelry as a giveaway winner. More details to come!

Other ways to get involved with and support my book

  • Do you like my book? Add a nice review on Amazon.com.
  • Share a review of my book on your blog if you like! Head to my book info page to see the Press Release and Media Kit PDFs for all the deets. Send me the link to my email cypresstextiles @ gmail . com, and I will add a snippet of your review and link to your blog in the Reviews section.

Island Wildflower Blanket Pattern – UK Terms

It all started with the idea to update all of my older written patterns, slowly, one at a time, in 2017… Wildflower has been a “wildly” popular pattern and I had a fantastic idea to update it using Scheepjes Stone Washed. And include a drumroll here…..

I converted it to a FREE pattern for your enjoyment!

Want the yarn kit to make this blanket? Click here to see it in my storefront! (affiliate link)

This pattern is in UK Terms. Looking for the Island Wildflower Blanket in US Terms? Click here!

img_9732

Swoon-worthy palette! Stone Washed is bae..

Description

Island Wildflower is a simple design using elements of crochet that you have probably used in the past, such as sunburst squares and granny stitch, and combining them in a new way. The result is a unique and opulent piece that will garner endless compliments. Use any favorite color combination as this beauty will make your stash yarn look great! Included are joining and border instruction, and feel free to use the motifs in a blanket or bag. Browse hashtag #IslandWildflowerBlanket on social media for color palette ideas!

Pattern is written by Rachele Carmona and was tested by the lovely Teresa Davis, who has also provided the gorgeous photographs for this pattern and all related blog posts at CypressTextiles.net.

Additional Information:

Yarny info: Find Stone Washed at Deramores* ,  LoveKnitting* (US), WoolWarehouse* (UK), and KnottyHouse* (CA), and other Scheepjes retailers. – scroll down for yarn amounts

img_9728

Materials

Yarn Scheepjes Stone Washed (78% Cotton, 22% Acrylic; 130m/50g)

  • Yarn A: 814 x 10 balls

1 ball each of the following:

  • Yarn B: 805
  • Yarn C: 826
  • Yarn D: 825
  • Yarn E: 816
  • Yarn F: 824
  • Yarn G: 808
  • Yarn H: 827
  • Yarn I: 823
  • Yarn J: 835
  • Yarn K: 834
  • Yarn L: 811
  • Yarn M: 806 x 2 balls

Notions

  • US Size 5mm hook, US Size 4.25mm hook (for final rnd of border only), Tapestry needle for weaving ends
  • Gauge: Motif 1, worked through Rnd 4, measures 4.75in; Finished blanket measures about 40x60in

Abbreviations – UK Terminology

  • as folls as follows
  • beg beginning
  • bet between
  • ch(s) chain(s)
  • ch-sp(s) chain space(s)
  • ch-1 sp(s) chain 1 space(s): number denotes number of chains in chain space
  • corner-sp corner space
  • dc double crochet
  • tr2tog treble crochet 2 together: (yoh, insert hook in next st/sp, yoh, pull up loop, yoh, draw through 2 loops) twice, yoh, draw through all loops
  • tr3tog treble crochet 3 together: (yoh, insert hook in next st/sp, yoh, pull up loop, yoh, draw through 2 loops) 3 times, yoh, draw through all loops
  • dec decrease
  • dtr double treble crochet
  • htr half treble crochet
  • incl including
  • lp(s) loop(s)
  • rep(s) repeat(s)
  • RS right side
  • dc2tog double crochet 2 together: (insert hook in next st/sp, yoh, pull up loop) twice, yoh, draw through all loops
  • ss slip stitch(es)
  • st(s) stitch(es)
  • tog together
  • tr treble crochet
  • ttr triple treble crochet
  • WS wrong side
  • yoh yarn over hook

Special Abbreviations

  • beg cl beginning cluster: beg tr, (yoh, insert hook in st/sp indicated, yoh, pull up loop, yoh, draw yarn through 2 loops on hook) 3 times, yoh, draw yarn through all 4 loops on hook – beg tr does not count as a st in this case
  • beg tr beginning treble crochet: dc, ch 1 (counts as 1 tr)
  • beg tr3tog beg tr, tr2tog – beg tr does not count as a st in this case
  • beg ttr beginning triple treble crochet: dc, ch 3 (counts as 1 ttr)
  • beg puff st Elongate the working loop slightly until it is the height of a normal puff st, then work puff st as normal
  • beg dtr beginning double treble crochet: dc, ch 2 (counts as 1 dtr)
  • cl cluster: (yoh, insert hook in st/sp indicated, yoh, pull up loop, yoh, draw yarn through 2 loops on hook) 4 times, yoh, draw yarn through all 5 loops on hook
  • picot ch 2, dc in top side bars of previous stitch
  • puff st yoh, (insert hook in st/sp indicated, yoh, pull up loop) 3 times, yoh, draw yarn through all loops on hook

IMG_3699.jpg

Instructions

Notes: All motifs are made using larger hook and joined as-you-go to create center panel, then zig-zag sides are straightened by working back and forth until tringle gap is filled. A simple border completes the piece.

Motif 1 (Make 50)

Color Distribution

There are 12 colors and 50 motifs. Using Yarns B-K, make 4 centers each, and using Yarns L and M, make 5 centers each. Then, using Yarns B and C, add rnd 2 onto 5 centers each, and using Yarns D-M, add rnd 2 onto 4 centers each. Use Yarns D and E to add rnd 3 onto 5 motifs each, and use Yarns B and C, and F-M to add rnd 3 to 4 motifs each. Use Yarns F and G to add rnd 4 to 5 motifs each, and Yarns B-E and H-M to add rnd 4 to 4 motifs each. Be sure not to repeat colors on a single motif.

Rnd 1 Using first color of motif, make a sl knot, ch 4 and ss in fourth ch from hook to make ring. All in ring: Beg tr, 19 tr, cut yarn and finish off. [20 tr]

Rnd 2 Join next color with ss in any st, and beg dtr in same st. (Ch 1, dtr) in all rem sts, ch 1, ss in beg dtr, cut yarn and finish off. [20 dtr, 20 ch-sp]

Rnd 3 Join next color with ss in any dtr. Beg puff st in same st, (ch 2, puff st in next dtr) 19 times, ch 2, ss in beg puff st, cut yarn and finish off. [20 puff st, 20 ch-sp]

Rnd 4 Join next color with ss in any ch-sp. Beg cl in same space. (ch 2, cl in next ch-sp) 19 times, ch 2, ss in beg cl, cut yarn and finish off. [20 cl, 20 ch-sp]

Note: Rnd 5 (Joining/squaring round) will be worked in the joining section. You can work all of Motifs 1 and 2 through Rnd/Row 4 for the perfect on-the-go project.

IMG_9095.JPG 

Motif 2 (Make 20)

Row 1 (RS) Using first color of motif, make a sl knot, ch 3, and ss in third ch from hook to make ring. All in ring: Beg tr, 10 tr, cut yarn and finish off, turn. [11 tr]

Row 2 Join next color in first st, and beg dtr in same st. (Ch 1, dtr in next st) 10 times, cut yarn and finish off, turn. [11 dtr, 10 ch-sp]

Row 3 Join next color with ss in first st. In same st: (Beg tr, ch 1, puff st). (Ch 2, puff st in next dtr) 10 times, ch 1, tr in same st as final puff st, cut yarn and finish off. Do not turn. [11 puff st, 2 tr, 10 ch-2 sp, 2 ch-1 sp]

Row 4 With RS still facing, join next color in first st. Beg tr in same st, tr bet first tr and puff st, (ch 2, cl in next ch-sp) 10 times, ch 2, tr bet puff st and final st, tr in final st, cut yarn and finish off. [4 tr, 10 cl, 11 ch-sp]

Join motifs to make center panel

Note: Motifs will be joined with RS facing, using a “join as you go” method worked in 10 rows from top to bottom of blanket. Each row of motifs is made of 5 of Motif 1 and 2 of Motif 2, as seen in Schematic. Color placement is random.

Lay out all 70 motifs in a zig-zag formation using Schematic as a guide.

Top row of motifs

First motif (Located in upper left corner) Join Yarn A with ss in first st. Beg dtr in same st, ch 2, 3 dtr in ch-sp, * 3 tr in next ch-sp, 3 dc in next 2 ch-sps, 3 tr in next ch-sp, ** (3 dtr, ch 3, 3 dtr) – corner made in next ch-sp, work from * to ** 1 time, 3 dtr in ch-sp, ch 2, dtr in first st, cut yarn and finish off.

Second motif (The second motif in the top row of the blanket) Join Yarn A with ss in any ch-sp, (beg dtr, ch 3, 3 dtr) in same ch-sp – note: this corner will be the bottom right corner of the motif, work from * to **, make corner, work from * to **,  (3 dtr, ch 1, ss in adjacent ch-sp on completed motif, ch 1, 3 dtr) in next ch-sp, ss bet 3-dtr group and 3-tr group on completed motif, 3 tr in next ch-sp on motif in progress, ss bet 3-tr group and 3-dc group on completed motif, (3 dc in next ch-sp on motif in progress, ss after 3-dc group) twice, 3 tr in next ch-sp, ss after 3-tr group, (3 dtr, ch 1, ss in adjacent ch-sp, ch 1, 3 dtr) in next ch-sp, work from * to **, 2 dtr in first corner to complete it, ss in beg dtr, cut yarn and finish off.

Continue to join in this manner across the row, joining one side to the adjacent completed motif, ending with a Motif 2.

Next row of motifs

First motif Work as for first motif of previous row, but join 1 side to adjacent motif above.

Second motif Work as for previous row of squares, but work the third corner as follows: (3 dtr, ss in top adjacent corner ch-sp, and ss in left hand side adjacent corner ch-sp, 3 dtr) in corner ch-sp, join next side as before, work remainder of motif without joining as before.

Join all remaining rows of squares in this manner until bottom of blanket is reached and all motifs are joined on. When fourth motif joins onto 3 others, always work the corner join as indicated above – 2 slip sts, 1 in the top motif’s corner, and one in the left hand side motif’s corner. When all motifs are joined, triangle gaps are ready to be filled in so that blanket is a complete rectangle.

Full Triangle Gap (Work four times)

Note: On first occurrence of a new st, please refer to Special Abbreviations section on p 2.

Row 1 With RS facing, join Yarn A with ss in first ch of ch-3 corner-sp before triangle gap, dc in same ch, dc 53 evenly across to center, dc 54 evenly up the other side, placing final dc in the ch-3 corner-sp at the end of the row, turn. [108 dc]

Row 2 Beg tr3tog over first 3 sts, * (ch 1, sk 1, tr) 24 times, ch 1, skip 1,* tr2tog over next st and fourth st, skipping over center 2 sts as folls: YO, insert hook in next st, pull up lp, YO, draw yarn through 2 lps on hook, YO, sk 2 sts, insert hook in next st, YO, pull up lp, YO, draw yarn through 2 lps on hook, YO, draw yarn through all 3 lps on hook, rep from * to *, tr3tog over final 3 sts, turn. [2 tr3tog, 1 tr2tog, 48 tr, 50 ch-sp]

Row 3 Beg tr3tog over first 3 sts – Note: “first 3 sts” here means dec st, ch-sp, and tr, * (ch 2, dc in next tr st) 22 times, ch 2 * tr2tog over next 2 tr sts skipping over 2 ch-sps and center dec, rep from * to *, tr3tog over final 3 sts, turn. [2 tr3tog, 1 tr2tog, 44 dc, 46 ch-sp]

Row 4 Dc2tog over first 2 sts – Note: these first 2 sts are the tr3tog and ch-2 sp. * (ch 2, dc in next ch-sp) 21 times, ch 2 * dc2tog over next 2 ch-sps skipping over center dec, rep from * to *, dc2tog over final 2 sts, turn. [3 dc2tog, 42 dc, 44 ch-sp]

Row 5 Beg tr3tog over first 3 sts, * (ch 2, dc in next ch-sp) 20 times, ch 2 * tr2tog over next 2 ch-sps, rep from * to *, tr3tog over final 3 sts, turn. [2 tr3tog, 1 tr2tog, 40 dc, 42 ch-sp]

Row 6 dc2tog over first 2 sts, * (ch 2, dc in next ch-sp) 19 times, ch 2 * dc2tog over next 2 ch-sps, rep from * to *, dc2tog over final 2 sts, turn. [3 dc2tog, 38 dc, 40 ch-sp]

Row 7 Beg tr3tog over first 3 sts, * (ch 1, sk 1, tr) 18 times, ch 1, sk 1,* tr2tog over next 2 ch-sps, rep from * to *, tr3tog over final 3 sts, turn. [2 tr3tog, 1 tr2tog, 36 tr, 38 ch-sp]

Row 8 dc2tog, * dc in 34 sts across side *, dc2tog over next 2 tr sts, rep from * to * across next side, dc2tog in final 2 sts, turn, cut yarn and finish off. [3 dc2tog, 68 dc]

Row 9 (RS) Join leftover of Yarn B-M with ss in first st, beg tr3tog over first 3 sts, * tr in 30 sts *, tr5tog over next 5 sts incl center dec, rep from * to *, tr3tog over final 3 sts, turn. [2 tr3tog, 1 tr5tog, 60 tr]

Row 10 Beg dtr4tog over first 4 sts, * (ch 1, sk 1, dtr) 12 times, ch 1, sk 1 *, dtr2tog over next st and fifth st as before skipping over center 3 sts, rep from * to *, dtr4tog over final 4 sts, cut yarn and finish off, turn. [2 dtr4tog, 1 dtr2tog, 24 dtr, 26 ch-sp]

Row 11 Join leftover of yarn B-M with ss in first st, beg tr3tog over first 3 sts, * (ch 1, puff st in dtr) 10 times, ch 1 *, puff st in next dtr. Without making any chs, puff st in next tr, rep from * to *, tr3tog over final 3 sts, cut yarn and finish off, do not turn. [2 tr3tog, 22 puff st, 22 ch-sp]

Row 12 (RS) Join leftover of Yarn B-M with ss in first st, beg tr3tog over first 3 sts, * (ch 1, cl in ch-1 sp 9 times, ch 1 *, cl in next ch-sp, without making any chs, cl in next ch-sp, rep from * to *, tr3tog over final 3 sts, cut yarn and finish off, do not turn.  [2 tr3tog, 20 cl, 20 ch-sp]

Row 13 (RS) Join Yarn A with ss in first st, dc2tog over first 2 sts, * dc in 17 chs/cls across, * dc2tog over next 2 ch-sps, rep from * to *, dc2tog over final 2 sts, turn. [3 dc2tog, 34 dc]

Row 14 Beg tr3tog over first 3 sts, * (ch 1, sk 1, tr) 6 times, ch 1, sk 1,* tr2tog over next st and fourth st skipping over center 3 sts, rep from * to *, tr3tog over final 3 sts, turn. [2 tr3tog, 1 tr2tog, 12 tr, 14 ch-sp]

Row 15 Beg tr3tog over first 3 sts, * (ch 2, dc in next tr st) 4 times, ch 2 * tr2tog over next 2 tr sts, rep from * to *, tr3tog over final 3 sts, turn. [2 tr3tog, 1 tr2tog, 8 dc, 10 ch-sp]

Row 16 dc2tog over first 2 sts, * (ch 2, dc in next ch-sp) 3 times, ch 2 * dc2tog over next 2 ch-sps, rep from * to *, dc2tog over final 2 sts, turn. [3 dc2tog, 6 dc, 8 ch-sp]

Row 17 Beg tr3tog over first 3 sts, * (ch 2, dc in next tr st) 2 times, ch 2 * tr2tog over next 2 ch-sps, rep from * to *, tr3tog over final 3 sts, turn. [2 tr3tog, 1 tr2tog, 4 dc, 6 ch-sp]

Row 18 dc2tog over first 2 sts, * ch 2, dc in next ch-sp, ch 2 * dc2tog over next 2 ch-sps, rep from * to *, dc2tog over final 2 sts, turn. [3 dc2tog, 2 dc, 4 ch-sp]

Row 19 Work a Beg tr6tog as folls: Beg tr, make tr5tog by working a tr up to the final step (leaving 1 lp on the hook) in all 4 chain-2 spaces, and in final st, making 6 “legs” total for the decrease, cut yarn and finish off. [1 tr6tog]

Half Triangle Gap (Work twice)

Row 1 With RS facing, join Yarn A with ss in first ch of ch-3 corner-sp before triangle gap, dc in same ch, dc 53 evenly across row, turn. [54 dc]

Row 2 Beg tr3tog over first 3 sts, (ch 1, sk 1, tr) 24 times, ch 1, skip 1, tr3tog over final 3 sts, turn. [2 tr3tog, 24 tr, 25 ch-sp]

Row 3 Beg tr3tog over first 3 sts, (ch 2, dc in next tr st) 22 times, ch 2, tr3tog over final 3 sts, turn. [2 tr3tog, 22 dc, 23 ch-sp]

Row 4 df2tog over first 2 sts, (ch 2, dc in next ch-sp) 21 times, ch 2, dc2to over final 2 sts, turn. [2 dc2tog, 21 dc, 23 ch-sp]

Row 5 Beg tr3tog over first 3 sts, (ch 2, dc in next ch-sp) 20 times, ch 2, tr3tog over final 3 sts, turn. [2 tr3tog, 20 dc, 21 ch-sp]

Row 6 dc2tog over first 2 sts, (ch 2, dc in next ch-sp) 19 times, ch 2, dc2tog over final 2 sts, turn. [2 dc2tog, 19 dc, 20 ch-sp]

Row 7 Beg tr3tog over first 3 sts, (ch 1, sk 1, tr) 18 times, ch 1, sk 1, tr3tog over final 3 sts, turn. [2 tr3tog, 18 tr, 19 ch-sp]

Row 8 dc2tog, dc in 34 sts across side, dc2tog in final 2 sts, turn, cut yarn and finish off. [2 dc2tog, 34 dc]

Row 9 (RS) Join leftover of yarn B-M with ss in first st, beg tr3tog over first 3 sts, tr in 30 sts, tr3tog over final 3 sts, turn. [2 tr3tog, 30 tr]

Row 10 Beg dtr4tog over first 4 sts, (ch 1, sk 1, dtr) 12 times, ch 1, sk 1, dtr4tog over final 4 sts, cut yarn and finish off, turn. [2 dtr4tog, 12 dtr, 13 ch-sp]

Row 11 Join leftover of yarn B-M with ss in first st, beg tr3tog over first 3 sts, (ch 1, puff st in dtr) 10 times, ch 1, tr3tog over final 3 sts, cut yarn and finish off, do not turn. [2 tr3tog, 10 puff st, 11 ch-sp]

Row 12 (RS) Join leftover of yarn B-M with ss in first st, beg tr3tog over first 3 sts, (ch 1, cl in ch-1 sp) 9 times, ch 1, tr3tog over final 3 sts, cut yarn and finish off, do not turn. [2 tr3tog, 9 cl, 10 ch-sp]

Row 13 (RS) Join Yarn A with ss in first st, dc2tog over first 2 sts, dc in 17 chs/cls across, dc2tog over final 2 sts, turn. [2 dc2tog, 17 dc]

Row 14 Beg tr3tog over first 3 sts, (ch 1, sk 1, tr) 6 times, ch 1, sk 1, tr3tog over final 3 sts, turn. [2 tr3tog, 6 tr, 7 ch-sp]

Row 15 Beg tr3tog over first 3 sts, (ch 2, dc in next tr st) 4 times, ch 2, tr3tog over final 3 sts, turn. [2 tr3tog, 4 dc, 5 ch-sp]

Row 16 dc2tog over first 2 sts, (ch 2, dc in next ch-sp) 3 times, ch 2, dc2tog over final 2 sts, turn. [2 dc2tog, 3 dc, 4 ch-sp]

Row 17 Beg tr3tog over first 3 sts, (ch 2, dc in next tr st) 2 times, ch 2, tr3tog over final 3 sts, turn. [2 tr3tog, 2 dc, 3 ch-sp]

Row 18 dc2tog over first 2 sts, ch 2, dc in next ch-sp, ch 2, dc2tog over final 2 sts, turn. [2 dc2tog, 1 dc, 2 ch-sp]

Row 19 Beg tr4tog as folls: Beg tr, make tr3tog, cut yarn and finish off. [1 tr4tog]

Ch 4 - P1 - Color Garden.jpg

Border

Rnd 1 (dc rnd) Join Yarn A with ss in upper right corner of blanket, * 3 dc in corner st, work 114 dc evenly across short side, 3 dc in corner, 157 dc evenly across long side, rep from * 1 time, ss in first st.

Rnd 2 (eyelet rnd) (Beg tr, ch 3, tr) in corner-sp * (ch 1, sk 1, tr) across, ch 1, sk 1, (tr, ch 3, tr) in corner-sp, rep from * 3 times omitting final corner on third rep, ch 1, sk 1, ss in beg tr.

Rnd 3 (dc rnd) * 3 dc in corner st, dc in all sts/chs across side, rep from * 3 times omitting corner on third rep, ss in first st.

Rnd 4 (tr/picot rnd) Change to smaller hook for this rnd. All in corner st: (Beg tr, 3 tr, ch 2, dc in previous tr – picot made, 4 tr), * sk 1, (2 tr, picot, 2 tr) in next st, ** sk 2, (2 tr, picot, 2 tr) in next st, rep from ** across, to corner, sk 1, (4 tr, picot, 4 tr) in corner st, rep from * 3 times omitting corner on final repeat, ss in beg tr, cut yarn and finish off.

Dutch Rose Blanket Pattern – UK Terms

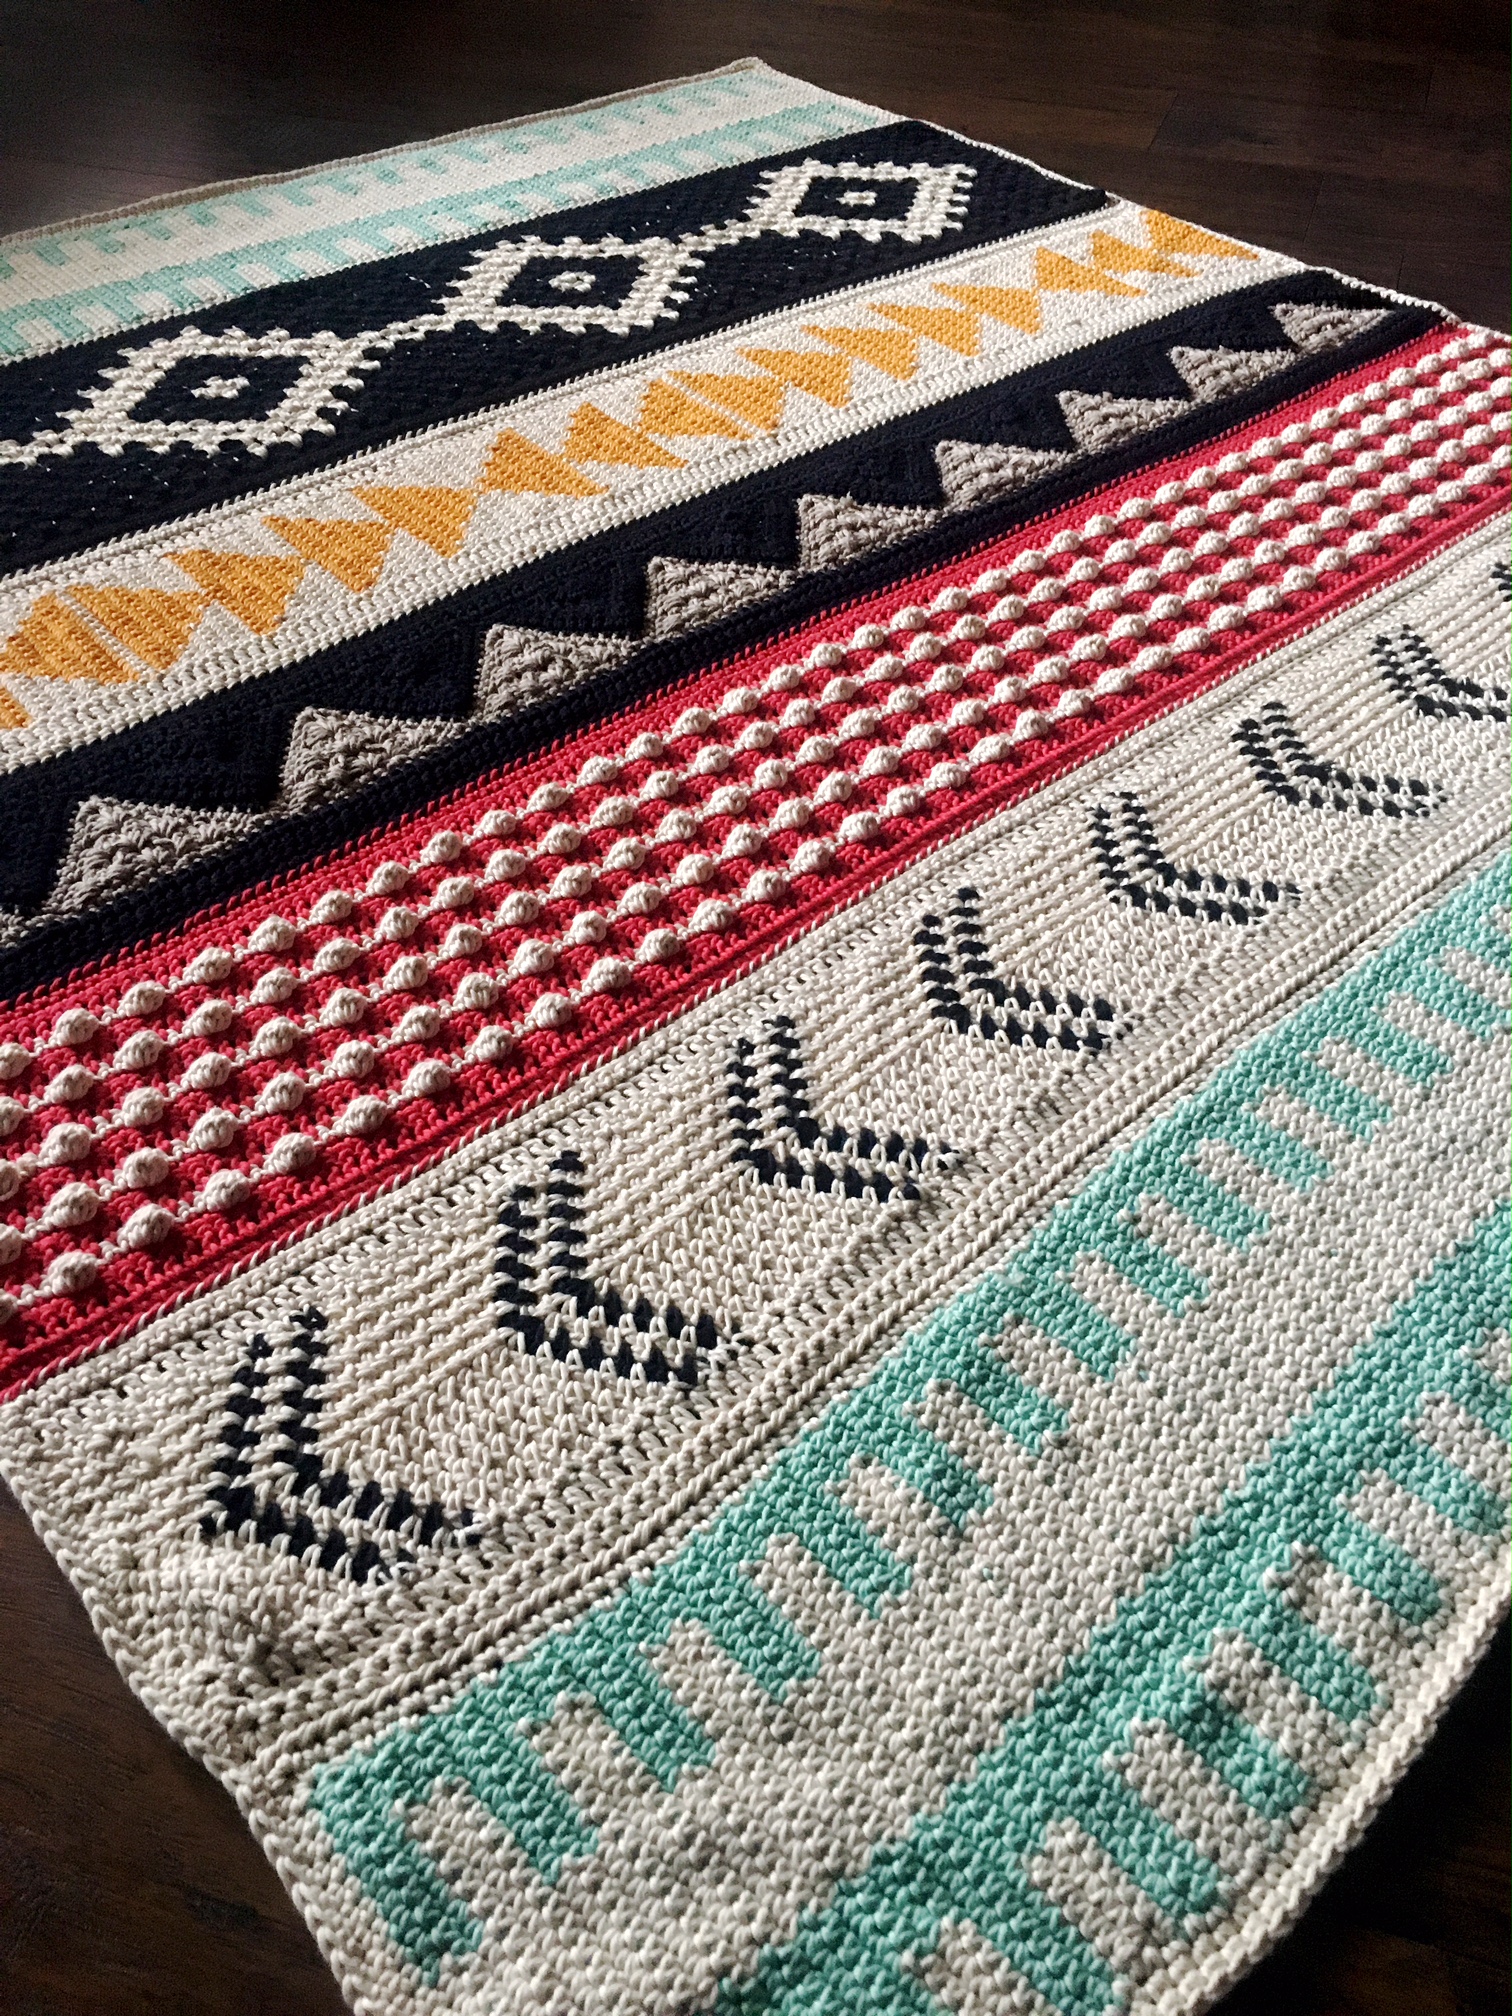
You Can Crochet This! – Dutch Rose Crochet Blanket Pattern – UK Terms

Check out the other patterns for absolute beginners in the You Can Crochet This! series.

This pattern is in UK Terms. Looking for the Dutch Rose Blanket pattern in US Terms? Click here!

Note: If you would like video instruction for any part of the blanket, here is the YouTube playlist; however, be aware, the stitch narration is in US Terms. If this is confusing, simply mute the video.

Find the yarn kit for this blanket in my yarn kit storefront at my affiliate link! (Shopping through this link will help support CypressTextiles and doesn’t cost you anything extra.)

Introduction

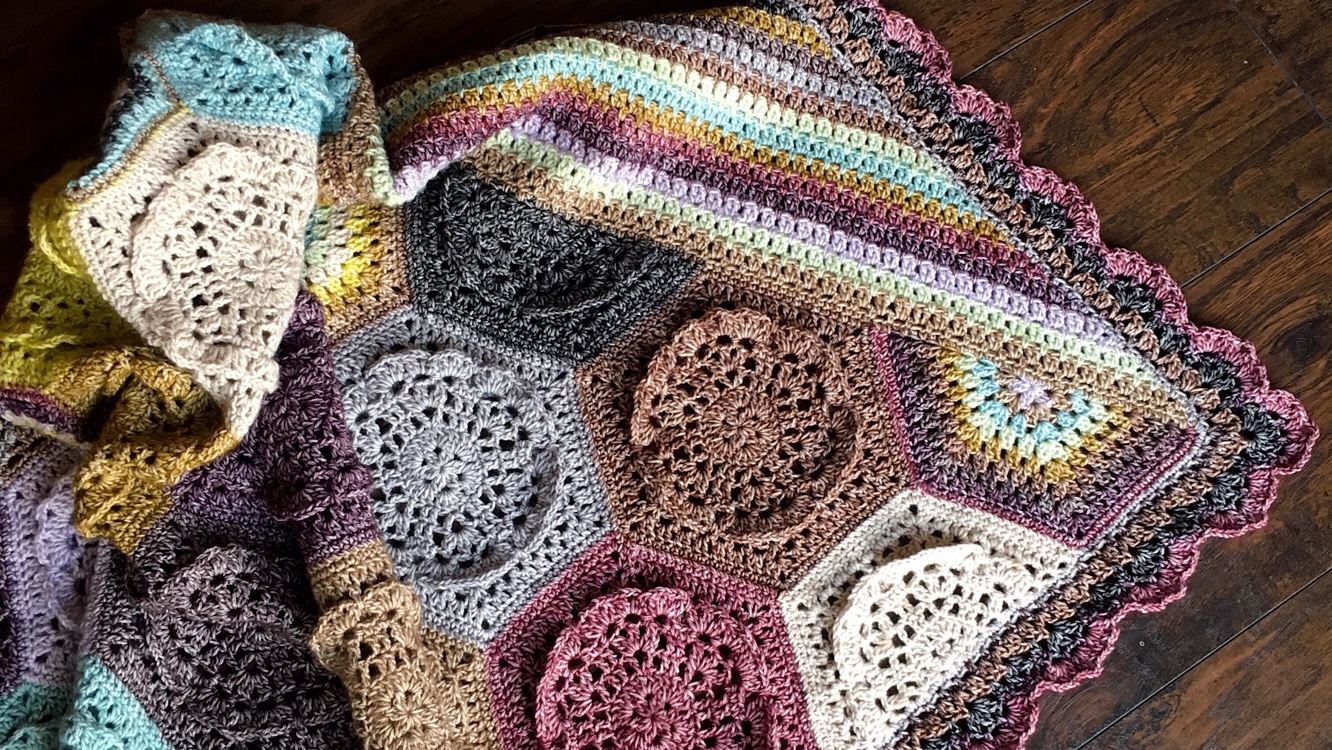
Dutch Rose is a piece that is near and dear to my heart. It is the perfect embodiment of the type of blanket that I love to design. Elegant rose hexagons get cozy with granny stripe hexagons, and a clever striped corner, only to be set off by a gorgeous lace border. Heavenly!

Hashtags: #DutchRoseBlanket, and as always #CypressTextiles

Materials

Here are the 14 colors of Stone Washed I used (1 ball each)

  • Yarn A: 804
  • Yarn B: 814
  • Yarn C: 810
  • Yarn D: 832
  • Yarn E: 830
  • Yarn F: 831
  • Yarn G: 812
  • Yarn H: 809
  • Yarn I: 829
  • Yarn J: 815
  • Yarn K: 818
  • Yarn L: 819
  • Yarn M: 813
  • Yarn N: 803

Sizing

This blanket measures about 36x45in when finished and blocked.

Motif measures about 7.5in at widest point, before blocking

Layout


Layout discussion

Schematics Overview

Layout 1 – Original Layout / Small (36x45in)

Quick reference stats

Yarn amounts – listed on main page

To make:

  • Motif 1 – 11 total, 1 each in Yarns A, B, C, D, E, F, G, H, I, J, K
  • Motif 2 – 6 total, 1 each in Yarns F, G, J, L, M, N
  • Motif 3 – 3 total, in mixed stripes
  • Motif 4 – 2 total, in mixed stripes

Layout 2 – Resized Original Layout / Large (70x94in)

Quick reference stats

Yarn amounts – 4 balls each of yarns listed on main page

To make:

  • Motif 1 – 69 total, 5 each in Yarns A, B, C, D, E, F, G, H, I, J, K, L, and M, plus 4 in Yarn N
  • Motif 2 – 12 total, 1 each in Yarns A, B, C, D, E, F, G, H, I, J, K
  • Motif 3 – 14 total, in mixed stripes
  • Motif 4 – 5 total, in mixed stripes

Layout 3 – Choose Your Own Adventure!

Creating blanket layout with striped corner

Below is a layout example that will not work. The striped corner can not end by cutting into a motif. As shown below in the red circle, the line for the striped corner is located at a point where a half hexagon is cut into. The green line below that will work as it does not cut into any motifs. This will change the blanket size of course, so if you choose your own adventure, and you want to keep the striped corner, you have to play around with the layout to make the blanket wider or taller.

Creating blanket layout omitting striped corner

Easy peasy! Refer to the large or small layouts to see that the top and bottom rows of hexagons need to start and end with a half-hexagon motif. Once you have that in place, your blanket can be as large or small as you’d like.


Pattern Instructions

Dutch Rose Hexagon Motif

Stitch Descriptions for Dutch Rose Hexagon and Half Hexagon Motifs (UK Terms)

  • cl (yoh, insert hook in st/sp, yoh, pull up lp, yoh, draw through 2 lps) 2 times, yoh, draw through all lps
  • ch chain
  • beg beginning
  • beg cl (beg tr, tr) – counts as 1 cl – Note: the beg tr does not count as a st here. When joining the round, join with slip st in the tr
  • beg tr (dc, ch 1) – counts as 1 tr
  • beg large shell All in same ch-sp: [beg cl, (ch 2, cl) 2 times]
  • beg small shell All in same ch-sp: (beg cl, ch 3, cl)
  • dc double crochet
  • large shell All in same ch-sp: [(cl, ch 2) 2 times, cl]
  • lp(s) loop(s)
  • rep repeat
  • RS/WS right side/wrong side of work
  • sk skip
  • small shell All in same ch-sp: (cl, ch 3, cl)
  • sp space
  • ss slip stitch
  • st(s) stitch(es)
  • tr treble crochet
  • yoh yarn over hook

Chart Instruction – Note: Stitch key on chart is in US terms

Written Instruction

Note: Full and half hexagon motifs are worked according to the yarn color quantity listed on pages 2 and 3. The motifs are joined using whip stitch to make the blanket body, an optional striped corner is added, and a simple lace border completes the piece.

Rnd 1 Sl knot, ch 3, ss in first st to make ring. All in ring: Beg large shell, ch 2, large shell, ch 2, ss in beg cl. [2 large shell, 2 ch-sp]

Rnd 2 (Beg tr, 3 tr) in ch-2 sp, 5 tr in next 5 ch-sps, tr in first ch-sp, ss in beg tr. [30 tr]

Rnd 3 (Beg tr, ch 2, tr) in next st, * ch 1, sk 1, tr in 2 sts, ch 1, sk 1, (tr, ch 2, tr) in next st, rep from * 5 times omitting final (tr, ch 2, tr), ss in beg tr. [24 tr, 6 ch-2 sp, 12 ch-1 sp]

Rnd 4 Beg large shell in ch-2 sp, * ch 1, tr in next 2 tr, ch 1, large shell in ch-2 sp, rep from * 5 times omitting final large shell, ss in beg cl [6 large shell, 12 tr, 12 ch-sp]

Rnd 5 * (dc in ch-2 space, ch 3) 2 times, dc in ch-1 sp, dc in next 2 tr, dc in ch-1 sp, ch 3, rep from * 5 times, ss in first dc. [36 dc, 18 ch-sp]

Rnd 6 Beg small shell in ch-3 sp, (large shell in next 2 ch-sps, small shell in next ch-sp) 6 times omitting final small shell, ss in beg cl, cut yarn. [12 large shell, 6 small shell]

Note: the ch-3 sps of the small shells will be oriented toward your 6 hexagon “corners.”

Rnd 7 Turn the motif over to the WS. Work only this round with WS facing. Reattach yarn with ss around first sc of Rnd 5, * (dc around dc st, ch 3) 2 times, sk 2 dc, (dc around next dc, ch 3) 2 times, rep from * 5 times, ss in first dc, turn back to RS. [24 dc, 24 ch-sp]

Rnd 8 Work this round into the ch-sps of Rnd 7. (Beg tr, ch 2, 2 tr) in ch-3 sp, * 3 tr in next 3 ch-3 sps, (2 tr, ch 2, 2 tr) in next ch-sp, rep from * 5 times omitting final (2tr, ch 2, 2tr), tr in first ch-sp to complete corner, ss in beg tr. [78 tr, 6 ch-sp]

Rnd 9 * (dc, ch 3, dc) in ch-2 sp, ch 3, sk 2, dc, ch 3, sk 1, dc, ch 3, sk 1, make a special dc to anchor Rnd 6 as follows: before you make dc in the next st, insert your hook between the 2 large shells of Rnd 6. Then insert the hook through that next dc to make your dc st. This will make a “tack” in Rnd 6, anchoring it. (Ch 3, sk 1, dc) 2 times, ch 3, rep from * 5 times, ss in first dc. [56 dc (6 of these are the special dc), 56 ch-sp]

Rnd 10 (Beg tr, ch 2, 2 tr) in corner ch-sp, * 2 tr in next 6 ch-sps, (2 tr, ch 2, 2 tr) in corner ch-sp, rep from * 5 times omitting final (2tr, ch 2, 2 tr), tr in first ch-sp to complete corner, ss in beg tr. [96 tr, 6 ch-sp]

Rnd 11 (3 dc in ch-2 sp, dc in 16 tr to next corner) 6 times, ss in first dc, cut yarn leaving a tail about 12-15in long for whip stitch join later. [114 dc]


Half Dutch Rose Hexagon Motif

Chart Instruction – Note: Stitch key on chart is in US terms

Written Instruction

Note: Full and half hexagon motifs are worked according to the yarn color quantity listed on pages 2 and 3. The motifs are joined using whip stitch to make the blanket body, an optional striped corner is added, and a simple lace border completes the piece.

Row 1 (WS) Sl knot, ch 3, ss in first st to make ring. All in ring: Beg tr, ch 1, large shell, ch 1, tr, turn. [large shell, 2 tr, 2 ch-sp]

Row 2 (Beg tr, 2 tr) in ch-1 sp, 5 tr in next 2 ch-sps, 3 tr in ch-1 sp, turn. [16 tr]

Row 3 (Beg tr, ch 1, tr) in first st, (ch 1, sk 1, tr in next 2 sts, ch 1, sk 1, (tr, ch 2, tr) in next st) 3 times, turn. [14 tr, 2 ch-2 sp, 8 ch-sp]

Row 4 (Beg tr, ch 1, cl) in ch-1 sp, (ch 1, tr in 2 tr, ch 1, large shell) 3 times omitting final large shell, (cl, ch 1, tr) in final ch-1 sp, turn. [2 large shell, 2 cl, 8 tr, 8 ch-sp]

Row 5 (Dc, ch 2, dc) in ch-1 sp, * ch 3, dc in ch-1 sp, dc in 2 dc, dc in ch-1 sp, (ch 3, dc in ch-2 sp) 2 times, rep from * 2 times omitting final (ch 3, dc), ch 2, dc in same ch-1 sp as previous dc st, turn. [20 dc, 8 ch-3 sp, 2 ch-2 sp]

Row 6 (Beg tr, ch 1, cl) in ch-2 sp, (large shell in next 2 ch-sps, small shell in next ch-sp) 3 times omitting final small shell, (cl, ch 1, tr) in final ch-2 sp, do not cut yarn. [6 large shells, 2 small shells, 2 cl, 2 tr, 2 ch-1 sp]

Row 7 Turn motif to WS and work this row on the WS. Elongate the working lp so you can comfortably reach the final dc from Row 5. dc around that st, ch 2, * (dc around next dc, ch 3) 2 times, sk 2 dc, (dc around next dc, ch 3) 2 times, rep from * 2 times omitting final ch, dc around final dc, cut yarn. [14 dc, 11 ch-3 sp, 2 ch-2 sp]

Row 8 With WS still facing, work this row into the ch-sps of Row 7. Reattach yarn with ss in first ch-2 sp, (beg tr, ch 1, 2 tr) in same ch-sp, * 3 tr in next 3 ch-sps, (2 tr, ch 2, 2 tr) in next ch-sp, rep from * 2 times omitting final tr, turn. [41 tr, 2 ch 2 sp, 2 ch-1 sp]

Row 9 (Dc, ch 3, dc) working through both ch-2 sp from Row 8 and ch-1 sp from Row 6. This will anchor Row 6. * ch 3, sk 2, ch 3, sk 1, dc, ch 3, sk 1, make special dc as for Motif 1, (ch 3, sk 1, dc) 2 times, ch 3, (dc, ch 3, dc) in ch-2 sp, rep from * 2 times working final (dc, ch 3, dc) through both ch-sps as for beg of row, turn. [23 dc, 22 ch-sp]

Row 10 (Beg tr, ch 1, 2 tr) in ch-3 sp, * 2 tr in next 6 ch-sps, (2 tr, ch 2, 2 tr), rep from * 2 times omitting final (ch 1, 2 tr), tr in same st as previous 2 tr, turn. [50 tr, 2 ch-2 sp, 2 ch-1 sp]

Row 11 (RS) 2 dc in ch-sp, (dc in 16 sts to ch-sp, 3 dc in ch-sp) 3 times omitting final dc, cut yarn leaving a long tail. [58 dc]


Granny Stripe Hexagon Motif

Stitch Descriptions for Granny Stripe and Half Granny Stripe Motifs (UK Terms)

  • ch chain
  • beg beginning
  • beg tr (dc, ch 1) – counts as 1 tr
  • dc double crochet
  • lp(s) loop(s)
  • rep repeat
  • RS/WS right side/wrong side of work
  • sk skip
  • sp space
  • ss slip stitch
  • st(s) stitch(es)
  • tr treble crochet
  • yoh yarn over hook

Written Instruction

Note: Each round is made using a different color yarn. Use any colors.
Rnd 1 Sl knot, ch 3, ss in first st to make ring. All in ring: Beg tr, (ch 1, 2 tr) 5 times, ch 1, tr, ss in beg tr, cut yarn. [12 tr, 6 ch-sp]
Rnd 2 Join new color with ss in any ch-sp, (beg tr, ch 1, 2 tr) in same ch-sp, * ch 1, (2 tr, ch 1, 2 tr) in ch-sp, rep from * 5 times omitting final (2 tr, ch 1, 2 tr), tr in first ch-sp to complete corner, ss in beg tr, cut yarn. [24 tr, 12 ch-sp]
Rnds 3-7 Join new color with ss in any corner ch-sp, (beg tr, ch 1, 2 tr) in same ch-sp, * (ch 1, 2 tr in next ch-sp) across to next corner ch-sp, ch 1, (2 tr, ch 1, 2 tr) in corner ch-sp, rep from * 5 times omitting final corner, tr in first ch-sp to complete corner, ss in beg tr, cut yarn. [After Rnd 7: 84 tr, 42 ch-sp]
Rnd 8 Join new color with ss in any corner ch-sp, (beg tr, ch 2, 2 tr) in same ch-sp, * 2 tr in all ch-sps across to next corner ch-sp, (2 tr, ch 2, 2 tr) in corner ch-sp, rep from * 5 times omitting final corner, tr in first ch-sp to complete corner, ss in beg tr, cut yarn. [96 tr, 6 ch-sp]
Rnd 9 Join new color with ss in any corner, (3 dc in ch-2 sp, dc in 16 tr to next corner) 6 times, ss in first dc, cut yarn leaving a long tail. [114 dc]


Half Granny Stripe Hexagon Motif

Written Instruction

Note: Each row is made using a different color yarn. Use any colors. Do not turn this motif after each row. All rows are worked with RS facing by simply attaching new yarn in the first ch-sp of the previous row.
Join yarn = Join new color with ss in first ch-sp
Row 1 Sl knot, ch 3, ss in first st to make ring. All in ring: Beg tr, (ch 1, 2 tr) 3 times, ch 1, tr, cut yarn. [8 tr, 4 ch-sp]
Row 2 Join yarn, (beg tr, ch 1, 2 tr) in same ch-sp, * ch 1, (2 tr, ch 1, 2 tr) in ch-sp, rep from * 2 times omitting final tr, cut yarn. [14 tr, 7 ch-sp]
Rows 3-7 Join yarn, (beg tr, ch 1, 2 tr) in same ch-sp, * (ch 1, 2 tr in next ch-sp) across to next corner ch-sp, ch 1, (2 tr, ch 1, 2 tr) in corner ch-sp, rep from * 2 times omitting final tr, cut yarn. [After Row 7: 44 tr, 22 ch-sp]
Row 8 Join yarn, (beg tr, ch 1, 2 tr) in same ch-sp, * 2 tr in next 6 ch-sps, (2 tr, ch 2, 2 tr) in corner ch-sp, rep from * 2 times omitting final (ch 1, 2 tr), tr in same st as previous 2 tr, cut yarn. [50 tr, 2 ch-2 sp, 2 ch-1 sp]
Row 9 Join yarn, 2 dc in same ch-sp, (dc in 16 sts to ch-sp, 3 dc in ch-sp) 3 times omitting final dc, cut yarn leaving a long tail. [58 dc]


Whip Stitch Join for Hexagons


Written Instruction:

Join motifs to make blanket body

Lay out motifs according to blanket schematic if you are working Layout 1. For Layouts 2-5, choose a motif placement that suits you. Whip st motifs together as follows:

  1. Hold 2 motifs with wrong sides together, and use the long tail of one of the motifs.
  2. Using your hook, pull the long tail through the center dc of both motifs, back to front.
  3. Insert the hook front to back through both loops of the next st to the left, on both motifs.
  4. Grab the long tail and pull it all the way through to the front of the piece, allowing the whip st to rest flush against the top edge of the motifs.
  5. Repeat steps 3 and 4 across, inserting the hook through both motifs from front to back in the next st to the left, and pulling the yarn through to the front.
  6. When the next corner is reached, if there are no more subsequent sides to join, you can weave the excess tail, cutting it down if necessary.
  7. If there are more sides to join, do so, then cut yarn shorter if needed and weave in.
  8. Important: Do not pull yarn tail to tighten whip sts. I prefer to let the whip sts rest flush and snug against the joined edge. Then when you open the motifs flat, you have a cute sewn edge with nice little stitches, giving a very cozy (but not messy) handmade look.

Add Striped Corner (if your layout has one)

Written Instruction:

special tr2tog = yoh, insert hook under ch-sp, yoh, pull up lp, yoh, draw yarn through 2 lps on hook, yoh, insert hook in final dc, yoh, pull up lp, yoh, draw yarn through 2 lps on hook, yoh, draw yarn through all 3 lps on hook.

Note: Stripes are made by changing color before every WS row beginning with row 4. 2 rows are worked per color. Use any colors.

Row 1 (RS) Join yarn with ss in top right corner of blanket. Dc 139 evenly down to top left corner of blanket, turn. [139 dc]

Row 2 (Dc, ch 2, sk 1) across row to final st, dc, turn. [70 dc, 69 ch-sp]

Row 3 Beg tr in first ch-sp, 2 tr in all ch-sps across, stopping before final ch-sp, make special tr2tog, cut yarn, turn. [135 tr, 1 tr2tog]

Row 4 Join new yarn with ss in top of tr2tog, dc in same st, (ch 2, sk 2 tr, dc between 2-tr “pairs”) across row, turn leaving final 2 tr and beg tr from previous row unworked. [68 dc, 67 ch-sp]

Row 5 Beg tr in first ch-sp, 2 tr in all ch-sps across, stopping before final ch-sp, (tr, special tr2tog) in final ch-sp, cut yarn, turn. [132 tr, 1 tr2tog]

Row 6 Join new yarn with ss in top of tr2tog, dc in same st, ch 2, sk 1, dc between skipped st and next st, (ch 2, sk 2, dc between 2-tr “pairs”) across row, turn leaving final 2 tr and beg tr from previous row unworked. [66 dc, 65 ch-sp]

Rows 7-10 Rep Rows 3 and 4 2 times.

Row 11 Work as for Row 5.

Row 12 Work as for Row 6.

Rows 13-54 Rep Rows 3-12 4 times, then work Rows 3 and 4 once more.

Row 55 Dc in ch-sp, (tr, special tr2tog) in next ch-sp, cut yarn and finish off.


Straighten zig-zag edges on short side(s) of blanket

Using any color, fill each little zig-zag dip independently as follows:

Row 1 With RS facing, ss in corner st of first motif, dc in same st and in next 19 sts, dc in 20 sts on next motif, placing final dc in corner dc , turn. [40 dc]

Row 2 Sk first st, (dc in next st, ch 3, sk 2) 6 times, dc in next 2 sts, (ch 3, sk 2, dc in next st) 6 times, turn. [14 dc, 12 ch-sp]

Row 3 Ss in first ch of ch-sp, beg tr in same ch-sp, (dc, htr, tr) in next ch-sp, (ch 1, 2 tr in next ch-sp) 3 times, ch 1, tr in next 2 ch-sps, (ch 1, 2 tr in next ch-sp) 3 times, ch 1, (tr, htr, dc) in next ch-sp, tr in final ch-sp, turn. [18 tr, 2 htr, 2 dc, 8 ch-sp]

Row 4 Sk first st, ss in 3 sts, (dc in next ch-sp, ch 3) 3 times, dc in next 2 ch-sps, (ch 3, dc in next ch-sp) 3 times, turn. [8 dc, 6 ch-sp]

Row 5 Ss in first ch of ch-sp, beg tr in same ch-sp, (dc, htr, tr) in next ch-sp, ch 1, tr in next 2 ch-sps, ch 1, (tr, htr, dc) in next ch-sp, tr in next ch-sp, turn. [4 tr, 2 htr, 2 dc, 2 ch-sp]

Row 6 Sk first st, ss in 3 sts, dc in 2 ch-sps, cut yarn and finish off. [2 dc]


Petal Lace Border


Written Instruction:

Note: For a “no waste” border, I used remaining colors randomly. When I ran out of a color, I attached the next color and continued. For this reason, I did not list the colors I used for the border, nor did I instruct to cut yarn after rounds, or join new yarn. A word on resizing blanket border – Round 1 st count: (3dc corner, repeat of 12 + 7) 4 times.

Rnd 1 Using any color, ss in top right corner of blanket. (3 dc in corner, make 139 dc evenly across short side, 3 dc in corner, make 163 dc evenly across long side) 2 times, ss in first st. [616 dc]

Rnd 2 * (dc, ch 2, dc) in corner st, (ch 2, sk 1, dc) across to next corner st, ch 2, sk 2, rep from * 3 times, ss in first dc.

Rnd 3 (Beg tr, ch 3, tr) in corner ch-sp, * [2 tr in next 2 ch-sps, (tr, ch 2, tr) in next ch-sp] across to within 2 ch-sps of next corner, 2 tr in next 2 ch-sps, (tr, ch 3, tr) in corner ch-sp, rep from * 3 times omitting final corner, ss in beg tr.

Rnd 4 [Beg cl, (ch 2, cl) 4 times] in ch-3 sp, * (ch 2, dc between 2-tr pairs, ch 2, large shell in ch-2 sp, ch 2, dc between 2-tr pairs, ch 2, small shell in ch-2 sp) repeating across, ending with a large shell in the final ch-2 sp of this side, ch 2, dc between 2-tr pairs, ch 2, [cl, (ch 2, cl) 5 times] in corner ch-3 sp, rep from * 3 times omitting final corner, ss in beg cl.

Rnd 5 * (dc in ch-2 sp, ch 3) 4 times, [dc in next 2 ch-sps, (ch 3, dc in next ch-2 sp) 2 times, ch 3, dc in next 2 ch-sps, ch 3, dc in next ch-sp, ch 3] repeating across ending with dc in 2 ch-sps after final large shell of row, ch 3, rep from * 3 times, ss in first dc.

Rnd 6 Beg large shell in ch-sp, * small shell in next ch-sp, large shell in next ch-sp, [dc in next ch-sp, (large shell, small shell, large shell) over 3 ch-sps, dc in next ch sp] repeating across to corner, large shell in next ch-sp, rep from * 3 times omitting final large shell, ss in beg cl, cut yarn.

Yay! All done! Weave ends and give yourself a fist bump!

Happy Little Tree Blanket Pattern – UK Terms

cypress _ textiles1

You Can Crochet This! – Happy Little Tree Crochet Blanket Pattern – UK TERMS

Check out the other patterns for absolute beginners in the You Can Crochet This! series.

This pattern is in UK Terms. Looking for this pattern in US Terms? Click here!

You can find the yarn kit for this project in my storefront via this affiliate link!


Hi, y’all! Welcome to my first pattern tutorial geared toward absolute beginners. Happy Little Tree is an engaging, yet stunningly simple piece that you’ll enjoy making as much as you enjoy the finished product. Plus, Bob Ross, am I right??

photo_2


Introduction

After spending so much time staring longingly at my Scheepjes Stone Washed and River Washed Cutie Pie Pack, I finally decided to design something for it. One of my goals for 2018 is to have a no-waste spirit, so I wanted to use every inch of yarn. I thought a fun and quirky granny square blanket would be perfect. Join as-you-go to make sure nothing is wasted, and of course since this blanket is in the Relaxghan Series (designed with peace in mind), I had to give it a special, peaceful name.

Who exudes peace more than Bob Ross? So the Happy Little Tree Blanket was born.

Hashtags: #HappyLittleTreeBlanket #CypressTextiles

photo-12

Materials

  • Yarn: Scheepjes “Stone Washed and River Washed Cutie Pie Colour Pack” (78% Cotton, 22% Acrylic; 50 x 10g balls, 26m) // Qty: 1 Colour Pack (Total: 500g Sport weight yarn)
  • Hook: US Size 3.75mm for blanket body, and US Size 3.5mm for border
  • Tapestry needle for weaving ends
  • Want to use the XL Colour Pack instead? Click here!

Sizing

This blanket measures about 30x30in when finished

Layout

Happy-Little-Tree.png


Pattern Instructions

Rose Hexagon Motif

Chart Instruction

Written Instruction and Step-by-Step Photos

Stitch Descriptions (UK Terms)

  • ch chain
  • beg beginning
  • beg tr (dc, ch 1) – counts as 1 tr
  • dc double crochet
  • dtr double treble crochet
  • htr half treble crochet
  • lp(s) loop(s)
  • MR make ring: Slip knot, ch 3, ss in third ch from hook to make ring
  • rep repeat
  • RS/WS right side/wrong side of work
  • sk skip
  • sp space
  • ss slip stitch
  • st(s) stitch(es)
  • tr treble crochet
  • yoh yarn over hook

Instructions

Rnd 1 MR, (dc, ch1) 6 times, ss in first dc. [6 dc, 6 sp]

Rnd 2 (dc, ch1, 3tr, ch1, dc) “petal” in 6 ch-sps around, do not join rnd. [18 tr, 12 dc, 12 sp]

Rnd 3 Release lp, insert hook back to front through first dc of Rnd 2, grab lp, pull lp to back of work, ch3, dc in skipped dc from Rnd 1, but work behind the “petal” instead of working between petals. Follow photos, and watch video for assistance. (Ch3, dc in next skipped dc st from Rnd 1) 4 more times, ch3, do not join rnd. [5 dc, 6 sp]

Rnd 4 Starting by working in the first ch-3 sp of Rnd 3, (dc, ch1, 5tr, ch1, dc) “petal” 6 times, do not join rnd. [30 tr, 12 dc, 12 sp]

Rnd 5 Release lp, insert hook back to front through first dc of Rnd 4, grab lp, pull lp to back of work, (ch5, dc in skipped dc from Rnd 3) 5 times, working behind petals as before, ch5, do not join rnd. [5 dc, 6 sp]

Rnd 6 Ss in first 2 chs of Rnd 5, beg tr in sp, (ch1, 3tr in same sp, 3tr in next sp) 6 times omitting final st, ss in beg tr, cut yarn leaving a 7-8in tail for joining later. [36 tr, 6 ch]

Set 43 of the partial balls aside for Motif 2.


Solid Hexagon Motif

Written Instruction with Step-by-Step Photos

Instructions

Rnd 1 MR, beg tr, (ch1, 2tr) 5 times, ch1, tr, ss in beg tr. [12 tr, 6 sp]

Rnd 2 Beg tr in sp, (ch1, tr in same sp, tr in 2 sts, tr in sp) 6 times omitting final st, ss in beg tr. [24 tr, 6 sp]

Rnd 3 Beg tr in sp, (ch1, tr in same sp, tr in 4 sts, tr in sp) 6 times omitting final st, ss in beg tr, cut yarn. [36 tr, 6 sp]


Half Solid Hexagon Motif

Written Instruction with Step-by-Step Photos

Instructions

Row 1 (RS) MR, beg tr, (ch1, 2tr) 3 times, ch1, tr, turn. [8 tr, 4 sp]

Row 2 Beg tr in sp, (ch1, tr in same sp, tr in 2 sts, tr in sp) 3 times, ch1, tr in same sp, turn. [14 tr, 4 sp]

Row 3 Beg tr in sp, (ch1, tr in same sp, tr in 4 sts, tr in sp) 3 times. ch1, tr in same sp, cut yarn. [20 tr, 4 sp]


Whip Stitch Join for Hexagons

When using this join for the Happy Little Tree Blanket, here is the layout I used:

And when joined: 

And here is a layout which closely follows the order of the colors in the box of the Scheepjes Stone/River Washed Colour Pack. This layout was made by talented crafter, Sarah Prather of @sarahdeecrochet on Instagram, and this is her gorgeous photo as well. Check out her IG feed for more beautiful hooky pics!


Video Instruction


how to straighten hexagon blanket sides

Straighten Hexagon Blanket Sides

how to straighten hexagon blanket sides

Written Instruction with Step-by-Step Photos

Step 1 Orient project so that zig-zag hexagon side is facing. Join yarn with a slip st in the first st of the half hexagon. In this case, we are joining in the ch-sp. Dc in the same sp, and in the next st.

how to straighten hexagon blanket sideshow to straighten hexagon blanket sides

Step 2 Htr in the next st, tr in the next 2 sts

how to straighten hexagon blanket sides

Step 3 Dtr in next st, make a decrease as follows: * yoh 2 times, insert hook in next st, pull up a lp, (yoh, draw yarn through 2 lps on hook) 2 times, sk 2 sps, rep from * 1 time, yoh, draw yarn through all 3 lps on hook.

how to straighten hexagon blanket sideshow to straighten hexagon blanket sides

Step 4 (Dtr, tr in next 2 sts, htr, dc in next 3 sts/sps, htr, tr in 2 sts, dtr, make decrease as before) rep in this manner across to final half hexagon. Dtr, tr in 2 sts, htr, dc in final 2 sts/sps, cut yarn.

Turn blanket to other zig-zag hexagon side, and rep Steps 1-4.


Painted Mountains Blanket Edging

how to straighten hexagon blanket sides

Written Instruction with Step-by-Step Photos

New Stitch Descriptions for this Section (UK Terms)

  • beg dtr (dc, ch2) – counts as 1 dtr
  • picot ch3, dc in top left side of previous st – do not work into top of st as you normally would

Instructions

Note: When worked for the Happy Little Tree Blanket, this edging uses all of the remnants from the Stone/River Washed Colour Pack. When one color runs out, simply use a surgeon’s knot, as shown in the image below, to secure the next color. Then weave the ends, or simply clip them short.

Rnd 1 Holding blanket with siz-zag side at the top, join yarn with ss in the top right corner. * 3dc in corner, dc in all sts across to next corner being sure to make a number of sts that is evenly divisible by 3, 3dc in corner, make 117 dc evenly across to next corner as follows: generally, you will make 13 dc across each half hexagon, and 8 dc across each full hexagon. Rep from * 1 time, ss in first dc.

Rnd 2 Beg tr in corner dc, * 8 tr in same corner st, (sk2, tr, ch1, tr in same st as previous) across to corner, sk2, tr in corner st, rep from * 3 times omitting final st, ss in beg tr.

Rnd 3 Beg dtr in next st, ch3, dc in fourth ch from hook, * (dtr, picot) in 6 more sts of corner, dtr in final st of corner, sk 1 sp, (2dtr, picot, dtr) in all sps across to 1 sp before corner, sk 1 sp, (dtr, picot) in first 2 sts of corner, rep from * 3 times omitting final dtr and picot, ss in beg dtr, cut yarn and finish off all ends.

Fin!! Give yourself a fist bump!

Resize to make a throw

How to resize your blanket to about 47x47in using 2 boxes of the Scheepjes Stone Washed and River Washed Colour Pack. Buy at Deramores!

Use instructions as for the smaller blanket, adjusting motif counts as follows:

  • Motif 1: Rose Hexagon (Make 100 using all 100 colors in 2 Colour Packs)
  • Motif 2: Plain Hexagon (Make 57 using 57 of the partial balls set aside from Motif 1)
  • Motif 3: Half Plain Hexagon (Make 16 from remnants of Motifs 1 and 2)

Join as for smaller blanket, and work border with included resizing instruction.

Larger blanket Schematic

Perfect Scallops Crochet Blanket

Welcome to the Perfect Scallops crochet blanket beginner’s guide and CAL page. This page is meant to be a supplement to folks who purchased my book and would like some gentle support with their pattern. If you are looking for alternate yarn selection, videos to help with tricky stitches, and the fun that comes with working up a project in a group, then this is the page for you.

My plan is to break the blanket up into weekly segments, then list all of the weeks below. Dates will not be assigned, so you can jump in at any time and flow through the project. Ways to connect with the community are provided on this page. I can’t wait to get started!

[Jump back to main CAL page.]


Before you begin

Gather your materials

Use the yarn listed in the book, or use the following suggested alternate yarn. This section has affiliate links marked with an asterisk. Ordering through these links will gain me a small commission (at no additional cost to you) and helps to support my free patterns.

Alternate yarn option

Scheepjes Merino Soft Brush (50% wool superwash merino, 25% microfiber, 25% acrylic; 115 yd [105 m]/1.75 oz [50 g]):

  • #251 Avercamp (A), 2 balls
  • #253 Potter (B), 4 balls
  • #256 Van Dyck (C), 2 balls
  • #252 Toorop (D), 2 balls

Scheepjes Colour Crafter (100% premium acrylic; 328 yd [300 m]/3.5 oz [100 g]):

  • #1011 Tynaarlo (E), 2 balls

Supplier: WoolWarehouse* or find a Scheepjes Retailer near you!

Here is what the colors above look like together. Amazing right?  The dark blue looks extra dark with that black label, but in real life it is the perfect shade to complement the pastels.


Weekly CAL timeline (12 Weeks)

As stated, I have omitted dates here, and shifted the focus from deadline-based to increment-based. This way you can focus on chunking the blanket up into bite-sized pieces and it doesn’t seem so overwhelming.

Don’t forget to take a photo of your progress each week so you can share it with everyone! (See “Get involved!” below.) I will choose 1 of your photos from Ravelry each week as the “model.”

  • Week 1: Work Motifs 1-11
  • Week 2:Work Motifs 12-21
  • Week 3: Work Motifs 22-32
  • Week 4: Work Motifs 33-42
  • Week 5: Work Motifs 43-53
  • Week 6: Work Motifs 54-63
  • Week 7: Work Motifs 64-73
  • Week 8: Work Motifs 74-83
  • Week 9: Work Motifs 84-94
  • Week 10: Work Motifs 95-104
  • Week 11: Work Motifs 105-115
  • Week 12: Work Motifs 116-125
  • Week 13: Join Motifs 1-32
  • Week 14: Join Motifs 33-63
  • Week 15: Join Motifs 64-94
  • Week 16: Join Motifs 95-125 and work Blanket Border. Weave any remaining ends and block if desired or necessary.
  • All done! Head back to the book CAL main page to pick your next project!

Beginner’s guide

If you are looking for a list of the basic stitches used in the book (with videos), head to the main book CAL page. There, you will also find tips like how I weave in my ends, how I block my work, and other general tips to make your work shine. There are no special sts in this pattern.

Get involved!

Ways to share your WIP pics (and any concerns!) with others in this CAL community.

Step 1: Take photos of your progress each week and make note of any questions you have.

Step 2: Share your photos and questions in any or all of the following ways. I recommend choosing the same day each week to post

Facebook

Post in my Facebook Group where the CALers will meet weekly to check in. PLEASE INCLUDE in your post:

  1. The name of the blanket – This way a simple search in the group will pull up all of the posts for that blanket. (Remember all 18 of the pattern CALs are going on at the same time.)
  2. What Week you are on in the CAL timeline

Example: If you’re on Week 3, put “Perfect Scallops Blanket – Week 3” somewhere in your post.

Instagram

Post on Instagram using all three of these hashtags. This is important because it will help me see and share your posts on Instagram. It will also allow folks to click the hashtags and see everyone’s posts together in one place.

  1. #cypresstextiles
  2. #theartofcrochetblankets
  3. #perfectscallopsblanket

Ravelry

Here is the Ravelry page for Perfect Scallops. Interacting with the Ravelry page will help people find my book page and grow the CAL community. Plus, folks who are outside my social media circles can see your projects and be inspired. Go ahead and do the following two things.

  1. Put it in your favorites!
  2. Add your project to enter in the weekly giveaway. Each week I will select someone from the projects on Ravelry as a giveaway winner. More details to come!

Other ways to get involved with and support my book

  • Do you like my book? Add a nice review on Amazon.com.
  • Share a review of my book on your blog if you like! Head to my book info page to see the Press Release and Media Kit PDFs for all the deets. Send me the link to my email cypresstextiles @ gmail . com, and I will add a snippet of your review and link to your blog in the Reviews section.

Layered Waves Crochet Blanket

Welcome to the Layered Waves crochet blanket beginner’s guide and CAL page. This page is meant to be a supplement to folks who purchased my book and would like some gentle support with their pattern. If you are looking for alternate yarn selection, videos to help with tricky stitches, and the fun that comes with working up a project in a group, then this is the page for you.

My plan is to break the blanket up into weekly segments, then list all of the weeks below. Dates will not be assigned, so you can jump in at any time and flow through the project. Ways to connect with the community are provided on this page. I can’t wait to get started!

[Jump back to main CAL page.]

Before you begin

Gather your materials

Use the yarn listed in the book, or use the following suggested alternate yarn. This section has affiliate links marked with an asterisk. Ordering through these links will gain me a small commission (at no additional cost to you) and helps to support my free patterns.

Alternate yarn option

Scheepjes Stone Washed (78% cotton, 22% acrylic; 142 yd [130 m]/1.75 oz [50 g]):

1 ball each of the following colors, unless specified:

  • #803 Black Onyx (A), 3 balls
  • #830 Lepidolite (B)
  • #825 Malachite (C)
  • #826 Forsterite (D)
  • #810 Garnet (E)
  • #807 Red Jasper (F)
  • #816 Coral (G)
  • #823 Carnelian (H)
  • #808 Corundum Ruby (I)
  • #811 Deep Amethyst (J)
  • #836 Tourmaline (K)
  • #835 Rhodochrosite (L)
  • #818 Lilac Quartz (M)
  • #827 Peridot (N)
  • #828 Larimar (O)
  • #822 Brown Agate (P)
  • #832 Enstatite (Q)
  • #805 Blue Apatite (R)
  • #819 New Jade (S)
  • #814 Crystal Quartz (T)
  • #831 Axinite (U)
  • #834 Morganite (V)
  • #806 Canada Jade (W)
  • #820 Rose Quartz (X)
  • #812 Lemon Quartz (Y)
  • #813 Amazonite (Z)
  • #833 Beryl (AA)
  • #821 Pink Quartzite (BB)
  • #801 Moonstone (CC), 5 balls.

Supplier: WoolWarehouse*, Deramores*, Knotty House*, or find a Scheepjes Retailer near you!

Here is how the stripe color order looks in Stone Washed. Feel free to swap colors out as you please.

Weekly CAL timeline (12 Weeks)

As stated, I have omitted dates here, and shifted the focus from deadline-based to increment-based. This way you can focus on chunking the blanket up into bite-sized pieces and it doesn’t seem so overwhelming.

Don’t forget to take a photo of your progress each week so you can share it with everyone! (See “Get involved!” below.) I will choose 1 of your photos from Ravelry each week as the “model.”

  • Week 1: Work about half of black section
  • Week 2: Continue with the remainder of black section
  • Week 3: Work 4 color stripes
  • Week 4: Work 4 color stripes
  • Week 5: Work 4 color stripes
  • Week 6: Work 4 color stripes
  • Week 7: Work 4 color stripes
  • Week 8: Work 4 color stripes
  • Week 9: Work 3 color stripes
  • Week 10: Work about a third of the white section
  • Week 11: Continue with the next third of the white section
  • Week 12: Continue with the remainder of the white section, plus blanket border. Block if desired or necessary.
  • All done! Head back to the book CAL main page to pick your next project!

Beginner’s guide

If you are looking for a list of the basic stitches used in the book (with videos), head to the main book CAL page. There, you will also find tips like how I weave in my ends, how I block my work, and other general tips to make your work shine. There are no special sts in this pattern.

Get involved!

Ways to share your WIP pics (and any concerns!) with others in this CAL community.

Step 1: Take photos of your progress each week and make note of any questions you have.

Step 2: Share your photos and questions in any or all of the following ways. I recommend choosing the same day each week to post

Facebook

Post in my Facebook Group where the CALers will meet weekly to check in. PLEASE INCLUDE in your post:

  1. The name of the blanket – This way a simple search in the group will pull up all of the posts for that blanket. (Remember all 18 of the pattern CALs are going on at the same time.)
  2. What Week you are on in the CAL timeline

Example: If you’re on Week 3, put “Layered Waves Blanket – Week 3” somewhere in your post.

Instagram

Post on Instagram using all three of these hashtags. This is important because it will help me see and share your posts on Instagram. It will also allow folks to click the hashtags and see everyone’s posts together in one place.

  1. #cypresstextiles
  2. #theartofcrochetblankets
  3. #layeredwavesblanket

Ravelry

Here is the Ravelry page for Layered Waves. Interacting with the Ravelry page will help people find my book page and grow the CAL community. Plus, folks who are outside my social media circles can see your projects and be inspired. Go ahead and do the following two things.

  1. Put it in your favorites!
  2. Add your project to enter in the weekly giveaway. Each week I will select someone from the projects on Ravelry as a giveaway winner. More details to come!

Other ways to get involved with and support my book

  • Do you like my book? Add a nice review on Amazon.com.
  • Share a review of my book on your blog if you like! Head to my book info page to see the Press Release and Media Kit PDFs for all the deets. Send me the link to my email cypresstextiles @ gmail . com, and I will add a snippet of your review and link to your blog in the Reviews section.

Boho Desert Crochet Blanket

Welcome to the Boho Desert crochet blanket beginner’s guide and CAL page. This page is meant to be a supplement to folks who purchased my book and would like some gentle support with their pattern. If you are looking for alternate yarn selection, videos to help with tricky stitches, and the fun that comes with working up a project in a group, then this is the page for you.

My plan is to break the blanket up into weekly segments, then list all of the weeks below. Dates will not be assigned, so you can jump in at any time and flow through the project. Ways to connect with the community are provided on this page. I can’t wait to get started!

[Jump back to main CAL page.]

Before you begin

Gather your materials

Use the yarn listed in the book, or use the following suggested alternate yarn. This section has affiliate links marked with an asterisk. Ordering through these links will gain me a small commission (at no additional cost to you) and helps to support my free patterns.

Alternate yarn option

Scheepjes Cahlista (100% natural cotton; 93 yd [85 m]/1.75 oz [50 g]):

  • #130 Old Lace (A), 24 balls
  • #385 Crystalline (B), 6 balls
  • #124 Ultramarine (C), 10 balls
  • #516 Candy Apple (D), 6 balls
  • #406 Soft Beige (E), 2 balls
  • #411 Sweet Orange (F), 4 balls

Supplier: WoolWarehouse*, Deramores*, Knotty House*, Black Sheep Wools* or find a Scheepjes Retailer near you!

Weekly CAL timeline (15 Weeks)

As stated, I have omitted dates here, and shifted the focus from deadline-based to increment-based. This way you can focus on chunking the blanket up into bite-sized pieces and it doesn’t seem so overwhelming.

Don’t forget to take a photo of your progress each week so you can share it with everyone! (See “Get involved!” below.) I will choose 1 of your photos from Ravelry each week as the “model.”

  • Week 1: Work about half of Panel 1

Helpful note: The repeat goes from Row 2 on when reading from the chart – so do not include the plain white Row 1 of the chart in your repeat.

Work and Photo by Britt (IG @xoxb_crochets)

  • Week 2: Continue with the remainder of Panel 1 including Panel Border

Photo and sample by IG user @craftygoodnesscrochet

  • Week 3: Work about half of Panel 2

Helpful note: Error in pattern – the row counts are off. After the 8 repeats, you need to work Rows 9-12 again to get that last pair of navy blue stripes. Then repeat Row 5 with the cream color 4 times. Then you can fill in the triangle corners as per the pattern.

Photo and work by Mary Bucek (CraftyGoodnessCrochet)

  • Week 4: Continue with the remainder of Panel 2 including Panel Border and Joining Rnd
  • Week 5: Work about half of Panel 3
  • Week 6: Continue with the remainder of Panel 3 including Panel Border and Joining Rnd

Photo and work by Mary Bucek (CraftyGoodnessCrochet)

  • Week 7: Work Base Triangles and Connect Base Triangles of Panel 4
  • Week 8: Continue with the remainder of Panel 4 including Panel Border and Joining Rnd

Helpful note: In the pattern, it indicates to join with yarn A, but you will join with yarn C.

Also, I have received feedback from a few folks, who may have a taller DC st than mine, that their navy blue portion is very “puffed out” and bunchy/rippling. If you believe your DC stitch is particularly tall, you should go down 2 hook sizes for the navy blue portion of this panel.

Photo and work by Teri Kripetz Stoppiello

  • Week 9: Work about half of Panel 5
  • Week 10: Continue with the remainder of Panel 5 plus Panel Border and Joining Rnd

Photo and work by Robyn Crough

  • Week 11: Work about half of Panel 6
  • Week 12: Continue with the remainder of Panel 6 plus Panel Border and Joining Rnd

Photo and work by Astrea Morgane (before joining)

  • Week 13: Work about half of Panel 7
  • Week 14: Continue with the remainder of Panel 7 plus Panel Border and Joining Rnd
  • Week 15: Weave any remaining ends and work Blanket Border. Block if desired or necessary.
  • All done! Head back to the book CAL main page to pick your next project!


Beginner’s guide

This section includes videos of tricky stitches where applicable, and any other significant notes to supplement your book.

If you are looking for a list of the basic stitches used in the book (with videos), head to the main book CAL page. There, you will also find tips like how I weave in my ends, how I block my work, and other general tips to make your work shine.

Special stitches for this pattern are listed in the Stitch Guide below.

Stitch Guide

  • Bobble video
  • Inc video

Get involved!

Ways to share your WIP pics (and any concerns!) with others in this CAL community.

Step 1: Take photos of your progress each week and make note of any questions you have.

Step 2: Share your photos and questions in any or all of the following ways. I recommend choosing the same day each week to post

Facebook

Post in my Facebook Group where the CALers will meet weekly to check in. PLEASE INCLUDE in your post:

  1. The name of the blanket – This way a simple search in the group will pull up all of the posts for that blanket. (Remember all 18 of the pattern CALs are going on at the same time.)
  2. What Week you are on in the CAL timeline

Example: If you’re on Week 3, put “Boho Desert Blanket – Week 3” somewhere in your post.

Instagram

Post on Instagram using all three of these hashtags. This is important because it will help me see and share your posts on Instagram. It will also allow folks to click the hashtags and see everyone’s posts together in one place.

  1. #cypresstextiles
  2. #theartofcrochetblankets
  3. #bohodesertblanket

Ravelry

Here is the page for Boho Desert. Interacting with the Ravelry page will help people find my book page and grow the CAL community. Plus, folks who are outside my social media circles can see your projects and be inspired. Go ahead and do the following two things.

  1. Put it in your favorites!
  2. Add your project to enter in the weekly giveaway. Each week I will select someone from the projects on Ravelry as a giveaway winner. More details to come!

Other ways to get involved with and support my book

  • Do you like my book? Add a nice review on Amazon.com.
  • Share a review of my book on your blog if you like! Head to my book info page to see the Press Release and Media Kit PDFs for all the deets. Send me the link to my email cypresstextiles @ gmail . com, and I will add a snippet of your review and link to your blog in the Reviews section.

The Art of Crochet Blankets: Beginner’s Guide and CAL Hub

Hi, everyone! Welcome to the Beginner’s Guide and CAL main page for my book, The Art of Crochet Blankets. On this page, you will find helpful information that supplements the patterns in my book. I know some of the designs appear daunting, but they are just made up of stitches, as any pattern. Hopefully this page will put your mind at ease when you pick one and get started.

Crochet-along Information

I am hosting a huge crochet-along for all of the patterns in the book. The CAL will take place beginning Monday, December 3 in my Facebook Group, and prizes will be given weekly to folks who post their projects and WIP pics on Ravelry – more info to come. Since each pattern will have a separate CAL timeline, I have set up an info page for each of them.

All you have to do is click the pattern name below and get started! Note: CAL pages will go live tomorrow, Nov. 28 – CAL begins Dec. 3. The CAL weeks will not be assigned dates, this way you can jump in at any time and move at your own pace.

CAL Info Pages Include

  • Yarn amounts and ordering info
  • Alternate yarn price-point where possible
  • Full weekly CAL timeline
  • Videos of tricky stitches where applicable
  • Ways to share your WIP pics (and any concerns!) with others in this CAL community
  • Link to behind-the-scenes content

Be sure to keep scrolling to the end of this post to see helpful info that will supplement the book. This info below is general – or non-pattern specific. The CAL info pages for each pattern will include the info that is specific to that design.

The Art of Crochet Blankets CAL

Chapter 1: Weaving – Maryanne Moodie

  • Rolling Plains
  • Rock Ridge
  • Sun and Sky

Chapter 2: Digital Art – Francisco Valle

Chapter 3: Fabric Design – April Rhodes

Chapter 4: Paper Cutting – Maud Vantours

Chapter 5: Cement Tile – Caitlin Dowe-Sandes

  • Stone Path
  • Moroccan Tile
  • The Northerner

Chapter 6: Quilting – Tula Pink


Stitches and Techniques

Use this general information as a beginner’s guide – I created this CAL and guide for folks who bought my book and don’t know where to start. Hope these stitch and technique videos help!

Stitch Guide

These stitches are used in my book, The Art of Crochet Blankets. They are general stitches and in US terms. Specific special stitches for each pattern can be found on their individual CAL pages above.

Links lead to how-to pages (with videos) where applicable/available. Un-linked stitches will have how-to pages soon if applicable.

Abbreviations

beg begin; begins; beginning
bet between
blo back loop only
CC contrasting color
ch(s) chain(s)
cm centimeter(s)
dc double crochet
dec decrease(s); decreasing; decreased
dtr double treble crochet
foll follows; following
g gram(s)
hdc half double crochet
inc increase(s); increasing; increased
lp(s) loop(s)
MC main color
m marker; meter(s)
mm millimeter(s)
pm place marker
rem remain(s); remaining
rep repeat; repeating
rnd(s) round(s)
RS right side
sc single crochet
sk skip
sl slip
sl st slip(ped) stitch
sp(s) space(s)
st(s) stitch(es)
tog together
tr treble crochet
WS wrong side
yd yard(s)
yo yarn over
* repeat starting point
( ) alternative measurements and/or instructions; work instructions within parentheses in place directed
[ ] work bracketed instructions a specified number of times

Glossary of Terms 

(Videos coming before Dec 3!)

beg dc (beginning double crochet)
beg dc3tog (beginning double crochet 3 together)
beg dc4tog (beginning double crochet 4 together)
beg dc5tog (beginning double crochet 5 together)
beg dc9tog (beginning double crochet 9 together)
beg dtr (beginning double treble crochet)
beg hdc (beginning half doublecrochet)
beg tr (beginning treble crochet)
dc2tog (double crochet 2 together)
dc3tog (double crochet 3 together)
dc4tog (double crochet 4 together)
dc5tog (double crochet 5 together)
dc8tog (double crochet 8 together)
dc9tog (double crochet 9 together)
Magic Ring
reverse sc (reverse single crochet)
sc2tog (single crochet 2 together)
sc3tog (single crochet 3 together)
sc4tog (single crochet 4 together)
sc5tog (singe crochet 5 together)
sc6tog (single crochet 6 together)

Special Techniques

  • Changing color
  • Border stitches
  • Beginning the row without a turning chain
  • Making matching decreases at both ends of a row
  • Making tall stitches neater

Joining Techniques

  • Joining square motifs as you go
  • Joining hexagon motifs as you go
  • Pull Loop Through (PLT) join
  • Slip-stitch motifs together
  • Whip-stitch motifs together

Finishing

  • Blocking
  • Making a flatter border
  • Weaving in ends – Lacy, open stitches
  • Weaving in ends – Solid stitches

Scheepjes Whirl Ombre and Four Free Patterns!

Hello, friends! I’m taking a short moment to shout something besides The Art of Crochet Blankets from the rooftops. It’s a yummy new yarn and four free patterns! Whether you’re a die-hard Scheepjes fan, or you’ve just newly discovered their yarns, I think you can agree that everyone is batty over Whirl! So it’s no surprise that Scheepjes just keeps giving us more Whirl flavors to love. This time they’ve come up with a Special Edition: Scheepjes Whirl Ombre, and it looks scrumptious as ever.

The Colors – YUM!

How sensational are these shades? When you see them all together, they look as sweet as candy, which is awesome! But taken individually, there is a lovely range of sensible colors here. The Shrinking Violet and the Coral Catastrophe are really calling to me, but that’s just today. Yesterday I was fawning over Sippy Sage and Golden Glowworm.. I guess it will just depend on my mood because they’re all winners!

Hashtags – #scheepjes and #scheepjeswhirlombre and #scheepjeswhirl

Related Links

Photo from @Scheepjes on Instagram

And now for the free patterns! Eeeeep! Which one will you choose? (Too much pressure – I’ll make one of each and sew them together to make an amazing blanket – lol!)


Floral Maze Shawl – Mijo Crochet

Have you seen the creations of Johanna of Mijo Crochet? If you haven’t, you must give her a follow. She creates the most beautiful projects, my favorite being the Macaw Wing shawl pattern.

But for now, I’ll introduce Johanna’s design “Floral Maze” using Whirl Ombre color 555 Forbidden Fuchsia. Isn’t it lovely? Find the blog post with free pattern for this floral wrap by clicking here.

Photo credit: MijoCrochet

Find Johanna and her awesome makes:


Brick Roads Scarf – The Guy with the Hook

Lately I have been obsessed the designs that Mark, The Guy with the Hook, creates. Please go look at his website, but warning, you may be browsing it all day. My favorite design of Mark’s is his Solstice pattern collection.

Here is Mark’s free pattern, “Brick Roads” using Whirl Ombre color 564 Golden Glowworm. Absolutely stunning. Find the blog post with free pattern for this handsome scarf by clicking here.

Photo credit: The Guy with the Hook

Find Mark and his awesome makes:


The Dip Dye Pyramid Shawl – Jellina Creations

Jellina is my teammate in the Scheepjes Bloggers group, and I look up to her so much for her striking and unique designs which push the boundary of visual crochet texture. My favorite of her designs is a pattern she wrote for the Scheepjes Yarn Bookazine, FOLK issue (affiliate link) – the Two Toned Tote.

But for now, I’ll introduce Jellina’s “Dip Dye Pyramid Shawl” using Whirl Ombre color 554 Tangerine Tambourine. Isn’t it lovely? Find the blog post with free pattern for this lovely shawl by clicking here.

Photo credit: Jellina Creations

Find Jellina and her awesome makes:


Maple Leaf Shawl – HaakMaarRaak

Kirsten of Haak Maar Raak is another of the Scheepjes Bloggers! Her creations are always bright with a perfect amount of simplicity that is so charming and dear. She creates some really lovely pieces, but my favorite is the Rainbow Wave Pillow and Blanket Set.

Let me tell you about “Maple Leaf Shawl” using Whirl Ombre color 554 Tangerine Tambourine. Beautiful and elegant. Find the blog post with free pattern for this textured shawl by clicking here.

Photo credit: Haak Maar Raak

Find Kirsten and her awesome makes:


Hope y’all enjoyed this look through the projects made with Scheepjes Whirl Ombre – It seems like this yarn just makes any pattern soar! I think my favorite shade has already changed after writing this blog post – it’s now Jade JimJam. Do you have a fave??

Happy crafting to y’all – love you guys!

Rachele C.

A Look Ahead at My Holiday Season of Crochet (plus everything I published in 2018!)

Okay, you guys… it’s crunch time. ‘Tis the Season… for Xtreme crafting. Are you as behind as I am? It’s November and I have a zillion projects I wanted to complete in 2018 that aren’t done yet. I know many of y’all are in the same boat, and you are probably freaking out that the year is almost over as much as I am… Where does the time go?? Well, In order to help me feel like I have my life together, I’m going to make a list of everything I want to accomplish before 2018 is over. Yay!

Before I let you guys into my check-list of non-stop crochet design, let me show off all the patterns I published in 2018 so far. This is going to be a long and comprehensive post that is more meant for my sanity than your viewing pleasure, I can already tell.. Bear with me.

Jan-Oct 2018


ShadeTree, Issue 1

A collection of five crochet blanket patterns, all made with Scheepjes Yarns, inspired by the artwork and nature photography of Jessica Wilkinson of IG @VanillaLemonCake. If you look through the Behind the Scenes posts, you can see the exact photos of Jessica’s that were the inspiration behind each piece. Her photography is wonderful, and if you tune in to her IG stories sometimes she will reveal her photography setup. It’s always a real treat and educational! Take a moment to visit Jessica’s Instagram; you’ll love it.

Information on these four free motifs and five crochet blanket patterns:

This info includes: The name of the piece, the blog post link for behind the scenes content, the Ravelry PDF link, the affiliated yarn shopping link marked with an *, and the photo/blanket sample credit.


Dutch Rose

What can I say about Dutch Rose? I made it into a CAL, because someone suggested it, and it ended up being a wild success due to all of the community love. What a wonderful project it was, and I’m super proud of this design. Thanks, y’all for all of the Ravelry favorites and kind words.

Information: Blog postFree PatternPrintable PDF RavelryYouTube Playlist (Subscribe!) – Shop Stone Washed yarn *

Edited to add: I made another Dutch Rose in November! More purples this time 🙂


Relaxghan Series

In January, I decided to create a series of blanket patterns that were designed with an air of peacefulness and tranquility. I’ve been saying lately: Crochet is meant to de-stress you, not re-stress you. The high strung and tightly wound among you will undoubtedly want to frustratedly obsess over every pattern element.

This includes me. I’m as tightly wound as they come, but I’m trying to get better at relaxing. While pressure makes diamonds, or what-have-you, I’ve recently begun to appreciate letting the light in a bit more. Patterns are named after peaceful concepts.

Information on these six crochet blanket patterns:

This info includes: The name of the piece, the blog post link for behind the scenes content, the Ravelry PDF link, and the affiliated yarn shopping link.


Scheepjes YARN Bookazine, Issue 5 – Lotus Leaf Blanket

I designed this piece to push my boundaries and experiment with carrying motifs and stitches in the same blanket. The color palette speaks to me as blues and greens are so relaxing, peaceful, and re-energizing. I have been on a real energy, meditation, zen kick lately, and expressing this through crochet has been the best thing for my mental health.

Information: Blog postOrder YARN Bookazine, Issue 5 “WOMAN”Check out the Ravelry page and give it a favorite heart – Shop Cahlista Yarn *


2018 Vibrant Vintage CAL (VVCAL) Reboot

Another VVCAL?? Well, I told everyone I was completely overhauling the VVCAL Square patterns as part of my endeavor to update all of my older patterns for better readability, and one of you spoke up and asked me, “Will there be another CAL as well?” I decided it was actually a great idea. Dutch Rose Blanket CAL was wrapping, and I had been bitten by the bug. So here we are! There are all new squares, which will completely coordinate with the 2016 squares. Yay!

Information: Blog post with free pattern  – Printable PDF Ravelry – YouTube Playlist (Subscribe!) – Shop Softfun yarn *


Crochet Learning Portal

Launched this year, and will be expanded greatly over time. Designed as crochet posts and videos that help you go from complete beginner to adventurous beginner, and beyond. I even have entrepreneur posts and videos planned, so stay tuned!

Information: Main Page – YouTube Playlist Shop Cahlista yarn *


Patterns for Absolute Beginners

In my series, You Can Crochet This!, I break down each of my crochet patterns into bite-sized chunks in an expanded version for absolute beginners. Each free course includes step-by-step photos and videos for stitches, motifs, edgings, and more. It is designed for the absolute crochet beginner, to help guide your hook through pieces that may look intimidating. You can crochet this!

Information:


The Art of Crochet Blankets

I wrote a crochet blanket pattern book, y’all! Squeeeeeeee! When Stephanie from Interweave approached me to write a book in 2016, I was completely gobsmacked. Two years later, and my eyes still glass over at the thought that I will have a crochet pattern book, out there in the wild. You lovely lot have made it even better with all of your support, excitement, and positive feedback for the book. Truly, I am filled to the brim with joy!

Information: Blog post with all the deetsOrder my book on AmazonHead to the Ravelry entry and pop some patterns in your queue and give everything a favorite heart – This helps more people find my book! Thank you for your support. So many have ordered and I’m really overjoyed.


Scheepjes YARN Bookazine, Issue 6 – Happy Folk Blanket

I was inspired by the geometric quilts depicted in American Folk Art, with the different sized blocks all pieced together to form a unique blanket. There are so many beautiful quilts made in this type of design. Unlimited inspiration! I love all how the blocks are pieced without too much thought to symmetry or balance. From this inspiration came Happy Folk.

Information: Blog postOrder YARN Bookazine, Issue 6 “FOLK”Check out the Ravelry page and give it a favorite heart – Shop Cahlista Yarn *


Nov-Dec 2018

I could never have published all of these designs without my incredible Tester Tribe who helped me with so many of the patterns, and even worked up some of the blanket samples for me. And as always the support of the best group – the Scheepjes Bloggers. I’m so proud to be among such talent! How great is that? I feel very fortunate to have such a supportive community surrounding me.

And here is a look at the rest of 2018, where I attempt to cram every possible blanket and pattern into two months. These are split into two categories: Magazine Features (incredible opportunities – I’m so thrilled), and Upcoming Patterns/Blankets.


Upcoming Magazine Features

Beach Hut Blanket – Crochet! Magazine

The Beach Hut Blanket pattern is a no-sew, reversible piece with linen stitch, so the front and back look equally fabulous. I am so excited that Crochet! Magazine will showcase it in an issue next year! Find Beach Hut on Ravelry (give it a favorite!) – Shop Colour Crafter Yarn *


My book, The Art of Crochet Blankets, has a mini feature in Mollie Makes, Issue 99!

Mollie Makes is a lifestyle magazine bringing contemporary craft to today’s makers. Designed for the engaged, connected generation who make up the handmade revolution, each issue of Mollie Makes is filled with unique home décor, fashion and children’s projects, all showcased with inspirational styling and photography. 

Readers can subscribe here: http://www.molliemakes.com/subscribe

Information: See a preview of Issue 99 – Find the digital version of Mollie MakesMollie Makes Website


Dutch Rose and Callie to be featured in Happily Hooked Magazine in early 2019

Happily Hooked is a monthly digital magazine filled with beautiful patterns that make the perfect gifts!

Information: Dutch Rose Pattern (Shop Stone Washed Yarn *) – Callie Pattern (Shop Cotton 8 Yarn *) – Happily Hookeed Magazine Website


Deep Chevron Project Linus Pattern

Prime Publishing, and the site AllFreeCrochetAfghanPatterns.com are hosting a Security Blankets Charity Drive with Project Linus from 11/16 – 12/17, and I am designing a security blanket to hook for the charity drive. I am so pumped… This blanket will be like a cross between my Chevron2.0 blanket and my olllld Deep Chevron blanket (that blurry photo on the right, below… perhaps my first pattern – it’s from like my crochet EP basically lol)

But I’m making the new chevron design with Colour Crafter yarn *, in a seaside palette like this one (heart eyes!):

Edited to add: I’m finished with it! Here’s how it came out 🙂

Pattern for the Sierra Blanket releases on Monday, Nov 19.


Upcoming Patterns/Blankets

Larger version of my Happy Little Tree Blanket

The original Happy Little Tree pattern uses 1 box of the Stone Washed and River Washed Cutie Pie Colour Pack *, but the larger version will use 2 packs. Yay!

happy little tree blanket


Scheepjes YARN Issue 6, Happy Folk Blanket, alternate colorway

I don’t have a photo for this yet, but if you scroll up on this post, you can see the Happy Folk blanket. See how the background is red? Well for this alternate colorway, the background is plum! Squeeeeee! Look out for this, coming soon 🙂


Block A Week 2019 with JulieAnny

Julie is planning to feature a Block of the Week Crochet-Along for 2019 on her blog. It will feature one afghan block weekly by a different designer, supplemented by her own designs – and I am contributing! Exciting!

Julie is well known on these platforms: Facebook Crochet-Along group, Crochet-A-Long with JulieAnny (11000 members), and Ravelry Board, Julie Yeager Designs (3000 members), and for her blog, http://julieyeagerdesigns.com.


ShadeTree, Issue 2 – Tessellation Magic!

Y’all, I have a new ShadeTree coming soon, with FIVE blankets based on amazing tessellation, and it is going to be bananas…

Here is a sneak peek of a couple of the tessellations and color palettes that I saved in my inspiration book:

I am super pumped for this collection – do you want to see a sneak peek?? This blanket is called Dimensions, and the sample blanket and photography are by the talented Andrea Greig. It is made in Stone Washed * yarn. Yes, that is Andrea’s beautiful pupper, Nesta (all the heart eyes). Just wait till you see the blanket all spread out on the ground… Eeep, I can’t wait to share it!


And that’s all folks!

Well, hope y’all enjoyed a look at my 2018! Here’s to a productive 2019 full of love and hooky. 🙂

Love you guys – Happy crafting!

Rachele C.