
Hello, lovely crafter! Today I want to show you what I have been working on while everyone is busy with the Colour Lab CAL Part 3. First, I want to show off a few of the many, many WIPs that you can find in the Scheepjes International Facebook Group, and then I will reveal my project. And here’s a hint: it is the Scheepjes Scrumptious demo that I’ve been working up alongside you!
A couple of weeks ago, I shared my Whirl version of the Colour Lab CAL. You can head to that post to see how it’s been working up!

Related Links
If you have not seen this project yet, here are all of the quick links so that you can see more and get started!
- The Scheepjes website page for the CAL
- Scheepjes official Tips and Tricks PDF
- My Tips and Tricks Post US Terms with some photo tutorials of tricky stitches
- My Tips and Tricks Post UK Terms with some photo tutorials of tricky stitches
- Scheepjes International Facebook Group
- Scheepjes Dutch Facebook Group
- YouTube videos for the CAL (Videos are in UK Terms): Right-Handed // Left-Handed
- Ravelry Pattern Page
- Colour Lab CAL Blog Posts UK Terms: Main Page, Part 1, Part 2, Part 3, Part 4, Part 5, Part 6, Part 7, Part 8, Bonus Project
- Colour Lab CAL Blog Posts US Terms: Main Page, Part 1, Part 2, Part 3, Part 4, Part 5, Part 6, Part 7, Part 8, Bonus Project
- USA: Jimmy Beans Wool Metropolis Kit / Scrumptious Kit
- UK/Worldwide: WoolWarehouse Metropolis Kit / Scrumptious Kit
- Find a Scheepjes Retailer near you!
Where to Find Me
- Instagram: @cypresstextiles
- Facebook Page: CypressTextiles
- YouTube Channel: Rachele Carmona
- Pinterest: CypressTextiles
- Tumblr: CypressTextiles
- Etsy: CypressTextiles
- Ravelry: Rachele Carmona
- Teachable: Creative Art Blanket Course
More Colour Lab CAL WIPs
The Colour Lab CAL projects have been so beautiful, and I am proud of how many people are participating. Everyone has given the project their own creative spin, and it has been lovely to see.
Instead of just showing the sample colorways, they have challenged everyone to create their own color layout, and I’ve been floored looking at all of the possibilities. Here are just a few of them, and it was so hard to choose just a few, but you should really check out the Facebook groups linked above to see them all!
The first show and tell piece is so precious! I just love the bright colors and the rainbow cloud look.

Oooh I love this next WIP! It reminds me of a sweet little village, and it definitely inspires me to pull yarn in similar colors for my own project.

Look at the neat work of this next piece. This is the colourway that I worked up, myself, so I definitely enjoy seeing this one in progress. This yarn is the Metropolis Yarn Kit.

The final sample floored me. It is a mashup of the Sophie Blanket squares by Dedri Uys. Aren’t the colors an absolute dream? What a clever idea!

And those are all the Colour Lab CAL WIPs I had time to present today, but trust me when I say I have loved every single project that has been shared! Keep sharing them 🙂
Scheepjes Scrumptious Yarn
For my Scrumptious Project, I am using the yarn from the Scrumptious Kit. Here is what the yarn looks like.

Scrumptious Kit
The Colour Lab CAL Scrumptious Kit contains:
- 13 x 100g balls of Scrumptious in 3 base colours
- 1 Scrumptious Colour Pack (80 x 30g). Please note: this Colour Pack was produced exclusively for the CAL and is not available separately.
- Classified Colour Lab booklet,
- Darning needle
- Limited Edition Scheepjes lanyard
- ‘Access All Areas’ pass granting exclusive extra content
Scheepjes Scrumptious (50% Recycled Polyester, 50% Acrylic; 100g/300m)
- Yarn A: 302 Buttercream Icing x 6 balls (+ 1 x 30g ball from colour pack)
- Yarn B: 380 Black Sesame Muffin x 3 balls (+ 1 x 30g ball from colour pack)
- Yarn C: 301 Charcoal Ice Cream x 4 balls (+ 1 x 30g ball from colour pack)
- Scheepjes Scrumptious Colour Pack (50% Recycled Polyester, 50% Acrylic; 80 x 30g/97m)
- Yarns D-BBBB: see relevant colourway schematic (Schematics 1-3) or assign your own colours using the Colour Lab booklet (included in Official Scheepjes CAL Kits)
- 3mm crochet hook (for final round of Blanket border only)
- 3.5mm crochet hook
- 4mm crochet hook (for joining motifs in Part 8 only

Buy an Official Kit!
To purchase a kit, you can see if there is a Scheepjes Retailer near you, or please consider heading to one of the links below, as I am personally affiliated with these two shops. Purchasing through these links will gain me a small commission to help support my work, at no additional cost to you. I appreciate your support!
- USA: Jimmy Beans Wool Metropolis Kit / Scrumptious Kit
- UK/Worldwide: WoolWarehouse Metropolis Kit / Scrumptious Kit
My Scrumptious Demo Colour Lab CAL!
And now to show you my work in progress! I will definitely be updating this page, and I will show you how it’s coming along as I go.
So far, I have finished Part 1, and I have made a great start on Parts 2 and 3. I am doing the random color layout, and I am thinking of making this blanket with a slightly altered layout, but we shall see. Aren’t these colors a little slice of heaven?

Here is an example of the colors I pulled for Part 1. The fun part of doing a random layout is that I can just pick a group of colors that I think go great together. This yarn is a dream! So squooshy!

Part 1 Progress Photos
For this project, I have been trying to keep my ends woven in after each part. This way, when I am finished, I don’t have copious amounts of ends to weave in, because that can be so frustrating! When I am done with the project, I want to have only a minimum of yarn ends to weave.

Part 1 consists of a strip of granny-style squares joined together on the final round.
I love making up those cute colorful center squares, and then adding on the outer color as the little frame.

Part 2 Progress Photos
This is one of my favorite parts of the blanket, and seeing everyone’s WIPs of Part 2 is so rewarding.

Here is how Part 2 measures up against Part 1 – a perfect fit!

These colors are gorgeous. I really love the Scrumptious range because the colors are somewhat muted, giving a unique color variety compared to other lines.

Part 3 Progress Photos
Part 3 are these full squares going in a zig-zag across the blanket. I made and joined all of these squares in the order that they appear in the pattern, from left to right.
Of course the first thing I had to go was choose some of the colors that I will use for this part. I liked this mix of shades!

The little striped granny square is the cutest! This color combination is so Springy, and you can really see how the Scrumptious yarn has some colors in it that are heathered, which is so neat!

I knew this square would be a fan favorite and it certainly has been. It’s so simple to create that flower look at the center, just by working a round of US dc stitches, and then a round of chain spaces and decreases to create the petals.
Then it is just a matter of working another round of dc to cover the chain spaces and really help the flower to stand out. It especially helps when the outer round is a contrast color like in the pattern!

I just love how this part comes together, and it’s a nice break from the full project since this piece doesn’t even connect to the main body of the blanket yet!
The Flat Braid Join is so fun and when you block the blanket out, that lace will look so pretty.

I have heard a few people say this in the Facebook groups, but if you “zoom in” on any part of this blanket, you may see colors that don’t necessarily go well together, but when you take a step back and look at the entire piece, the blanket is a beautiful combination of colors, and it somehow works!

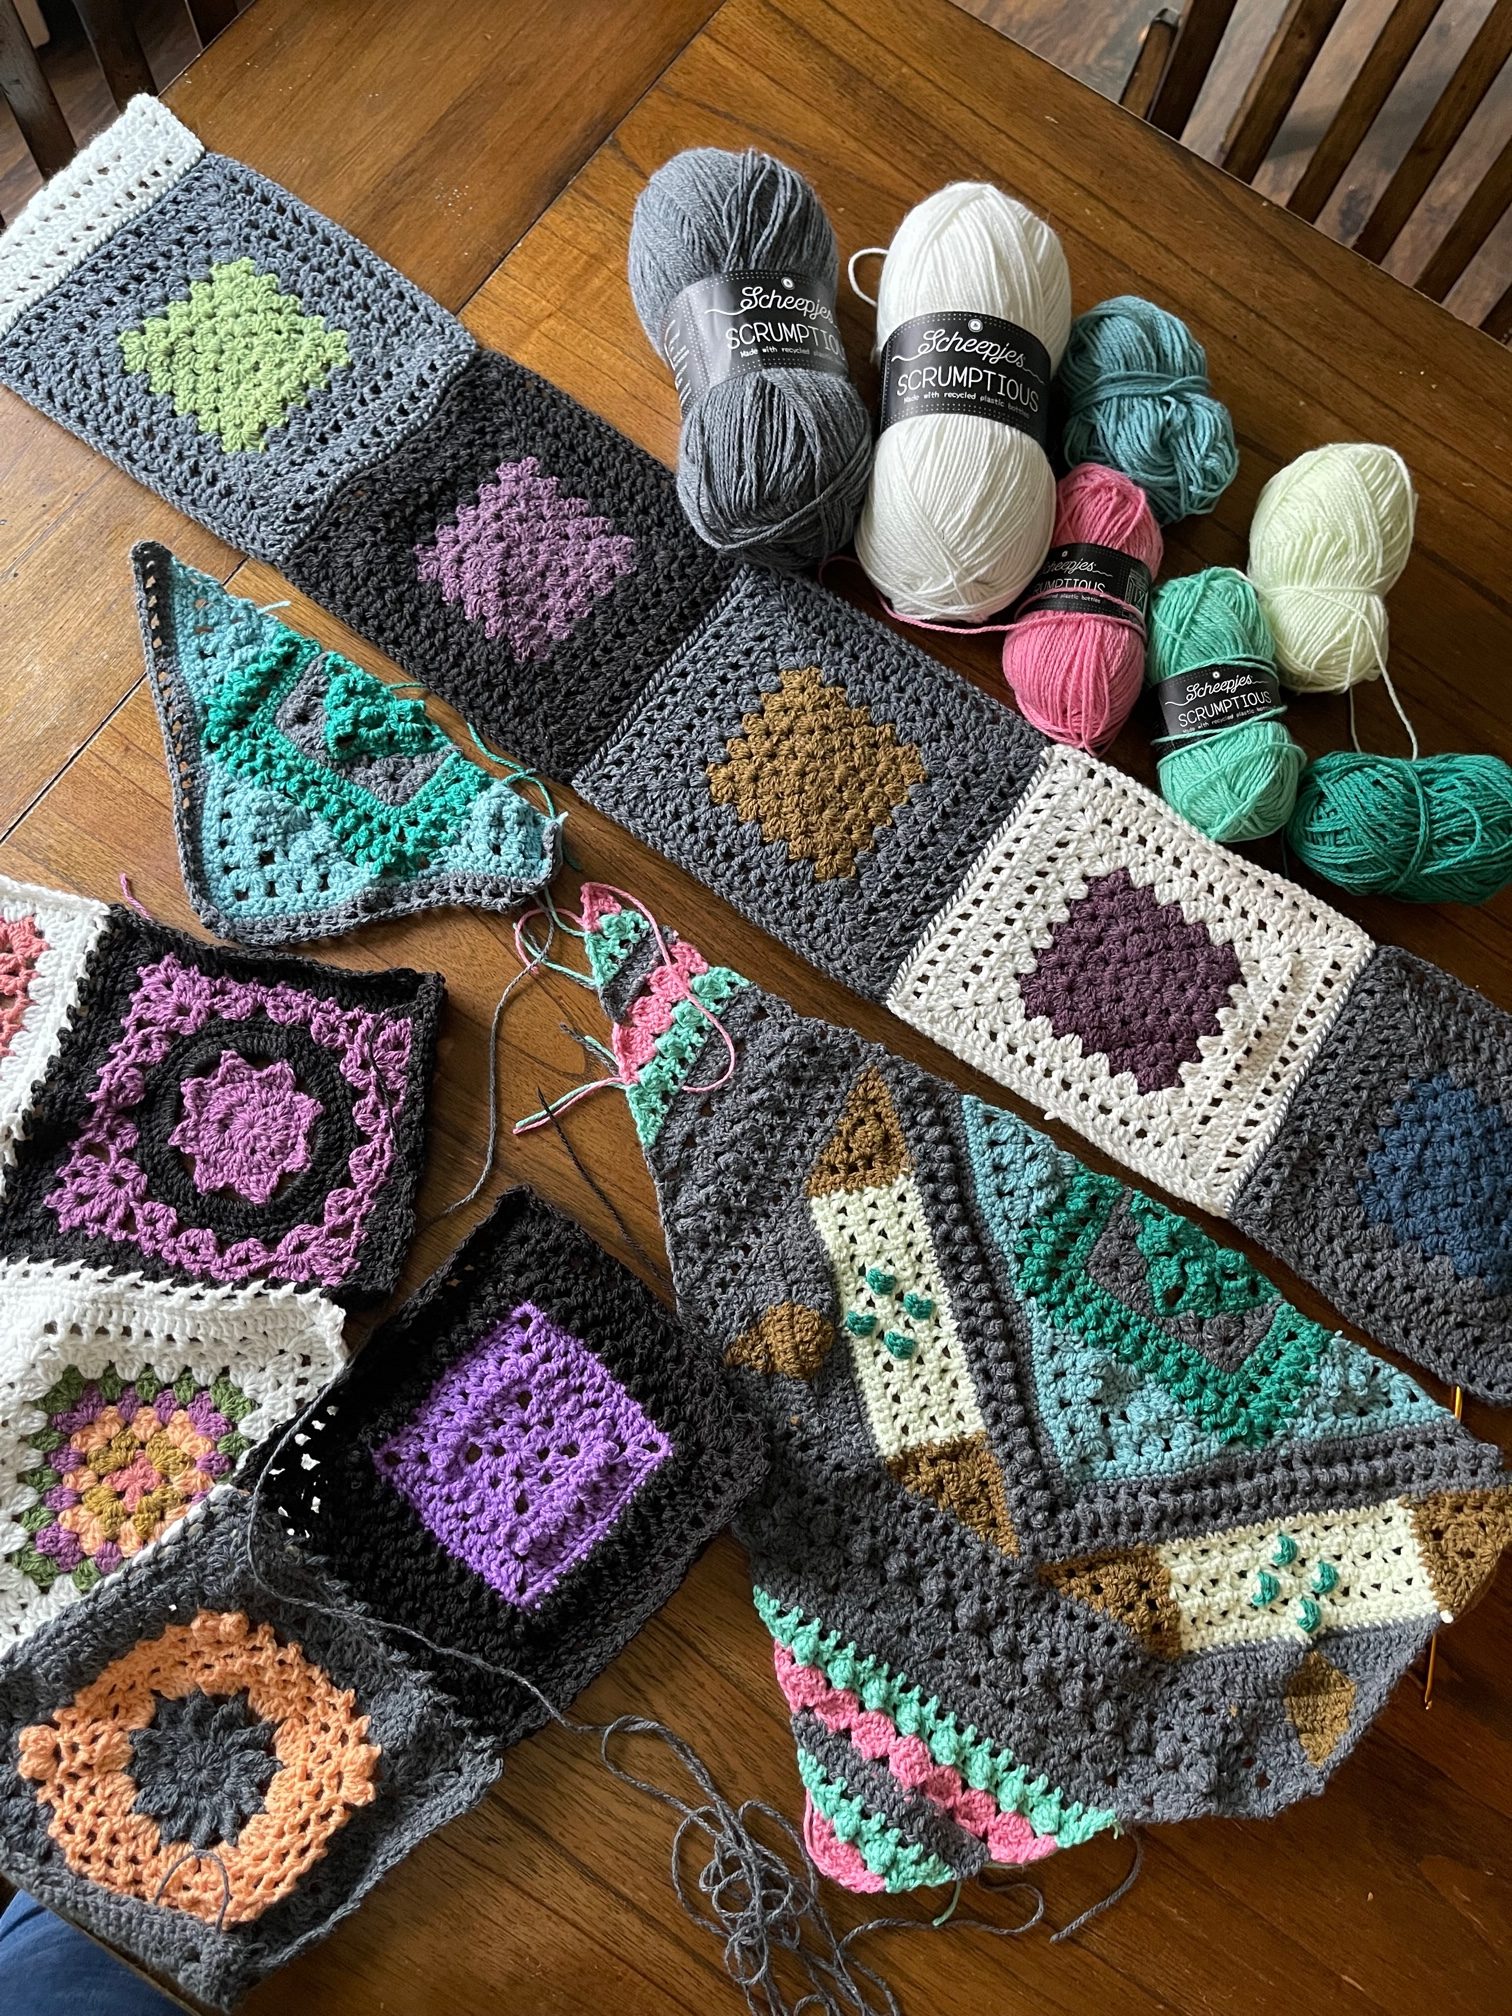
Here are how all of my blanket pieces will fit together once I get to finishing the parts. I have a bit of a mess here, but that is the fun of working on a blanket with several pieces. I can spread everything out on my work table and pick any part to continue working!

Of course I had to include my Della Q bag from Jimmy Beans Wool in the photo,

Here’s a closer look. It’s my favorite project bag because I am very hard on my things, and it never looks worn out, due to the material. The one I have is the Maker’s Roll Top. (aff)

And here’s a final look at my pieces so far! I am working on this project as we speak, to catch up, and get ready for Part 4 next week. So exciting!

Well, I want to say thank you so much for checking out my Scrumptious version of the Colour Lab CAL! I have enjoyed showing you, and hope you loved it.
Happy crafting!
Rachele C.
The Art of Crochet Blankets (affiliate)
Support My Work
You’re supporting by just being here! You can read my blog (Start Here!), like and comment on socials, and message me for a chat. All of this supports my work free of charge!
- Affiliate links – Shopping through my links supports me at no additional cost to you as I get a small commission through my affiliates. Jimmy Beans Wool // WoolWarehouse // Amazon.com
- Buy my pattern book – I wrote a super neat crochet blanket pattern book, published under Penguin Random House. You can buy it here!
- Browse my self-published patterns – I have over a hundred patterns on Etsy and Ravelry
- Creative Art Blanket Course – Check it out on Teachable
- My new Creative Clarity Blog Post Series