
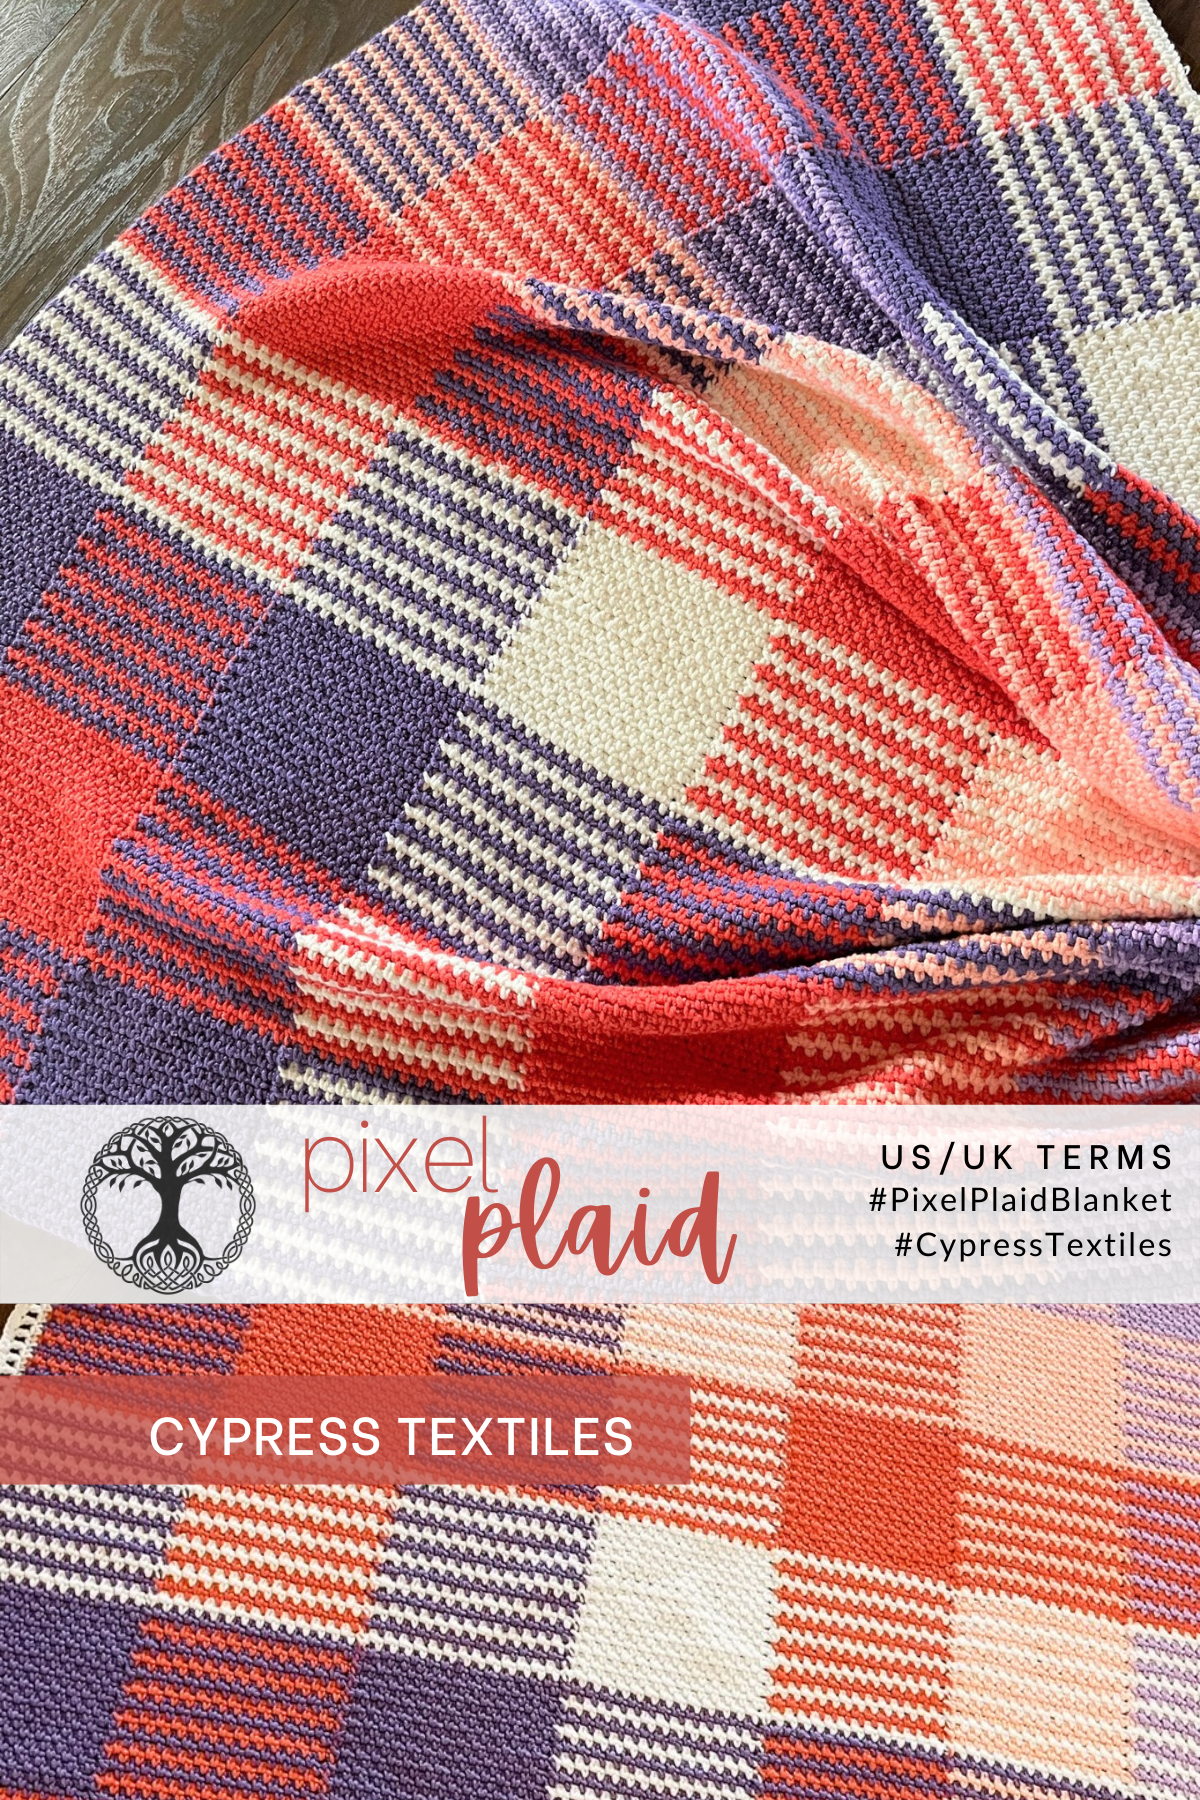
Hello, lovely! Today I have a free pattern for you! I showed my Facebook Group “CypressTextiles Tree Huggers” this blanket last week, and they absolutely loved it. If you want to join the fun in my FB Group, click here! My brand new design is called Pixel Plaid because it is a blocky checkered pattern that will show off your favorite five colors in a creative and eye-catching layout. Mixing striped and solid “squares” (they’re actually join as-you-go strips) creates the plaid look.
The Pixel Plaid Blanket – a no-sew linen stitch crochet blanket that works up quick in front of the television, but never gets boring.
Social Media: #PixelPlaidBlanket and #CypressTextiles
PDF Format
Find this pattern in a convenient printable PDF format at Etsy /Ravelry

Project Details
- Skill Level Easy
- Measurements 58in X 58in (Gauge is not necessary for this project.)
- Materials Scheepjes Chunky Monkey Yarn (details below), Size 5.5mm Crochet Hook
- Social Media Instagram, Facebook, Twitter, Pinterest, Etsy, Ravelry: CypressTextiles
- Hashtags #PixelPlaidBlanket #CypressTextiles

Yarn + Affiliate Links
Shopping through these links will gain me a small commission to support CypressTextiles, at no additional cost to you!
Scheepjes Chunky Monkey Yarn
- Yarn A: 1277 x 9 Balls
- Yarn B: 1132 x 8 Balls
- Yarn C: 1005 x 8 Balls
- Yarn D: 1026 x 7 Balls
- Yarn E: 1432 x 7 Balls

Key Stitch Descriptions (US Terms)
Note: This pattern is in US Terms, but there is only 1 stitch used: single crochet, so if you are used to reading UK Terms, please know that you will be using (UK) dc for this entire project. (US) sc = (UK) dc
Remember that the US double crochet = UK treble crochet, as this stitch is used in the border only.
- chN chain N number of times
- dc double crochet
- MR make ring: slip knot, ch3, ss in third ch from hook
- Rep repeat
- sc single crochet
- sp space or chain space
- ss slip stitch
- st stitch
- yoh yarn over hook

Repeat and Bracket Guide
Square brackets [ ] are used for small repeats: 4dc, [2dc, 3tr, 2dc] 2 times
Asterisks *are used for repeats that include small repeats: *5dc, [1ch, 1dc] 3 times in next ch, rep from * 3 times
Round brackets ( ) are used when a string of stitches are worked into the same spot: (3tr, 3ch, 3tr) in next st
Stitch Counts are given at the end of rows where necessary, in the following format: [12 dc, 3 sp]

Tips and Notes
- Weave your ends after each time you cut the yarn to avoid having to do them all at the end.
- Please read the stitch guide for any abbreviations.
- To get a neater result, I do not “chain up” for the first sc of the round/row. Jump straight into the first sc.

Instructions
This blanket is made by beginning a strip, and then working until the first strip is complete, changing color along the way to make the stripes. The next panel is then made, joining it as you go using my PLT Join before each adjacent WS Row. All subsequent strips are made in this manner until the blanket is complete. A simple 3-round border finishes the piece.

Color placement and stripe layout
I describe my color placement for the plaid layout in detail in my behind the scenes post for this project. I highly recommend checking that post out and you can copy my layout with 5 colors of your choosing. This is the layout and color scheme that I used for my blanket, with the Chunky Monkey colors shown.

I also put together 8 more color combinations for you in case you’re stumped. As I mention in the description for this blanket, though, this blanket will definitely be a crowd pleaser, so it’s perfect for baby showers and house-warming gifts. In that case, choose the 5 colors that will coordinate with the recipient’s color scheme. I like to make sure I include a dark color and a light color to provide contrast so the plaid layout stands out.


Stripes: The plaid look is created by combining striped “squares” and solid “squares” in such a way that it looks like the colors are crossing over each other like they do in a traditional plaid blanket. Each stripe is 2 rows, and we will discuss that more in the pattern.

How to change color
For this project, here is how I changed color. When ending one color, fasten it off completely. To join on the next color, make a slip stitch in the chain space where the new color will begin. Start working directly into the same chain space for the new row. Note: Since this project is entirely linen stitch, you will only work into chain spaces throughout the blanket, with the exception of the simple border.
Now on to the instructions!
First Panel
Row 1 (WS) Using Yarn A, slip knot and ch29, sc in 3rd ch from hook, [ch1, sk1, 1sc] to end, ch1, turn. [14 sc, 14 sp]


Rows 2-234 (1sc in ch-sp, ch1) across to end. Follow stripe sequence below. – 14 sc, 14 sp
Stripe Sequence
- Rows 1-26: Yarn A
- Rows 27 and 28: Yarn B
- Rows 29 and 30: Yarn A
- Rows 31-50: Rep Rows 27-30
- Rows 51 and 52: Yarn B
- Rows 53-78: Yarn A
- Rows 79-104: Alternate 2 Rows each Yarn C and Yarn A, ending with Yarn C
- Rows 105-130: Rep Rows 27-52
- Rows 131-156: Alternate 2 Rows each Yarn D and Yarn A, ending with Yarn D
- Rows 157-182: Alternate 2 Rows each Yarn E and Yarn A, ending with Yarn E
- Rows 183-208: Yarn A
- Rows 209-234: Rep Rows 79-104


Second Panel Through Ninth Panel
Work exactly as for First Panel, but before every WS Row, make PLT Join to previous panel as follows:
- Release loop from hook (First photo below)
- Lay blanket in progress with WS facing, insert hook front to back through first space of adjacent row on completed panel (Second and third photos)
- Grab loop and Pull Loop Through (PLT) to front of work (Fourth and fifth photos)
- Ch1 and work row as normal (Sixth photo)
With the PLT Join before each WS row, the panels are joined together as you go. Alternately, you may work 9 panels separately and sew them together for a different look.
Stripe Sequences for panels follow photo instruction.


Stripe Sequence for Second Panel
- Rows 1-26: Alternate 2 Rows each Yarn A and Yarn B, ending with Yarn A
- Rows 27-52: Yarn B
- Rows 53-78: Rep Rows 1-26
- Rows 79-104: Alternate 2 Rows each Yarn C and Yarn B, ending with Yarn C
- Rows 105-130: Yarn B
- Rows 131-156: Alternate 2 Rows each Yarn D and Yarn B, ending with Yarn D
- Rows 157-182: Alternate 2 Rows each Yarn E and Yarn B, ending with Yarn E
- Rows 183-208: Rep Rows 1-26
- Rows 209-234: Rep Rows 79-104
Stripe Sequence for Third Panel
Work exactly as for first panel.
Continue panel colors as represented in the color layout copied at below for convenience.


Finishing
When all panels are complete, cut yarn and weave in all ends.
Border
Round 1 Join yarn color Iris 1277 with ss in corner st, [3sc in corner st, 1sc in the end of each row across to next corner] 4 times, being sure to make an equal amount of sc sts on opposing sides, ss in first sc.
Round 2 1sc in next st, 1ch – counts as the first dc of the round, [2dc in same st, 1dc in all sts across to next corner, 3dc in corner st] 4 times omitting final dc, ss in ch.
Round 3 [3sc in corner st, 1sc in all sts across to next corner] 4 times, ss in first sc, cut yarn and weave ends.
Yay!! You’re finished! Do a happy dance!
Pictured below is my Chevronnie Blanket, but I used the same border.

Copyright Information
No pattern or other material may be reproduced — mechanically, electronically, or by any other means, including photocopying — without written permission of Rachele Carmona. This applies to all content on CypressTextiles.net, BabyLoveBrand.net, and all other sites used by Rachele Carmona including social media. Paid patterns are for personal use only. You may sell your finished crocheted items.
PDF Format
Find this pattern in a convenient printable PDF format at Etsy /Ravelry
Pin this Free Crochet Pattern!

Happy Crafting as always!
Rachele C.
Order my book: The Art of Crochet Blankets