
Hello, lovely crafter! Welcome to the pattern for my Quarter-Mandala Square, part of the Gloria Blanket. I have written this pattern specifically with Scheepjes Catona in mind just to avoid confusion with so many yarn options.
For the Gloria Blanket CAL, please look for your yarn choice on the Week 9 post. You will find specific yarn colors for each square, gauge, motif measurements, hook size, and lots more info on that post. In that post, scroll to your yarn choice and follow the steps to complete this week’s CAL work. You will refer back to this pattern to create the square.
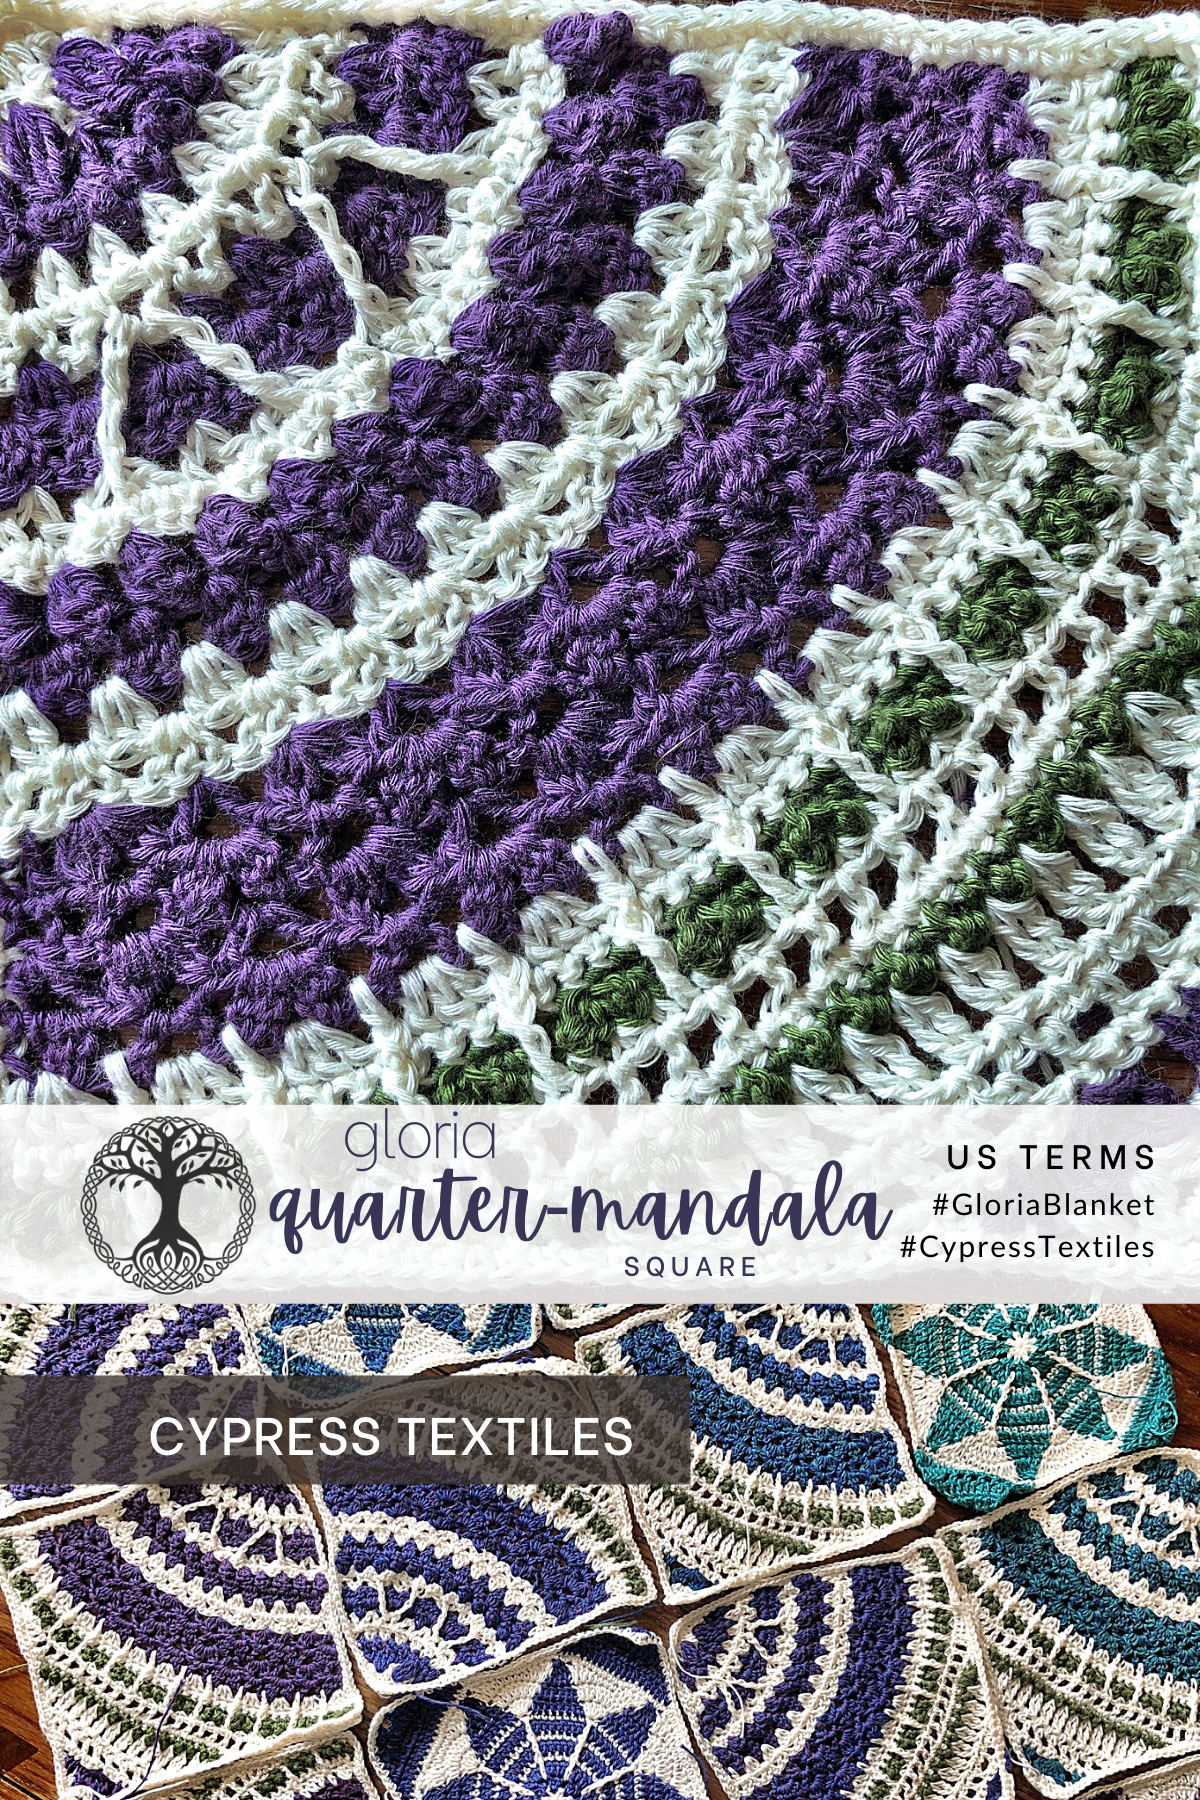
The pattern is in US Terms (This post) and UK Terms, and I provide step by step photos as well as a video which will release on Saturday, Sept 26th on my YouTube channel.
Gloria Blanket CAL Quick Links
- Gloria Blanket CAL Main Info Page
- Gloria Blanket PDF Pattern Ravelry / Etsy / My Shop As usual, the CAL will be released free every week here on my website, but I will offer the full blanket pattern in PDF form as soon as I write it up (I’ll have a date soon!)
- Instagram Sharing – I’m on Insta as @CypressTextiles. Hashtag your WIP and FO pics with #GloriaBlanket and #CypressTextiles so I can share and save them in my story highlights!
- CypressTextiles Tree Huggers Facebook Group – This is my main FB group (join!). Share your progress pics in this group if you like, and I will share CAL highlights there as well.
- YouTube Channel (Subscribe!) – Here I will be posting Gloria Blanket CAL pattern videos. Yay!
Social Media Hashtags: #GloriaBlanket and #CypressTextiles

Quarter-Mandala Square
This square was inspired by a photo of floor tiles that I saw in 2016 on the incredible Instagram account, @ihavethisthingwithfloors. After I saw that photo, I got to work designing the two motifs that are featured in this Gloria Blanket. The Quarter-Mandala Square looks intricate, but the individual stitches are pretty simple. It’s just the way the stitches come together, and working the square corner to corner that gives it that complex look. Your first few motifs will require concentration, but after that, you should be able to sail through them in front of the telly.
You can use any amount of colors, one or many, to make this square. Here in this pattern, I use a background color plus two contrast colors, which I think you will really enjoy. Any color combination till be glorious – hence the name, Gloria! Hope you love the pattern! – Rachele C.

Details and Materials
Note: These details and materials are written for Catona yarn in general. Refer to the Week 9 CAL Post and find your yarn choice if you are using different yarn. Some notes for other versions will be given within the pattern, but please check the week 9 post first.
- Square measures 8in in Scheepjes Catona with a size 3mm hook, unblocked (I recommend blocking your squares before you join them.)
- To make each square, you need 8g each of 2 contrast colors (CC1 and CC2), plus 20g of main color (MC) (Ordering info below)
- 3mm hook
- 4 Stitch markers – Or use a small length of yarn, bobby pins, etc.
Order Yarn
For a variety of color, order the Scheepjes Catona 10g Colour Pack at the following shops. These are affiliate links, so shopping through them will help support CypressTextiles at no additional cost to you.
Order 50g balls of Scheepjes Catona background color from these shops. These are also affiliate links.

Chart
Chart is to be used alongside video or written instruction to help with stitch placement and increase completion speed of motif.

Video
Link goes to part 1 of 3 of the Quarter Mandala Square.
Stitch Guide (US Terms)
- 2dccl (yoh, insert hook in st indicated, yoh, pull up lp, yoh, draw yarn through 2 lps on hook) 2 times, yoh, draw yarn through all 3 lps on hook
- 2trcl * yoh 2 times, insert hook in st indicated, (yoh, pull up lp, yoh, draw yarn through 2 lps on hook) 2 times, rep from * 1 time, yoh, draw yarn through all 3 lps on hook
- 3dccl (yoh, insert hook in st indicated, yoh, pull up lp, yoh, draw yarn through 2 lps on hook) 3 times, yoh, draw yarn through all 4 lps on hook
- 3trcl * yoh 2 times, insert hook in st indicated, (yoh, pull up lp, yoh, draw yarn through 2 lps on hook) 2 times, rep from * 2 times, yoh, draw yarn through all 4 lps on hook
- 4dc-popcorn 4dc in st/sp indicated release lp from hook, insert hook front to back through first dc, grab lp, pull lp to front to close popcorn
- beg 4dc-popcorn (beg dc, 3dc) in st/sp indicated release lp from hook, insert hook front to back through beg dc, grab lp, pull lp to front to close popcorn
- beg dc (sc, ch1) – counts as 1 dc
- beg tr (sc, ch2) – counts as 1 tr
- BPdc Back Post double crochet
- ch chain
- dc double crochet
- FPdtr Front Post double treble crochet
- FPtr Front Post treble crochet
- hdc half double crochet
- lp loop
- MR (make ring) ch3, ss in third ch from hook
- rem remaining
- rep repeat
- RS right side
- sc single crochet
- ss slip stitch
- sk skip
- sp space
- st stitch
- tr treble crochet
- WS wrong side
- yoh yarn over hook
Instructions
Tips and Notes:
- To avoid having a lot of work when you are finished with the square, weave your ends after each time you cut the yarn. Please read the stitch guide for any abbreviations.
- Written instruction is followed by step-by-step photos with the respective snippet of instruction added above the photo for clarity.
- To get a neater result, I do not “chain up” for the first sc of the round/row; rather, I just jump straight into the first sc.
- Color Notes for the different CAL versions are added in where necessary. If you aren’t making this square for the Gloria Blanket CAL, just ignore these Color Notes.
Row 1
Row 1 (RS) Using MC, MR, beg dc, 4dc, turn. [5 dc]
Step-by-step Photos
MR, beg dc,

4dc.

Row 2
Row 2 Beg dc in first st, ch1, dc in same st, (ch1, sk1, dc) 2 times, ch1, dc in same st changing to CC1 by drawing it through on the final step of the st, cross working yarn of MC over working yarn of CC1 to carry it up, turn. [5 dc, 4 sp]
Step-by-step Photos
Beg dc in first st,

ch1, dc in same st, (ch1, sk1, dc) 2 times, ch1, dc in same st changing to CC1 by drawing it through on the final step of the st,


cross working yarn of MC over working yarn of CC1 to carry it up.

Row 3
Row 3 Continuing with CC1, beg dc in first st, ch1, dc in same st, ch1, 3trcl in first skipped dc from Row 1, ch1, (dc, ch1, dc) in next dc, ch1, 3trcl in second skipped dc from Row 1, ch1, (dc, ch1, dc) in final dc, turn. [2 3trcl, 6 dc, 7 sp]
Step-by-step Photos
Continuing with CC1, beg dc in first st,

ch1, dc in same st, ch1, 3trcl in first skipped dc from Row 1, ch1,


(dc, ch1, dc) in next dc, ch1,

3trcl in second skipped dc from Row 1, ch1, (dc, ch1, dc) in final dc.

Row 4
Row 4 Sc in first st, (tr, sc) in next 6 ch-sps, tr in next ch-sp, sc in final st changing to MC by drawing it through on the final step of the st, cross working yarn of CC1 over working yarn of MC to carry it up, turn. [7 tr, 8 sc]
Notes: Tr sts will make tiny bobbles on the RS of the work. Also, when drawing yarn through final st to change color, always be sure not to pull too tight on it. Leave enough slack that the yarn naturally lays against the side of the motif. See photos for reference.
Step-by-step Photos
Sc in first st,

(tr, sc) in next 6 ch-sps,


tr in next ch-sp,

sc in final st changing to MC by drawing it through on the final step of the st.

Note in the photo below, the MC yarn is carried up the side at a natural tension. Not too loose, not too tight.

cross working yarn of CC1 over working yarn of MC to carry it up.

Row 5
Row 5 Continuing with MC, beg dc in first st, dc in same st, (ch1, 2dc in next sc) 7 times, turn. [16 dc, 7 sp]
Step-by-step Photos
Continuing with MC, beg dc in first st,

dc in same st, (ch1, 2dc in next sc) 7 times.

Row 6
Row 6 Beg dc in first st, (dc, ch1, dc) in next 7 ch-sps, dc in final st changing to CC1 by drawing it through on the final step of the st, cross working yarn of MC over working yarn of CC1 to carry it up, turn. [16 dc, 7 sp]
Step-by-step Photos
Beg dc in first st,

(dc, ch1, dc) in next 7 ch-sps, dc in final st changing to CC1 by drawing it through on the final step of the st,


cross working yarn of MC over working yarn of CC1 to carry it up.

Row 7
Row 7 Continuing with CC1, beg dc in first st, 3dc in next 7 ch-sps, dc in final st, turn. [23 dc]
Step-by-step Photos
Continuing with CC1, beg dc in first st,

3dc in next 7 ch-sps, dc in final st.

Row 8
Row 8 Beg dc in first st, 3dc between first and second st working into the space between them – not working into any st or ch-sp, 3dc between next 2 3-dc groups 6 times, 3dc between last 3-dc group and final st, dc in final st changing to MC by drawing it through on the final step of the st, cross working yarn of CC1 over working yarn of MC to carry it up, turn. [26 dc]
Step-by-step Photos
Beg dc in first st,

3dc between first and second st, 3dc between next 2 3-dc groups 6 times, 3dc between last 3-dc group and final st, dc in final st changing to MC by drawing it through on the final step of the st,


cross working yarn of CC1 over working yarn of MC to carry it up.

Row 9
Row 9 Continuing with MC, beg dc in first st, sk1, (dc, ch1, dc) in next st, sk2, dc in next st, ch1, FPdtr around fifth dc from Row 6, ch1, dc in same st as previous dc, sk2, (dc, ch1, dc) in next st, sk2, dc in next st, ch1, FPdtr around sixth dc from Row 6, ch1, dc in same st as previous dc, sk2, dc in next st, ch1, FPdtr around eleventh dc from Row 6, ch1, dc in same st as previous dc, sk2, (dc, ch1, dc) in next st, sk2, dc in next st, ch1, FPdtr around twelfth dc from Row 6, ch1, dc in same st as previous dc, sk2, (dc, ch1, dc) in next st, dc in final st, turn. [4 FPdtr, 18 dc, 12 sp]
Step-by-step Photos
Continuing with MC, beg dc in first st,

(dc, ch1, dc) in next st, sk2, dc in next st, ch1,

FPdtr around fifth dc from Row 6,


ch1, dc in same st as previous dc, sk2, (dc, ch1, dc) in next st, sk2, dc in next st, ch1,

FPdtr around sixth dc from Row 6, ch1, dc in same st as previous dc, sk2, dc in next st, ch1, FPdtr around eleventh dc from Row 6, ch1, dc in same st as previous dc, sk2, (dc, ch1, dc) in next st, sk2, dc in next st, ch1, FPdtr around twelfth dc from Row 6, ch1, dc in same st as previous dc, sk2, (dc, ch1, dc) in next st, dc in final st.

Row 10
Row 10 Sc in 34 sts/sps across, changing to CC1 in final sc by drawing CC1 through on the final step of the st, cross working yarn of MC over working yarn of CC1 to carry it up, turn. [34 sc]
Step-by-step Photos
Sc in 34 sts/sps across, changing to CC1 in final sc by drawing CC1 through on the final step of the st,


cross working yarn of MC over working yarn of CC1 to carry it up.

Row 11
Row 11 Continuing with CC1, beg 4dc-popcorn in first st, (ch2, sk2, 4dc-popcorn) 11 times, turn. [12 4dc-popcorn, 11 sp]
Step-by-step Photos
Continuing with CC1, beg 4dc-popcorn in first st,


(ch2, sk2, 4dc-popcorn) 11 times.


Row 12
Row 12 Beg dc in first 4dc-popcorn, 3dc in 11 ch-sps, dc in final st changing to MC by drawing it through on the final step of the st, cross working yarn of CC1 over working yarn of MC to carry it up, cut CC1 yarn unless instructed not to in the Color Note below, turn. [35 dc]
Gloria Blanket CAL Color Note:
- Catona 10g Colour Pack Version – Cut your CC1 yarn now and weave the end in. Save the remainder of CC1 for Rows 21 and 22
- Cahlista 15g Colour Pack Version – Cut your CC1 yarn now and weave the end in. Save the remainder of CC1 for Rows 21 and 22
- Stone Washed / River Washed 10g Colour Pack Version – Cut your CC1 yarn now and weave the end in. Save the remainder of CC1 for Rows 21 and 22
- Metropolis 10g Colour Pack Version – Do NOT cut your CC1 yarn yet.
- Whirl + Whirlette Version – Do NOT cut your CC1 yarn yet.
- All other versions – Do NOT cut your CC1 yarn yet.
Step-by-step Photos
Beg dc in first 4dc-popcorn,

3dc in 11 ch-sps, dc in final st changing to MC by drawing it through on the final step of the st,


cross working yarn of CC1 over working yarn of MC to carry it up, cut CC1 yarn unless instructed not to in the color note above.

Row 13
Row 13 Continuing in MC, beg dc in first st, dc between first and second st working into the space between them – not working into any st or ch-sp, 3dc between next 2 3-dc groups 10 times, dc between last 3-dc group and final st, dc in final st, turn. [34 dc]
Step-by-step Photos
Continuing in MC, beg dc in first st,

dc between first and second st working into the space between them – not working into any st or ch-sp, 3dc between next 2 3-dc groups 10 times, dc between last 3-dc group and final st, dc in final st.


Row 14
Row 14 Beg dc in first st, 3dc between second dc and third dc as before, 3dc between next 2 3-dc groups 9 times, 3dc between last 3-dc group and final 2 dc, dc in final dc changing to CC2 (see Color Note below) by drawing it through on the final step of the st, cross working yarn of MC over working yarn of CC2 to carry it up, turn. [35 dc]
Gloria Blanket CAL Color Note
- Catona 10g Colour Pack Version – Change to CC2.
- Cahlista 15g Colour Pack Version – Change to CC2.
- Stone Washed / River Washed 10g Colour Pack Version – Change to CC2.
- Metropolis 10g Colour Pack Version – Change back to CC1; do not use CC2 yet.
- Whirl + Whirlette Version – Change back to CC1; do not use CC2 yet.
- All other versions – Change back to CC1; do not use CC2 yet.
Step-by-step Photos
Beg dc in first st,

3dc between second dc and third dc as before, 3dc between next 2 3-dc groups 9 times, 3dc between last 3-dc group and final 2 dc, dc in final dc changing to CC2 (see color note above) by drawing it through on the final step of the st, cross working yarn of MC over working yarn of CC2 to carry it up.


Row 15
Row 15 Continuing with CC2 (See Color Note below) beg dc in first st, ch1, dc in same st, sk1, * (3dccl, ch2, 3dccl) in next st, sk2, (dc, ch2, dc) in next st, sk2, rep from * 4 times, (3dccl, ch2, 3dccl) in next st, (dc, ch1, dc) in final st, turn. [12 3dccl, 14 dc, 13 sp]
Gloria Blanket CAL Color Note
- Catona 10g Colour Pack Version – Continue with CC2.
- Cahlista 15g Colour Pack Version – Continue with CC2.
- Stone Washed / River Washed 10g Colour Pack Version – Continue with CC2.
- Metropolis 10g Colour Pack Version – Continue with CC1.
- Whirl + Whirlette Version – Continue with CC1.
- All other versions – Continue with CC1.
Step-by-step Photos
Continuing with CC2 (See color note above) beg dc in first st,

ch1, dc in same st, sk1, * (3dccl, ch2, 3dccl) in next st,


sk2, (dc, ch2, dc) in next st, sk2, rep from * 4 times, (3dccl, ch2, 3dccl) in next st, (dc, ch1, dc) in final st.


Row 16
Row 16 Beg dc in first st, ch1, 3dccl in first sp, * (dc, ch2, dc) in next sp, (3dccl, ch2, 3dccl) in next sp, rep from * 4 times, (dc, ch2, dc) in next sp, 3dccl in final sp, ch1, dc in final st, turn. [12 3dccl, 14 dc, 13 sp]
Step-by-step Photos
Beg dc in first st, ch1, 3dccl in first sp,

* (dc, ch2, dc) in next sp, (3dccl, ch2, 3dccl) in next sp, rep from * 4 times, (dc, ch2, dc) in next sp, 3dccl in final sp, ch1, dc in final st.

Row 17
Row 17 Beg dc in first st, ch1, dc in same st, * (3dccl, ch3, 3dccl) in next sp, (dc, ch2, dc) in next sp, rep from * 4 times, (3dccl, ch3, 3dccl) in next sp, dc in final sp, ch1, dc in final st, turn. [12 3dccl, 14 dc, 13 sp]
Note: Eeep, this is the only photo I took of this row. Luckily, it is very similar to the previous row!

Row 18
Row 18 Beg dc in first st, ch1, 3dccl in first sp, * (dc, ch2, dc) in next sp, (3dccl, ch3, 3dccl) in next sp, rep from * 4 times, (dc, ch2, dc) in next sp, 3dccl in final sp, ch1, dc in final st changing to MC by drawing it through on the final step of the st, cross working yarn of CC2 (See Color Note below) over working yarn of MC to carry it up, cut CC2 yarn, turn. [12 3dccl, 14 dc, 13 sp]
Gloria Blanket CAL Color Note
- Catona 10g Colour Pack Version – Cross working yarn of CC2 over MC, and cut CC2 yarn.
- Cahlista 15g Colour Pack Version – Cross working yarn of CC2 over MC, and cut CC2 yarn.
- Stone Washed / River Washed 10g Colour Pack Version – Cross working yarn of CC2 over MC, and cut CC2 yarn.
- Metropolis 10g Colour Pack Version – Cross working yarn of CC1 over MC, and cut CC1 yarn.
- Whirl + Whirlette Version – Cross working yarn of CC1 over MC, and cut CC1 yarn.
- All other versions – Cross working yarn of CC1 over MC, and cut CC1 yarn.
Step-by-step Photos
Beg dc in first st, ch1, 3dccl in first sp, * (dc, ch2, dc) in next sp, (3dccl, ch3, 3dccl) in next sp, rep from * 4 times, (dc, ch2, dc) in next sp, 3dccl in final sp, ch1, dc in final st changing to MC by drawing it through on the final step of the st,


cross working yarn of CC2 over working yarn of MC to carry it up, cut CC2 yarn (See Color Note above)

Row 19
Row 19 Continuing in MC, beg dc in first st, (3dc in next ch-sp, dc between next 3dccl and dc, 3dc in next ch-sp, dc between next dc and 3dccl) 6 times, 3dc in next ch-sp, dc in final st, turn. [53dc]
Step-by-step Photos
Continuing in MC, beg dc in first st,

(3dc in next ch-sp, dc between next 3dccl and dc, 3dc in next ch-sp, dc between next dc and 3dccl) 6 times, 3dc in next ch-sp, dc in final st.


Row 20
Row 20 Sc in first 4 sts, (BPdc in next st, sc in 3 sts) 11 times, sc in final 4 sts changing back to CC1 (see Color Note below) in final sc by drawing CC1 through on the final step of the st, cross working yarn of MC over working yarn of CC1 to carry it up, turn. [12 BPdc, 41 sc]
Gloria Blanket CAL Color Note
- Catona 10g Colour Pack Version – Change back to CC1.
- Cahlista 15g Colour Pack Version – Change back to CC1.
- Stone Washed / River Washed 10g Colour Pack Version – Change back to CC1.
- Metropolis 10g Colour Pack Version – Change to CC2.
- Whirl + Whirlette Version – Change to CC2.
- All other versions – Change to CC2.
Step-by-step Photos
Note: I magically switched motifs, so you’ll notice the different colors! I was also booted out of my photo office by one of my kiddoes virtual schooling. So there’s a change of scenery for a few more rows, too. Sorry about that!
Sc in first 4 sts,

(BPdc in next st, sc in 3 sts) 11 times, sc in final 4 sts changing to CC1 in final sc (see Color Note above) by drawing CC1 through on the final step of the st,

(A peek from the reverse side…)


cross working yarn of MC over working yarn of CC1 *see color note above) to carry it up.

Row 21
Row 21 Continuing with CC1 (See Color Note below), sc in first 4 sts, (ch1, sk1, sc in next 3 sts) 12 times, sc in final st, turn. [41 sc, 12 sp]
Gloria Blanket CAL Color Note
- Catona 10g Colour Pack Version – Continue with CC1.
- Cahlista 15g Colour Pack Version – Continue with CC1.
- Stone Washed / River Washed 10g Colour Pack Version – Continue with CC1.
- Metropolis 10g Colour Pack Version – Continue with CC2.
- Whirl + Whirlette Version – Continue with CC2.
- All other versions – Continue with CC2.
Step-by-step Photos
Continuing with CC1 (See Color Note above), sc in first 4 sts, (ch1, sk1, sc in next 3 sts) 12 times, sc in final st.


Row 22
Row 22 Sc in first 2 sts, * (tr, sc, tr) in next st, sc in next sc, ch1, sc in next sc, rep from * 12 times, sc in final st changing to MC by drawing it through on the final step of the st, cross working yarn of CC1 over working yarn of MC to carry it up, cut CC1 yarn (See Color Note below), turn. [26 tr, 41 sc, 12 sp]
Gloria Blanket CAL Color Note
- Catona 10g Colour Pack Version – Cross working yarn of CC1 over MC, and cut CC1 yarn.
- Cahlista 15g Colour Pack Version – Cross working yarn of CC1 over MC, and cut CC1 yarn.
- Stone Washed / River Washed 10g Colour Pack Version – Cross working yarn of CC1 over MC, and cut CC1 yarn.
- Metropolis 10g Colour Pack Version – Cross working yarn of CC2 over MC, and cut CC2 yarn.
- Whirl + Whirlette Version – Cross working yarn of CC2 over MC, and cut CC2 yarn.
- All other versions – Cross working yarn of CC2 over MC, and cut CC2 yarn.
Note: Tr sts form tiny bobbles on RS of work.
Step-by-step Photos
Sc in first 2 sts,

* (tr, sc, tr) in next st, sc in next sc, ch1, sc in next sc, rep from * 12 times, sc in final st changing to MC by drawing it through on the final step of the st,


cross working yarn of CC1 over working yarn of MC to carry it up, cut CC1 yarn (See Color Note above).

Row 23
Row 23 Continuing in MC, sc in first 2 sc, (2sc in next sc, sc in next sc, FPtr around next dc, sc in next sc) 12 times, 2sc in next sc, sc in final 2 sc, turn. [12 FPtr, 54 sc]
Step-by-step Photos
Continuing in MC, sc in first 2 sc, (2sc in next sc, sc in next sc, FPtr around next dc, sc in next sc) 12 times, 2sc in next sc, sc in final 2 sc.


Row 24
Row 24 Ss in first 10 sts, sc in next 2 sts, hdc in next 2 sts, dc in next 2 sts, (ch1, sk1, dc) 17 times, ch1, dc in next 2 sts, hdc in next 2 sts, sc in next 2 sts, turn. (10 sts are left unworked.) [21 dc, 4 hdc, 4 sc, 18 sp]
Step-by-step Photos
Ss in first 10 sts,

sc in next 2 sts, hdc in next 2 sts, dc in next 2 sts,

(ch1, sk1, dc) 17 times, ch1, dc in next 2 sts, hdc in next 2 sts, sc in next 2 sts.


Row 25
Row 25 Ss in first 6 sts, sc in 35 sps/sts, turn. [35 sc]
Step-by-step Photos
Ss in first 6 sts,

sc in 35 sps/sts.


Row 26
Row 26 Ss in first st, change to CC2 in next st by making ss as follows: insert hook in next st and finish ss with CC2, continuing in CC2 and working over MC (sc in next st, tr in next st) 15 times, sc in next st, cut CC2 yarn, turn. [15 tr, 16 sc]
Note: On this row, CC2 is used, no matter what yarn version you are making. Tr sts make tiny bobbles on RS of work.
Step-by-step Photos
Ss in first st,

change to CC2 in next st by making ss as follows: insert hook in next st and finish ss with CC2,

continuing in CC2 and working over MC (sc in next st, tr in next st) 15 times, sc in next st, cut CC2 yarn.


(A peek from the RS so you can see the bobbles.)

Row 27
Row 27 Ss in first st, change to MC in next st by making ss as follows: insert hook in next st and finish ss with MC, cut CC2 yarn, continuing with MC, beg tr in next sc, (2trcl in next sc, ch1) 11 times, 2trcl in next sc, tr in next sc, turn. [12 2trcl, 2 tr, 11 sp]
Step-by-step Photos
Ss in first st,

change to MC in next st by making ss as follows: insert hook in next st and finish ss with MC, cut CC2 yarn,

continuing with MC, beg tr in next sc,

(2trcl in next sc, ch1) 11 times, 2trcl in next sc, tr in next sc.


Row 28
Row 28 Sc in first ch-sp, (ch2, sc in next ch-sp) 10 times, turn. [11 sc, 10 sp]
Step-by-step Photos
Sc in first ch-sp,

(ch2, sc in next ch-sp) 10 times.


Row 29
Row 29 Beg dc in first ch-sp, dc in next ch-sp, (ch1, dc in next ch-sp) 6 times, ch1, decrease next 2 ch-sps together as follows: (yoh, insert yarn in next ch-sp, yoh, pull up lp, yoh, draw yarn through 2 lps on hook) 2 times, yoh and draw yarn through all 3 lps on hook, turn. [1 decrease, 8 dc, 7 sp]
Step-by-step Photos
Beg dc in first ch-sp,

dc in next ch-sp,

(ch1, dc in next ch-sp) 6 times, ch1, decrease next 2 ch-sps together as follows: (yoh, insert yarn in next ch-sp, yoh, pull up lp, yoh, draw yarn through 2 lps on hook) 2 times, yoh and draw yarn through all 3 lps on hook.


Row 30
Row 30 Sc in first ch-sp, sc in next 10 sts/sps, turn. [11 sc]
Step-by-step Photos
Sc in first ch-sp, sc in next 10 sts/sps.


Row 31
Row 31 Ss in first st, change to CC2 (see color note below) in next st by making ss as follows: insert hook in next st and finish ss with CC2, continuing in CC2, beg dc in next st, dc in next st, ch1, sk2, (3trcl, ch2, 3trcl) in next st, ch1, sk2, decrease next 2 sts together as follows: (yoh, insert yarn in next st, yoh, pull up lp, yoh, draw yarn through 2 lps on hook) 2 times, yoh and draw yarn through all 3 lps on hook, cut CC2 yarn, turn. [1 decrease, 2 3trcl, 2 dc, 3 sp]
Gloria Blanket CAL Color Note
- Catona 10g Colour Pack Version – Change to CC2.
- Cahlista 15g Colour Pack Version – Change to CC2.
- Stone Washed / River Washed 10g Colour Pack Version – Change to CC2.
- Metropolis 10g Colour Pack Version – Change to CC1.
- Whirl + Whirlette Version – Change to CC1.
- All other versions – Change to CC1.
Step-by-step Photos
Ss in first st,

change to CC2 (see color note below) in next st by making ss as follows: insert hook in next st and finish ss with CC2,

continuing in CC2, beg dc in next st, dc in next st,

ch1, sk2, (3trcl, ch2, 3trcl) in next st, ch1, sk2, decrease next 2 sts together as follows: (yoh, insert yarn in next cyoh, pull up lp, yoh, draw yarn through 2 lps on hook) 2 times, yoh and draw yarn through all 3 lps on hook, cut CC2 yarn.


Row 32
Row 32 With RS still facing, insert hook in first ch-sp (not beg dc) and pull up lp of MC, ch1 to secure lp, beg dc in same sp, (2dccl, ch2, 2dccl) in next sp, dc in next sp, turn. [2 2dccl, 2 dc, 1 sp]
Step-by-step Photos
With RS still facing, insert hook in first ch-sp (not beg dc) and pull up lp of MC,

ch1 to secure lp,

beg dc in same sp,

(2dccl, ch2, 2dccl) in next sp, dc in next sp.

Row 33
Row 33 3sc in ch-sp, turn. [3 sc]
Step-by-step Photos
3sc in ch-sp.


Square Border
Rnd 1 With RS facing, (loosely ss in corner sc st, mark this ss as the corner, loosely make 34 ss evenly across side) 4 times, ss in first ss. Make your ss into the sts – not around them. So do not make the ss into the spaces, rather, make them by inserting your hook into the sts. Working this round will ensure a neat edge when you make your sc border.[140 ss]
Note: It is important to work these ss loosely. If you cannot work them loosely, then go up a hook size for this round, or you will regret it on the next round because the ss will be too tight to work into.
Rnd 2 Working into both lps of each ss, (make 3sc in marked corner ss, sc in all ss across) 4 times, ss in first sc, cut yarn and weave all remaining ends. Work over the “floats” that were made when yarns were carried up – this way they are hidden. [148 sc]

Finishing
Block square into square shape to expand lace and make for easier joining and a neater blanket.
The end! Give yourself a fist bump!
Hope you enjoy this square, and I can’t wait to see your WIP pics with all the awesome colors the community has picked. See you in the FB group and on IG!
Happy Crafting as always,
Rachele C.