
Hello, lovely! Today I want to share something I have been working on lately. Remember when I was gifted some new Scheepjes Mighty yarn to test out? I got started right away making a bag, and luckily before it was all over, I took some snapshots to show you the progression.

Scheepjes Mighty Yarn
This yarn is called Mighty for a reason! It is perfect for any project where you will need strong, durable material, just like this crochet bag I am creating. Shop this yarn at the links below, or read more about it at my official review.
- My review of Mighty Yarn
- Shop Mighty at WoolWarehouse (Use this affiliate link to purchase and I’ll receive a small commission to help keep CypressTextiles running – all at no additional cost to you!)
Color Combinations
Scheepjes Mighty has a limited color range at this moment. There are six neutral and earthy unicolours, three two-tone twisted blends, and two indigo shades.
Here is the color combination that I used for this sample bag. I was sent these five colors to play with from Scheepjes headquarters, and something just screamed “try your first bag!” at me. The material is perfect for a rugged and durable bag.
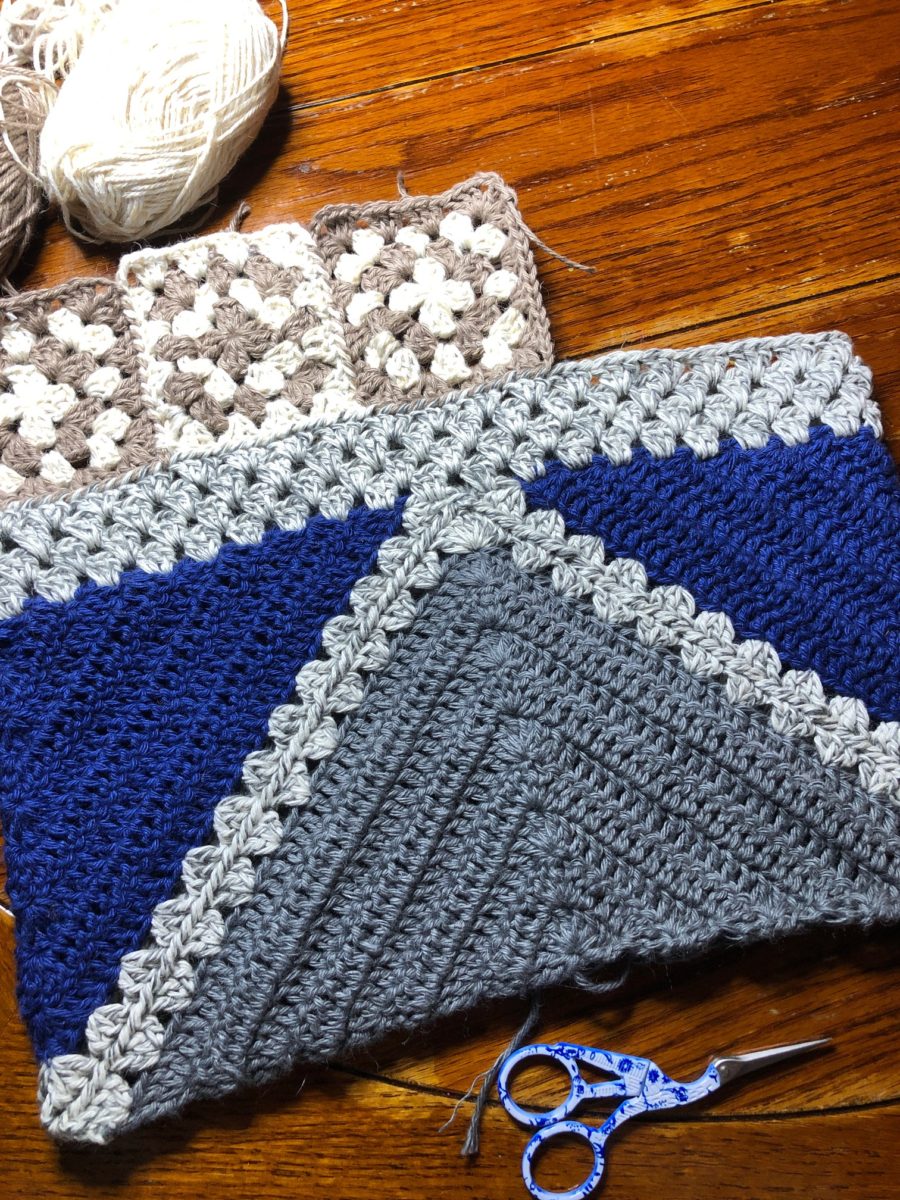
The first two colors I used for the large triangles at the bottom of the bag, the center as an accent, and the final two shades for the granny squares at the top.

If I could choose colors to make a second bag, I would use the ones below! The tans for the triangles, the darker two-tone as the accent, and then a couple of pale grey/blue to use for the granny squares at the top. I think this would be so pretty and very sophisticated. Actually, this project is so fast and fun, I have considered making and selling these bags in my shop as finished objects. I could make one per day, it is so quick!

Work in Progress
I took a few in-progress shots so you can get an idea of how this bag came together. I crochet joined these triangles together for the bottom of the bag. So at the center of the blue triangles will be the “side seams” of the bag.

Here is a close-up of how I sewed the bag together. I am using a technique that I created in 2012 called “PLT Join” which is really a great method when you want to join pieces as you go, in a tight and flat manner.

You can see how the join turns out below. I love using the two-tone yarn as this joining accent! It came out so pretty.

I also took a few shots of the granny square crochet at the top of the bag. It is something I had to end up pulling out in the end, because I miscalculated the width of the granny squares and it turned out that I should have made 8 squares instead of 10. But it all worked out in the end and the bag turned out lovely (stay tuned for the final reveal).

Learn New Skills
These are just some of the skills you will learn as you create your Learner bag. This pattern will be designed for folks who have never made a crochet bag and are quite intimidated by the idea of constructing the bag and then lining it and adding handles. Trust me, I felt the same way! Now I feel like I could make a hundred more of them!
- Granny square with no visible starting corner
- Solid chevron (half square triangle) with no holes at “peak”
- PLT Join – a totally flat join-as-you-go method
- Make a project by building on previous pieces – completely no-sew crochet
- Line a bag using an old pillowcase
- Attach leather handles to bag
You can see below that for this project, each piece builds off of the previous section. So you don’t have to sew a bunch of pieces together, which for me means this crochet bag is just the bees knees!

Also pictured are my blue and white scissors, which were gifted to me at our Scheepjes Bloggers’ Days in the Fall 2019 – you can find Scheepjes scissors here, and there are often different colors and metals to choose from.
I collect blue and white china, so these scissors were really a special gift!

One more shot for you of the construction process for this crochet bag. I am truly chuffed to be able to bring you this pattern in the future! It really is for someone who has never made a bag and is scared to try. Actually when I began telling crafters I was making a bag that was lined and with handles, many gave me the feedback that they have always been scared to line their bags – well it is a must, I assure you! What a game changer it is!
So never fear, this Learner Bag is the perfect starter pattern for you. Free pattern coming later in the month!

Thank you for popping in and checking out something I have been working on! I appreciate it 🙂
Happy crafting to you,
Rachele C.
3 Comments