
I am so excited to finally offer my Hexagon Burst free pattern to you all!
Find Pattern
Pattern is available on Ravelry in PDF format for a small $5 fee – ad-free and easy to print. Also on Etsy! See free pattern below.
You can also find this pattern on AllFreeCrochetAfghanPatterns.
Update: This pattern now has a yarn kit at my storefront on Deramores.com. Check it out and get the yarn in just a few clicks!
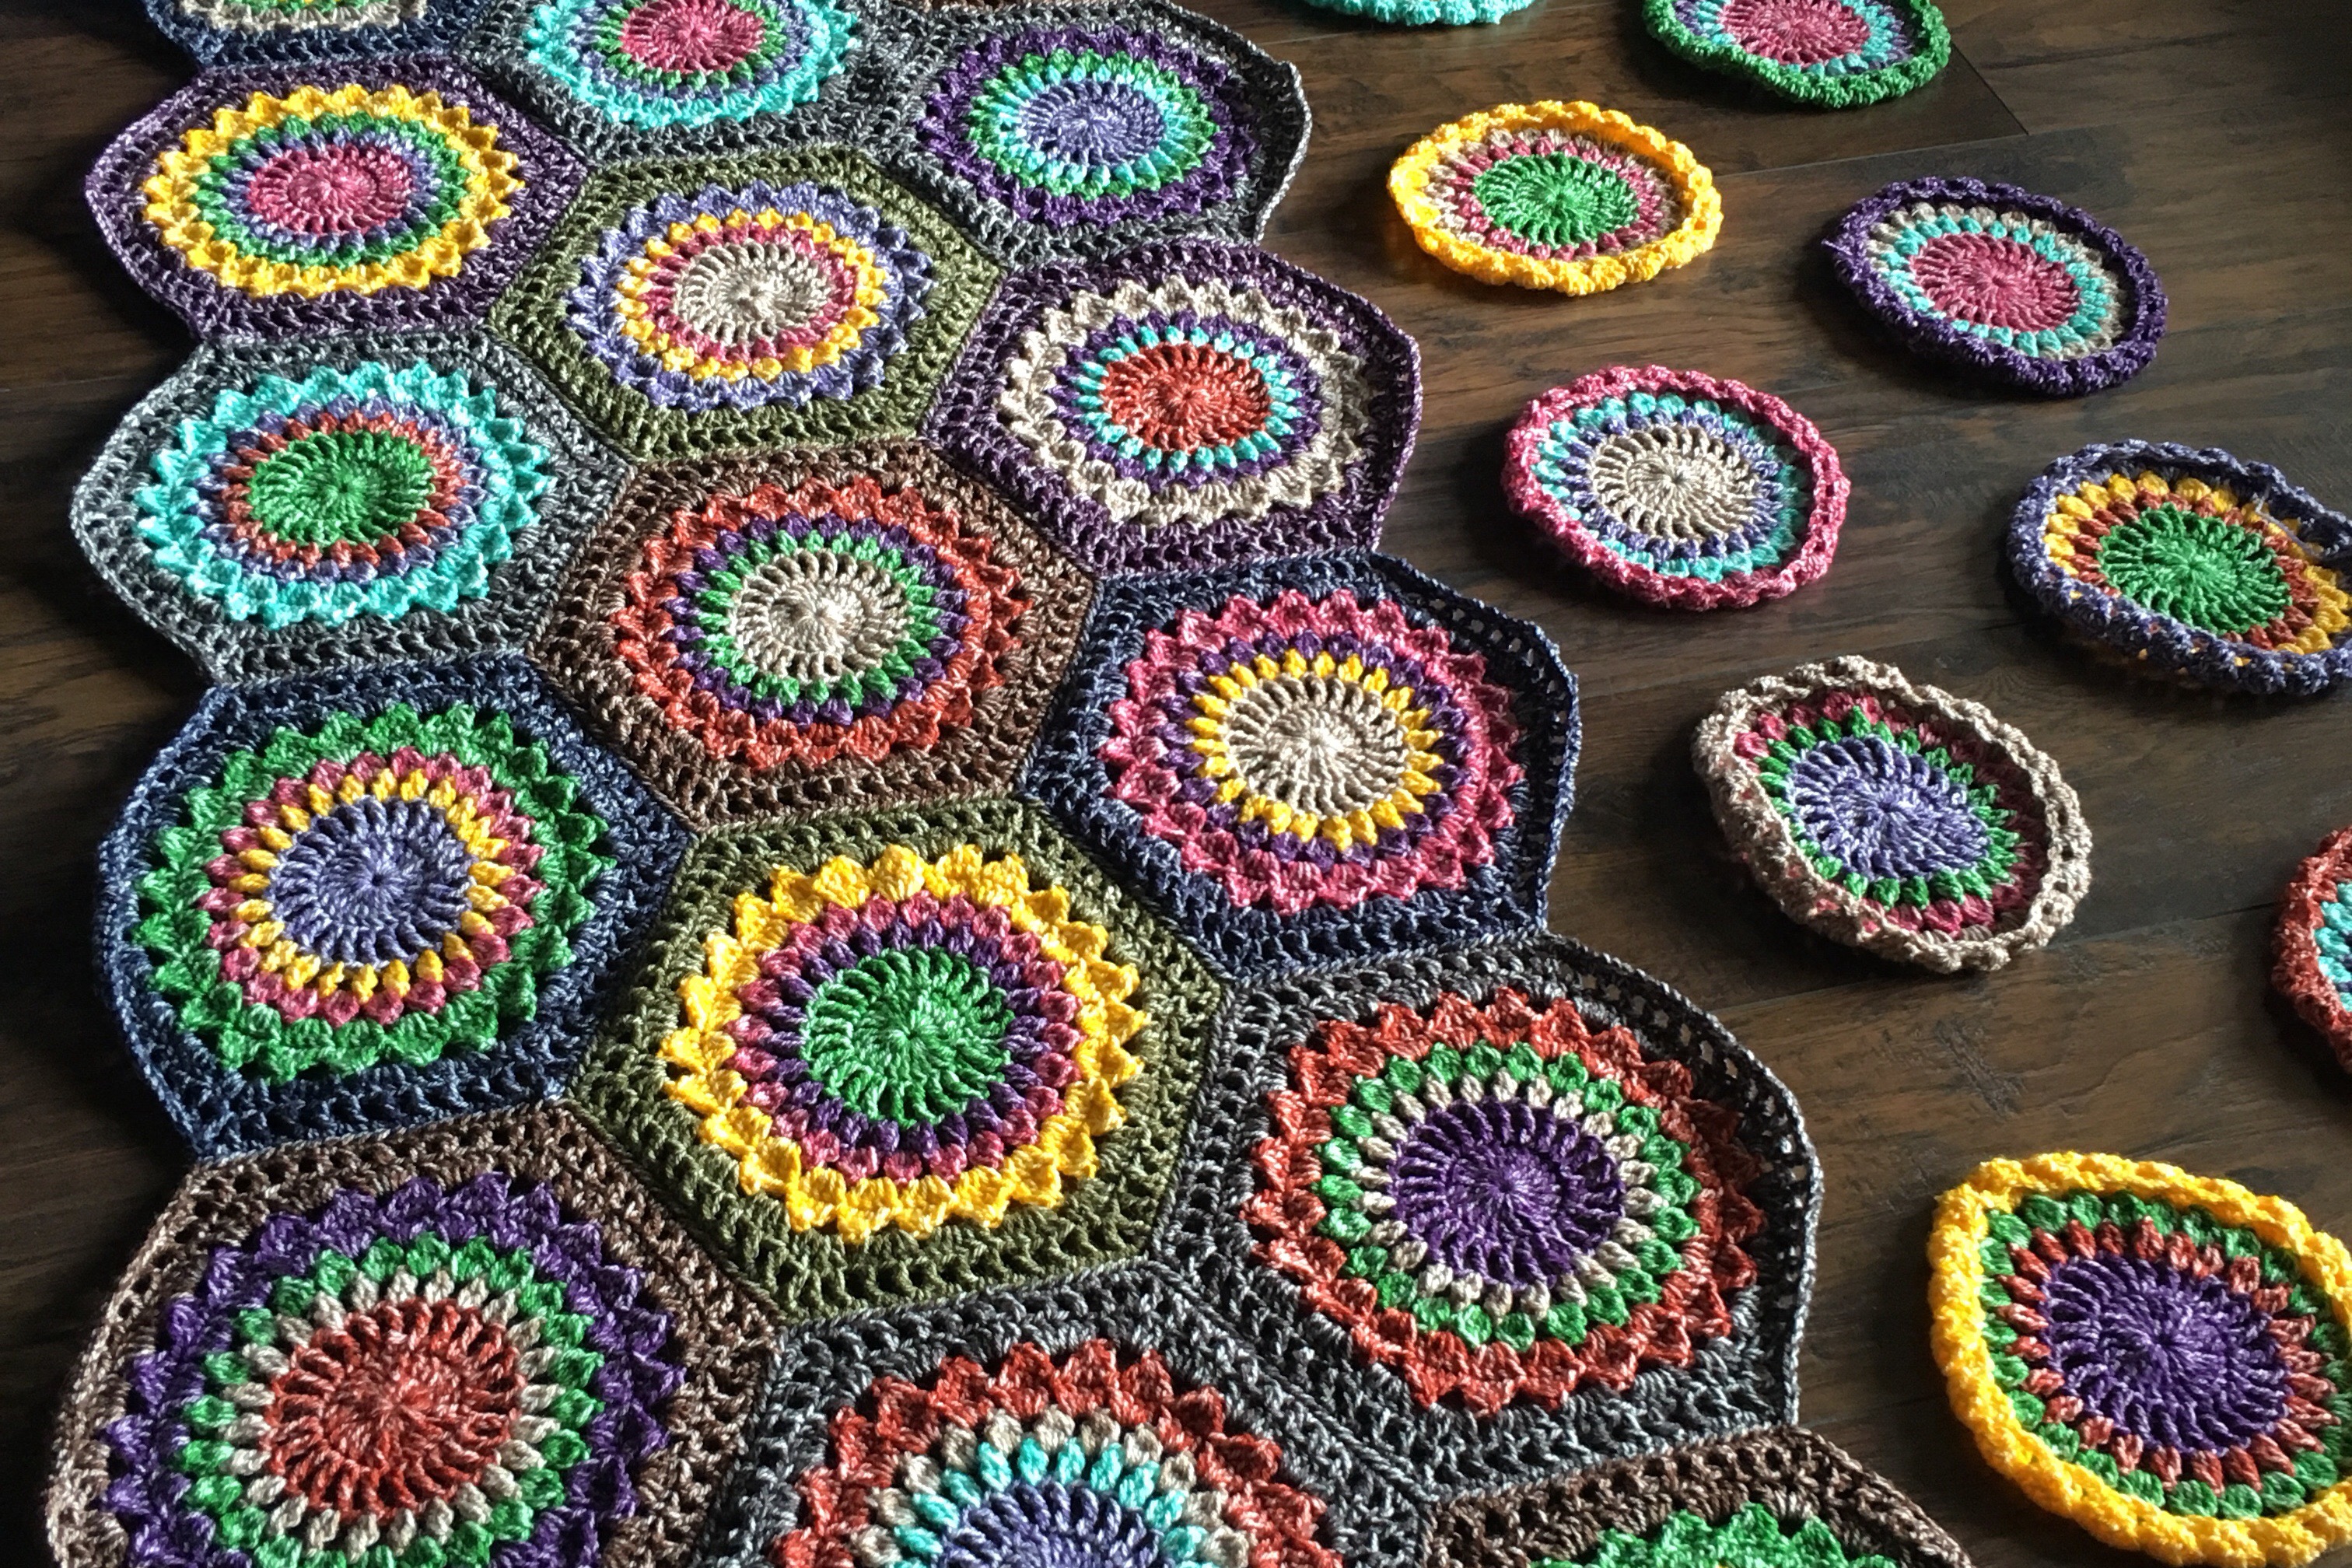
Peep this rockin’ blanket. I’m in love with it and so pleased to share the pattern with you all – look for “Hexagon Burst: Free Pattern” next week! (Needs to go through my updated pattern template checklist!) I’m still going around for portions of the border, but I’m still calling this an FO because I can finish the pattern at this point.

Can you just imagine draping this blanket around your shoulders for an instant rock star energy boost? Make it in the original Scheepjes* Velvet* for maximum energy potential, or pick your own yarns and have a blast mixing up the color palette.
Here I started one in a little 17-color mix of Catona Denim* and Sunkissed*.


Isn’t it darling in this yarn? Complete change of personality! And so lacy in the thinner weight too. In this sample, I used the same color for the first three rounds instead of just two, because I wanted to have more variety of colors among the motifs.. Lowering the amount of colors per hexie to four helped, and I like the way it looks with the flowery center instead of cutting off after Rnd 2.
Back to the Velvet version. 🙂


For this rock star blanket, I used the darker shades of Velvet for joining and lighter ones for the flowers, and as I mentioned in a previous post, I was careful not to use the brighter shades (yellow, aqua) for the center circle to avoid having any circle “polka dot” effect.

Looking forward to sharing this pattern and seeing all your lovely makes. Be sure to hashtag #hexagonburstblanket on social media!
Few more pics:
Close-up of border that I’m calling “Big Leaf Edging” which will be included in the pattern but I’ll also publish it separately to use on any blanket. Also, it will look more clearly like leaves in a solid color! So I’ll make up a small sample for that shortly.


And one last photo featuring my son who is taking advantage of the moment to draw on the floor in pen.. His expression says it all 🙂

Related Links Quick Reference:
- Velvet yarn review
- Catona Denim yarn review (coming soon!)
- Sunkissed yarn review (coming soon!)
- Hexagon Burst WIP post
- Pastel Hexagon Burst FO post (coming soon!)
Disclosure: This post contains affiliate links, which means I receive a small commission if you make a purchase using the links marked with an asterisk*. It doesn’t cost you anything extra, and it helps keep CypressTextiles going!
___________
Hexagon Burst came to be when I decided to see how many petals I could jam onto a sunburst circle flower. Turns out you can safely cram 24 petals if you add an extra round in the centAer and make those sts taller with trebles (UK double-trebles).

Such an exaggeratedly large and bold hexagon motif deserves a unique yarn, and Scheepjes* Velvet* is just that! With a saturated palette, and a super-cool color effect, this yarn makes a pattern really stand out. Perfect for Hexagon Burst! To read my full review or buy this yarn, click – HERE.
By the way, I love that they named this yarn “Velvet” because it totally reminds me of those fuzzy velvet coloring posters.

click to order one and enjoy a blast from the past


More motifs as the blanket grows.. The yellow and green colors stand out so much, I decided not to use them for the center 2-round circle, only for outer petal rounds. That way I don’t get a polka-dot effect.

Can’t want to finish this up and write the freebie pattern – Hexagon Burst – to be released in mid September. This will be the first free pattern that I’m going to make in my updated system. All of my patterns – free and paid – will be getting an update!! By the end of 2017 I’m hoping that I’ll be done with every single one of them 🙂
New patterns and updates will include:
- Charts (yay!)
- Updated written instruction
- Fewer step-by-step photos, but more clarity and precision in photos and writing
- PDF download on Ravelry, Craftsy, Etsy, and LoveKnitting – even for free patterns where possible
- Options for both US and UK terms
- More precise yarn information if possible
Woohoo! Looking forward to the overhaul! Stay tuned for the Hexagon Burst FO reveal 🙂
Extra WIP pics added 9/12/16!


Disclosure: This post contains affiliate links, which means I receive a small commission if you make a purchase using the links marked with an asterisk*. It doesn’t cost you anything extra, and it helps keep CypressTextiles going!
Blanket info
- Scheepjes ColourCrafter Velvet* – DK weight – One ball each, colors: 860-Fonda, 855-Chaplin, 850-Crawford, 844-Hepburn, 841-Kelly, 851-Gardner, 852-Garland, 848-Rogers, 856-Grant, 858-Martin, 859-Burton, 854-Turner, 853-Leigh
- Size H hook for body and G hook for final Border round.
- Size: 50×64″
Here’s a general outline of how the blanket is constructed.
First, make the pretty motifs!

Once you make all the motifs, join them with your favorite method! I’ve been crushing hard on the Flat Zipper Join by Dedri Uys. Any join will work, so use your fave!
If I’m honest, I used my freebie SC PLT join on the blanket in the photos, but I didn’t include it in the pattern because I wanted to avoid complexity. By all means, read up on it and join as you go on Round/Row 9 of motifs. Go wild!
In the actual pattern, I describe a simpler join method involving slip st through back loops only.

Once all motifs are joined, we’ll square off the zig-zag edges and make the 7-round Big Leaf Border. And ta-da! Done! 🙂

Related Links Quick Reference:
- Scheepjes Velvet yarn review
- Hexagon Burst WIP post and FO Reveal
- Do you love sunburst flower patterns? See more: My Sunburst Flower blanket collection, 50 Shades of 4-Ply Retro Flower blanket, Crafty Queens Modified Sunburst
Notions & Sizing
- US Size 5mm hook – body
- US Size 4mm hook – final Rnd of border
- Tapestry needle for weaving ends
- Gauge Full hexagon motif is 10 inches tall from flat top to flat bottom. If you choose alternate yarn and hook, beware dimensions will vary.
- Measurements Finished piece is about 50x64in
Key Stitch Descriptions (US Terms)
- ch chain
- 2dc-cl Work as for dc2tog, but work into the same st/sp, creating a cluster
- 3dc-cl Work as for dc3tog, but work into the same st/sp, creating a cluster
- 4dc-cl Work as for dc4tog, but work into the same st/sp, creating a cluster
- beg beginning
- beg dc (sc, ch 1) – counts as 1 dc
- beg tr (sc, ch 2) – counts as 1 tr
- dc double crochet (wrap yarn around hook 1 time)
- dc2tog (in next St work dc up to final step, leaving behind one loop on hook) 2 times, yoh, draw yarn through all 3 lps on hook
- dc3tog (in next St work dc up to final step, leaving behind one loop on hook) 3 times, yoh, draw yarn through all 4 lps on hook
- dc4tog (in next St work dc up to final step, leaving behind one loop on hook) 4 times, yoh, draw yarn through all 5 lps on hook
- dec decrease
- hdc half double crochet
- lp(s) loop(s)
- rep repeat
- RS/WS right side/wrong side of work
- sc single crochet
- sc2tog (insert hook in st indicated, yoh, pull loop to front) 2 times, yoh and pull yarn through all 3 lps on hook
- sk skip
- sp space
- ss slip stitch
- st(s) stitch(es)
- tr treble crochet (wrap yarn around hook 2 times)
- yoh yarn over hook
Layout

Full Motif

Half Motif

Blanket Body
Full Hexagon motif (Make 27)
Rnd 1 Sl knot, ch 4, ss in fourth ch from hook to make ring. All in ring: Beg tr, 23 tr, ss in beg tr. [24 tr]
Rnd 2 In next st, beg tr, (ch 1, tr) 23 times, ch 1, ss in beg tr, cut yarn. [24 tr, 24 ch-sp]
Rnd 3 Join new yarn with ss in any tr, (beg dc, dc) in same st, (ch 2, 2dc-cl) 23 times, ch 2, ss in beg dc, cut yarn. [24 2dc-cl, 24 ch-sp]
Rnd 4 Join new yarn with ss in any ch-sp, (beg dc, 3dc-cl) in same sp, (ch 2, 4dc-cl in next ch-sp) 23 times, ch 2, ss in beg dc, cut yarn. [24 4dc-cl, 24 ch-sp]
Rnd 5 Join new yarn with ss in any ch-sp, (beg dc, 3 dc) in same sp, 4 dc in 23 ch-sps, ss in beg dc. [96 dc]
Rnd 6 Beg dc in same st as join, dc3tog, (ch 3, dc4tog) 23 times, ch 3, ss in beg dc, cut yarn. [24 dc4tog, 24 ch-sp]
Rnd 7 Join new yarn with ss in any ch-sp, (beg dc, ch 1, 2 dc), in same sp, * 5 dc in next 3 ch-sps, (2 dc, ch 1, 2 dc) in next ch-sp, rep from * 4 times, 5 dc in next 3 ch-sps, dc in first ch-sp, ss in beg dc. [114 dc, 6 ch-sp]
Rnd 8 (Beg dc, ch 1, dc) in first ch-sp, * (ch 1, sk 1, dc) 9 times, ch 1, (dc, ch 1, dc) in next ch-sp, rep from * 5 times omitting final (dc, ch 1, dc), ch 1, ss in beg dc. [66 dc, 66 ch-sp]
Rnd 9 3 sc in first ch-sp, * sc in each st/sp 21 times, 3 sc in next ch-sp, rep from * around motif until beg corner is reached, ss in first sc, cut yarn. [144 sc]
Note: I used brights for flower portion, and darks for final 3 rnds to make the flowers “pop.”

Half Motif (Make 6)
Row 1 (RS) Make sl knot, ch 3, ss in third ch from hook to make ring. All in ring: (Beg tr, 13 tr), turn. [14 tr]
Row 2 Beg tr in first st, (ch 1, tr) 13 times, cut yarn, turn. [14 tr, 13 ch-sp]
Row 3 Join new yarn with ss in first st, beg dc in same st, ch 1, (2dc-cl in next tr, ch 2) 11 times, 2dc-cl in next tr, ch 1, dc in final st, cut yarn, do not turn. [2 dc, 12 2dc-cl, 11 ch-2 sp, 2 ch-1 sp]
Row 4 (RS) Join new yarn with ss in first st, beg dc in same st, 2dc-cl in ch-1 sp, (ch 2, 4dc-cl in next sp) 11 times, ch 2, 2dc-cl in ch-1 sp, dc in final st, cut yarn, turn. [2 dc, 2 2dc-cl, 11 4dc-cl, 12 ch-sp]
Row 5 Join new yarn with ss in first st, beg dc in same st, 4 dc in next 12 ch-sps, dc in final st, turn. [50 dc]
Row 6 Beg DC in first st, ch 2, (dc4tog, ch 3) 11 times, dc4tog, ch 2, dc in final st, cut yarn, do not turn. [12 dc4tog, 11 ch-3 sp, 2 ch-2 sp]
Row 7 (RS) Beg DC in first st, 2 dc in ch-2 Sp, * 5 dc in next 3 ch-sps, (2 dc, ch 1, 2 dc) in next ch-sp, rep from * 1 time, 5 dc in 3 ch-sps, 2 dc in next ch-sp, dc in final st, turn. [59 dc, 2 ch-sp]
Row 8 (Beg dc, ch 1, dc) in first st, * (ch 1, sk 1, dc) 9 times, ch 1, sk 1, (dc, ch 1, dc) in next ch-sp, rep from * 2 times omitting final (dc, ch 1, dc), ch 1, sk 1, (dc, ch 1, dc) in final st, turn. [35 dc, 34 ch-sp]
Row 9 Sc in first st, * sc in all sts/sps to next “corner” ch-sp, 3 sc in corner-sp, rep from * 2 times omitting final 3 sc, sc in ch-sp and in final st, cut yarn. [73 sc]

Join Motifs
Arrange motifs like in schematic on page 2. Make 5 vertical strips as follows: holding motifs right side together, whip st flat bottom and top edges together. Once 5 strips are complete, whip st strips together, zig-zagging from top to bottom in the same manner.
Fill Side Gaps
Along zig-zag sides, fill each triangle dip one by one as follows:
Row 1 With RS facing and any leftover yarn color – I chose the darker shades, locate the center sc at the “peak” on right hand side of triangle gap (white arrow). Join yarn with ss in the sc to the LEFT of that center st, sc2tog over same and next st, sc in 19 sts, sc2tog over next st and center sc on motif corner. Working now on next motif, sc2tog over center sc of corner and next sc, sc in 19 sts, sc2tog, turn. [4 sc2tog, 38 sc]
Row 2 Beg dc, dc3tog (counts as dc4tog here and throughout), (ch 1, sk 1, dc) 7 times, ch 1, sk 1, dc4tog, (ch 1, sk 1, dc) 7 times, ch 1, sk 1, dc4tog, turn. [3 dc4tog, 14 dc, 16 ch-sp]
Row 3 Beg dc, dc3tog, dc in 11 sts, dc3tog (note: these 3 sts are ch-sp, dec, ch-sp), dc in 11 sts, dc4tog, turn. [2 dc4tog, 1 dc3tog, 22 DC]
Row 4 Beg dc, dc3tog, dc in 7 sts, dc3tog, dc in 7 sts, dc4tog, turn. [2 dc4tog, 1 dc3tog, 14 dc]
Row 5 Beg dc, dc3tog, dc in 3 sts, dc3tog, dc in 3 sts, dc4tog, turn. [2 dc4tog, 1 dc3tog, 6 dc]
Row 6 Beg dc, dc3tog, sk center dec, dc4tog, turn. [2 dc4tog]
Row 7 Sc2tog, cut yarn. Repeat to fill all 12 gaps.
Border
Note: For my border, I used every darker shade of leftover yarn balls until they ran out. This created a fun color effect, and helped to conserve yarn.
Rnd 1 Join yarn with ss in any corner st/sp, (3 sc in corner, sc evenly in all sts across to next corner) 4 times, ss in first sc. (Tip: Be sure to SC enough sts so make a flat border. Too few will create puckering, and too many will cause ruffling.)
Rnd 2 (Beg dc, ch 2, 2 dc) in corner st, dc in all sts across to corner st, (2 dc, ch 2, 2 dc) in corner st, rep around in this manner until first corner is reached, dc in first corner, ss in beg dc.
Rnd 3 (3 sc in corner, sc in all sts to next corner) 4 times, ss in first sc.
Rnd 4 (Beg dc, ch 1, 2 dc) in corner st, * (sk 2, 4 dc in next st) across to next corner, (4 dc, ch 1, 4 dc) in corner st, rep from * around to first corner, 3 dc in first corner, ss in beg dc.
Rnd 5 (Beg dc, 3dc-cl) in corner sp, * (ch 3, dc4tog) across to corner sp, ch 3, 4dc-cl in ch-sp, rep from * around to first corner, ch 3, ss in beg dc.
Rnd 6 3 sc in top of 3dc-cl, (3 sc in all ch-sps across to corner, 3 sc in 4dc-cl), rep around to first corner, ss in first st.
Change to size G hook, or hook one size smaller than main hook.
Rnd 7 Reverse sc in all sts around (Note: do not add any extra sts at corners), ss in first st, cut yarn. YAY!

Copyright
No pattern or other material may be reproduced — mechanically, electronically, or by any other means, including photocopying — without written permission of Rachele Carmona. This applies to all content on CypressTextiles.net, BabyLoveBrand.net, all free/paid patterns, and tutorials. Paid patterns are for personal use only. You may sell your finished crocheted items.