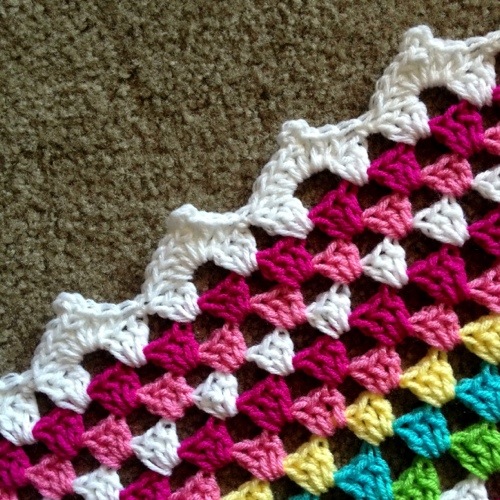
Meringue Edging Crochet Blanket Border – Tutorial
Materials
- Yarn recommendation – For this tutorial, you can use a soft, sturdy economical powerhouse like KnitPicks Brava Sport (Affiliate). See a full review of this yarn on my crafty site.
- Hook Recommendation – I own and use the hook from this set on Amazon (Affiliate)
Meringue Edging Crochet Blanket Border Tutorial
Pssst! Looking for more crochet blanket border patterns? Check it out!
Information
This edging can be used on a straight DC or a granny edge as in this project. If you’re doing a straight DC border, just skip 3 stitches between the shell and the SC like if it were a granny.
I work a round of the border color first, so when I start, I’m not attaching new yarn. I finish the round in a chain 2 corner. Essentially the shell is: 3DC, Picot, 4DC
*See how to make the Picot below*
Edging: (SC, chain 1, 3DC, Picot, 6DC) in chain 2 corner (Corner shell made). *SC in the next ch2 space. (3DC, Picot, 4DC) in next ch2 sp* repeat across to the next corner.
At my corners, I come to a shell at the end, when I should be SC-ing before the corner. I just play it off and do the corner shell anyway! It makes for a great leafy corner and I love it as an added piece of the design.
Picot:
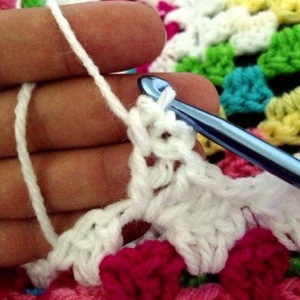
After you 3DC, chain 3
Insert your hook in the DC, through the center with the two outer bars on the outside, like in the photo below.
Yarn over and pull the loop through to make an SC.
Finish the SC. Picot made.
So, chain 3, SC in base stitch. This base stitch could be an SC too, if you’re just working SC across with picots at an interval. By the way, that makes a pretty, delicate edge.
Have fun, and let me know how it goes!


