
Hello, you! Today I have the fourth installment of my free Linen Stitch Blanket Series, the Beach Hut Blanket. This pattern was originally published in 2015, but since then it has been updated a couple of times and was also featured in a magazine! I decided it needed to live as a free pattern on my blog, in my Linen Stitch Blanket Series, but of course the pattern will always be available in PDF version for easy printing.

Quick Links: Linen Stitch Blanket Series
Have a look at the other blankets in this series! They are all free patterns, releasing on the last day of each month from May through September.
- French Braid Blanket
- Zendoodle Blanket (Part 1) // Rectangle Version
- LissMiss Blanket
- Beach Hut Blanket (This post)
- Chevronnie Blanket
Beach Hut: PDF Version
Find the PDF version here for easy print or just to help support CypressTextiles: Etsy, Ravelry, CypressTextiles Pattern Shop. 2 versions are available in the download – the heavy-image version, and the condensed version.
Social Media Sharing
Please use these hashtags when posting about your Beach Hut Blanket on Social Media:
#BeachHutBlanket and #CypressTextiles

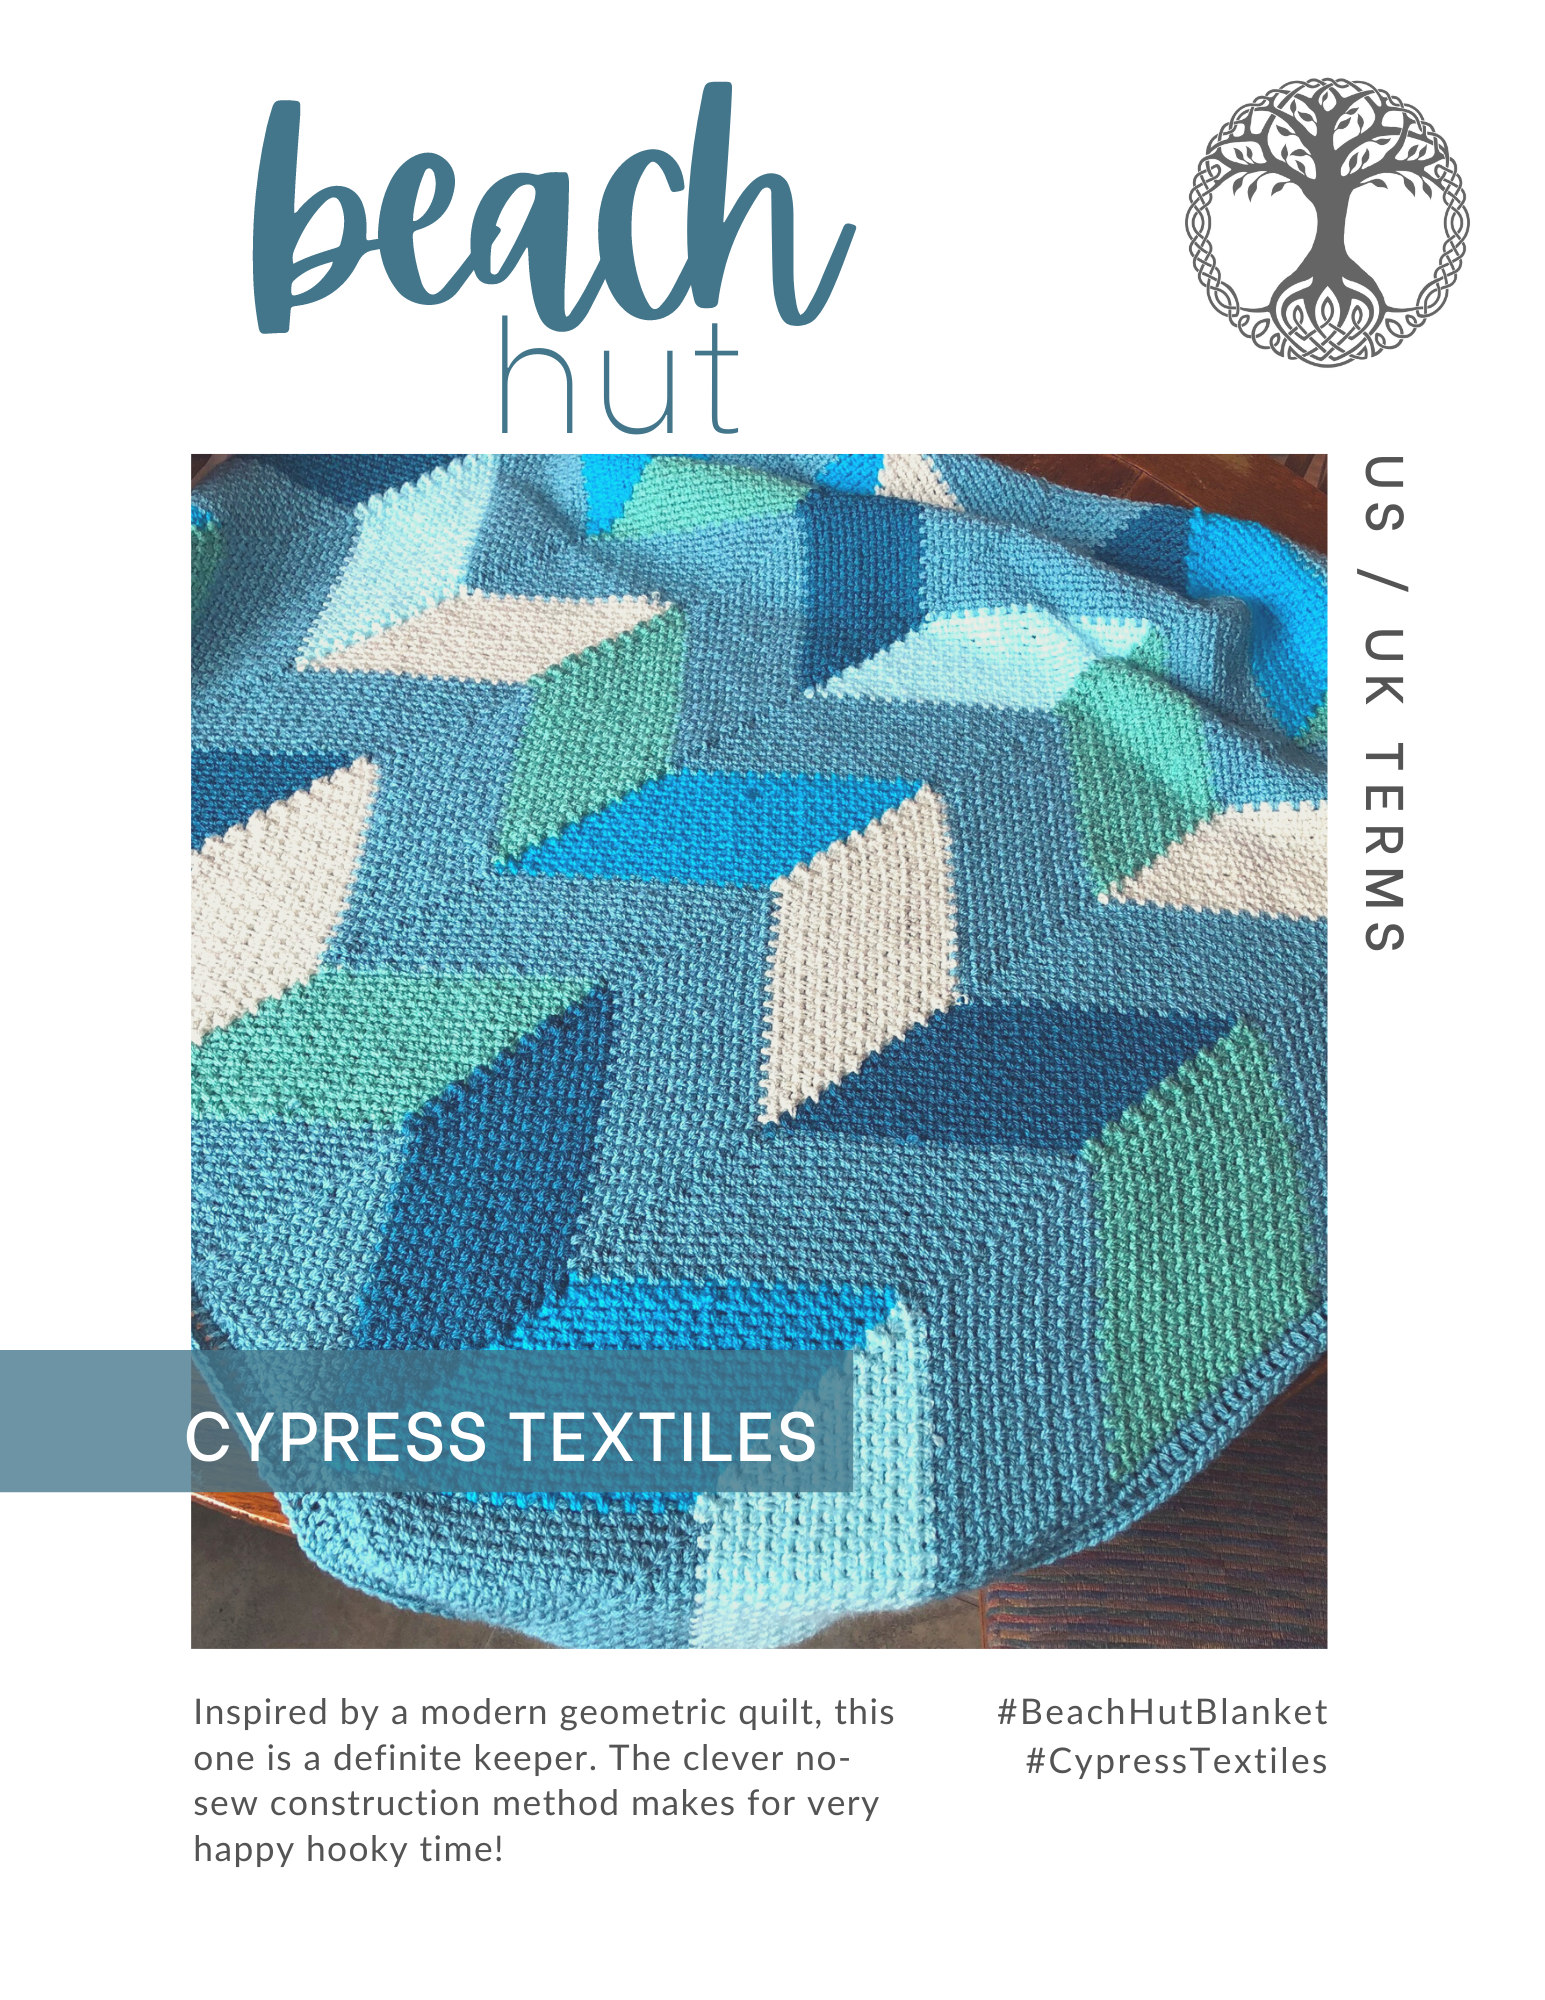
About the Beach Hut Blanket
The Beach Hut Crochet Blanket is a definite keeper. It was inspired by the Colorful Chevrons Quilt by Christa Watson. I highly recommend looking into her work! It’s the modern quilts that inspire me to convert them to my crochet medium. The clever no-sew construction will definitely make you happy! The piece is made by creating base triangles and layering colored chevron with simple zig-zag until your blanket is long enough. Finish off by squaring the top and you have a gorgeous, modern blanket. Any border can be substituted for the one in the pattern, but I believe the bright colors on a white background call for simplicity.
- Skill Level Easy
- Finished Measurements 40x40in
- US Hook size 4.5mm, and tapestry needle for weaving ends
- US Hook size 3.75mm, for final round of border only
- Gauge With J hook, 18 sts and 18 rows = 4 inches in pattern. Take time to check gauge.

Scheepjes Colour Crafter Yarn
You will need Scheepjes, Colour Crafter 100g balls in the following colors and amounts to make the teal and sea green colored blanket pictured above and below.
Color No. x Qty
- Yarn A: No. 1722 x 4
- Yarn B: No. 1725 x 1
- Yarn C: No. 1034 x 1
- Yarn D: No. 2017 x 1
- Yarn E: No. 2012 x 1
- Yarn F: No. 1708 x 1
Shop Colour Crafter Yarn
Shopping through the following affiliate links helps support CypressTextiles at no additional cost to you!
Or find a Scheepjes retailer near you!

Pattern Notes
- Weave in loose ends as work progresses.
- Do not make a turning chain when beginning the row with a single crochet. This creates neater edges without rippling or puckering.
- Consistently turn work counter-clockwise for neater edges.
Special Stitches
Pull Loop Through join (PLT join): release lp from hook, insert hook front to back in st/sp indicated, grab lp, pull lp to front of work, continue as instructed in pattern. Loop joins pieces as you go.
Key Stitch Descriptions (US Terms)
Note: This pattern is only in US Terms, but there is only 1 stitch used: single crochet, so if you are used to reading UK Terms, please know that you are using UK dc for this entire project. (US) sc = (UK) dc
In the border, UK TR is also used, so remember, US DC = UK TR
- Ch-n = Chain “n” number of Sts
- St(s) = Stitch(es)
- Sp = Space
- Beg = Beginning
- YO = Yarn Over
- Slst = Slip stitch
- SC = Single Crochet
- DC = Double Crochet
- Beg DC = SC, Ch-1
- TR = Treble Crochet
- Inc = “Increase” (SC, Ch-1, SC) in Sp or St indicated
- PLT = “Pull Loop Through” See more info within pattern
- Make Ring: Chain 3 and join with Slst to first Ch
- Join new yarn = Attach new color yarn with a Slst in indicated spot

Instructions
Note: The step by step photos reflect a different stitch count. Please read the stitch count in the pattern, and make sure your work matches. Use the step by step photos to see the general methods used to construct the blanket. The colors shown in the step by step photos are used to make a previous version of this blanket, not the teal one.
Base Triangles
Make 4 Identical
Row 1 (RS) With A, ch 3, join (see Pattern Notes) in 3rd ch from hook to make ring, [sc, ch 1] 3 times in ring, sc in ring, turn. [4 sc, 3 sp]
Note: Mark RS to help in pattern construction. I consistently turn Counter-Clockwise to keep edges nice and tidy.
Row 2 (Sc, ch 1, sc) in first ch-1 sp, * ch 1, (sc, ch 1, sc) in next sp, rep from * once, turn.
Row 3-15 (Sc, ch 1, sc) in first ch-1 sp, (ch 1, sc in next ch-1 sp) across to center ch-1 sp, ch 1, (sc, ch 1, sc) in center ch-1 sp, (ch 1, sc in next ch-1 sp) across to last ch-1 sp, ch 1, (sc, ch 1, sc) in last ch-1 sp, turn. [32 sc, 31 sp]
After Row 15, cut yarn and finish off. Weave bottom center tail. Base Triangle complete.

No-Sew Chevron Layer
First Color Block
Row 1 (RS) With RS facing, join C in first ch-1 sp, sc in same sp, (ch 1, sc in next ch-1 sp) across to center ch-1 sp, ch 1, (sc, ch 1, sc) in center ch-1 sp, turn. [17 sc, 16 sp]
Note: I do not “chain up” after turning rows because I find it leaves my edges messy and loose. For a tighter edge that lies flat, I simply begin my next row by going straight into an SC.


Row 2 (Sc, ch 1, sc) in first ch-1 sp, (ch 1, sc in next ch-1 sp) across to last sp, turn. (17 sc, 16 ch-1 sps)

Row 3 Sc in first ch-1 sp, (ch 1, sc in next ch-1 sp) across to last ch-1 sp, ch 1, (sc, ch 1, sc) in last ch-1 sp, turn. [17 sc, 16 sp]

Rows 4-16 [Rep Rows 2 and 3] 6 times, ending with WS facing. [17 sc, 16 sp] Fasten off after last row.

Second Color Block
Row 1 (WS) With WS facing, join E in first ch-1 sp, sc in same sp, (ch 1, sc in next ch-1 sp) across to ch-1 sp just before center ch-1 sp, turn. [15 sc, 14 sp]


Row 2 PLT join (Special Stitches) in first ch-1 sp of Row 2 of previous color block, ch 1, sc around PLT lp (before first sc), (ch 1, sc in next ch-1 sp) across to last sp, turn. [15 sc, 15 sp]


Row 3 Sc in first ch-1 sp, (ch 1, sc in next ch-1 sp) across to last ch-1 sp, turn. [15 sc, 14 sp]

Rows 4–16 [Rep Rows 2 and 3] 6 times, making PLT join at beginning of every RS row into the ch-1 sp 2 rows up on the previous color block, ending with RS facing. [15 sc, 15 sp] Fasten off after last row.


Third Color Block
Row 1 (RS) Holding second base triangle with RS facing, join F in first ch-1 sp, PLT join in first ch-1 sp of row 1 of previous color block, sc in same sp as sl st, (ch 1, sc in next ch-1 sp) across to center ch-1 sp, ch 1, (sc, ch 1, sc) in center ch-1 sp, turn. [17 sc, 16 sp]


Row 2 (Sc, ch 1, sc) in first ch-1 sp, (ch 1, sc in next ch-1 sp) across to last ch-1 sp, turn. [17 sc, 16 sp]

Row 3 PLT join in first ch-1 sp of row 2 of previous color block, sc in first ch-1 sp, (ch 1, sc in next ch-1 sp) across to last ch-1 sp, ch 1, (sc, ch 1, sc) in last ch-1 sp, turn. [17 sc, 16 sp]


Rows 4–16 [Rep Rows 2 and 3] 6 times, making PLT join at beginning of every RS row into the ch-1 sp 2 rows up on previous color block, ending with WS facing. Fasten off after last row. Make square knot with ends from this row and Row 16 of second color block. Weave in ends through sts of their own color. [17 sc, 16 sp]

Fourth color block
Rows 1–16: With B on left side of second base triangle, work same as second color block, joining to third color block.

Fifth–Eighth color blocks
Work same as second and third color blocks, on third and fourth base triangles, using the colors D, F, B, and E, respectively, joining to previous color block.
Note: Once you complete the final Color Block, you will have all 4 Base Triangles used up. You will always start a Color Block by joining new yarn at the bottom right hand corner of a Base Triangle.

Zig-Zag Layer
Row 1 (WS) With WS facing, join A in first ch-1 sp of eighth color block, *[sc in ch-1 sp, ch 1] 15 times, (sc, ch 1, sc) in center ch-1 sp, [ch 1, sc in next ch-1 sp]15 times, rep from * 3 times, turn. (Note: Count to ensure there are 15 sc on each zig-zag “slant”, plus a [sc, ch 1, sc] in each center or “peak” ch-1 sp). [128 sc, 124 sp]
Rows 2–15 *[Sc in ch-1 sp, ch 1] 15 times, (sc, ch 1, sc) in center ch-1 sp, [ch 1, sc in ch-1 sp] 15 times, rep from * 3 times, turn. [128 sc, 124 sp] Fasten off.


Second No-Sew Layer
Work same as first no-sew layer, working in the following color sequence: 1 color block each in B, F, D, E, B, D, C and F.

Second Zig-Zag Layer
Rep first zig-zag layer.

Third No-Sew Layer
Work same as first no-sew layer, working in the following color sequence: 1 color block each in E, D, B, C, F, B, E and C.
Third Zig-Zag Layer
Rep first zig-zag layer.
Fourth No-Sew Layer
Work same as first no-sew layer, working in the following color sequence: 1 color block each in C, B, E, F, D, E, B and F.
Straightening No-sew Chevron Layer
First triangle gap
Row 1 (RS) With RS facing, join A in first ch-1 sp, (sc in ch-1 sp, ch 1) 15 times, sc in center ch-1 sp, turn. [16 sc, 15 sp]

Rows 2–15 (Sc in ch-1 sp, ch 1) across to last sp, sc in last ch-1 sp, turn. [12 sc, 11 sp at end of last row]

Row 16 Sc in next ch-1 sp. [1 sc] Fasten off.

Second, third, and fourth triangle gaps
Row 1 (RS) With RS facing, join A in same ch-1 sp holding last sc of row 1 on previous triangle gap, *[sc in ch-1 sp, ch 1] 15 times, sc in next ch-1 sp, rep from * once, turn. [32 sc, 30 sp]

Rows 2–15 *(Sc in next ch-1 sp, ch 1) across to last sp of “valley”, sc in next ch-1 sp, rep from * once, turn. [4 sc, 2 sp at end of last row]

Row 16 Sc in each of next 2 ch-1 sps. [2 sc] Fasten off.
Fifth triangle gap
Rows 1-16 With WS facing, join A in first ch-1 sp on last side of eighth color block, work as for first triangle gap. Do not fasten off at end of last row.
Border
Rnd 1 *3 sc in corner st, sc evenly across to next corner, working 1 sc in each row, rep from * around, making sure that opposing sides have the same number of stitches, join in first sc.
Rnd 2 (Sc, ch 1, 4 dc) in corner st, *dc in each st across to next corner st**, 5 dc in next corner st, rep from * around, ending last rep at **, join in top of beg ch-1.
Rnd 3 Change to F hook. With smaller hook, sc in each st around, join in first sc. Fasten off.
Finishing
Weave in ends. Block if desired.
Resizing or Making a Rectangle
Change the amount of rows in the Base Triangle or the amount of rows in the Color Blocks or the Chevron Layers and you can change the look of the whole blanket!
This piece is so easy to resize. Add more Base Triangles for a wider blanket. I’ve made these Beach Hut Blankets as custom orders when I did custom work. Check them out!

To widen
Easy version: Add more Base Triangles to widen the base of the blanket in 8-inch increments. Work the blanket in the same way.
Intermediate version: You can work the Base Triangles with fewer or more rows to change the width, and the construction process will be the same. In the photo below, I have made smaller Base Triangles, and as a result, the No-Sew Chevrons are narrower as well. Of course, the Zig-Zag Layer is also modified, but again, the process is the same. Experiment with different widths for a new look!


To lengthen
Simply add more layers to lengthen. I find that adding 1 more layer each of Zig-Zag and No-Sew Chevron makes a lovely rectangle. If you have widened your piece, you can surely add as many layers as you like!
Note: You can definitely alter the amount of rows that you work on either Layer to get different effects. Play with the pattern to make it your own!


FIN!
Copyright Information
No pattern or other material may be reproduced — mechanically, electronically, or by any other means, including photocopying — without written permission of Rachele Carmona. This applies to all content on CypressTextiles.net, BabyLoveBrand.net, and all other sites used by Rachele Carmona. Paid patterns are for personal use only. You may sell your finished crocheted items.
Pin this Pattern!
Thank you for stopping in for this freebie!
I’ve enjoyed sharing my LInen Stitch Blanket Series, and there’s just one more pattern. Stay Tuned!
Until then, happy crafting,
Rachele C.
Quick Links: Linen Stitch Blanket Series
Have a look at the other blankets in this series! They are all free patterns, releasing on the last day of each month from May through September.
- French Braid Blanket
- Zendoodle Blanket (Part 1) // Rectangle Version
- LissMiss Blanket
- Beach Hut Blanket (This post)
- Chevronnie Blanket (Coming September 30)