
Hello, friend! I hope you are having a great week so far. Have you gotten any hooky in? If not, be sure to prioritize your interests and make some time for yourself.
Trellis and Chevron Blanket
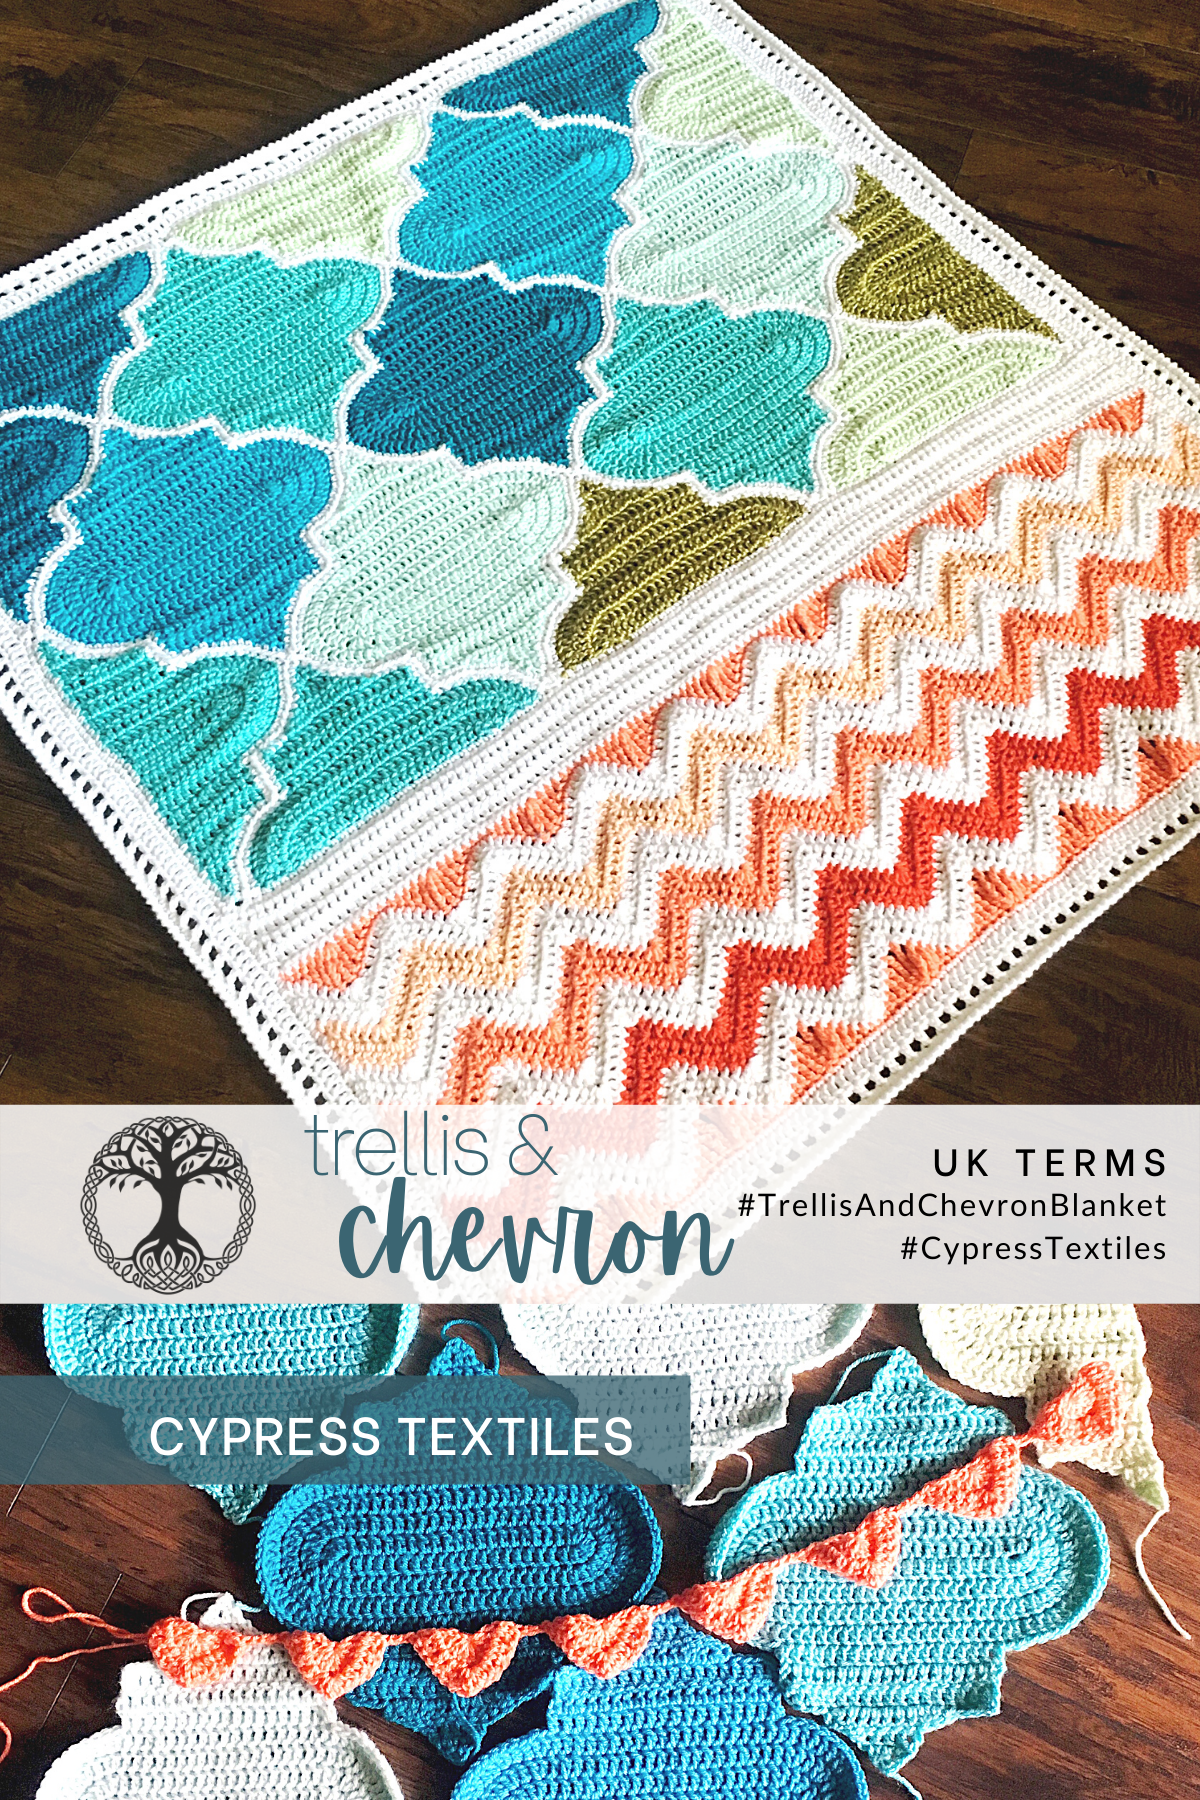
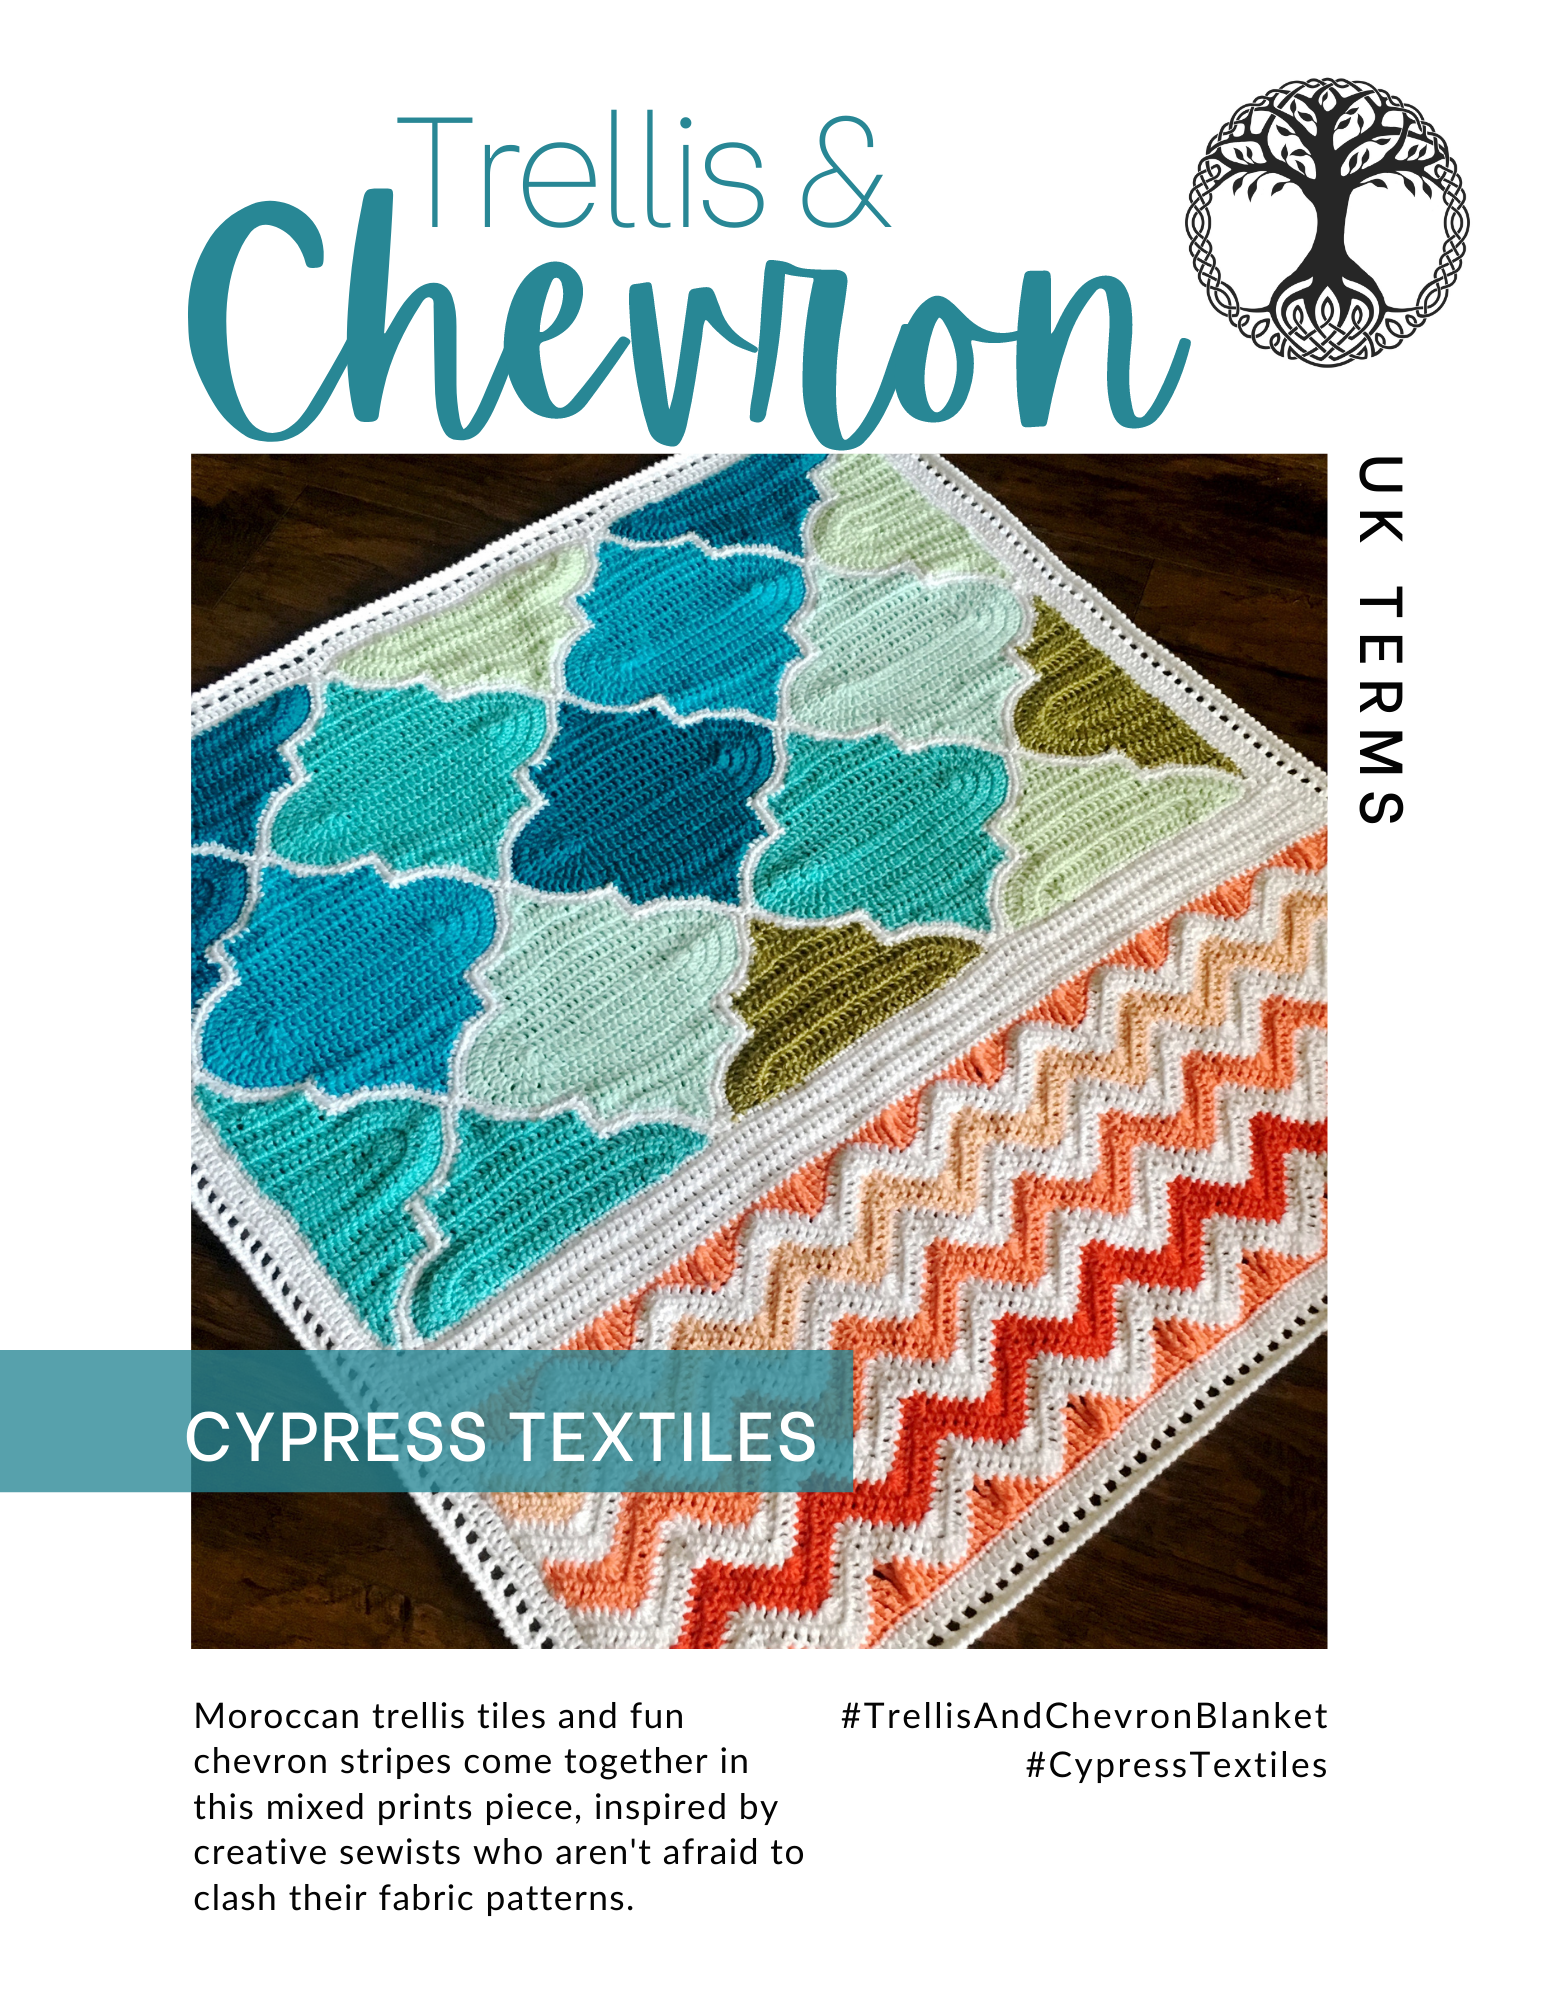
Today, I have a special offering! My Trellis and Chevron Crochet Blanket Pattern is a fan favorite and has been since I wrote it in early 2016. There have been so many gorgeous Trellis and Chevron Blankets “in the wild” and each one is so unique, it warms my heart to see them.
I am so pleased to give this pattern to you in a free version. Below, you will find it in UK Terms. Click here for the US Terms free version!
PDF Version
Find this pattern in a condensed ad-free PDF for a small fee in my Etsy Shop and on Ravelry. Pattern PDFs for US and UK Terms are both included in the purchase.

Social Media
Social Media Instagram, Facebook, Twitter, Pinterest, Etsy, Ravelry: CypressTextiles

Materials
- US Size 4.5mm hook for blanket body
- US Size 4mm hook for border
- Tapestry needle for joining and weaving ends
Yarn + Affiliate Links
Scheepjes Colour Crafter Yarn
- Yarn A: No. 1005 x 4 balls
- 1 ball each of 9 colors:
- Yarn B: No. 1708
- Yarn C: No. 2012
- Yarn D: No. 1422
- Yarn E: No. 1034
- Yarn F: No. 1820
- Yarn G: No. 1709
- Yarn H: No. 1723
- Yarn I: No. 1132
- Yarn J: No. 1026
Shop Scheepjes Colour Crafter Yarn
Yarn colors and amounts are listed below.
This yarn is a dream. It’s economical and very durable – which I love – and is soft, squooshy, and luxurious. For a 100% acrylic DK weight yarn, it is the best one out there.
Browse the links below to get some for yourself – as always, these (*) are affiliate links, so shopping through them helps support CypressTextiles and all my yarny endeavors, and it doesn’t cost you any extra!

Measurements: Blanket measures 40x42in
Stitch Guide (UK Terms)
- beg beginning
- beg tr beginning treble crochet: dc, ch1 – counts as 1 tr
- beg tr3tog beginning treble crochet 3 together: beg tr, tr2tog – beg tr does not count as a st in this case
- dc double crochet
- tr2tog treble crochet 2 together: (yoh, insert hook in next st/sp, yoh, pull up loop, yoh, draw through 2 loops) 2 times, yoh, draw through all loops
- tr3tog treble crochet 3 together: (yoh, insert hook in next st/sp, yoh, pull up loop, yoh, draw through 2 loops) 3 times, yoh, draw through all loops
- dec decrease
- dtr double treble crochet
- dttr double triple treble crochet
- htr half treble crochet
- lp(s) loop(s)
- rem remaining
- rep repeat
- RS Right Side of work
- dc2tog double crochet 2 together: (insert hook in next st/sp, yoh, pull up loop) 2 times, yoh, draw through all loops
- split tr4tog (yoh, insert hook in next st/sp, yoh, pull up loop, yoh, draw through 2 loops) 2 times, sk 1, (yoh, insert hook in next st/sp, yoh, pull up loop, yoh, draw through 2 loops) 2 times, yoh, draw through all 5 loops
- ss slip st
- st(s) stitch(es)
- tr treble crochet
- ttr triple treble crochet
- WS Wrong Side of work
- yoh yarn over hook
Repeat and Bracket Guide
- Square brackets [ ] are used for small repeats: 4dc, [2dc, 3tr, 2dc] 2 times
- Asterisks *are used for repeats that include small repeats: *5dc, [ch1, 1dc] 3 times in next ch, rep from * 3 times
- Round brackets ( ) are used when a string of stitches are worked into the same spot: (3tr, ch3, 3tr) in next st
- Stitch Counts are given at the end of rows where necessary, in the following format: [12 dc, 3 sp]
- NOTE: All sts on charts/diagrams are in US Terms.
Tips and Notes
- Weave your ends after each time you cut the yarn to avoid having to do them all at the end.
- Please read the stitch guide for any abbreviations.
- To get a neater result, I do not “chain up” for the first sc of the round/row. Jump straight into the first sc.
- Read carefully through the entire pattern. There are two Joining Method options.
- Option to resize the blanket to be larger is given at the end of the pattern as well.
Pin this Pattern!

Instructions
Moroccan trellis tiles and fun chevron stripes come together in this mixed prints piece, inspired by creative sewists who aren’t afraid to clash their fabric patterns.
Motif Chart
The chart shows Full Trellis, Horizontal Half-Trellis, and Vertical Half-Trellis.Red sts indicate placement of joining sts – to be used during joining only.

Full Trellis
Make 7 as follows:
- Make 1 in Yarn B
- Make 2 in Yarn C
- Make 2 in Yarn D
- Make 2 in Yarn E
Note: Motif is worked by crocheting an oval base shape in rounds, then working back and forth to make a point on both the top and bottom.
Base
Rnd 1 Ch24, 2tr in fourth ch from hook (turning ch counts as 1 tr), 19tr, 6tr in final ch, 19tr in bottom lps, 3tr in next ch, ss in beg tr. [50 tr]


Rnd 2 (Beg tr, 1tr) in next st, 2tr in next st, 19tr, 2tr in next 6 sts, 19tr, 2tr in next 4 sts, ss in beg tr. [62 tr]


Rnd 3 Beg tr in next st, 2tr in next st, 20tr, (2tr in next st, 1tr) 6 times, 19tr, (2tr in next st, 1tr) 5 times omitting final tr, ss in beg tr. [74 tr]
Rnd 4 (Beg tr, 1tr) in next st, 21tr, (2tr in next st, 2tr) 6 times, 19tr, (2tr in next st, 2tr) 5 times, ss in beg tr, ss in next 3 sts, do not cut yarn. [86 tr]
Proceed to Top Point


Top Point
Note: The Top Point is worked over the center 19 sts. Row 1 is started on the RS.
Rows 1-3 Beg tr in first st, 18tr, turn. [19 tr]


Row 4 Ss in 4 sts,1dc, 1htr, 1tr, 2tr in next st, 3tr, 2tr in next st, 1tr, 1htr, 1dc, turn. [9 tr, 2 htr, 2 dc]
Row 5 Ss in next 4 sts, beg tr in next st, 4tr, turn. [5 tr]
Row 6 Sk first st, beg tr in next st, tr2tog, cut yarn.


Bottom Point
Locate first tr of center 19 sts on opposite side of trellis, re-join yarn with ss in that first tr.
Rows 1-6 Work as for Top Point, cut yarn, turn.


Horizontal Half-Trellis
Make 6 as follows:
- Make 2 in Yarn B
- Make 1 in Yarn D
- Make 2 in Yarn F
- Make 1 in Yarn G
Base
Row 1 (WS) Ch24, 2tr in fourth ch from hook (turning ch counts as 1 tr), 19tr, 3tr in final ch, turn. [25 tr]
Row 2 (Beg tr, 1tr) in first st, 2tr in next 2 sts, 19tr, 2tr in next 3 sts, turn. [31 tr]


Row 3 (Beg tr, 1tr) in first st, 1tr, (2tr in next st, 1tr) 2 times, 19tr, (2tr in next st, 1tr) 3 times, turn. [37 tr]
Row 4 (Begtr, 1tr) in first st, 2tr, (2tr in next st, 2tr) 2 times, 19tr, (2tr in next st, 2tr) 3 times, cut yarn. [43 tr]


Top Point
Re-join yarn with ss in first st of center 19 sts.
Rows 1-6 Work as for Top Point of Full Trellis, cut yarn.

Vertical Half-Trellis
Make 4 as follows:
- Make 1 in Yarn B
- Make 1 in Yarn D
- Make 1 in Yarn F
- Make 1 in Yarn G
Base
Row 1 Ch13, 1tr in fourth ch from hook, 8tr, 6tr in next ch, 9tr in bottom lps, 1tr in next ch, turn. [26 tr]
Row 2 Beg tr, 9tr, 2tr in next 6 sts, 10tr, turn. [32 tr]


Row 3 Beg tr, 9tr, (2tr in next st, 1tr) 6 times, 10tr, turn. [38 tr]
Row 4 Beg tr, 9tr, (2tr in next st, 2tr) 6 times, 10tr, do not cut yarn, turn. [44 tr]
Proceed to Half Top Point.


Half Top Point
Rows 5-7 Beg tr, 9tr, turn. [10 tr]
Row 8 Ss in 4 sts, 1dc, 1htr, 1tr, 2tr in next st, 2tr, turn. [1 dc, 1 htr, 5 tr]
Row 9 Beg tr, 2tr, turn. [3 tr]
Row 10 Sk first st, beg tr in next st, 1tr, cut yarn.


Re-join yarn in first dc on opposite side of motif.
Rows 1-6 Work as for Rows 5-10 above.
Join Motifs
Option A: Slip Stitch Join
I offer this method as an option for anyone who is familiar with slip stitching motifs together, and is feeling hesitant to try the Continuous (US) SC PLT Join as you go. To work this join, make (UK) dc Border Round/Row on each motif in Yarn A following instructions below, cutting yarn after each motif. Then following the path shown below, Slip St motifs together through front loop only. This creates a nice ridge on the front of the piece.
Full Trellis Border Round (RS) Using Yarn A, ss in tr2tog, 2dc in same st, 2dc down side of beg tr, 2dc down side of tr, 2dc, 1dc in htr, 1dc in dc, 3tr, 3dc in next tr, 1dc in bottom half of same tr, 2dc in side of beg tr, 1dc in top half of tr, dc2tog over bottom half of same tr and second tr of Full Trellis, (4dc, 2dc in next st) 2 times, 1dc in next st. This completes one-fourth of the trellis border rnd. Reverse and mirror st placement to complete the remainder of the border, remembering to place 2 dc in the tr2tog of the opposite trellis point. When beg is reached, ss in the first dc, cut yarn.
Horizontal Half-Trellis Border Row With RS facing, join Yarn A with ss in first st. Make dc across piece using same placement as for top half of Full Trellis, cut yarn after final dc.
Vertical Half-Trellis Border Row With RS facing, join Yarn A with ss in first st. Work dc around piece using same placement as for top half of Full Trellis, cut yarn after final dc. (Note: Place only 1 dc at each point since this represents half of Full Trellis.)
Slip Stitch Join
Lay motifs out as shown in joining guide at right. The green lines represent the path of the Slip Stitch Join to minimize the number of ends to weave. Slip stitch through front lps only on the RS of the piece using Yarn A, starting at the bottom edge, and working toward the top edge, cutting yarn when the top edge is reached.

Option B: Continuous Join As-You-Go with Single Crochet and my PLT Join
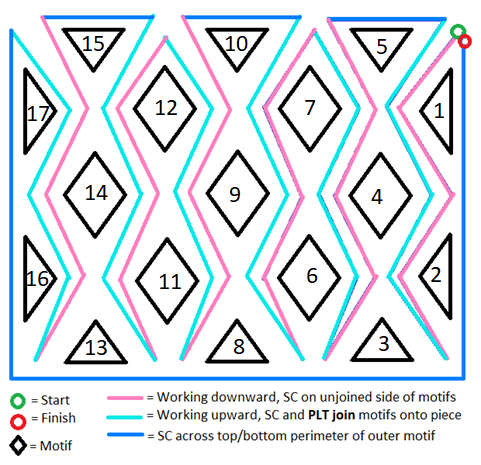
This is the method I used to join the motifs in my sample blanket. To prepare for the join, arrange all motifs in a as shown in path guide at left. Motifs are numbered in the order that you will join them.
The diagram shows the continuous path you will take when crocheting this join. I have color-coded the path, and matched it to corresponding text in the written instruction.
Stitch Placement Guides for Continuous Join

Continuous Join As-You-Go with SC and PLT Join Instructions
Referring to motif numbers on joining path guide, begin with Motif 1. To avoid confusion, refer to the red dc sts on the Trellis Motif Chart at the beginning of the pattern, and the Stitch Placement Guides above to figure out where to place the dc sts. Also, the color of these written instructions matches the colors on the motif joining path guide above.
Note: When you work dc sts into the side of a tr, there are 2 dc per 1 tr side. Work INTO the tr st, not “around” it.
Working downward, dc on unjoined side of motifs
Join Yarn A in top st of Motif 1 (purple arrow in first photo below), 1dc in same spot, ch1, * work 13dc, 1dc in same st as prev for corner (red arrow), 5dc down the side putting first dc in same st as corner, referring to the joining path guide dc2tog over bottom half of final tr and next dc below (blue arrow), (4dc, 2dc in next st) 2 times, 1dc in next st, ** 1dc in next st (2dc in next st, 4dc) 2 times, dc2tog over next st and bottom side of first tr on Row 1 of the Point (blue arrow). 5dc down the side, dc for corner st in same st as prev (dark red arrow), 13dc as before. *** [2 dc2tog, 64 dc]
Ch1. Pick up Motif 2 and work from * to *** as for Motif 1 (third photo below).

Ch1, pick up Motif 3, 1dc in first st (photo 1 below). Make my PLT Join as folls: Release lp from hook, insert hook through corresponding stitch on completed motif, grab lp (photo 2 below), Pull Loop Through to front of work (photo 3 below). While making dc up the side of the motifs, work PLT Join after every stitch to join motifs.

Working upward, dc and PLT Join motifs onto piece
Continue working from ** to *** until all 13 sts of Base are joined, dc2tog as before (photo 3 below),

Geometric Lace Blanket Crochet Pattern
5dc up the side, dc in same st as prev (photo 1 below), PLT in dc2tog, work 13sc evenly up to final st of Top Point, ch1, pick up Motif 4, 1dc in top st of Bottom Point, work from * to **, PLT join after every stitch, to the center of “semi-circle”, continue on Motif 4 from ** to ***, PLT joining it to lower half of Motif 1.


Working downward, dc on unjoined side of motifs
Locate Motif 5, and work from * to **, joining to upper half of Motif 1. 35dc sts evenly across top of Motif 5 (photo 1 below), make dc evenly as normal down the side of Motif 5, and after final dc, PLT working loop through the center ch1-sp (photos 2 and 3 below).

Work as normal down the left side of Motif 4 (photo 1 below), PLT through the side ch1 as before (photo 2 below). Finish working down left side of Motif 3 (photo 1 below), note: bottom side of Motif 3 will remain unworked for now,

Place Motifs 6 and 7 and begin working up the right side of motifs, joining with PLT Join after each st as before.
Working upward, dc and PLT join motifs onto piece
Work up side of Motif 6, ch1, and work up side of Motif 7,

Work down left side of Motifs 6 and 7 (photo 1 below). Working upward, attach Motifs 8, 9, and 10, then dc across top edge of Motif 10 (photo 2 below). Work down left side of Motifs 8, 9, and 10.

Working upward, attach Motifs 11 and 12, work down Motifs 11 and 12. Working upward, attach Motifs 13, 14, and 15, 35dc across top edge of Motif 15. Work down Motifs 13, 14, and 15. Working upward, attach Motifs 16 and 17.
Now you have reached the upper left corner, and all motifs are joined. Dc down the side of the blanket, as shown in photo. Be sure to put 2 dc in the side of each tr as normal. Make your corner 3dc and work across the bottom of the piece, putting 35dc across each “horizontal half-trellis” as before. Turn the 3dc corner again, and dc up the right side of your piece. Be sure to keep stitch count consistent with the left- hand side.
You are now back to the beginning! Hurrah! Time to add a White Stripe, and some pretty Chevron.

White Stripe
Row 1 (WS) Using Yarn A and working along bottom edge of Trellis portion, 119dc sts evenly, turn. [119 dc]
Rows 2-4 Beg tr in first st, 1tr in all sts across, turn. [119 tr]
Row 5 1dc in all sts across, cut yarn.

Note: Blanket “relaxes” into shape the more you work on it. Fold it up neatly (or roll it up) to help it get settled flat.
Chevron
Chart
Follow along with Chevron Chart below while working written instruction.
Row 1 (RS) Using Yarn I, **1dc, 1htr, 1tr, 1dtr,1 ttr, 3dttr in next st, 1ttr, 1dtr, 1tr, 1htr, 2dc, rep from ** 9 times, omitting final dc, cut yarn. [30 dttr, 20 ttr, 20 dtr, 20 tr, 20 htr, 29 dc]


Geometric Lace Blanket Crochet Pattern
Row 2 With RS still facing and usingYarn A, beg tr3tog, 3tr, 5tr in next st – Shell Made, 5tr, tr3tog, (5tr, Shell, 5tr, tr3tog) 8 times, 5tr, Shell, 3tr, tr3tog (see photos below), turn. [10 Shells, 96 tr, 11 tr3tog]

Row 3 Beg tr3tog, 3tr, Shell, 5tr, split tr4tog (see stitch guide and photos below), (5tr, Shell, 5tr, tr4tog) 8 times, 5tr, Shell, 3tr, tr3tog, turn. [10 Shells, 96 tr, 9 split tr4tog, 2 tr3tog]

Rows 4-15: Using Yarn Order J, A, I, A, H, A, and changing colors on every odd row, rep Row 2.[10 Shells, 96 tr, 9 split tr4tog, 2 tr3tog]

Row 16 Join Yarn I in first st, 1dc in same st, ch4, 1ttr in next st, 1dtr, 1tr, 1htr, 3dc, * 1htr, 1tr, 1dtr, 1ttr, work special dttr3tog as follows (see photos below as a guide): ** yoh 3 times, insert hook in next st, (yoh, draw yarn through 2 lps on hook) 2 times, sk 1 st, rep from * 2 times omitting final skipped st, yoh, draw yarn through all 4 lps on hook – special dttr3tog made, 1ttr, 1dtr, 1tr, 1htr, 3dc, rep from * 8 times, 1htr, 1tr, 1dtr, 1ttr, 1dttr, cut yarn and weave all ends.


Border
Rnd 1 Join Yarn A in top right corner of work, 2dc in same spot, 1dc in all sts across, making 1tr in the gaps on trellis portion, as shown in photos below, on side of White Stripe portion, work 2dc in the side of each tr, on Chevron portion, work 5dc for every 2 rows/color stripe, then make dc all across bottom row of Chevron, continue around in this manner, and join with ss in first dc.


Rnd 2 (Beg tr, ch2, 2tr), in corner st, * 1tr in all sts to next corner, (2tr, ch2, 2tr) in corner st, rep from * 3 times omitting final corner, 1tr in first corner to complete it, join with ss to beg tr.
Rnd 3 (Beg tr, ch2, 2tr) in corner sp, * (ch1, sk1, 1tr) across to next corner sp, ch1, (2tr, ch1, 2tr) in corner sp, rep from * 3 times omitting final corner, 1tr in first corner to complete it, join with ss in beg tr.
Rnd 4 (3tr in corner sp, 1dc in all sts across to next corner) 4 times, ss in first dc.
Round 5 Using size 4mm hook, work 1 Crab Stitch or “reverse dc” in each st around blanket, join with ss in first st, cut yarn and weave all ends.

Copyright Information
No pattern (partial or in its entirety) or other material may be reproduced — mechanically, electronically, or by any other means, including photocopying — without written permission of Rachele Carmona. This applies to all content on CypressTextiles.net, BabyLoveBrand.net, and all other sites used by Rachele Carmona including social media. Paid patterns are for personal use only. You may sell your finished crocheted items.
RACHELE CARMONA
Crochet Designer & Fiber Artist

I hope you enjoyed the Trellis and Chevron Blanket pattern! It was so fun to update this fan favorite pattern. If you start/finish the blanket, be sure to hashtag it on socials: #TrellisAndChevronBlanket and #CypressTextiles so I will see it and share in my stories/pages!
Happy crafting,
Rachele C.
PS: Another pattern that has been getting a lot of love lately is my Modern Patchwork Blanket Pattern. Find the pattern here!
