
Hello, and welcome to the eleventh week of my Gloria Blanket Crochet-Along! Today I have decided to release both the joining instruction and the border, all in one post. This way anyone who is already joining can go ahead and work the border too! Have fun and share pics!
Please read everything carefully.
Gloria Blanket CAL Quick Links
- Gloria Blanket CAL Main Info Page
- Gloria Blanket PDF Pattern Ravelry / Etsy / My Shop– As usual, the CAL will be released free every week here on my website, but I will offer the full blanket pattern in PDF form as soon as I write it up (I’ll have a date soon!)
- Instagram Sharing – I’m on Insta as @CypressTextiles. Hashtag your WIP and FO pics with #GloriaBlanket and #CypressTextiles so I can share and save them in my story highlights!
- CypressTextiles Tree Huggers Facebook Group – This is my main FB group (join!). Share your progress pics in this group if you like, and I will share CAL highlights there as well.
- YouTube Channel (Subscribe!) – Here I will be posting Gloria Blanket CAL pattern videos releasing shortly after the Friday CAL release. Yay!
Social Media Hashtags: #GloriaBlanket and #CypressTextiles

How This CAL Works
Find your chosen yarn down below. I list separate instruction for each of the yarns that I discussed in the main info post. If you aren’t working any of the listed yarns, you can check out the Stash Yarn Version section, or go completely rogue! I often say that’s my favorite part of hosting a CAL, the variety of blankets that everyone presents in the Facebook group or on Instagram.
Once you make your squares following each week, you can take pics and share them in my Facebook Group, or on Instagram with hashtags #GloriaBlanket and #CypressTextiles
When your squares are all done, proceed through steps 1-3 below to join and make the border.

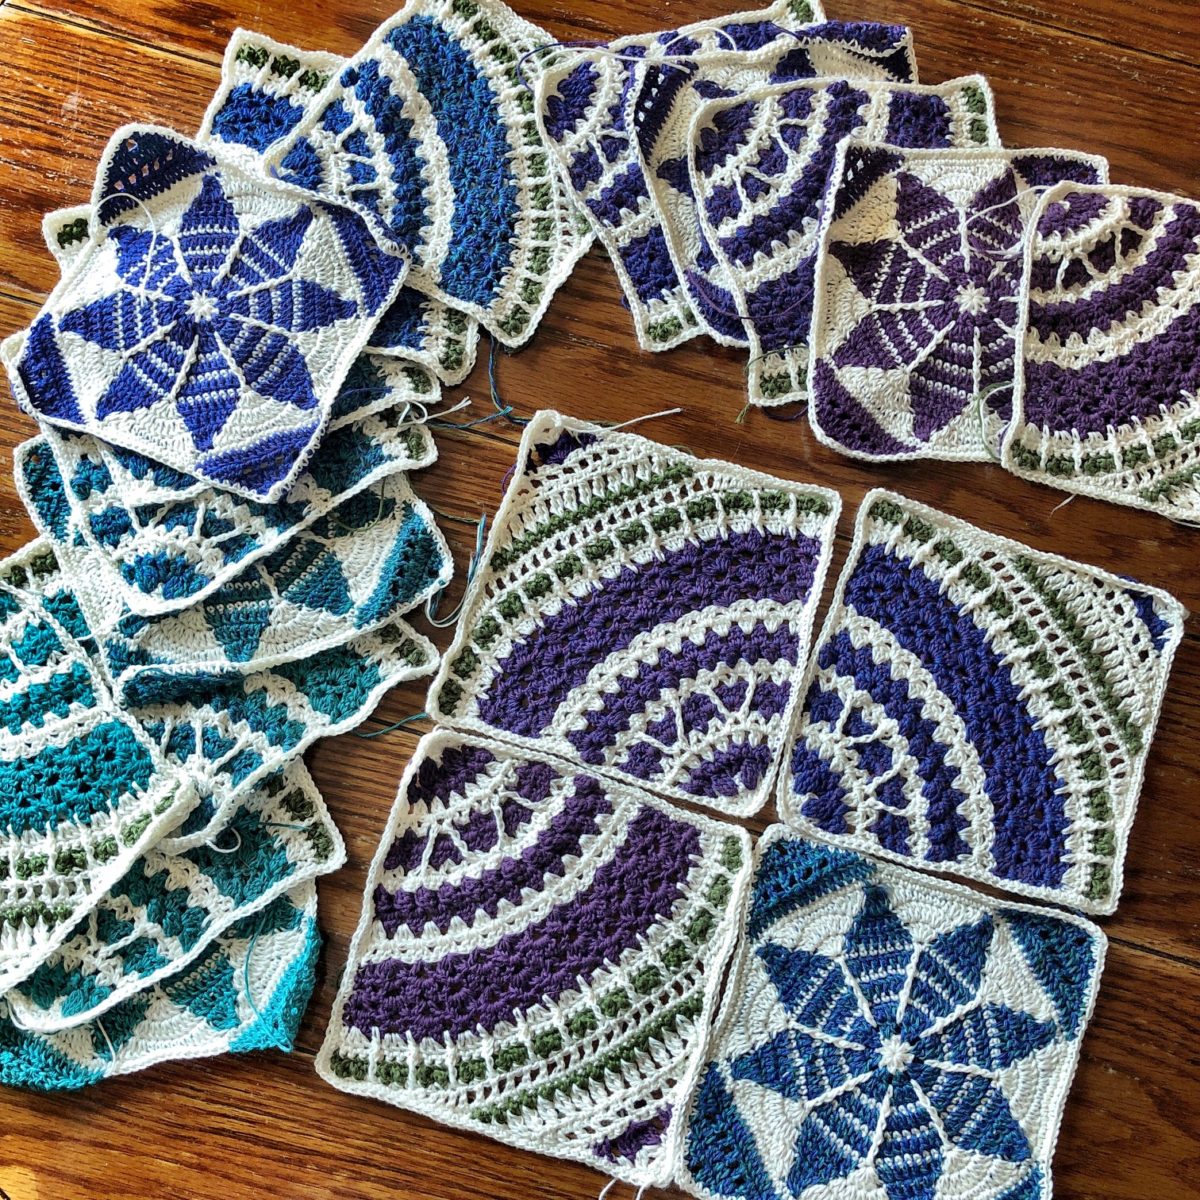
Step 1: Lay Out Squares for Joining
To create the color fade layout, begin in one corner with the
first squares, and slowly expand the layout, adding squares to
the sides and diagonal, until your final corner square is placed.
Make sure that the Snowflake Squares are spread fairly evenly
throughout the blanket, but still in a “random” placement. Turn
the Quarter Mandala Squares to any orientation, sometimes
making curves, and sometimes cutting the curve with a rotated
square.

Above is an example layout with some Whirl motifs. These are
not all of the squares, but it does represent the layout concept
well. Since there are so many color options for this blanket,
there is not one specific layout.
Remember these layout concepts:
- Start in one corner and work your way to the opposite corner for your color fade.
- Spread Snowflake Squares evenly
- Turn Quarter Mandala Square somewhat haphazardly.
- If you do not have a “color fade” type blanket and you just have a palette of different colors, then the color layout doesn’t matter as much. Simply lay the squares out in a way that pleases you.

Step 2: Join Squares Together
You can use any join which does not require much yarn, and also which does not add any dimension to the blanket measurements. I am using Zipper Join, and The Look At What I Made tutorial on Zipper Join is excellent.
This is what I recommend. Click here to see that tutorial.
Here are some more joins that will work. You can google them to see which one looks appealing. You are looking for a join that does not take up much yarn, and that does not add dimension to the blanket, to the width or length.
- Whip Stitch Join
- Slip Stitch Join at the back of the work
- Slip Stitch Join at the front of the work
- Single Crochet Join at the front of the work
- Single Crochet Join As-you-go with PLT Join (If you choose this join, you can join on the second border round of the QM
- Square, and the border round of the SF Square
For the Catona Colour Pack version, you will use the background color for the join and border.
For the Whirl+Whirlette version, you will use the Whirlette (or Cotton 8 if that is what you have).
For the Metropolis Colour Pack, you can use the background color. If you choose, you can incorporate the pastel colors that were unused in the blanket for Round 3 of the Border if you like.

Step 3: Make the Border
Rnd 1 Join MC with ss in top right corner st, (3dc in corner st, dc in all sts across) 4 times, ss in first dc.
Rnd 2 (3dc in corner st, dc in all sts across) 4 times, ss in first dc, cut yarn if changing to CC1/CC2 remnants – see next row.
Rnd 3 Using CC1/CC2 remnants from squares in color order (optional – if not desired, use MC), beg 4tr-popcorn in corner st, * ch5, 4tr-popcorn in same st, (ch2, sk2, 4tr-popcorn) across to next corner, 4tr-popcorn in corner st, rep from * 3 times omitting final 4trpopcorn, ss in beg 4tr-popcorn.
Rnd 4 Join MC with ss in ch-5 sp, (9dc in ch-5 sp, 3dc in every ch-2 sp across) 4 times, ss in first dc.
Rnd 5 Ss in next 3 sts, (3dc in corner st, dc in all sts across) 4 times, ss in first dc, cut yarn and finish off.
Step 4: Share pics!
- Instagram Sharing – I’m on Insta as @CypressTextiles. Hashtag your WIP and FO pics with #GloriaBlanket and #CypressTextiles so I can share and save them in my story highlights!
- CypressTextiles Tree Huggers Facebook Group – This is my main FB group (join!). Share your progress pics in this group if you like, and I will share CAL highlights there as well.
**Suggested Yarns Without a Sample Blanket**
Here is some advice on these yarn versions for this week. Feel free to follow along with one of the versions above!
Stone Washed / River Washed 10g Colour Pack Version

Catona 50g Skeins Version

Cahlista 15g Colour Pack Version

Stash Yarn Version!
If you are going rogue (YAY!) you can make use any narrow join you like and even add any border you like!
Here is the Quarter-Mandala Square Pattern: US Terms // UK Terms
Here is the Snowflake Square Pattern: US Terms // UK Terms
Have fun joining squares and adding the border over the next 2 weeks! Be sure to share progress pics as we love them in the FB group and IG. I share them in my IG story highlights as well if you post them and add the hashtags.
THANK YOU for joining me in the Gloria Blanket CAL!
Happy crafting as always,
Rachele C.
1 Comment