
Hey, gorgeous crafter! Remember this WIP from a couple of weeks ago? I have been working on these crochet nesting baskets for a little while and have really enjoyed making something completely different from a blanket, but still a small and quick project. Also as a side note, every time I’m chugging along on a project, I’m jotting improvements in my notebook.
So, I already have a few more ideas to make crochet nesting basket sets using these wooden bag bottoms. And I did get many messages asking about these bag bottoms and where to find them. I just might start selling them along with some kits for baskets once I get the design just right.
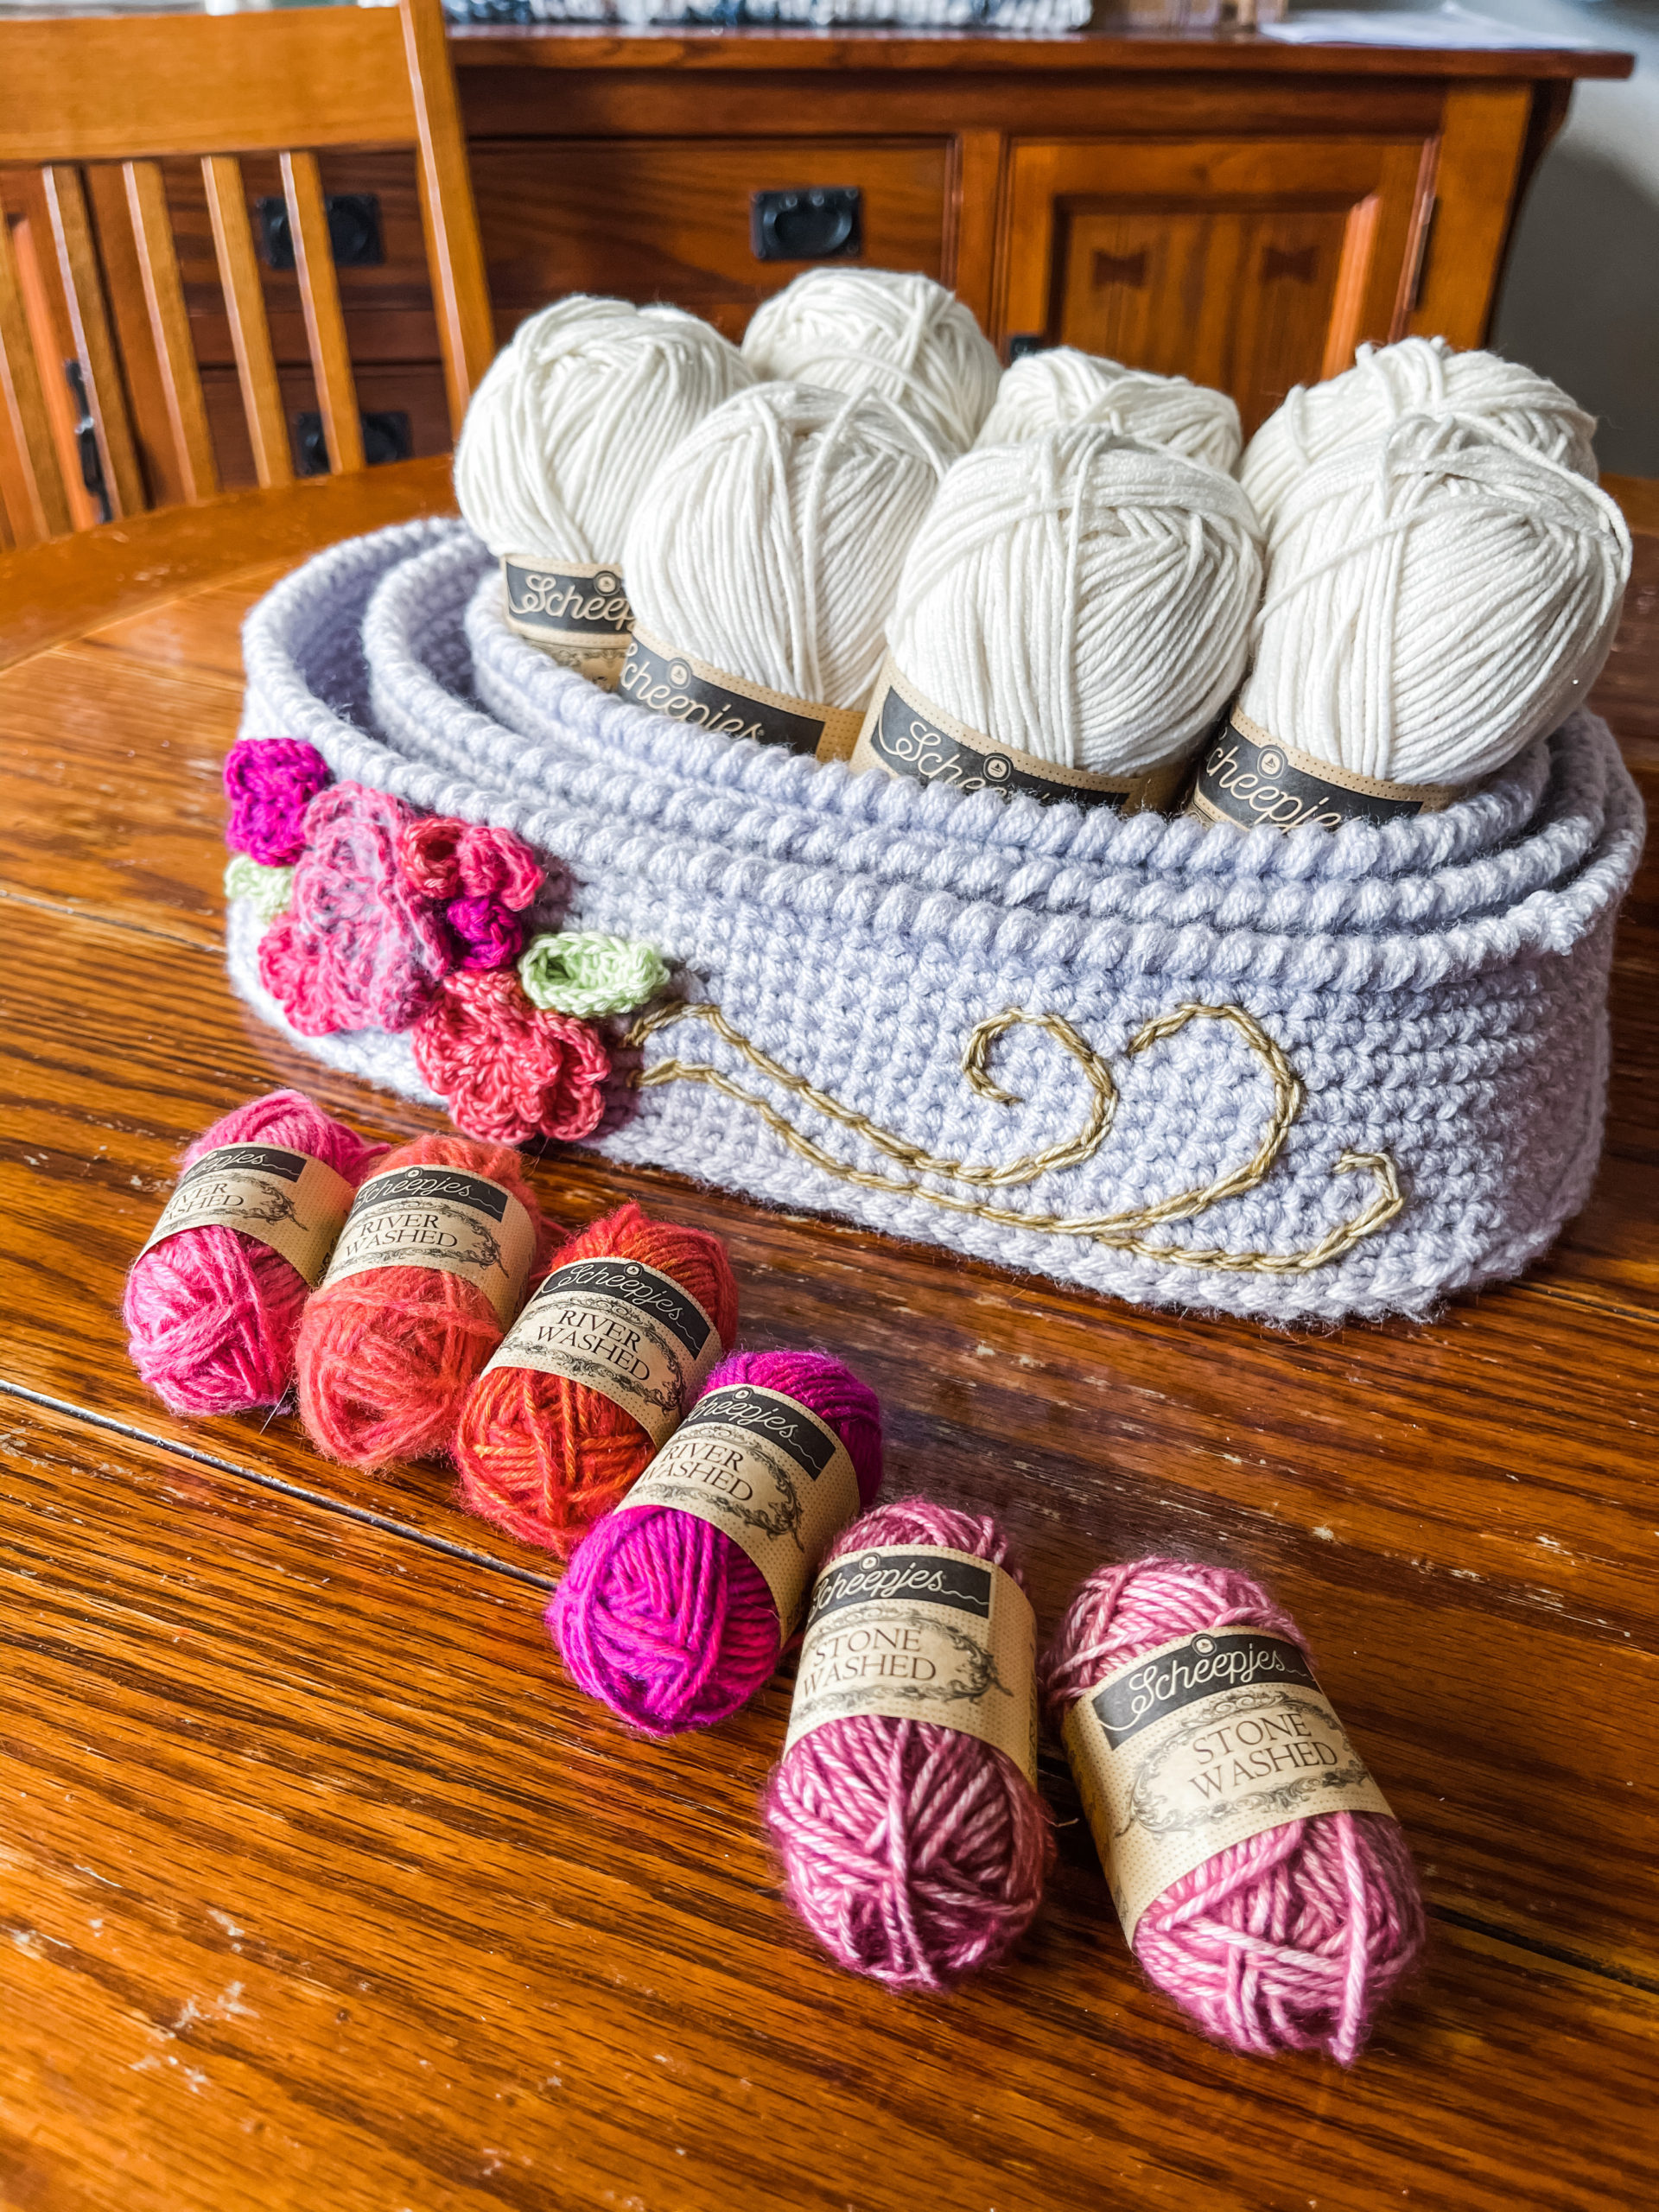
Crochet Nesting Baskets
These baskets worked up fast and were super simple. Aren’t they just perfect? I used Scheepjes Colour Crafter for them, in a wonderful purply grey, No. 1724, and I used some odds and ends of Stone Washed and River Washed mini skeins to embellish the largest basket.
Related: Pick up the Stone Washed and River Washed 10g Colour Pack here. (Affiliate)

Shop Colour Crafter
These are affiliate links, so shopping through them will gain me a small commission at no additional cost to you.
Large Basket
The largest basket will hold at least 14 x 50g balls of yarn, and it’ll keep all of your remnants together, at the ready. My next project will use Softfun, so I’ve already packed it into my large basket.


My smallest basket is holding the little Stone Washed and River Washed minis that I have left over from a past project. I picked from these for the embellishments as well!
It’s funny how stash yarns actually get used when you put them in a basket right next to you, versus stowing them away in the bins. I like to pull random stash yarn from the bins to my work area, and then I find inevitably, I get inspired to use them up.
Small and Medium Baskets

The small and medium baskets are a beautiful pair. A few improvements to this first prototype are as follows:
- Use a thicker yarn like Chunky Monkey, instead of using Colour Crafter held triple.
- Put a small leather tag with brass hardware over the jog at start/end of the final reverse single crochet round.
- Use a more robust stitch than single crochet for the basket body.
- Improve the embellishment designs to include cross stitch, especially on the smaller baskets.

The outer basket was the only one I could add 3D embellishments to, as the smaller ones wouldn’t nest properly otherwise. That’s why I have in mind to add some cross stitch or even duplicate stitch to the baskets so that the inner ones can have some decoration.

Stone Washed and River Washed
For the colorful flower pieces, I used Stone Washed and River Washed. Get the Stone Washed and River Washed 10g Colour Pack at WoolWarehouse (affiliate)

Embellishments
The smaller flower is adapted from the first 2 rounds of the Rose Hexagon from my Happy Little Tree Blanket pattern. The leaves are something I played with. I don’t know how much like leaves they look, and I’ll end up tweaking them I’m sure!
Now for the larger rose and buds. The rose is directly from my Happy Little Tree Blanket hexagon, and it’s just the first 4 Rounds. The buds were improvised and I do like them!

Take a peek at the original embellishment design from my previous WIP post. It came a log way, didn’t it?

I just love these and can’t wait to play more with the design!
Wooden Bag Bottoms
Here are a couple of WIP pics and shots of the Wooden Bag Bottoms. Folks loved these and I’m looking forward to adding them to my shop in some form soon.

They work just perfectly, and I know they are designed for bags, but they do work great for baskets as you can see here.

Well, as always, thank you for stopping in to see my FO reveal. I’ll release the free pattern for these on Tuesday!
Happy crafting,
Rachele C.
3 Comments