
Hey, y’all! My Scholar Pillow pattern is in full effect, but interrupted by a serious jonesin’ to make something for Valentine’s Day this year. So I’ve decided to make a quick Scholar Pillow, but with a heart stitched on, in the same style as my letterman alphabet.
While the Scholar Pillow pattern (plus the letterman cross stitch alphabet charts!) won’t be released until March/April, I thought today I’d just go ahead and show you how I will cross stitch the design onto my pillow cover.
So, welcome to my “Needle-Free Cross Stitch Over Your Crochet Tutorial for Beginners!”
It’s such a fun way to add a design to your piece without the frustration of changing color all the time. If you’re like me, you’re never 100% satisfied with your color changes…
Note: I recommend this method if you are going to use just one color for your design. This tutorial is meant to be a way to spice up your craft life by adding in some cross-stitch-esque funsies. If you want to make a more traditional multi-color cross stitch piece over your crochet work, I recommend working over a smaller gauge “crochet fabric” and checking out some other learning resources – YouTube is so helpful!

Introduction
I can’t get enough of the Scholar Pillow – shown above – and I made three of them over the holidays to give as gifts to family members. The rustic cross stitching and the letter design was really well received by everyone, and this is such a quick make that you can do it last-minute. Plus, cross stitch with your hook is so totally zen. Loved every moment.

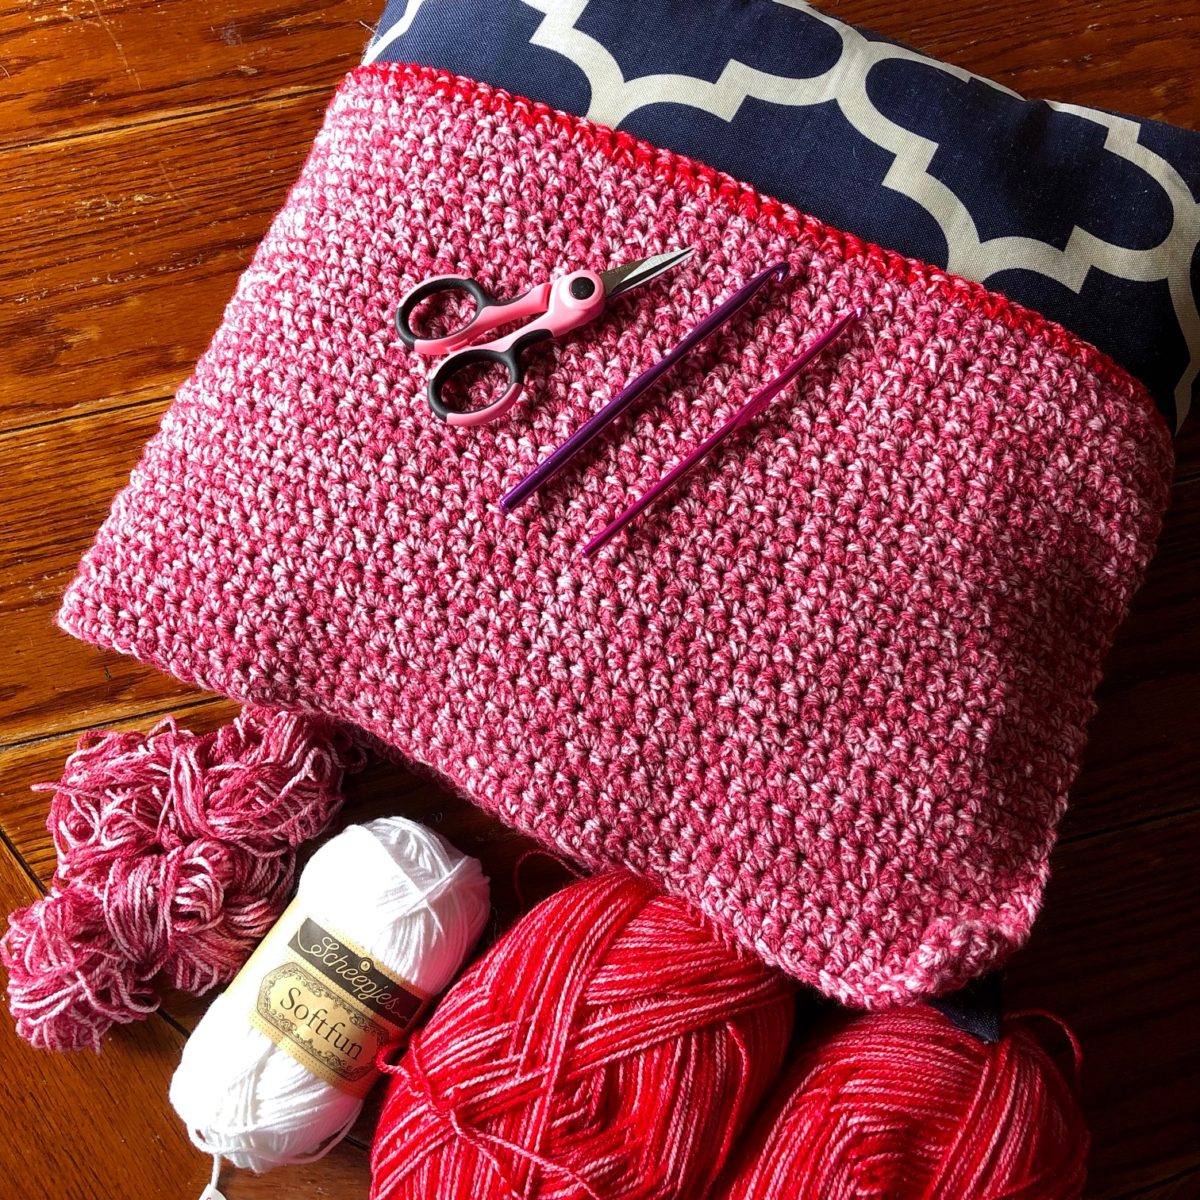
Materials
For this lovey-dovey sweetheart edition of the Scholar Pillow, I chose Scheepjes | Colour Crafter Velvet, colors 857 and 846. Plus Scheepjes Softfun in color 2412 for the cross stitch. Important: I did both the pillow cover and the cross stitching with the yarn held double. It makes for a sturdy yet soft pillow cover and is finished so much quicker.
Where to get this gorgeous yarn, Scheepjes Velvet? Deramores and Wool Warehouse (affiliates) both carry it, and you can also browse Scheepjes retailers near you!
Here is the materials setup for my cross stitch pillow. I haven’t actually finished the pillow cover here in this photo below, but you can see my upcycled blue and white pillow (one that we don’t display anymore), and you can see I am just starting to add on the lush red section to the cover. All of this cover instruction will be shown in the actual Scholar Pillow pattern release. For now I’m just focusing on the actual cross stitch because you can use this skill for any project.

For the cross stitch tutorial, I have my size 4.5mm hook ready. All you need is a hook that’s smaller than the hook you used to create your crochet “fabric.” For my pillow cover, I used a size 6.5mm hook. I have my scissors and stitching yarn ready as well.

Here you can see my hooks. For now you can set the larger hook aside – you only need the smaller hook for your cross stitch.

Overview
To show you an overview, this is how we will be stitching on the fabric. Starting at the bottom left corner of the design and work each column of stitches The white lines are the first stitches you’ll make, then you’ll make the pass for the blue stitches. I created this little diagram to show how you make the stitches over the single crochet fabric. Single crochet makes for a perfect cross stitch fabric because the stitches are “square” and at the “corners” of each stitch there are “holes” to cross stitch into.

Here is a diagram of how we are going to make the first pass of stitches moving from bottom to top starting at the far left of the piece. This heart is not the actual design I will be stitching; rather, it’s just a model to show you where to begin stitching in your design.
In the diagram below, you can see we will start by stitching the left-slanted (marked red in the diagram below) diagonals first, moving from bottom to top, column by column.
The orange dots show where the yarn will come up from back to front, and the blue dots show where the yarn will go down to the back of the fabric.

Now let’s get started!
Step 1: Set up and attach your stitching yarn
Cut a long piece of yarn – I like to use 2-3 arm-lengths long – then fold the yarn in half one time. Here in this photo, I’ve already folded my yarn in half. This is how we will use the yarn doubled.

The Loop Method is a cross stitch term and that is what we are going to use. It’s a way to attach your cross stitch thread that does not require you to weave in any tail at the beginning.
Insert your hook back to front through the spot marked “start” and with a number 1.

Grab your folded yarn at its mid-point and pull a loop through to the back of the fabric.

With that mid-point loop still on your hook, insert your hook back to front through the spot marked with a 2.

Grab both strands of yarn now, treating them as one strand, and pull a loop to the back of the work.

Draw that loop through the mid-point loop, and pull the yarn all the way to the back of the work. This is The Loop Method (or how I do it).

Turn your work to the front side and now you see your first left-slanting stitch is complete.

Now, insert your hook front to back through the spot marked 3.

Grab your yarn (again from now on you’ll grab both strands as one) and pull it all out to the front side of the work.

Now you’re ready to rock and roll! Your yarn is set up and attached. Ready to stitch.
Step 2: Make all left-slanting stitches in the first column
A: Insert the hook front to back through the spot marked 4, and back to front through the spot marked 5. Now your hook is piercing the fabric as shown below.

B: Grab the yarn and pull it all the way through so it’s still on the front side. In the photo below, I’ve started pulling the loop through, but then I pulled all of the yarn through.

Repeat steps A and B all the way up, piercing the fabric, and pulling the yarn through so it’s still at the front of the work.
Below, I’ve made 7 sts for demo purposes. The stitches are not perfect looking, but it will come out looking great. There are other methods (like using tear-away stabilizer paper and a needle) but I really love that I can use only my hook, and I enjoy the rustic feel of the stitches.

Step 3: Make the right-slanting stitches back down this column.
In the photo below, where the yarn is coming out at the top right corner – that’s marked as number 8 in the diagram in the Overview above. This is the point where you’re ready to turn and work back down the column to finish the Xs.
Insert the hook down through number 6 and back up through number 7. Grab the yarn and you’ll see the X has been created.

Continue moving down, inserting the hook down through orange and back up through blue, just like before until you get to the last X.
Once you’re at the last X, you need to move over to the next column. So find out where your yarn will need to come out of to begin stitching, and insert your hook front to back through that spot, and then back to front through the bottom left corner of your stitch.
Now when you pull the yarn through as usual, it ends up coming out in the position you can see below.
Ready to start the next column.

Repeat Step 2.

And Step 3 to finish the Xs.

And there you have it! This is how I will be stitching over my Scholar Pillow.

Once I release the actual pattern, you’ll find all of the instruction for the pillow cover and the letterman alphabet, as well as the heart that I’ll be stitching for Valentine’s Day.
Hope this inspires you to start cross stitching, with baby steps – cross stitching over your crochet fabric. It’s so totally zen once you get into the groove. If you do get into it, I am trying to slowly build a cross stitch / embroidery blog post library – you can see that here!
Enjoy and happy crafting!
Rachele C.