
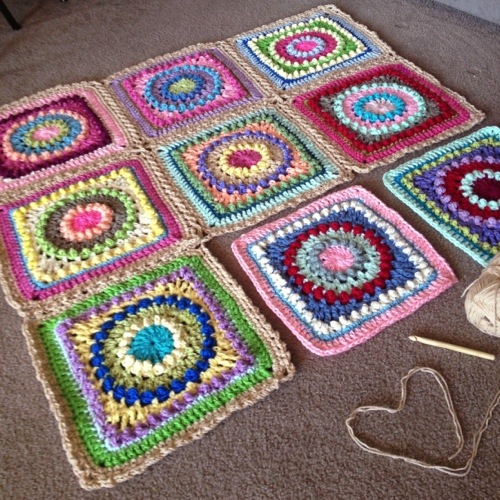
The Flat Braid Join crochet joining method is a magical thing of crochet wonderment. I learned how to do it from my crochet idol: Priscilla Hewitt, pattern designer of such famous works as the Sunburst Granny Square (Ravelry) and the Circle of Friends Square (Ravelry), which I slightly adapted to create the Textured Circles blanket. (Free pattern)
How I learned Flat Braid Join
The pattern that I used to learn flat braid join is called Lacy Lapghan (PDF), from Priscila’s website. Now I use some type of variation of FBJ for almost all of my projects. See every project I’ve used FBJ on HERE!
FBJ Tutorial
This joining method is a join as you go, which means on the final round of the square, join it to the adjacent sides of the previously completed motifs.
Materials
- Yarn – I like Scheepjes Colour Crafter (DK weight) because it’s plush and soft
- I own and use this set of hooks from Amazon (affiliate) every day
Instructions

flat braid join crochet 1
First Motif
Rnd 1: (3 sc in the corner, then sc in all sts across to next corner) 4 times, slip st in first st.

flat braid join crochet 2
Rnd 2: SC in the joining stitch, and then ch4. Skip 1 stitch and SC in the next stitch. *Ch2, skip 1 stitch, SC in next stitch* Repeat across to next corner, and (sc, ch 4, sk 1, sc) just as before to make corner. Work remaining sides to beginning, slip st in first st. Complete the first motif in this manner, and then all subsequent motifs will be joined on Rnd 2.
Remaining Square Motifs
Rnd 1: Take your next square and work the first side only up to 2 chains of the second ch4 corner. (One side will be completed only.) – See photo below.

Flat braid join crochet 3
Lay first and second motifs side by side as seen in the photo below. Drop the loop from your hook and insert the hook into the ch4 corner from front to back. Pull the loop through and complete the other 2 chains of the ch4 corner. In the photo below, I have dropped the loop, inserted the hook, and grabbed the loop. I am ready to pull the loop through and continue chaining.
[Related: I later developed this maneuver into the PLT Join! I’m almost nearly close to being famous for it]

Flat braid join crochet 4
After those 2 chains are completed, make an SC the same as in that last stitch of the corner (That is where I stopped in the photo below). Ch1, drop loop, insert hook into the CORRESPONDING ch2 space on the completed motif, and then pull the loop up through. Work a chain to complete the ch2 space, skip a stitch, and then SC in the next stitch.

Flat braid join crochet 5
Clarification
To be clear: normally, you have a chain 2 space on the sides. On the sides that are joined to an adjacent motif, interrupt the chain 2 space to drop loop, pull loop through opposing chain 2 space, and complete the chain. As seen in the photo below, there is a little “twist” where two chain 2 spaces are joined. This twist (that resembles a whip stitch in a way) is made when you complete your chain after you have pulled the loop up through.

Flat braid join crochet 6
Work in this manner until the two squares are joined, and you get to the next corner.
Let’s talk about the corners
You have two corner meeting situations. Either two corners meet around the perimeter of your blanket, or they meet in the body of the blanket. Remain aware which type of corner meeting you approach, then ask yourself: Will this corner be around the edge of my blanket? Or am I working in the center? Around the perimeter of your blanket, join those corners immediately.
The spot where four corners meet in the body of your blanket, is worked in a special way, in order to create perfectly crossing corners.
Here is what I do with the corners
When you come to a corner that you know is in the center of your blanket, LEAVE IT ALONE. See photo below. These two corners will soon be picked up by their diagonal partners, so for now, they are just hanging out.

Flat braid join crochet 7
Okay, in the photo below, I have a diagonal corner pairing and I have a corner loop that has not yet been picked up – you can see that the bottom square is not yet joined. One diagonal pair crosses over the other one. Make all crosses facing the same direction, instead of accidentally crossing the other way, because it is super-noticeable.

Flat braid join crochet 8
Below, three different corner meeting situations occur
- At the top left, four corners joined up.
- Top right, a loop waits to be picked up by the diagonal square, and
- Bottom left, both loops await their diagonal partners.
Remember, When you get to the final row of squares, join adjacent corners immediately, as this will be around the perimeter.

Optional Border
Once you finish joining, you can work a reverse SC round. I work 2 reverse SC stitches in each chain 2 space. I skip over the SCs because the reverse SC is naturally large… many times, I will go down a hook size so that the border is not stretched out. Here, I stay with the same hook size.
Please ask questions if I can clarify something 🙂 Wanting inspo? Head to my FO Gallery and browse!