
Welcome to the Continuous Flat Braid JAYG for Hexagons tutorial. I’ve made a video for this Join, but written instructions are added below. I recommend looking at both the video and the written instructions for the best clarity. (Add this pattern to your favorites on Ravelry!)
[Related: Sept 2017 is Hexagon Month!]
Video Instruction
Part 1
Part 2
Written Instruction
Materials
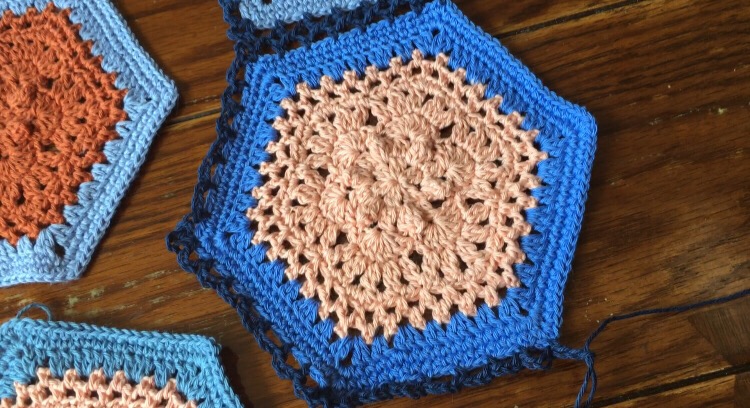
A pile of hexagons, with the same stitch count around. It doesn’t matter what the pattern is. For these Hexagons I have 18 sts between my 3-sc corners. I used Scheepjes Cotton 8 yarn and these hexies are from my Autumn Blues Blanket releasing this weekend.
If you’ll be filling in the half-hexagons on the sides, set those to the side for now. They’ll be added in once all of the full hexies are joined together.
Joining yarn – you’ll want to have full balls of this, as one of the joys of joining continuously is that you eliminate having to weave all those ends. If you have a bunch of shorter lengths of your joining yarn, you’ll cancel that fun part out. Boo!
Abbreviations (US Terms)
ch-n chain n number of times
PLT Pull loop through
RS right side of motif/blanket
sc single crochet
sp space
ss slip stitch
Setup
Before you begin, choose your motif layout. For my hexagon blankets I like to square the edges off by adding in half-hexagon motifs, and then filling in the “zig-zag” sides to make a perfect rectangle. You can choose either hexie orientation from the diagram below, but be sure your opposite sides start and end with a half-hexagon as shown. This will help when you’re filling in the zig-zag sides. If you don’t want to fill these sides in, you can easily start and end these rows with a full hexagon instead, and adjust the join path to accommodate.

For this blanket the orientation is with the half-hexies along the sides; however, when joining, the blanket will be rotated like the photo below. The green spot indicates where the Join will start and stop.

Here is the diagram you will follow for this tutorial. The start/end point is labeled, and the special path is drawn in using colors to represent the steps. Along the way there will be “Close-ups” (areas circled in blue) where detailed explanation is needed.

Part 1
Coming shortly!